We may receive a commission when you use our affiliate links. However, this does not impact our recommendations.
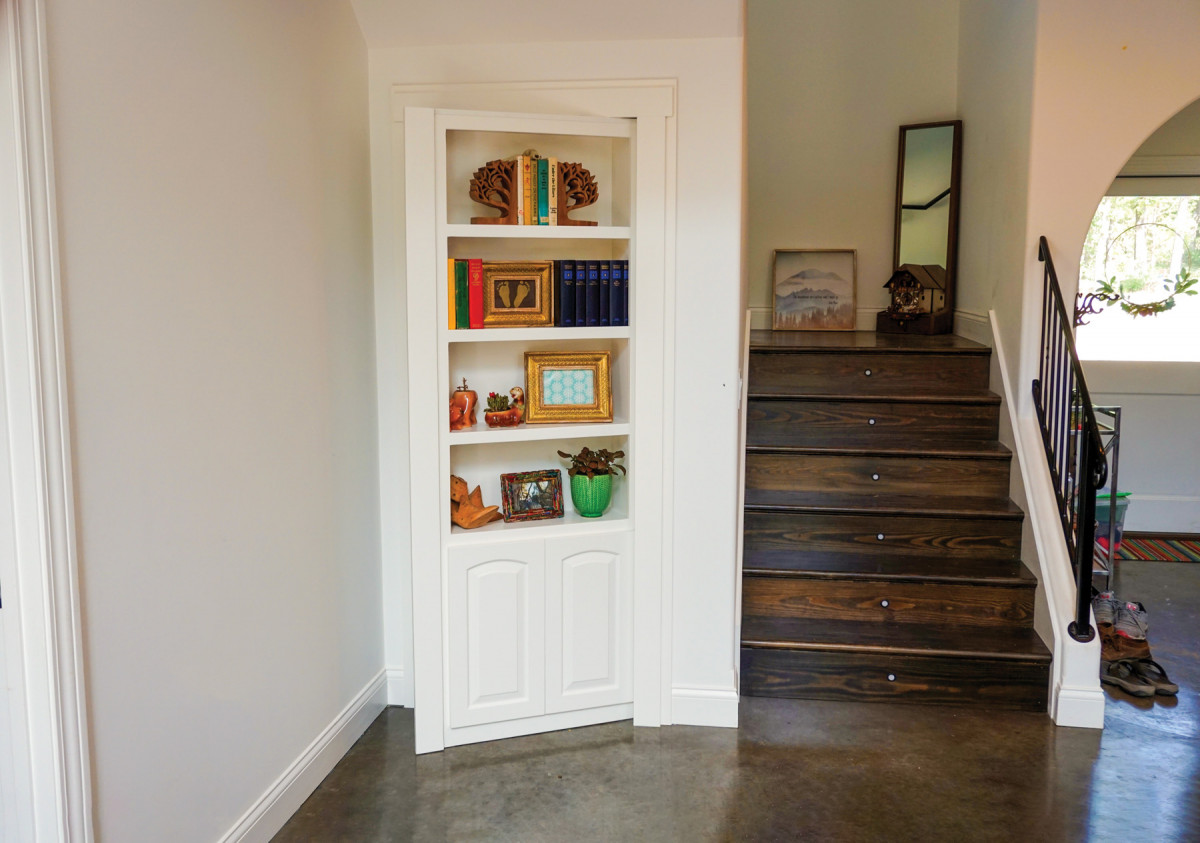
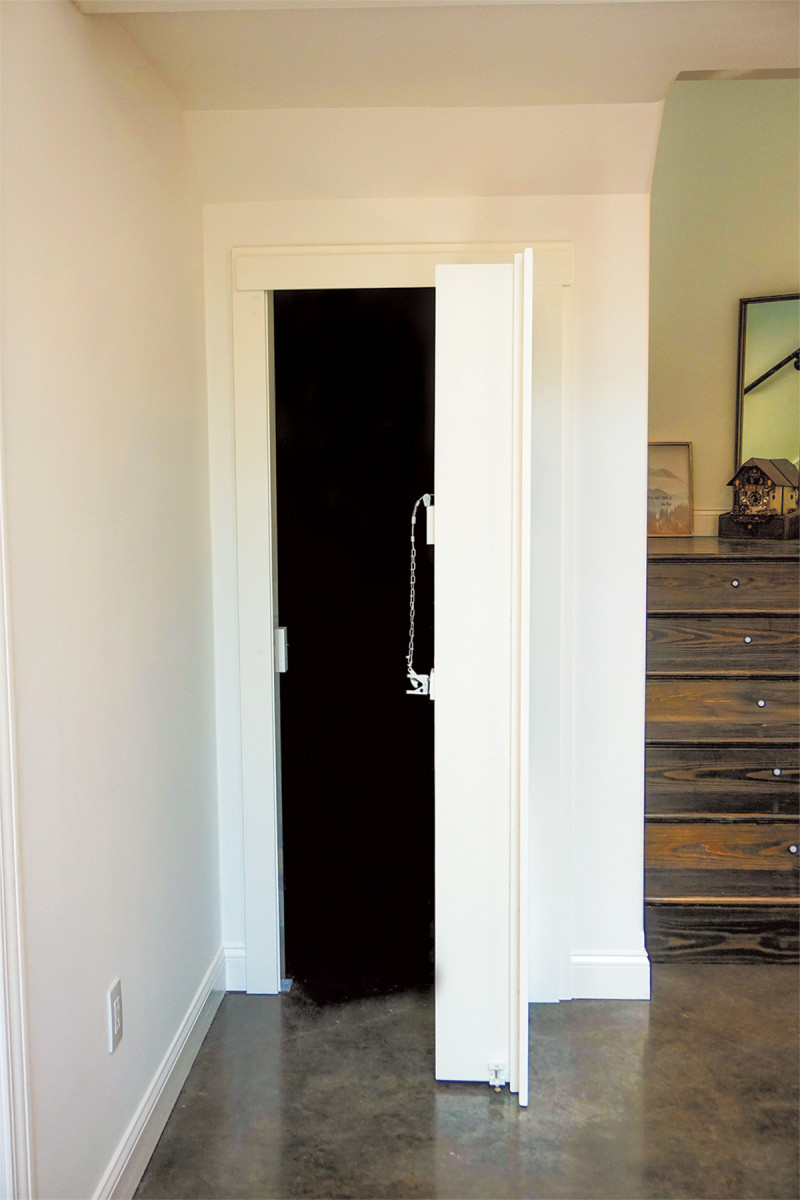
Turn a closet into a hiding place with a basic bookcase, trimmed to match the room.
The alluring nature of secret rooms has captivated my imagination for as long as I can remember. Growing up, my mind would race with possibilities, as I’d watch someone unlock a bookcase by tilting a book or some other secretive method on television. As an adult, their mystique is still appealing, though having built several of them now their functionality is no longer a mystery to me. Whether a person wants to hide a safe, have a safe room or just find a creative way to hide a utility room, a bookcase door is a fairly easy way to go about doing it.
The secret to making a bookcase door function is in the hinges. For an in-swing door, you can use regular door hinges placed on the back of the case but I don’t recommend it. Even though the tendency to sag can be mitigated some with a caster on the strike side, eventually those hinges will become loose and falter. So for both in- and out-swing doors, I use what’s called a pivot hinge.
With a pivot hinge, the load is transferred from the jam to the threshold and the header, alleviating the stress of the traditional jam hinge configuration. The hinge I found to work best for my needs is the Invisi-Door Hinge kit ($149) from CS Hardware. With its 500-pound load capacity and the fact that it surface mounts with no mortising required, it’s a great solution for both pros and homeowners alike. The kit comes with easy-to-follow instructions for a 36″ door, including frame and case dimensions (which, if the same overhangs and reveals are used, can be adapted to about any width opening).
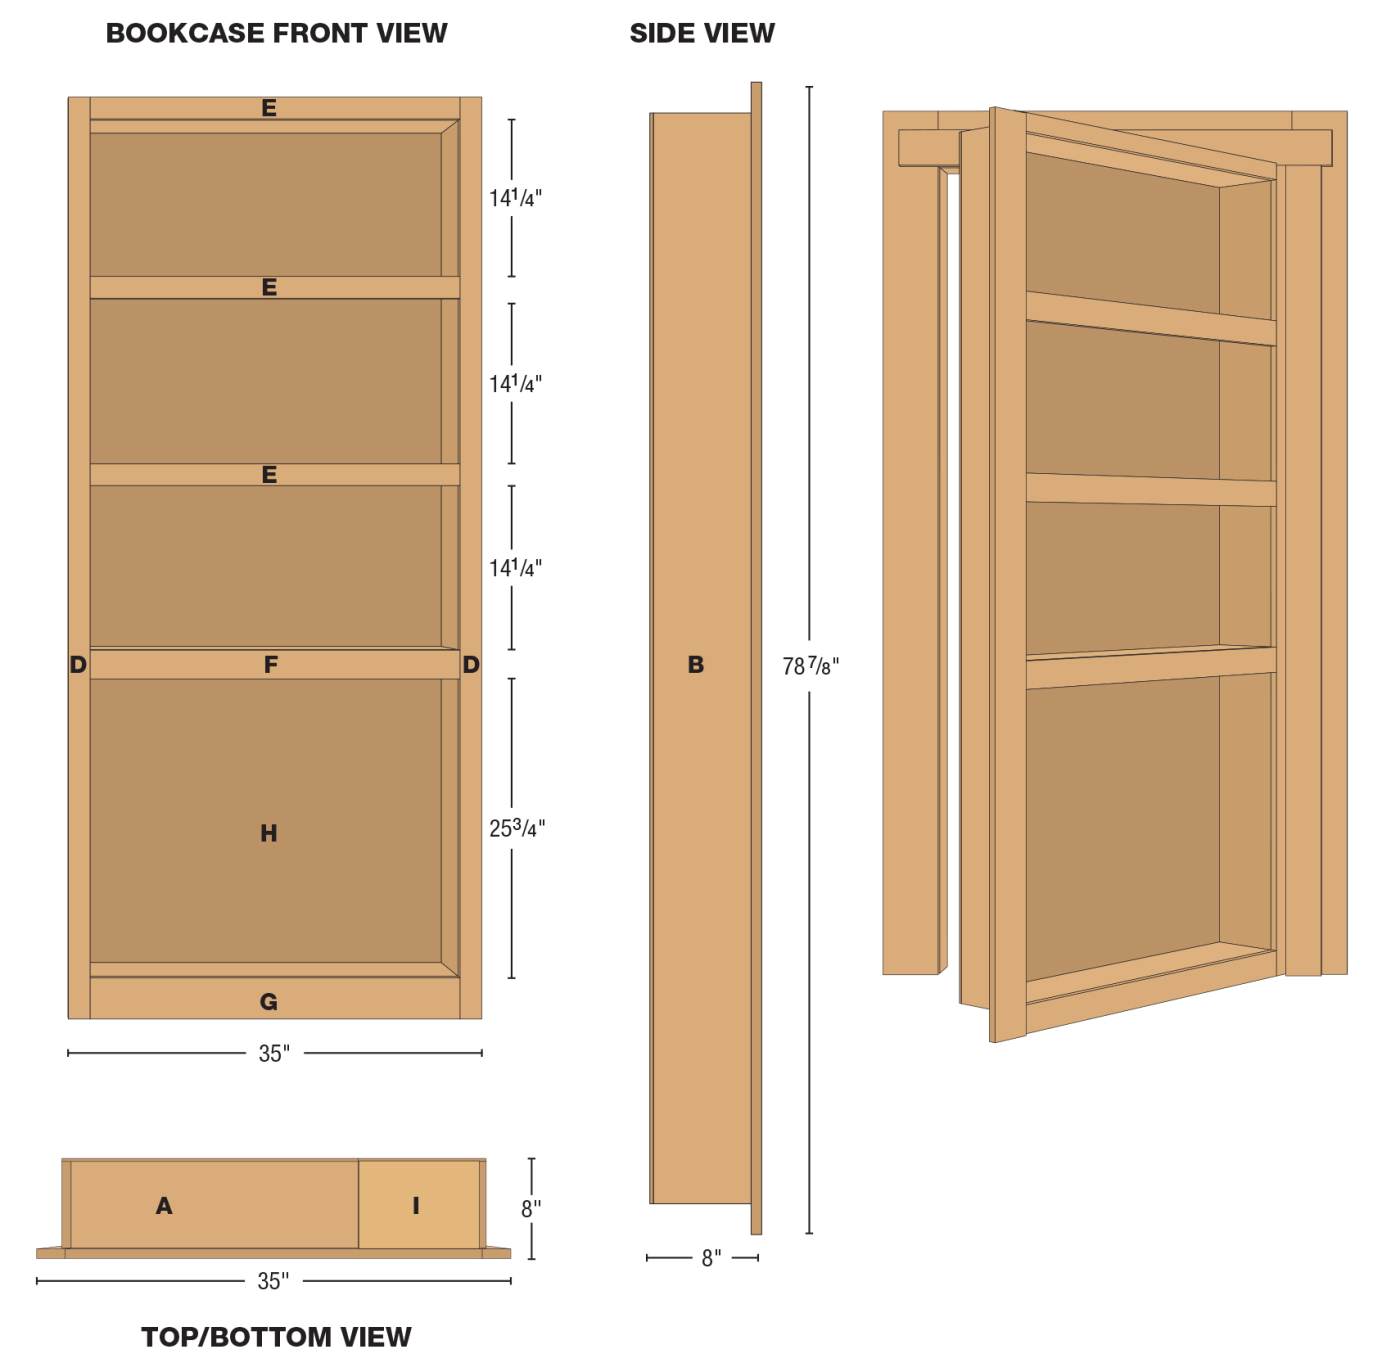
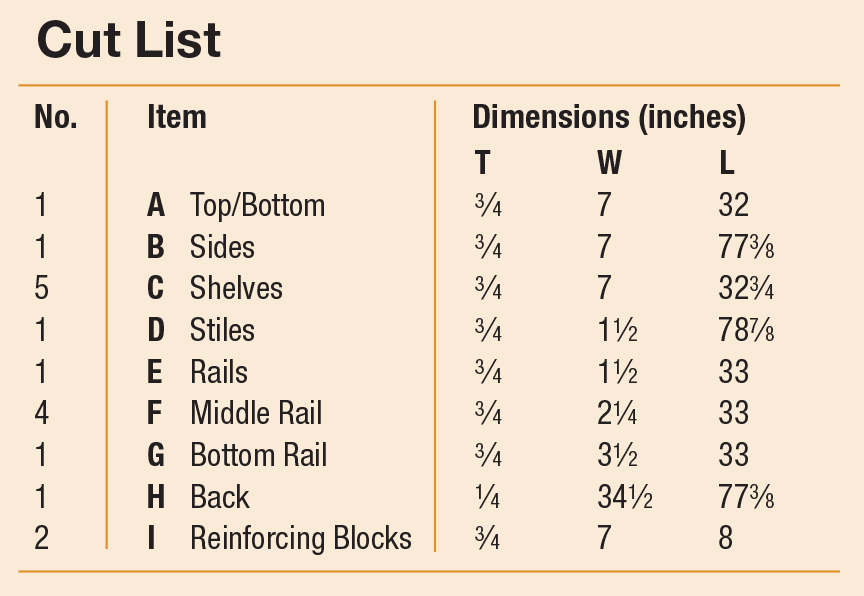
Cutlist and Diagrams
 Hardware

 Hardware
• Invisidoor Hinge Kit from Custom Service Hardware; includes hinge kit for one bookcase door, support foot/stop; and all fasteners
Prepare the Opening
The opening that your door will pivot in needs to be jammed and cased with flat stock (3.5″) as you would a pass-through opening. It is absolutely imperative that your jams are set both level and plumb to keep your reveals even.

1. Start with trimming out the door jamb. Being accurate here is key to hiding the opening. Cut your jambs to length.
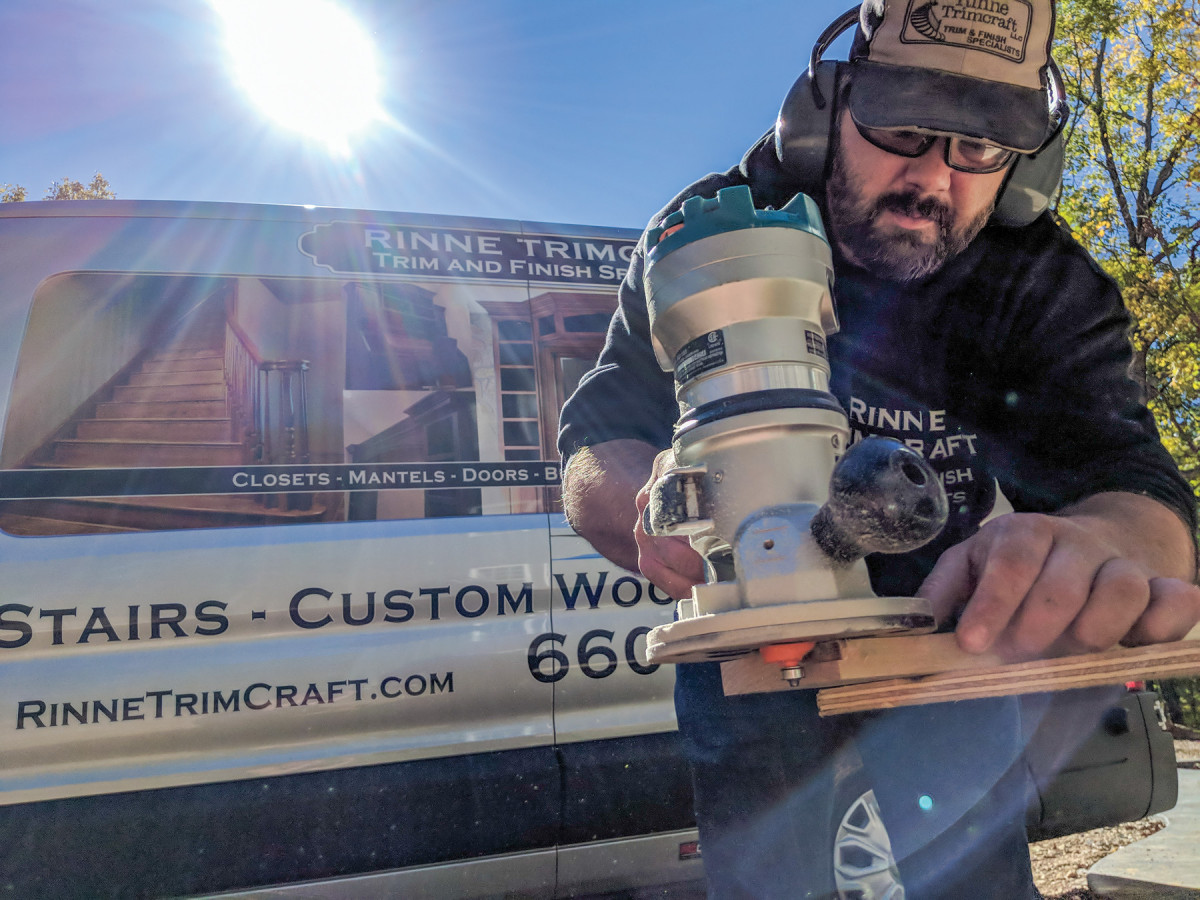
2. The jambs are joined to the header with rabbets. The rabbets are cut with a rabbeting bit in the router.
You’ll also be measuring off the top and bottom of the hinge side jamb leg to set your hinges on the threshold and header and as such, keeping your jamb leg plumb is critical to insuring they are parallel to one another. Once this is done, measure your opening and subtract 1″ from the width and 11/8” from the height. This will be the dimension of your face frame.

3. I assemble the jambs and header with staples to get it ready to install in the opening.
Make the Face Frame
4. Getting a perfectly square and plumb door frame is critical to making the rest of the process go smoothly. Here, I use a shim to figure out how I need to cope my jamb.
Start by cutting your two 11/2” wide stiles to length. Place them on a flat surface, face to face, backside up and aligned with one another. Make a mark 21/4” from the top and 31/2” from the bottom.
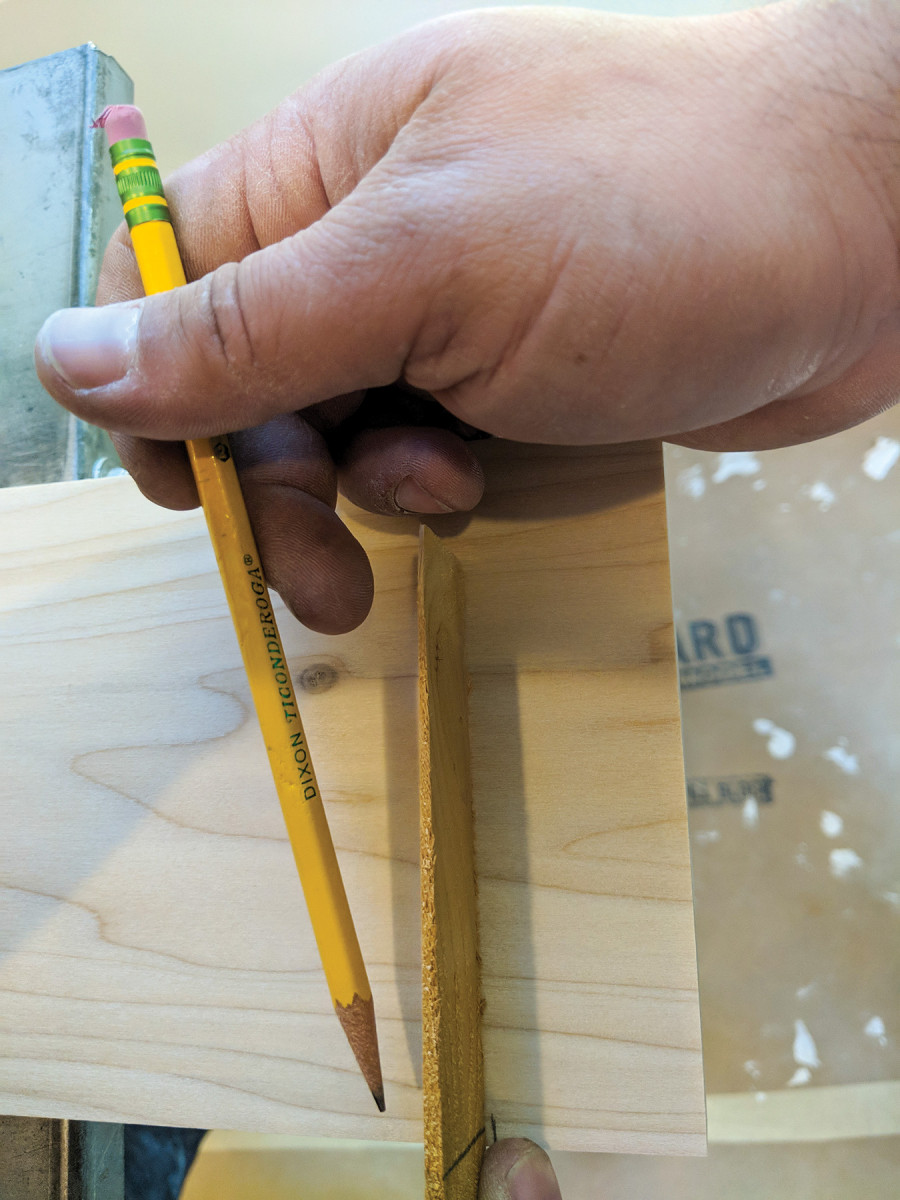
5. I use the shim to lay out my cut line on the jamb.
These marks represent your top and bottom rails. Next, make a mark at 311/2” from the bottom of the stile. Draw an x below this line to remind you which side the rail goes on when assembling. This rail is wider because it will have a door resting on it with a 3/4” overlay, which in turn will leave 11/2” showing so that it matches all of your other 11/2” rails.
6. I miter the first layer of trim for installation, to match the rest of the house.
Next, measure the distance from the top of your stile and the mark you made at 311/2“. Subtract from this number the 21/4” being allowed for the top rail. The difference will be what you use to determine the layout of the rest of your shelf rails evenly. Once you have their locations figured, make marks for them along the face edge of one stile.
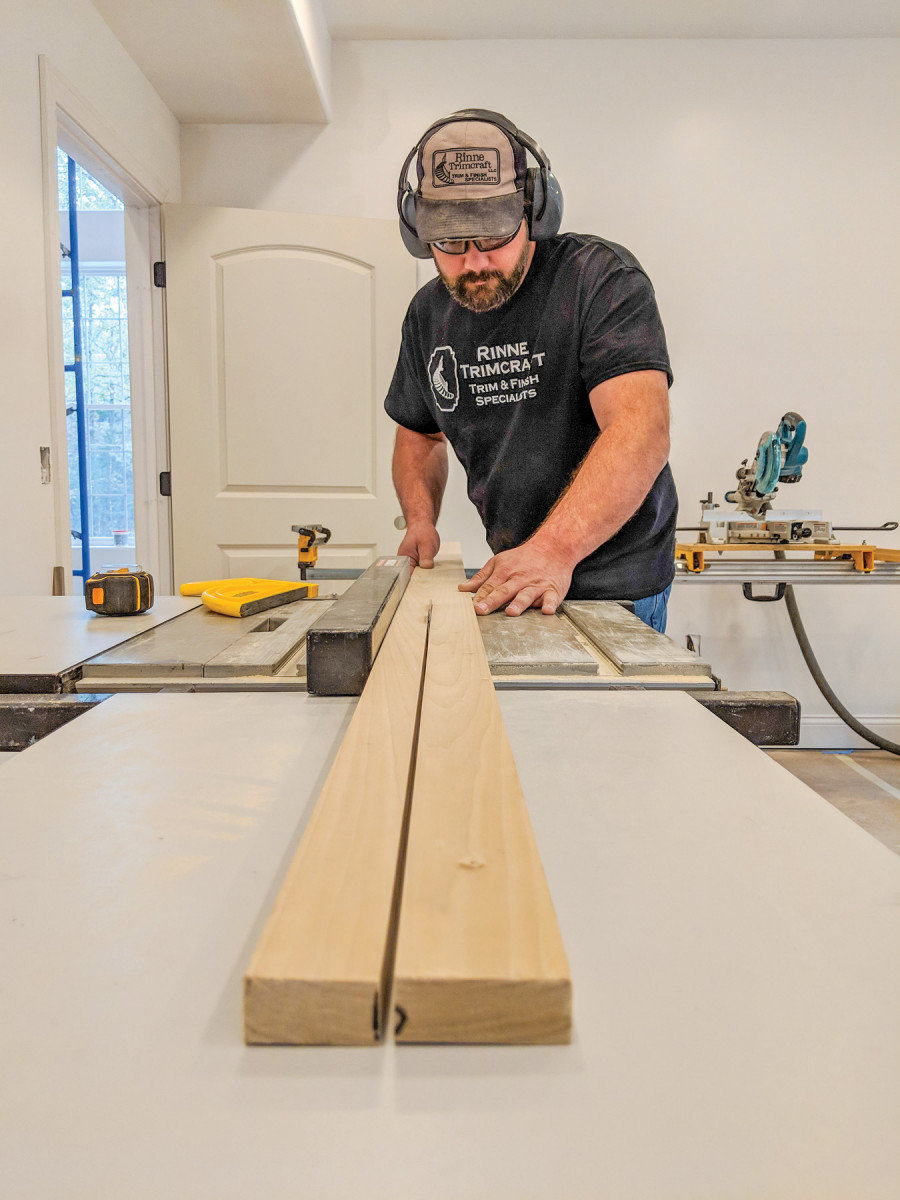
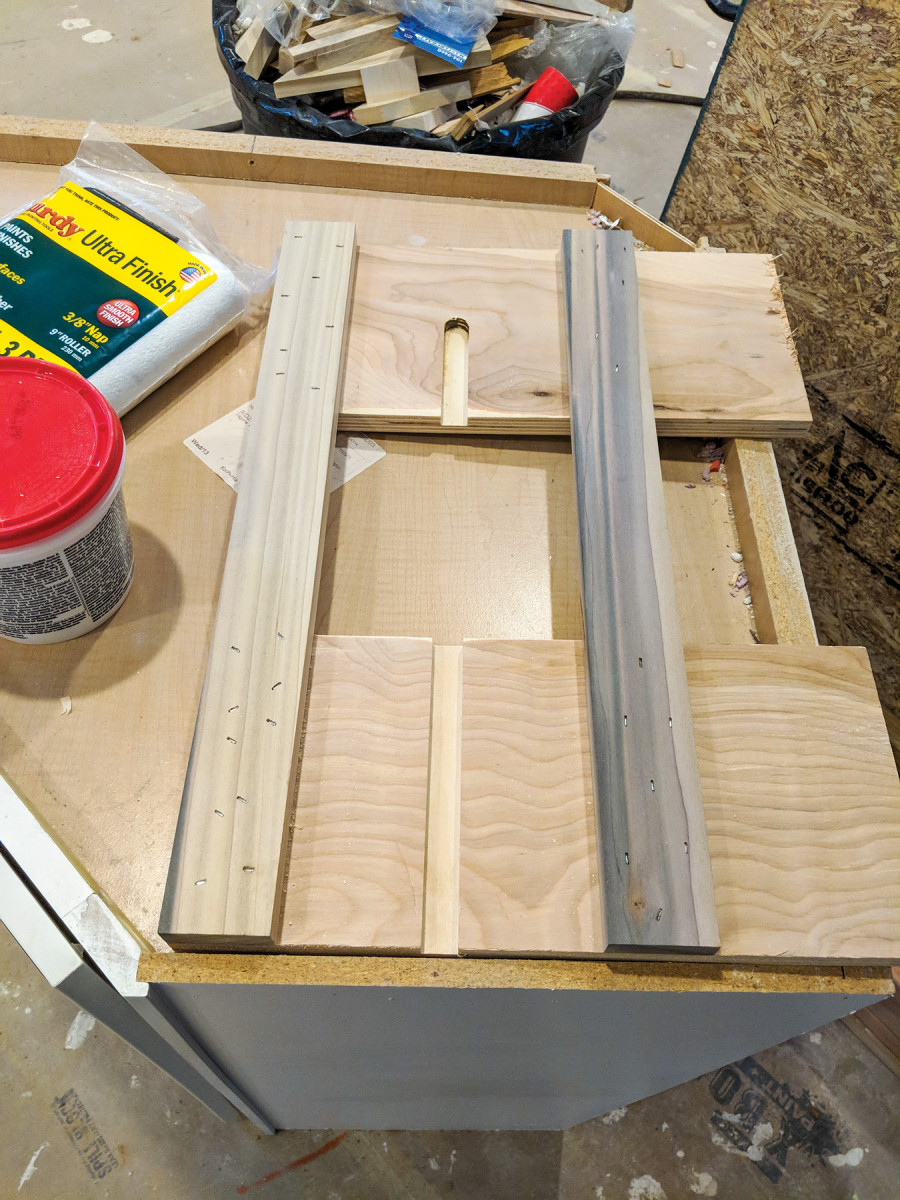
7. The face frame is made up of 3-1/2″, 2-1/4″ and 1-1/2″ wide stock. I start the face frame by ripping boards to width on the table saw.
Transfer these marks across both stiles remembering to place an x to the side each rail as you go. To find the width of your rails, take the overall with of the frame and subtract 41/2“. Next, drill pocket holes in all of the rail ends. Assemble the frame placing each rail on its respective mark with glue and pocket screws clamping them as you work. Once your face frame is assembled, you’re ready to build your case.
Build the Case
8. The face frame is assembled using pocket hole joinery. It’s fast and strong for installation in the field. l add a little glue for peace of mind.
The sides of the cabinet cannot exceed 7″ as the overall depth including a 3/4” face frame and 1/4” back must be 8″ or less. This ensures you will have the proper clearances specified by the manufacturer so that your door functions with the recommended hardware placement. Cut the case sides 13/8” less than the height of your face frame. The top of the case will be recessed 3/4” below the top of your face frame.
Using a combination square, draw a line on the back of your face frame 3/4” from the top. At this time, I also make reveal lines on the stiles 15/16” from the outsides on the back and 3/4” from the outsides on the front. The lines on the back represent the overall width of your case whereas the lines on the front will be the reveal marks for your trim boards later.
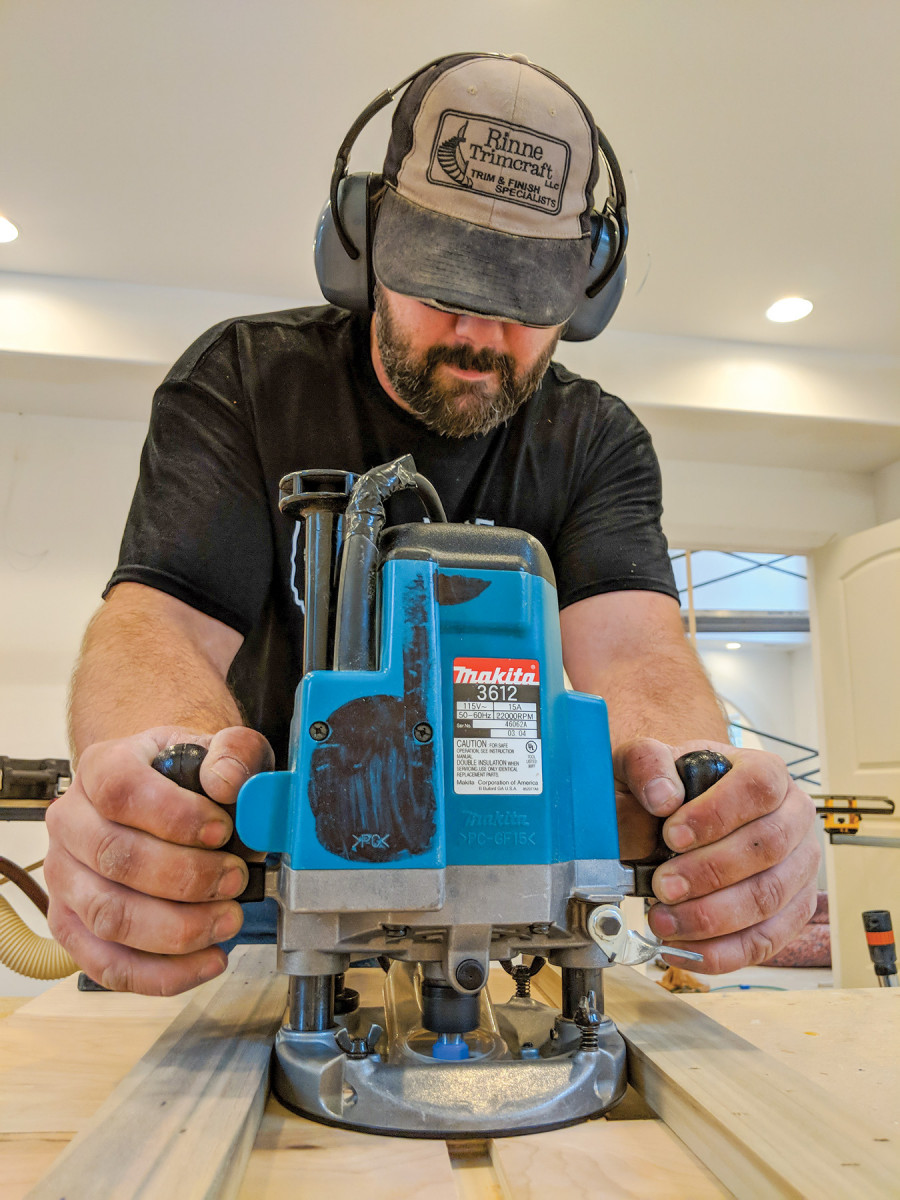
9. Dadoed shelves give the case rigidity. I cut the dadoes with a router and simple dado jig.
Now place one cabinet side on edge and flush with the 3/4” reveal line on the frame. Make a mark on the cabinet side between 1/16“- 1/8” below the top of each shelf rail with an x placed on the side the shelf board will go. This slight reveal will prevent any seams from showing and save you a bit of filling and sanding of seams. The top shelf board, which is the ceiling of the case, will be flush with the sides. The very lowest board will sit 1/2” below the top of your bottom rail. Once you’ve made all of these marks, place the two cabinet sides face to face and transfer them using a large square to draw them as continuous lines.
10. The dado jig is just two sets of fences, sized to fit my router base that fit over the 7″ wide bookcase sides.
Dado joints are a must for these bookcases. The added strength of a mechanical joint is needed to prevent sagging and racking. I start by making a squared router jig the width of the sides plus 1/16” to allow easy sliding of the material. I add a hold down clamp to the out-feed side of the jig and use a wedge to shim between the jig and work for extra stability. I plow my dadoes 3/8” deep in one pass using my router.
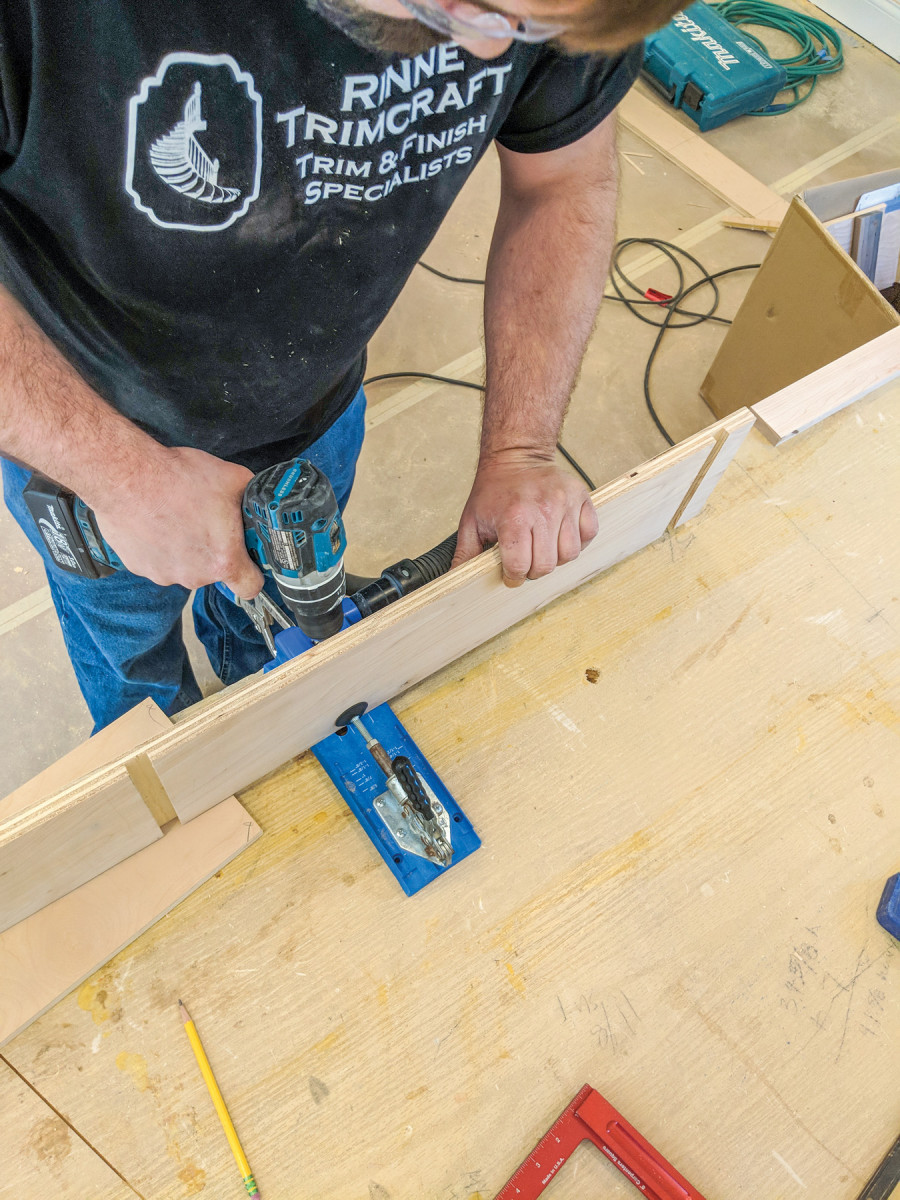
11. The face frame is attached to the case with pocket hole joinery (pockets on the exterior of the case).
Make your first dado in a piece of scrap so that you will have a referencing mark on both sides of the work. I find that if you do not plow all the way through the jig on the outside of the cut, your dust collection will work substantially better as this creates a dam of sorts to prevent the debris from flying all over the room. Once all of your dadoes are plowed, drill pocket holes between them on the opposite face of each case side. These will hold the frame to the case much better than glue alone. Now you are ready to cut your shelves.
To find the width of your shelves, you will subtract 25/8” from your frame width. 17/8” for both outside reveals and another 3/4” for the material thickness of the sides left over after your dadoes. Cut all of your shelves to the same length and inspect them for any discrepancies. Next, place glue in each dado, insert the shelves and shoot 13/8” staples into them from the outside. I do this even on stain grade shelves as this portion is hidden until the door is opened. Continue these steps until the case is assembled.
Attach the Frame
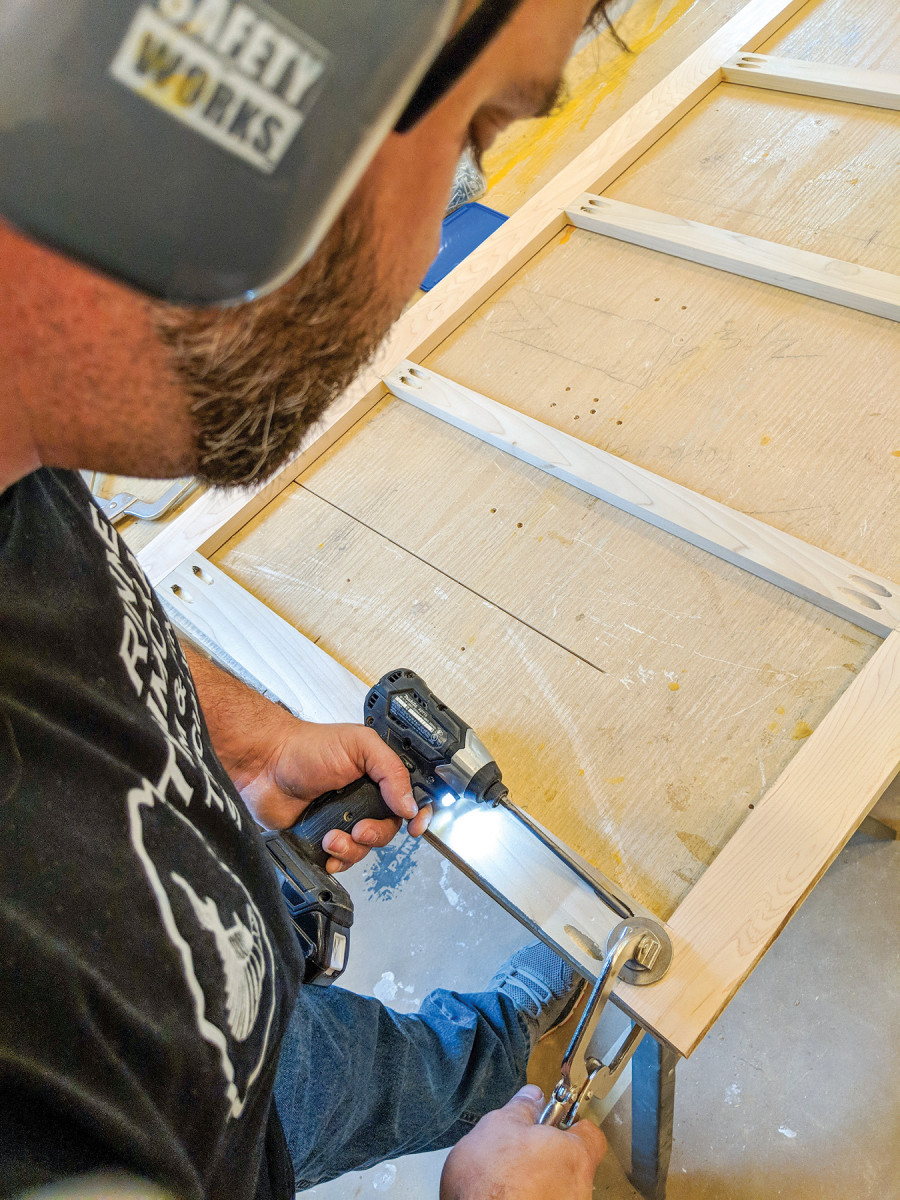
12. I use screws about every 12″ to attach the face frame to the bookcase. This makes the piece feel really solid it.
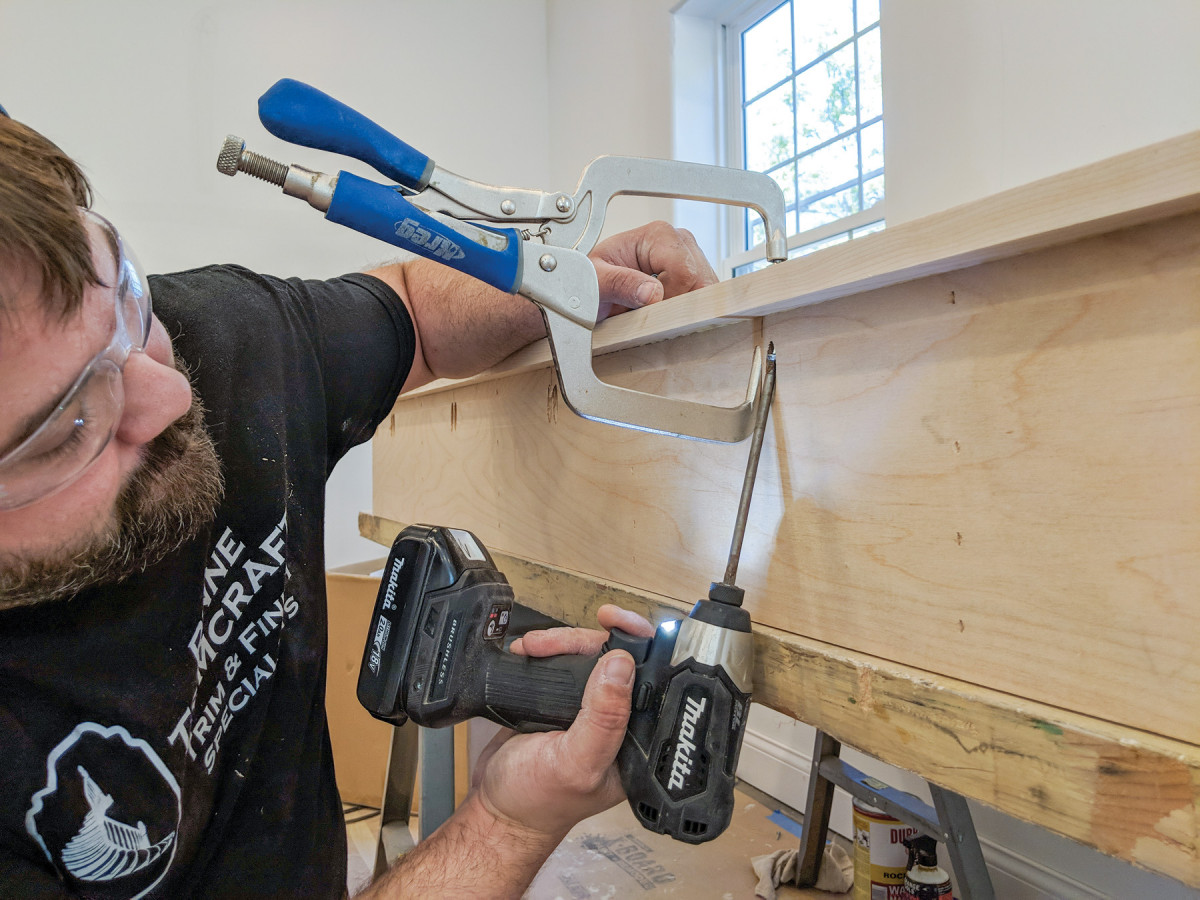
First, test fit the face frame making sure to line up both the top and sides of the case with the reveal marks on the back of the frame. You will likely need to rack the case one way or the other to ensure square alignment. Once this is done, put a bead of glue on all edges of the carcass that come in contact with the face frame. Place the face frame back onto the carcass, again paying attention to you reveal marks, and tack a few 16 gauge nails along the sides to hold the frame in place.
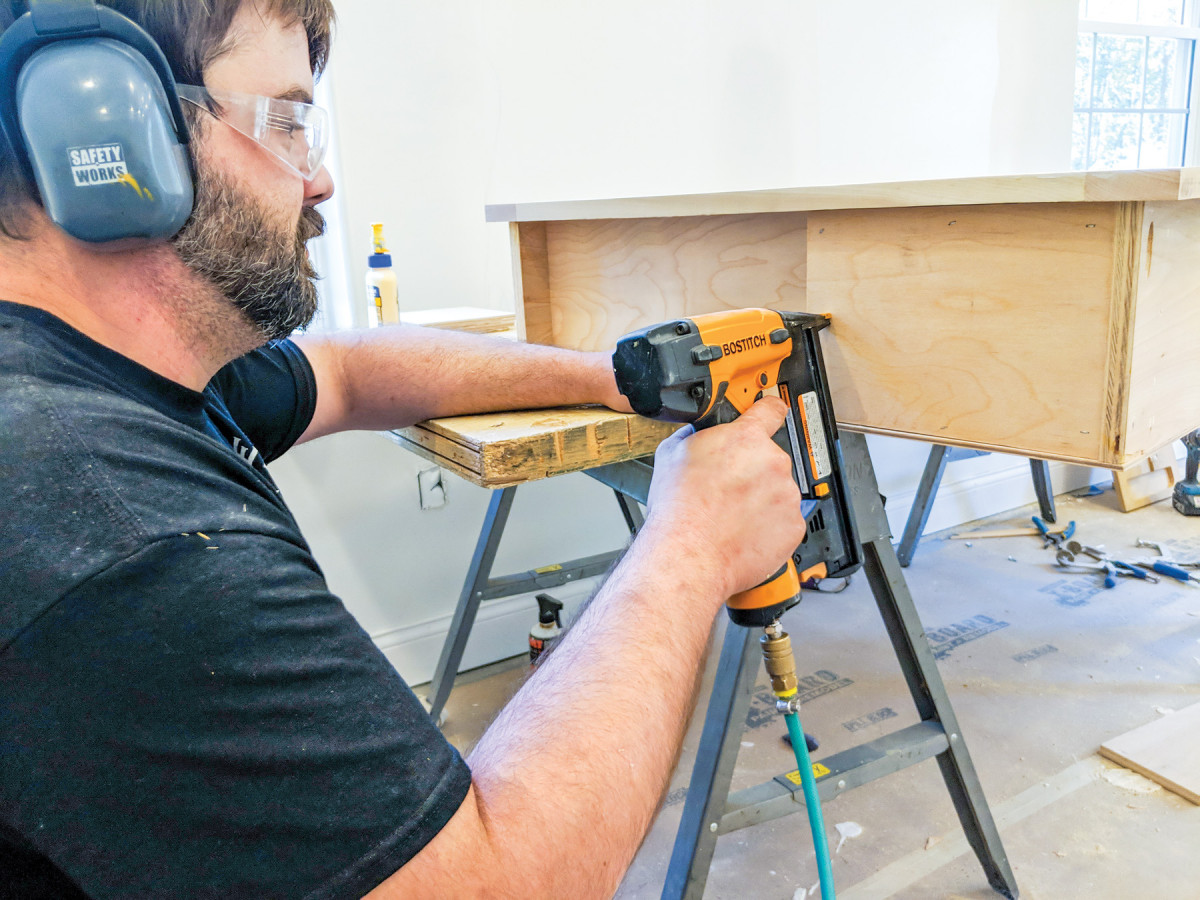
13. I reinforce the top and bottom of the bookcase for the hardware with another layer of plywood attached with glue and staples.
If building a stain grade door, clamp both sides and every rail accordingly to avoid exposed nail holes. Working quickly within the glue’s open time, clamp the frame to the carcass at each pocket hole location, and proceed to screwing the frame down. For paint grade work, I will shoot about three nails evenly spaced through the face frame and into each shelf just for extra hold until the glue dries. After attaching the face, cut the back out of 1/4” plywood then glue and staple it on.
A Hidden Lock
To me, the book-opener is what puts the magic into a hidden door bookcase. When I ask a client to pick a book to use as the opening mechanism, they will undoubtedly pick a well-known or vintage title, or perhaps a book with a pleasant color scheme. Whatever book you choose, ensuring that it has ample height clearance to fully open hinging outward and that the page thickness is a number that can be divided in quarter inches will save you some headaches later on.
A book with a page thickness of 11/2” is ideal for use as the hidden means of opening the door. This is because, you will be cutting out some pages to use solid stock or make a glue blank to fill them back with. This keeps things disguised while creating a sturdy place to mount your hinge and anchor your cable out of sight below.
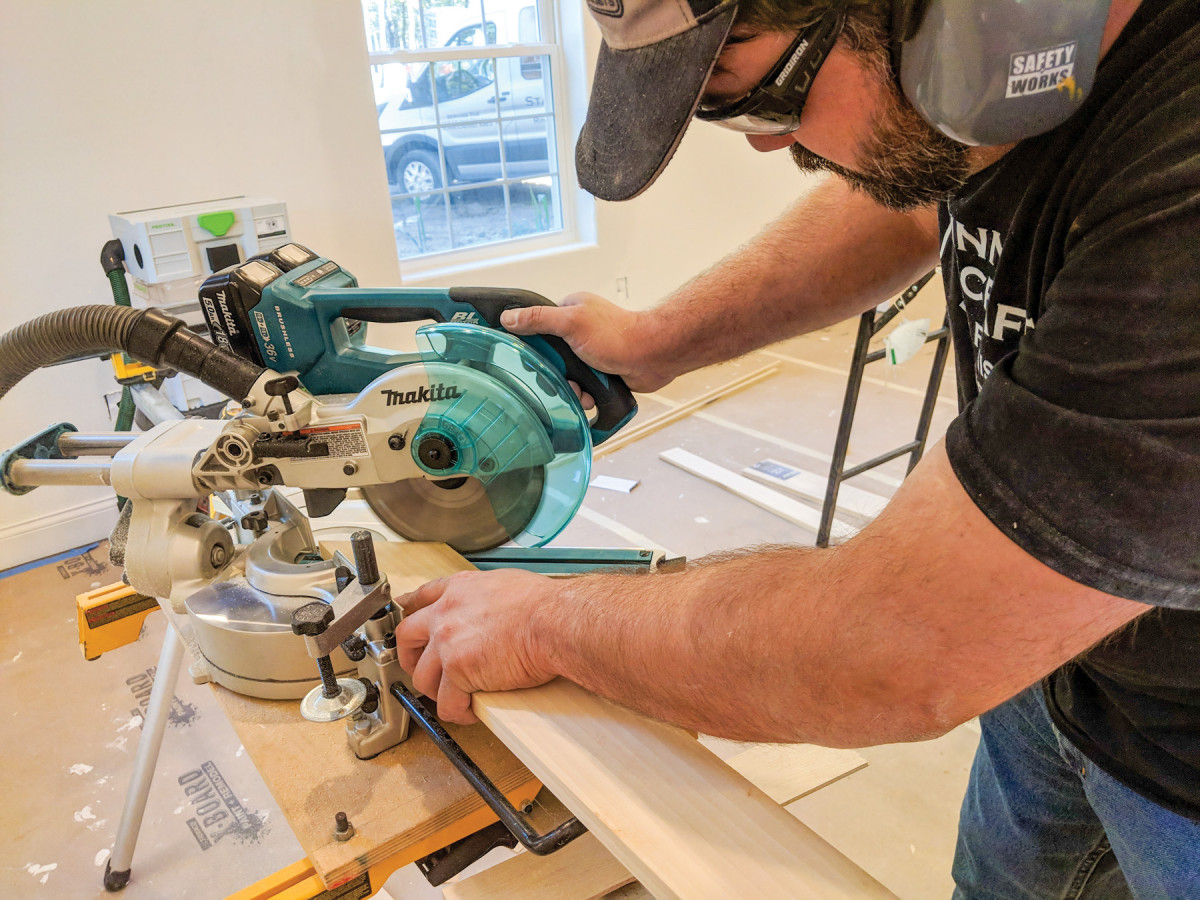
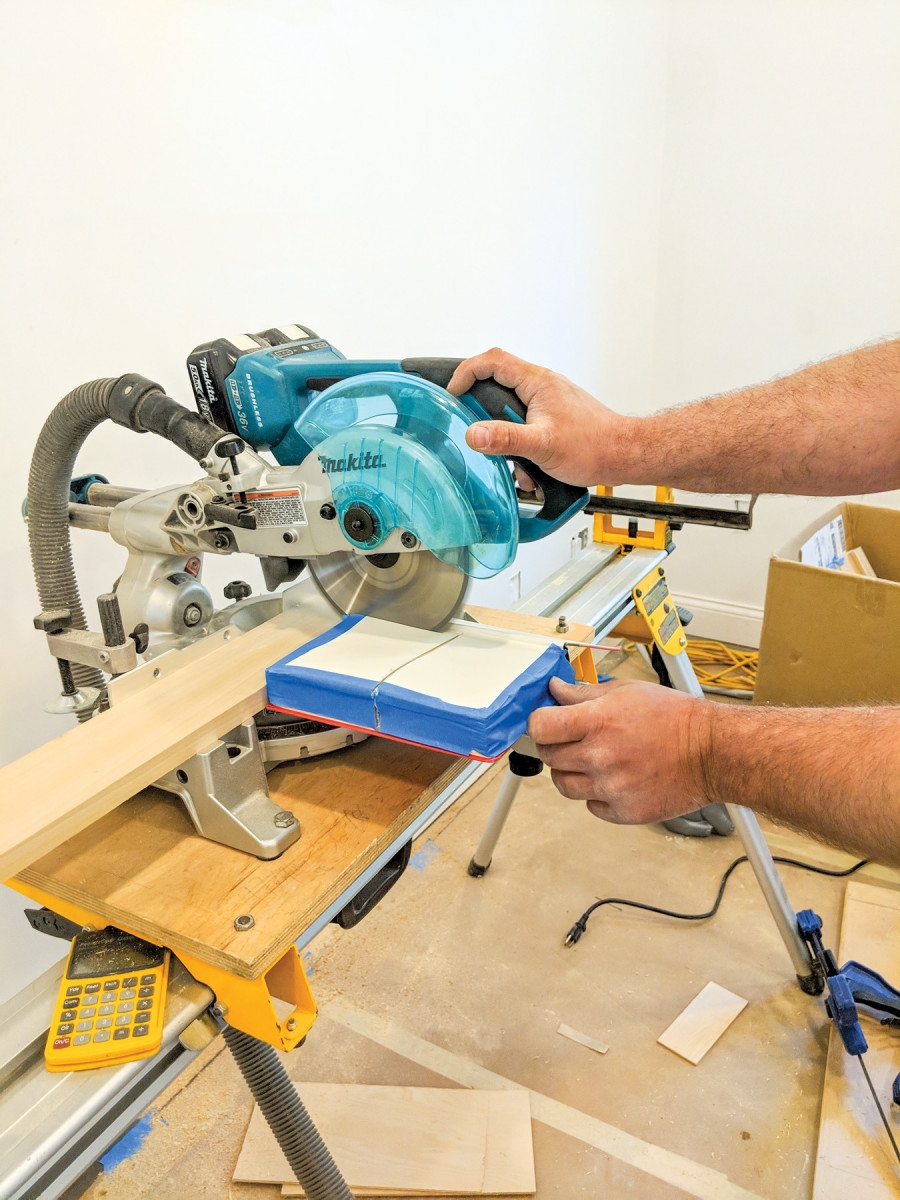 A) Using a square, make a mark across the pages a little over half way up. With painters tape, tape all edges of the pages together along with one cover to keep them from flying apart when cut. Leave the other cover free for holding while cutting. With the book next to the blade as a depth gauge and using your adjustable depth stop, set your sliding miter saw to make a cut that is shy of touching the back cover by 10 or so pages. Place a sacrificial board of about 3″ wide between the book and fence so that you can creep up on the line and complete the exit cut on the backside of the book Next, lay the book open with the cover bent towards you to hold onto and make the first cut across the pages. Turn the book 90° and make your second cut about 1/2” or so from the spine. Then finish both cuts making scoring passes with a utility knife.
 B-C) Make a block to fill the void (minus an inch or so in width to hide hardware) using either solid stock or a combination of solid stock and 1/4” plywood.
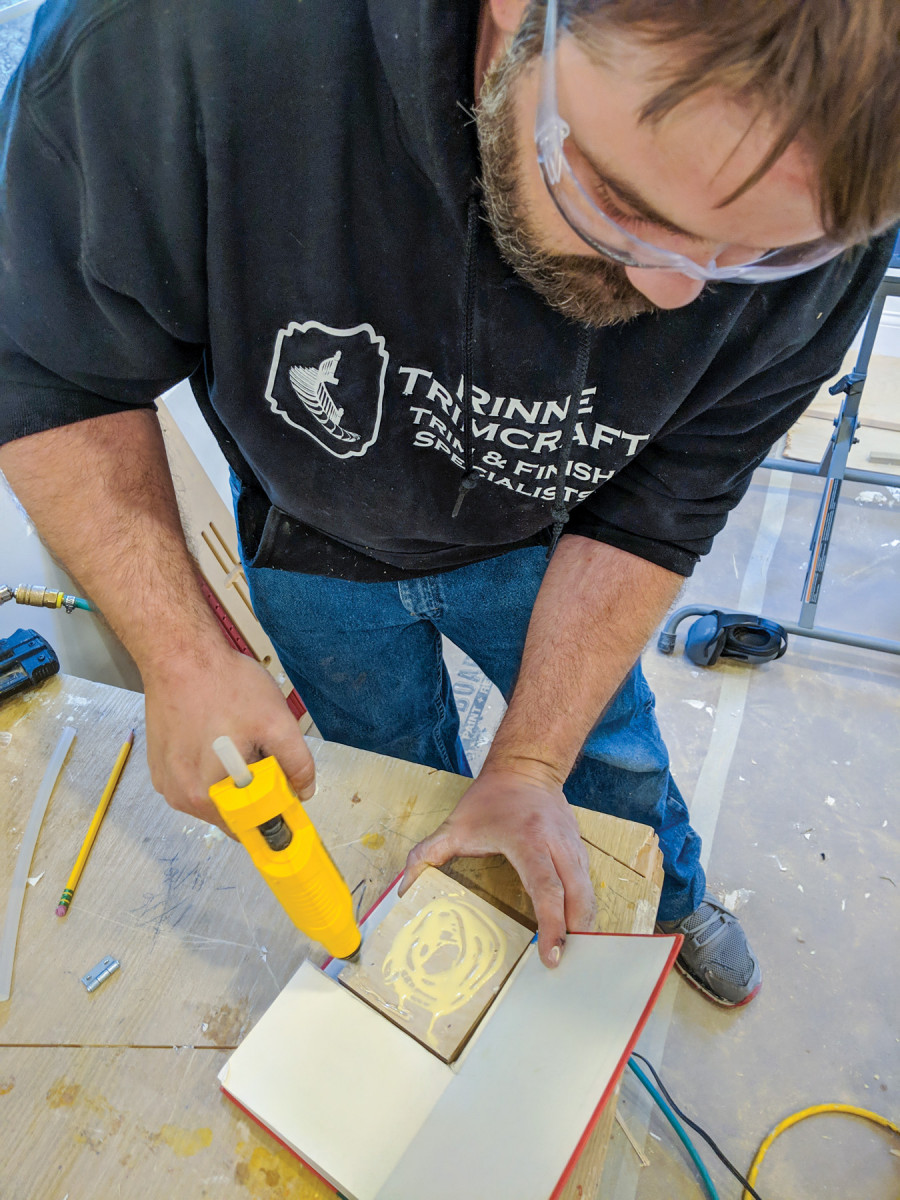 Apply PVA glue liberally to both faces and all edges except the bottom and the outside facing edge of the block and clamp the assembly overnight.
Mount the Hinges
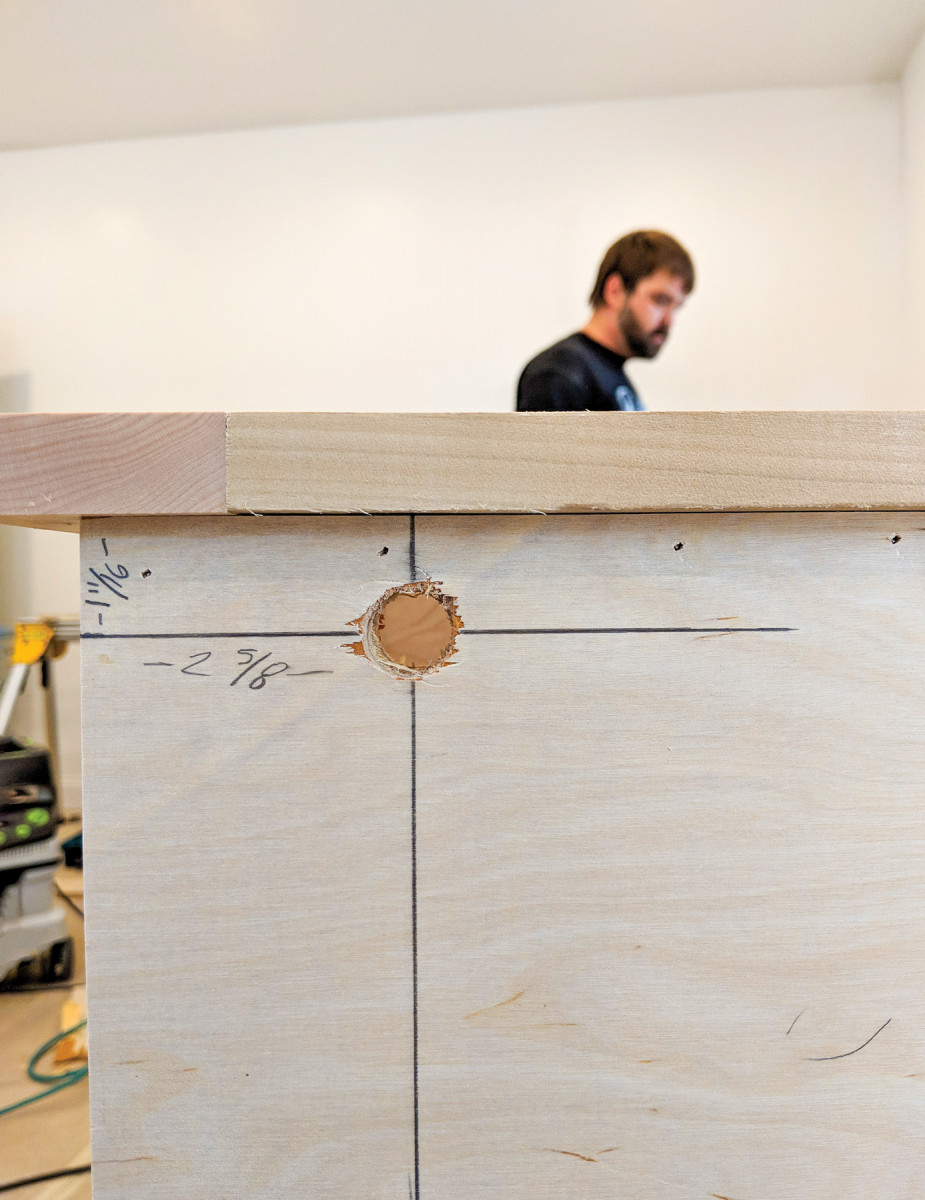
14-15. I mark, check, and recheck mounting the hardware and drilling through-holes for the pivot pins.
Mounting the hinges is critical to a good-fitting door. If you’ve never done this before, it’s a good idea to make a working mockup to test placement. To mount the hinges on the case, you’ll need to shim the top with a 1/2” block, and the bottom with a 3/4“. I use scrap pieces and cut blocks about 10″ x 7” and place them directly in the corners where the hinges will mount.
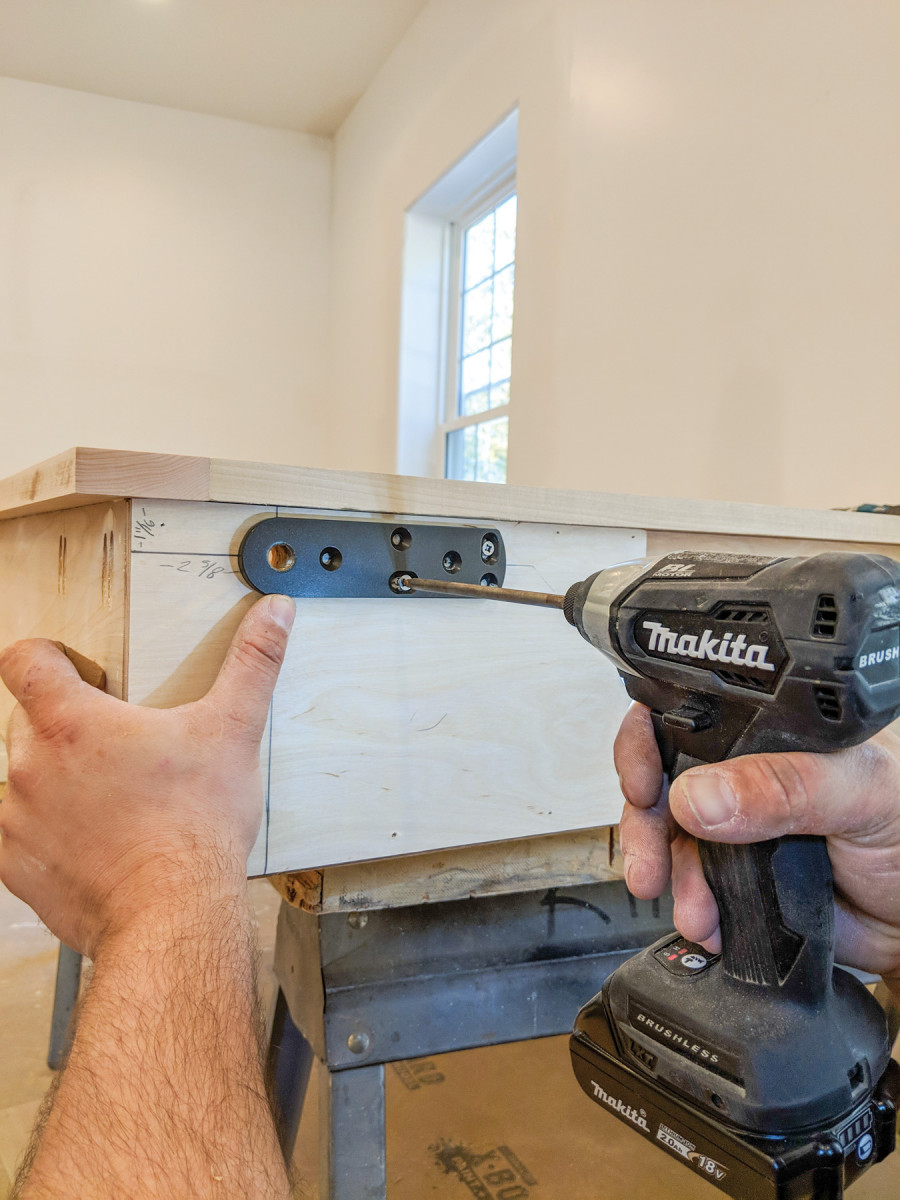 Glue and nail them on and then install your hinges as shown in the diagram at left (follow the manufacturers instructions). Pay attention to the individual components as one blade of the pivot hinge is threaded and must be installed on top of your case. You will drill a 5/8” hole through the top and into your case to allow access to the Allen screw that threads into this blade and acts as the upper pivot pin.
Install the Door
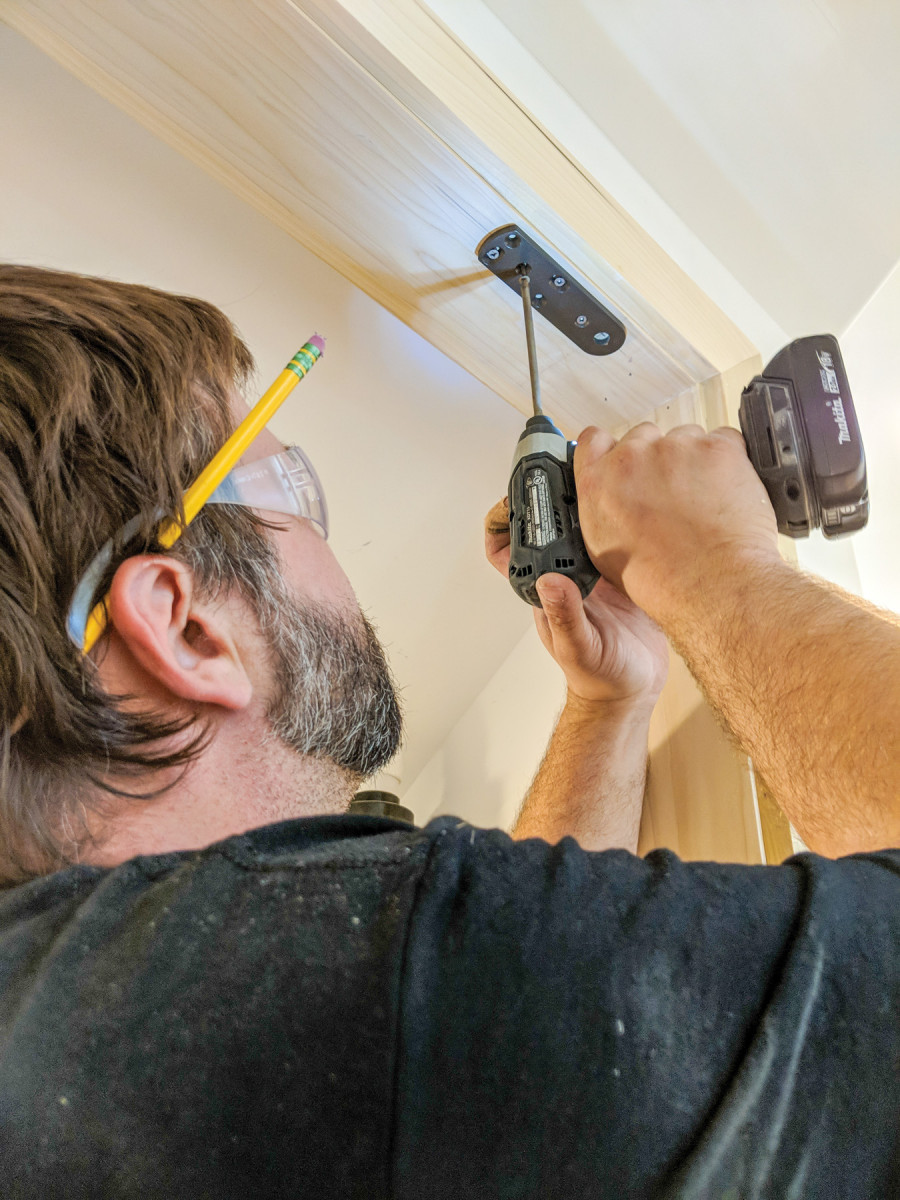
16. Attach the top part of the upper pivot hinge to the header, paying particlar attention to alignment and the offsets indicated in the directions.
First start your Allen screw through the top hinge and add the supplied washers to the threshold hinge pin. Place the door into the opening hinge side first with the top tilted slightly outward. Maneuver the door until the bottom hinge is engaged with the threshold hinge-pin. Then tilt the door into the hole while threading the Allen screw up and into the head jamb hinge. The door should now be in place and functioning.
Disguise the Opening
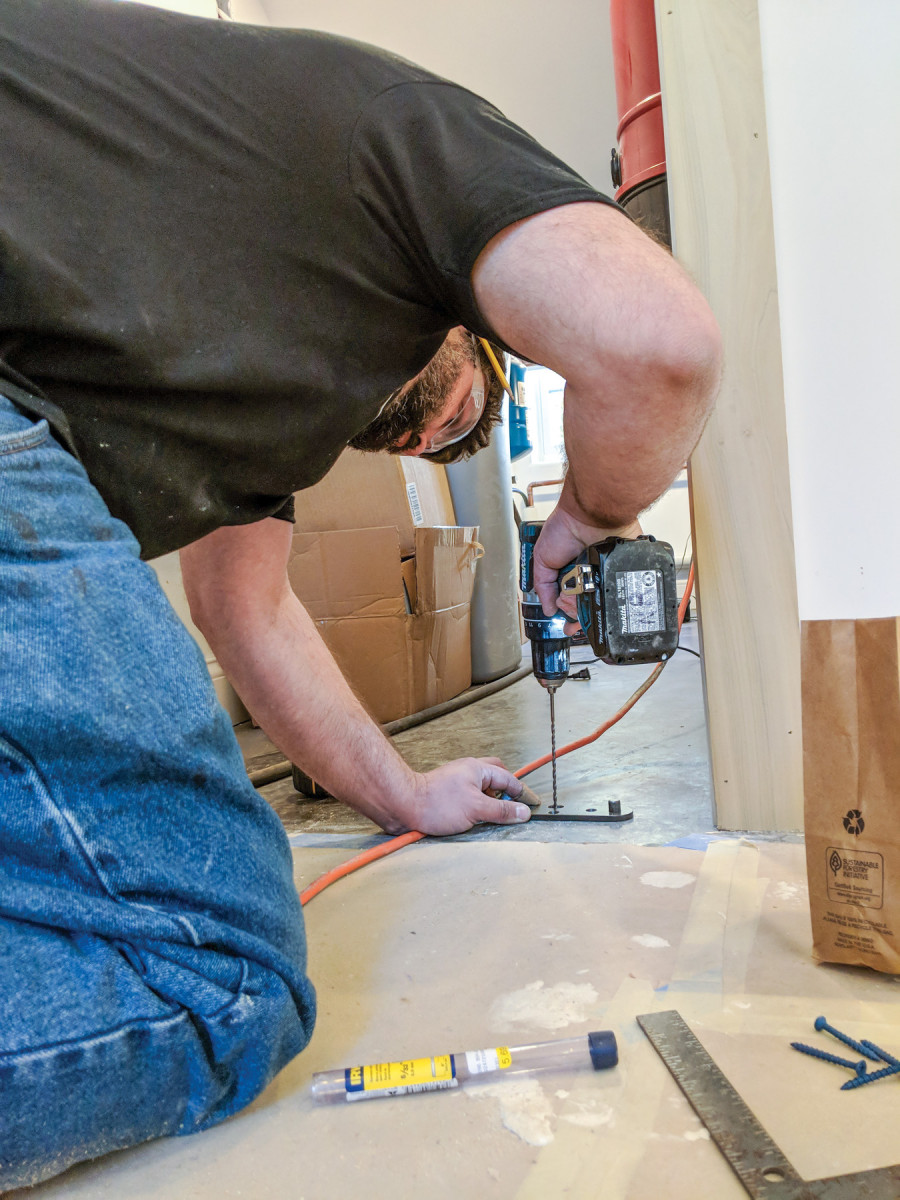
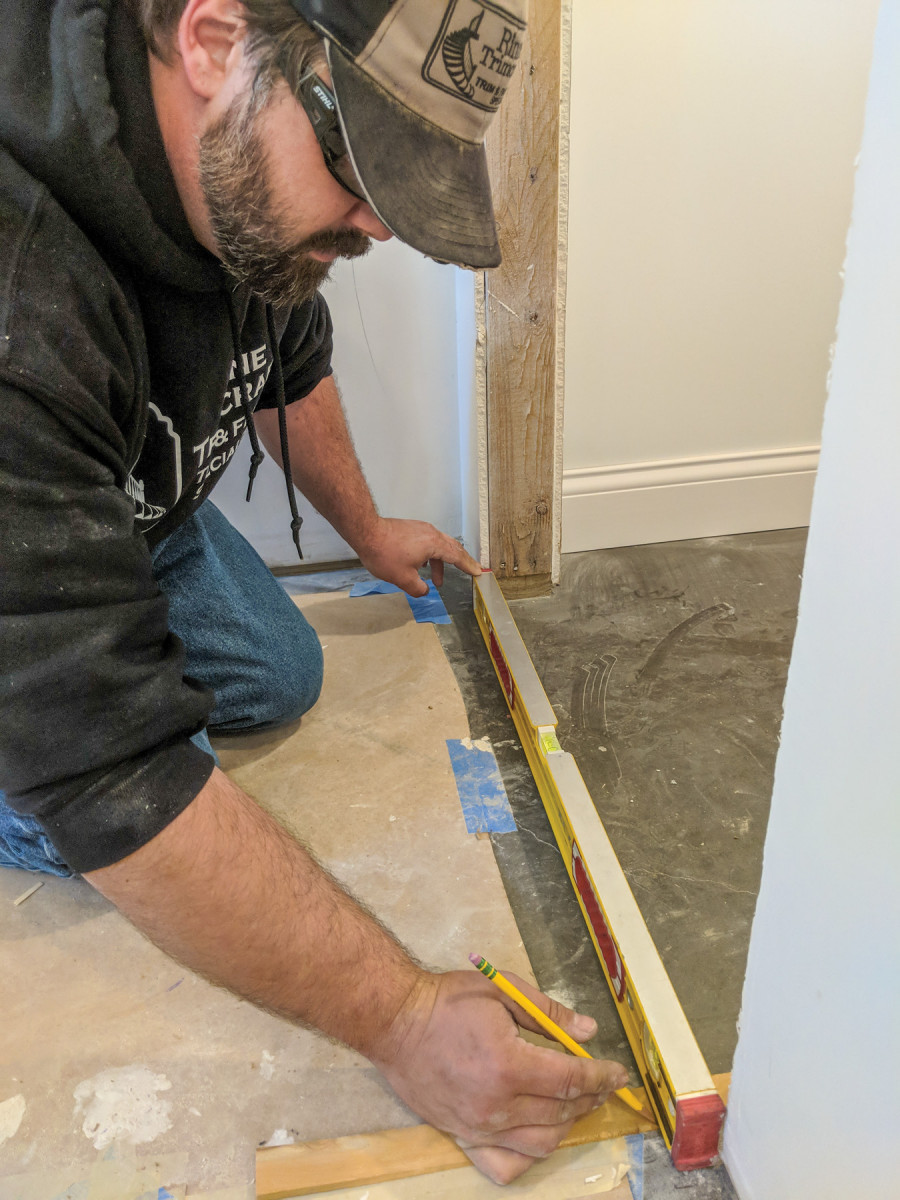
17. Do the same thing with the floor hinge plate. I used a hammer drill to attach it to the concrete here, and I also drilled out a little extra room where the pivot point attaches.
Using 31/2” flat stock, you will now trim the bookcase door to hide gaps as well as disguise it’s presence. The head trim needs to be down as close to the top rail of the bookcase as possible while still allowing free movement. I take a scrap piece and hold it across the top while opening the door back and forth until I find this position. Make a mark beneath it on both the right and left hand side casings. This mark represents the height of both side trim boards as they will butt the to the bottom of the top trim.
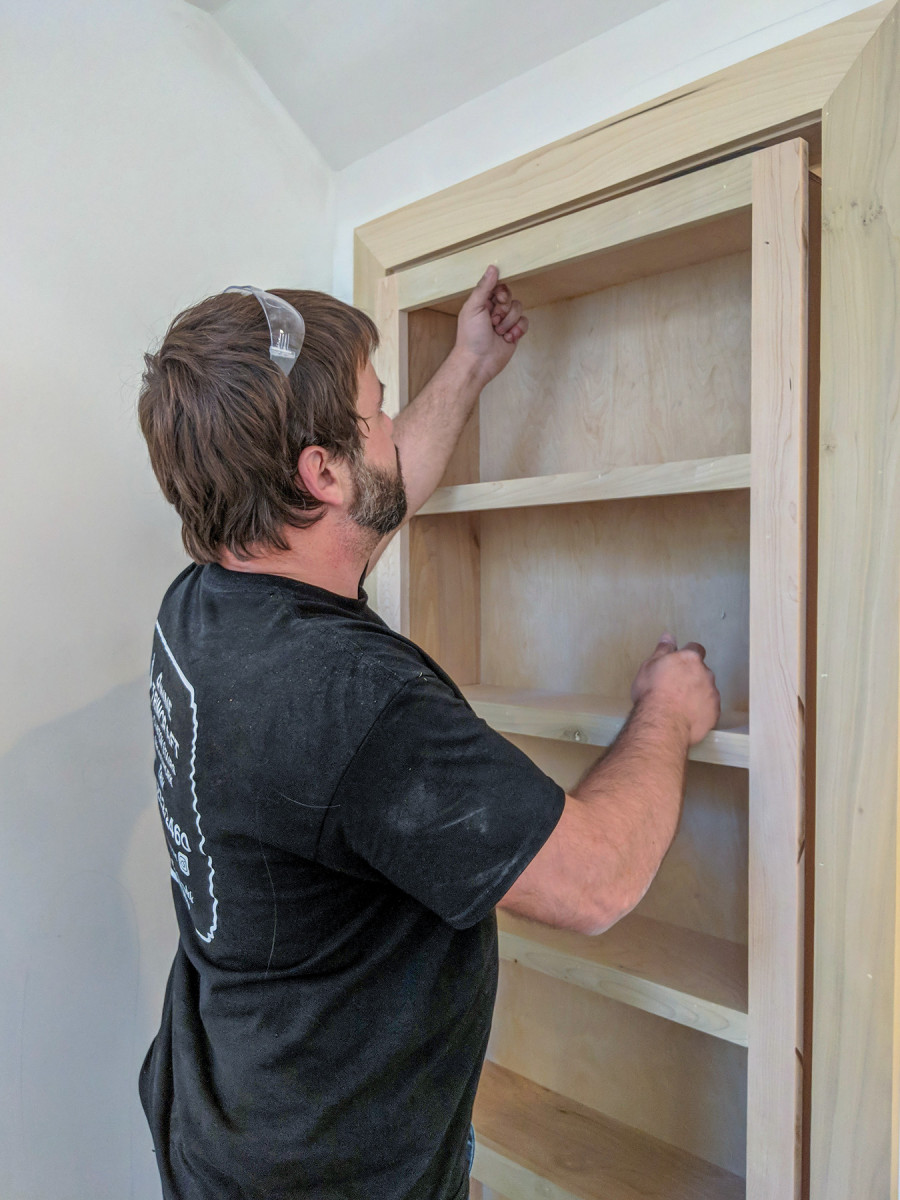
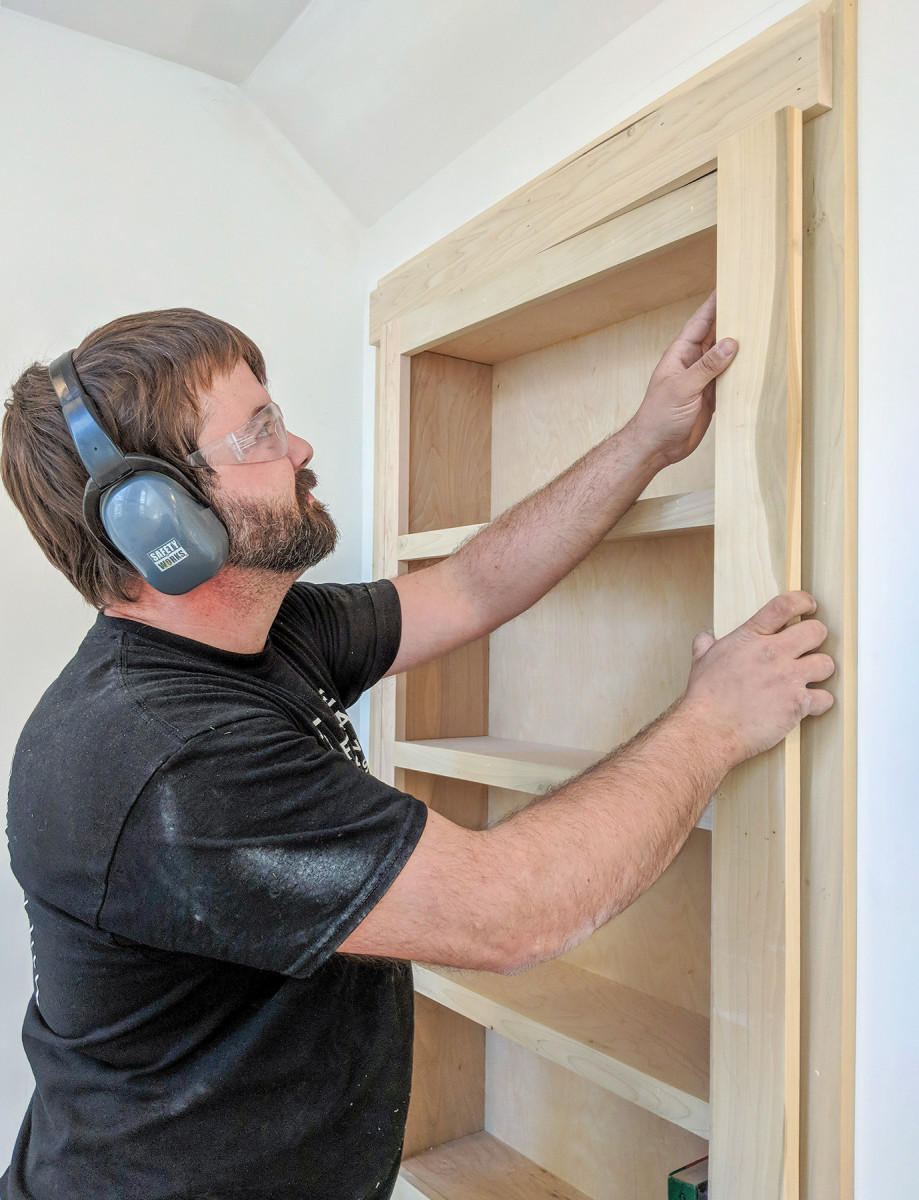
18. I set the door into place, first aligning the bottom pivot hinge and checking my gaps.
Trim on the hinge side and top of the case will be attached only to the wall (or in this instance the casing of the opening). The trim on the non-hinged, or strike side, will be attached to the face frame of the bookcase and act as a stop. Allow 1/8” of clearance initially so that the door can swing freely from the upper piece of trim as well as the floor. You may find you need to plane or sand a little bit to fine-tune this clearance.
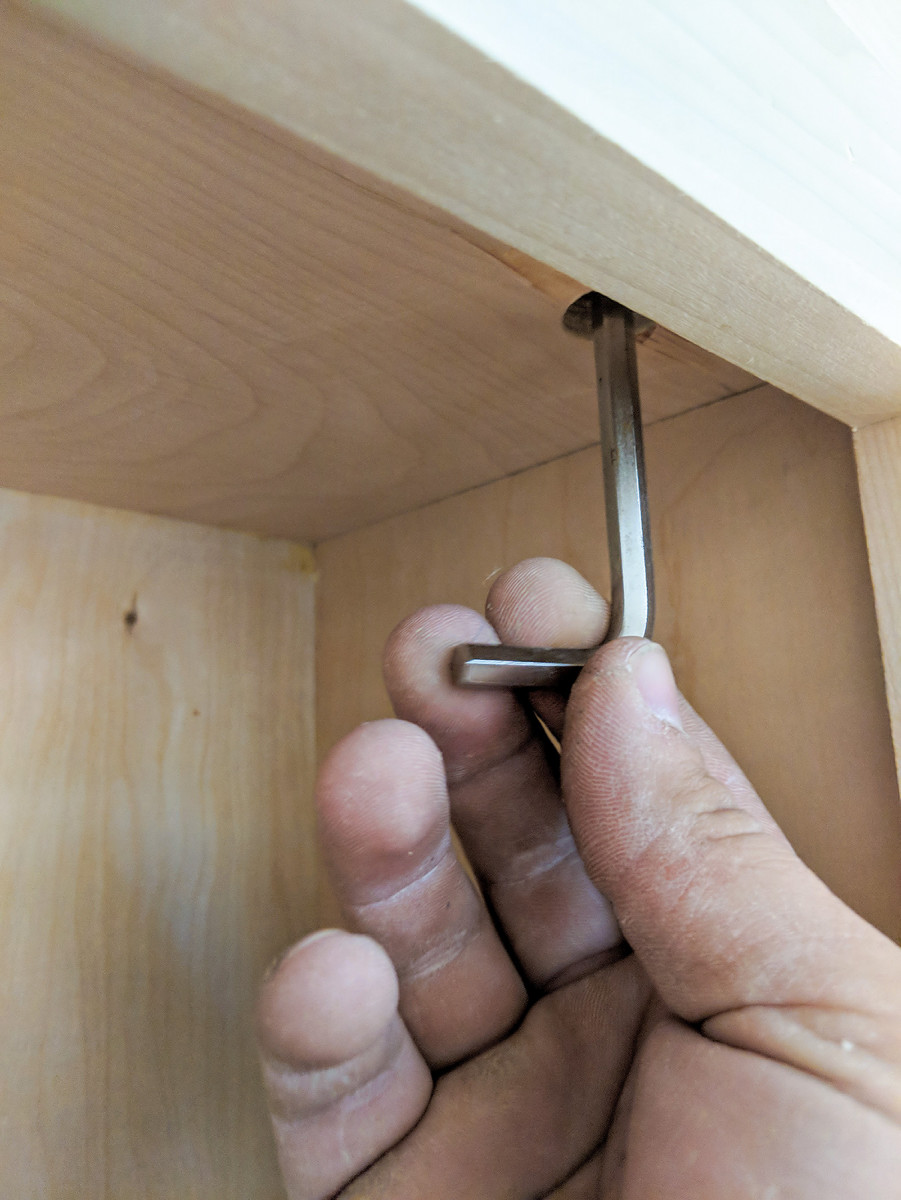
19. A pin is inserted through the top hinge plates from inside the bookcase, then rotated with a hex key to lock it in place.
Place your hinge side trim on first aligning it with the three quarter reveal mark you made earlier on the outside of your case’s face. Nail it only on the portion that makes contact with the casing of the opening. Next, place a scrap on the reveal line of the strike side and mark the outside of the trim there. Measure from that mark to the outside of the hinge side trim and add 1″. This is the length of your head trim allowing 1/2” of overhang beyond each side trim. Now, I hang the head trim (nailing it only to the head casing of the opening) so that I can get an exact measurement for the strike side trim. I then glue and tack the strike side trim to the face frame of the bookcase at my 3/4” reveal line using 11/4” Brad nails. Finally, I run 11/4” screws from the backside of the face frame into the trim for extra stability as this is going to act as the doorstop and need to withstand some abuse.

20. Finally, I test the door for any flex or rub along the floor. With the door in place, you can move on to the second layer of trim.
Once the trim is mounted, I like to embed rare earth magnets in the backside of the strike trim and the face of the casing it abuts to act as closers. I make marks on the outside edge of the strike trim and on the casing showing the edge of the trim as well as a reference mark showing the elevation of my magnets.
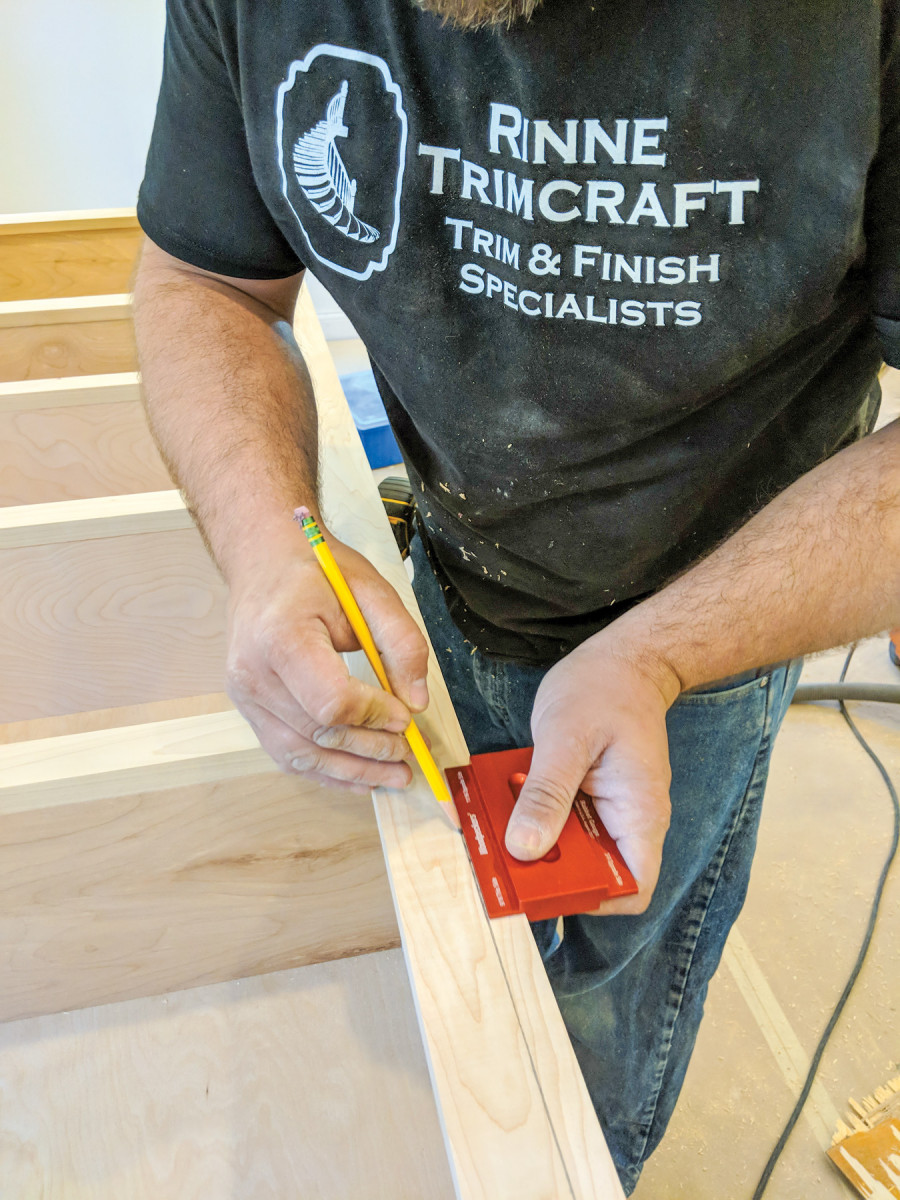
21. I mark 3/4″ in on the bookcase trim to help keep an even reveal during install. Some of the trim is attached to the bookcase and some is attached to the frame.
I then open the door and transfer these lines inward about an inch, which becomes the center points of my magnets. I drill recesses using a Forstner bit, then hot glue and place a screw in the center of each magnet.
Install the Stop
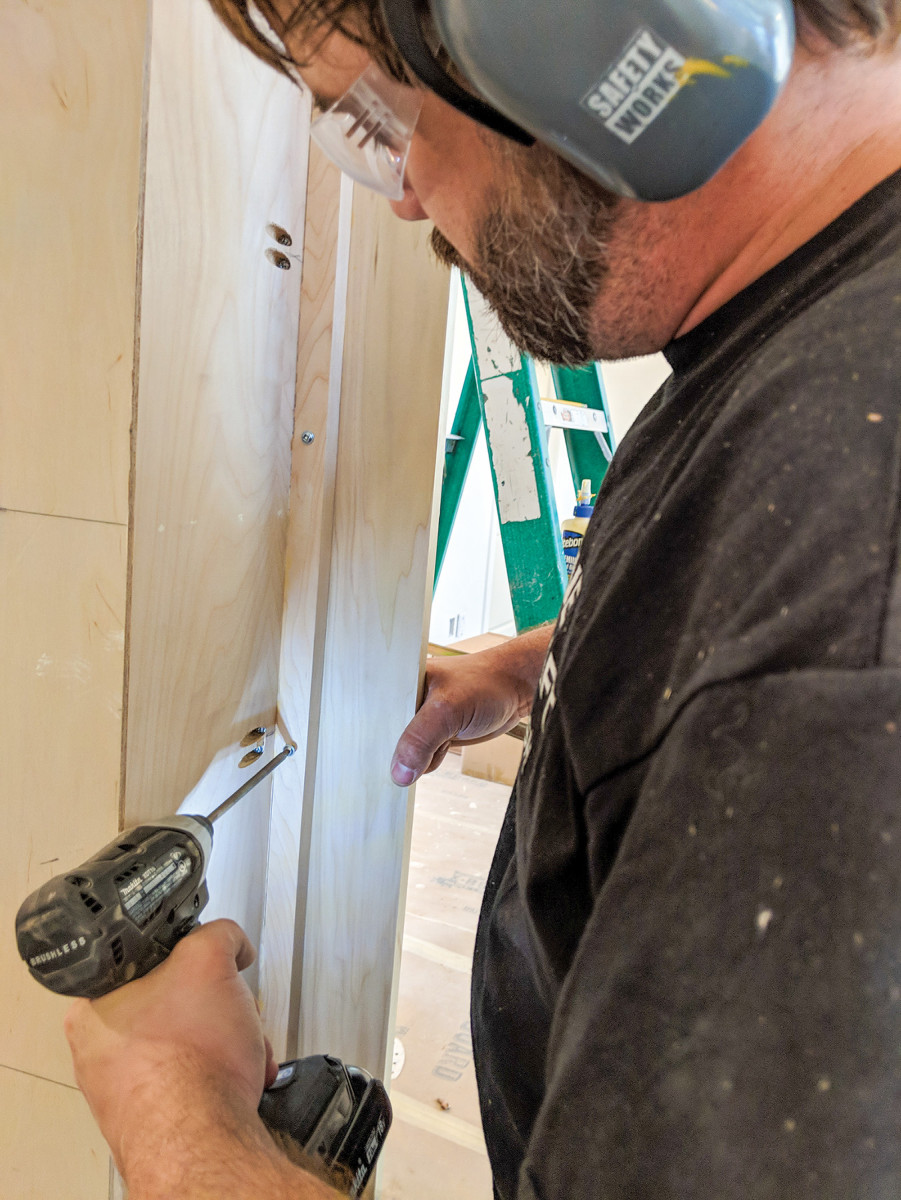
22-23. I align and attach the trim to the bookcase and front of the opening with a couple staples, then reinforce it with trim screws from the back.
The hinge kit comes with a threaded bracket and bolt that together, act as an adjustable foot to help keep the door from sagging when closed.
 It also functions as a catch with the included tapered stop that mounts on the floor. You will need to install the bracket close enough to the face frame to allow clearance to swing past the jam.
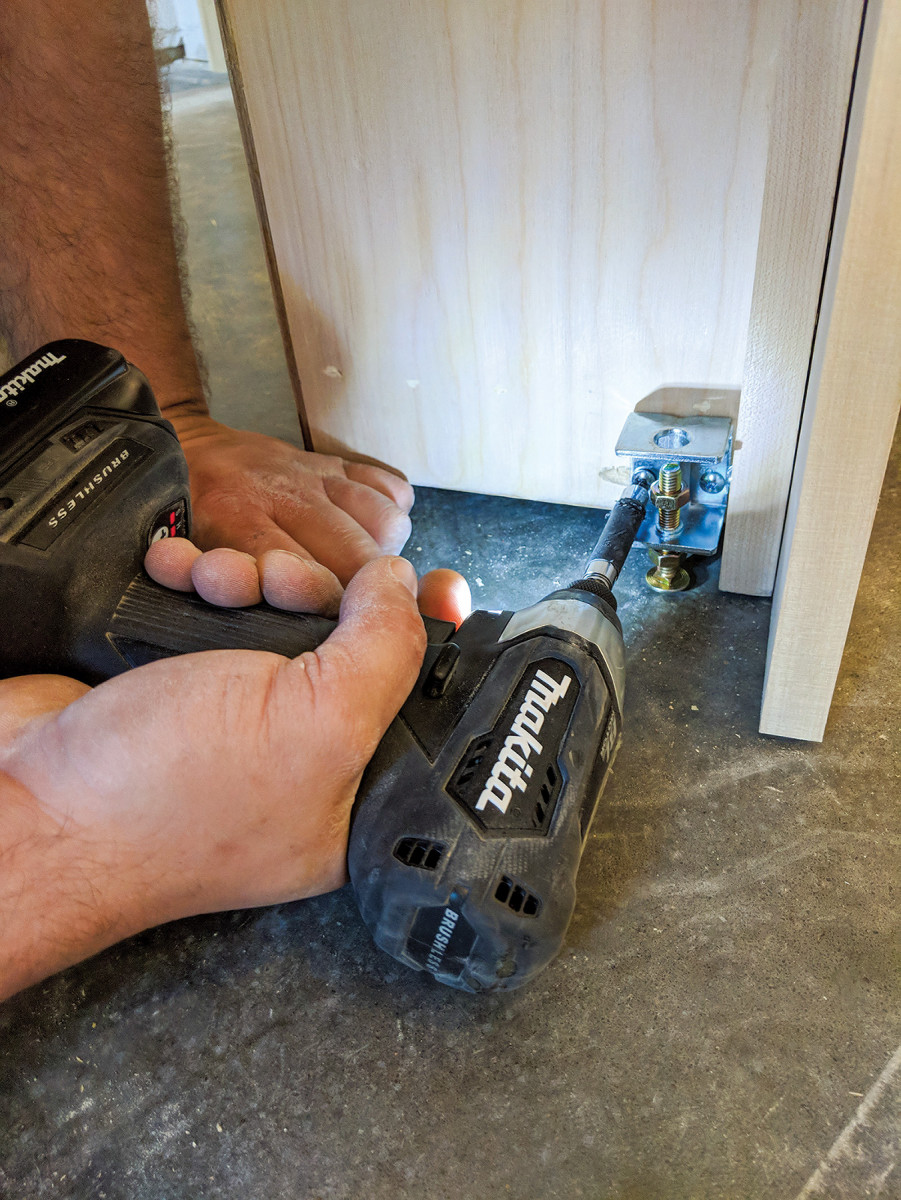
24. The last step of installing the door is adding the adjustable foot and stop. The plastic foot glides on the floor to keep the door from sagging and nests into a stop so you get perfect reveal every time the door is closed.
Once you have the foot installed, align the round indention in the tapered stop to the location of the bolt when the door is closed. Fasten the stop with the supplied tape, epoxy or a screw depending on the surface you’re mounting it to. All that’s left is to apply the paint.
Here are some supplies and tools we find essential in our everyday work around the shop. We may receive a commission from sales referred by our links; however, we have carefully selected these products for their usefulness and quality.