We may receive a commission when you use our affiliate links. However, this does not impact our recommendations.
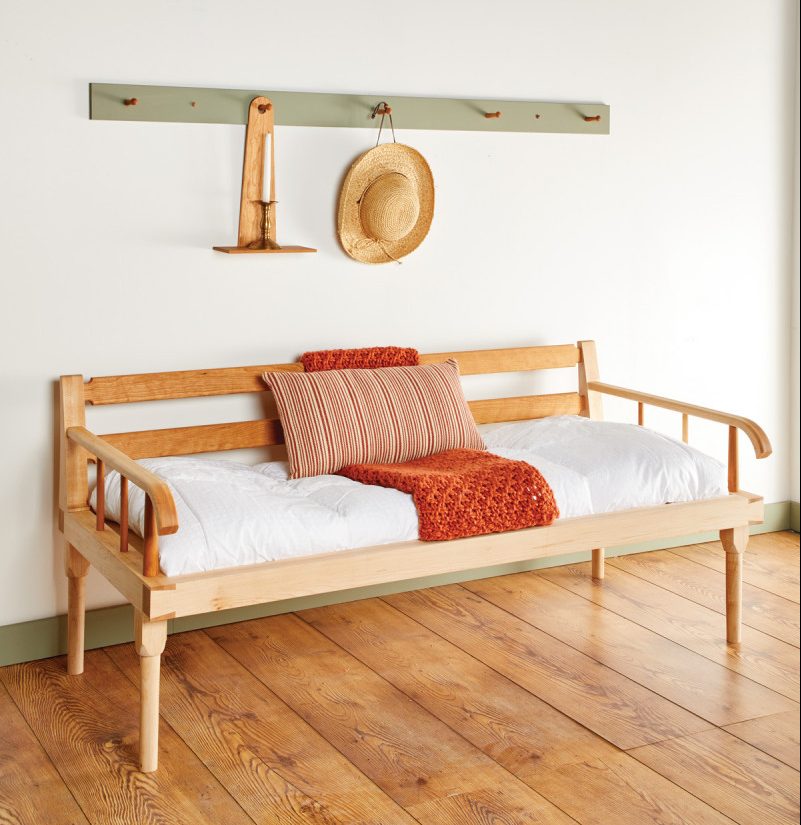
Recreated from a photograph and measurements, this design feels both modern and timeless.
One of the things I have come to admire as a furniture designer-maker is the timelessness of works created long before us. I am continually impressed by the works’ latent ability to establish a perpetual necessity within the lives its users. It’s this impression that suggests that the evolution of furniture, undoubtedly, parallels the human experience and exists as a direct reflection of one’s own way of living.
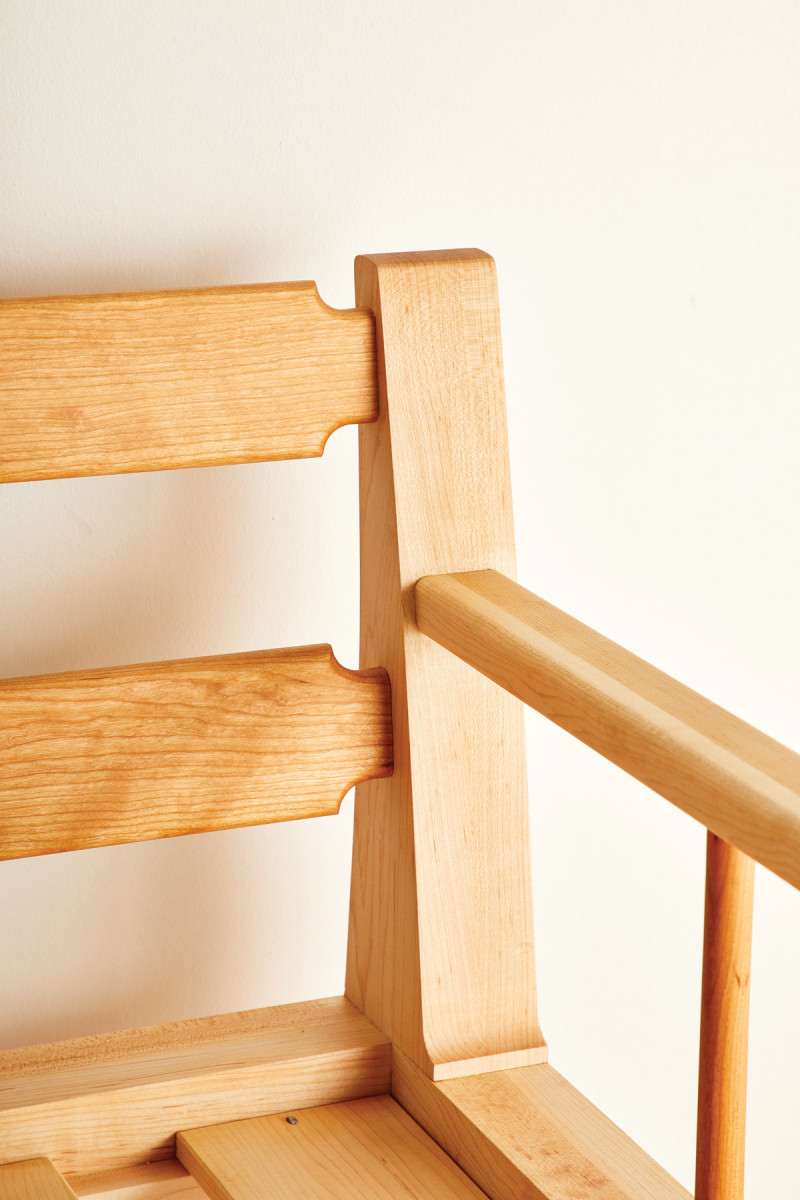
1. Solid cherry back slats are mortised into the maple arms.
This sentiment is no truer now than it was with the Shakers; a communal Protestant sect which emigrated from England in the latter part of the 18th century to start a new life in America. Known for their austere and virtuous lifestyle, Shakers’ guided principles led to a display of perfection that was unrivaled for the period, and more than visible in the various crafts they created.
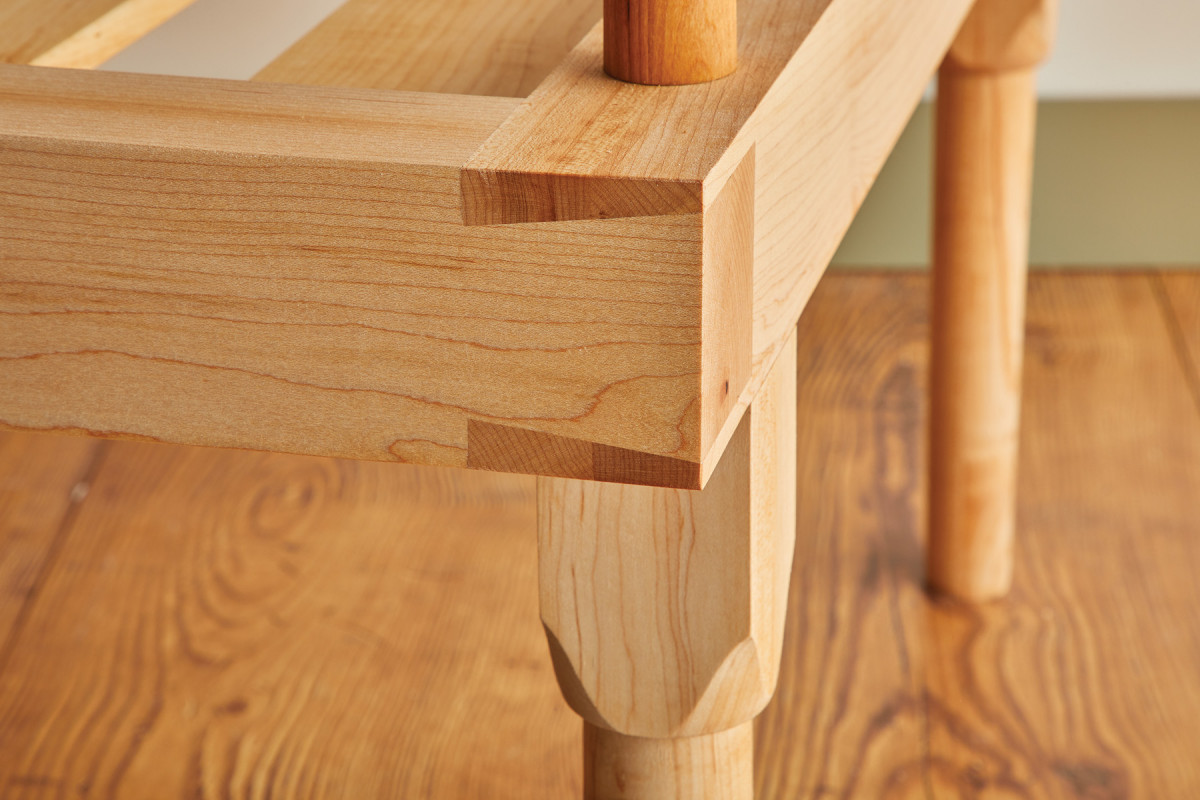
2. The dovetailed joint connecting corner of the bed is both beautiful and useful.
A model example of this unstinting quality can be seen in an extremely rare form of Shaker furniture once found in the Hancock Shaker Village, located in Pittsfield, Massachusetts. What’s commonly known today as either a settee or daybed, this piece demonstrates an early example of upcycling.
What fascinates me about this piece, outside of its peculiarity, is how it seems to perfectly embody the adaptive living orthodoxy of the Shakers. The bedstead, which was no longer in use, was then ingeniously transformed into a new utilitarian design.
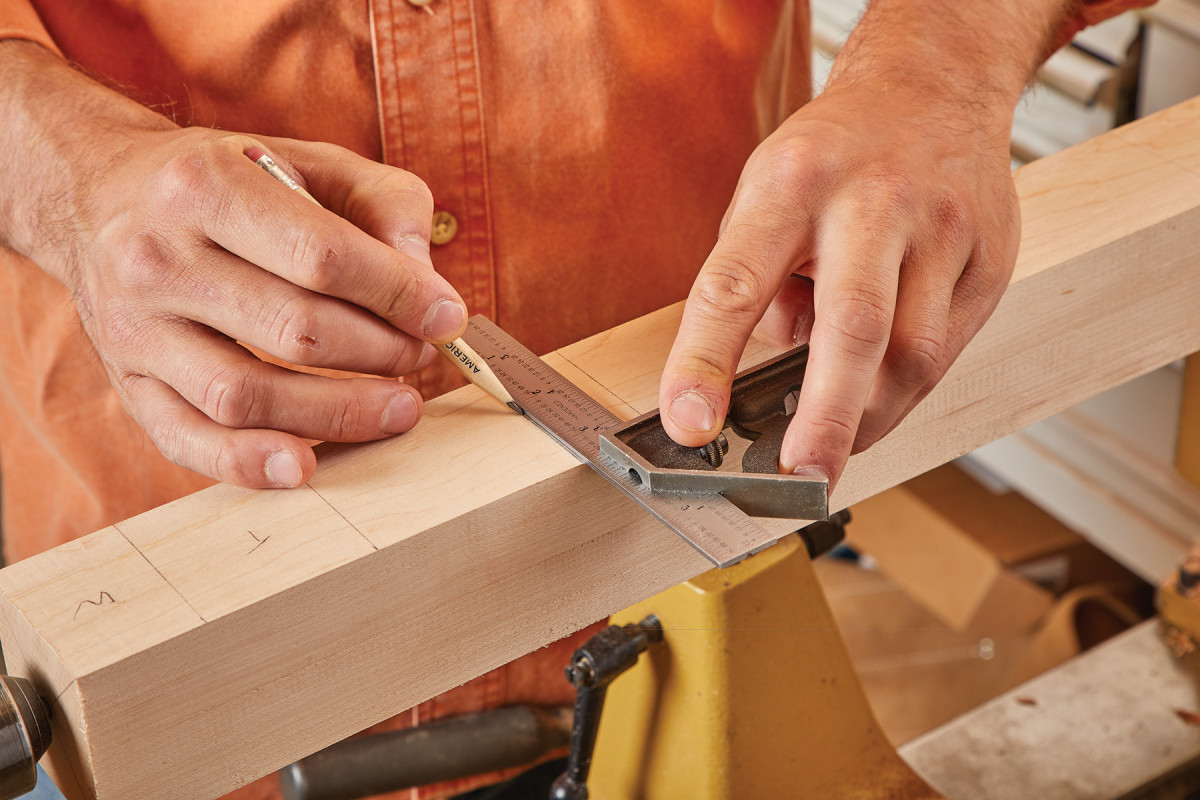
3. This project gives you a good primer in turning furniture parts. First, start with laying out the different parts of the spindle, where transitions to different diameters happen.
Aside from its relative scarcity, another point of interest in recreating the daybed developed from the fact that the Shakers seemed to have lacked devotion in the refinement of this form. This absence of development only further expressed their “modesty of purpose” while simultaneously rousing my spirit of inquiry.
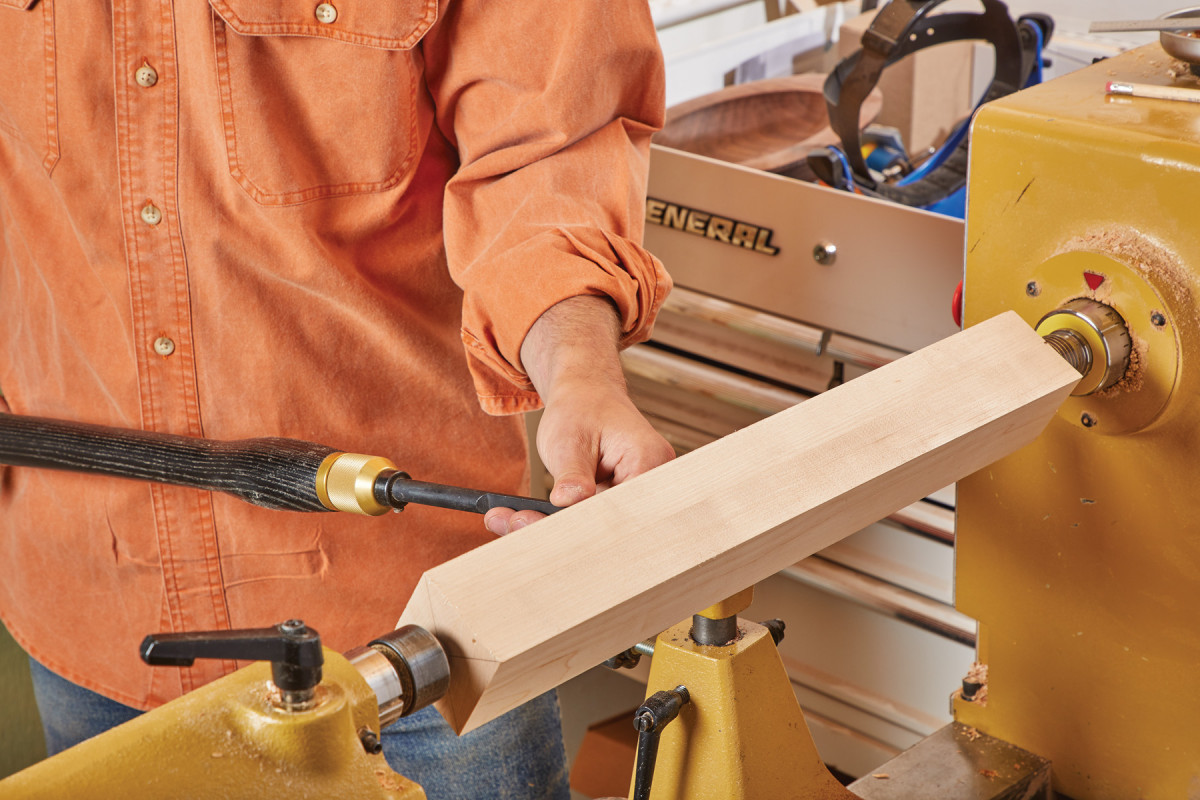
4. For the legs, there’s a taper up from the foot, ending with a block and round tenon. So, I start by using a parting tool to get my reference lines down to size.
It’s worth noting that (based off my research) the example built for this article is merely a translation based off of one of the only photographs documenting this unusual creation, which was found in The Shaker Legacy by Christian Becksvoort (Taunton Press, 1998). Thus, what initially started off as my investigation into rebuilding a historic piece quickly evolved into constructing a modern “working” piece of furniture with historical roots.
Turning
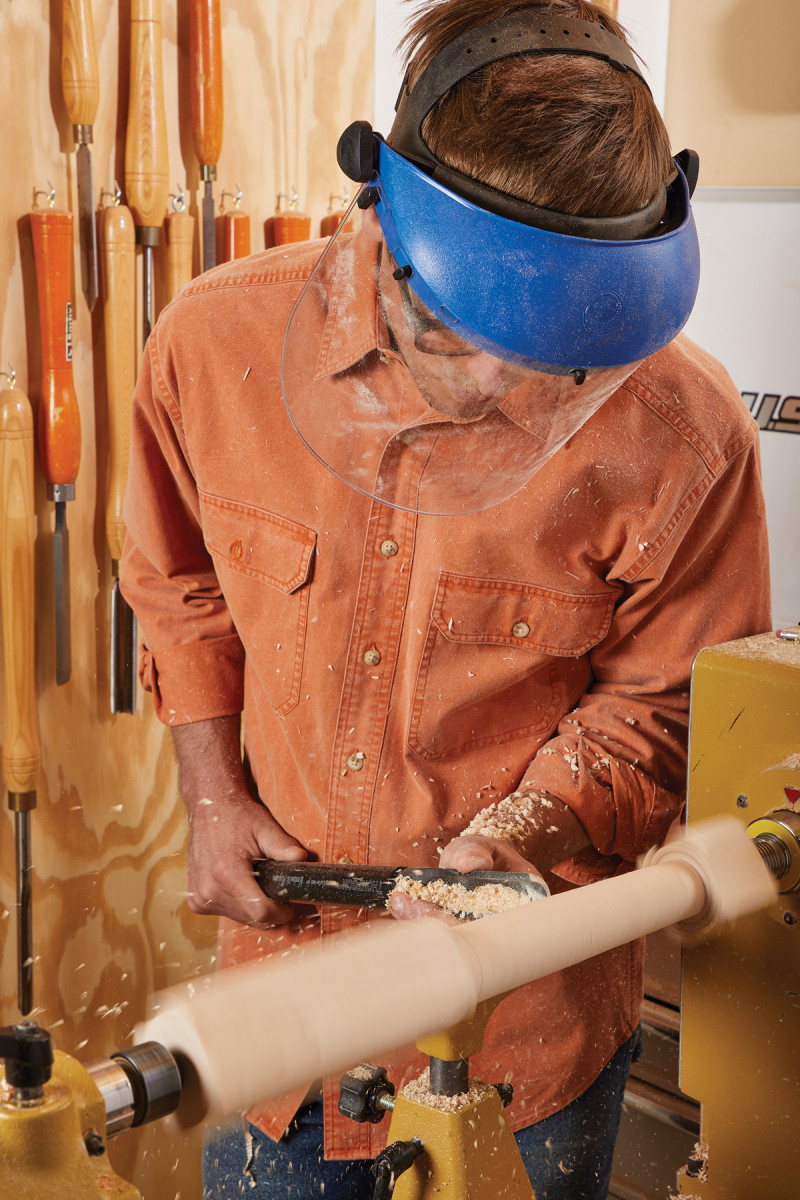
5. Next, I use a roughing gouge to get the general shape of the leg.
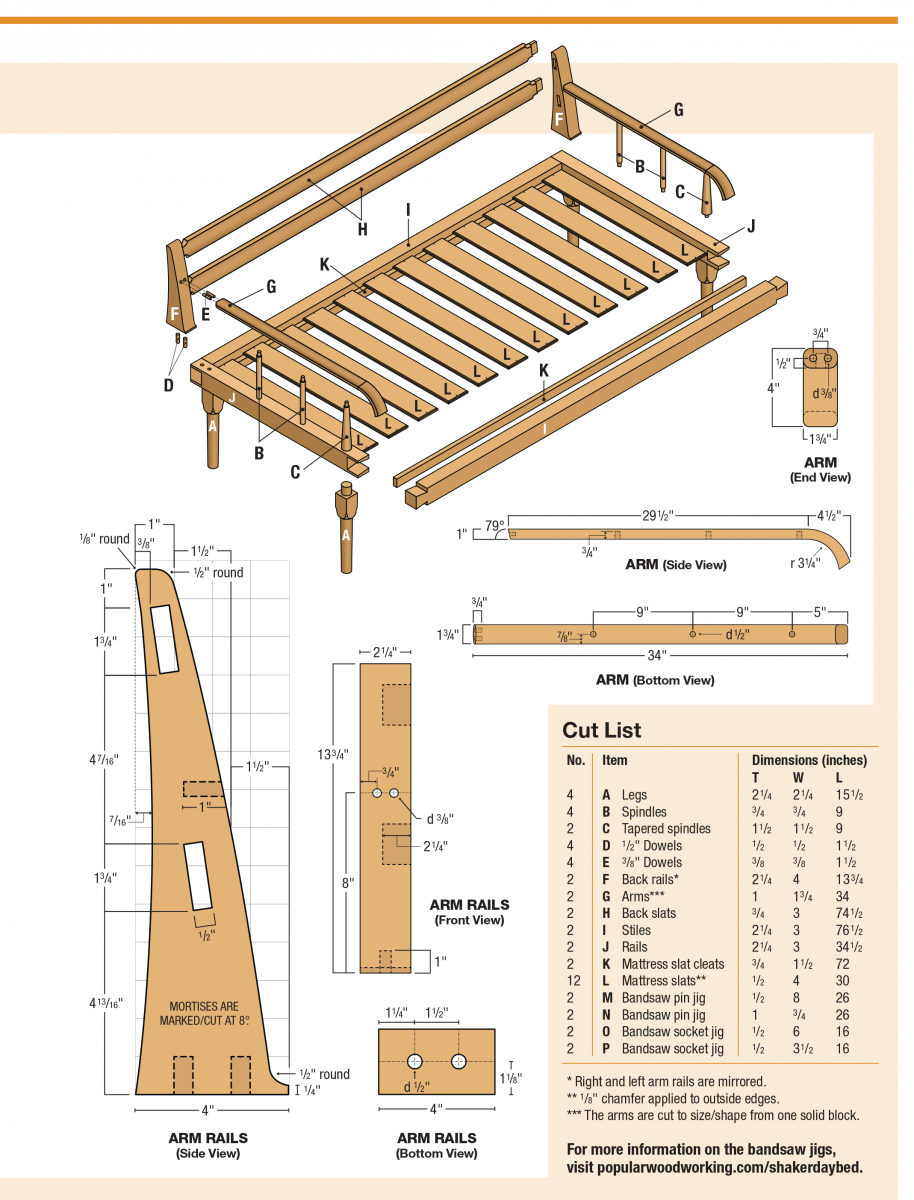
Most of the components of the daybed will require gluing up 8/4 hard maple stock, apart from some 5/4 cherry used for the spindles and back slats.
Start by marking the layout lines on the legs. It’s okay to leave the tapered spindle as well as the tenon a little long, as these can be trimmed over at the table saw once completed to ensure a consistent length on all four legs.
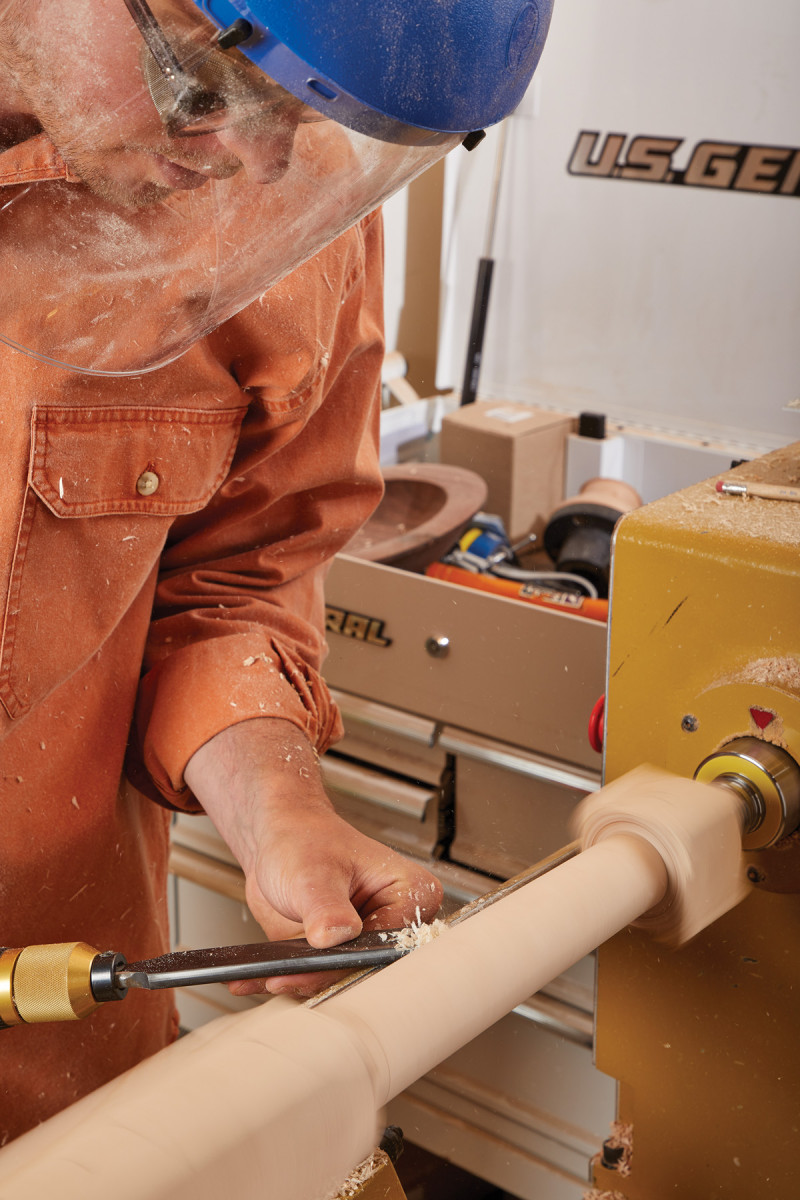
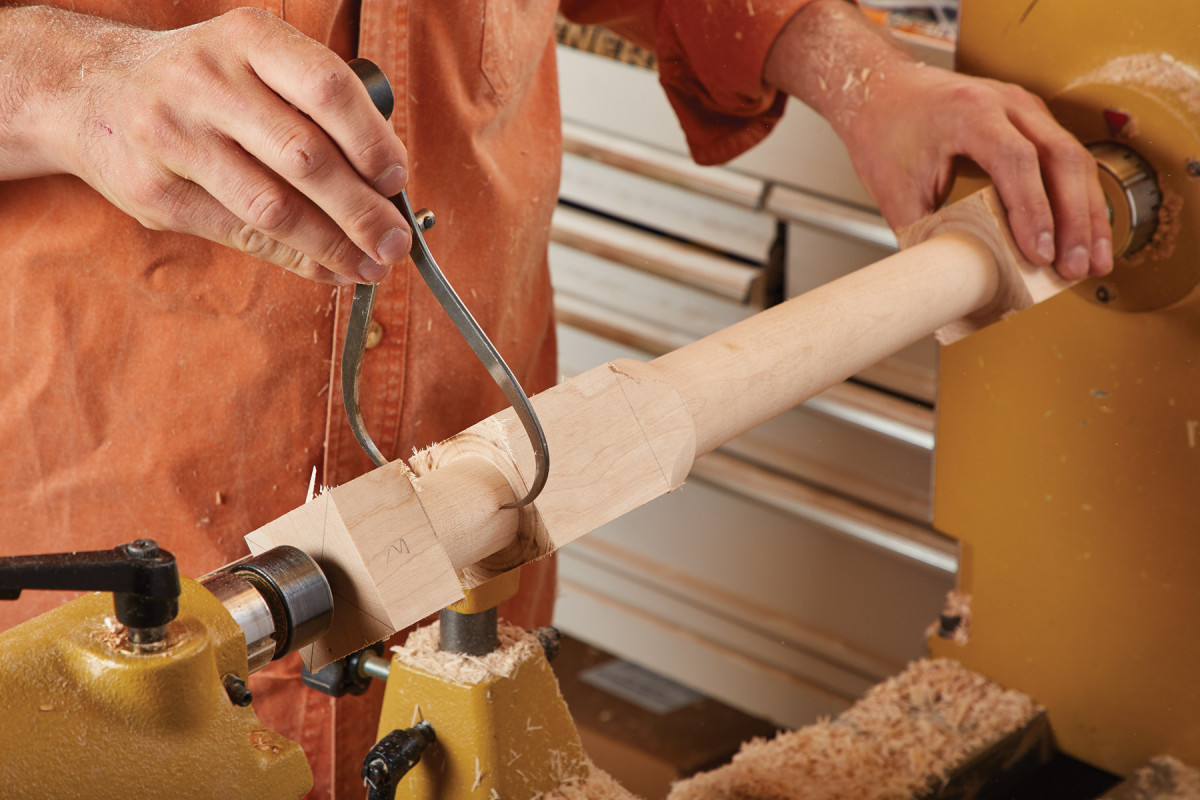
6. When I’m close, I use a sharp skew to do a final finishing pass on the tapered portion of the leg.
Before proceeding to turn, it’s important to understand that variable speeds correspond with the size as well as soundness of the stock used. Turning at too low of an RPM can make work tedious, while too high can yield potentially dangerous results. The formula for calculating safe minimum/maximum speed is the diameter of the piece multiplied by RPM equals 6,000 to 9,000.
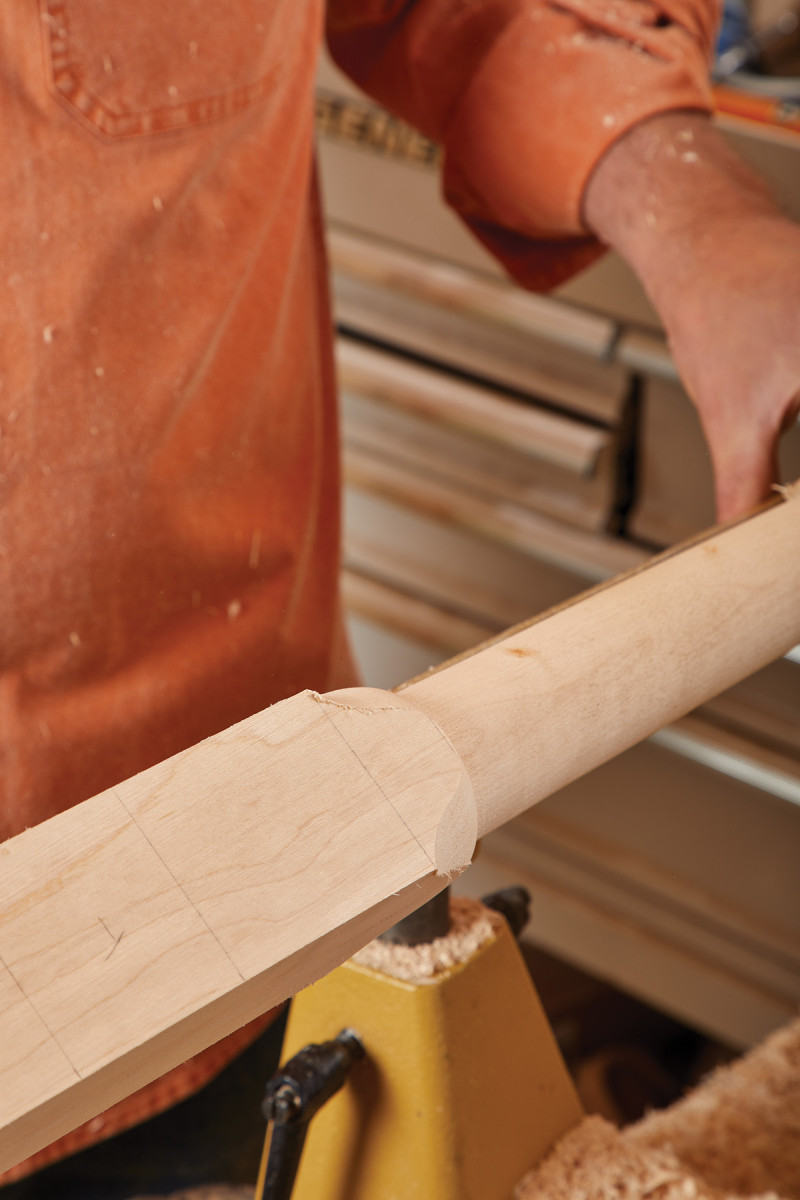
7. At the block, I knock down the edges and create an ogee with a 1/4″ gouge. Apply light pressure here, as it’s easy to do some damage.
Since all the pieces are 2 1/4“ or smaller, a higher RPM (3,500-8,000) is required to effectively remove material. If high speed is outside of one’s comfort zone, turning at a lower RPM is adequate, however, may take longer to reach the desired diameter/shape.
8. Finally, I remove material above the block to create a 11/2″ round tenon.
Using a parting tool, calipers, and the reference/layout lines, start removing material with the parting tool at the layout points. Check often with calipers to ensure accuracy of the diameter. These initial incisions will create reference points in which to work between. The order in this case is somewhat arbitrary, however, working from the taper up to the shoulder, and then onto the tenon works well in terms of continuity (however the same could be argued from the opposite direction).
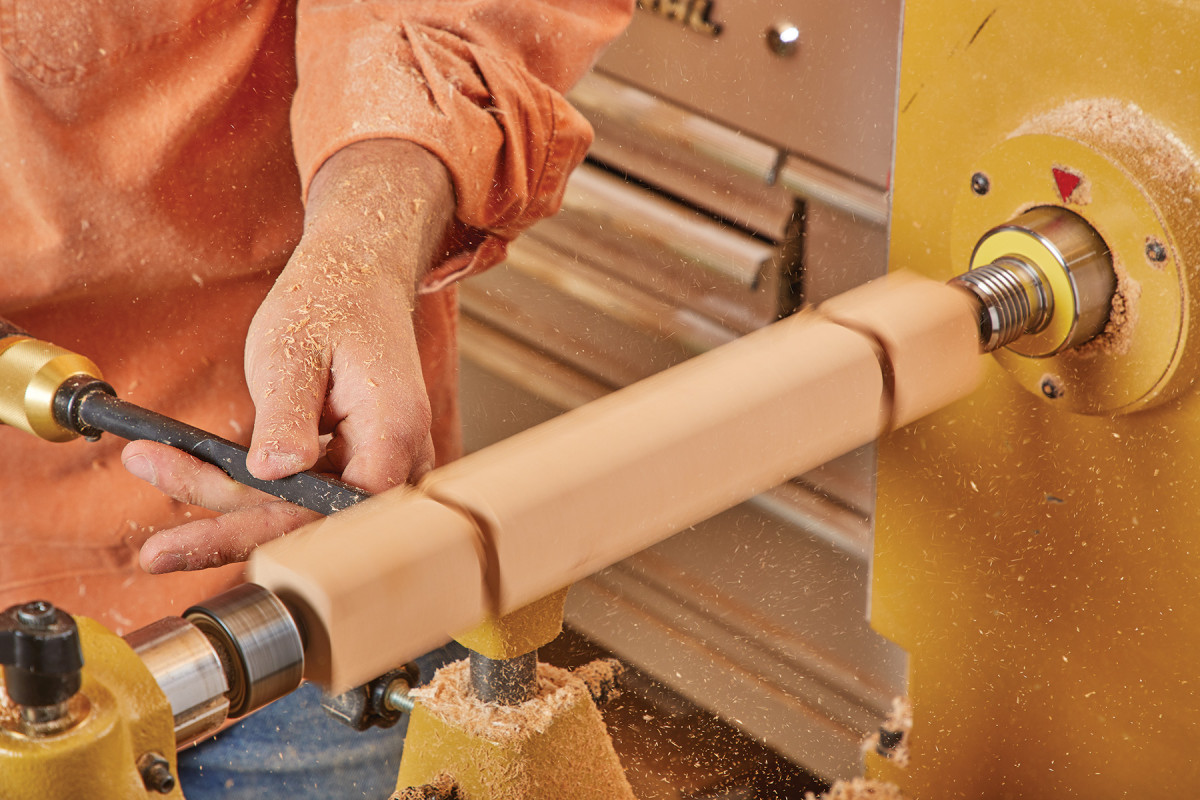
9. Turning the spindles for the arms is pretty straightforward compared to the legs. Using a parting too to define the length of the spindle.
Once you work your way down to the two reference points, utilize a 3/4“-1“ skew chisel to clean up any unwanted undulations or valleys left from the roughing gouge.
The profile of the ogee is done by using a 1/4“–3/8“ roughing gouge. Start from the bottom of the top block and transition into the shoulder where the taper meets the bottom of ogee profile. Gingerly apply pressure to avoid chip-out on the top block/post. Once the initial shape is created, go back through with a round nose scraper to clean up any chatter.
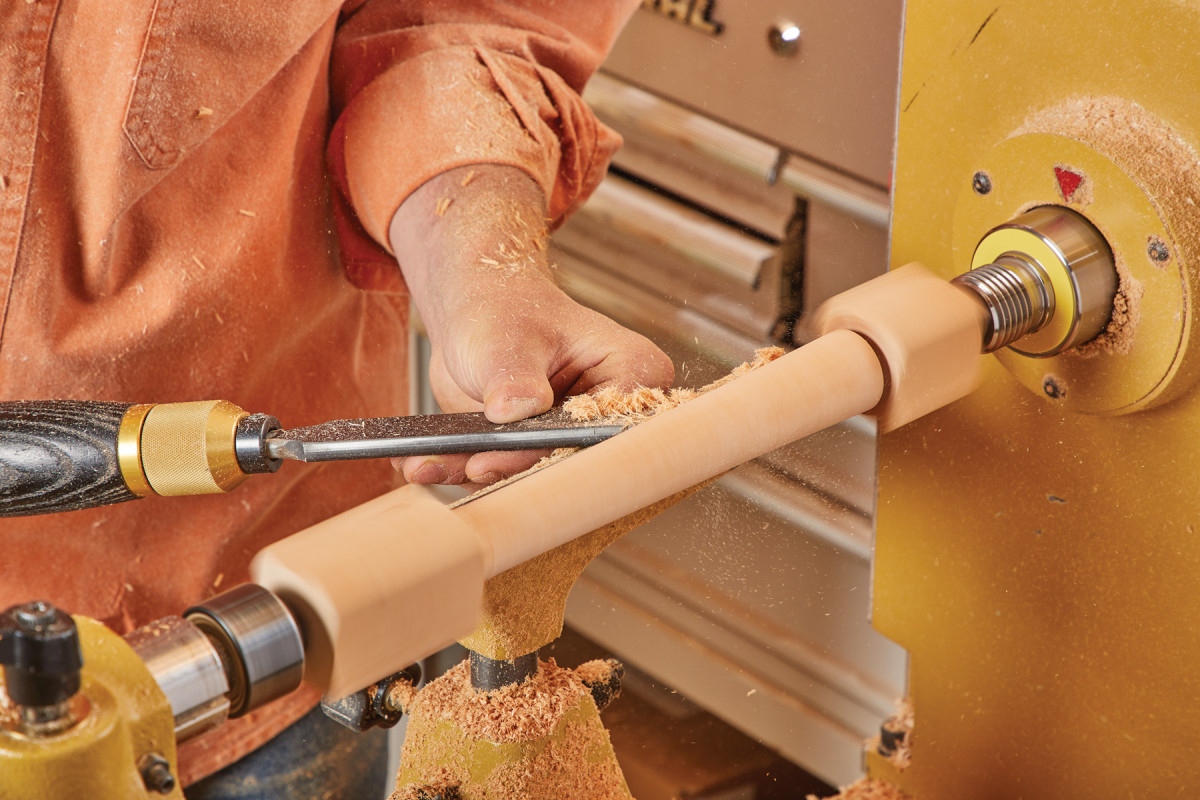
10. Turn the spindle to size with a gouge or skew.
Then, using the smaller 1/4“–3/8“ roughing gouge, remove the excess material between your two reference points to create the 1 1/2“ tenon.
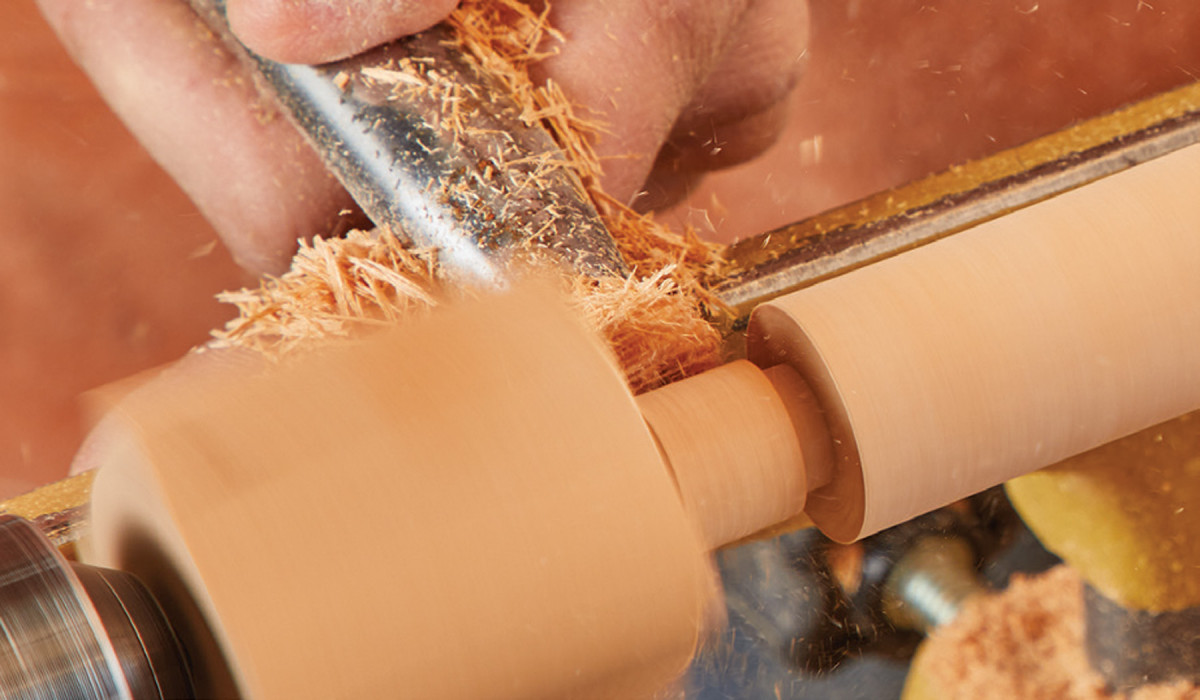
11. Then, turn the tenons to their exact sizes.
Once again, clean-up any chatter using a scraper or skew chisel.
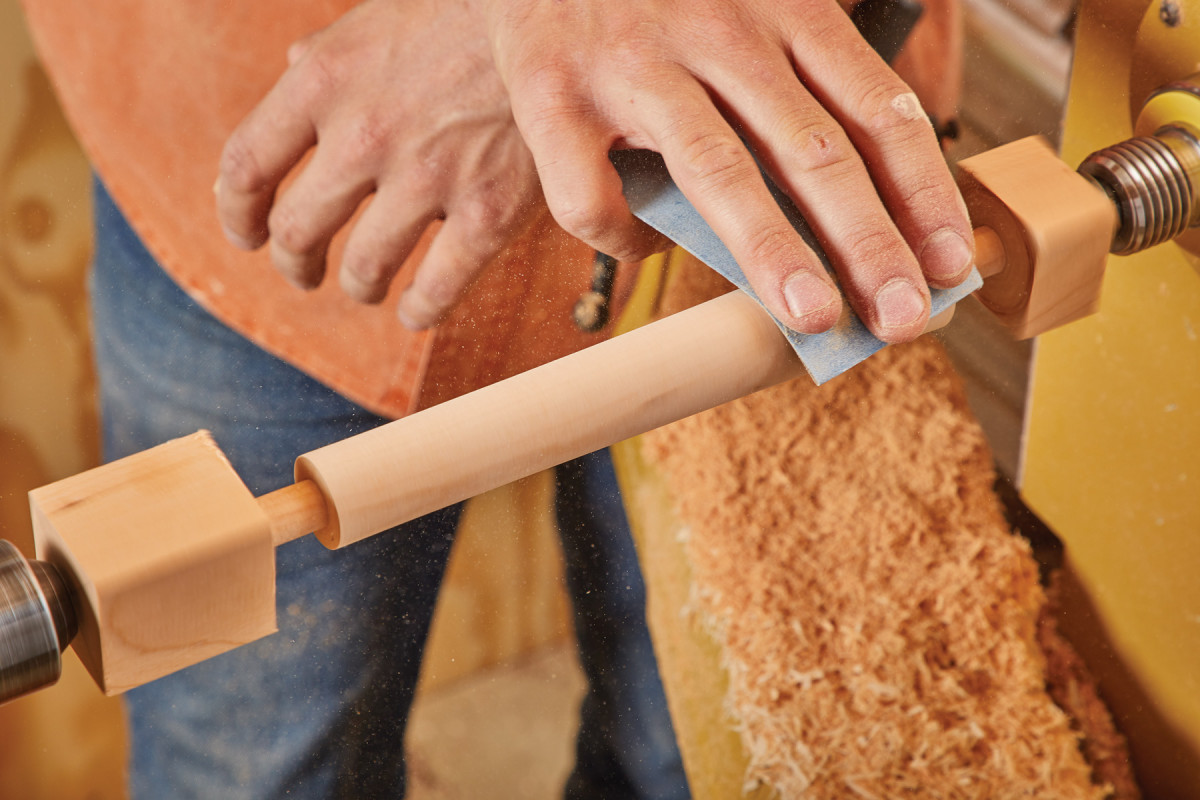
12. While the spindles are still on the lathe, I take the opportunity to do some finish sanding.
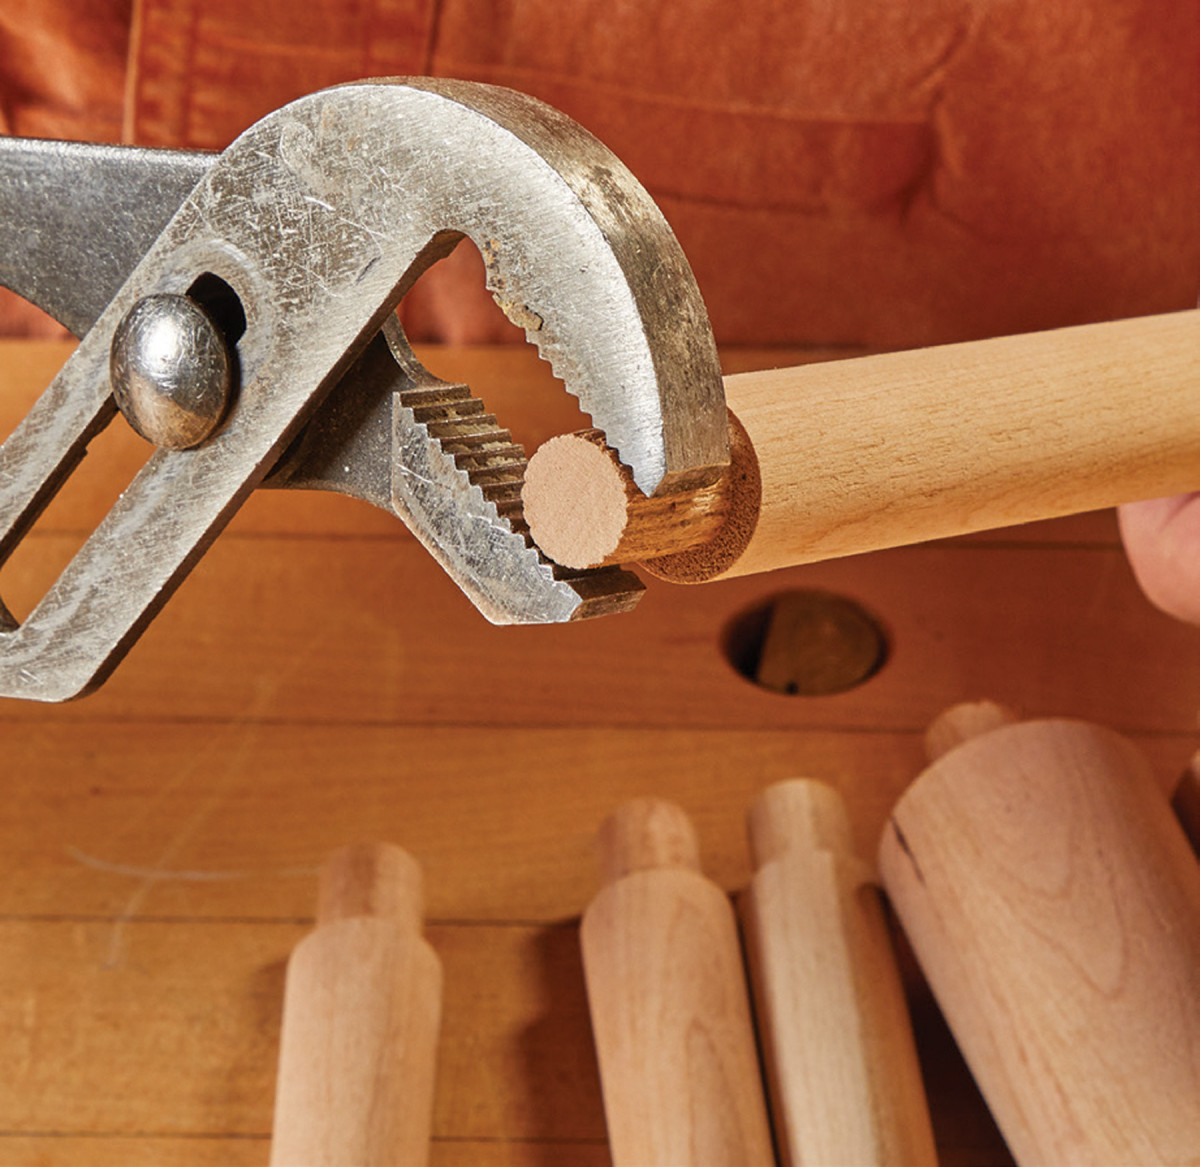
The same process is done for all four cylindrical spindles as well as the two tapered spindles. Remember, it’s better to leave the tenons slightly proud of the desired diameter. The tenons can be manipulated to more accurately accommodate the mortise by slightly compressing the ends with a set of Channelocks or pliers. This not only establishes a firm fit, but also creates a fluting texture around the circumference of the tenon. This fluting allows for glue to run the length of the tenon and ultimately strengthens the joint.
Creating the Base
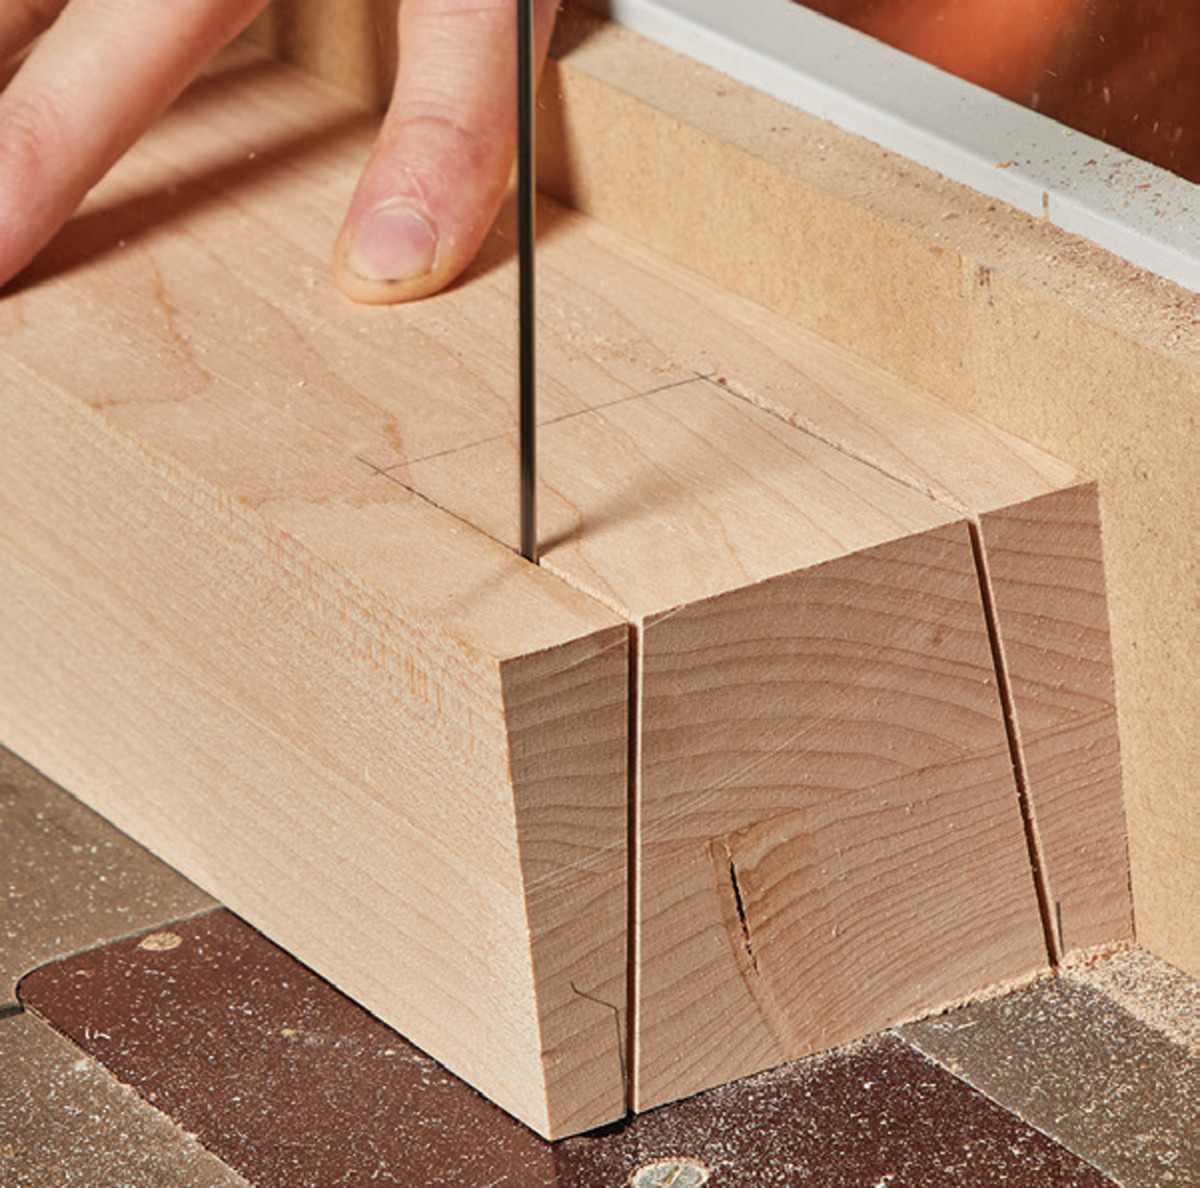
13. To build efficiently, I group like processes together. First, I cut the shoulders of the dovetails on the tablesaw using a crosscut sled.
Rip and crosscut both rails as well as both stiles to final lengths over at the table saw. If you do not have access to a sled large enough to effectively accommodate the two stiles, use a miter saw to cut the lengths.
14. Next, I do a similar cut on the back slats for the backrest.
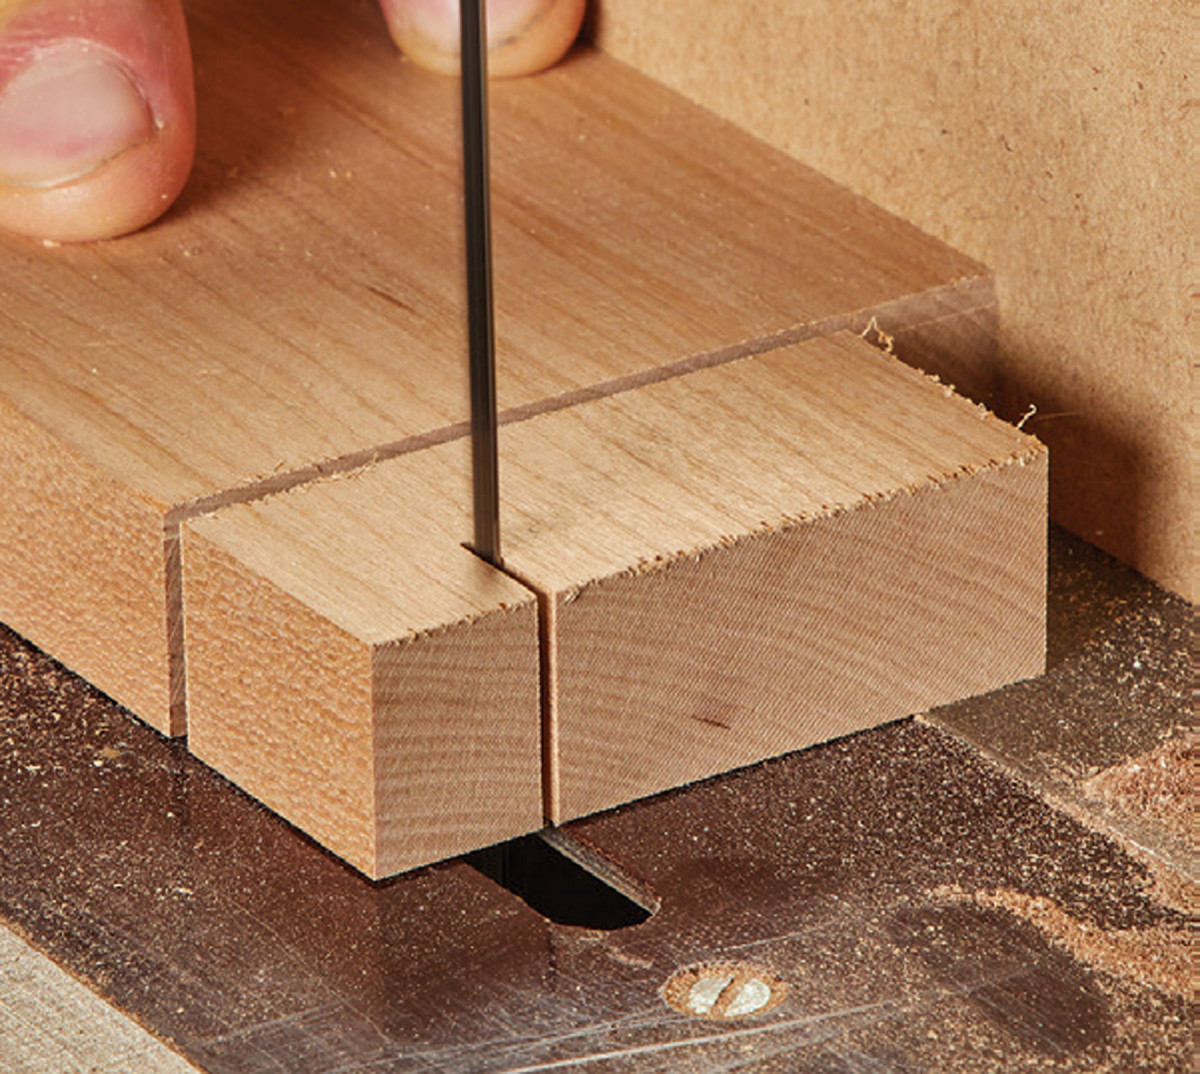
While still at the table saw, set up a stop block and cut the 3/8“ shoulders of the pins. Once this is complete, the pins, (in conjunction with a 7° plywood jig), can be cut over at the bandsaw.
15-16. Then, I make a shallower pass on the faces of the back slat to define the rest of the tenon.
In order to provide a snug fit, transfer the profile of the tails from the stiles onto the rails using a marking knife. If these are a difficult read, go back over the lines with a sharp pencil. Once this is complete, transfer the profile lines onto both faces of the rail to use as a reference over at the bandsaw.
Using a separate jig (specifically for the pins), run the template in tandem with the rail back to the 21/4“ reference depth. Flip the rail on end 180° and make the same stop cut. Due to the fact the bandsaw table only tilts clockwise, ditch the jig and set the table angle to 7° to cut the other reference line. Rotate the rail 180° side-to-side and make another stop-cut. Flip the rail on end and make the same cut.
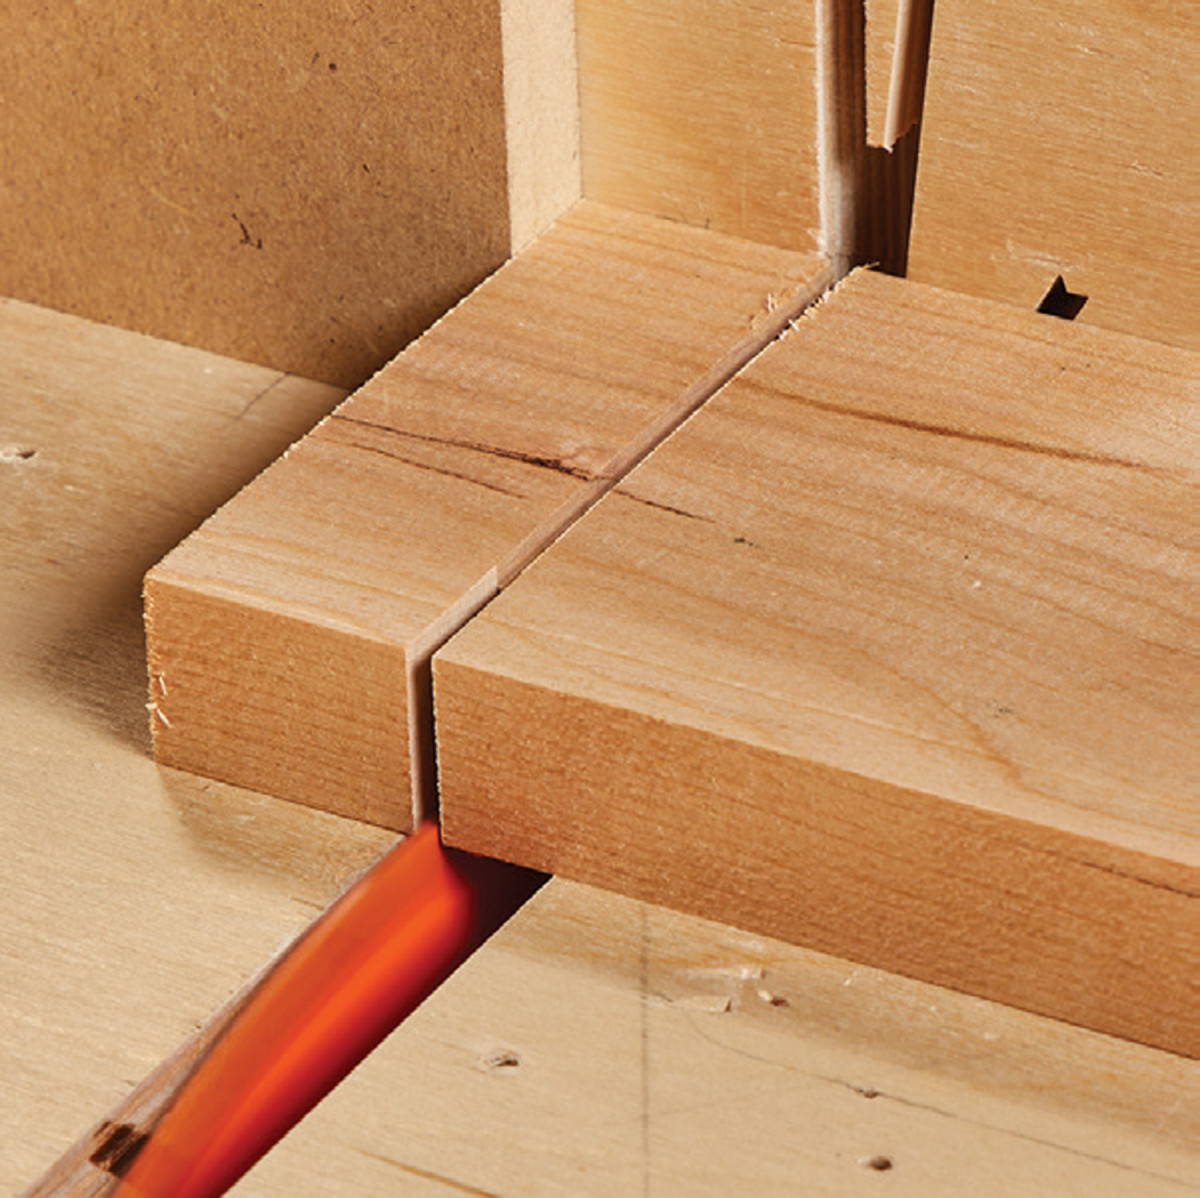
17. Then it’s over to the bandsaw to cut away the waste on the tails. I use 7° angled jig to make sure both sides of the tail match.
Once the outside pin cuts have been made, continue to make a series of stop-cuts between the two tail profile lines to remove the remainder of the waste. Now that this is complete, it’s time to move over to the bench. Referencing the layout line for the depth of cut made over at the bandsaw, use a bench chisel to clear out the remaining waste.
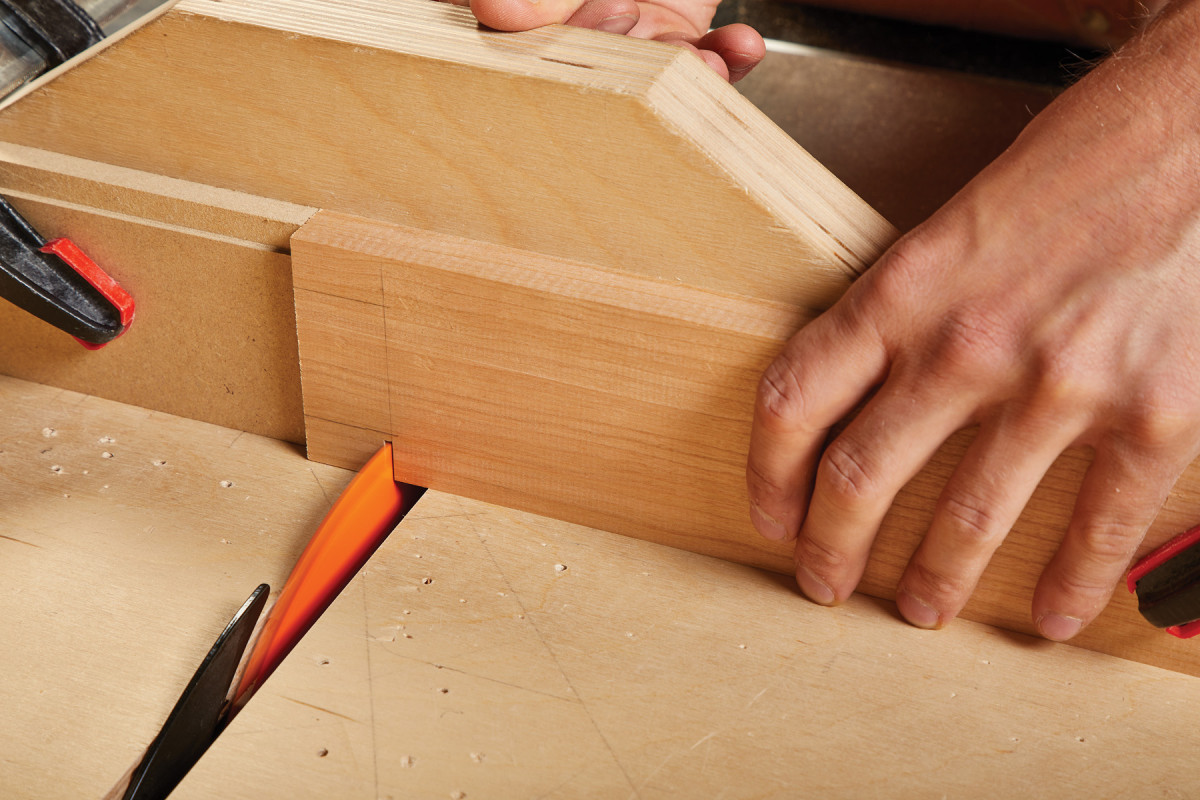
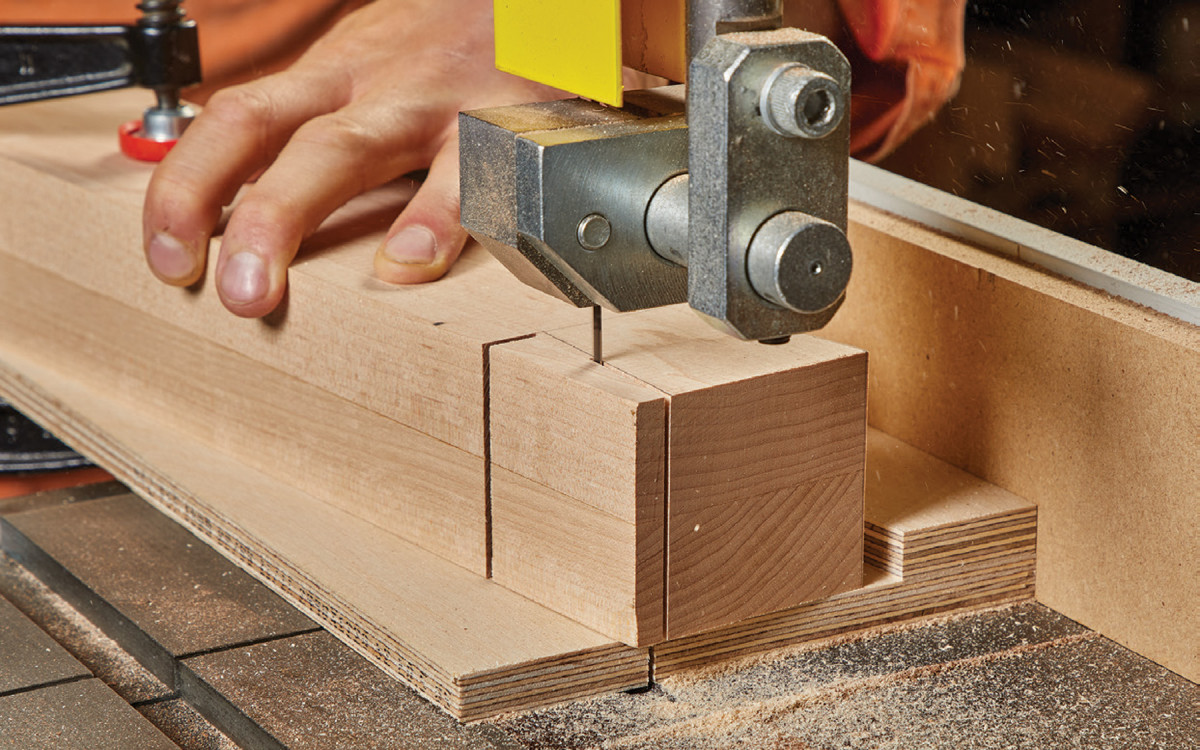
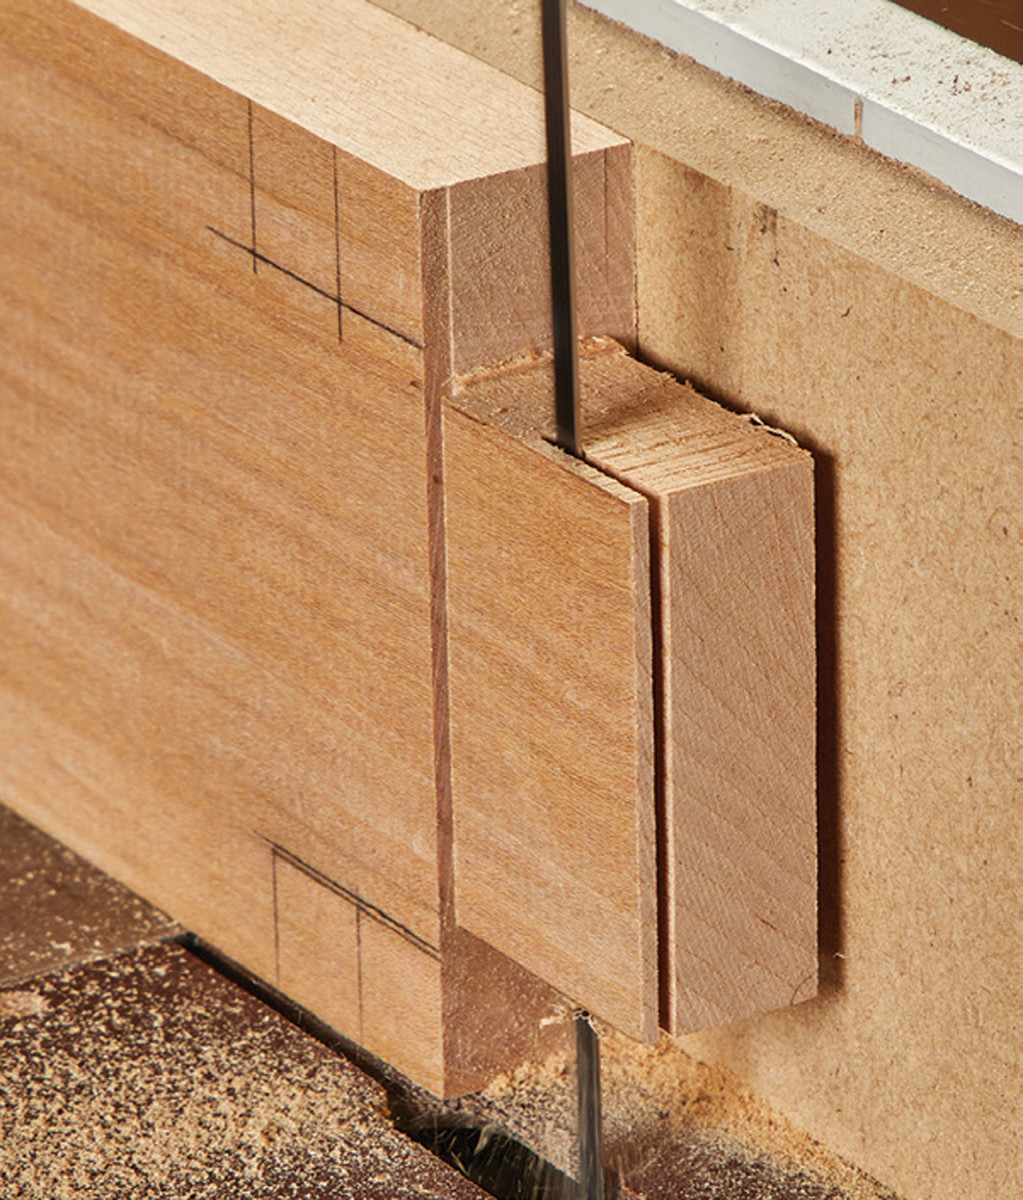
18. Another jig is used to cut the pins. First, cut one side of the pin with the jig.
Since this is thicker stock, work down to about half the thickness of the material, flip the work piece, and repeat the former step. This strategy keeps the chisel from under-cutting the bottom of the pin and provides a flush connection once the joint is applied.
Dowels for Mortising
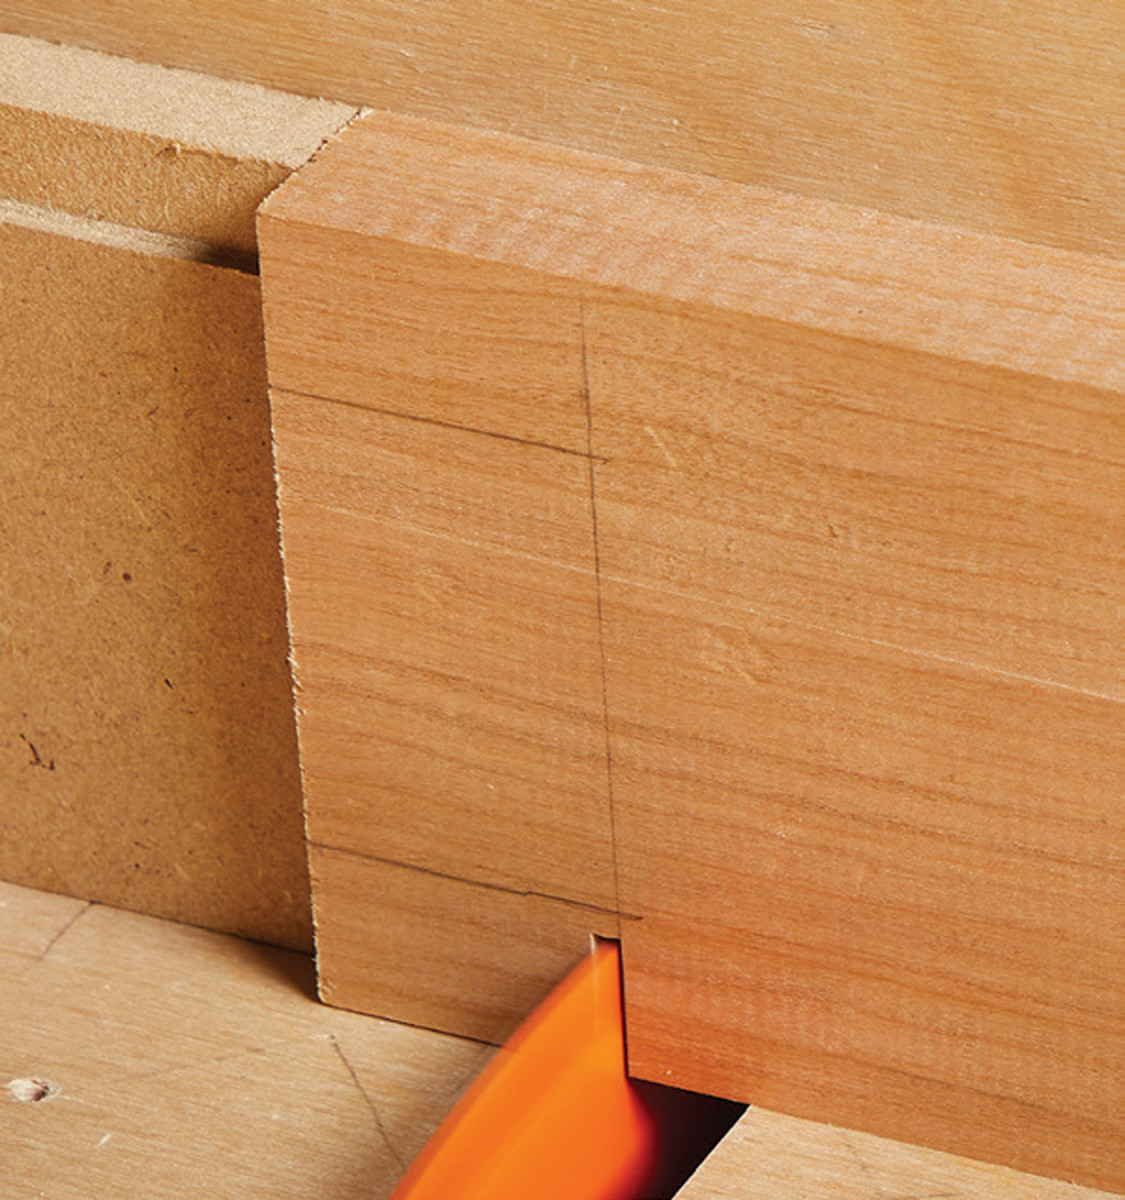
19. Then, remove the jig and tilt your table to 7° to cut the other side of the pin.
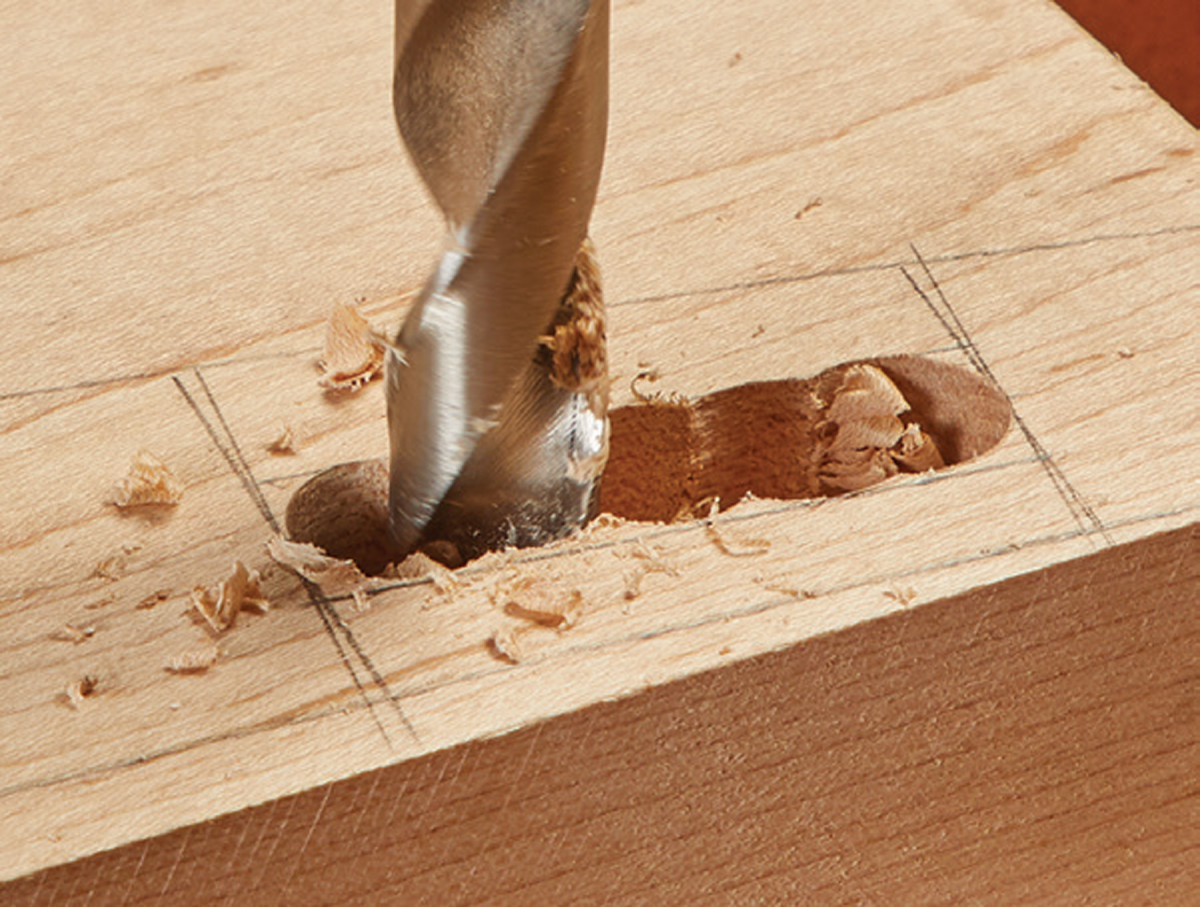
With the exception of the back slats, all the mortising for this project is accomplished using either a drill press, or a ‘dowel-it’ jig. This streamlined method makes for quick accurate joinery.

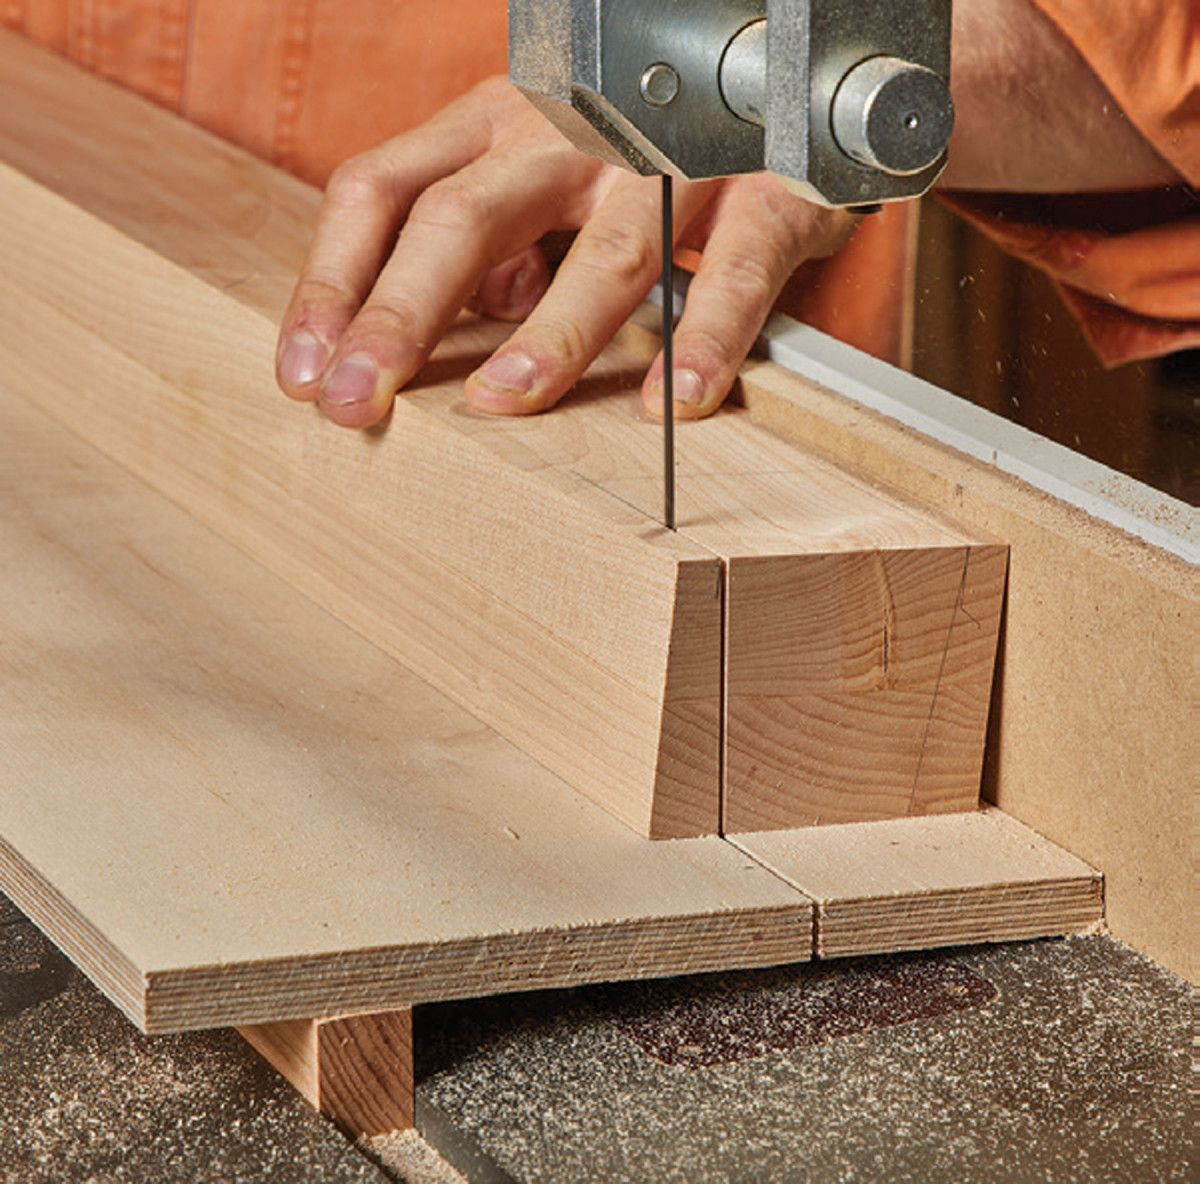
20-21. Then bring your table back to 0° and slice the waste. With a small blade, you can also sneak in and cut out the bulk of the waste.
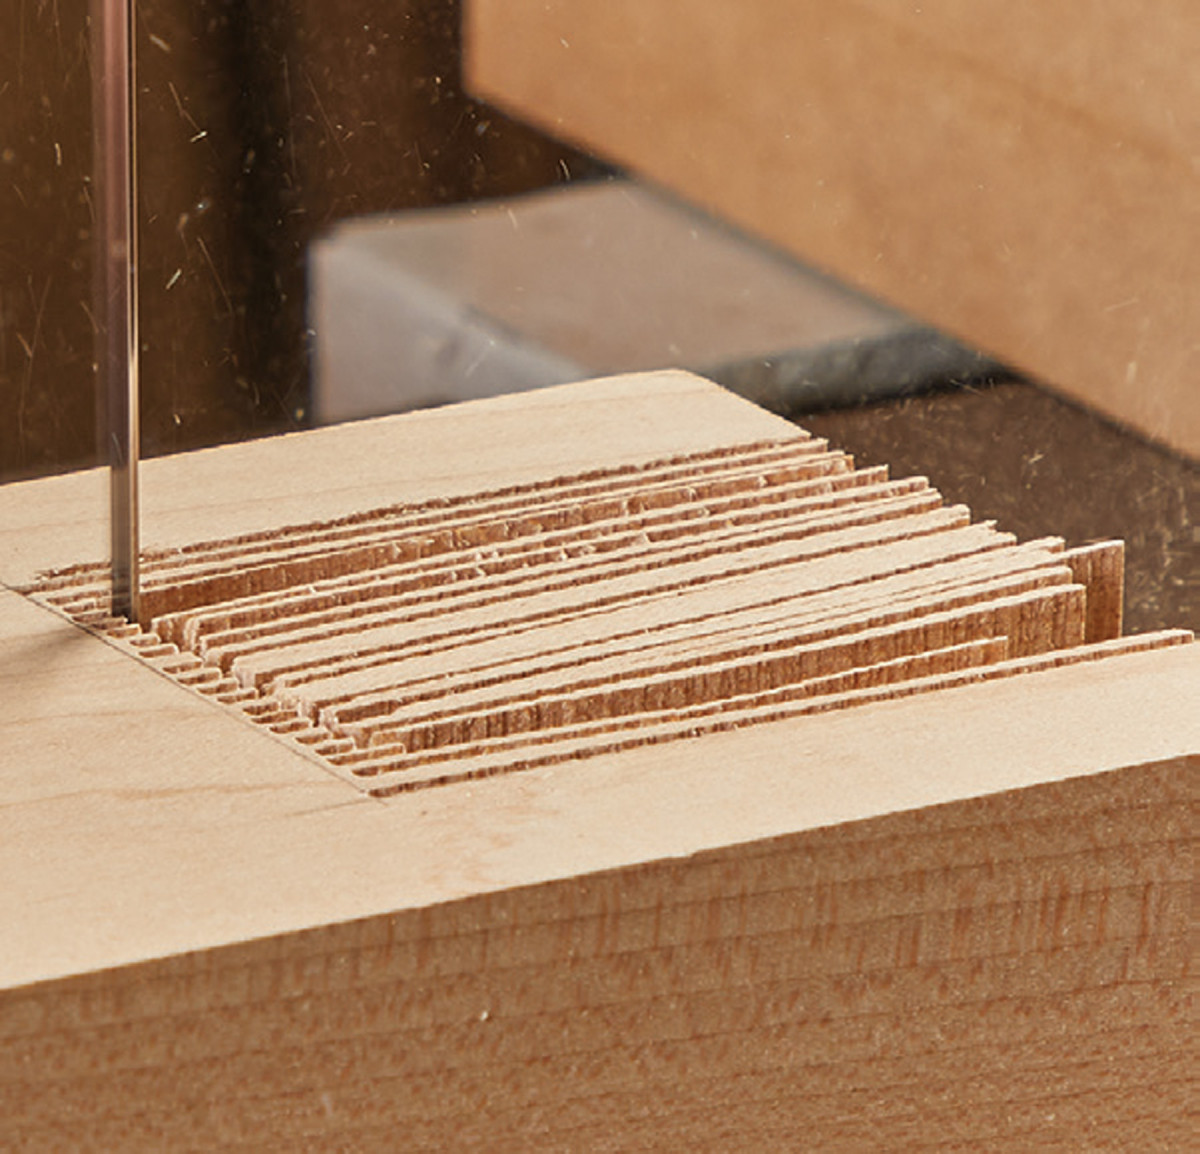 Setup a stop-block in conjunction with a fence and drill out the 11/4“ mortises for the four legs. Since all of the mortises are centered on the rails, there is no need to re-setup the fence, just adjust the stop-block as needed. Swap out the 11/4“ Forstner bit for a 1/2“ , and drill out the mortises for all six spindles, as well as the two back rails.
Assembly in Sections
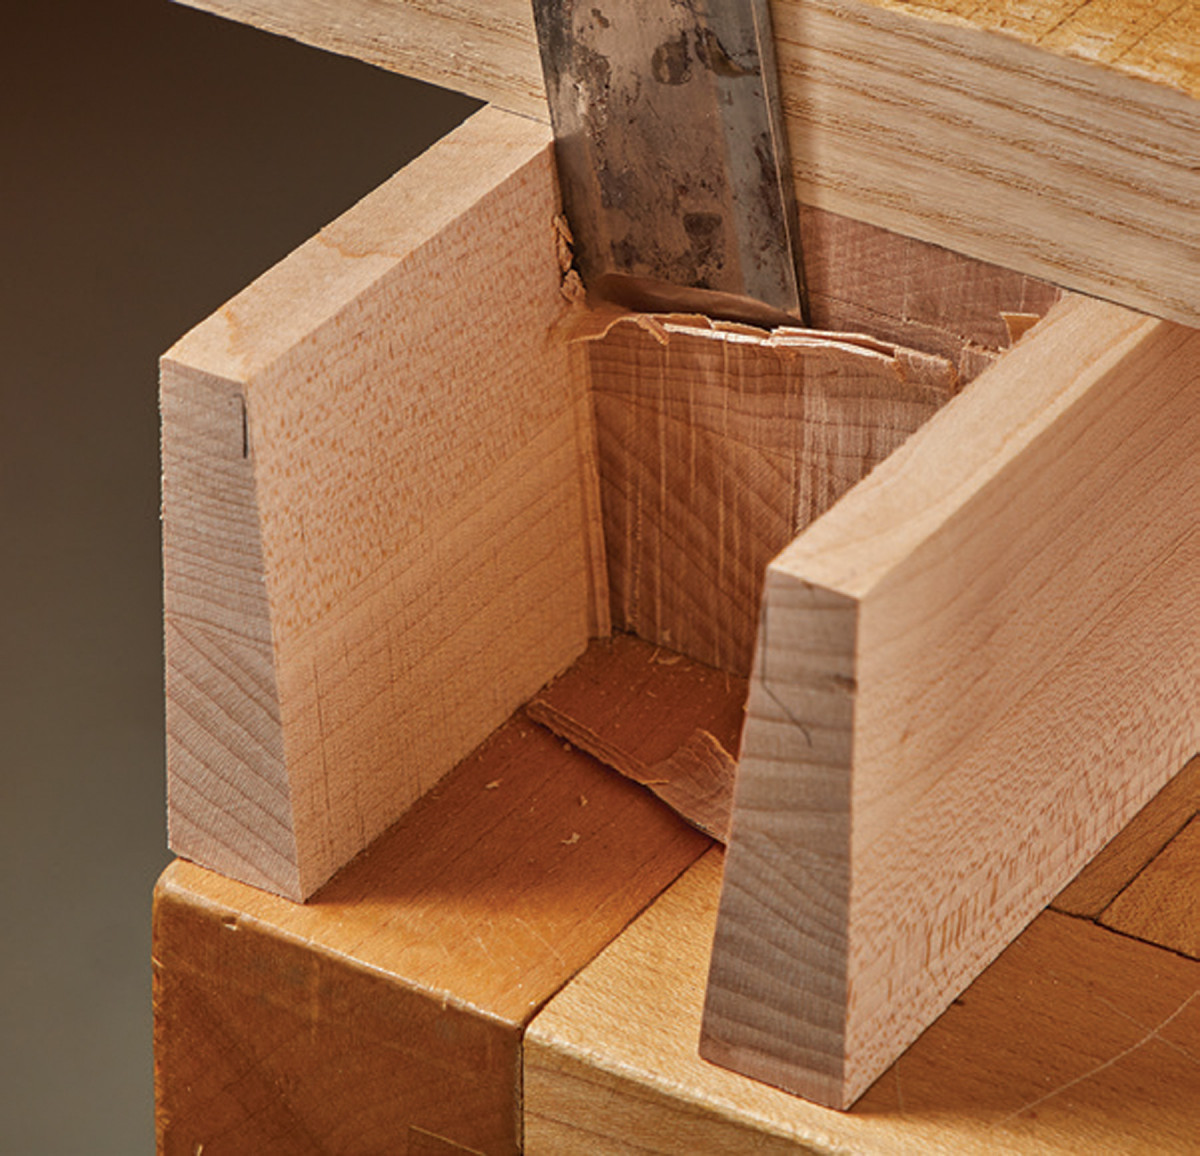
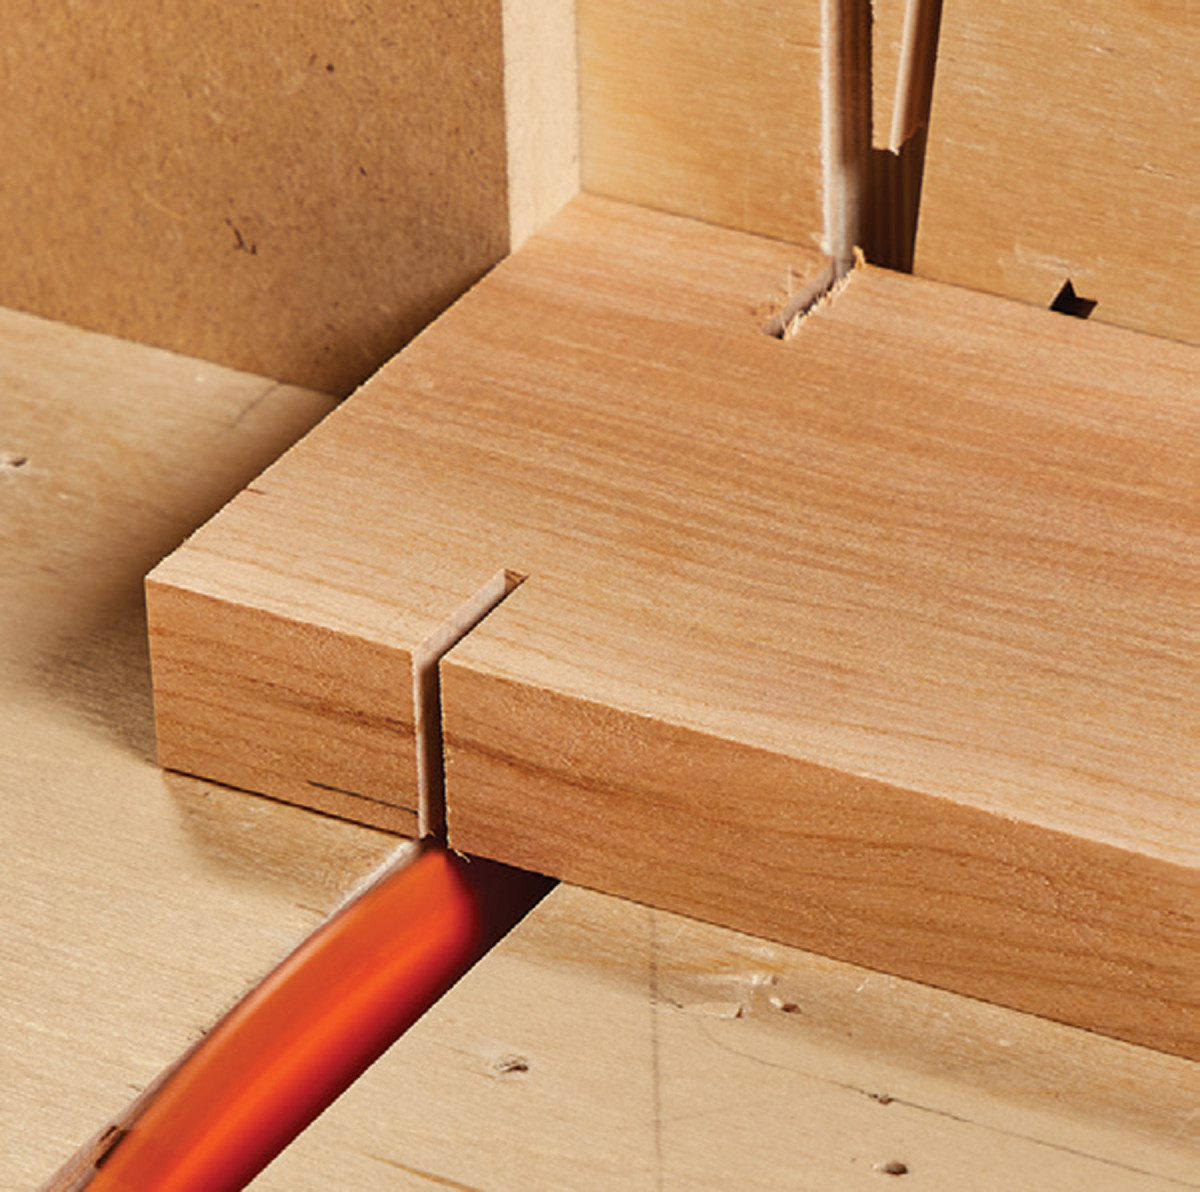
22. Pare the waste with a chisel.
Since this piece (when glued up) has a larger footprint, attaching the legs to the rails makes this process more accessible from a construction standpoint.
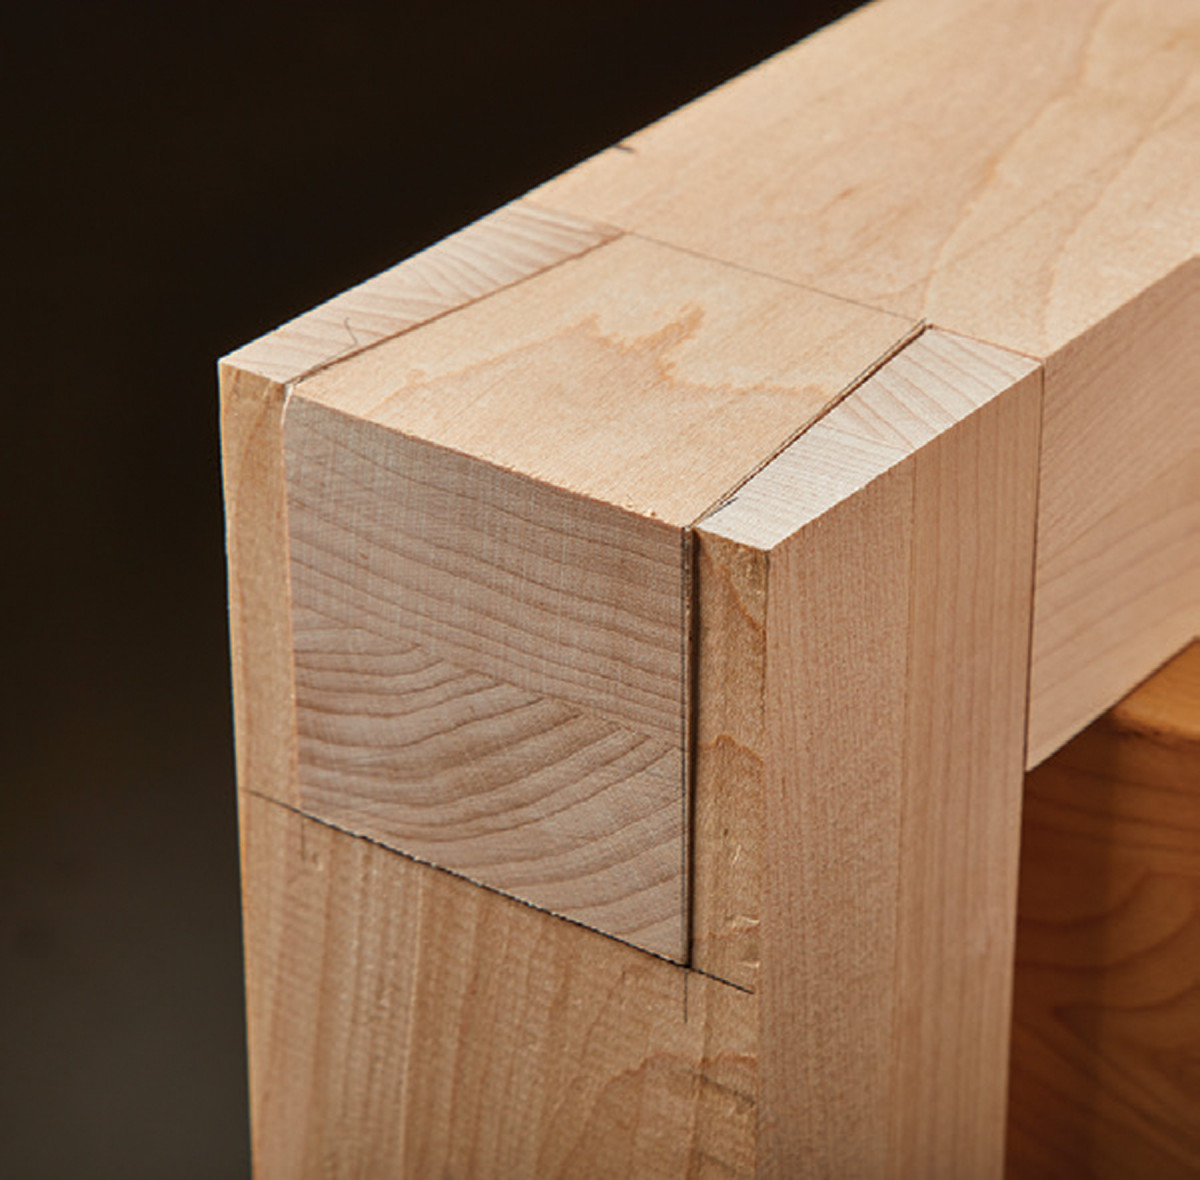
23. Test the fit of your joints and refine as needed. The tails are left a little proud of the pins, and you can trim those to size during the assembly process.
Gluing the legs on first allowed the piece to be clamped down to a flat work surface, ensuring a tight as well as square joint connection.
24. Before you assemble, though, drill the mortises for the legs as well as the spindles. It’s much easier to do this on the drill press before the frame is assembled.
Once all four legs are attached to the rails, proceed to attach the front and back stiles to complete the frame.
Back Rails
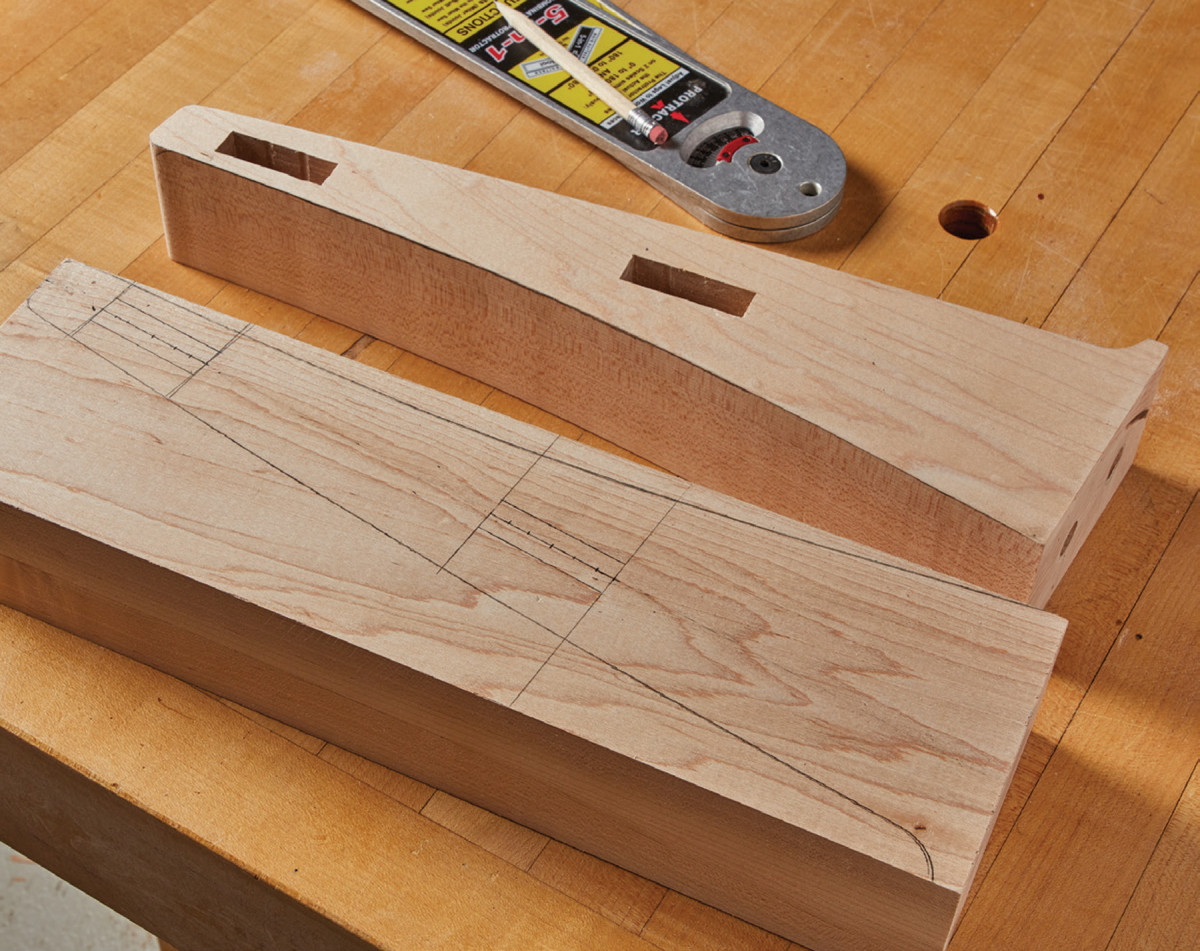
25. Leave the back rails square to make it easier to drill the mortises for back slats and dowels.
Back rails are glued up from 8/4 stock. Start with the blank cut to its final length, width, and thickness. Lay out all of the mortise locations along with the final profile shape.
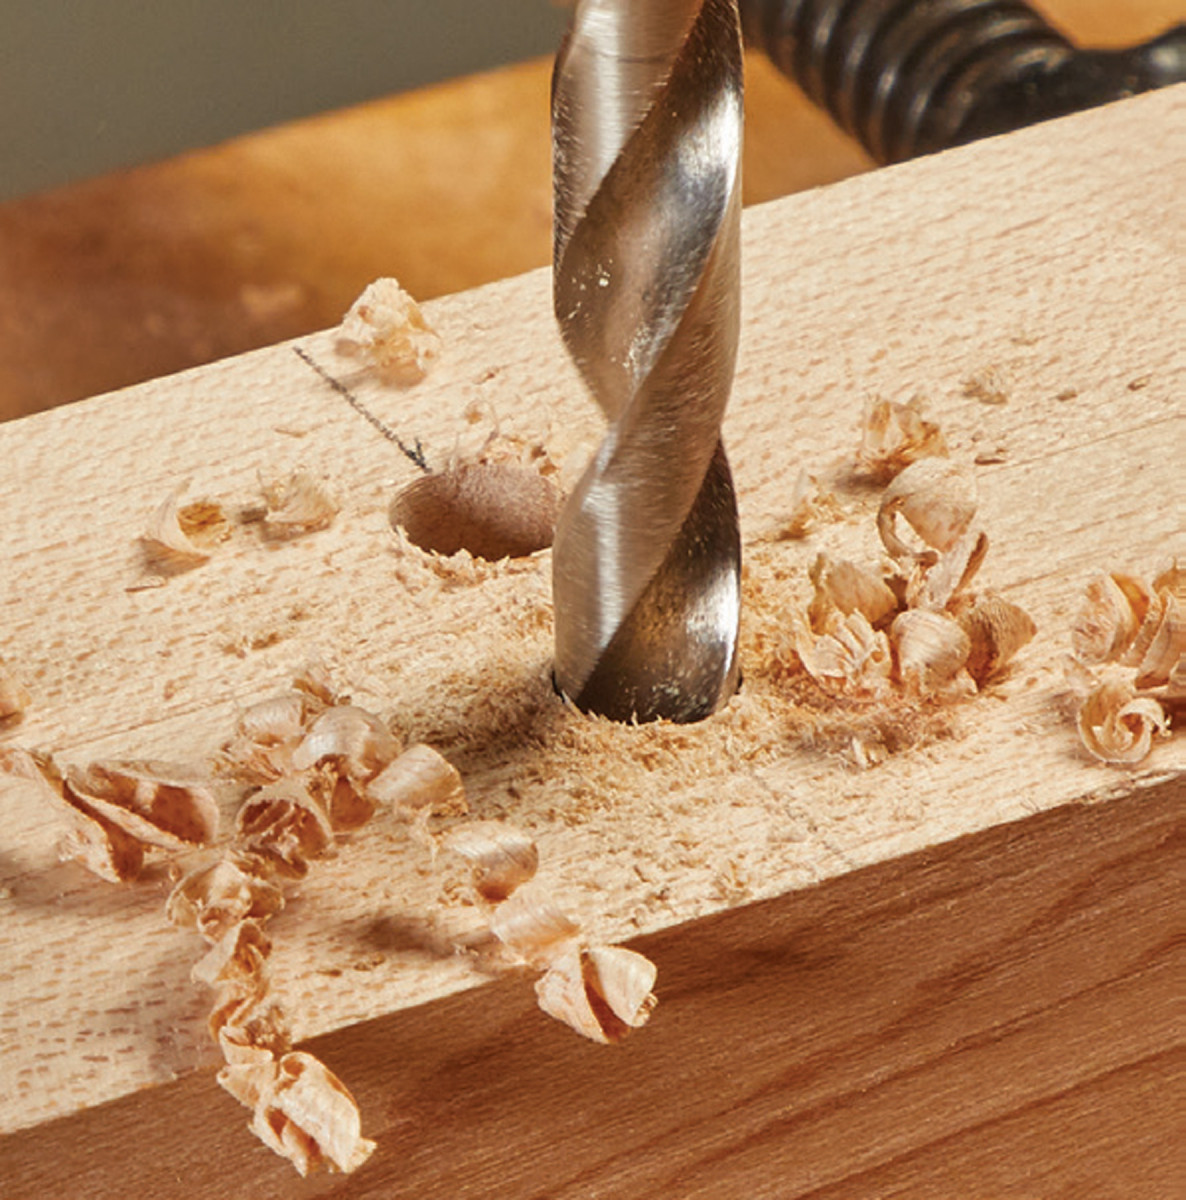
26. Drill two mortises for dowels, used to attach the back rails to the bed frame.
Using a ‘Dowel-it’ self-centering jig, drill the two 3/8“ diameter holes for the arm-rail mortises by aligning its center indicator with the layout lines. Once this is done, flip the blank on end, switch to a 1/2“ drill bit and proceed to drill the two holes that will connect the back to the frame.
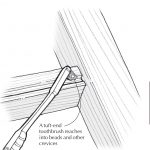
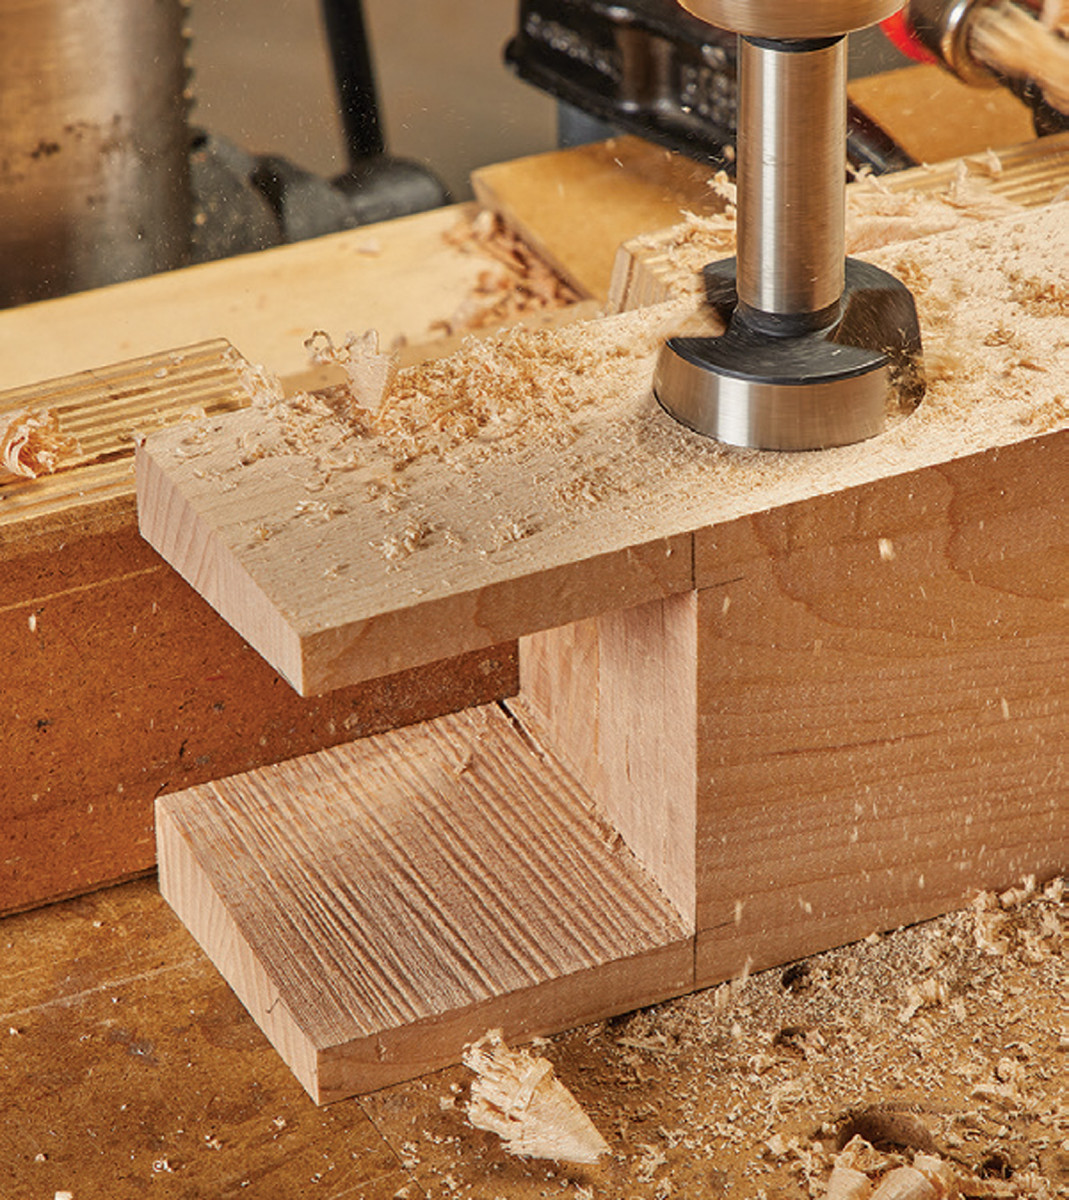
7. You can use the same 3/8″ drill bit to hog out the bulk of the waste for the back slat mortises.
Move over to the drill press and start boring out relief holes for the back-slat mortises. This procedure helps establish the overall length as well as the depth of the mortises.
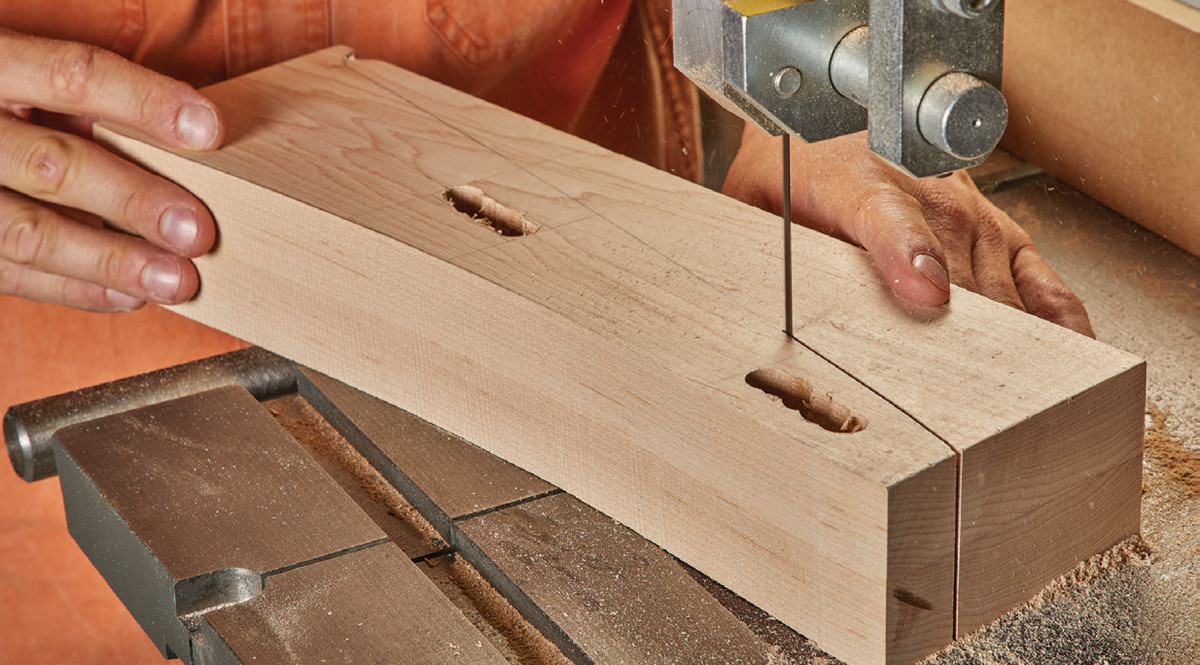
28. Finally, cut the back rails to shape at the band saw.
Now that most of the material is wasted out of the mortise, trade the drill bits for a 1/2“ mortising as well as a 3/4“-1“ bench chisel. Square up the cheeks/mortise walls using a combination of both chisels.
29-30. Next, cut the cheeks of your back slat tenons (see step 15 and 16) at the band saw. Double check that your table is set at 90° to the blade and use the fence to get straight cuts.
 Once the joinery is complete, utilize the bandsaw to cut out the profile of both back-rails. Since even a good bandsaw blade leaves chatter/blade marks, clean-up any imperfections left by the blade with a spindle sander. The two radii on the peak of each back-rail can be rounded over during this process.
Back Slats
31. Dry assemble the back of the daybed to make sure it all fits together. Finish refining the ends of the slats, then glue up the back assembly.
Made up of 4/4 cherry, cut the two back-slats to their final length, width and thickness. Using the table saw, cut the shoulders on all four sides of each slat. Once these are cut, proceed to cut the cheeks over at the bandsaw. On either end, one will notice there is a radius that transitions from the shoulder of the mortise.
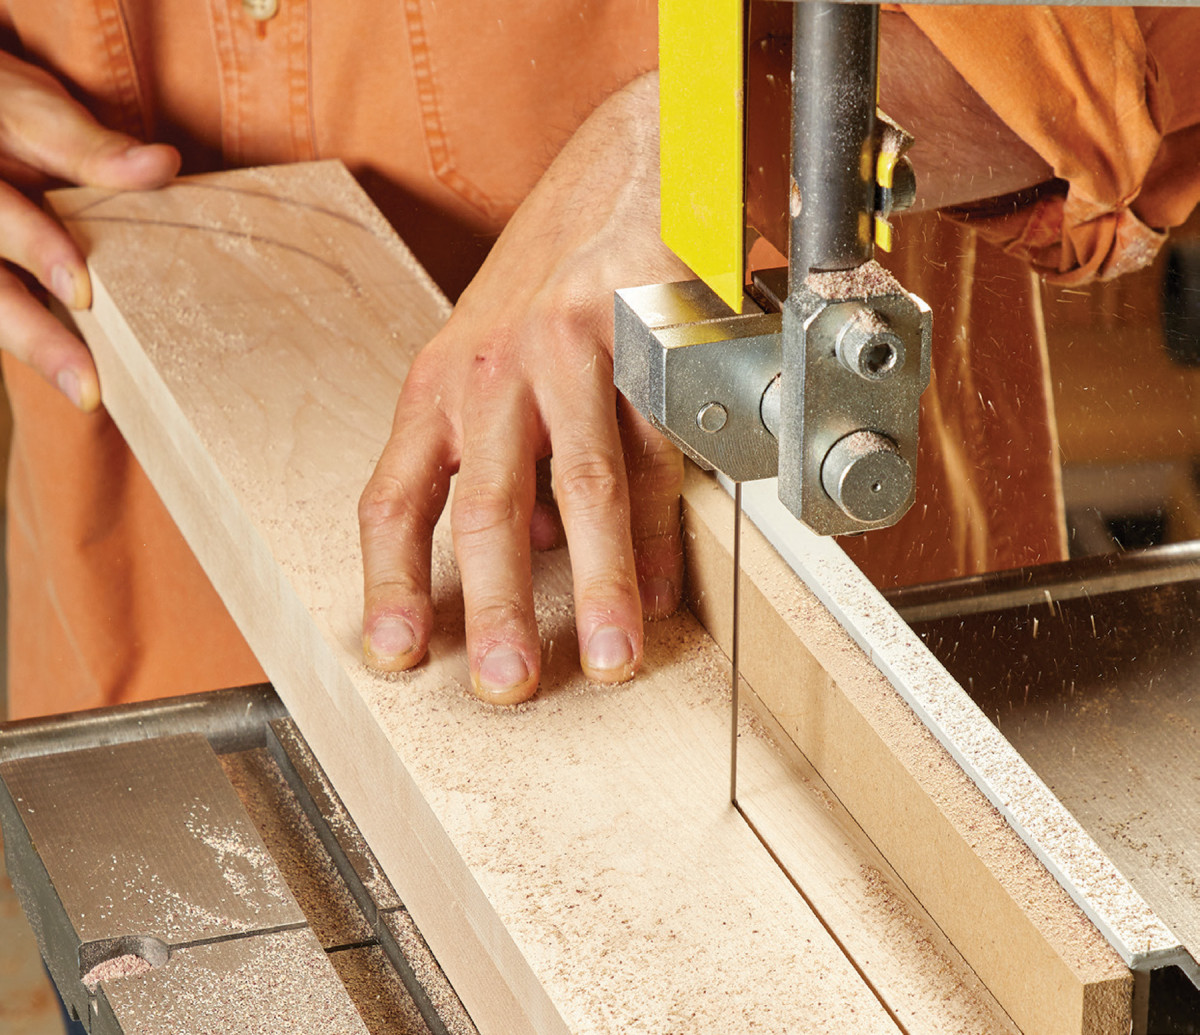
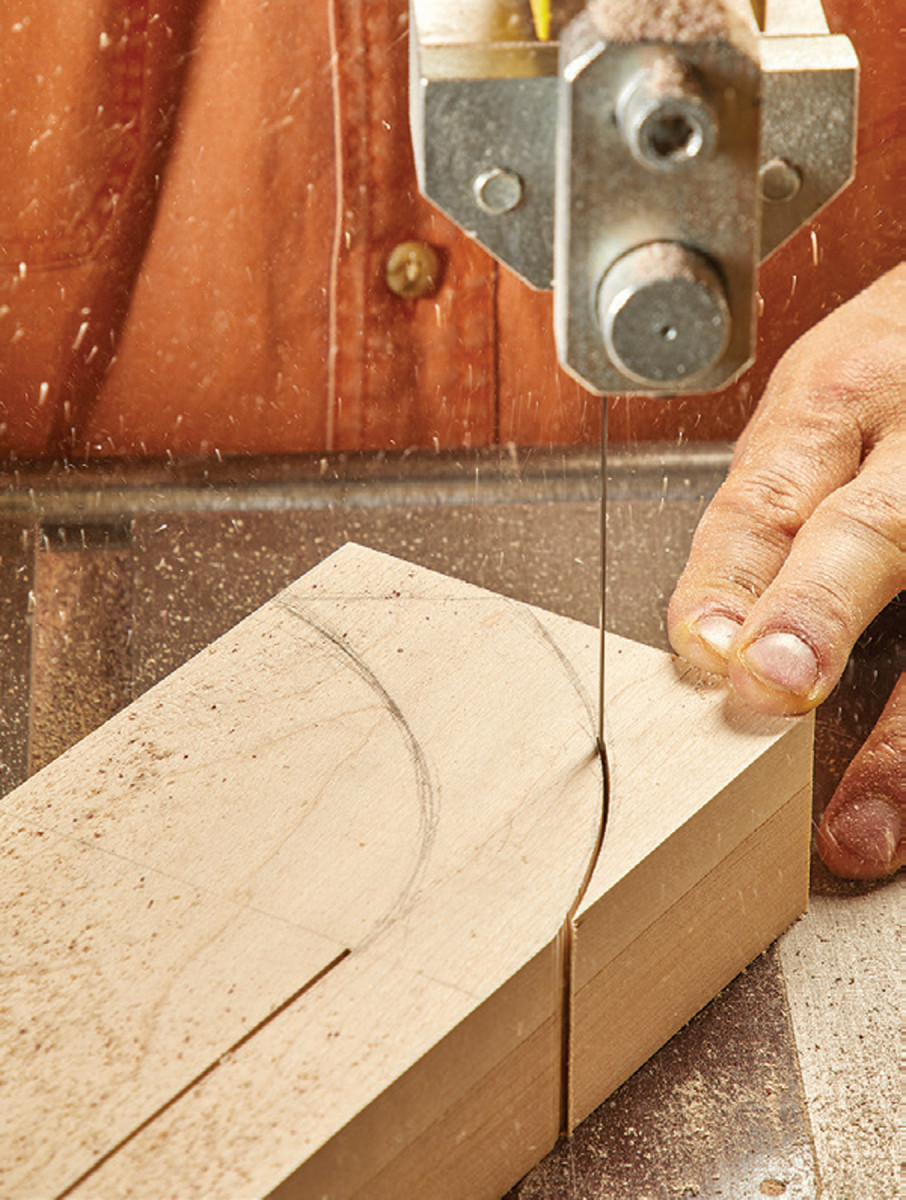
32. Cut out the arm from a single block, paying attention to the grain during layout.
Reset the fence at the bandsaw and proceed to make a stop-cut on each side of the tenon. Rough cut the 1/2“ radius on either side of the tenon and clean up remaining blade marks back over at the spindle sander. Using the router table, give all four sides of the back-slat a 3/8“ round-over profile.
Arms
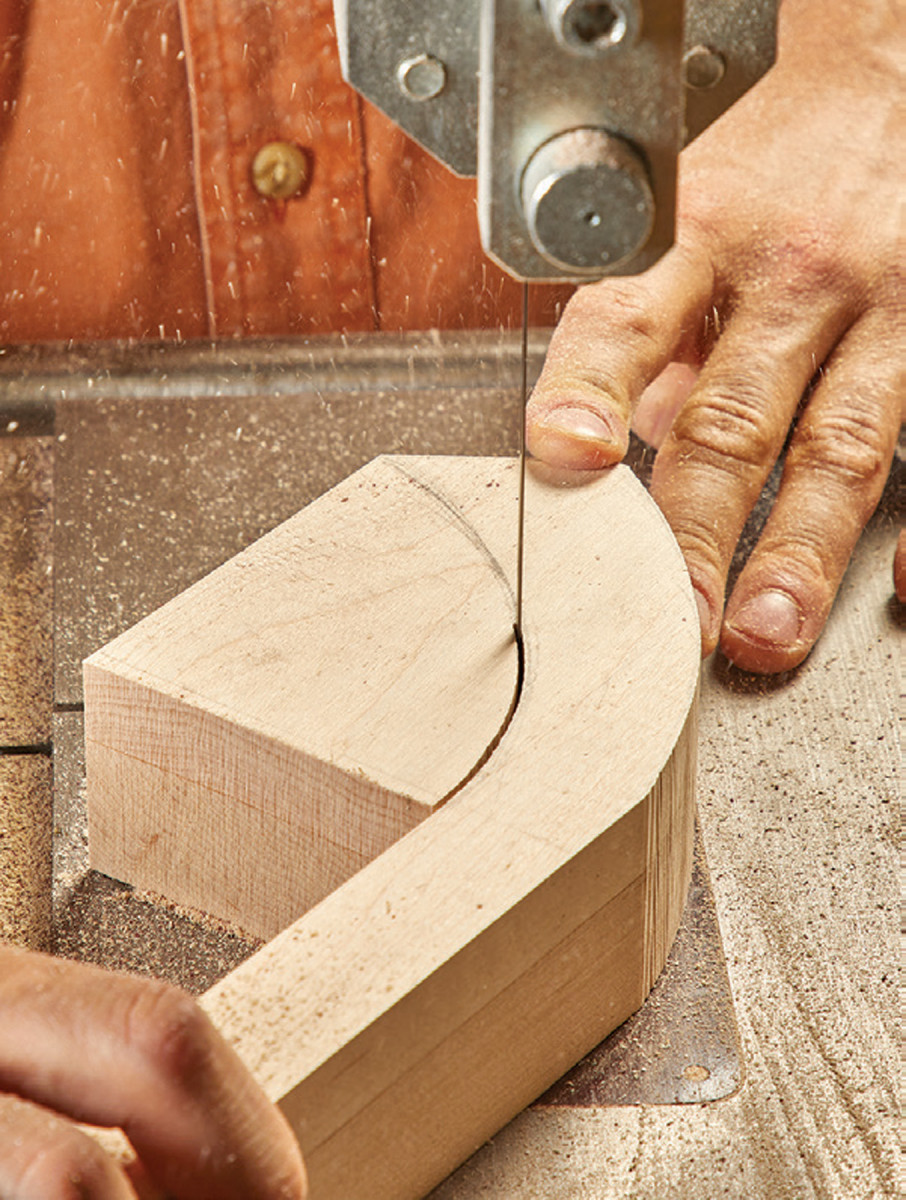
33-34. When you get to the curve, cut a bit outside the lines, then refine the shape with a rasp or sandpaper with both arms clamped together.
 Start by gluing up another 8/4 hard maple blank. Rip and crosscut this blank to its final length, width, and thickness. Map out the concentric radii on the end that create the profile of the arm rail. Using the bandsaw, make a 1“ wide stop-cut where the strait of the arm meets the contour.
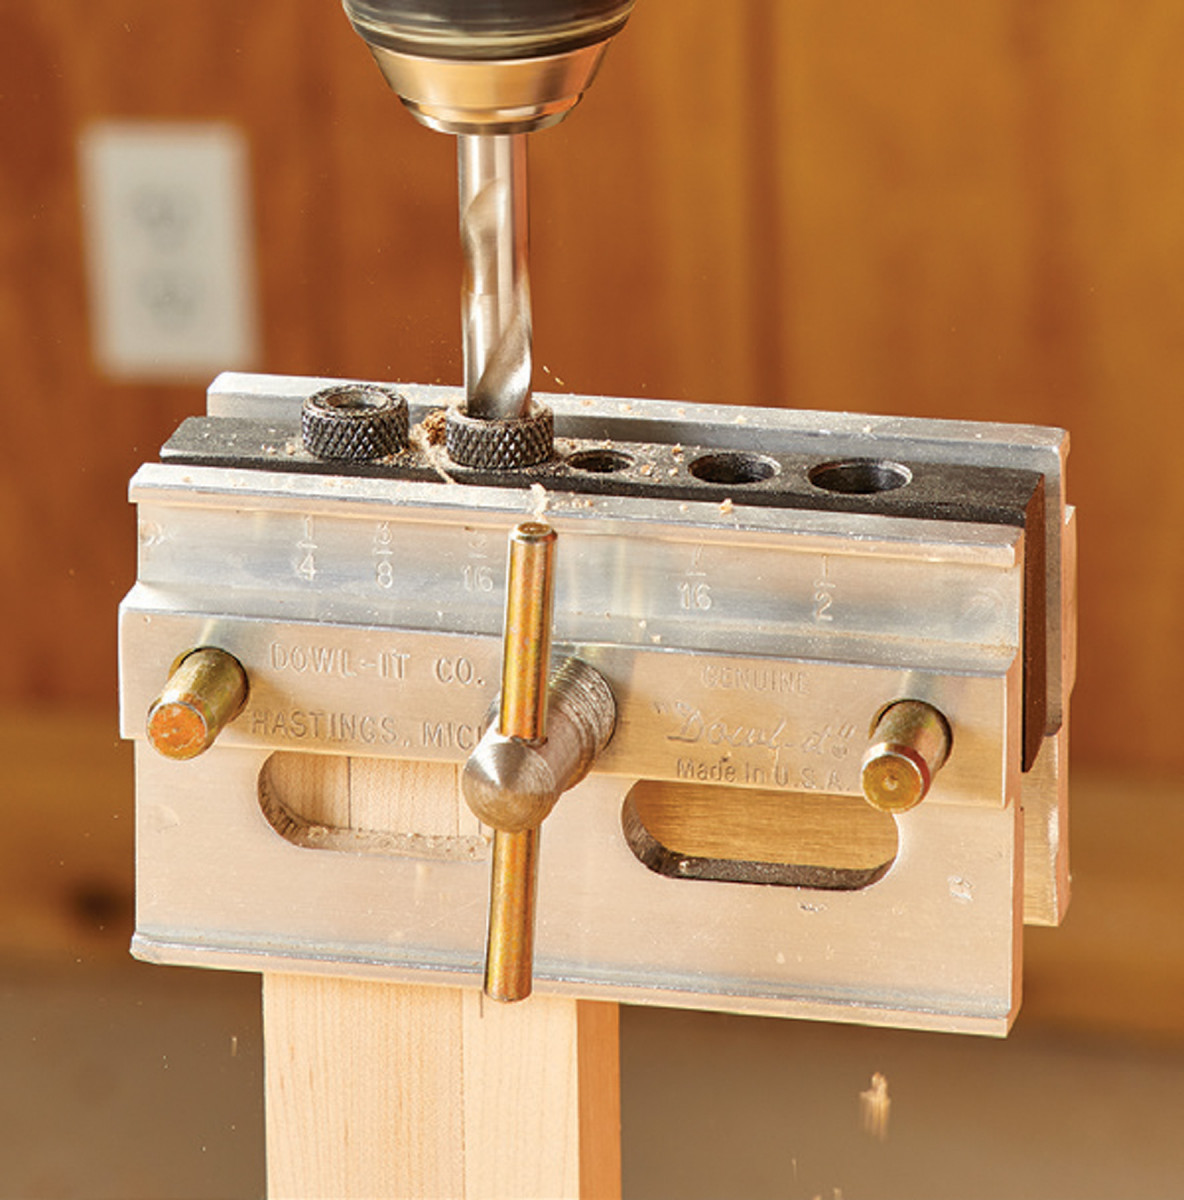
35-36. Finally, I drill holes for dowels in the ends of the arms to attach them to the back stiles.
 Back off the fence and proceed to cut out the inner as well as the outside profiles of the arm. Clean-up any bandsaw marks over at the spindle sander. Now move over to the drill press and create the mortises for the spindles on the underside of the arm. Once again, utilize the ‘Dowel-it’ self-centering jig to create the two 3/8“ mortises on the end of the arm. Proceed to cut the doweled end at an 11° angle over at the table saw.
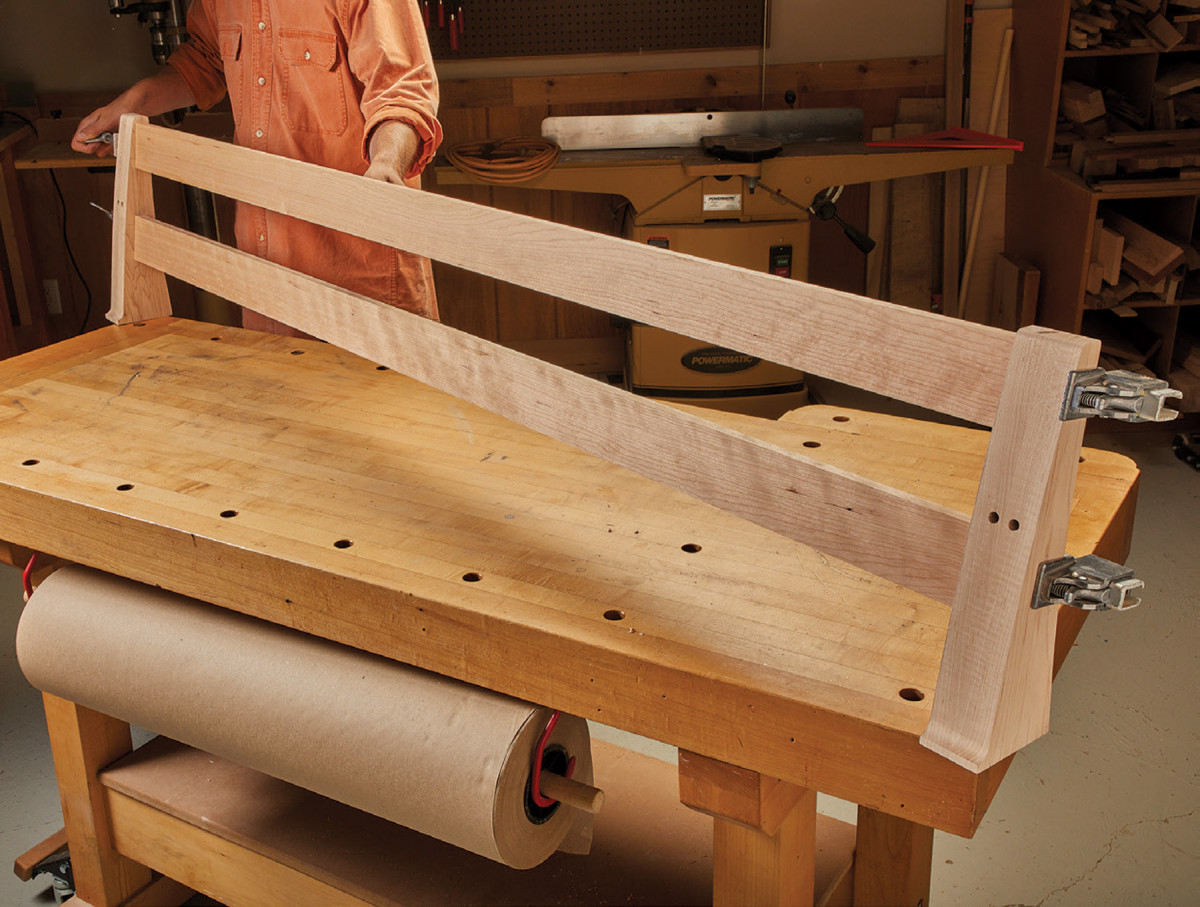
Back Assembly
37. With all your mortises drilled, you can start assembling the arms. I use tongue and groove pliers to compress the tenons.
Dry clamp to ensure a smooth connection. Once the adequate fit is achieved, apply glue to the insides of the mortise walls along with the tenons. After this assembly has dried, apply the back to the main frame construction using a couple of bar clamps. Since there is a minimal amount of clamping surface available at the top of the back-rail, (under pressure) ensure that the clamp is running as perpendicular to the plane of the rail as possible.
The procedure for the attachment of the arm rail along with the spindles is as follows: Apply the two 3/8“ dowels to the end of the arm rail with a small amount of glue. Press the arm rail into the corresponding mortises on the back rail and proceed to lower the arm rail down onto the spindles. Once everything is aligned, secure the joint between the arm rail and back rail using a band clamp. Wrap the band around the spindle closest to the back rail and the backside of the back rail. Once this connection seems firm, apply a couple of bar clamps to the top of the arm rail(s) as well as the underside of the frame rail(s).
Rope vs. Slats
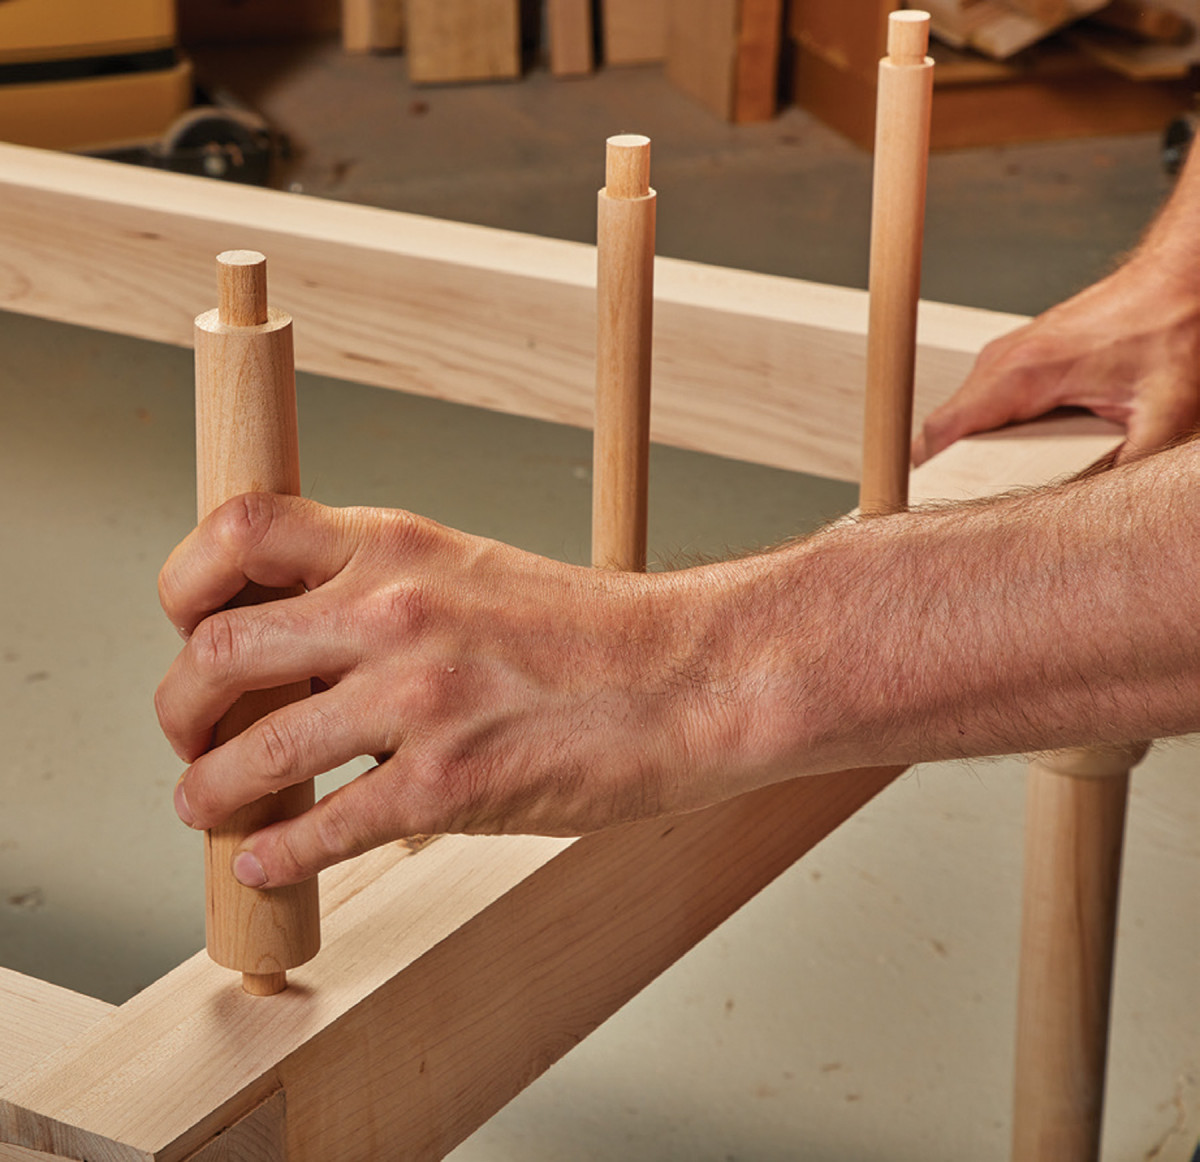
38. Add glue, then assemble, starting with the spindles.
Early beds were constructed using one of two methods of suspending the mattress. One of the earliest methods was to bore holes through the rails of the frame and then to feed rope through these holes in a crisscross pattern. The second method was to attach pegs around the inside the of the frame using a similar spacing method as in the previous one. Although ingenious for the time, the major disadvantage(s) of these two techniques is the sagging and stretching that occurred over time. A modern remedy to this issue (prior to coil/spring mattresses) was to attach a series of boards, known as slats, running the length in an equally spaced manner. The advantage this provides is a solid flat surface that allows for good air circulation, thus reducing the chances of mold and mildew.
Making modern dimensioning concessions on behalf of this piece seemed like a good idea, and upgrading from a feather or corn husk stuffed mattress was a good place to start. There is a surplus of manufacturers that offer custom mattress sizing at an affordable rate. I went with a company with a rather explicit moniker called Foam Factory based out of Macomb, Michigan. Two 4″ thick, high-quality custom cushions cost less than $100 with shipping.
Finishing

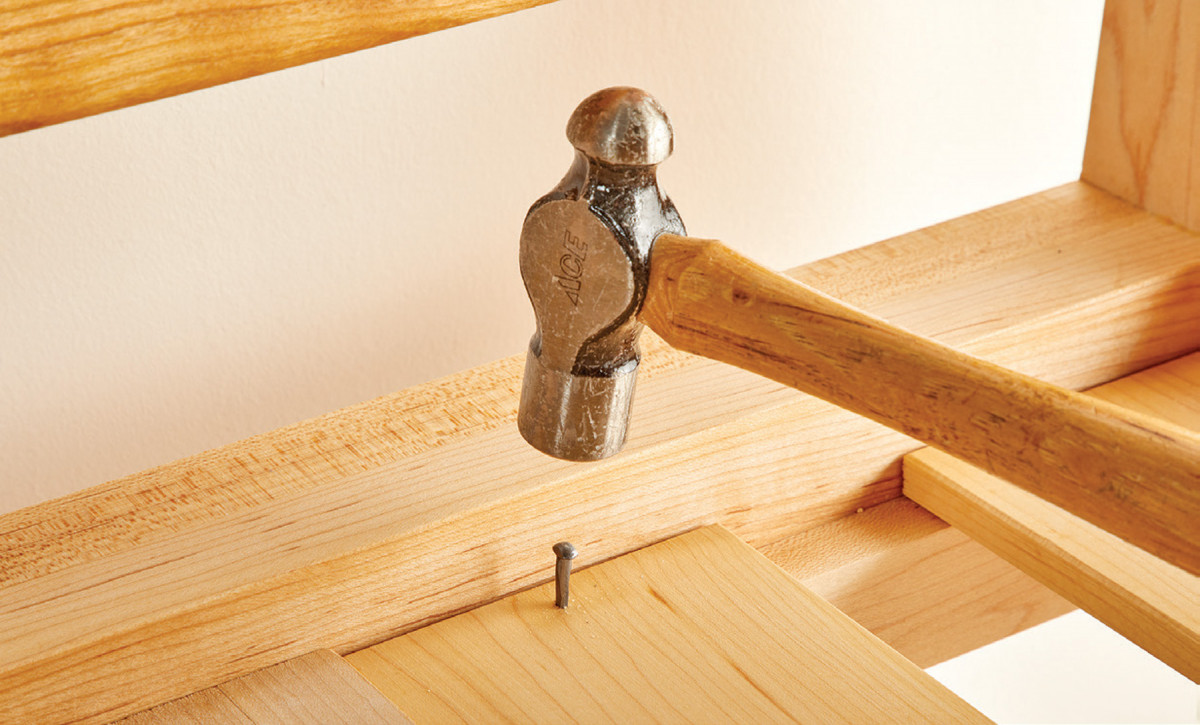
39-40. Leftover maple is used to support the mattress, held in place with nails. Pre-drill, then drive the nails home.
 Shakers typically developed their own finishes that were dictated and regulated by leaders of their society. (There were even rules in outlined in the Millennial Laws from 1845 proclaiming that all beds should be painted green. Fortunately, we are not adherent and/or beholden to any such ostensibly arbitrary doctrines.) If not painted one of the selected monochromatic colors, finishes were prepared as brown and honey-colored stains which were compounded in oil, water and spirits (modern-day linseed oil). Keeping partial to tradition seemed inescapable for this project, so I opted for a coat of cherry Danish oil that was applied using a foam brush. Once this dried (about 72 hours) a couple coats of lacquer were used to further protect the piece from abrasion and common wear.
With the project built and the curiosity mildly contented, the genesis of the piece continues to elude me as a builder. Perhaps this is as good a time as any to implore you, the reader, to pick up where my findings may have fell short. In the meantime, I will remain acquiescent with the idea that this was nothing more than a labor of love
Here are some supplies and tools we find essential in our everyday work around the shop. We may receive a commission from sales referred by our links; however, we have carefully selected these products for their usefulness and quality.