


We may receive a commission when you use our affiliate links. However, this does not impact our recommendations.
 Elegant results from a humble beginning.
Thin strips of wood littered the shop floor after I completed the doors for a custom kitchen. Throwing these “toothpicks” away didn’t seem right, but neither did storing them. So instead I used them to build this great little wine rack. It stores up to 15 bottles of wine and tucks away into the tightest spaces. Yet it always gets noticed, and my dinner guests love the story of its humble origin.
Start with straight pieces
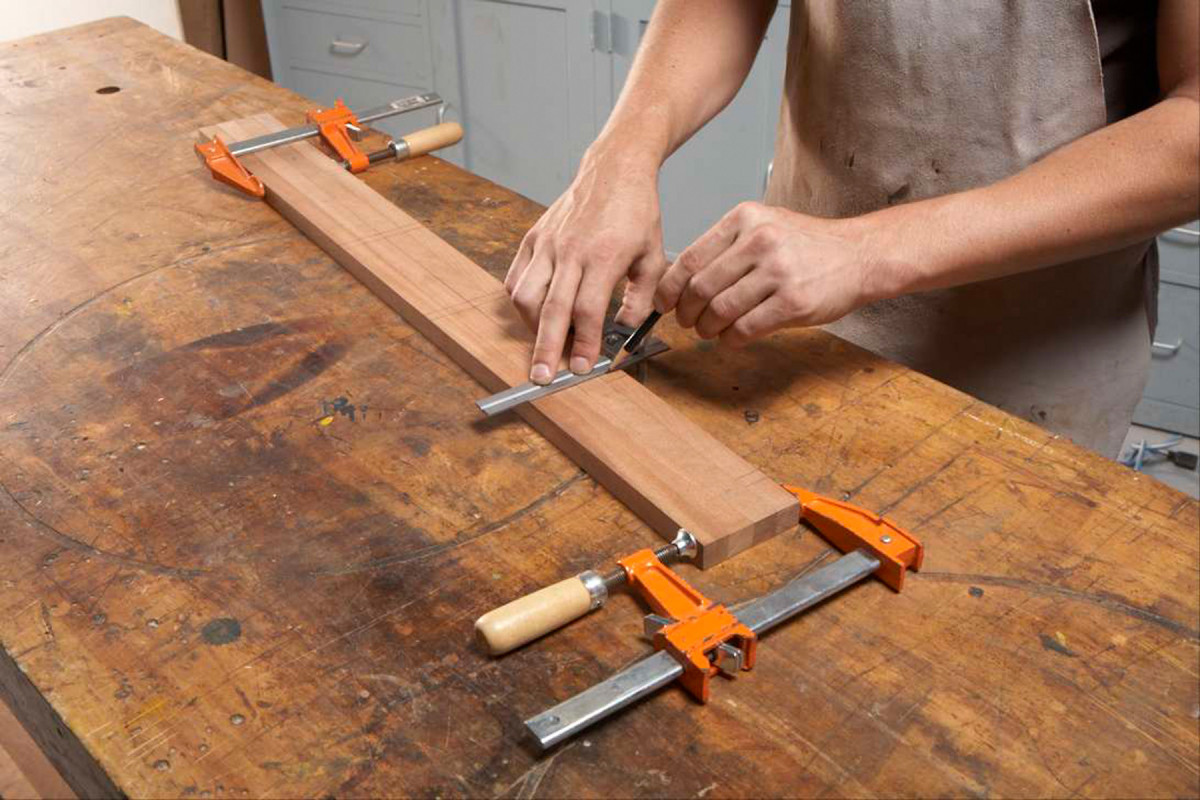
1. Transfer the mortise locations to all four legs after laying them out on one leg. Follow the same procedure to lay out mortises on four of the stretchers.
Mill hardwood stock for the legs, stretchers and rails (A–D, Fig. A). Make sure the edges are square and weed out any pieces that are bowed. Include extra pieces for making test cuts. Lay out the mortises on one leg. Then transfer the marks to the other legs (Photo 1). Follow the same method to lay out the mortises on four of the stretchers.
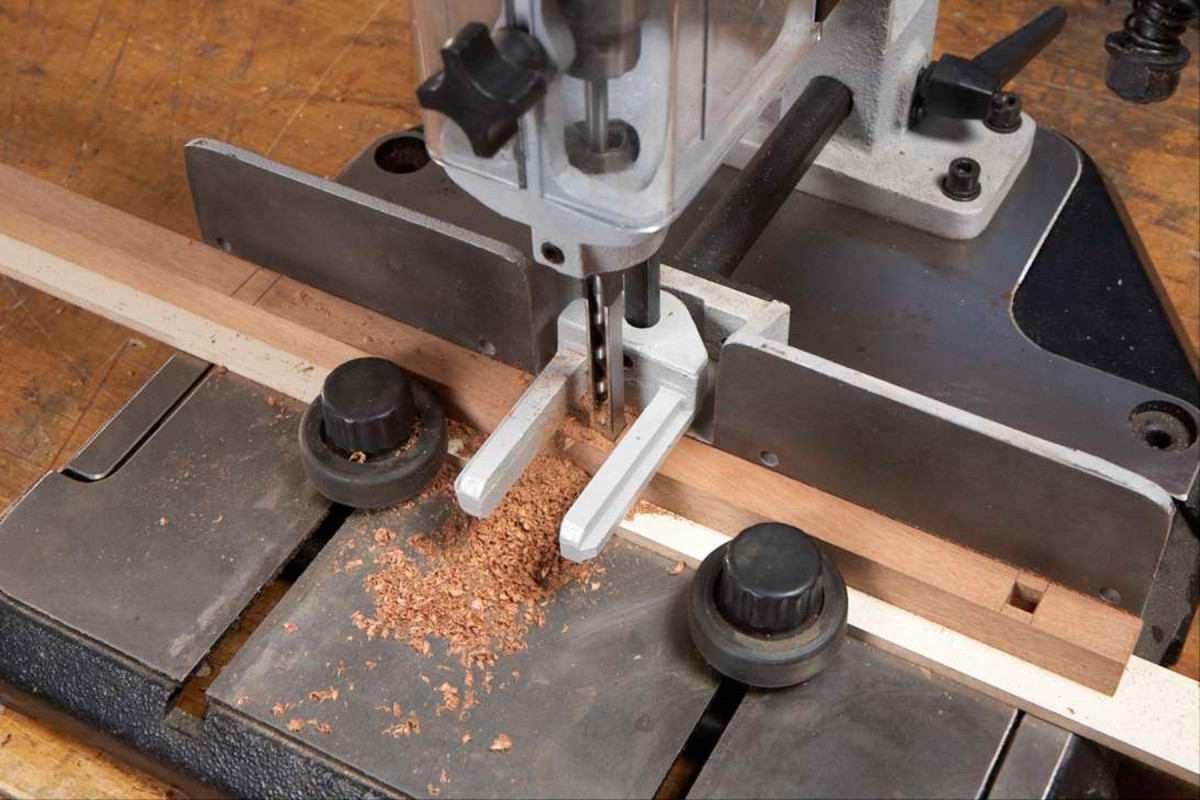
2. Chop square mortises in the legs and stretchers. These mortises are centered from side to side.
Use a mortiser or a drill press outfitted with a mortising attachment to chop the mortises (Photo 2). Make sure the bit is square to the fence. Then position the fence exactly 3/16″ behind the bit to center the mortises. Use the layout lines to position the bit before chopping each mortise.
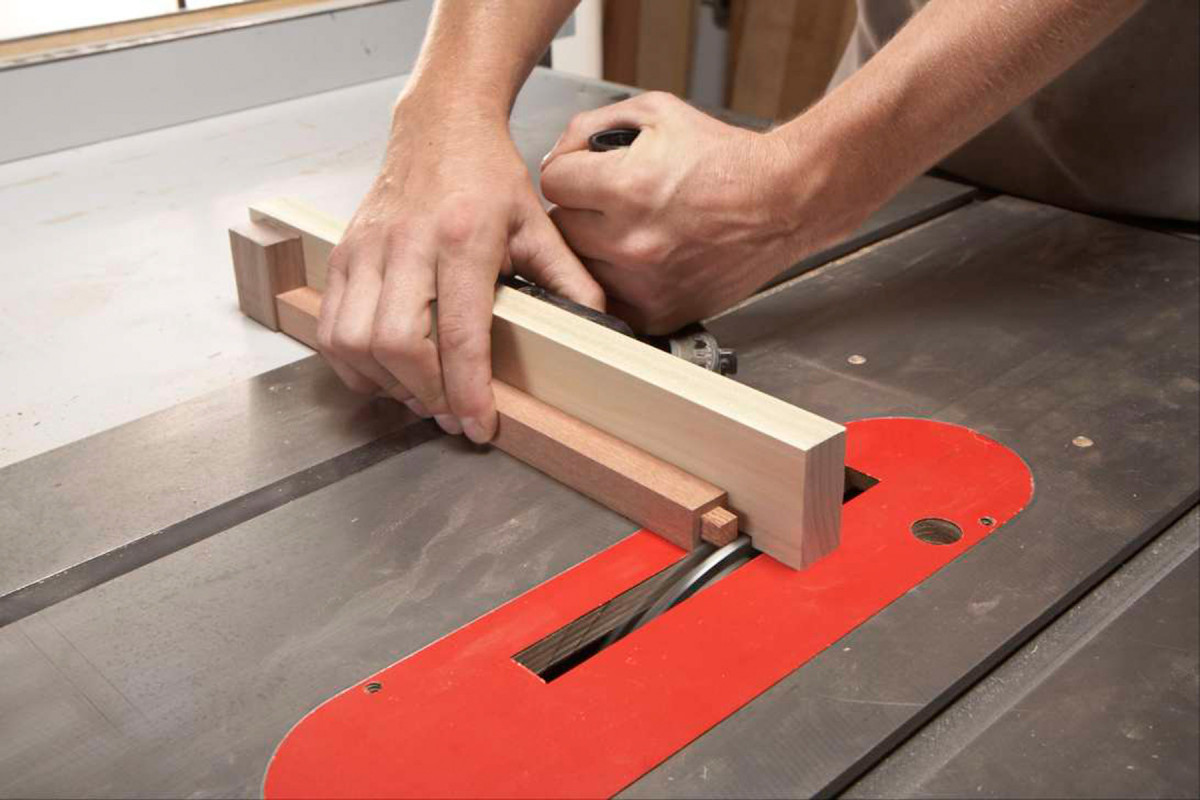
3. Use a miter gauge with a fence and a stop block to cut square tenons on the stretchers and rails. Each tenon requires four passes to complete, one on each face.
Cut tenons on the stretchers and rails on the tablesaw (Photo 3). Set the dado blade 3/16″ above the table and position the stop block 11-1/2″ from the blade. Cut test tenons to check the fit and make any necessary adjustments—the tenons should fit without binding or wobbling. The 1″ wide top rails require an extra step. Raise the blade to 7/16″ to cut the top shoulder of each tenon.
Saw and sand coves on both ends of the top rails to complete the reveal beneath the rack’s top. Then drill shank holes for the screws that will fasten the top. Elongate the end holes to allow the top’s seasonal movement.
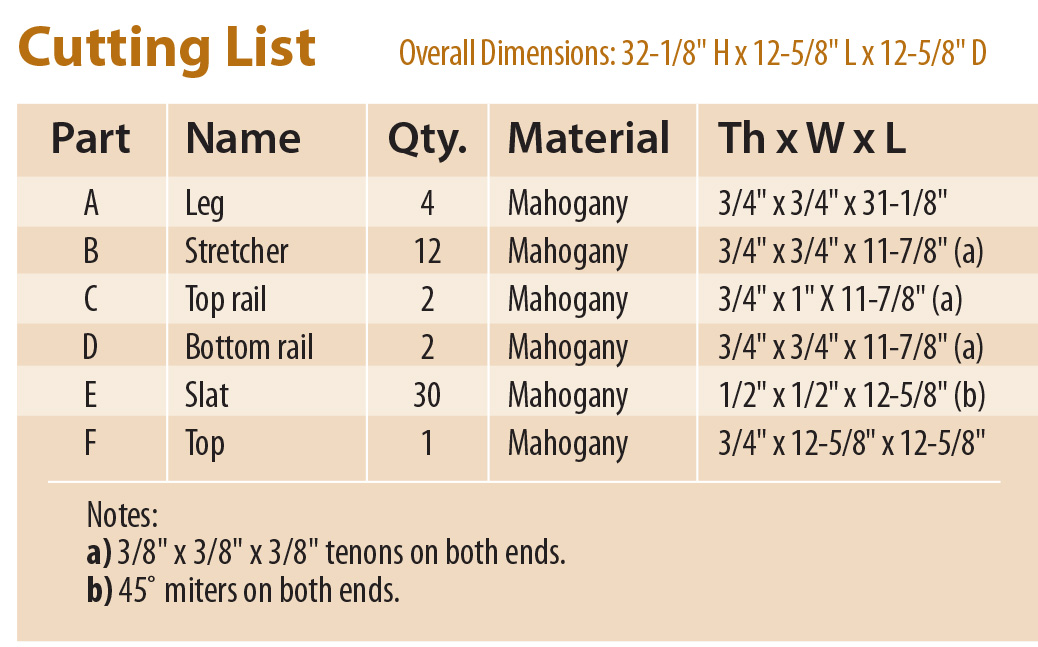
Wine Rack Cut List
Assemble the sides and rails
Finish-sand all of the parts and then assemble each side without glue to check the fit. Disassemble the parts. Then glue and clamp each side separately. Make sure each assembly is square and that the mortises in the top and bottom rails face the same direction. Use a damp cloth to remove squeezed-out glue.
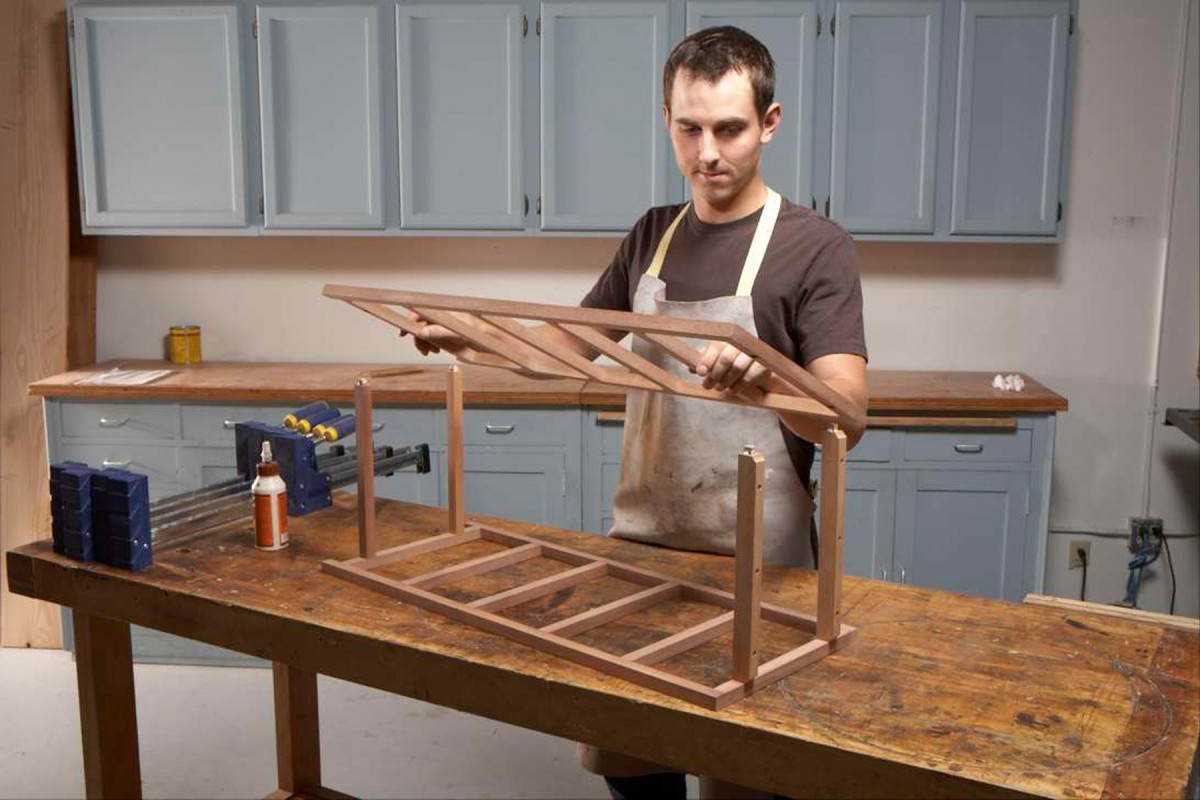
4. Assemble the base in stages. First, glue the stretchers between the legs to create the sides. Then glue the top and bottom rails between the two sides.
Remove the clamps when the glue has dried and smooth the joints by sanding. Assemble the sides and rails without glue to check the fit. Then glue and clamp together the base (Photo 4). Make sure the coves on the top rails are correctly oriented.
Make and attach the slats
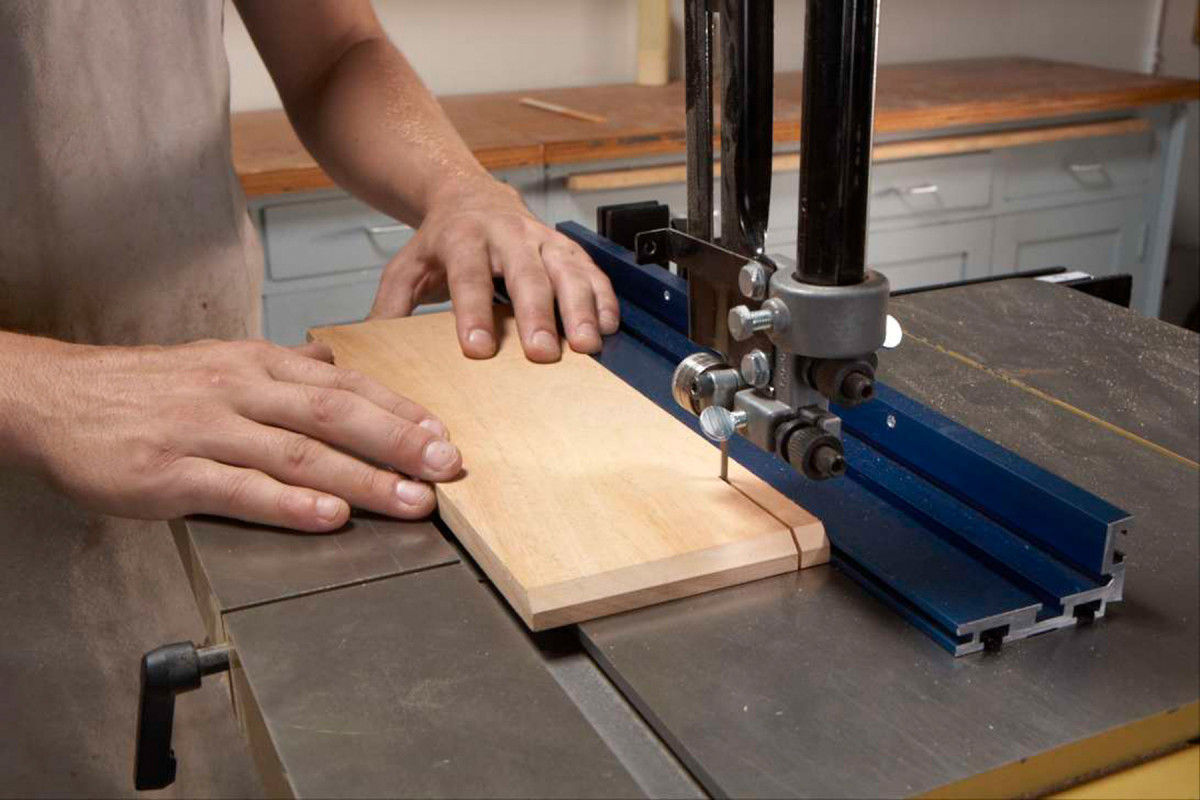
5. Rip the slats from wide blanks with chamfered ends. Use a bandsaw to safely cut these narrow pieces.
Cut the slats (E) from wide blanks milled to 1/2″ thickness and cut to final length (Photo 5). Before cutting the slats, finish-sand the blanks and saw or rout 45˚ chamfers on both ends. After cutting the slats, turn them on their sides and clamp them together for sanding to remove the saw marks.
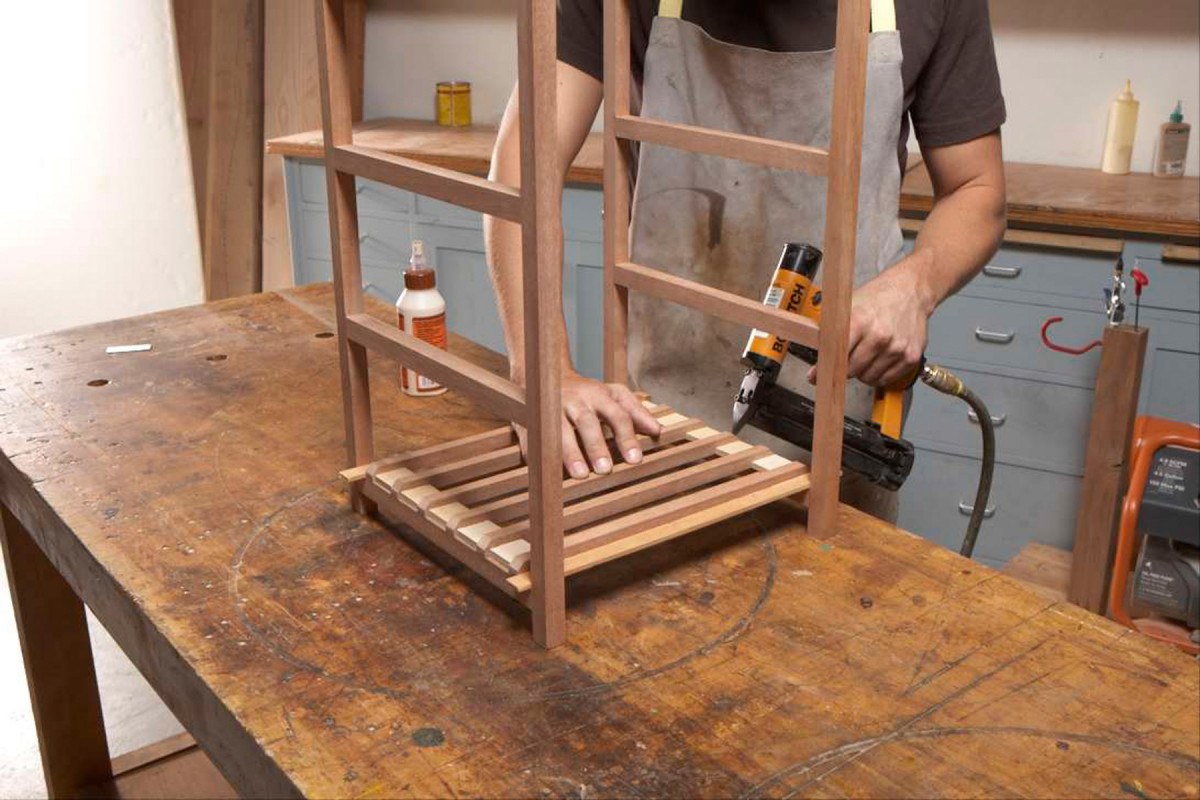
6. Attach the slats with spacers, glue and 23-ga. nails.
Use spacers to position and install the slats (Photo 6). Cut ten 1-3/8″ wide spacers to go between the slats and two 5/8″ wide spacers to go between the slats and the legs—adjust the width of these outside spacers to true the fit. Starting at the bottom, align the slats with the stretchers at both ends. Slightly lift the ends of each slat and insert a drop of glue. Press the slats down onto the stretchers and recheck their alignment. Then fasten each slat with 3/4″ 23-ga. pin nails. Remove the spacers and move to the next level.
Finish and final assembly
Cut and finish-sand the top (F). This is a perfect spot for a special piece of wood—one with rich color and spectacular figure.
Apply your favorite finish. For this project I prefer polyurethane. I use an HVLP gun, but aerosol cans also suffice. I start with the base upside down and spray on two very light coats. Then I flip the base right side up and spray on two coats. I’ve found that this is the best way to prevent drips and get all sides of each part finished. I spray the top the same way, bottom side first. After the finish has dried, I lightly sand all the surfaces with 400 grit and then wipe on a final coat of polyurethane.

7. Use a shop-made square corner to attach the top to the base. Their dimensions are the same, so the edges are flush.
Attach the top to the base after the finish has thoroughly dried. These pieces are easy to align because their dimensions match (Photo 7). Clamp a couple boards to your bench to create a square corner. Snug the top into the corner—make sure its top face is oriented towards the bench and that there’s a clean surface between it and the bench. Place the base on the top and snug both parts into the corner. Mark pilot holes for the screws in the top. Remove the base to drill the holes. Then reposition the base, snug both pieces to the corner and install the screws. Done!
Here are some supplies and tools we find essential in our everyday work around the shop. We may receive a commission from sales referred by our links; however, we have carefully selected these products for their usefulness and quality.


