We may receive a commission when you use our affiliate links. However, this does not impact our recommendations.
I teach woodworking and design at a remarkable place in Brooklyn, New York. We have around 18 classes just in the woodworking department; we have tons of other classes in the rest of the lofty old industrial building that houses 3rdWard. The institution is a hub of creativity in crafts, art, and design. It functions as a home for a community of young and old professional and amateur makers and is a Mecca for the budding cadre of hipsters from all over New York City. One of the classes that I teach there is Intro to Woodworking. The mission of this class is to give someone who has never worked with wood the skills to become a beginner woodworker. Over the course of 5 class meeting my students learn the following:
- The basics about wood and its properties
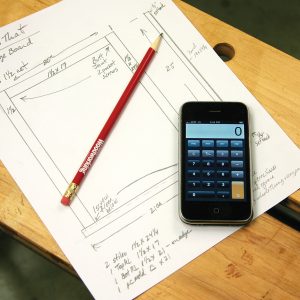
- How to read plans
- How to measure and mark
- How to safely and confidently operate the miter-saw, the band-saw and the table-saw
- How to cross cut, rip, drill, groove and made dados
- How to glue and clamp
- How to work with a chisel, a rasp & file, a scraper and a mallet
- How to make a project out of dimensional lumber
What we at 3rd Ward seek to achieve is for the student to leave the 5 sessions with a passion for woodworking. We want the student to be able to feel comfortable knowing that they can go to a Home-Depot or the like, buy wood and make nice looking furniture. As a teacher I made a decision not to teach sharpening, hand-planing, use of the jointer and the planer in the beginner's class. I explain that these ultra-important tools are integral to woodworking, but I feel that if we overwhelm the student with requirements to master too many skills in such a short class, they might not enjoy the experience as much.
In order to let them experience woodworking to the fullest in the five meetings of the Intro to Woodworking class, I give them two projects. One is to make a Mallet, the other one is to make a Shaker-style step-stool. I will blog about the mallet in the future but today I would like to show you the plan I made for the step-stool. I sought to include in this project all the basics I mentioned above.
Students receive a white oak board that is 10' long 5 -1/2" by 3/4"– milled on four sides. They cross cut it into several parts, then they rip one of the parts. They glue some of the parts together. After this they scrape out the glue residues, cross cut the glued parts, measure and mark, make dados and grooves. Following this they shape the stool's back on the band saw. Lastly they glue the parts together to make the stool. If a student has the time, he or she can create a personal detail on the stool's legs, back or seat.
After the glue dries they can strengthen the structure by adding screws sunken into holes and covered with plugs. I think that this is a nice project. I will post pictures of its progress in the future. Meanwhile, here is my design…


