


We may receive a commission when you use our affiliate links. However, this does not impact our recommendations.
 The simplest tool in your chest is also the most sensitive and versatile; here’s how to set up a chisel to a high level and wield it like a maestro.
 The simplest tool in your chest is
 It’s almost impossible to build furniture without a chisel, yet most woodworkers I’ve met (even professionals) have chisels that are unbalanced, the wrong shape and poorly sharpened.
Before you despair, this article is not a commercial to convince you to buy an expensive set of boutique chisels. You cannot just throw money at this problem. Instead, my hope is that after reading this article you will fetch the 1⁄2” chisel you have in your set – no matter the brand or the vintage – and set it up for a high level of work.
Once you see what a proper and perfect chisel is capable of – and how to wield it – you’ll quickly discover that the chisel you have is (most likely) perfectly adequate, or that it could be better. Either way, you’ll know exactly why that is the case.
Warning: If you are a tool collector or have beliefs that tools should not be radically altered, you definitely want to stop reading now.
Types of Chisels & What You Need

It’s better with a bevel. The narrow flats on the long edges of these chisels let you sneak into acute corners, yet they are strong enough for fairly heavy work.
Most woodworkers have far more chisels than necessary. Years ago I sure did. The downside to being chisel-rich is the downside to having a dozen children: You have to take care of them all. I’d much rather have a small set of perfect and sharp tools than a menagerie of misfits that I’m always poring over to find a decent one.
Likewise, I don’t think you need a bunch of styles of chisels to do good work. I’ve explored the world of firmer chisels, slicks, registered, butt, paring, patternmaker and crank-neck tools. Yes, they all have their uses for certain trades and times in history. But I always come back to the basic bevel-edge chisel as the most handy pattern for making furniture. A good bevel-edge chisel (and we’ll discuss what makes a good one) can handle almost any task imaginable.
What sizes? A set of five (1⁄4“, 3⁄8“, 1⁄2“, 3⁄4” and 1″) is more than enough. If I had my druthers, I’d skip the 1″ chisel and get a 11⁄4” or 11⁄2” chisel instead. These wider tools come in handy for paring and defining tenon shoulders.
When students ask me how to start buying chisels, I recommend they buy a 1⁄2” tool (the most-used size), then expand cautiously from there. You might end up with a 1⁄8” bevel-edge chisel because you make London-pattern dovetails. You might never pick up a 3⁄8“.
The only exception to this blanket of love for bevel-edge chisels is when it comes to mortising. If you cut your mortises by hand, you’ll be best served by a couple dedicated mortise chisels. I’ve snapped bevel-edge chisels in a deep mortise (heck, I’ve seen students snap mortise chisels in a deep mortise).

Mortising needs mass. Hand-mortising can be brutal on the wood and the maker. Mortise chisels are built to withstand heavy blows and levering out boulders of waste.
But what style of mortise chisel? Japanese? English? Continental? All of the patterns work just fine – I’ve used them all in my shop for many years. My favorite is the English pattern because it has an oval-shaped handle that helps you line up the tool with the joint’s walls. Also, the English pattern is the most beefy and seems to take abuse the best.
You don’t need a lot of sizes of mortise chisels (please don’t buy a whole set). Start with a 1⁄4” chisel if you work with mostly 3⁄4“-thick material or a 5⁄16” if you work mostly with 7⁄8” to 1″. Let your work dictate the next size you purchase. If you plunge into bench-building, you’ll find a 1⁄2” to be indispensable. If you make delicate frames, a 3⁄16” will come in handy.
Fancy Specialty Chisels
There are lots of specialty chisels out there – some are helpful; others are not. Here are the patterns that I find most helpful for furniture making.

Second-string chiselers. The fishtail chisel (top, right) is a huge help when cleaning up half-blind dovetails. The swan-neck chisel (top, left) scours the bottom of mortises. And the drawer-lock chisel (sorry, no cute animal name) lets you work in tight quarters.
Fishtail chisel: If you cut half-blind dovetails, these chisels are invaluable for cleaning out the sockets on the pinboard. Note that you can make your own fishtail chisel with a hardware-store chisel and a grinder if you want to try out the pattern first. In any case you need only one chisel that reflects the type of dovetails you cut.
Swan-neck chisel: If you cut a bunch of mortises, this chisel is a life-saver when it comes to cleaning out the trash at the bottom of the mortise, which can be vexing at times. I have only one (a 1⁄4“) that matches the size of my mortising chisel.
Drawer-lock chisel: This odd-looking bird gets you into tight places when installing locks in small drawers. You can get around owning one of these with this simple trick: Install the lock before assembling the drawer.
What’s Important & Not
While it seems logical to focus on the steel of the chisel – the tool is a piece of steel stuck to a stick – it’s one of my smallest concerns. I think there’s basically good steel and bad steel. Bad steel won’t hold an edge for more than a few minutes of work. It needs to be annealed, re-hardened and tempered (which will make it good steel). Good steel covers a wide range of tools from the well-made hardware-store tool up to premium products. Yes, there are differences in the edge-holding properties between the inexpensive and expensive stuff, but if you keep your chisels sharp with regular honing, you won’t really notice the difference.

Chop, hone, repeat. When dovetailing a carcase, I hone my chisel after each corner. When dovetailing a large drawer, I might do two corners before honing. With small drawers, I hone after finishing each drawer. These little rules keep me sharp.
Chisels should be honed regularly during work. When I chop out dovetails in a chest or case, I’ll rehone the chisel after every corner. This gives me a break from bending over the work and ensures the chisel is keen when I start at it again.
You are welcome to obsess over all the different steel formulations and read all the torture tests that get published (confession: I’ve been involved in some of these), or you can quit worrying and get to work at the bench.
Bottom line: If your chisel won’t hold an edge for more than a few chops, send it back to the maker or learn to heat treat steel. Otherwise, focus your energies on what is far more important than steel: the handle.
The Handle & the Balance
The comfort of the handle and the balance of the tool are, in my opinion, the most important factors in selecting a good chisel. Here’s what I look for when I pick up any chisel.
You should be able to wrap your fingers entirely around the handle. But the tool shouldn’t get lost in your palm. Handles that are too big or small reduce your control and increase your fatigue.

About this long. For general use, the handle should be the width of your palm – like here.
Unless it’s a paring chisel, the length of the handle should be about the width of your palm. Anything more increases the weight and can affect the balance.
Necks are for pushing. The small hollow area in the handle makes the tool easier to push.
My favorite handles, no matter who makes them, have some sort of “neck” near the transition between the handle and the steel. This narrow area is an ideal place for your thumb and index finger to push the tool forward while paring. Having this neck allows you to use a more relaxed grip when paring.

Farewell heavy plastic. Use a hacksaw to remove the plastic handle. Then turn a wooden one. It’s time well spent.
I’m not a fan of plastic handles for a couple reasons:
■ They are much heavier than wooden handles and throw off the balance of the chisel. The extra weight makes them quite fatiguing to use when chopping dovetails especially. You have all that weight swinging up in the air that you have to control. You quickly feel this as soreness in the meat between your thumb and palm.
■ I don’t like the feel of plastic. Though I’ve held many quality handle shapes made with plastic, I got into making furniture because I love wood.

Handle-heavy hurts. If the balancing point for the tool is in the handle, I think it’s too heavy for light chopping. Cut the handle down or replace it with a wooden one.
If you have a heavy plastic handle, here are my two recommendations: 1) Replace it with a wooden one. It’s not difficult (we have an article by Roger Holmes on this process). 2) If you refuse to take this route (which is weird because you are a woodworker), then hacksaw off the end of the handle and shape it with a rasp to reduce the weight and shorten the handle. This is what woodworker Lonnie Bird does when students bring plastic-handle chisels to his school. The tools look pretty bad after the operation, but they are much easier to wield.
When it comes to the balance of the tool, you want the steel part to be heavier than the handle. The tool should be balanced 50/50 at a point somewhere along the steel part. A handle-heavy chisel is misery.

Tiny flats are good. The thin flat area on the side of this chisel makes it ideal for dovetailing. Poorly designed bevel-edge tools have flats as wide as 1⁄4″.
One of the other important details of a bevel-edge chisel is the size of the side bevels. The bevels of a good chisel will almost touch the flat back of the tool – leaving a very fine flat. A chisel like this will plunge nicely into a tailboard without bruising the tail. It also can get into other acute corners, such as butterfly-shaped mortises and sliding dovetail sockets, with ease.
Note that if your chisel has a chunky flat on the side, you can fix that easily on the grinder.

It’s not scary. If you have a flat platform around your grinding wheel, then grinding down the side bevels is easy work, even for a beginner.
While I like this small flat on the edges of the steel, I don’t like the bevel and the back to come to a point for the simple reason that these tools shred my fingers while chopping or paring.

Three ways to attach the handle. Here are the most common three ways to attach the handle to the blade: a tang (top), a socket (center) or a combination of socket and tang.
Oh, and what about the different ways of attaching the handle to the blade? Manufacturers try to make a lot of hay about the differences between a socket chisel, a tang chisel and the combined socket/tang construction of Japanese chisels. Don’t get too wrapped up in it.
Socket chisels are heavier but it’s easier to replace the handle (turn a new one and knock it into the socket). Tang chisels are lighter, but the handle is more difficult to replace and might require a ferrule, which is a sleeve of metal that keeps the wood from splitting at the intersection of the metal and wood. And the Japanese hybrid construction is probably the best of both worlds, but it is available on only certain tools.
Japanese Chisels for Westerners

That’s not flat. One of the nice features of Japanese chisels are the hollows ground in the back. These hollows make the chisel easy to set up – there’s less steel to flatten.
Most woodworkers have flirted with Japanese chisels. I had a set of beautiful blue-steel blacksmith-made chisels in the late 1990s. They are the most gorgeous form of chisel made, and the best Japanese chisels seem to stay sharp much longer.
In use, Japanese chisels aren’t really all that different than Western chisels. There are small differences in how to set them up. But before you dive headfirst into that world, I recommend a good deal of research, because there is a huge gap between the low-end chisels and the pricey handmade ones.
Set Up a Chisel
One of the best reasons to buy premium chisels is they are a cinch to set up. The back is flat, the handle is perfect out of the box and the bevel is square and nicely ground. All you have to do is polish the back, hone the bevel and get to work.
Less expensive, vintage or abused chisels generally need work. You might not have to perform all the steps below, so take stock of each chisel first.

Great, good & bad. When the scratches cover the entire back (left), it is flat. When the scratches are at the tip and near the handle (center), it is hollow. When the scratches are in the center of the blade only, it is bellied. Bellied blades can be hard to set up.
The first thing I do is to flatten and polish the back of the chisel. This can take a moment or a day. To asses the state of the back, I first rub it on a #1,000-grit waterstone (or the equivalent) to see how wonky it is. As I work the back of a chisel, I always plunge it on and off the stone. Working the back side-to-side can result in the back becoming convex, especially with narrow tools.

In & out. To flatten the back (especially with narrow chisels), it’s best to plunge the tool onto and off of the stone rather than working side to side.
After about 30 seconds on the #1,000-grit stone, I look at the back. You’ll see one of three patterns: 1) The scratches cover the entire back, meaning your back is flat. 2) The scratches will be at the tip and up near the handle only, meaning your back is hollow. 3) The scratches are in the middle of the length of the blade, meaning your chisel is bellied. (See the illustration above.)
If the back is flat or hollow, polish it. I use #4,000 grit and finish with #8,000. And then you are done with the back.

Remove metal & tedium. Grinding out a bellied back can save hours of work. Once again, a flat platform around the wheel makes this operation a cinch.
If the chisel is bellied, I’ll put a straightedge on it to see how bad the situation is. If the straightedge makes close contact, I’ll try to fix the situation with some coarse belt-sander paper stuck to a flat surface, such as my table saw’s wing or a piece of granite flooring. I use the same plunging strokes on the coarse paper and hope for the best. If I manage to get it flat enough so the scratches reach the tip of the tool, I’ll then move to the #1,000-grit stone and polish it up.
If it seems hopeless, I take the chisel to the grinder and attempt to grind out the belly. This is pretty easy (see the photo above), but the results are generally not pretty unless you are a maestro at the grinder.
Other Modifications
If your chisel has chunky flats on its long edges and you plan to cut dovetails, you’ll want to grind these bevels to make the flats thinner along the blade. You can do this operation with a file, but it’s tedious. Set up a grinder and you’ll find it’s fast work.
After grinding the bevels (or just inspecting them), take some fine sandpaper or a burnisher and break any sharp edges along the shaft of the blade. Sharp edges will shred your hand while chopping dovetails.
Now turn your attention to the handle. If it’s uncomfortable or plastic, I recommend you turn a new handle or at least modify the existing one. Most plastic handles are too heavy, so cutting off 1⁄2” to 1″ from its end will greatly improve the balance.

Farewell plastic. I’ve turned a new wooden handle for this chisel that is the same shape as the old plastic one.
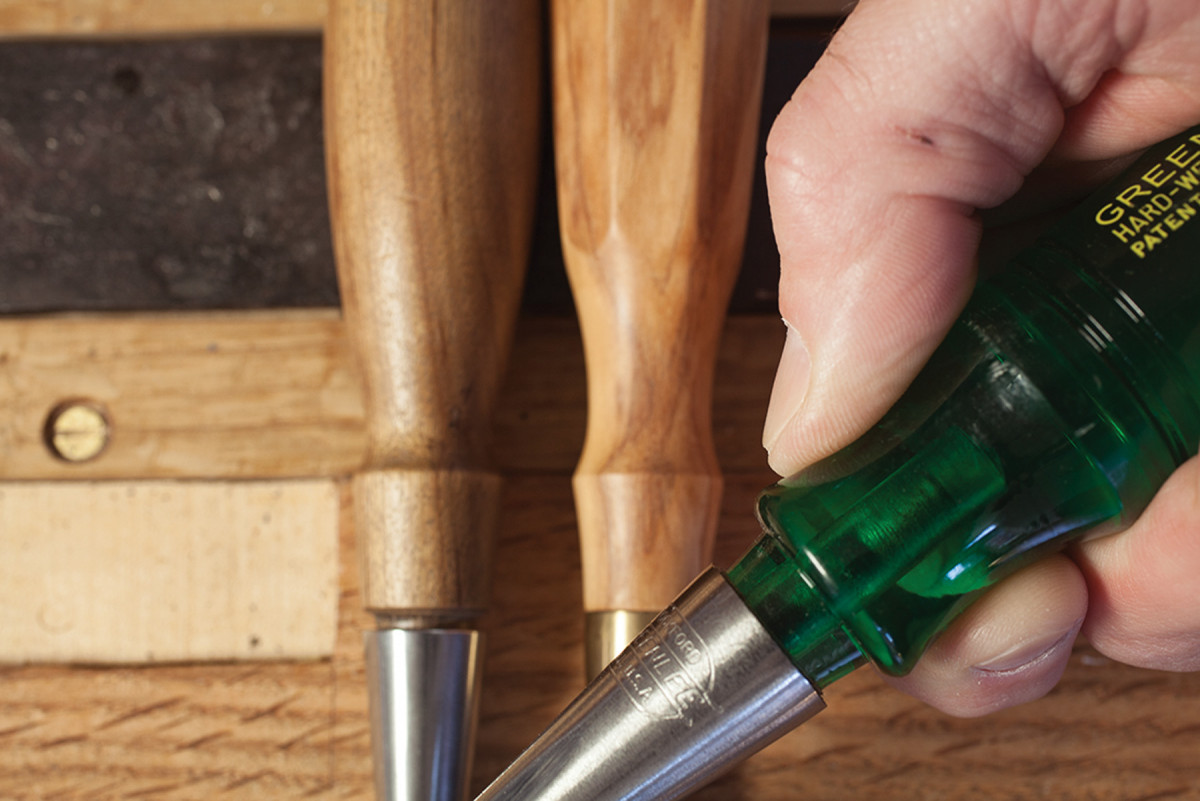
Many inexpensive wooden-handled chisels are covered with a thick skin of goopy lacquer. Remove this with solvents, scraping or sanding. Many people leave their handles bare, but if you want a finish, I recommend a couple coats of oil. Slick film finishes aren’t my favorite thing in the world, and I think they make the handle a tad more difficult to grip.
If you have a Japanese chisel, you might need to set its metal hoop on the end of the handle. There are lots of detailed tutorials on the internet, but here’s the quick-and dirty: Remove the hoop, then hammer the handle in the hoop area to compress the wood to receive the hoop. Tap the hoop on the handle so it’s about 1⁄8” or 3⁄16” from the end. Soak the end in water for about 20 or 30 minutes to make the wood swell. Use the chisel, which will mushroom the end of the wooden handle over the hoop.
Sharpen the Bevel
Check to make sure the bevel is relatively square to the sides of the tool. If it’s out by more than a couple degrees, regrind the bevel square. Note that, with some homemade chisels, the long edges of the tool might not be parallel, so you’ll just have to split the difference.
Most chisels are ground with a bevel of 25°, then honed. You can hone the entire bevel (a Japanese practice), or just hone the tip, which is called a secondary bevel. Honing just the tip speeds sharpening and increases the angle of the edge in relation to the back.
Most people hone their chisels somewhere between 30° and 35°. Some woodworkers tune up their chisels for specific jobs. Wide paring chisels get ground at 20° and honed at 25° (or less). The middle sizes are ground at 25° and honed at 30°. The small sizes for chopping get ground at 25° and honed at 35°.
Lower angles are easier to push and higher angles retain their edge longer.
I don’t mess with this. I find that sharpness is more important than the cutting angle. So I grind all my tools at 25° and hone at 35°. It keeps things simple and I can pare and chop without any problems.
When I hone, I start with #1,000 grit, then proceed to #4,000 and finish with #8,000. Many woodworkers skip the #4,000 and go straight to the #8,000. Others stop at #4,000. Experiment.
Chisel Safety
The most serious workshop accidents I’ve seen were caused by chisels. Preventing accidents is simple: Never put your flesh in the path of the blade. When paring, both hands should always be on the tool. Never hold the work with one hand and chisel with the other.
With the serious lecture out of the way, we can learn how to use the versatile chisel.
Use a Chisel
Most chisel applications can be divided into three operations: paring, light chopping and heavy chopping – usually mortising. Each operation has different rules and tricks to ensure the chisel does what you want it to.
The first rule applies to all three operations: Chisels want to travel through the wood at an angle that bisects the bevel. So if you have the tip sharpened at 30°, and you drive the chisel straight down into a board, it will try to travel at an angle of 15° to the back of the tool. (See the illustration below if you are scratching your head.)

A little geometry. When wood presses against both the bevel and the back, the tool will plunge into the wood at an angle that bisects the bevel. The black arrow indicates the desired direction of travel. The red arrow indicates the direction the tool wants to go.
You can overcome this tendency by removing wood in front of the bevel. If the wood offers minimal resistance, then the chisel will travel straight down.
So when paring, the trick is to remove as much material as possible before making the final paring cut. Think of a drawbored peg that you need to flush up to the surface of the leg. First you should saw away as much of the peg as possible. Then take light paring cuts with a chisel to reduce the peg so it’s just a whisker proud. Then you place the back of the tool flat on the leg and pare away the last bit.
The other trick when paring is to use a slicing cut. This reduces tearing. A slicing cut is where you move the chisel both forward and sideways in the cut. It takes a little practice to master, but it’s the best way to tame tricky grain and will up your carving game as well.
When paring, put your off hand on the blade to steer it in a slicing cut. Use your dominant hand to push the tool forward.
Make Your Own Butt Chisels

Instant butt chisel. Removing the handle of your socket chisel gets you into most tight spaces.
Butt chisels can get in tight places that bench chisels cannot. But I don’t own butt chisels (nor do I want to). That’s because I can transform my socket bench chisels into butt chisels by removing the handle with a few taps. When I’m done, I can then tap the handle back into the socket.
This is why I don’t recommend gluing your handles into your sockets. If you find a handle comes loose too easily, spray the handle’s tenon with hairspray. Let it dry and knock it into the socket. That will improve the grip.
Light Chopping

Slice while paring. It’s usually best to use a slicing cut while paring. Move the chisel both forward and laterally to do this. My left hand is moving the chisel to my left.
The most common light-chopping operation is removing waste between your tails and pins when dovetailing. Your off hand holds the chisel like a pencil. Your dominant hand drives the tool with a mallet.
Because you are driving straight down into the wood, the chisel will want to travel in a direction that bisects your bevel’s angle. That is why many beginners cross the joint’s baseline when chopping out their dovetails – they leave too much wood on the bevel side of the tool and the tool moves across the baseline, ruining the cut.

See the 90°. If you cannot see the relationship of the back to the work, you are likely to undercut or overcut. Sit or stand so you can see this important angle when chopping.
Just like with paring, the way to avoid this problem is to remove as much waste in front of the bevel as possible before you put your chisel in the baseline. One way to do this is by sawing away the majority of the waste with a fret saw or coping saw. Another method is to chisel away the waste before placing the chisel in the baseline.

The rule of halves. To avoid crossing the baseline, remove half the waste.

Then remove half of the remaining waste. Continue this cycle until you cannot remove any waste. That’s when you drop your chisel tip into your baseline.
When I teach students to cut dovetails, here’s the scheme we follow to ensure they don’t cross the baseline. When you chisel away the waste, first chop half of the waste away. If there’s 1⁄4” of waste left, chop away 1⁄8“. Then repeat the operation. Chop away half of the 1⁄8” of the waste (1⁄16“). Then chop away half of the 1⁄16“. Keep going until you cannot remove half of the waste. And that’s when you drop your chisel’s tip into the baseline.

A low-angle chisel. This low-angle chisel is great for the final chop when dovetailing. It’s fussy. But some customers pay for fussy.
The other trick involves where you sit or stand when chopping (I prefer to sit). It’s best to sit to the side of the chisel so you can see that the back of the chisel is 90° to the work. If you sit in any other orientation, you cannot tell if the chisel is dead vertical and you are unlikely to cut straight down.
One more thing about light chopping. Sometimes the wood will come out in chunks that are below the baseline. Usually this isn’t much of a problem because it’s inside the joint. In some softwoods the chunking can be so bad that it might show when the finished piece is planed up.
The solution is to use a chisel with a really low angle (usually between 20° and 25°) for the last couple chops. It’s kind of a pain and requires another chisel to maintain, but that’s the best way I know to avoid the problem.
Mortising
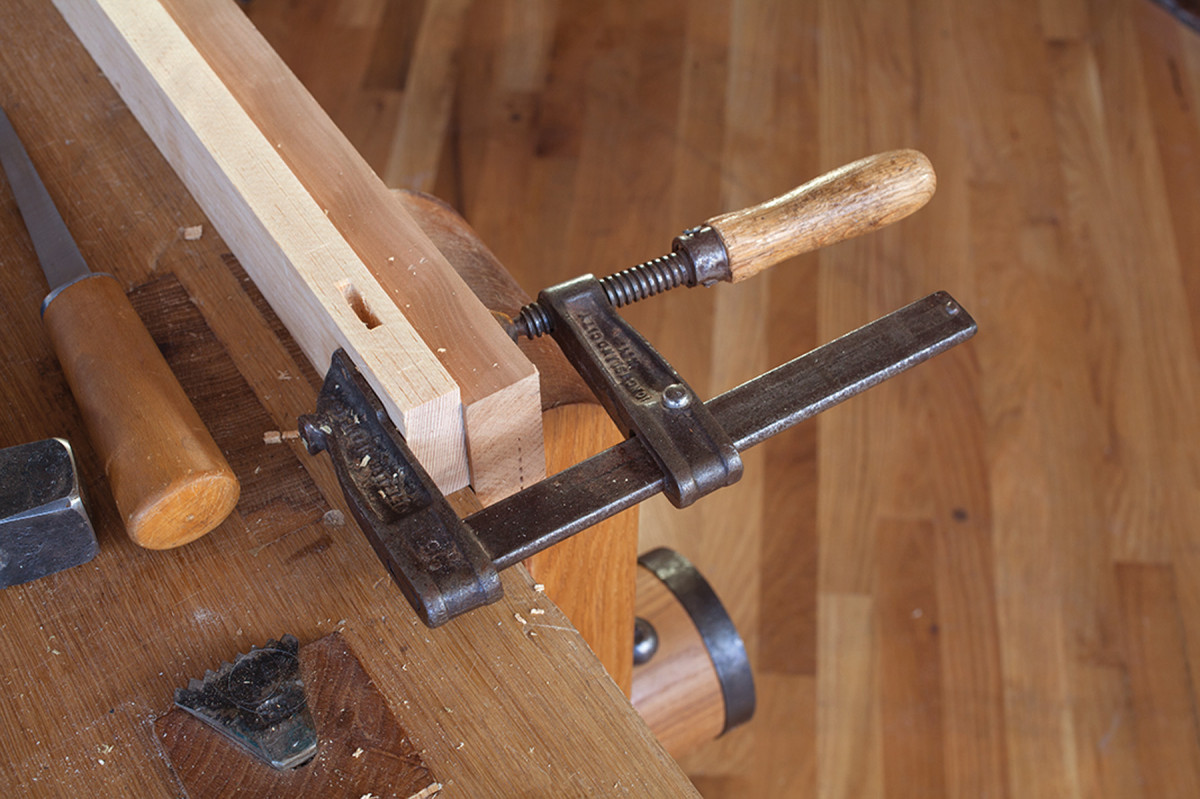
A solid mortising setup. This is a fairly common English way to cut mortises. Note that the side pressure from the cramp, I mean clamp, helps prevent the work from splitting during mortising.
There are lots of ways to cut mortises by hand; this is my favorite method. Just like with light chopping, it’s important to stand in the right place. When mortising, you don’t want to stand to the side of the tool. Instead you want to stand facing the bevel of the tool. That will ensure your chisel doesn’t wander left or right, making your mortise wider than intended.
Another important note: I don’t recommend mortising in your vise. It’s better to work on the benchtop over a leg. See the photo above for a simple setup for mortising that works well.
I first learned to mortise using the “central V” method, which is where you drive down hard in the center of the mortise with the bevel facing you. Then turn the chisel so the bevel faces the far end of the mortise and drive down about 1⁄8” away from the first strike. Turn the chisel around and drive down about 1⁄8” from the first strike, but this time on the edge of the strike that is closest to you. The bevel of the tool should always face the ends of the mortise at this stage.

‘Central V’ is a friend to me. Here you can see how the cut progresses with the “central V” mortising method. At left the V is first made. The cut progresses at center. Then you turn the bevel around to clean up the ends of the mortise at right.
When you get to your finished depth, turn the chisel so the bevel faces the mortise, and chop down gradually to get to the knife lines at the ends of the mortise.
At the end, you might have a lot of debris at the bottom of the mortise that is difficult to lever out without damaging the ends of the mortise. This is where the swan-neck chisel saves the day. Another option is to just keep chopping until the mortise is deeper and the debris is not in the way of the tenon.
Mallets: Round, Square & Metal

Common mallets. Most woodworkers prefer round, square or metal mallets (which can be round or square). This is 100-percent personal preference.
Mallets are objects as personal as your knife. And working with someone else’s mallet feels like wearing their underwear: very weird.
The three most common choices are wooden mallets (both round- and square-headed) and metal ones. Square-head wooden mallets come in two common sizes: about 11 ounce or 16 ounce. They are inexpensive and easy to make, but (in my opinion) a bit bulky.
My favorite chisel mallet is a 16-ounce round mallet that is infused with resin so it’s tough and compact. The only downside to these resin-infused mallets is they are expensive.
Japanese and some English joiners use metal mallets; I use one for mortising that is about 21⁄2 pounds. The weight of the head does the work and it doesn’t destroy the handle (promise).
My best advice on mallets is not to take anyone’s advice. Try some out for yourself at a woodworking store or show. The answer is in your fingers.
Hinge Mortise

Chop, chop. As with any light chopping, sneak up on your layout lines so you don’t cross them. Remove all the waste in the middle before paring or chopping on the knife lines.
The other common type of mortising is actually light chopping: making a hinge mortise. The trick to accuracy is to remove as much waste as possible in front of the bevel before chopping out the layout lines that define the extant of the hinge leaf. First break up the surface of the mortise with light chops. Remove that layer of waste with a router plane.
Then sneak up on the layout lines using the same method as for dovetailing (take half the waste until you cannot take half of the waste). Be careful when you are chiseling parallel to the grain. Chopping here might split the work. I’ll usually use hand pressure to pare away the section of the mortise that is parallel to the grain.
The Most Important Trick
Whenever you are having trouble with your chisels, stop and sharpen them. That fixes about 90 percent of problems. It also gives you a few minutes to clear your head and perhaps think of a better solution to the trouble you are having.
I never allow my chisels to come anywhere near dull. And this strategy ensures my problems will only be with my chiseling technique. It also allows me to forget about my tools’ edge retention properties. They never see dull, and I never want for a chisel that costs as much as a table saw.
Here are some supplies and tools we find essential in our everyday work around the shop. We may receive a commission from sales referred by our links; however, we have carefully selected these products for their usefulness and quality.


