We may receive a commission when you use our affiliate links. However, this does not impact our recommendations.
Make your own door and drawer pulls for a custom finishing touch on your work.
It’s the grip that counts. A limp handshake is as bad as a poorly designed handle. OK – that’s a stretch. But there is something to a well-designed handle that invites you to explore a cabinet or drawer. Handles are usually the first thing that people touch on a cabinet or drawer, and it’s a crucial opportunity for a designer to make a good impression. Yet handles are usually the last thing made for a piece.
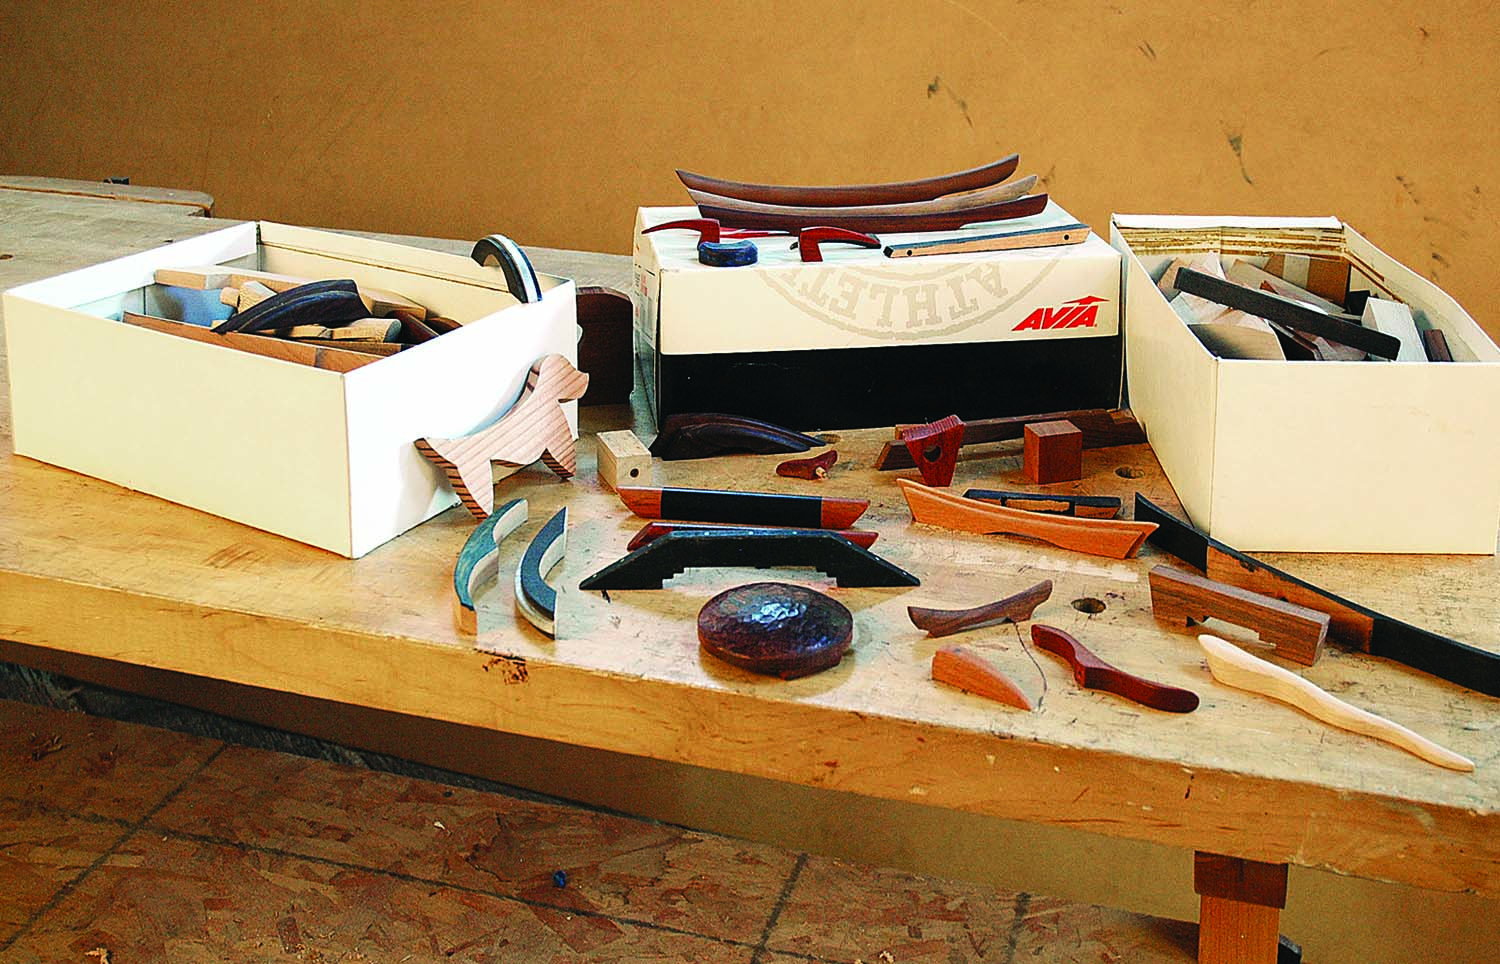
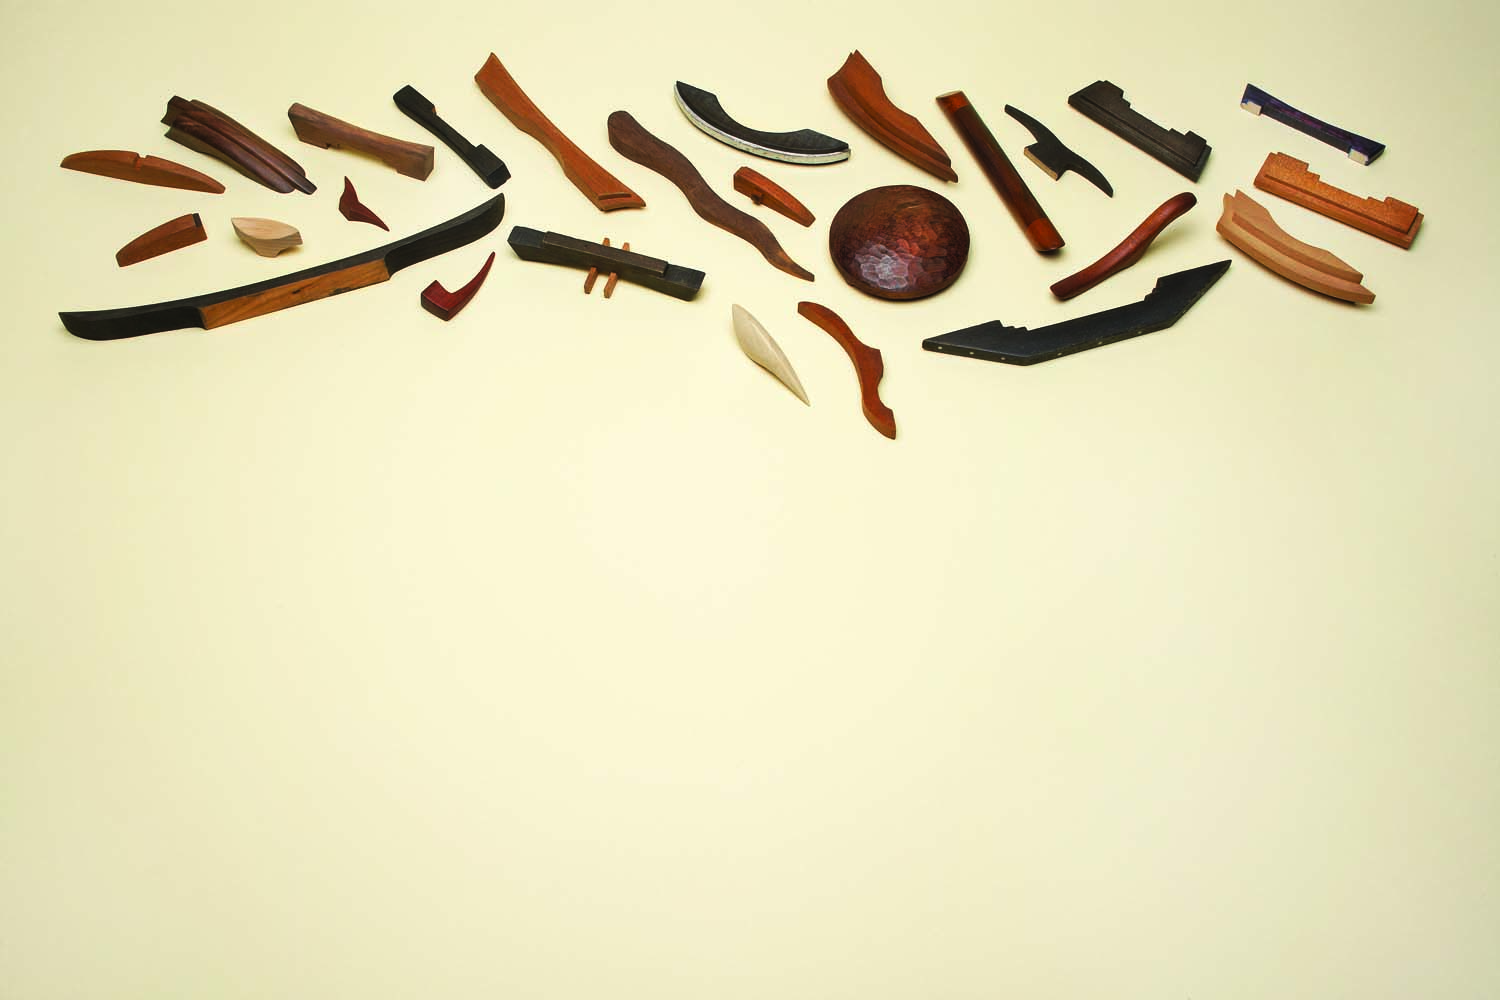
Options. Keep the discards and prototypes for every handle you make – you never know when one of your previous attempts might be just the thing to help you get a handle on a current project.
Prototypes
When I build a cabinet, I stare at it for a few days before deciding what kind of handle makes the most sense. I never design my handles first because I want to get a sense of how the piece feels just sitting on my shop floor.
Handle designs are also subject to the vagaries of my moods and the wood I have – so who can say how they will turn out from one day to the next? One of my favorite handles I made in an hour when I learned of the death of one of our cats that I had renamed Fatboy. He died of overeating of course, but it was sad to see him go nevertheless. That handle, which I made for my tool cabinet, always makes me think of him with fondness.
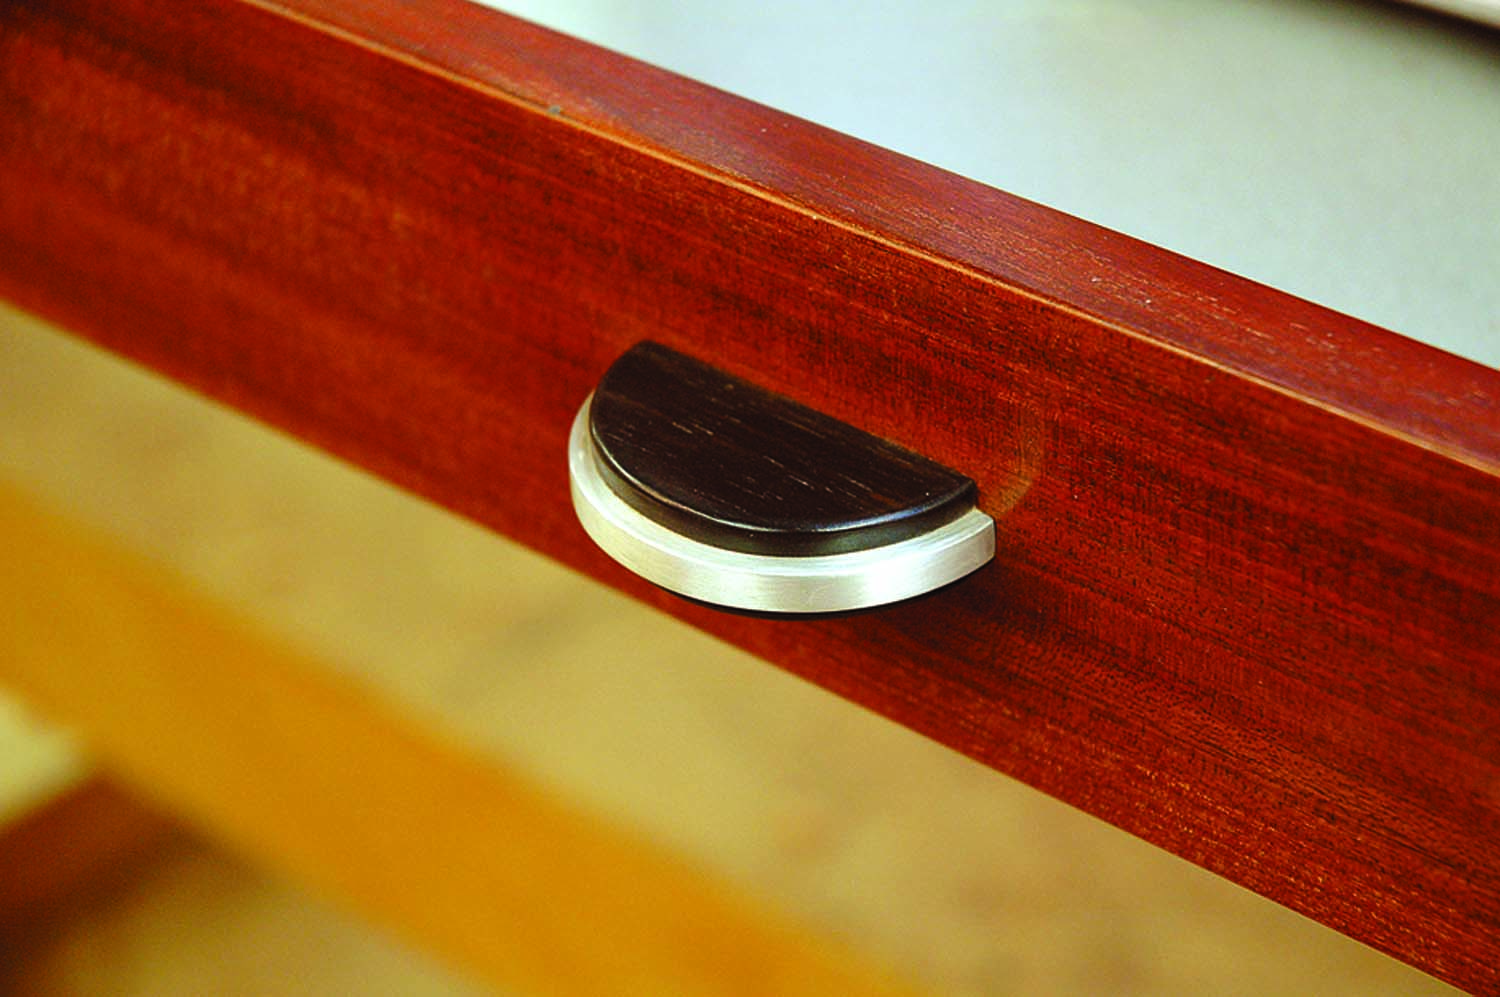
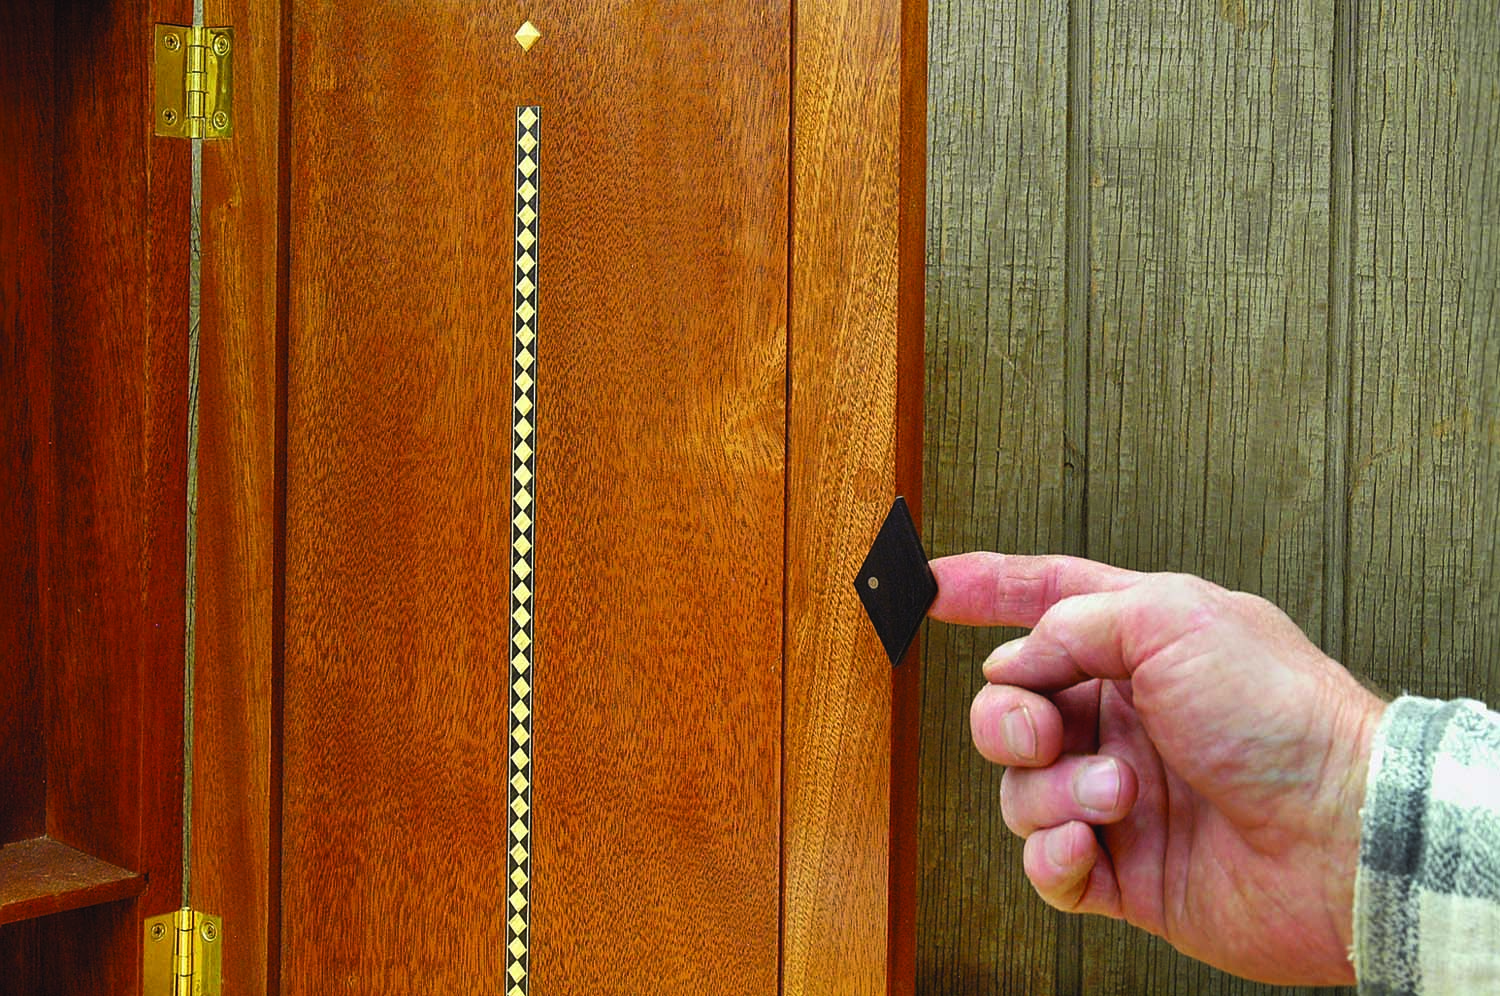
Art deco. This ebony and aluminum pull for a vanity strikes just the right visual chord for the piece to which it’s attached.
If a handle is the finishing touch to a piece, doesn’t this put some pressure on you as the designer to get it right? Darn tootin’ it does – which is why I approach this part of the job carefully. I try out all sorts of possibilities before deciding on the right handle for a piece. To make this job easier I keep all my reject handles, flops, wrong wood choices, good prototypes and extra successes in two boxes. These are all the possibilities that are terrific – but maybe not for my current piece. This gives me two ready boxes of samples for perusal, and allows the chance to start playing with ideas already fleshed out. It’s a huge step forward in the design process.
Making prototypes may seem like a waste of time, but this effort will in the end save you time and wasted precious wood. Try out your possibilities in scrap wood and you will see if the elements of design – form, proportion, color and contrast – are working together in your handle design.
Designing Handles
There are, of course, functional considerations to a handle. But I wouldn’t start my designing there. Start with ideas, whimsy, cocktail napkin sketches, tracings in the sand at the beach. This is the same sort of approach I take for designing cabinets, so I continue this kind of brainstorming for the handles.
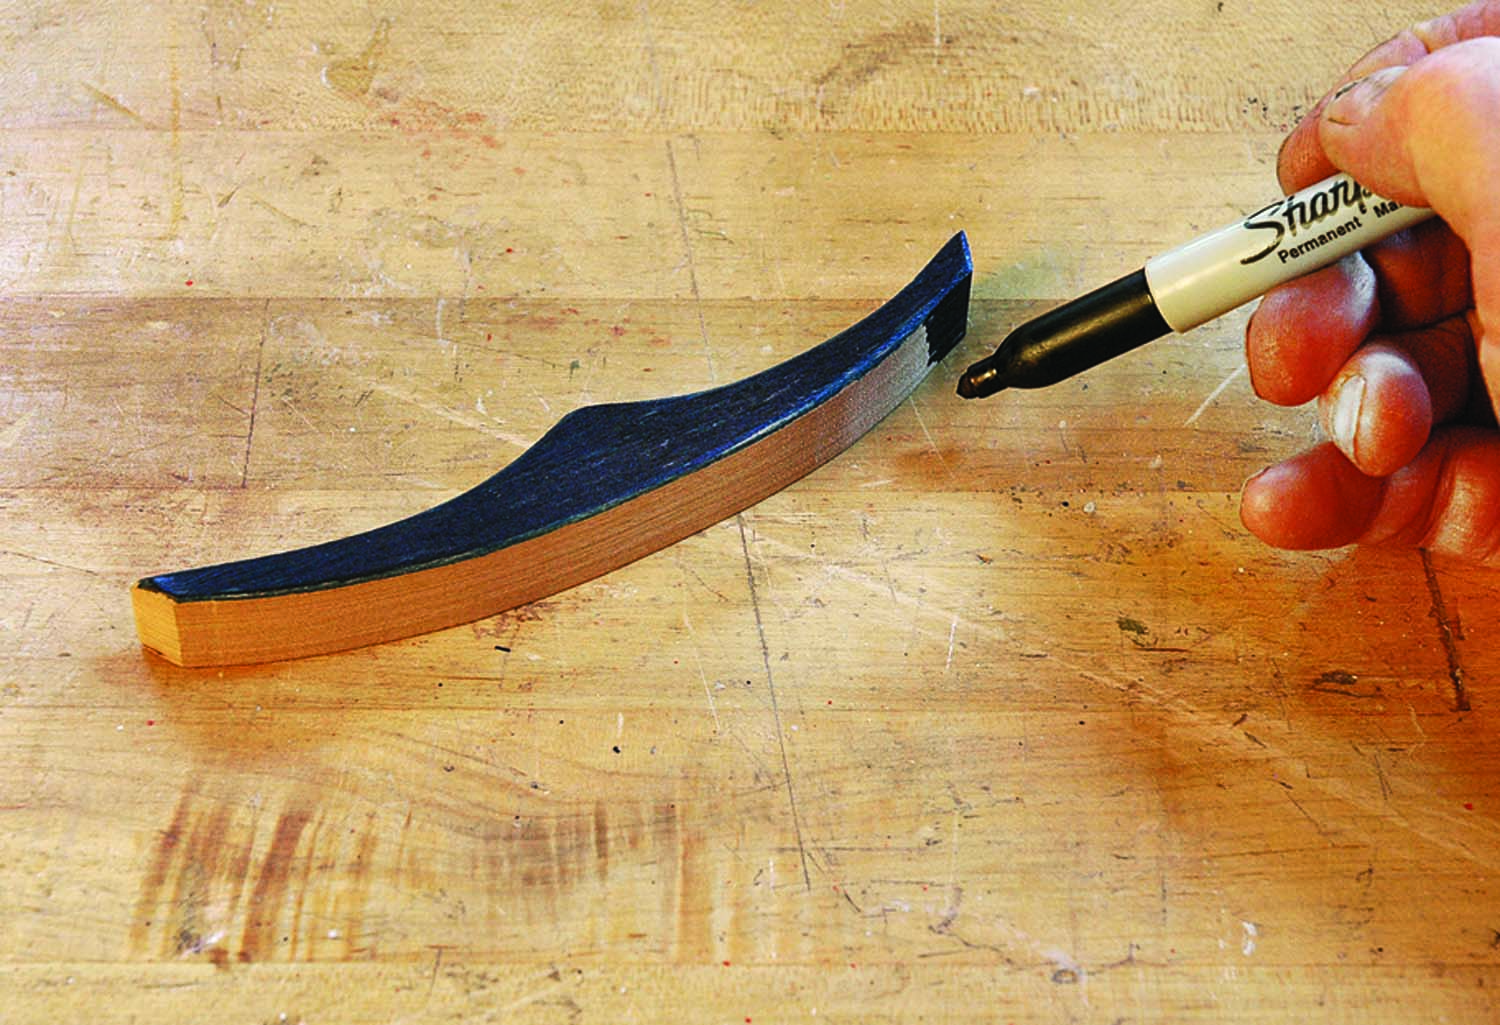
Simulate. Don’t use good wood for prototypes – use something inexpensive and color it with a marker to simulate your actual stock (in this case, a black marker makes poplar scrap look like ebony).
Design starts with a sense of wonder. I wonder what this would look like? Or that? Begin sketching, playing with your mashed potatoes, shaping clay or carving up blocks of cheddar cheese. Whatever medium helps you to generate ideas is the one to use. (You can also eat your failures if you so choose.)
I sketch first just to get a sense of forms and to generate ideas. You never know what may emerge from your doodles. They’re important.
Pay attention to the already existing shape and details of your piece. Make the handle form recall these forms or shapes. It doesn’t have to be an exact match to a shape. But is the handle complementary or is it fighting for top billing? Does it have the right proportions for the piece? It can’t be too small to see or grip, or so large that it blots out the front of the cabinet.
This is where we get back to function. How big does the handle need to be to grip comfortably? Is it large enough to overcome that new catch you installed? Sometimes a beautiful handle just can’t handle the load. Don’t despair. Put it in your Box of Handles and save it for another piece.
Finally, consider the intention of your handle design. What are you trying to do with it? Is it friendly, austere or highly decorative? Does it offer a nice spot of light on some dark wood or is it in contrast to a white background? Is a sleek art deco sandwich of ebony and aluminum right for the piece?
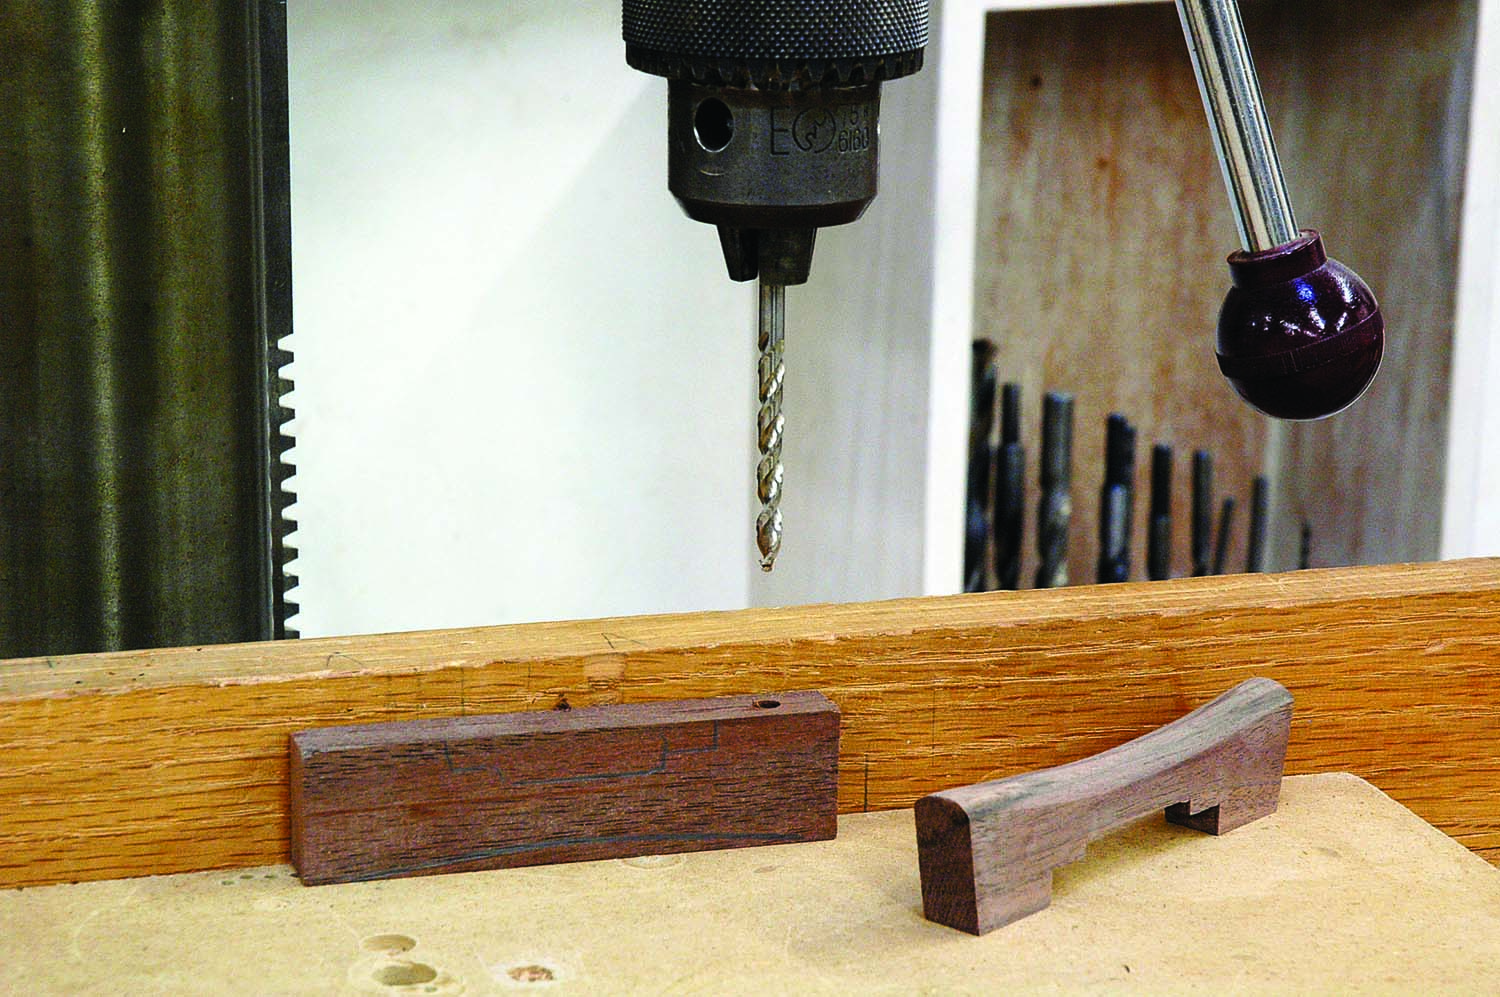
Plan ahead. Decide how you’re going to attach your handles before you shape them – that way, you can drill any necessary screw holes while the blanks are square.
How about a sweeping Japanese-style handle made from walnut that looks like the roofline from a Buddhist temple? These are the things that will make a handle stand out from the surrounding wood and make it welcoming.
Making Handles
Most of the time, I make my prototype handles out of scrap: poplar, alder, walnut or whatever is lying about. Then it’s to my handy felt markers to turn them into either ebony with a black marker or rosewood with a red and then a blue marker. With double-sided tape, I can place the handles anywhere on the piece; that allows me to decide about their size, placement and spacing.
Once I decide on a shape, I have to figure out how I’m going to mount the piece, and I also need an efficient and safe method for handling these small chunks of wood. It is much easier to cut tenons or drill holes for pins into a rectangular chunk of wood instead of into a shaped handle. Plan for this work ahead of time to save yourself some headaches.
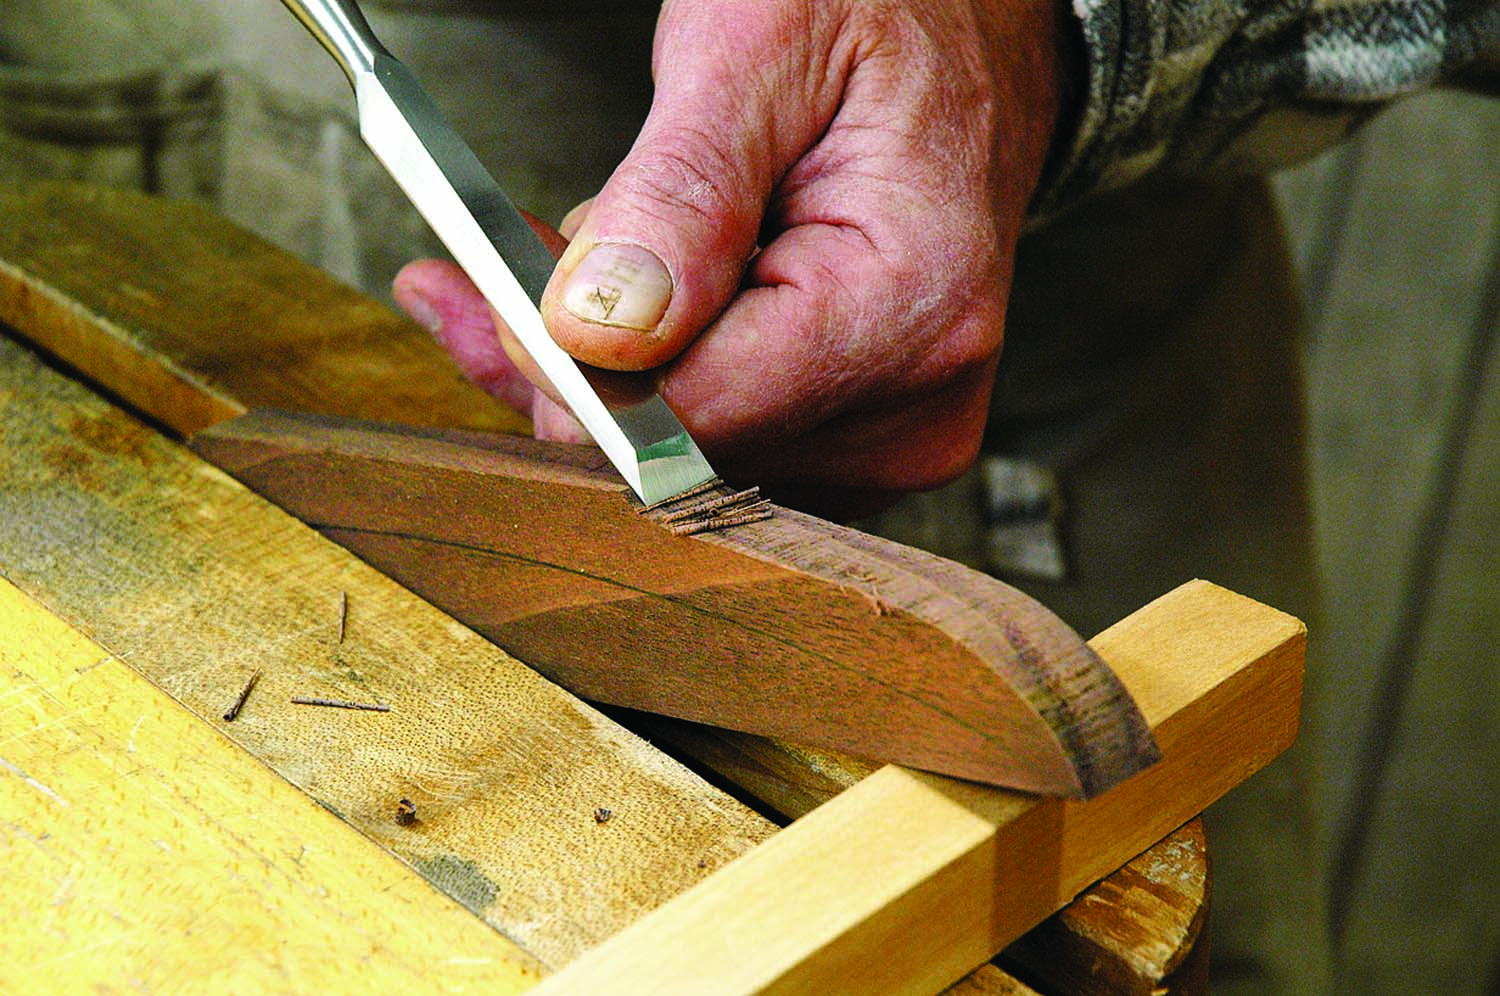
Sharp tip. A sharp chisel can work wonders on sharp curves to erase any sawblade marks or sanding scratches.
Shaping begins for me on the band saw. Using a 1⁄4″ blade I can cut some pretty tight curves and shape close to my layout lines then nibble away wood with the teeth of the blade. I remove the band saw marks either at my spindle sander or at the bench with hand tools. The spindle sander has speed on its side, but it has some limitations, too. You’ll need a coarse grit to get started with your shaping. But then you have to get those scratch marks out. There is also only one point of contact of the sanding drum to the wood. Longer, shallower lines are harder to get fair with a spindle sander.
For really tight curves on a handle, a sharp chisel works remarkably well to pull out filing marks or sanding scratches. Clamp the handle into your vise and when it rotates on you – as it will – just clamp a stick down to your benchtop. The handle will hit that and stop moving, so you can shape with confidence. Lever against the top of the curve with your chisel bevel-side up to scrape away the marks. It will work until you get too far from the pivot point, then the chisel will chatter a bit. But try it for tight curves and you’ll be pleasantly surprised at the results.
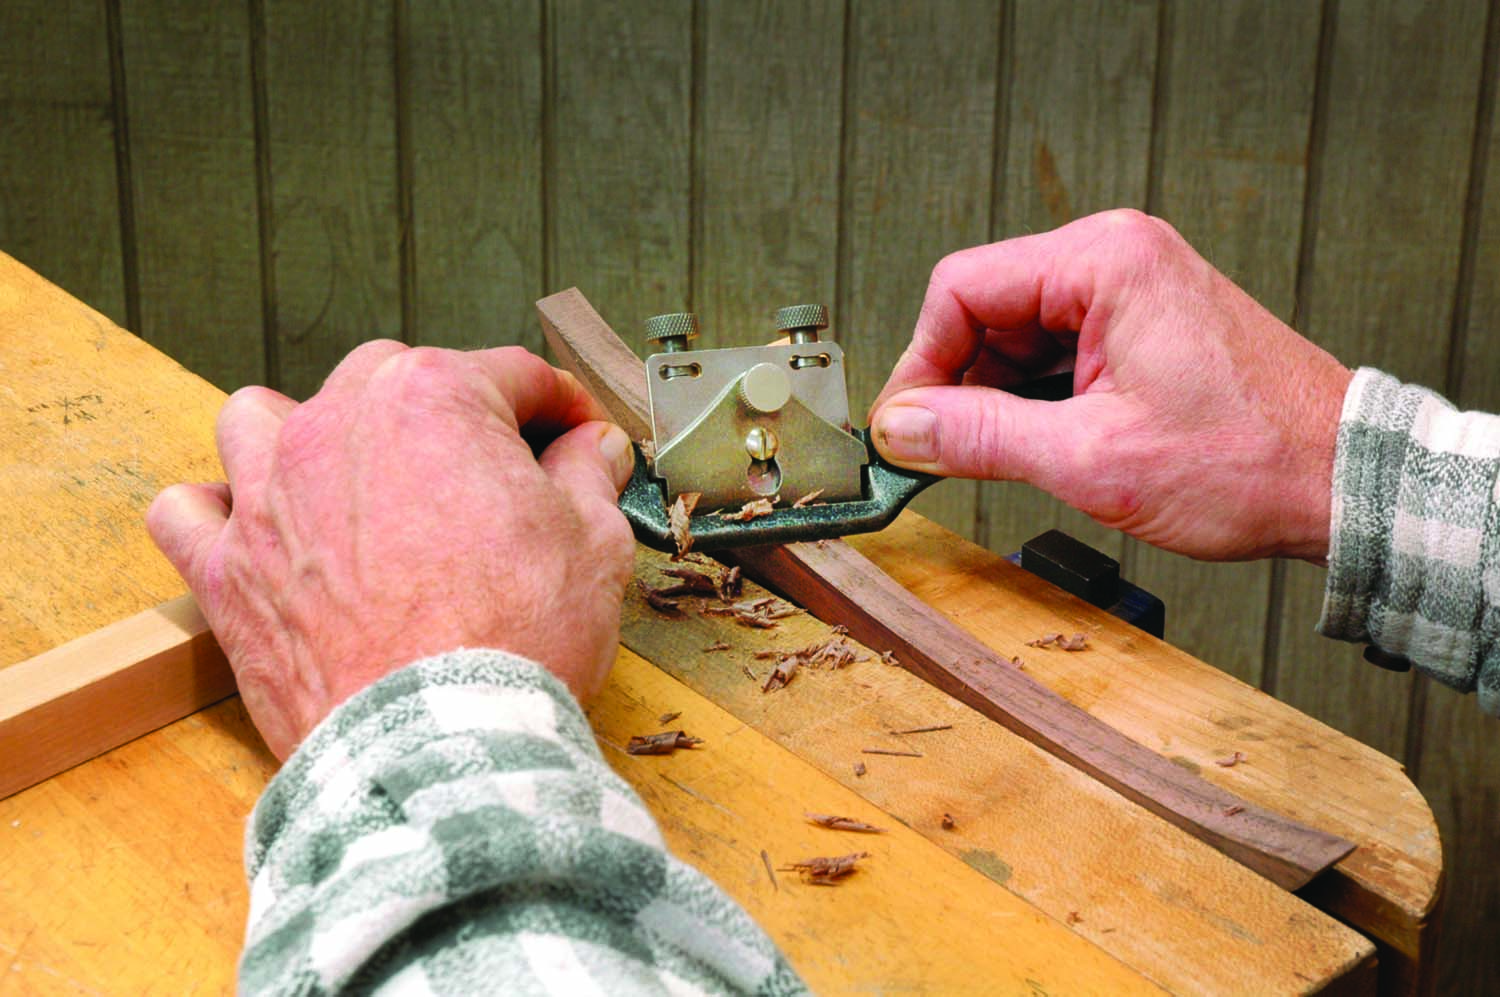
Smooth moves. Angle your spokeshave in the cut to lengthen the amount of blade that touches your work as you smooth curves.
Larger handles or gentler curves that I can hand-shape, I prefer to cut with files, rasps, my spokeshave and, finally, my scraper. I prefer the spokeshave for most curved work just because I can easily fair a curve with it. The tool has a fairly short sole on it, but by angling it you can effectively lengthen that sole and it will just ride on the high spots of the wood to trim those off first.
Hand carving is another method for making a pull. Again, I would make my round or square tenon first before whittling away at the wood. Wear a glove to protect your fingertips and use your sharpest tools so you have more control over the cut.
Attaching Handles

Drill after shaping. If you neglected to drill holes for your screws or pins before shaping your handle, clamp it tightly between blocks to hold it square.
Deciding on how you will mount your handle depends on its particular use and wear factors. Is it likely to be struck, abused or man-handled (by which I mean will you or your children be using it? Or is it for the shop?) Can you run a screw into it without splitting the wood? There are few feelings as annoying as splitting an intricately shaped handle. If you are gluing the handle in place with a tenon, what are the odds that it’s going to not fully seat and you’ll need to put a clamp on it? Because it’s woodworking, I’d say the odds are good you’ll encounter challenges. Can you make a clamping caul that will put pressure where you need it – without that pressure splitting the piece? Think about these things when getting ready to fit a handle.
Screws are the simplest method for attachment. Mark out your cabinet door or drawer front for the screw centers but drill a hole big enough for the screw to fit through comfortably. If you have problems with accuracy, drill these holes oversized so you can make adjustments. If you use brass screws for attachment, run a steel screw first to cut the threads into the handle. On all tough woods and especially on hard exotic woods, drill a pilot hole as big as the root diameter of the screw – maybe even one size larger for the tough woods, just to avoid splitting.
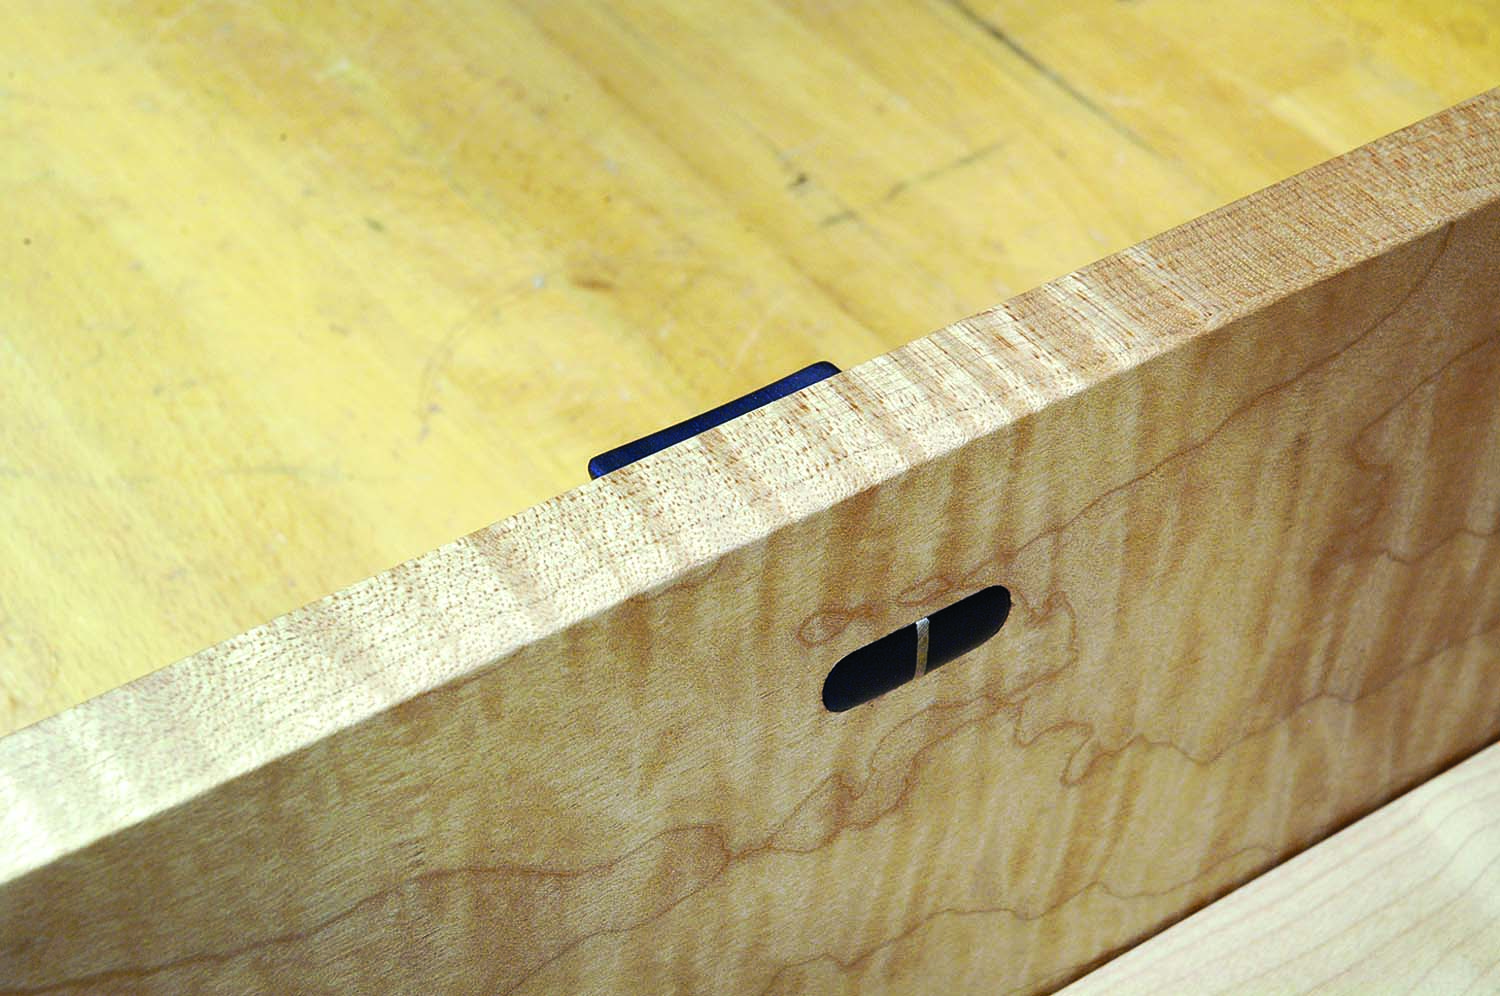
Foxed wedge. If your handle is attached with a dowel, you can wedge it in place by cutting a slot and then insert a wedge loosely in the slot. When the handle fully seats and the dowel bottoms out in the hole, the wedge will be pushed farther into the dowel and spread it for a tight fit.
Dowels are used with glued-on handles when you need some extra mechanical strength. When using pins, drill your handle before shaping. (If you missed this step or really need to shape a handle first, clamp it between two blocks of scrap the same height and then drill it for holes.) Hold the handle up to the cabinet, mark hole centers then drill for your pins. Glue the pins into the handles then check their fit into the cabinet or drawer front. You can shave a little off a misplaced dowel and still have it hold just fine.
In repair work when fixing shrunken tenons, or perhaps with undersized dowel-pin stock, you may have to go to another method of attachment. Fox wedging or blind wedging works great if you plan it out. Make your tenon or pin shorter than the full depth of the hole. Cut a slot in the tenon about two-thirds of its length. Make a wedge as wide as the diameter of the hole and long enough to fit in the bottom of the hole. The wedge pushes on the bottom of the mortise and into the tenon to wedge it as it enters.
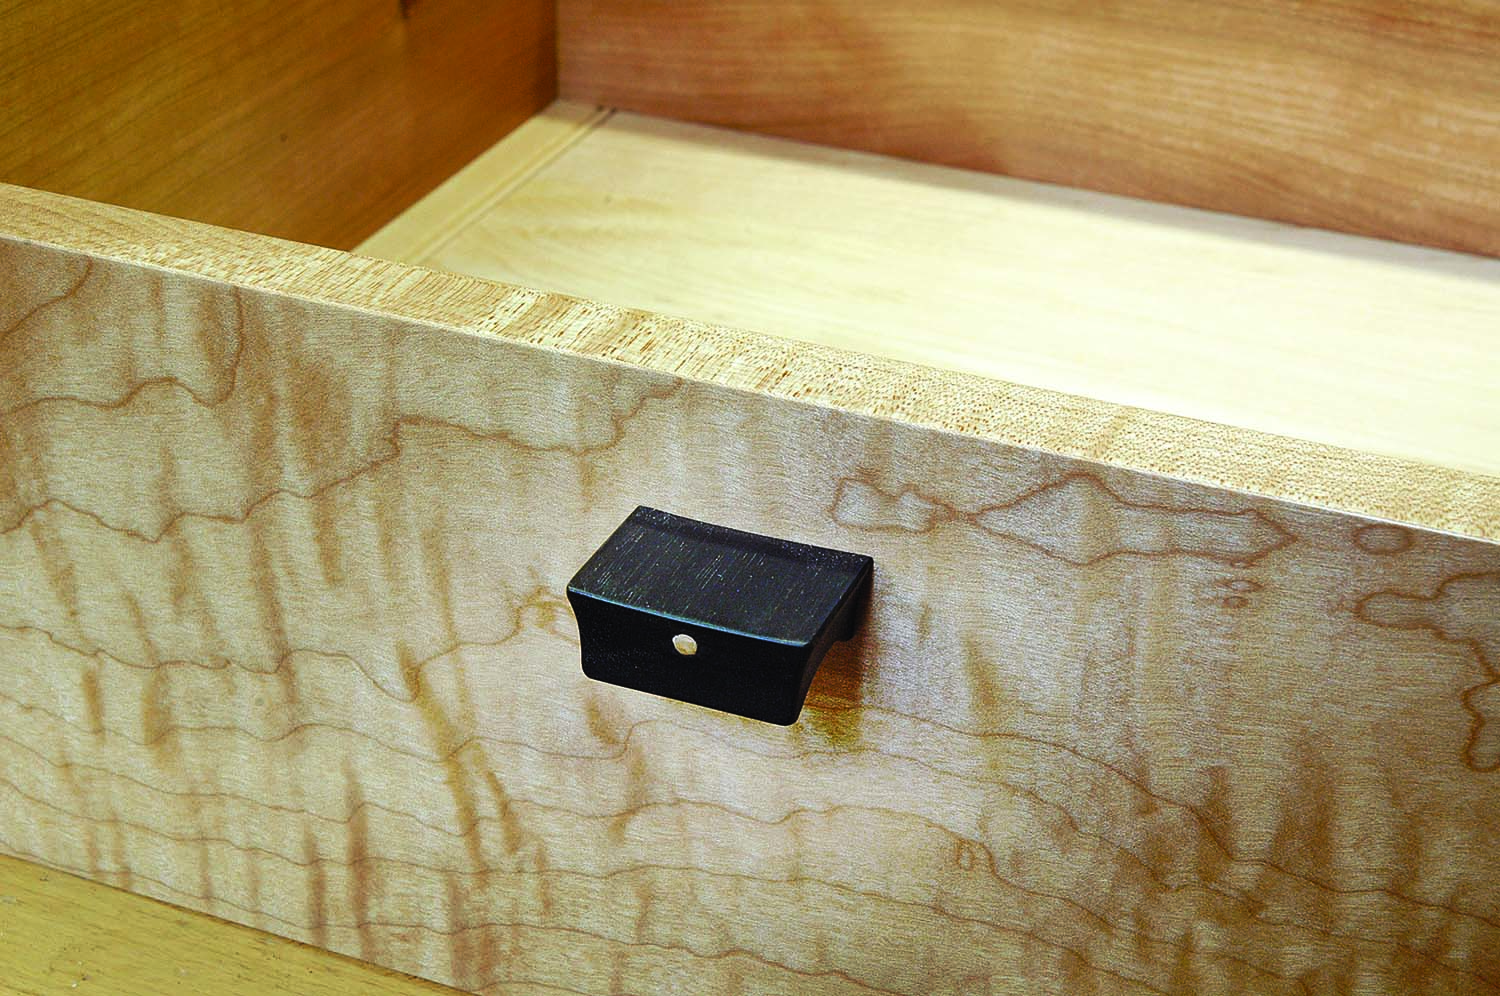
Inlaid. The handle becomes a seamless part of a door or drawer if inlaid.
Mortising a handle in place requires some nerves of course. You cut a hole right in the middle of your door or drawer at the end of a long process (but remember that you can always make a bigger handle to cover any errant cuts).
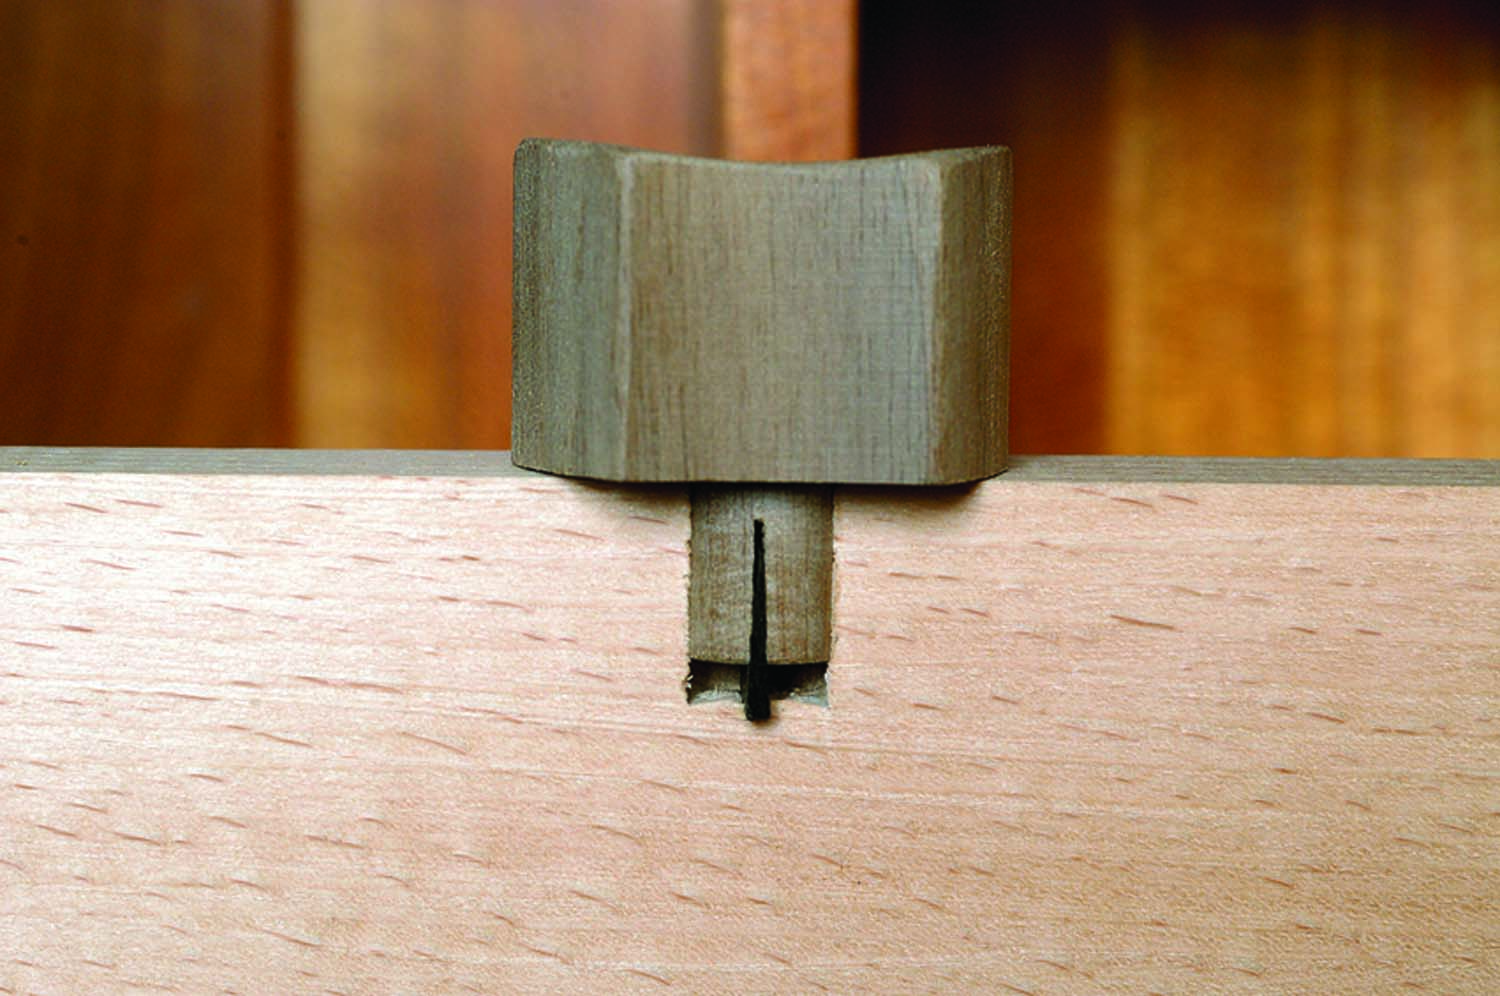
Mark out the position of your mortise and rout or chop it through. A wedged tenon not only looks nicer but it imparts better strength.
For an inlaid handle in the edge of a door, use rubber cement or hold your handle in place to mark out its position on the door or drawer. Mark out its edges carefully with a marking knife. I rout to depth, but you may just want to hand chop to depth. Check your fit before gluing the handle in place.
Finishing Touch
Wedged through-tenon. A handle attached with a wedged through-tenon adds visual interest on the inside – and it will stay in place.
It’s small wonder that people reach for a handle first. They approach a cabinet in two stages, sizing up the form immediately. This is perhaps unconscious, but people decide fairly quickly if they like a cabinet – or not – first by its form. If they do like it, then they go to touch the piece. This is where you, as the designer, get to direct them. Where do they put their hands? When they touch the handle, do they handle it with care and awareness and a sense of discovery – or are they just grabbing a pull?
Are they grabbing something that’s been stuck on and there it is, open me up? Where someone puts their hand on a cabinet or drawer is important and the handle is crucial to this meeting.
Gary is director of the Northwest Woodworking Studio in Portland, Ore. (NorthwestWoodworking.com).
WEB SITE: Visit the web site for the Northwest Woodworking Studio.
ARTICLE: Read Gary’s “Jasmine Jewelry Box” article.
Here are some supplies and tools we find essential in our everyday work around the shop. We may receive a commission from sales referred by our links; however, we have carefully selected these products for their usefulness and quality.