We may receive a commission when you use our affiliate links. However, this does not impact our recommendations.
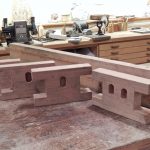
 Much of the furniture found in the Gamble House living room has a cloud lift pattern detail on all four sides, along with a carved pattern matching this detail. The cloud lift shape can be accomplished by template routing, but the corresponding carving requires a few more steps.
To produce repeatable results I created a routing template that uses a 3/8” guide bushing and ¼” core bit. To create the template, use a ½” piece of MDF or Plywood that is large enough to support your router, allow for the router to travel and not touch the clamps you will use to clamp it and the piece down.
Steps to make this template from the left side:

1. Transfer the 45 degree cloud lift pattern found in your part to the template
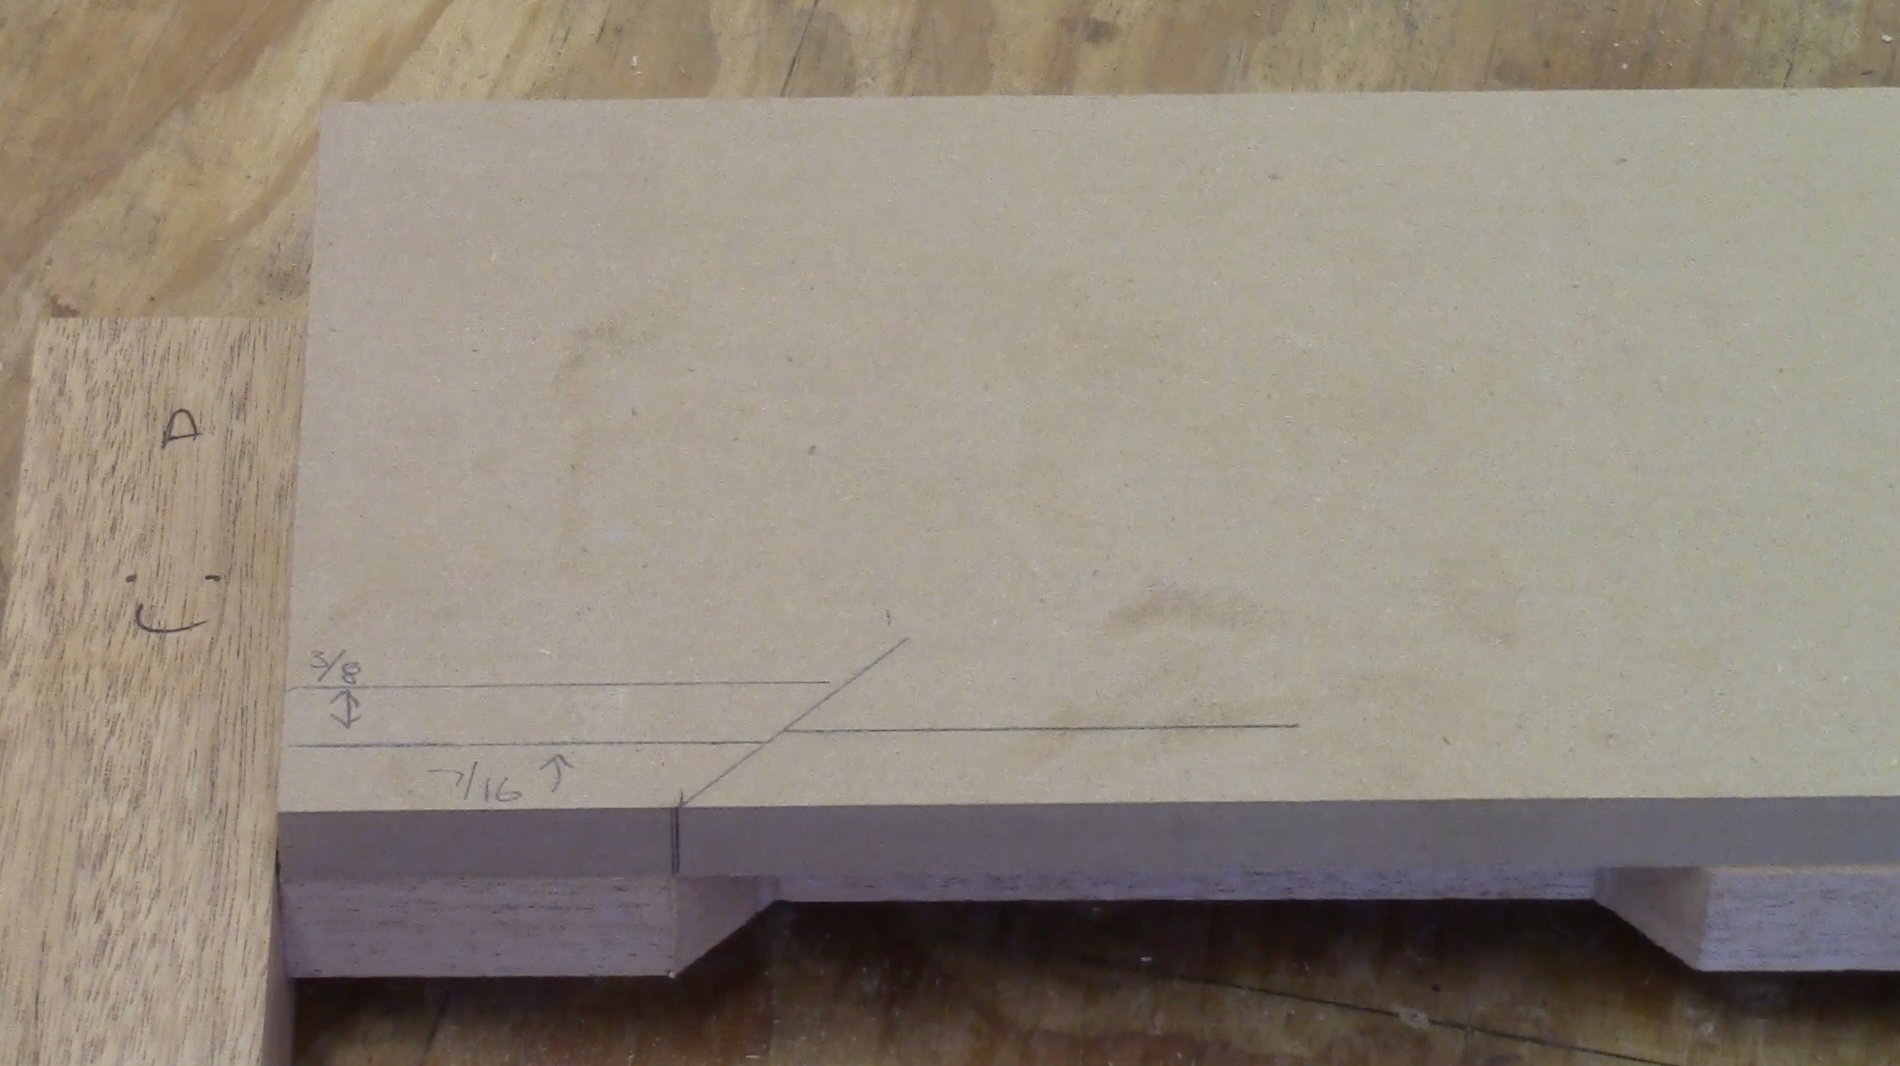
2. Draw a line 7/16” up that connects to your angle and another line 3/8” above this line
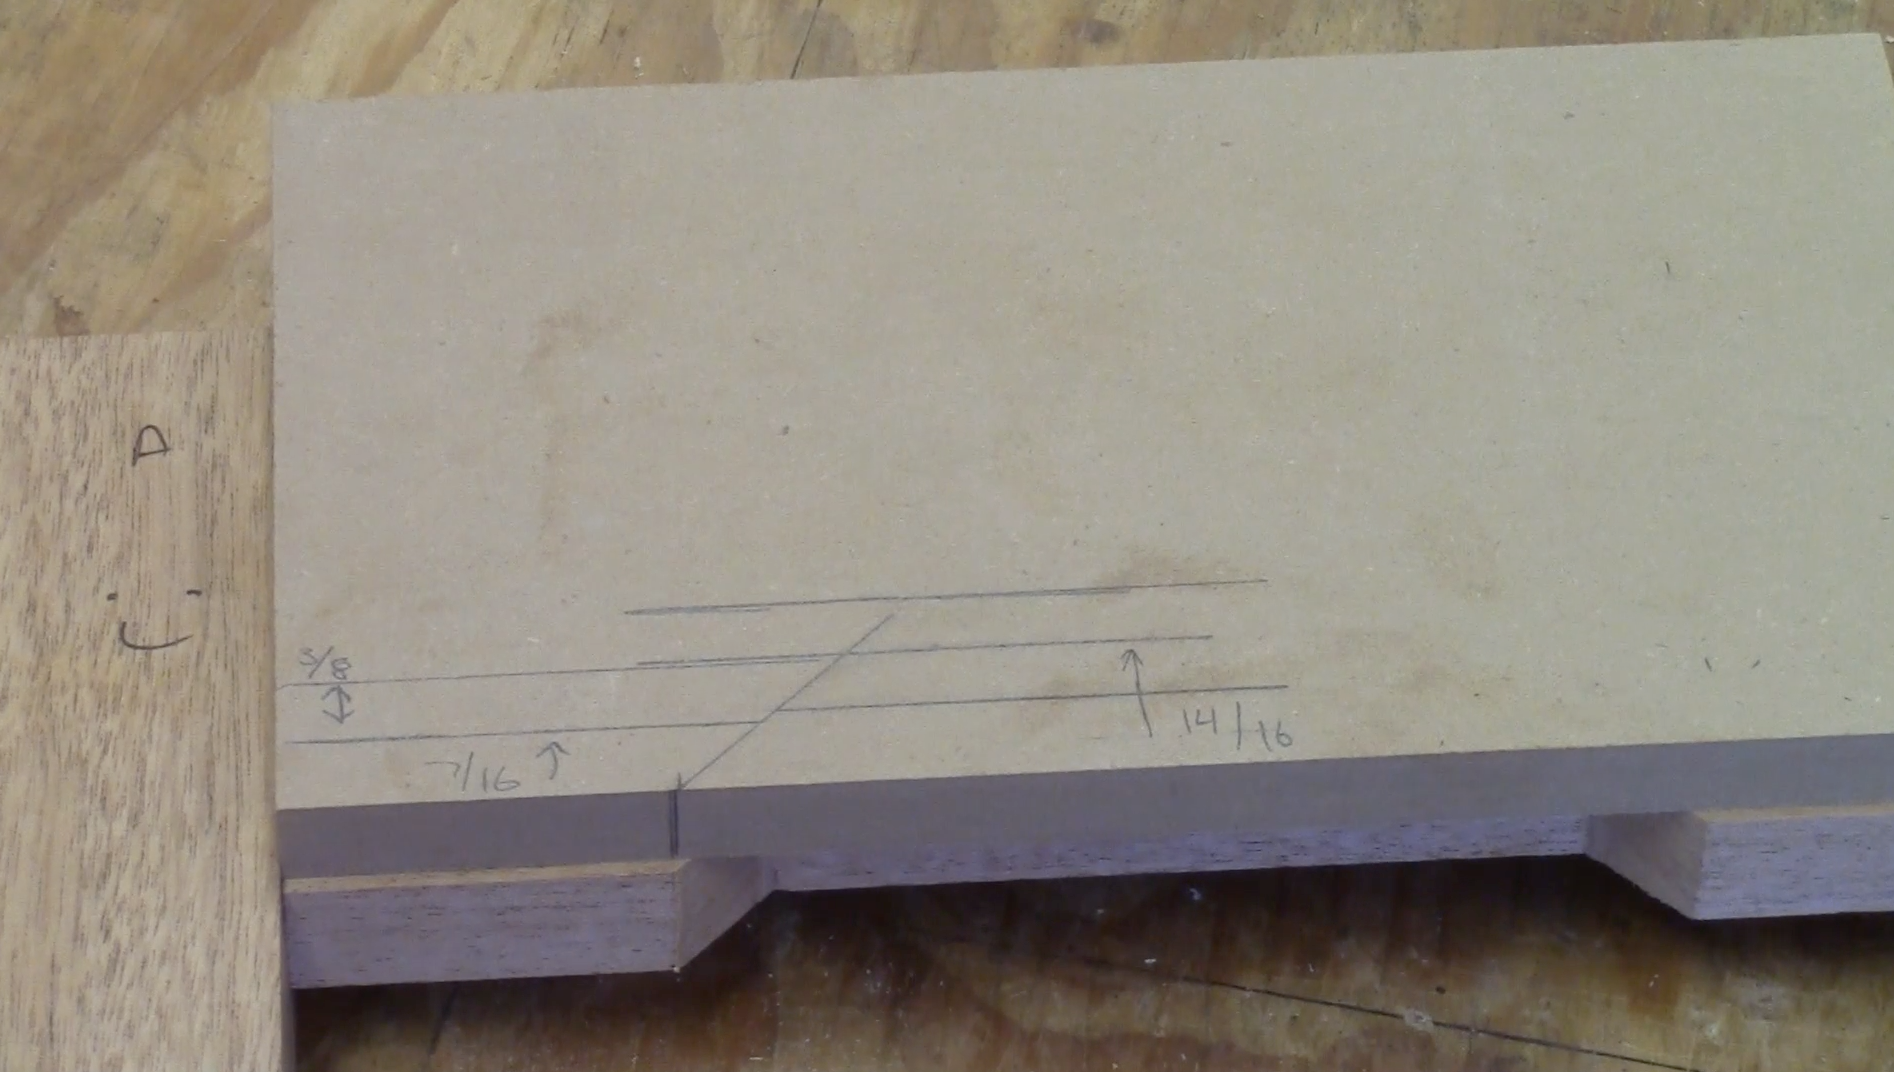
3. Draw a line 14/16” up ending at your angle and another line 3/8” above this line
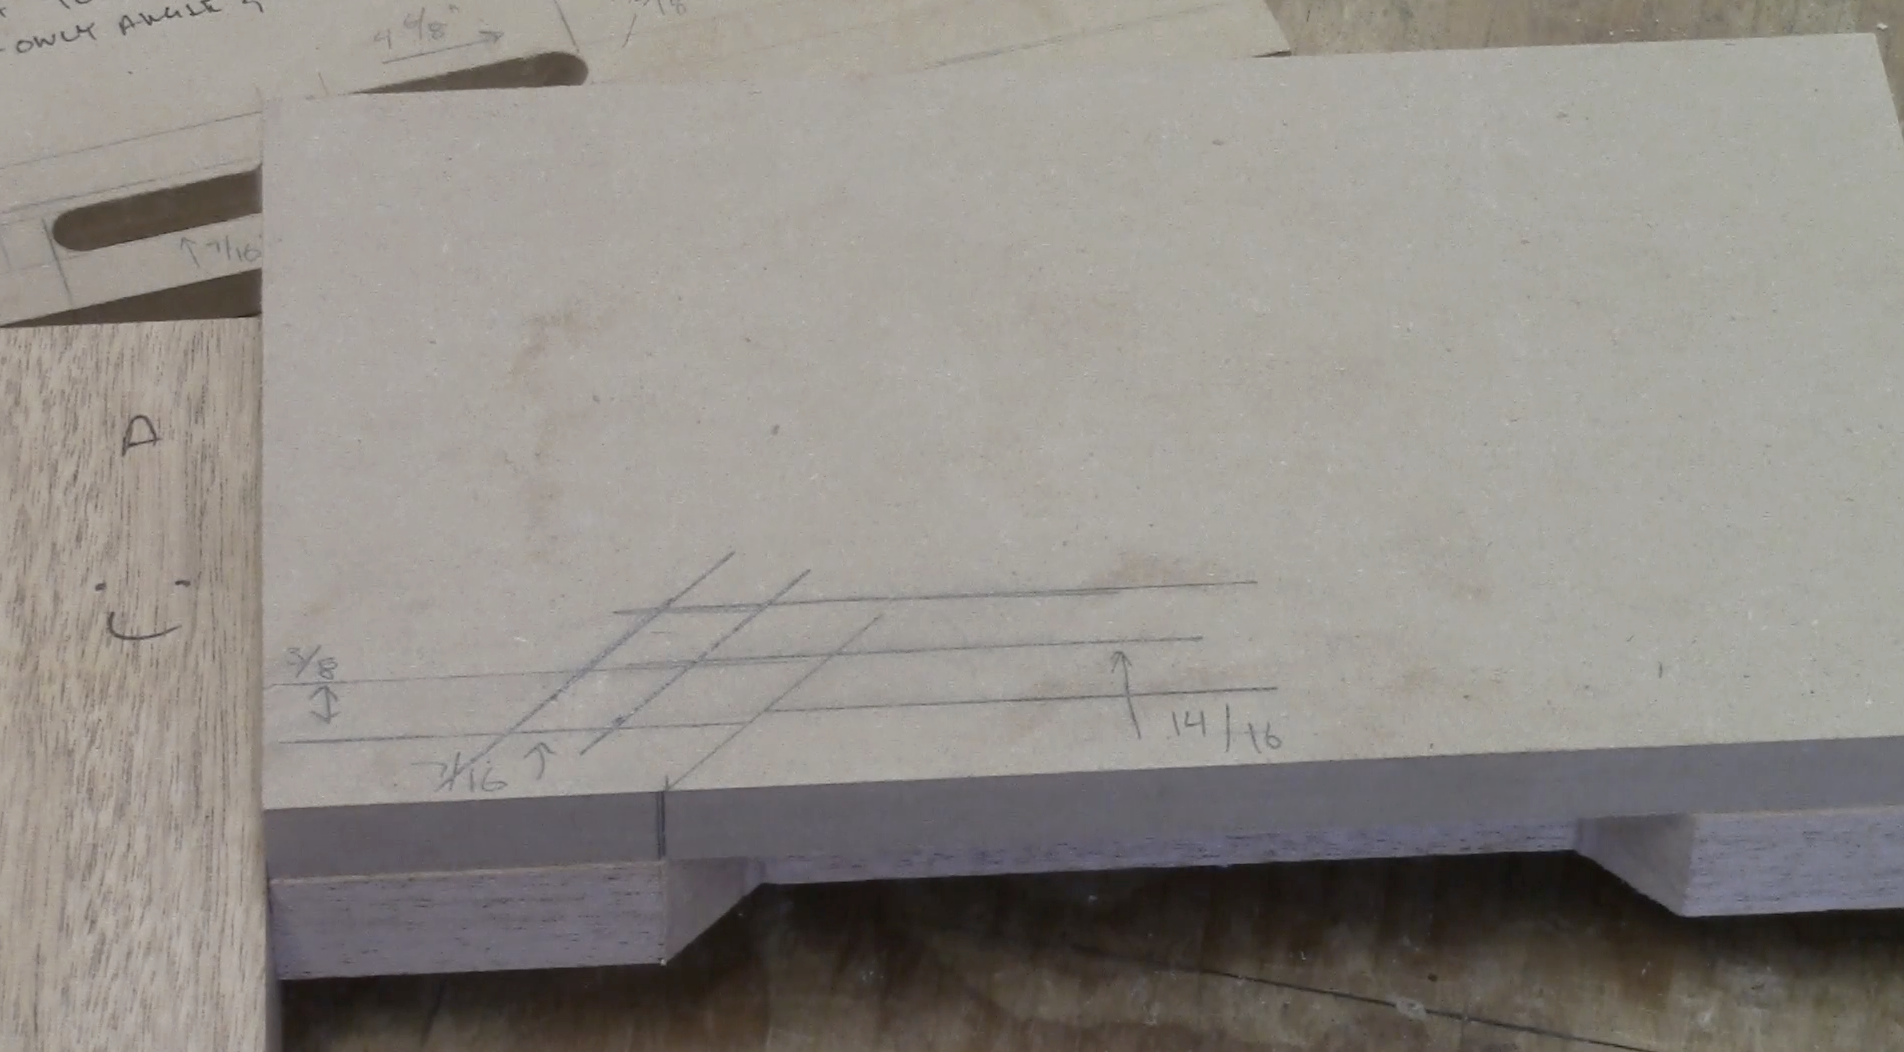
4. Align a ruler to the 45 degree angle line, make ticks marks ½” up and another 3/8” above that and connect them with your square and intersect them with your lower lines set at 45 degrees

5. Erase the lines that are no longer needed.
6. Decide how long on each side you want to create the indent, keeping in mind the outer diameter of the guide bushing.

7. Remove the waste between your lines for the bottom and top section at the router table with a 3/8” diameter bit

8. Connect the two sections by chiseling out the waste at your 45 degree lines
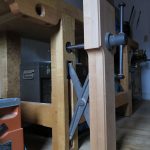
Now that the template is made, make sure your bushing can travel with the groove. If it gets hung up, you may need to file away some waste. The bushing may also be to tall for the material. In that case, use a sander to remove some metal and change the total height of your bushing where it exits the router base.
To create the carving, play around with different depths using a ¼” cove bit. I tend to stay around 1/16” deep, feathering the ends using a combination of a sand paper, a needle rasp and a ¼” gouge.
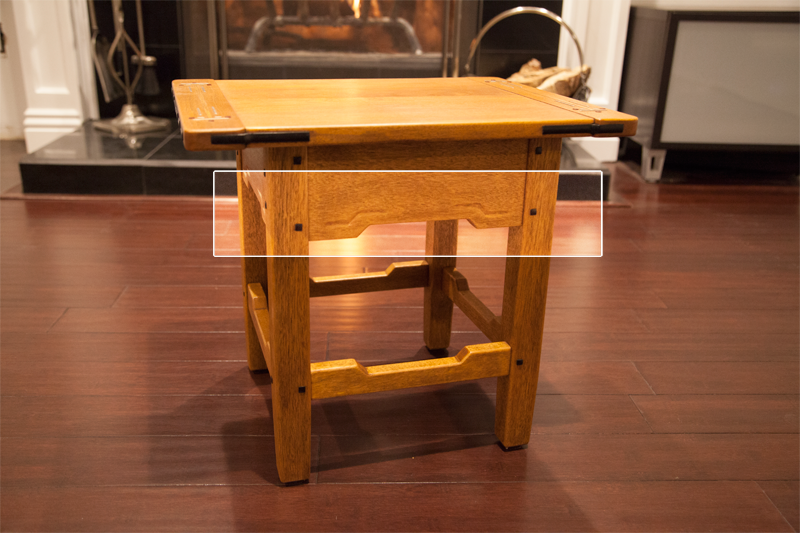
Learn more about Greene and Greene details, and build the table above in Build a Gamble House Inspired Side Table, from Popular Woodworking University.
Here are some supplies and tools we find essential in our everyday work around the shop. We may receive a commission from sales referred by our links; however, we have carefully selected these products for their usefulness and quality.