


We may receive a commission when you use our affiliate links. However, this does not impact our recommendations.
Here, I’m explaining the layout of the magnets inside the walnut rails.
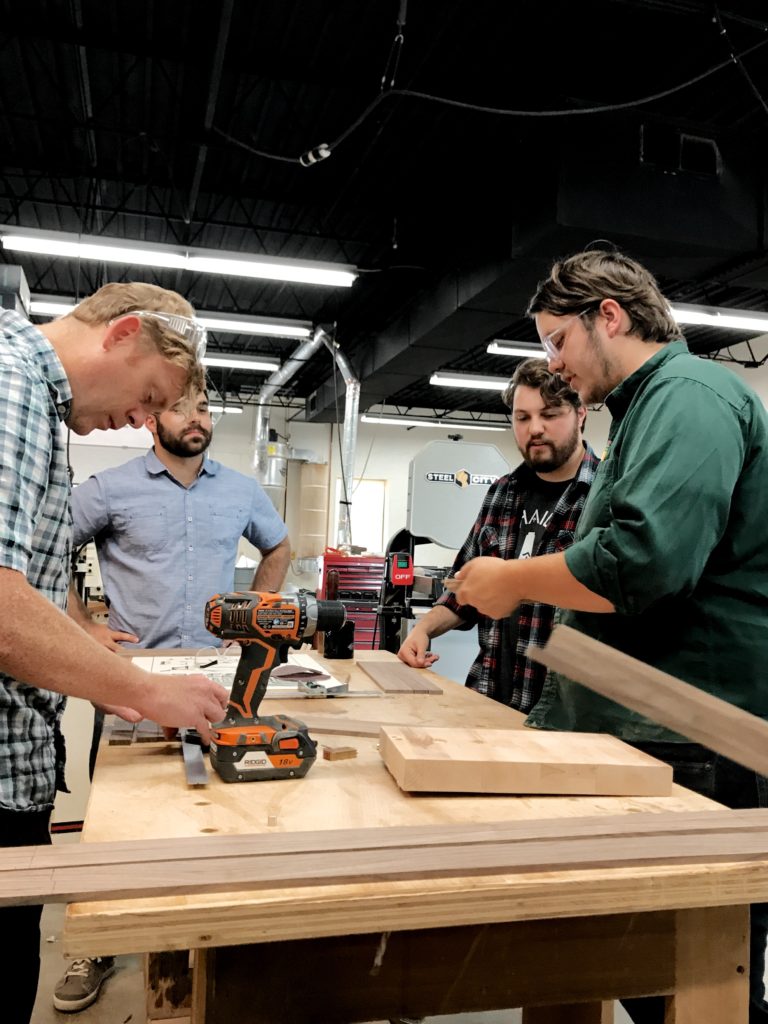
Last week, Marissa Bowers (our wonderful designer, who’s been helping us out while we seek a new permanent art director*) mentioned she had been looking for a set of picture rails – and wondered aloud if it was something we could build in the shop. Ever eager for an excuse to bring everyone out to the shop, we decided that everyone in the office could use their own, and I (Brendan Gaffney) led us in a group project building some of these simple frames.
While I came on staff a woodworker, some in our office are in the process of learning the skills and setting off on the journey of being a woodworker (and others are tackling far more complex builds, like massive maple dovetails and Hayward toolboxes). One of the great perks of this job is the well-equipped shop and the tremendous bank of knowledge and skill that resides in our staff and on our bookshelves. One of the perks for me is getting others in the office get out to the shop and helping them get their feet wet. It’s a funny situation many of our readers find themselves in, too – we read, write and research woodworking all day, every day, but we don’t always have a chance to put that knowledge to use in a shop context.
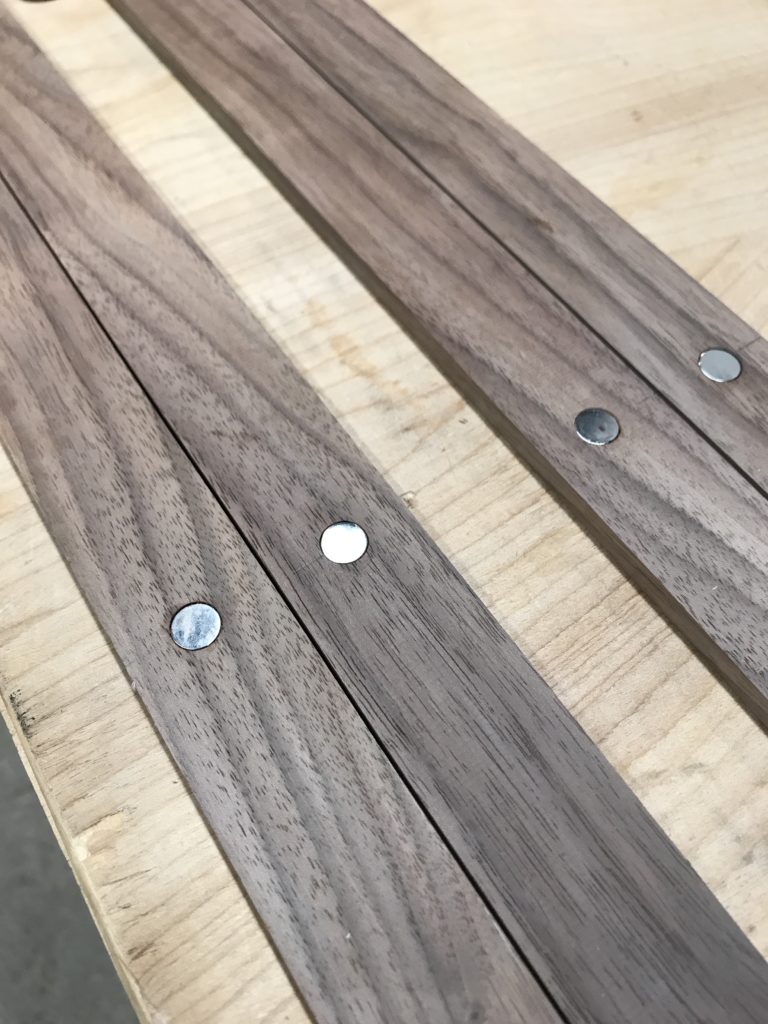
Here are the magnets, inlaid into the walnut rails. The holes were drilled on a drill press with a Forstner bit.
The frames have a simple function and construction – two battens hold the poster or print at top and bottom, and hold themselves together through the use of magnets sunk into the wood. The stock was milled from walnut, thick enough to have the magnets inlaid fully flush to the surface. We cut our battens to length, using the print we wanted to hang as a guide, and then drilled a few small holes in the top back batten for a hanging string to put them up on the wall.
This is among the simplest, but most rewarding, little builds I’ve seen. In one project, you dimension stock, make rip cuts and crosscuts, surface all faces and apply a finish, with the added task of marking and drilling the small round holes to let in the magnets. We padded on a shellac finish (my preferred finish for unabused surfaces) and Marissa picked up a handplane for the first time and took to it wonderfully.
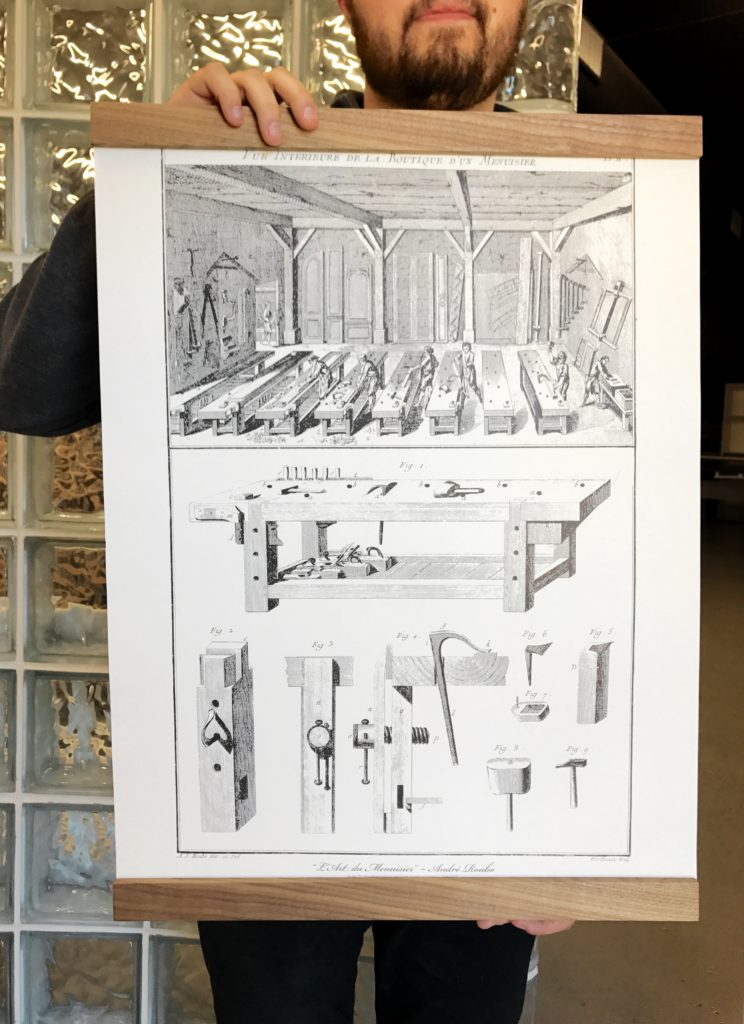
Jake holds up his new picture rails, with a vintage Popular Woodworking poster of Roubo’s Plate 11.
Small projects like these are always useful – even if they seem elementary. They’re a great place to try something new, experiment with a new wood or finish, or just feel good about finishing a project, start to finish, in an hour. Either way – find some time in the shop for the little things.
P.S. You can check out the job posting for Art Director here.
Here are some supplies and tools we find essential in our everyday work around the shop. We may receive a commission from sales referred by our links; however, we have carefully selected these products for their usefulness and quality.


What size/strength of magnets did you use? Would that size work for a kitchen knife rail?
Do you epoxy the magnets into the rails?
Hire Marissa Bowers as your Art Director!!!
I’m not kidding. If Chris Schwarz can become what he is while working at Popular Woodworking, imagine the potential that Marissa has in her.
I really nailed the judgemental foreman pose in that first photo.