


We may receive a commission when you use our affiliate links. However, this does not impact our recommendations.
When you set out to design a piece of furniture, don’t be surprised if you end up designing four or five pieces in the same vein. With this campaign chest, I ended up with three separate designs:
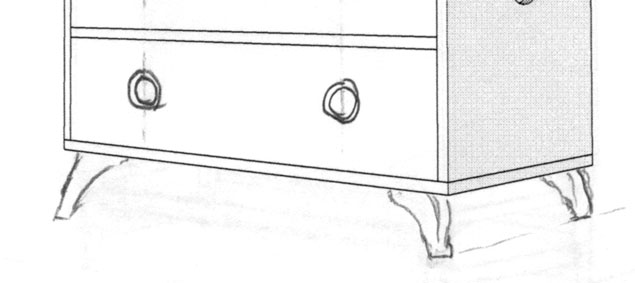
- A Baltic birch plywood version with round stainless steel pulls and a base that uses 4” casters.
- A more Japanese/Chinese version with recessed round pulls (shown in the previous entry) and sled feet that were charred.
- The final version made using curly oak, the half-round cutouts and a 10”-tall plinth made like a post-and-rung chair.
As you can see, one of the primary differences among the versions is the plinth, or base. So let’s discuss that.
The Plinth
Historical campaign chests used a few different kinds of plinths. The most common was to have four turned feet about 4” high that screwed into square blocks affixed to the bottom of the chest. The removable feet made the chest easier to transport.
Thanks to the insect kingdom, however, the second most-common plinth was a chest that was missing its four turned feet because they had been consumed by bugs (or lost). So the chest sat squatly on its four square blocks.
The least common plinth is a traditional bracket-foot base. These were sometimes added to a chest after its owner came home to England.
Among Danish modern chests, the most common plinth is four skinny peglegs – 6” to 10” tall that were joined with some sort of stretchers – round or rectangular.
As I started sketching bases, I also added some ideas of my own. I’ve designed a lot of furniture with industrial casters as the plinth, and it seemed appropriate here because the chest is supposed to be easy to move. All the casters I like are steel with rubber or plastic wheels. Those casters would look odd with the brass backplates I designed for the pulls (read more here).
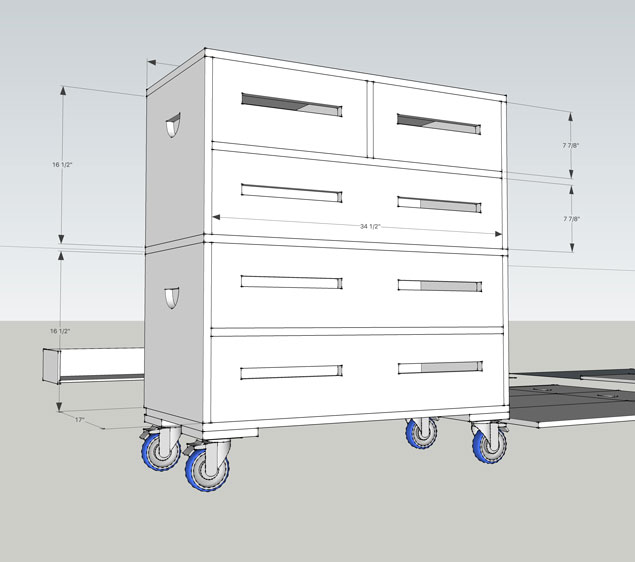
So for a couple days I played with steel pulls and casters and found some great round stainless pulls from Lee Valley that would look good with the steel casters. Ultimately I decided these would look good with a plain wood, such as Baltic birch, so I finished those sketches and set them aside for another day.
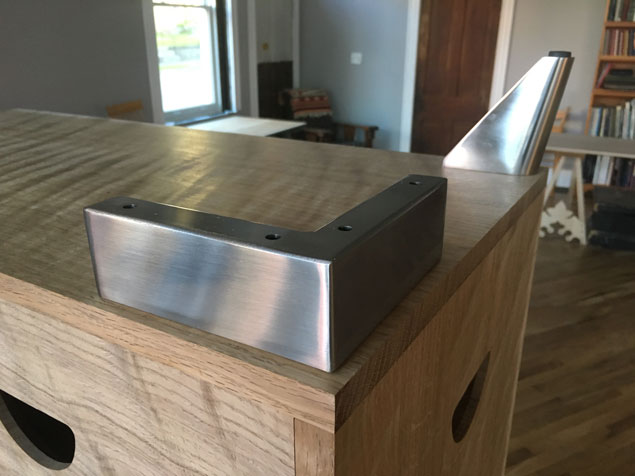
I also investigated some other steel and nickel bases, but they were too squat for a 36”-tall chest. I’ll ultimately use these bits of hardware on a smaller floor chest.
Wooden Plinths
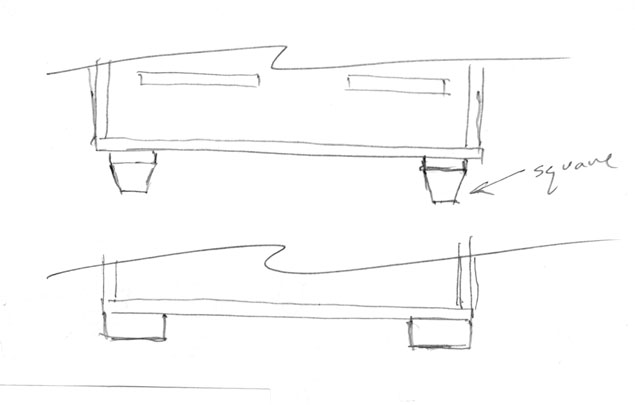
Campaign chests owe a lot to Asian designs (Chinese, to be exact), and so I sketched some bulky sled feet – 5” square – that looked pretty good but reminded me of a pallet. So I decided to char them with torch (another Asian process) and pair them with black iron ring pulls. This led to the second iteration of the chest, which I set aside for another day or another customer.
One of the big differences between Campaign chests and Danish modern ones is the height of the plinth. Danish bases lifted the chest higher off the floor, which I like. So I started sketching bases using tapered round legs and round stretchers.
After a few sketches, the base started to look like a post-and-rung construction – like an odd-sized ottoman for a snake family. So I leaned into that.
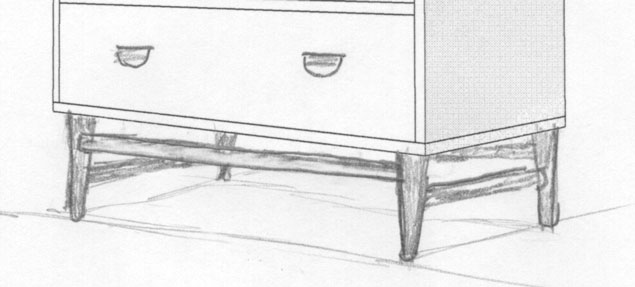
As drawn, this chest has little joinery showing, and so I decided to put a little expressed joinery in the base. So the legs and stretchers are joined with wedged through-tenons. And, to tie the oak base to the case above, I drew in using brass or copper wedges to hold everything together.
The most difficult part of the plinth was deciding how tall it should be. So I left that decision until I had the case assembled and could get a feel for what that would look like in real life. I knew the plinth height was going to be somewhere between 8” and 10” tall, so it was a small, easy-to-make decision at the end. (I went with 10”.)
At this point I had my design settled and just had to figure out the joinery, which will be the final part of this series.
— Christopher Schwarz
Read part 1 of this design series here
Part 2 is here.
Part 3 is here.
Part 4 on pulls is here.
Here are some supplies and tools we find essential in our everyday work around the shop. We may receive a commission from sales referred by our links; however, we have carefully selected these products for their usefulness and quality.


Where did you purchase the steel and nickel bases?