


We may receive a commission when you use our affiliate links. However, this does not impact our recommendations.
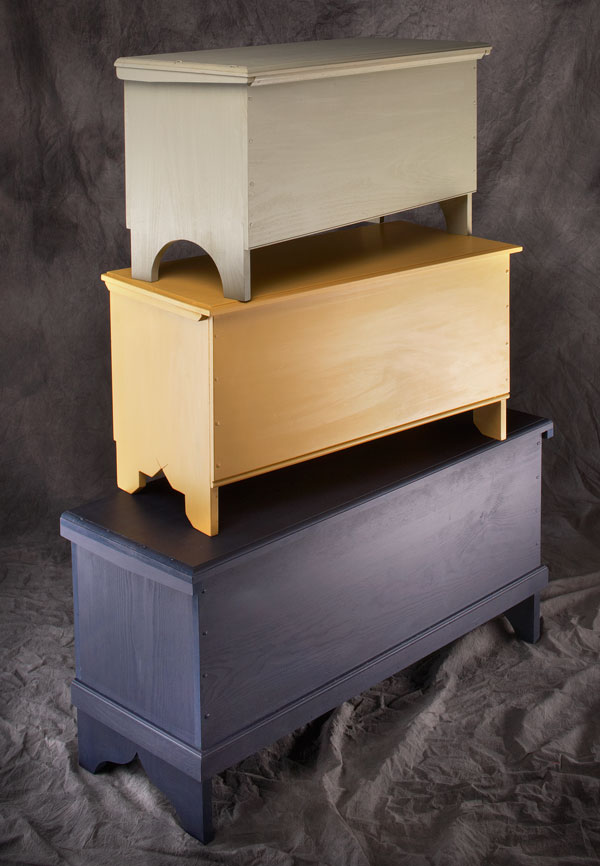
 In the November issue of Popular Woodworking Magazine, you’ll find my 6-Board Chest article. The opening photo (shown below) shows three chests – mine (the blue one), Tim Henricksen’s (the yellow one) and Ty Black’s (the green one). My chest (the one I teach you how to build in the article) has an ogee on both ends.
There are multiple ways to lay out an ogee, but this is my favorite. Now the fastest way to lay it out is to use your body parts – just eyeball it and wing it. But I like to take the extra minute or two to make the ogee, which is sometimes called a “cyma recta” or “cyma reversa.”
Step 1. Draw the inverted “V” shape as if you were making bootjack ends for this chest. The point of the “V” should be slightly lower than where you want the bottom of the chest to lie.
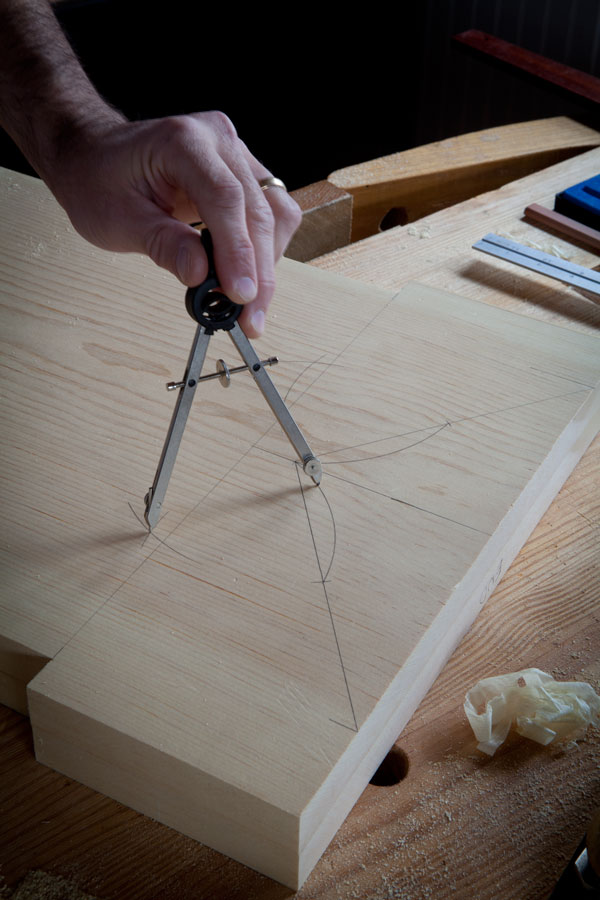
Step 2. Set your compass so it bisects one of these lines at the halfway point of the line segment. This is the only compass setting you need, by the way. Mark the center point of each line segment.
Step 3. Use your compass to strike four intersecting arcs as shown in the photo. Two arcs are from the ends of the line segment. Two are from the center point. Note that where you strike these arcs determines if the ogee will be a cyma recta – where the curves bend to a horizontal – or a cyma reversa – where the curve bend to the vertical. This ogee is a cma reversa.
Step 4. Place the point of your compass at the intersection of an arc. Draw an arc that bisects your line segment. Move the point to the other intersecting arc. Strike a second arc that bisects your line segment.
Step 5. One side of the ogee is complete. Move to the other leg of your inverted “V” and repeat the same process to make the mirror image of the first ogee.
— Christopher Schwarz
Here are some supplies and tools we find essential in our everyday work around the shop. We may receive a commission from sales referred by our links; however, we have carefully selected these products for their usefulness and quality.


For folks who need a little more visual description – Roy Underhill covered this layout technique on his most recent Roubo bookstand episode.
http://www.pbs.org/woodwrightsshop/video/3100/3101.html (Link is correct if I recall – I can’t watch video from this computer right now)
Chris,
What type of compass are you using? And do you have a source for where I can buy one?
Thanks,
Luis
There isn’t any need to smooth the curve because it’s one curve intersecting another that is tangent to the other. Thus the intersection is only a point. Part of the problem with this post is Mr. Schwarz seems to have jumped a couple of steps in the process. Also the layout photo stops just short of showing where the center point for the lower curve.
I’m kind of surprised Chris hasn’t added a reply to update the missing steps or a more informative picture of the final layout. Must be polishing his anarchist tool chest for WIA!
How do you smooth the curve, particularly the point in the middle?
Remember the teacher in you and that there are not dumb question!
The bottom part of the ogee requires another board to be abutted to the end of the board with the ogee. The center point will be on the second board. The directions were a bit confusing to me. I had to go over them a few times to get what he was saying. That being said, you should see some of the directions I’ve tried to write out. These were great!
Can we get video on how to do this? I’m having trouble visualizing it from the directions, since one of the points seems like it is off the edge of the board.