We may receive a commission when you use our affiliate links. However, this does not impact our recommendations.
Get that menacing belt sander under control with these whip-it-into-shape tips.
by George Vondriska

Does the prospect of using a belt sander make your palms sweat and your hands shake? I feel your pain. Belt sanders have a bad rap as the quickest way to ruin a project. Use them incorrectly and your project starts to look like the rolling hills of Ireland. But used correctly, they’re a great tool for flattening panels, flushing up trim and face frames and getting to the finish line fast.
Start by learning the belt-sander rules of the road:
• Keep it moving. The slightest pause can form a gouge.
• Let the weight of the sander to the work. Don’t lean on the machine.
• Use nothing but 120-grit paper until you’re comfortable with the machine.
• Don’t overextend yourself. Running a belt sander at your reach’s extreme end is a sure way to gouge material.
Handling the Sander |
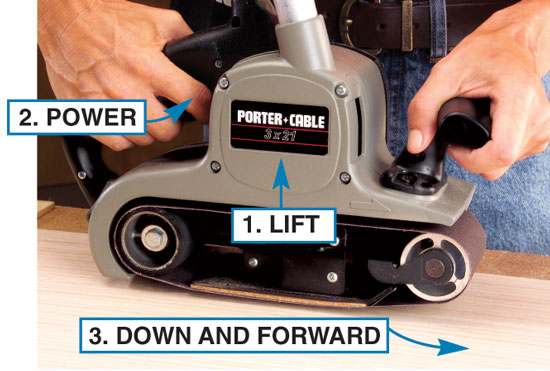
Photo 1: Start with a soft landing. Before you pull the trigger, lift the sander slightly off the workpiece. Squeeze the trigger as you ease the sander down and forward, feathering it into the material. Think of it as an airplane making a smooth landing.
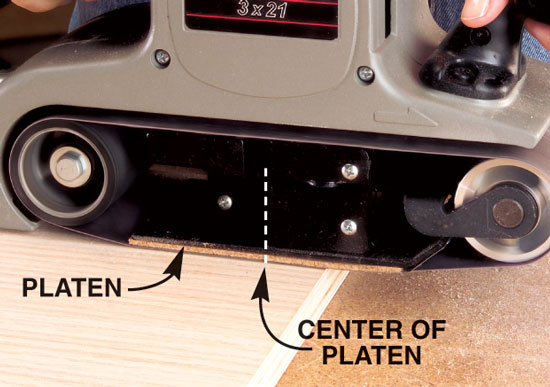
Photo 2: Go over the edge, but only a little. As you sand to an edge, allow the platen to project over the corner, but never by more than half its length or width. This keeps the sander balanced and flat.
Photo 3: End with a smooth take-off. OK, you’ve successfully landed your sander and finished sanding. Now it’s time to take off. On your last stroke, lift the sander as it moves forward. Then release the trigger. |

Setting UpA big part of the battle is won just by taking the time to set up properly. |
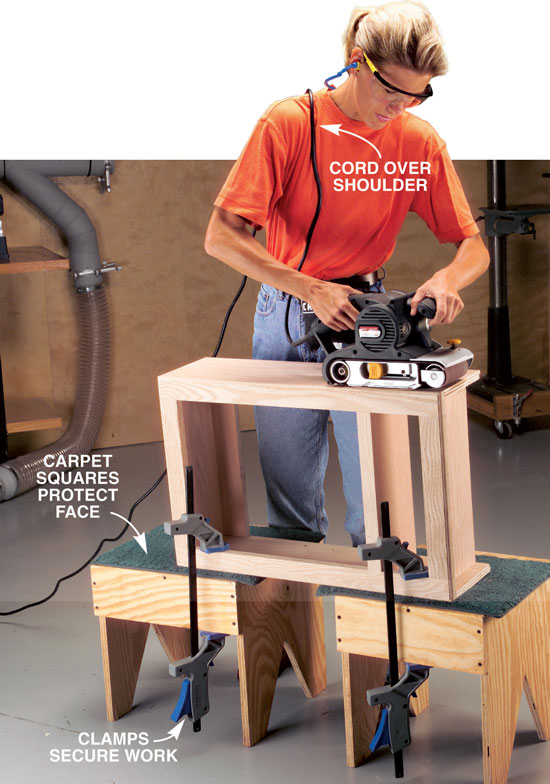
Get the height right. The surface you’re sanding should be slightly lower than your waist. This puts your arms at a comfortable working height. For some projects, like cabinets, it may mean working on a surface other than your workbench. Make sure the piece you’re sanding is secure. It’s also good practice to keep the cord out of the way by draping it over your shoulder. It looks weird, but it prevents frayed cords— and nerves—from belt-sanded wires.
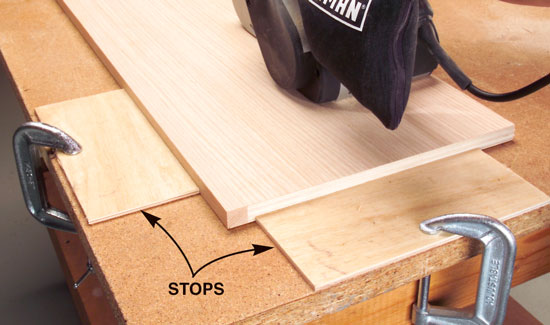
Provide solid stops. You can’t sand a piece that you’re chasing around the shop. Belt sanders are powerful and have a tendency to launch projects off their perches. Be sure your material is trapped against stops that are firmly clamped to the bench. Clamping the material itself to the bench is a hassle because the clamps get in the way. The stops should be thinner than the material you’re working on and wide enough so the sander won’t bump into the clamps. |
Trueing UpA belt sander can flatten a glued-up panel in no time. |
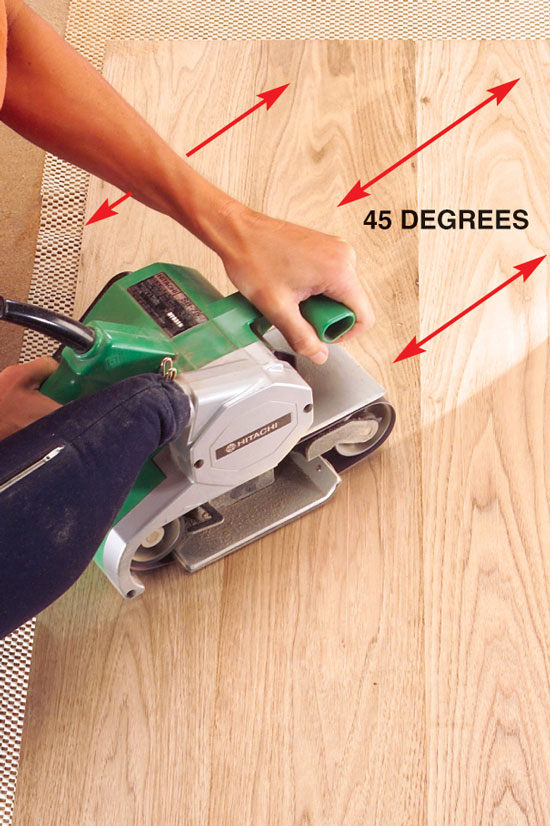
Photo 1: Sand diagonally first. Flatten a solid wood panel by first sanding at 45 degrees to the grain using an 80-grit belt. This helps level the high spots that often occur at the joints. Use a straightedge to check the panel, working the angles in a crisscross fashion until it’s flat. Note: Never sand plywood at an angle.
Photo 2: Then go straight. When the panel is flat, sand parallel to the grain, using the same 80-grit belt, until the cross scratches from your diagonal sanding are gone. Each stroke of the sander should overlap the previous stroke by half a belt width. Pencil marks help you keep track of where the sander has been and where it needs to go. When the cross-grain marks from the previous step are gone, change to a 120-grit belt and work the entire panel again. |

Tooling UpIt’s a poor craftsperson who blames the tool, but it’s hard to get good results from a prehistoric belt sander. Here’s what to look for in a new belt sander. |
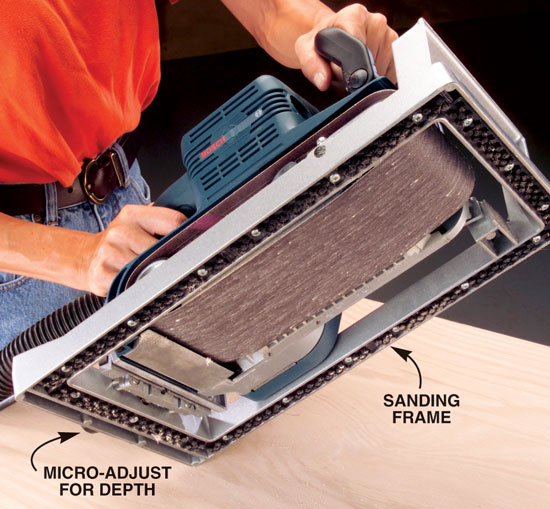
Eliminate gouging with a sanding frame. A sanding frame ($50 to $80) is like training wheels for a belt sander. Unlike training wheels, you’ll never want to remove the sanding frame. A slick surface on the bottom of the frame rides on your material, and the sander is suspended within the frame. This is a no-experience-required way to keep the sander under control and dead flat. Some frames even have micro-adjust knobs that allow you to control how much material the sander is taking off. Frames really shine when you’re working on large surfaces. Not every belt sander is made to work with a frame, so if you’re buying new, it’s a feature to look for.
Clean belts = better results. An abrasive cleaning stick, epoxied to a board and clamped nearby, will keep your belt clean and working hard. Abrasive cleaning sticks act like an eraser for sandpaper. At less than $10 per stick, it’s a lot less expensive to frequently use the cleaning stick than to frequently change paper.
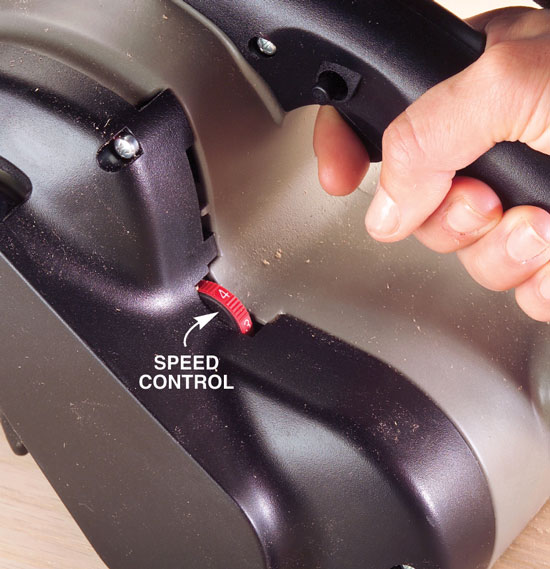
Variable speed gives you better control. A belt sander set on low speed and equipped with a fine-grit belt is easy to control. It’s especially useful on veneered materials. If you want to hog off barrels of sawdust quickly, switch to a higher speed. |

Get the Right BeltLook for no-lap belts for your sander. The seam is a butt joint with high-strength tape holding the back of the joint together. Belts with lap joints tend to have high spots that go thump, thump, thump, as you sand, which makes controlling the sander more difficult. |
 |
This story originally appeared in American Woodworker October 2004, issue #110.
Source information may have changed since the original publication date.

Here are some supplies and tools we find essential in our everyday work around the shop. We may receive a commission from sales referred by our links; however, we have carefully selected these products for their usefulness and quality.