We may receive a commission when you use our affiliate links. However, this does not impact our recommendations.
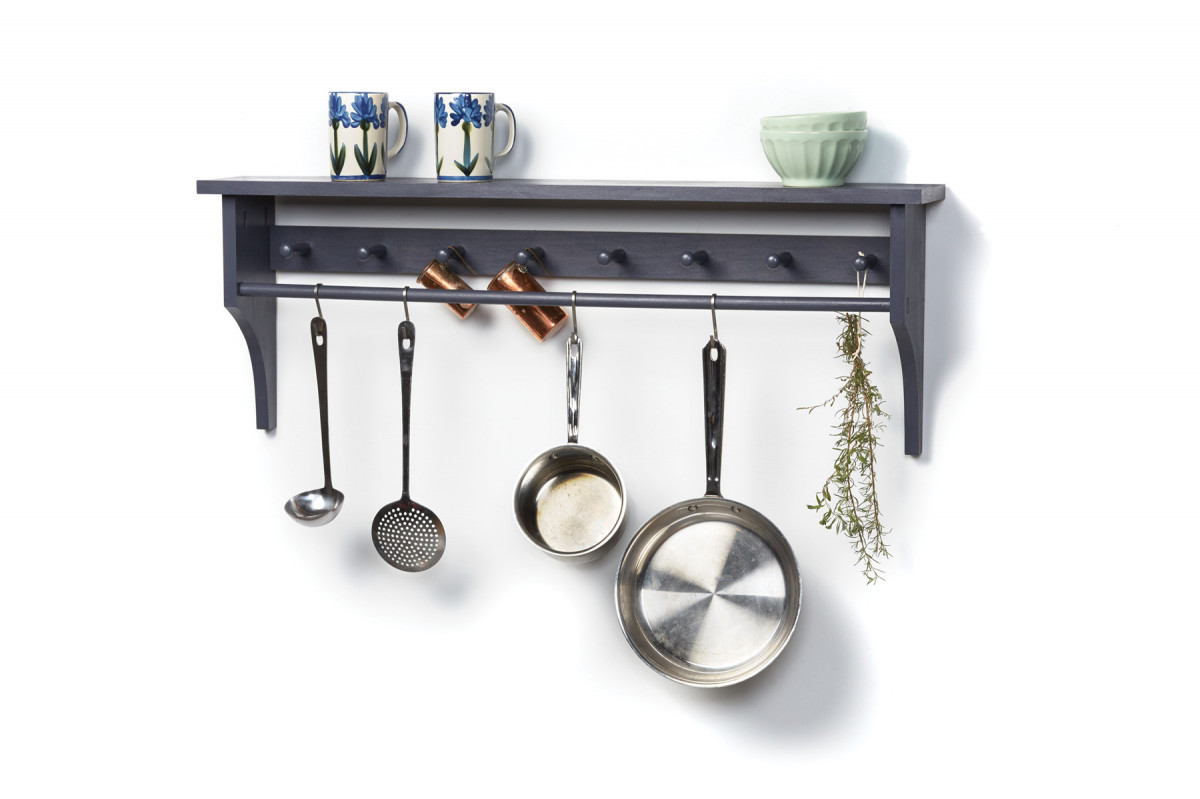
This simple piece keeps your favorite cooking implements close at hand.
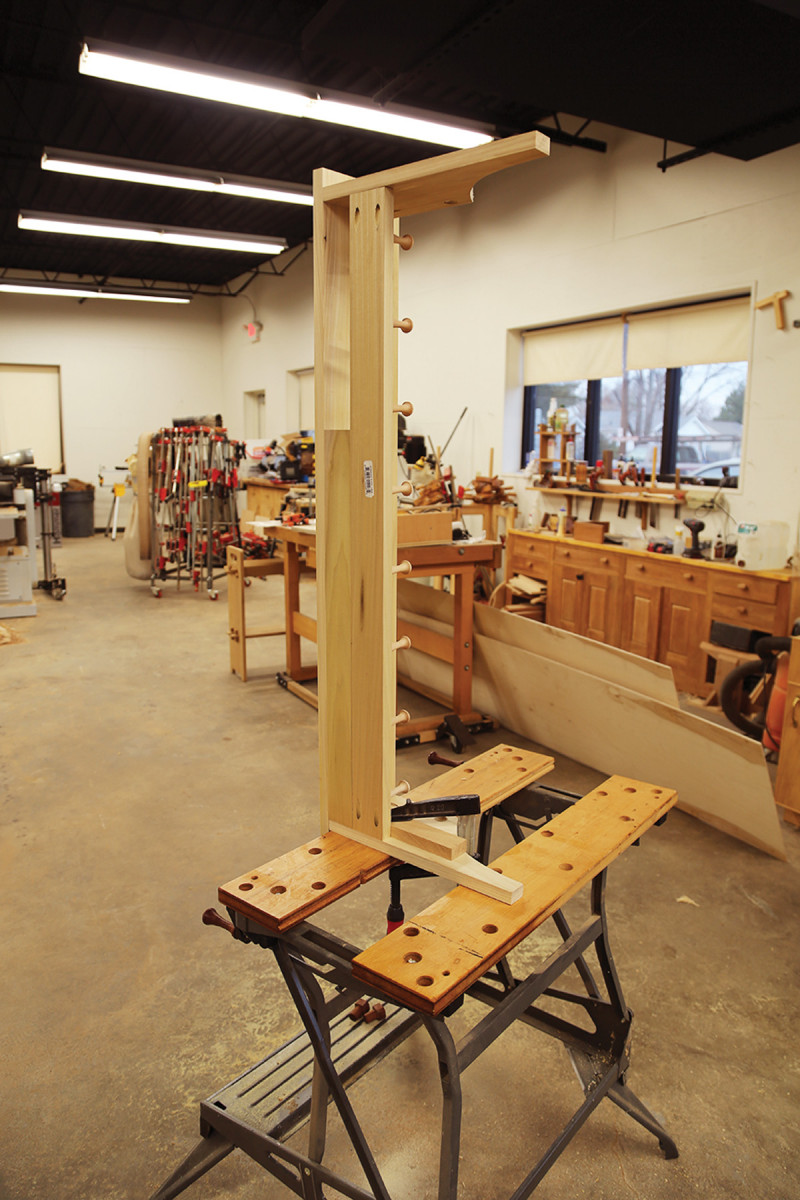
I like having the pots, pans and cooking utensils I use most often within easy reach of my stove, and this simple pot rack fits the bill (with a shelf on top for lids or what have you).
My original design of this piece hangs over the counter in my kitchen. That one has three sections (to span the counter-sink-counter span of my cabinet run) and is in hard maple, with two 3⁄4″-diameter 304 stainless steel rods on either side of the sink.
The construction methods are basically the same as what I’m showing here, but to make this version more approachable, I used materials from a home center, including a 3⁄4″-diameter wooden dowel. But there’s no reason you couldn’t get creative and use a copper rod or black steel pipe capped with matching metal bits on either end.
The First Cuts
This project is assembled using pocket screws, dimensional poplar and some maple Shaker pegs (because that’s what the home center had available).
You’ll need 4′-long pieces of 1×8 (the top) and 1×3 (the back), 2′ of 1×6 (the sides) and a 4′-long dowel. (I considered using a smaller-diameter dowel, but had concerns about the weight of heavy cookware bowing it.)
One way I simplified this build from my original was to, as much as possible, use the actual widths of the dimensional lumber. But the 1×8 top simply has to be ripped – a 1-3⁄4″ overhang just looked bad.
So the first task is to rip that 1×8 to 6-1⁄2″. For this, I used a circular saw with an edge guide (though you could also use a jigsaw), then cleaned off the saw marks with a block plane.
Next, cut the top and two side pieces to length at the miter saw. (It’s best to hold off on cutting the back to length until you have the sides screwed to the top; that way, you can measure the actual rather than the theoretical distance.)
Appealing Curves
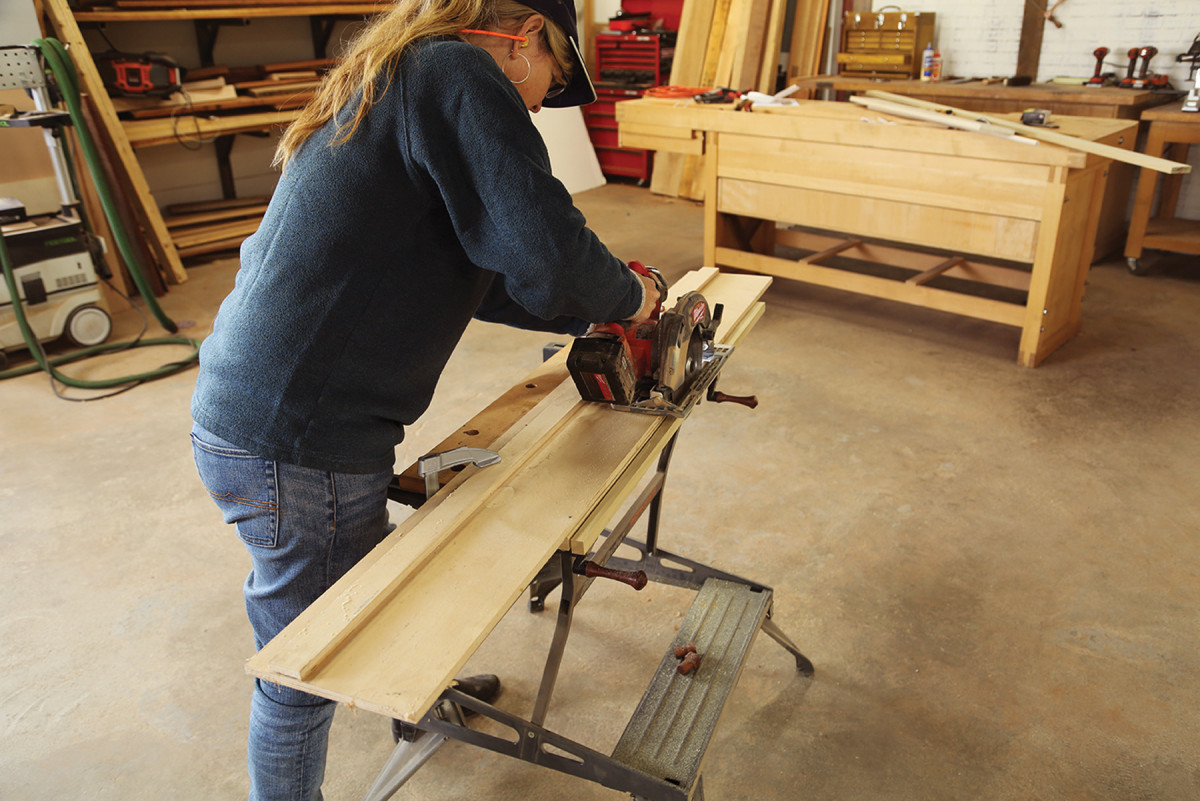
Rip it. This jig’s platform matches the width of the saw’s shoe from the blade to the edge; the edge of the shoe rides against the fence. To use it, align the jig’s bed with your cutline, then clamp it in place. Keep the saw tight against the fence as your cut.
Now set the top aside and work on the sides.
You have a couple options on laying out the curves. The easiest – if you have access to a printer with legal paper – is to download the SketchUp drawing, print out the side piece full-size, then cut it out and use spray adhesive to stick it on the workpiece. Then, you can simply cut to the pattern.
But while I have access to a suitable printer, I prefer the “bendy stick” method. So, using a combination square, I measured 6″ down from the top and made a mark on the front edge, then 1″ in from the back and made another mark at the bottom edge. I tacked in a nail near each of those marks, then rooted through the trash for a thin offcut.
With the offcut registered against the nails, I can tweak the curve until I get something that looks right to my eye, then mark the curve with a pencil. Note that my curve might not exactly match the printout – and that’s OK. What looks good to your eye is what matters.
Once you have the curve marked on one piece, cut it out using a jigsaw. And the cleaner and more fluid your cuts are, the better – then there’s less cleanup to make a fair curve.
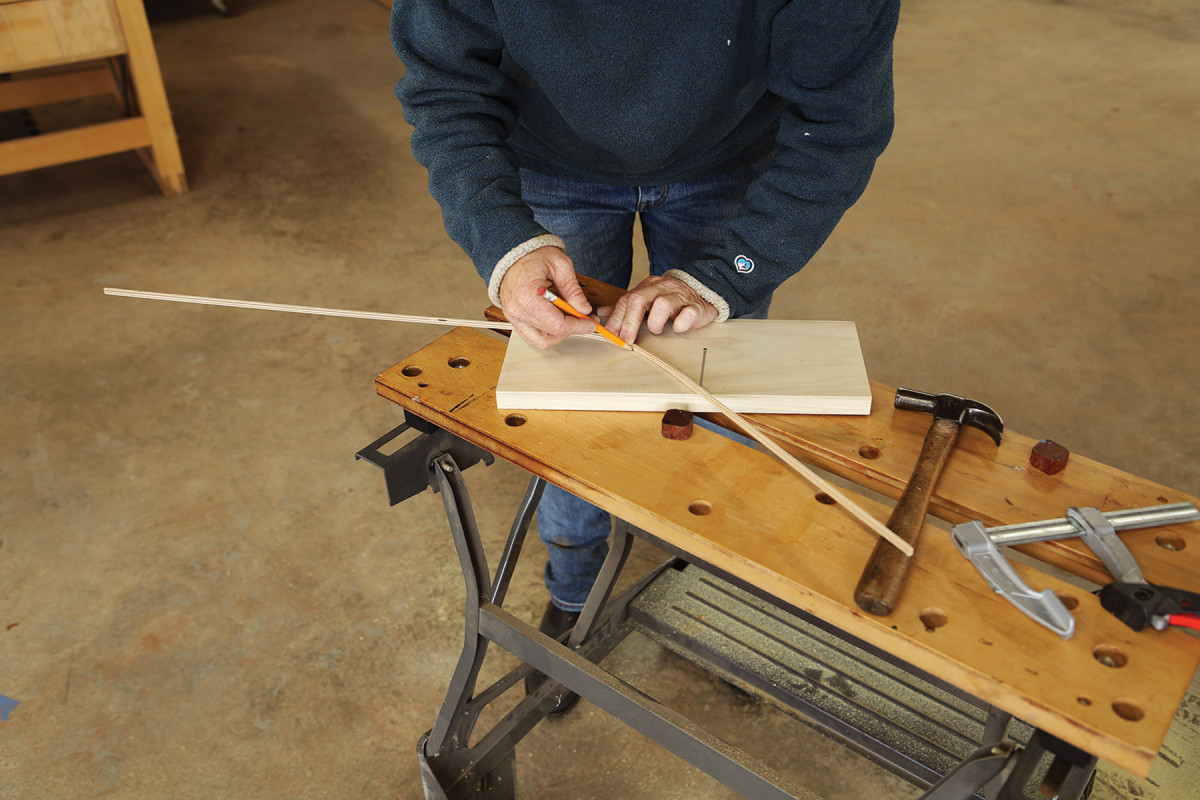
Bendy stick. I often use two nails and a thin offcut to lay out curves. This approach allows me to tweak things to my liking rather than adhere to a strict pattern.
If you’ve cut close to the line and have an almost-fair curve, go ahead and use the first piece to lay out the curve on the second, then cut it out, too. If you’re not happy with the first cut, clean it up with a rasp until you’re almost there, then mark and cut the second side.
Now clamp the two sides together (cut side up), and use a rasp and sandpaper to fair and smooth the curves on both at the same time; that way, they’ll match. (But if they’re a little off, don’t fret. No one will notice when they’re 36-1⁄2″ apart on your wall.)
The last bit of work on the two side pieces is to drill the holes for your dowel (or pipe). On my original, I used stopped holes and captured the steel rod – but that makes the assembly a little trickier without a helper to hold things in place. So here I drilled through-holes.
To keep from getting blow-out on the backside, it’s a good idea to drill in from both faces of the workpiece. First lay out the hole on the inside face of each piece, then drill a tiny hole right at the center. Now chuck a 3⁄4″-diameter Forstner bit or spade bit in your drill and align the bit’s point with the small hole. Drill halfway through, flip the piece, then repeat. (It’s important that these holes be straight and at 90°, so grab a helper to spot you if necessary.)
Weekend Pot Rack Cut List
No.ItemDimensions (inches)MaterialComments
t w l
❏ 1 Top 3⁄4 x 6 1⁄2 x 40 Poplar
❏ 2 Ends 3⁄4 x 5 1⁄2 x 13 Poplar
❏ 1 Back 3⁄4 x 2 1⁄2 x 36 1⁄2 Poplar
❏ 1 Dowel 3⁄4 dia. 39 Poplar Cut to fit
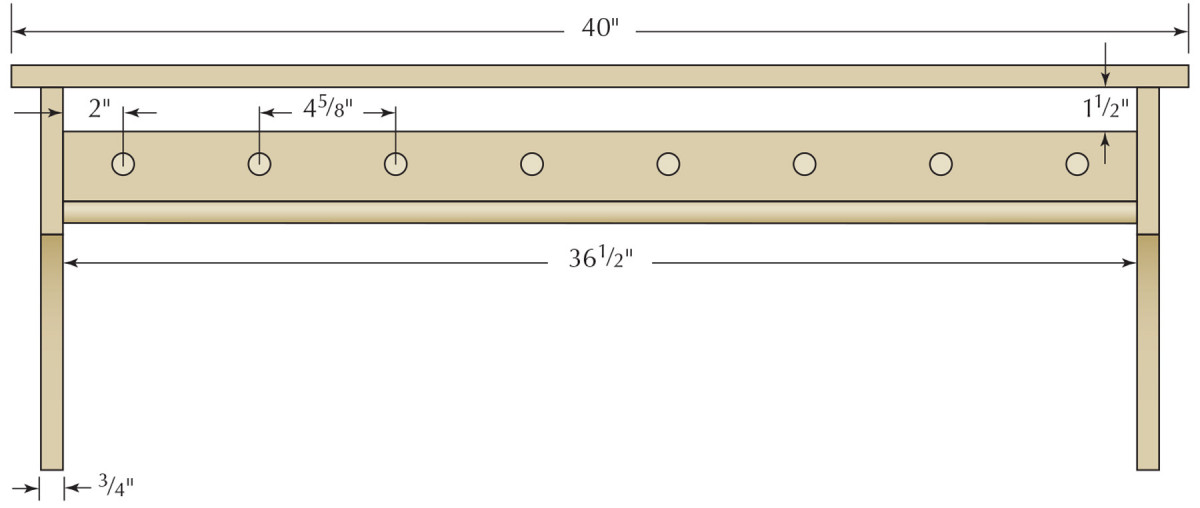
Elevation
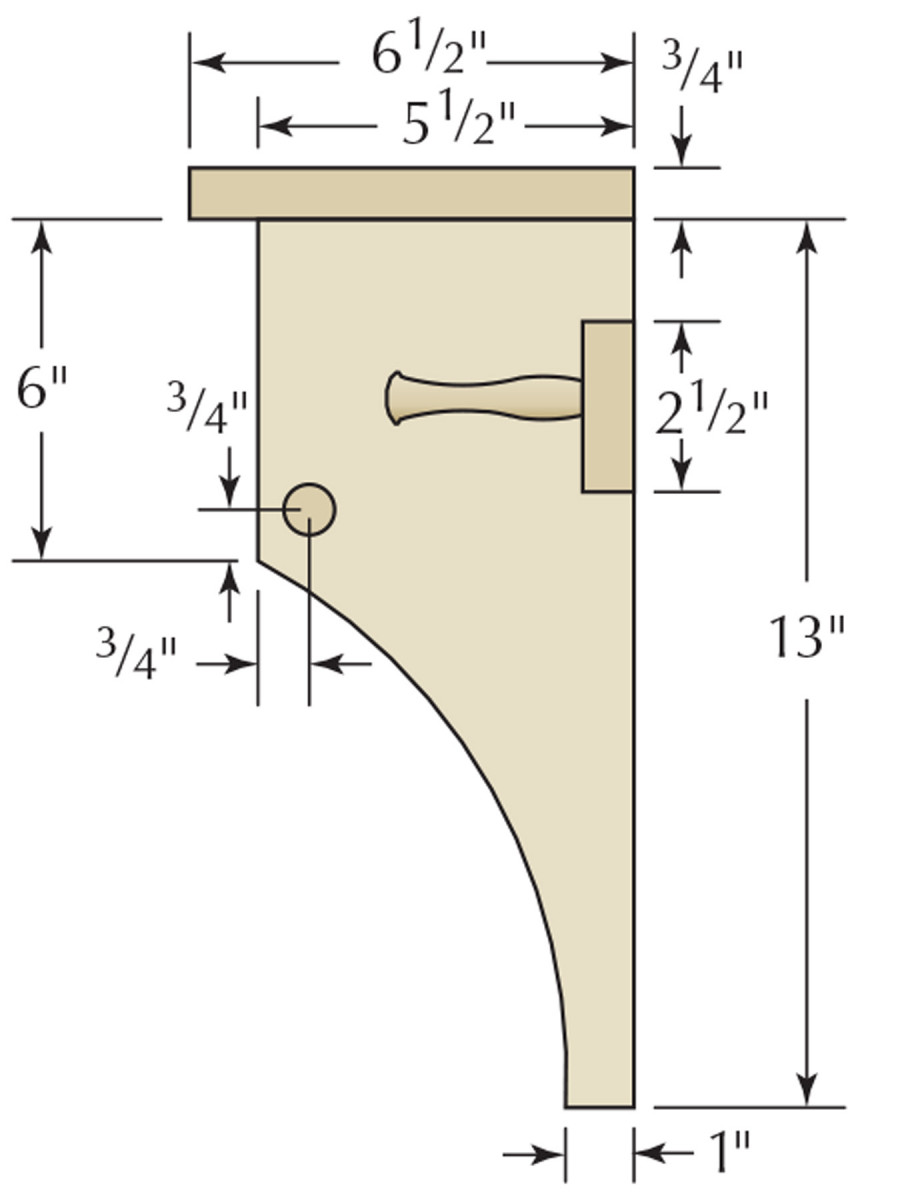
Profile
In the Pocket
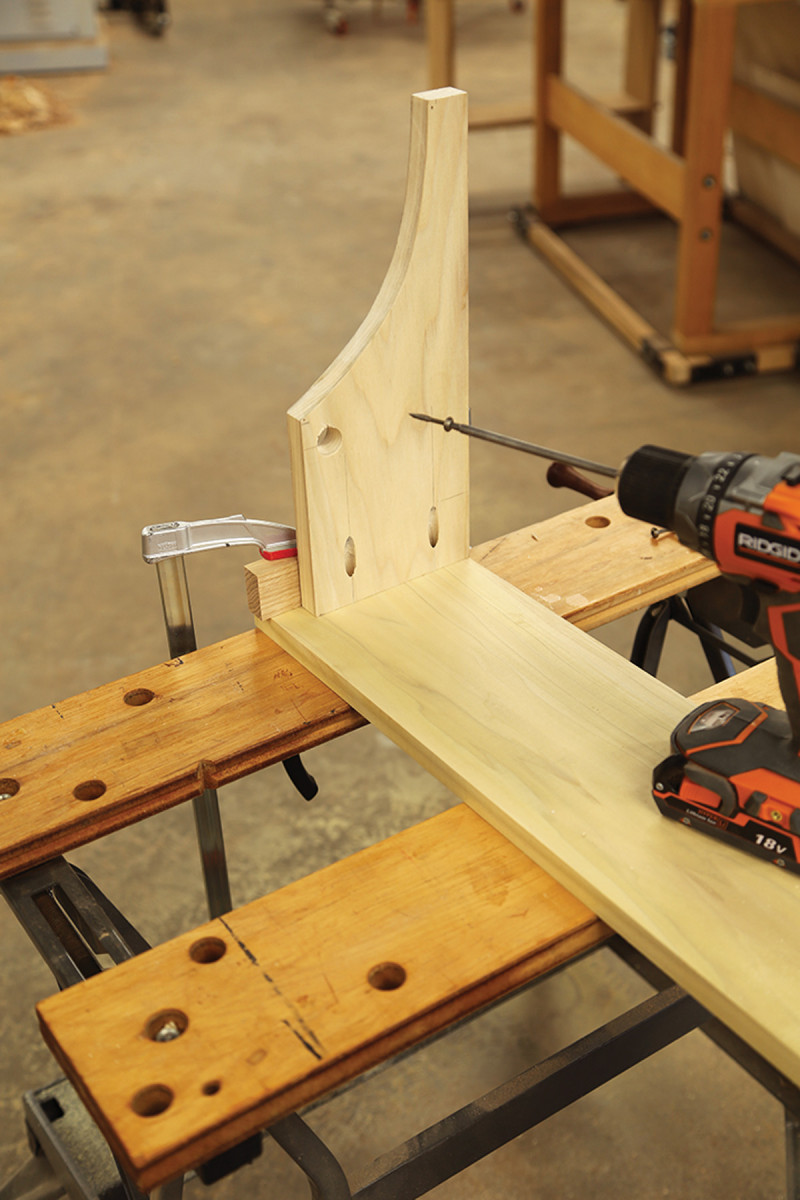
Assembly block. To help with assembly, I clamp an offcut at my layout line, then use that to support the side and keep it aligned as I drive the screws.
Using a pocket screw jig, bore two holes on the inside faces at the top of each side piece. (I measured in 11⁄4″ from each long edge and struck a layout line…because I’m anal-retentive.)
Before getting started on the assembly, I recommend sanding the top and sides now. For painted work, I usually sand to #150 grit.
With the surfaces prepped, you’re ready to attach the sides to the top. There’s a 1″ overhang on each end, so use your combination square to mark 1″ in from both ends on the underside of the top. Clamp a straight block of wood at that line, and use that both to align the workpiece and help hold it in place as you screw the side to the top, flush at the back edge.
Repeat the process on the other end.
Ready for Round Bits
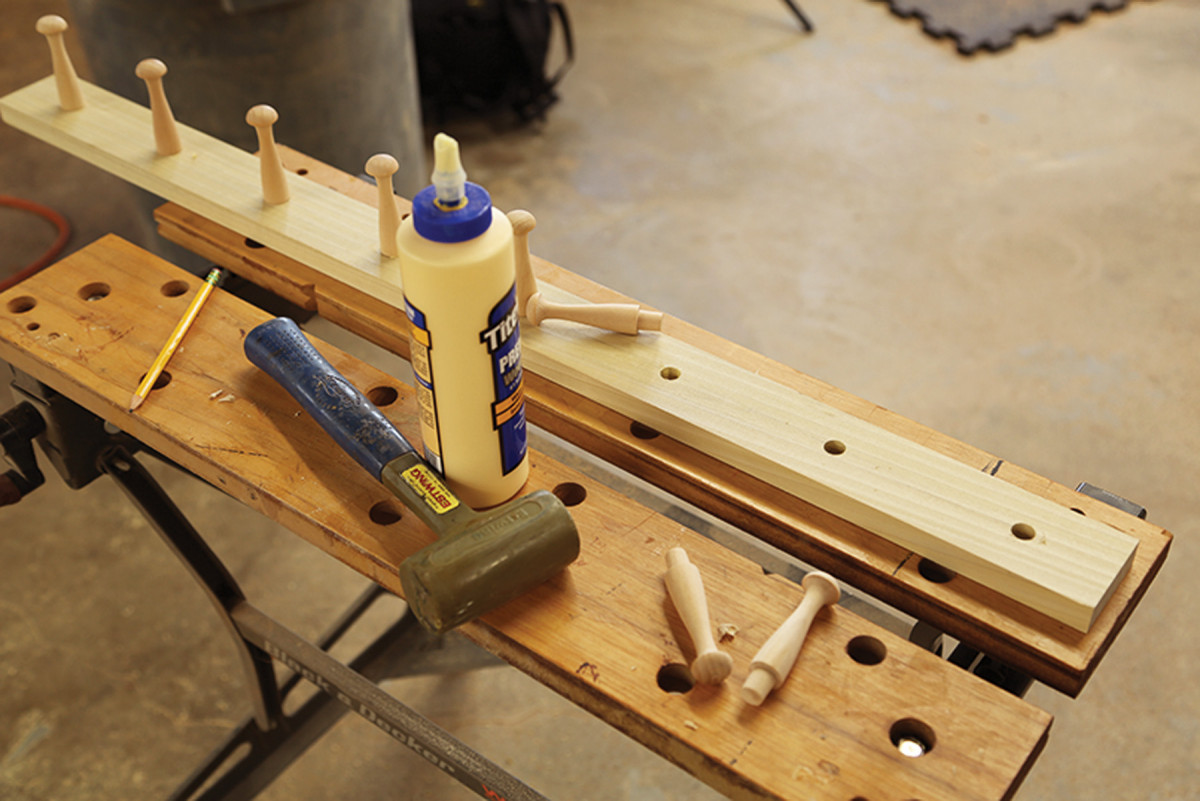
Pegs. A little glue and a light tap with a mallet to fully seat the pegs will keep things in place.
Measure the distance between the two sides and transfer that length to the 1×3 (better yet, mark the length of the back by holding it up to those two pieces). Cut the back piece to length, drill two pocket holes on the back at either end, then sand up to #150 (it’s awfully hard to sand after the pegs are installed).
Lay out the eight peg locations. On mine, the pegs are 2″ in from either end, and 4-5⁄8″ apart on center. You can, of course, adjust this for your aesthetics and needs. Match your drill bit to the diameter of the tenons (1⁄2″ on mine) and drill stopped holes a little deeper than the length of the tenon. You can drill through-holes, but then the glue will drip through.
Spread a little glue around the walls of each hole, then tap the pegs in place.
After the glue has sufficient time to set, screw the back to the sides.
Now insert the dowel rod through its holes, mark it to length, then cut it about 5⁄8″ overlong. Cut a 3⁄4″ deep kerf centered across each end, reinsert the dowel, then tap a wedge (with a little glue on it) into each kerf. This will spread the dowel just enough to lock it in its hole and keep it from sliding out.
After the glue dries, use a flush-cut saw to flush the dowel to the sides, then clean up the cut with sandpaper.
Get Out Your Brush
Spacer block. Along with clamping an assembly block in place, for this operation, I also inserted a 11⁄2″-wide spacer block between the top and the back.
Because of the pegs and the round dowel, I knew it would take me longer to paint this project than to build it, so I was sure to choose a good paint that included primer – I didn’t want to have to apply more than two coats. In hindsight, it might have been easier to paint before assembly, then touch up where needed when done.
Of course, if you like the look of your wood, an oil/varnish blend or other clear coat would work nicely, too.
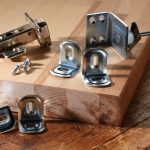
Once your chosen finish is dry, attach D-rings at the back on each side piece, hang your pot rack on the wall, buy a pack of S-hooks (mine are from Ikea) then decide which of your pots and pans to keep close at hand.
Download a PDF of this article for the drawing and cutlist: Weekend Pot Rack
Plan: Download a free SketchUp model for this pot rack.
Here are some supplies and tools we find essential in our everyday work around the shop. We may receive a commission from sales referred by our links; however, we have carefully selected these products for their usefulness and quality.