We may receive a commission when you use our affiliate links. However, this does not impact our recommendations.
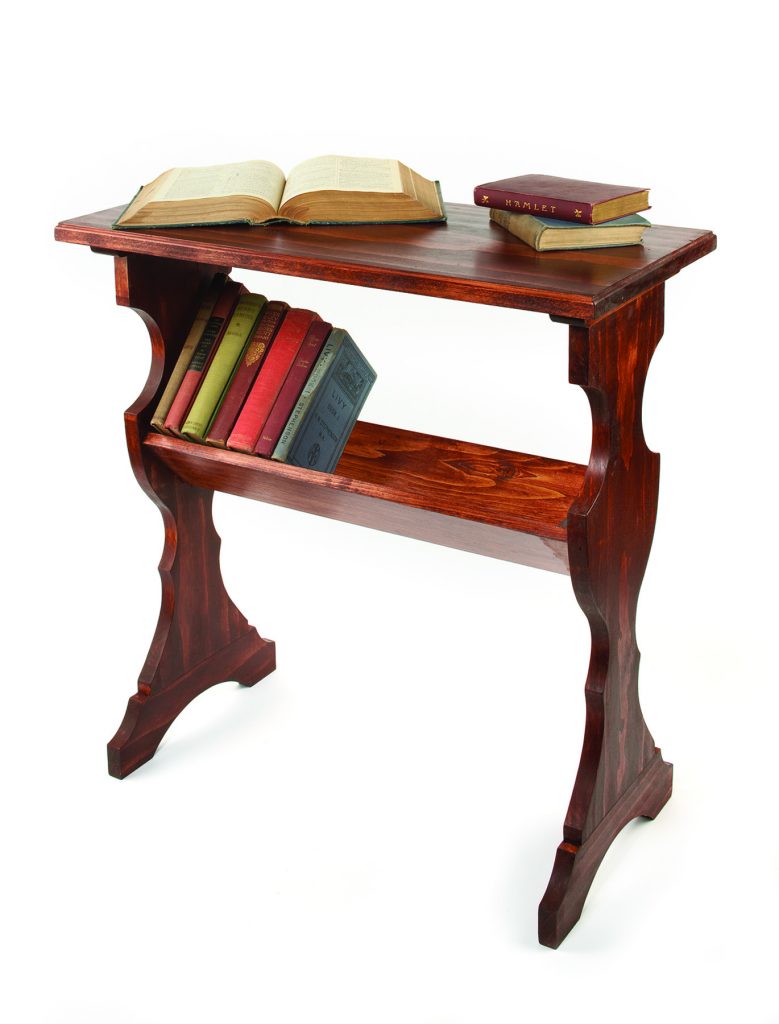
This Victorian side table is ideal for placement alongside a comfy chair – it has a V-shaped shelf underneath to hold a handful of your favorite books.
Pattern routing makes quick and easy work of these urn-shaped sides.
Click here for the SketchUp model of this project.
While vacuuming a few weeks back, I was thinking about what to build for this issue’s “I Can Do That” project when it hit me … actually, when I hit it with my vacuum. I’ve had a small Victorian table/bookshelf in my guest room for years, tucked away in a corner where I rarely see it. It’s suffered from a broken foot for as long as I’ve had it. I decided the time had come to fix the problem so that I could put the table where it belongs – next to my favorite reading chair.
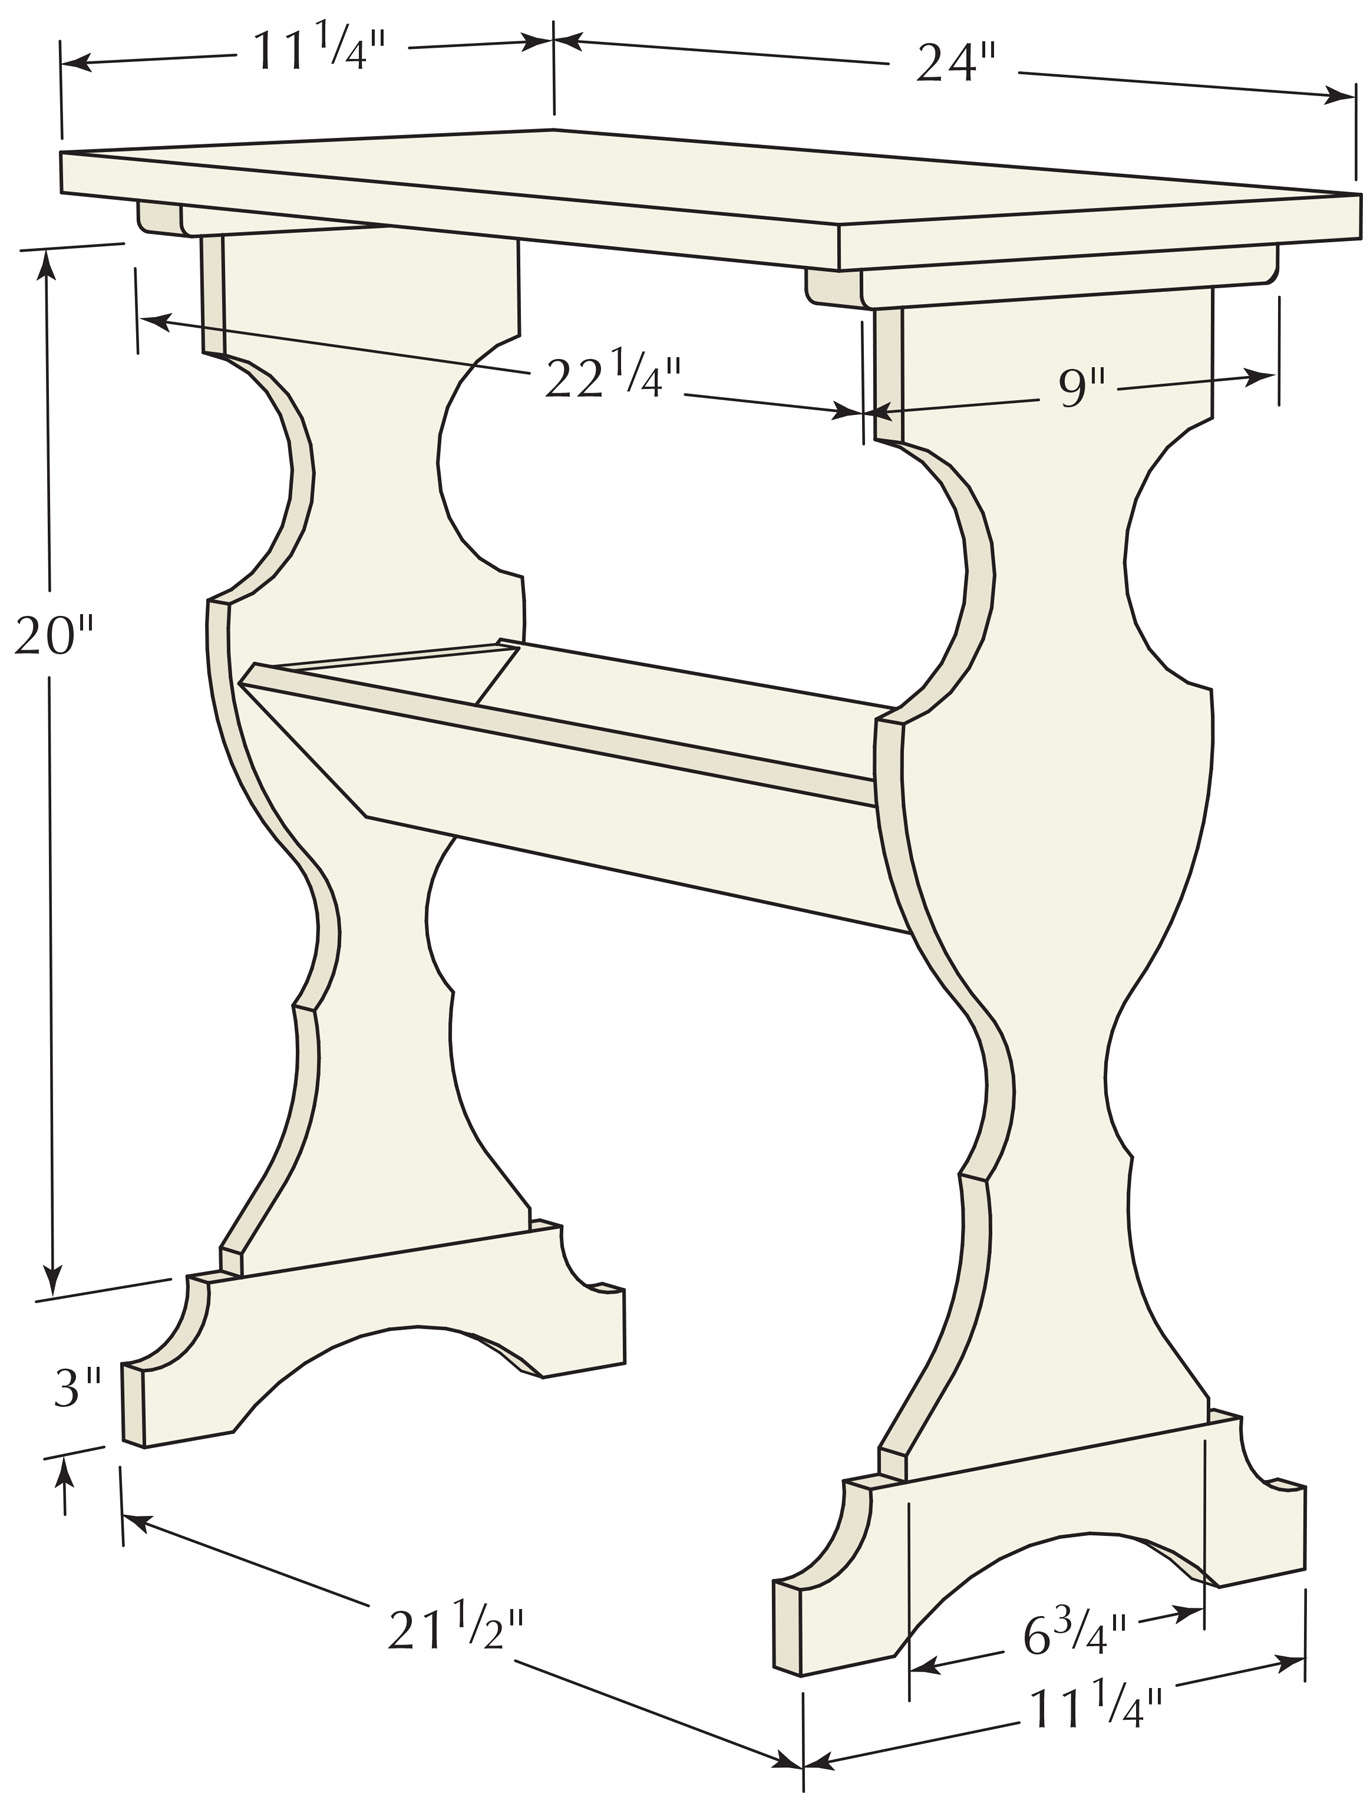
3-D View
I brought the table into our shop, took a look underneath and realized that, because we’ve introduced a router to the toolkit, it was ideal for “I Can Do That.” So I headed to the big box store for select pine (4′ lengths of 1×2, 1×12 and 1×8, as well as a 1/2″-thick piece of pine 4″ wide and 4′ long – once you get out of the realm of dimensional lumber, the nominal size and actual sizes are the same). I also grabbed a 2′ x 2′ piece of 1/2″ plywood and a can of mahogany gel stain.
First, Make a Perfect Pattern
There are a great many curves in this piece – while you could use a jigsaw to cut out the sides and feet, then laboriously smooth and sand them with rasps, files and sandpaper, it’s far easier to take the time to make one perfect pattern out of 1⁄4″ or 1⁄2″ MDF, hardboard or plywood. We prefer to use 1⁄2″ materials for patterns if we have it handy, because it gives the router bit bearing a wide surface on which to ride.
Take the time to make a good pattern and save it, so you can quickly make a bunch of these tables should you find yourself in need of a few handmade presents for the holiday season.
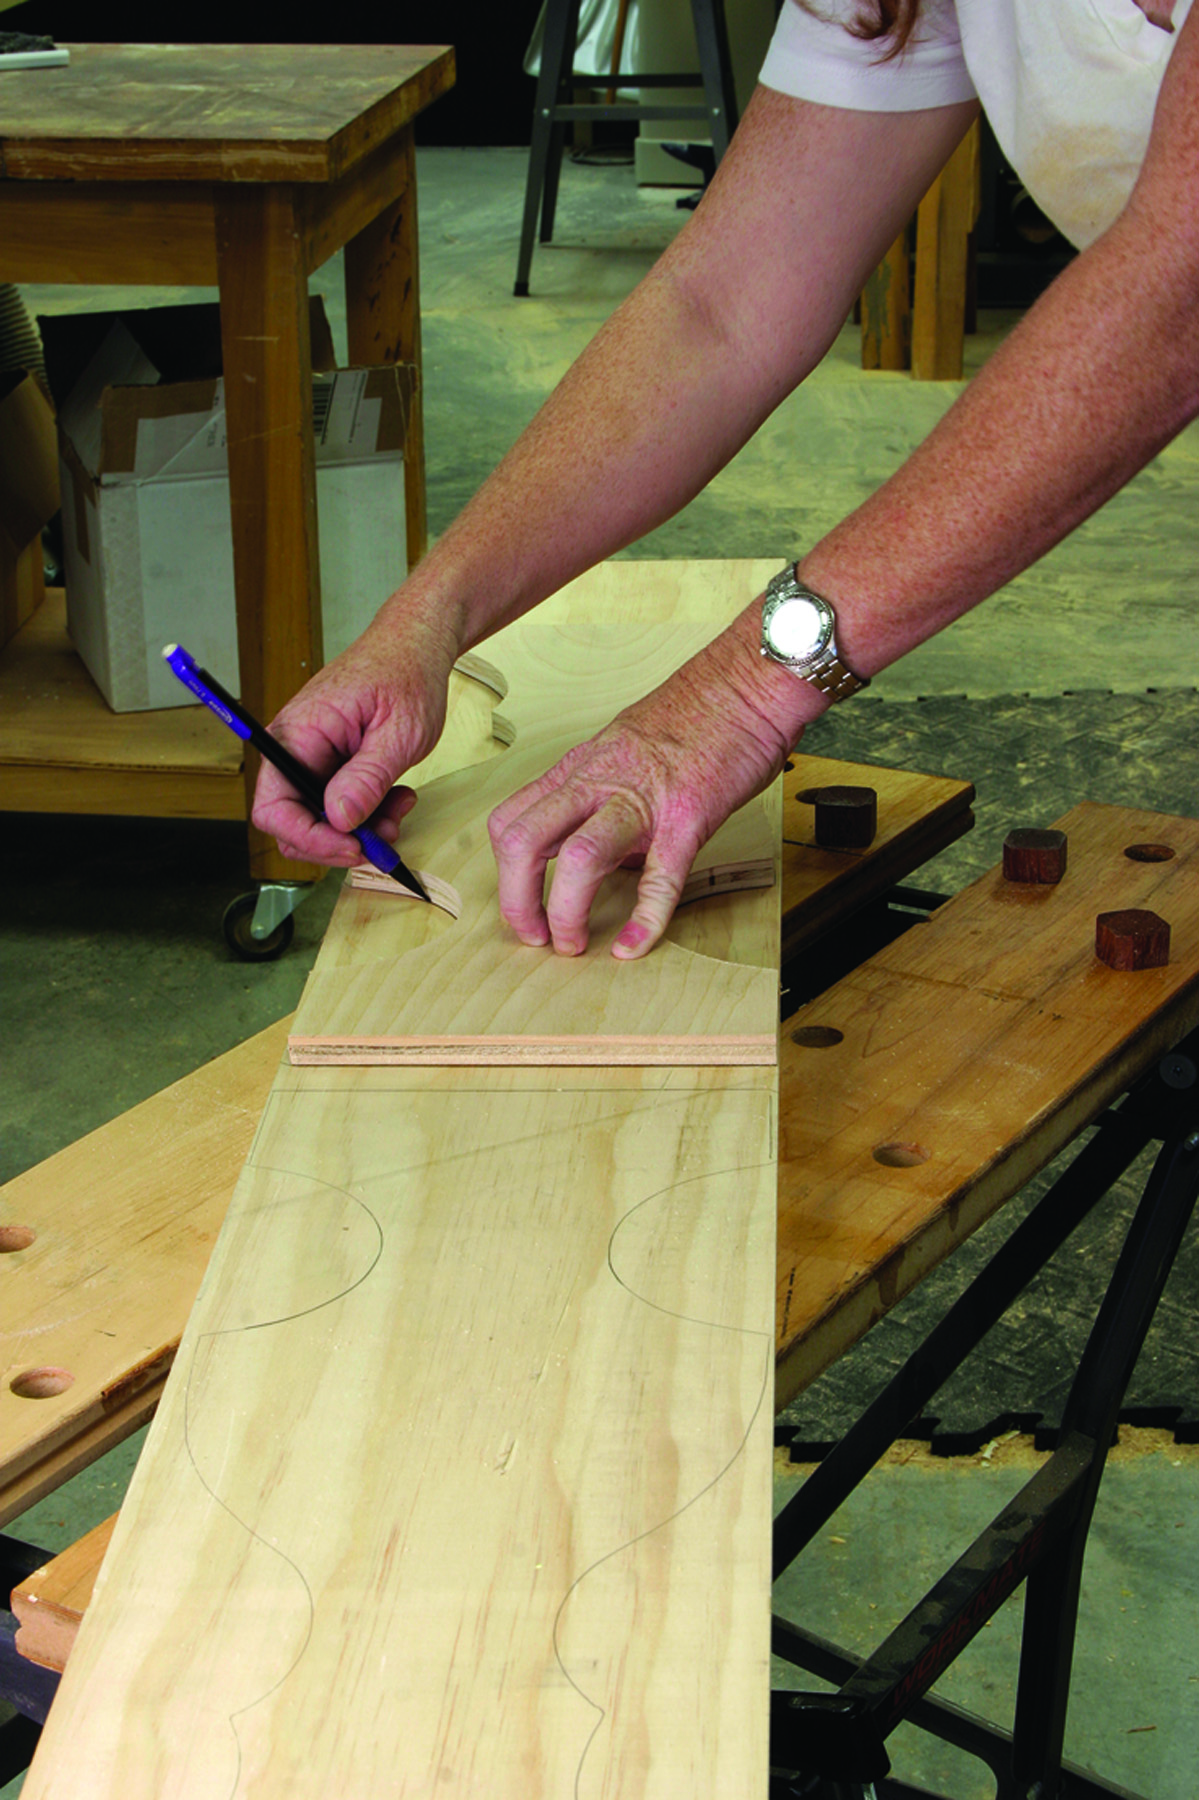
Trace amounts. Trace your pattern two times on your 1×8; try to keep the grain figure centered and continuous for a good look.
I drew the entire side pattern on a piece of 1⁄2″ plywood (with the pattern’s straight top edge at the factory edge of the plywood), then cut with a jigsaw about 1⁄16″ outside my lines. No matter how good the blade, the plywood will tear out a bit, so I wrapped sandpaper around a big dowel and used that to clean up the cuts down to the line.
Getting the pattern to look perfect may take some time – but it’s worth it. Do it right (and use a sharp router bit), and you’ll have almost finish-ready edges on your workpieces.
Pattern Transfer
Trace the side pattern twice on your 1×8, then cut with the jigsaw 1⁄8″ or so outside the curvy lines. While you can set up for pattern routing at this point, I found it easier to first cut the two sides apart (and simultaneously make the straight cut for the top of both pieces) by using the miter saw (or you clamp a straightedge to guide the shoe of your jigsaw for a straight cut, or simply let the router make the final cut).
Now clamp the pattern in place on one side piece, and install in your router a 1⁄2″ straight bit with a top-mounted bearing. Adjust the depth of cut so that the blade will completely engage your workpiece, and the bearing will ride on your pattern.
For most of the work, make the cuts by moving the router from left to right, or with the direction the router bit is spinning, But as you start to move out of the grain toward the outer edge of the piece, climb-cut – that is, cut against the grain – to avoid breaking off the delicate points. Try to keep moving at a steady pace; if you leave the blade in one location for too long, you’ll burn the edge of your workpiece (not a big deal – it can easily be sanded out). Also, you’ll get a cleaner edge if you make one pass to remove the bulk of the waste, then ride the bearing along the pattern as you make a final light pass to cut the final shape. Do the same on the second side.
Strong Feet
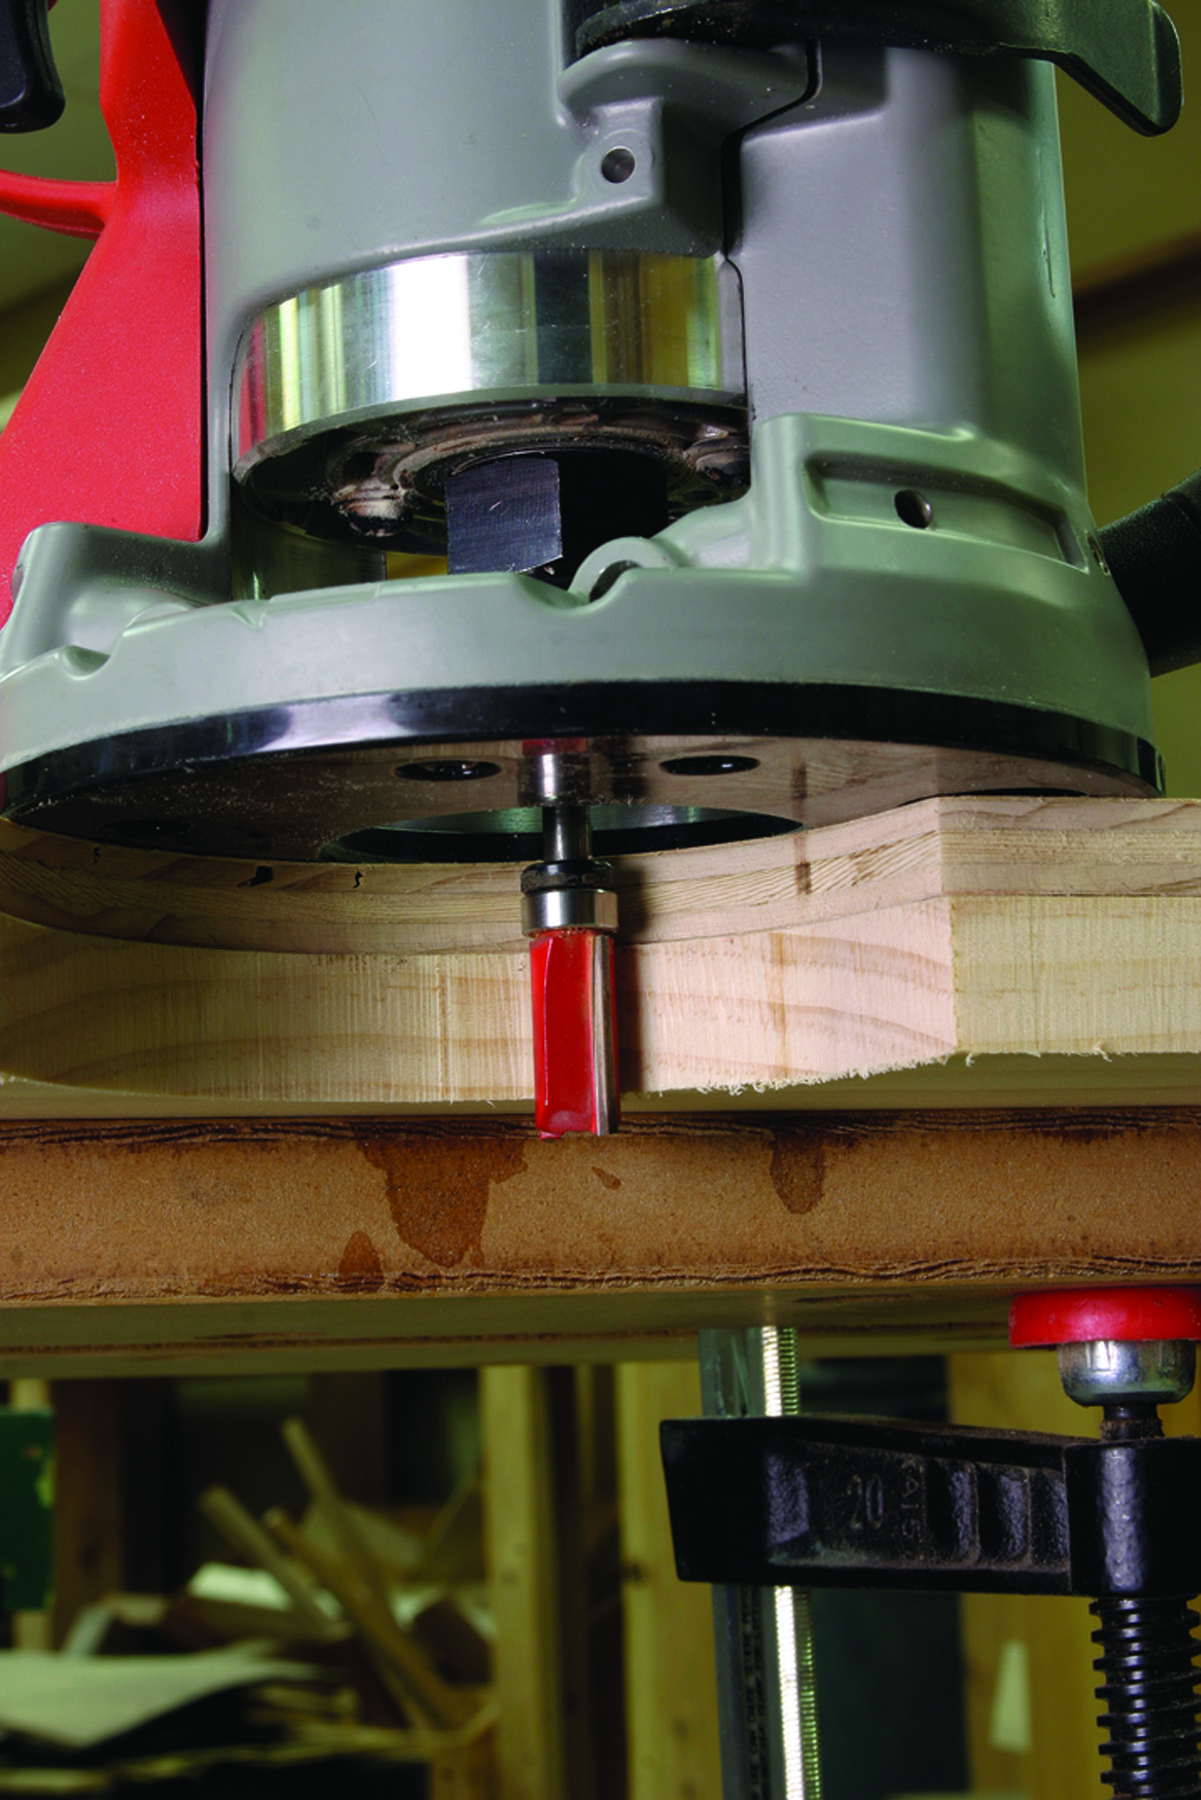
Ready to rout. Grab your router and before you plug it in, install a 1⁄2″ straight bit, then adjust the depth of cut so that the blade hits your workpiece and the bearing rides on your pattern.
You’ll notice in the illustration that the feet are separate from the sides. It’s important that the grain runs across the feet so that the 1-1⁄2″ ends don’t snap off (which is exactly what happened to my antique inspiration piece). You can make a pattern and use a router to cut the feet from the end of your 1×12, but because they are simple curves, I just drew them directly on the pine, cut them with a jigsaw then sanded them.
Attach the feet to the sides with three countersunk screws – a 2″ one in the middle of each foot, and 3″ screws located 11⁄2″ or so to each side of center (I eyeballed it; there’s no need to measure).
Shelves & Top
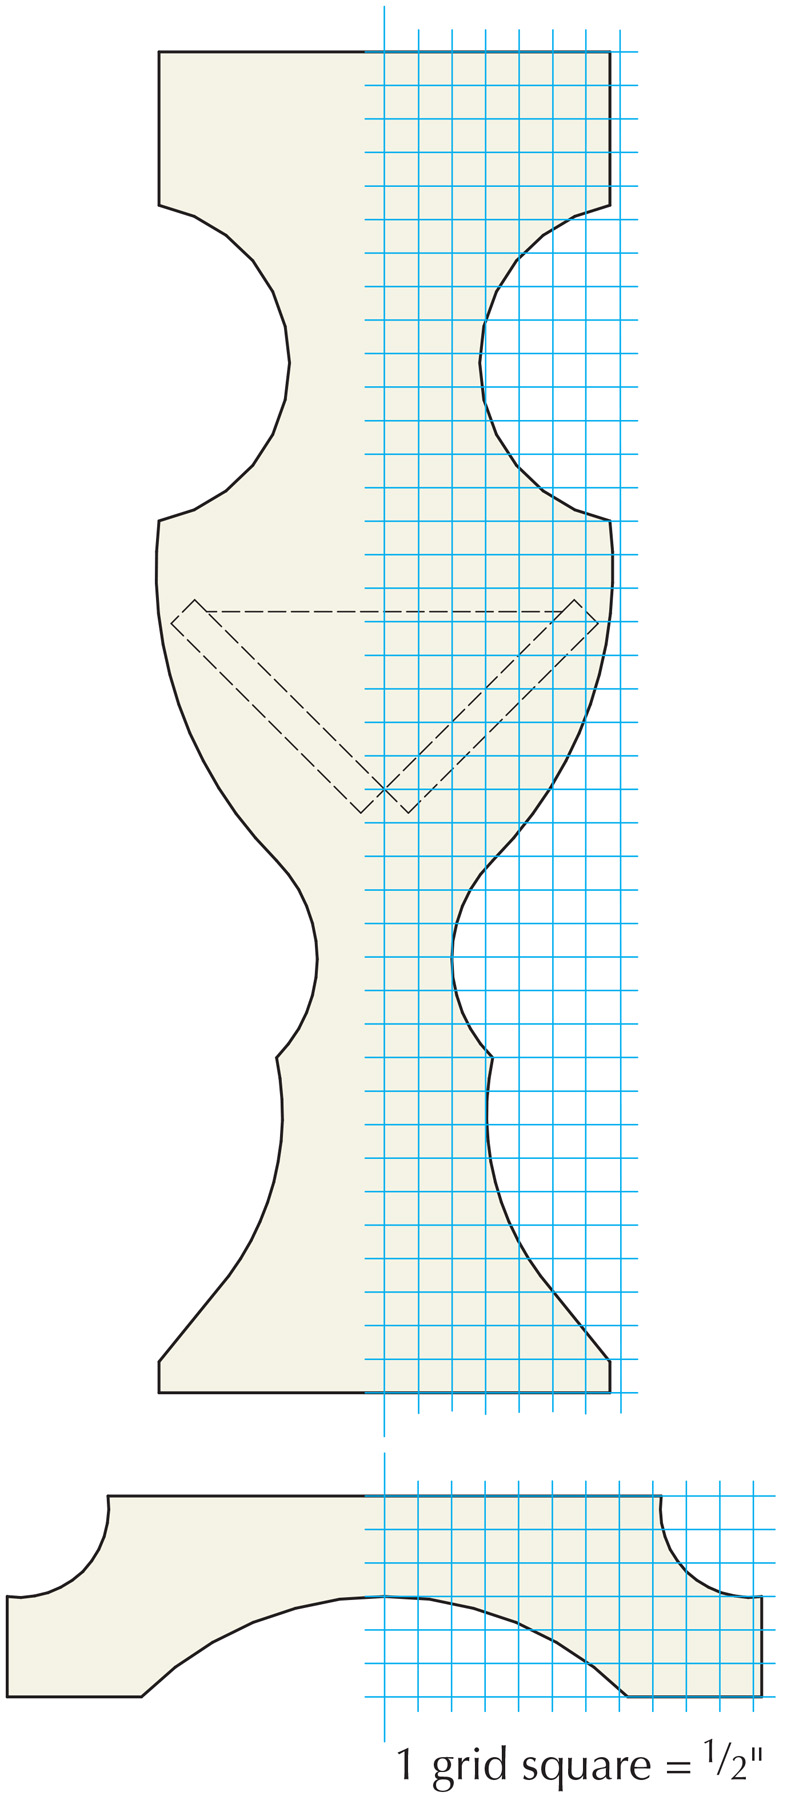
Side & Foot Patterns
The shelf cleats are simply a 3⁄4″-thick, 3-3⁄4″-square piece, cut in half diagonally. They’re secured by three 1-1⁄4″ countersunk screws in each. The two 20″ shelf pieces are cut from the 1⁄2″ stock and are simply butted together at a 45° angle then secured to the cleats with three nails per end. (Don’t forget to drill pilot holes.)
Cut the top cleats from the 1×2 and before screwing them down to the top of each side, round the ends with a rasp and sandpaper.
Cut the top to size, and if you like, add a decorative profile on the top edge using a 1⁄4″ roundover bit (or any profile you like.)
I stained this piece with two coats of gel stain before attaching the top, and added a top coat of wipe-on poly for protection. (Gel stain sits on top of the wood more than traditional, penetrating stain, so it cuts down a bit on the blotching inherent to pine.)
With the finish done, flip the top over, position the cleats, drill countersinks and drive 1 1⁄4″ screws through the cleats into the underside of the top to secure it.
Now, choose a selection of your favorite books and stock the shelf. You’re ready to read.
Here are some supplies and tools we find essential in our everyday work around the shop. We may receive a commission from sales referred by our links; however, we have carefully selected these products for their usefulness and quality.