


We may receive a commission when you use our affiliate links. However, this does not impact our recommendations.

Turned Lidded Box
A Precision Fit Lid that Snaps Shut
By Alan Lacer
|
Of all the different forms of woodturning, I find the most |
You may also like… |

|
Turn your blank into a cylinder then cut tenons on each end with a parting tool. Use a caliper to size the tenon to fit your scroll chuck. |
Click any image to view a larger version.
|
|
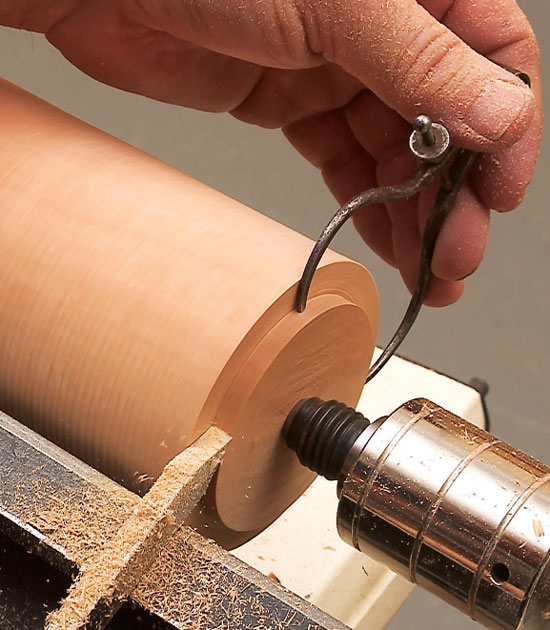
Use a thin-kerf parting tool to separate the lid from the base. This tool removes as little material as possible and helps maintain the grain match at the joint. |
|

|
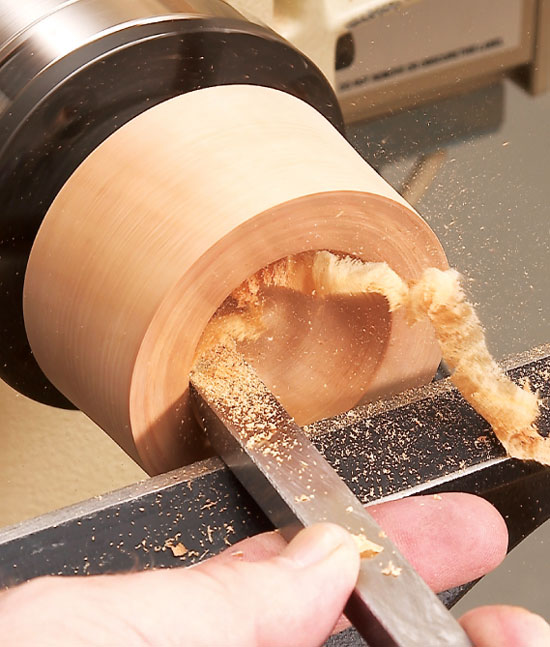
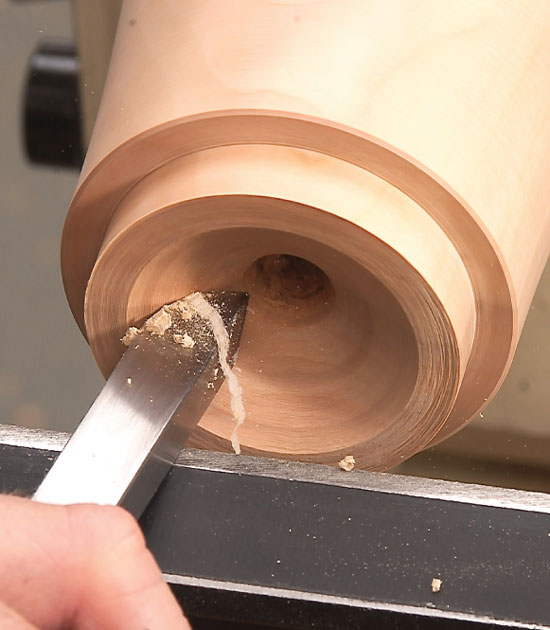
Rough out the inside of the lid with a 1/2-in. side scraper. Hollowing end grain is best done from the center out to minimize tear-out. |
|
|
Check that the mortise does not taper in towards the center of the lid by holding a rule against the mortise. The perfect mortise will position the ruler so that it sits parallel with the lathe bed. |
|

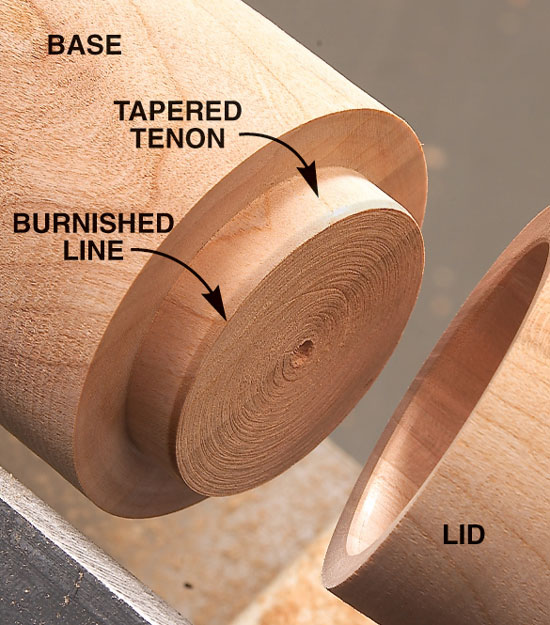
| Mount the base in the jaw chuck. Cut a tenon that tapers so the lid just fits on the end. Twist the lid to create a burnished line then shave the tenon down to that line. The fit has to be tight so the lid won’t spin as it’s turned on the base. |
|
|
Shape the top of the lid with a shallow gouge. Let your creativity be your guide for the top design. Shoot for a 3/16" – 1/4" thick top. |
|
|
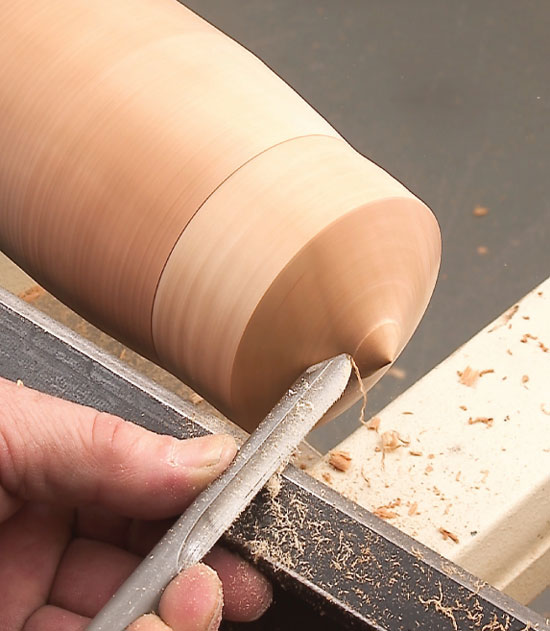
Use a spindle-roughing gouge to shape the rest of the box. A groove cut with a parting tool marks the bottom of the box. |
|

|
Cut a shallow V-groove at the joint with a skew. This detail helps disguise slight changes in circularity that may show up at the joint over time. |
|

|
Use a side radius scraper to continue hollowing the base after drilling out its interior using a drill chuck mounted in the tailstock. Start in the drilled opening and work from the center out. |
|
|
Part the base off from the blank. Be sure to leave enough wood on the base so the bottom can be scooped out in the next step. |
|

|
This story originally appeared in American Woodworker April/May 2007, issue #128.
|
|

Here are some supplies and tools we find essential in our everyday work around the shop. We may receive a commission from sales referred by our links; however, we have carefully selected these products for their usefulness and quality.


