


We may receive a commission when you use our affiliate links. However, this does not impact our recommendations.
Gathering the tools and materials necessary to make a Roorkee chair might seem intimidating because of some of the unusual operations (riveting?). I think the list of necessary tools is pretty manageable and reasonably priced – nothing too exotic.
When students ask me for recommendations on what they should buy, here is my list. I have found this set of tools to work very well. Make substitutions at your own peril.
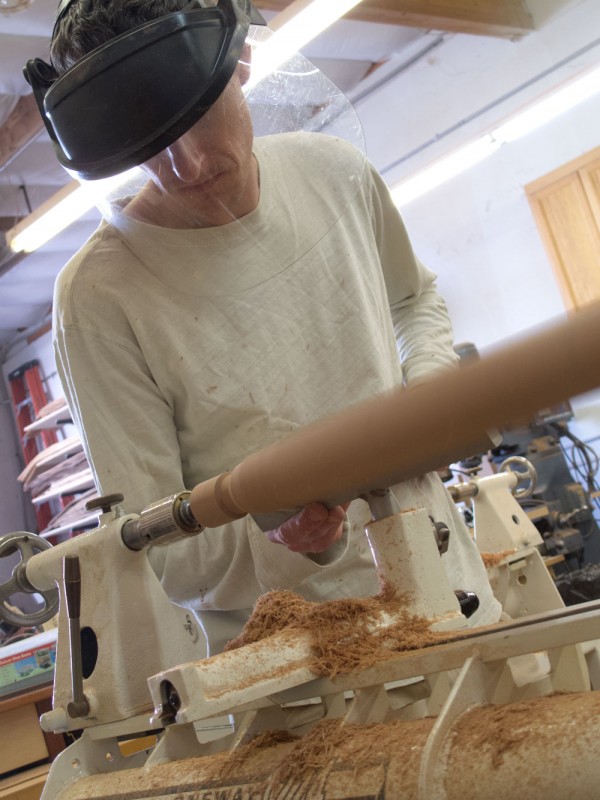
A Midi-Lathe
A Roorkee chair is a great way to get into spindle turning. Its legs and stretchers are an ideal first lathe project. So lots of people ask me: Which lathe should I buy? If you plan to stick with building furniture, one of the so-called midi-lathes with a bed extension is a good choice.
I have a Jet midi-lathe, the ancestor of the JWL-1221VS. I have the bed extension, which allows me to turn the longer parts for the Roorkee and typical table legs. I clamp my machine to a low workbench. Most cheapie lathe stands vibrate too much for my taste.
I like the electronic variable speed on my lathe, but you don’t need it for a Roorkee. You’ll use the higher speed for all the turnings, so you can save a little money and skip the variable-speed feature.
You don’t need fancy chucks, accessory tool rests or a steady rest for a Roorkee. Any stock model of any brand of midi-lathe will do the job. As always, you get what you pay for.

Lathe Tools
I started on traditional tools. Heck, I started turning on a spring-pole lathe. But when I was introduced to Easy Wood turning tools I switched immediately. They are easy to use. You don’t have to sharpen the tools (so no grinder and honing stones). You can teach yourself to turn in about an hour with these tools.
And you need only one tool to make the Roorkee. I recommend the full-size Easy Rougher. This tool comes with a cutter with a 4” radius on the tip. That is great for a Roorkee with straight cylinders at the top of the legs. If you want something curvier, pick up a 2”-radius cutter for your Easy Rougher (a $15 accessory).
The cutters are durable. If you take care of the cutter, you can turn the parts for 10 Roorkee chairs before having to rotate the cutter. That’s 40 chairs on one cutter.
I don’t have experience with other brands that imitate the Easy Wood tools. Easy Wood is a local, family-run business here. So I’m not interested in knockoffs made overseas.

Reamers and Tenon Cutters
Lucky for us, Lee Valley Tools makes the tooling for the conical mortise-and-tenon joints that are the foundation of the chair. I see no reason to make your life difficult and try to find a vintage reamer.
Buy the large standard reamer and the 5/8” tapered tenon cutter. Then you are set. To drive the reamer you’ll need a brace, electric drill or drill press.

Leatherworking Tools
Like any craft, you can go nuts with the tools. Here is the starter set I used for my first 10 chairs. I have some additional tools now, but the following tools will get you started.
- Utility knife with sharp blades.
- Punches. Get the mini set and maxi set from Tandy and you’ll be covered.
- Poly cutting board and mallet for riveting and cutting.
- A rivet and burr setter for No. 9 rivets.
- 16 oz. hammer for riveting. Nail nipper for cutting rivets to length.
- A strap cutter. You can make your straps with a straightedge, but a strap cutter is cheap and way better.
Miscellaneous Tools
The rest of the tools you need are pretty standard stuff in any workshop. The include some drill bits to make holes in the wood. A handplane and some sandpaper to remove tool marks. A rasp to shape the top of the arms.
As to hardware to make the chairs, here is a complete list with links.
— Christopher Schwarz
Here are some supplies and tools we find essential in our everyday work around the shop. We may receive a commission from sales referred by our links; however, we have carefully selected these products for their usefulness and quality.


Chris-I know late to the party on this, but what size oval punch do you use for the buckle?
Chris –
On the leather side you suggest the mini and maxi punch set but your picture shows a rotary punch. What are your thoughts on that over, or in addition to the mini and maxi set?