We may receive a commission when you use our affiliate links. However, this does not impact our recommendations.
This is the last in a series of four posts designed to introduce the woodworker to new tool – SketchUp. SketchUp is a powerful and ideally suited tool for woodworkers who design their own furniture, cabinets, jigs, fixtures or workbenches. Anything you build in the shop can more efficiently begin on the computer using SketchUp to design it.
This post will show the user how to customize the SketchUp shortcut keys as well as how to add functionality and customize SketchUp by locating, downloading and installing Ruby script Plugins; most of which are free and easily accessible. If you haven’t seen the previous three posts in this series you can find them using these hyperlinks shown in chronological order:
SketchUp Comes To American Woodworker
Installing & Setting Up SketchUp
Tools, Components & Dialog Boxes
Shortcut Keys – Default and Customizing
 When SketchUp is installed there are a set of default shortcut keys the modeler can use which he/she may find more efficient than tool icons. Most professionals learn and customize the shortcut keys, and use them almost exclusively. However, not all tool icons or menu commands have a shortcut key, and it is difficult to customize keys to cover every tool or command. The goal is to cover all the tools and commands you commonly use in your day-to-day work.
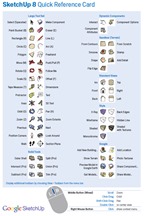
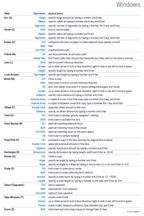
 The default keys can be seen using the SketchUp Quick Reference Card which is a downloadable PDF. If you intend to use SketchUp Pro there is also a LayOut Quick Reference Card. These PDFs are available in both Microsoft Windows and MAC versions. Click on this hyperlink to access them. For your reference the tools are shown above left and the shortcut keys are shown at right. Click on the images to enlarge them.
A quick look at the shortcut image will show that the characters in red below may be unassigned and available for customizing:
ABCDEFGHIJKLMNOPQRSTUVWXYZ
I say may be unassigned because not all of the tools and commands are shown on the Quick Reference Card, so some characters, such as the I, may actually be assigned. Note that the Spacebar is assigned to the Select tool. More importantly note that this reference card supplies you with a quick description of all the operations you can perform with each tool. For example, the Tape Measure tool with the Ctrl key creates a new Guide line; the Arrow keys lock the axis direction; typing a number into the VCB after measuring a distance will Resize the entire model.
I have a Ruby script Plugin I wrote to produce cut lists. The menus command is found either under the Window menu or the Context menu (right click menu). In the video below I will show you how to assign the X key to open up its Extended Entity Info dialog box. I will also demonstrate how to reassign the F key to the Front view and I to Iso view, two views I use frequently.
Locating Ruby Script Plugins
When the inventors architected SketchUp they envisioned an intuitive and easy to learn 3D sketching application. To that end they set out to make its functionality the smallest common denominator; but envisioned users extending it to suit their own needs. Hence they included the Ruby API (applications programming interface) into the architecture and with this API users could write their own programs (called scripts) to extend SketchUp’s functionality in the Ruby language. They were successful beyond their wildest dreams. Today there are thousands of Ruby script Plugins available on the internet. These Plugins are written by people who have a need and know the Ruby language; which, by the way, is also easy to learn. Many of them are woodworkers like you and I and most of these Plugins are free. These Plugins can be found with a Google search, but you can find most of them at one of the two sources below:
Smustard.com – the Companion to SketchUp
Ruby Library Depot
Not all Ruby scripts are found at one of these two locations. For example, most of my scripts are found on my website (srww.com) or blog (srww.com/blog). Also, Ruby Library Depot, while a treasure trove of scripts, is often down for maintenance. Don’t give up if it is. Come back in a day or two and browse through the collection.
Downloading and Installing Ruby Script Plugins
Instead of recreating a procedure for downloading and installing a Ruby script here I am going to point you to one of my Ruby script download and installation instructions available on my website. This particular script, called Layers Management Tool, is needed if you chose to take my Beginner’s SketchUp Webinar. Therefore, using Layers Management Tool as the vehicle of demonstration will serve two purposes. It is also typical of most Ruby script downloads and installations.
Before going to the Layers Management Tool page I have a few comments. In this series of four posts you have learned the very basics of SketchUp but you are not yet ready to effectively use it. Essentially you have completed pre-school. It is now time for elementary school. I highly recommend going on to my Beginner’s SketchUp Webinar; a series of nine videos that show you how to model a Bedside Table. Not because I make a few bucks, but because it will quickly get you to a point of using SketchUp effectively for your own design projects. Further, you will have those videos always available as a refresher course or reference set.
SketchUp is intuitive, and generally has a shallow and short learning curve. But there are no shortcuts to learning it. You need to practice and use it. Start with simple designs with few or no curves and get comfortable with the basics. Stay tuned to this American Woodworker Blog for more posts demonstrating the use of SketchUp. Visit my website and blog for similar material and Ruby scripts. Most of all, enjoy SketchUp and if you need help contact me at jpz@srww.com.
Go now to Layers Management Tool and follow the directions.
Here are some supplies and tools we find essential in our everyday work around the shop. We may receive a commission from sales referred by our links; however, we have carefully selected these products for their usefulness and quality.


