


We may receive a commission when you use our affiliate links. However, this does not impact our recommendations.
 Two classic joints build a beautiful utility piece
 Two classic joints build a beautiful utility piece
PROJECT #2103 • Skill Level: Advanced • Time: 1 week • Cost: $200
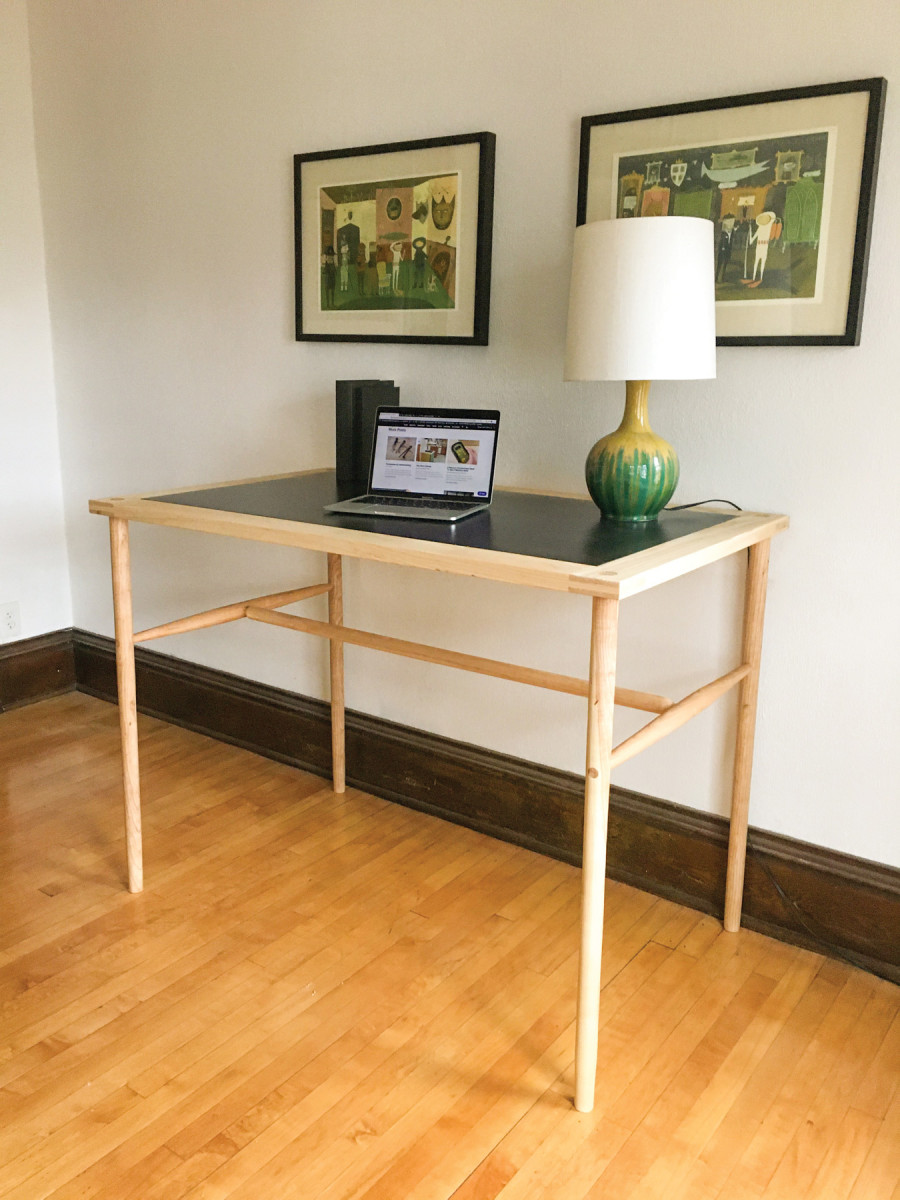
As we’ve settled into our fully working from home routine, one thing has become clear: sitting all day, without the prompts to head to a different office for a meeting, run out to lunch with a coworker, or even head outside to commute, isn’t good for me (or my body). It was decided that a secondary standing desk fit the bill. I wanted something that was sturdy but lightweight, with a smooth writing surface and enough space to spread out a bit. It also needed to fit through the doorways of my old house and, most importantly, be at a height that was comfortable for me to work and stand.
The lightweight but sturdy qualifier led me down the path of post and rung designs and all of the surprisingly light but long-lasting chairs I’ve seen over the years. I settled on laminate for the surface of the desk, for durability. And I had a pile of ash blanks in the shop already waiting for the right project. Let’s get started.
Basic Design
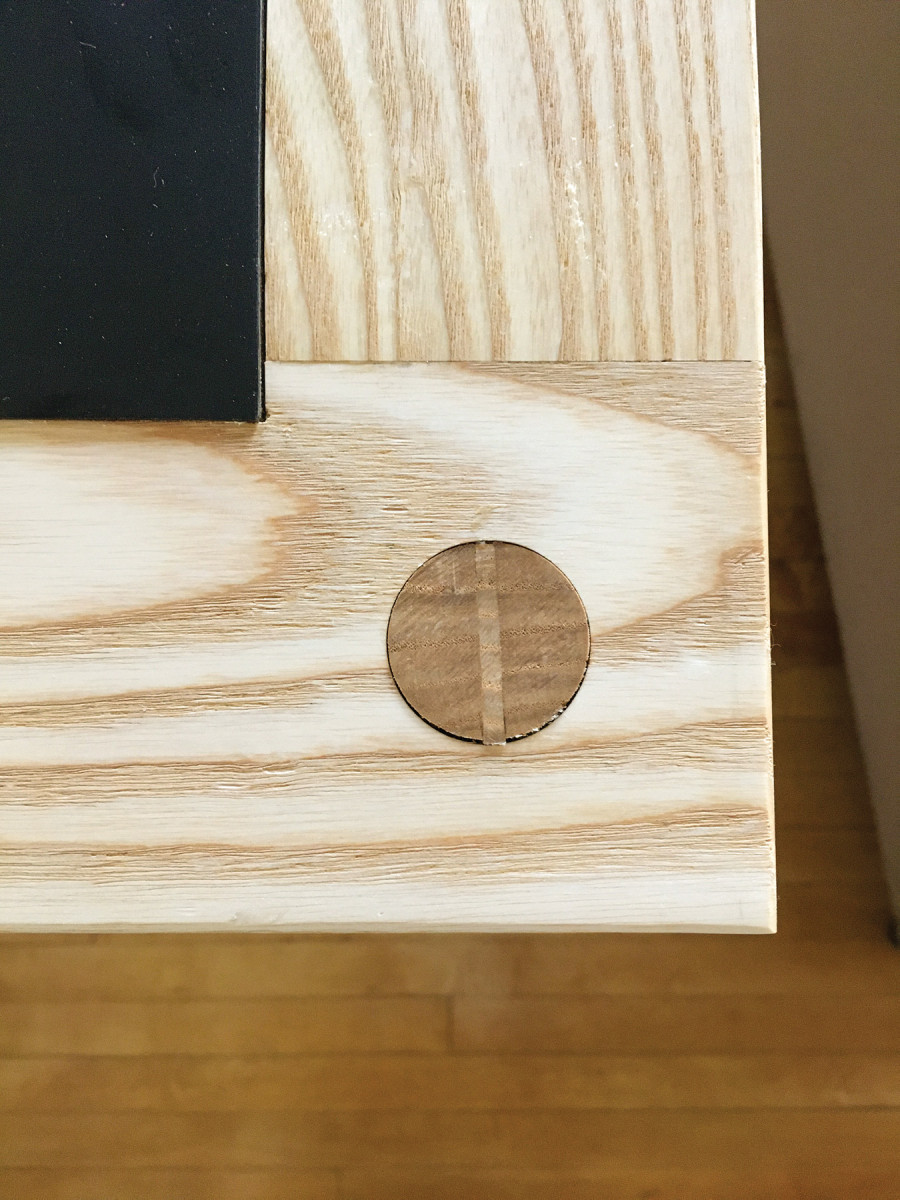
The bridle joint that holds the desktop frame together is mortised and the leg is wedged in the hole to lock it all together
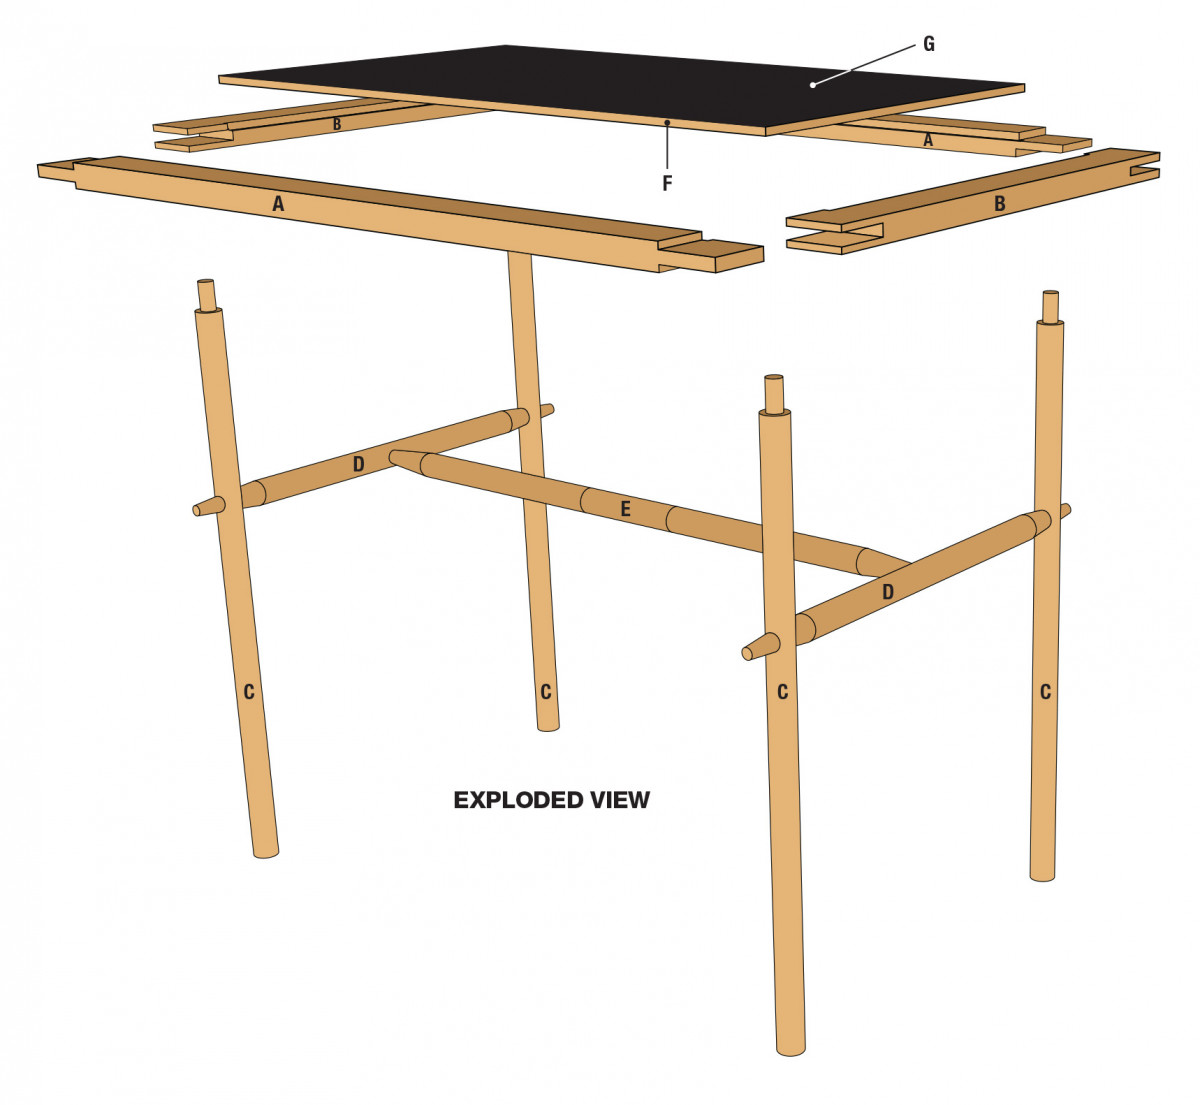
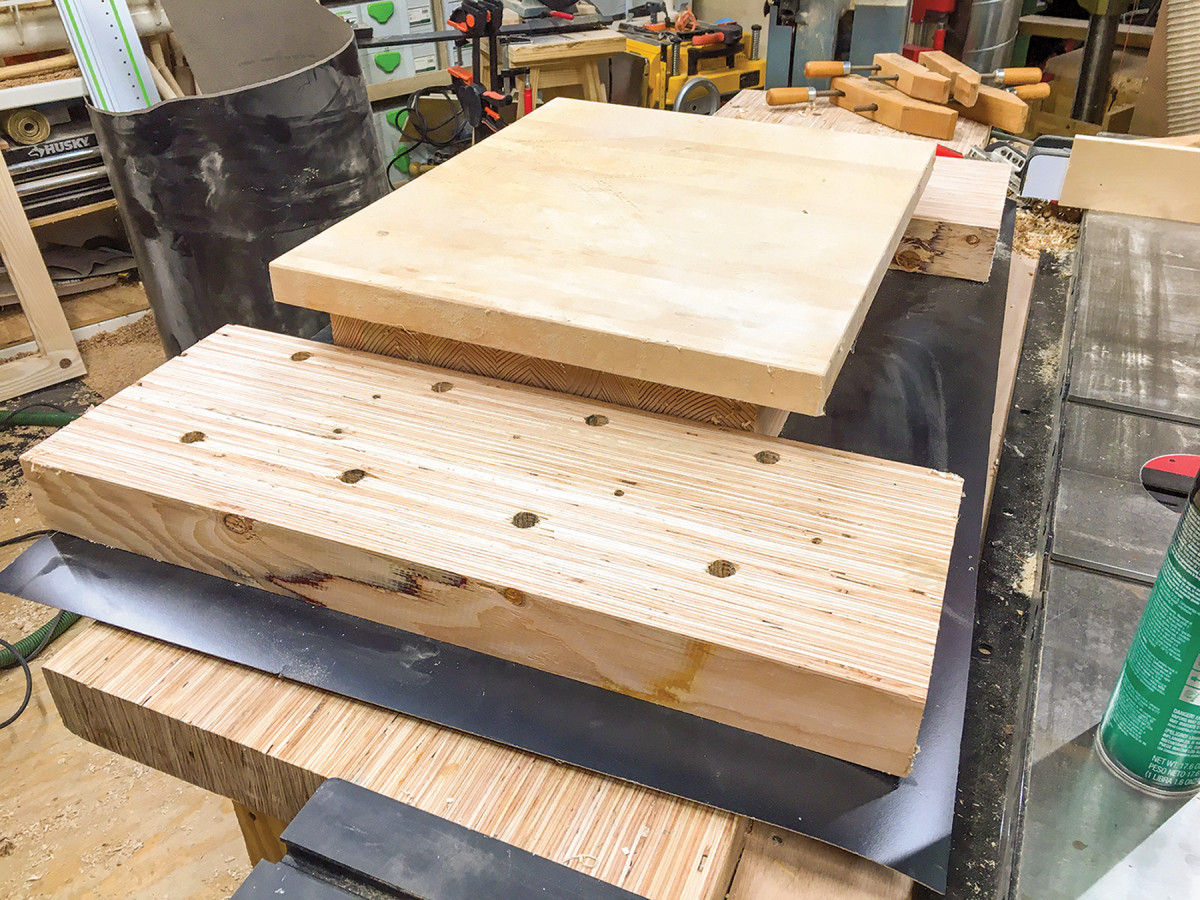
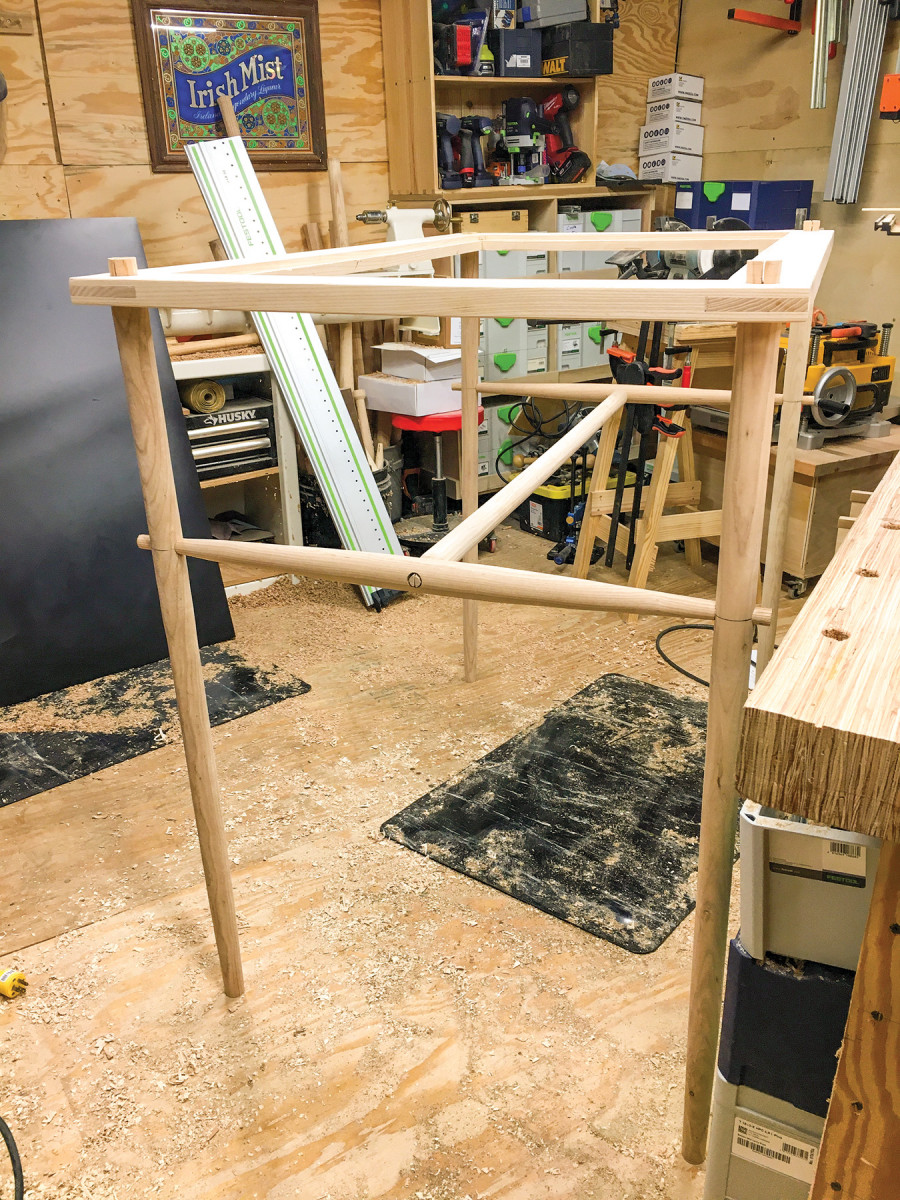
The top frame is held together with bridle joints. With a leg mortised through the top and wedged, it’s a very sturdy connection. The top insert is just a piece of plywood, cut to fit the frame, with a piece of laminate applied to the top.
Because this is a standing desk, the legs a fairly long and maxed out the length of my lathe (I turned them at about 44“ long, then cut them to final length at the end). The two side stretchers are much more manageable. The middle stretcher didn’t fit on the lathe, so I rounded that one by hand, planing down the facets of a straight piece until it was more or less round. If you don’t have a lathe, or the capacity for these legs, it’s a great alternative. In fact, it’s easier to deal with longer pieces on a workbench than on a lathe (with flex and a steady rest).

Bridle Joints
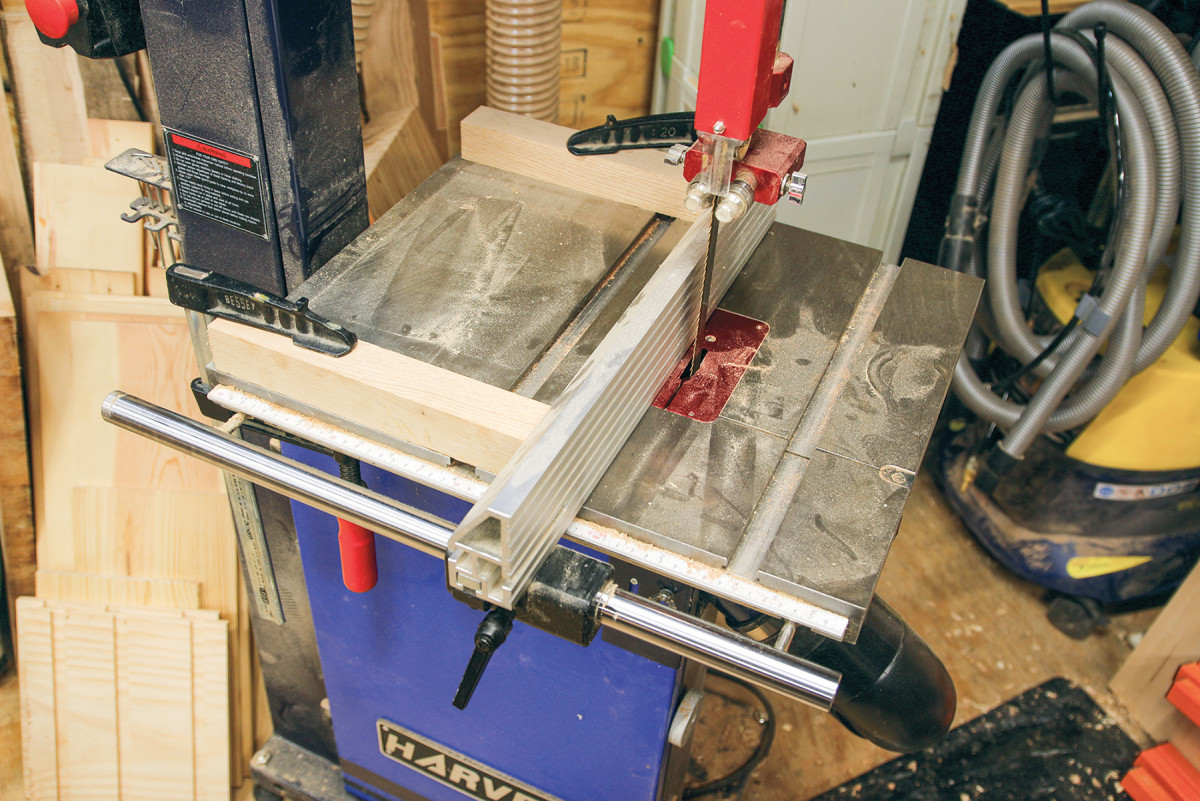
Two stop blocks behind the fence are key to bandsaw-cut bridle joints
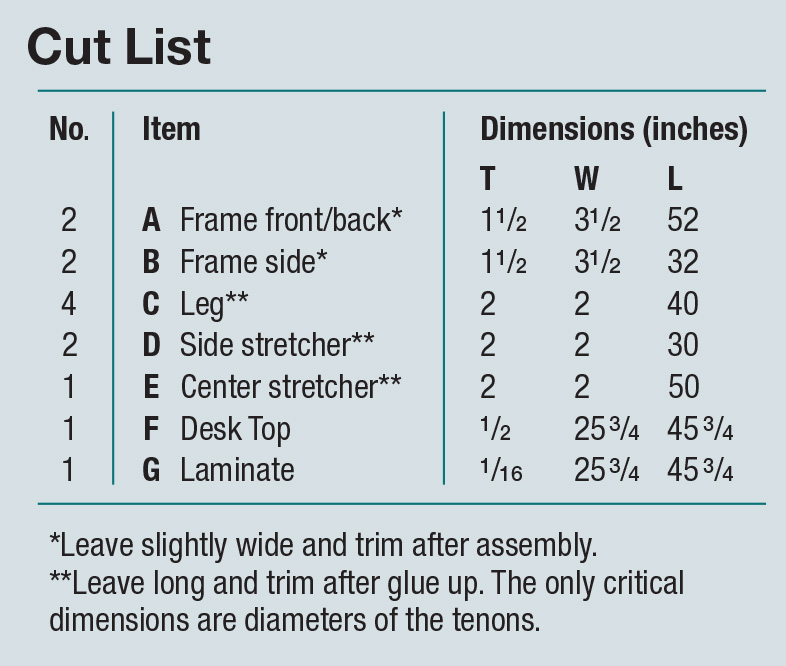
First, prepare the four pieces for the top frame (two sides, and a front and back). The bridle joints go all the way through the joint, so you can cut your pieces to width and length. I left mine a bit long and wide with the intention of trimming them down later using a track saw. That’s one of the main benefits of a bridle joint—there’s lot of surface area for glue, so removing material after the fact doesn’t do much in the way of weakening the joint.
A third stop block, clamped to the fence, sets the depth of the mortises and tenons on the bridle joints.
I cut these bridle joints on the bandsaw using one of my favorite shop tools: playing cards. This is a trick I picked up from an article Brian Boggs wrote for Fine Woodworking a few years back, and it’s the best way I’ve seen to cut bridle joints. There’s no math or layout other than figuring out your first cut.
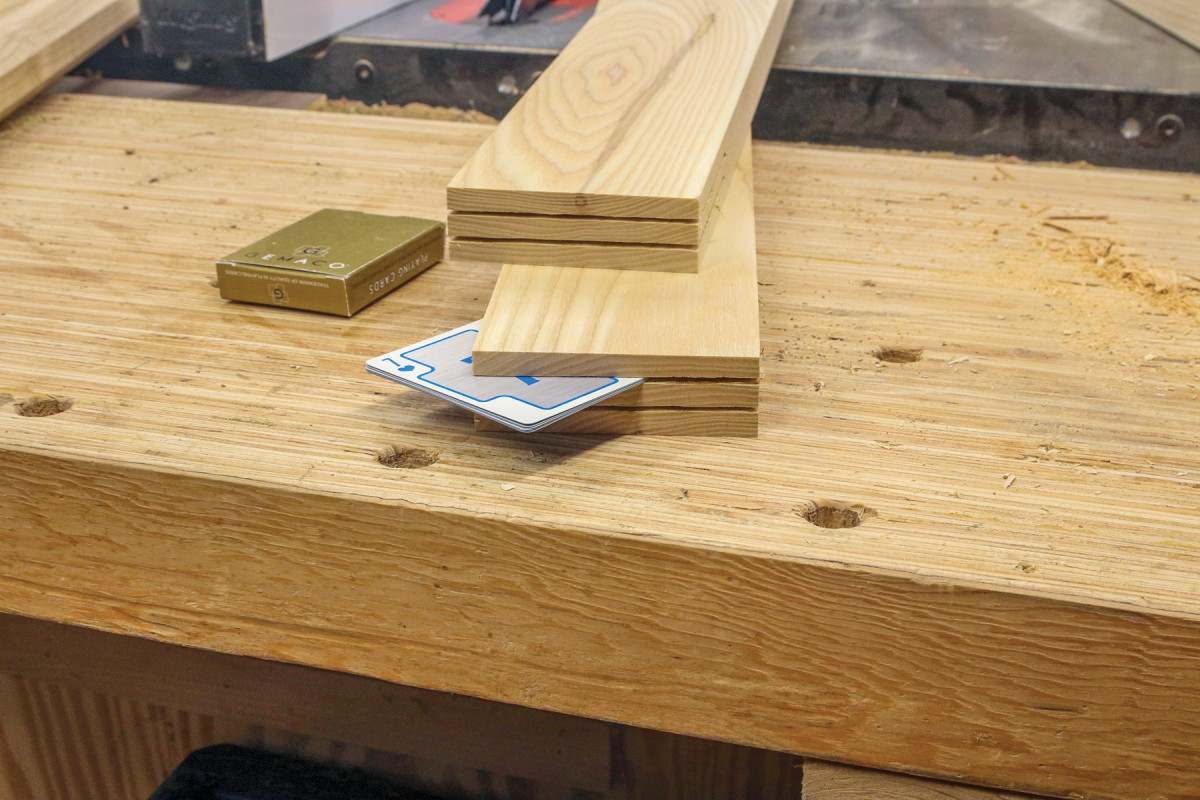
Use playing cards to find the width of the saw kerf.
The simple explanation is that you use two stop blocks behind the fence once you have your first cut dialed in on the tenon. Then, you use playing cards to find the kerf of the cut, and use those cards as spacers for the mating mortise cuts. Once you hog out the waste, your joint fits snugly off the saw. Like most woodworking operations, it’s worthwhile to practice this a few times until you dial in a good fit.

Then, use those cards as shims to move the fence closer to the blade. That accounts for the blade width in
the joint.
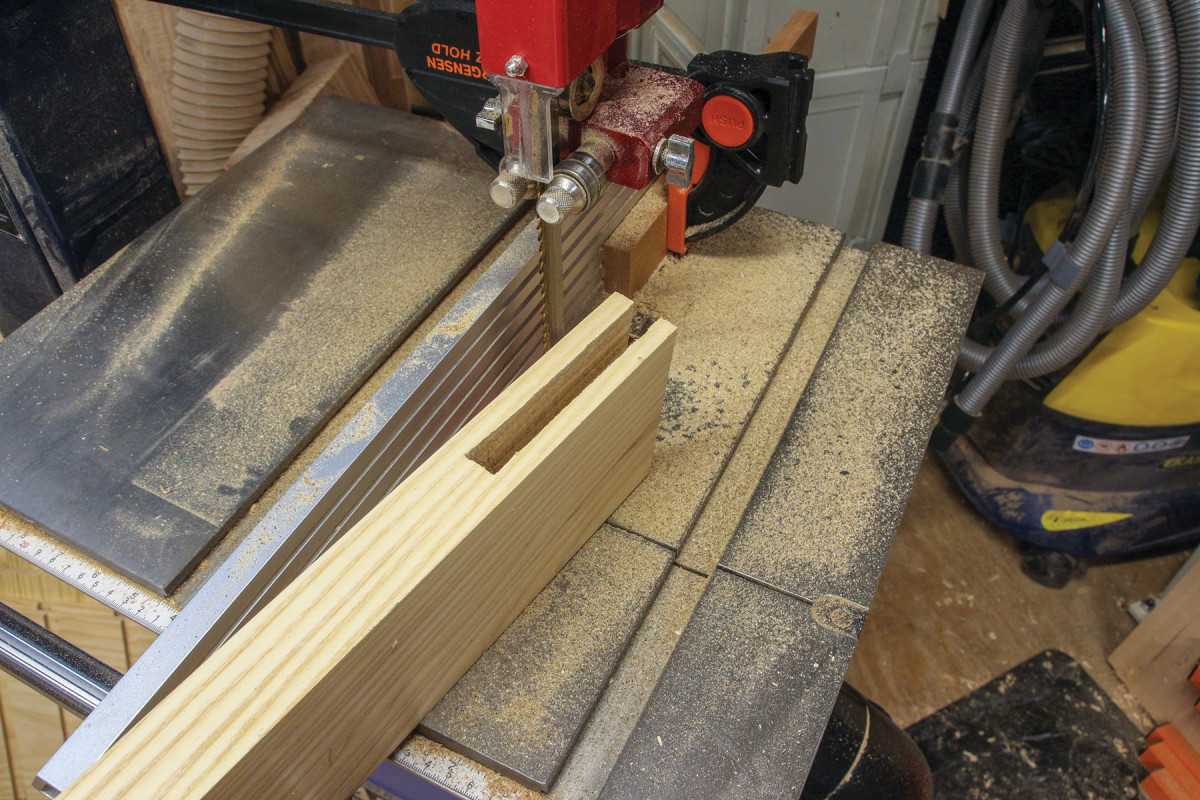
Cut the mortise, then clean out the waste by nibbling away on the
bandsaw
An ideal bridle joint has a tenon that’s 1/3 the thickness of the board. In practice, I’ve found that as long as you’re close, a little bit thicker or thinner on the tenon isn’t a huge deal. With this frame, I eyeballed the first cut, leaving about a third of the thickness of the board between the blade and fence. Then, I clamped a stop block to the fence to set the depth of the cut (slightly deeper than the width of the board).
Make two cuts for each of the tenons on the longer front and back frame pieces. Once all those cuts are made, grab your stack of playing cards and insert a few into the saw kerf to figure out how much you need to move the fence for the next cuts. You’re looking for a fit where the cards move in and out of the kerf without too much pressure, but enough that they’ll stay in place, too. If the cards are too loose or too tight, your joint will be too tight or too loose (they’re inversely related).
Add your spacer cards behind the fence (in front of the stops). This will nudge the fence closer to the blade. Make two cuts on each end of the side pieces, similar to the tenons. Remove the fence stop blocks and spacers and cut out the rest of the waste in the mortise. I make a couple of freehand cuts on the bandsaw, staying short of mortise depth.
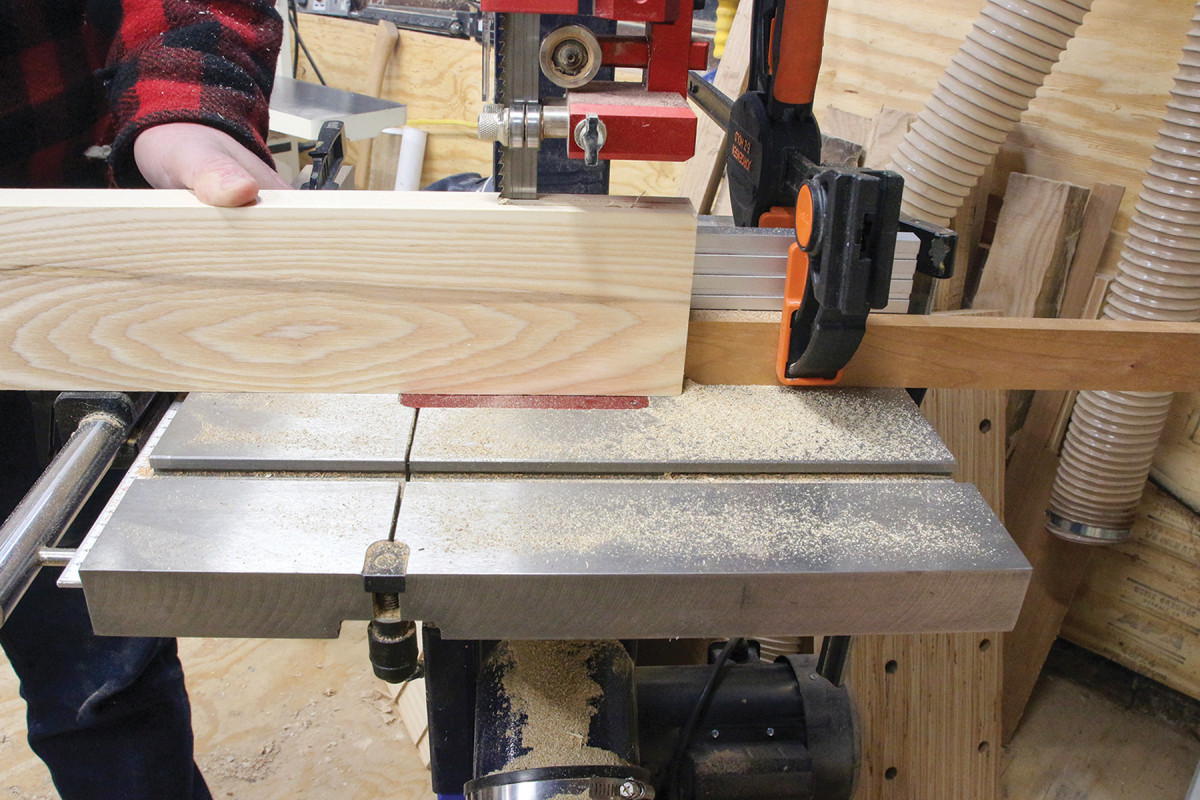
 Then crosscut the shoulders of the tenon on the table saw
Then I bring the fence (with stop block still attached) back closer to the cut, and use the blade to nibble away the rest of the waste, using the stop block to keep the depth of the mortise consistent. Finally, I cross cut the waste off the tenon pieces with a miter gauge on the bandsaw.
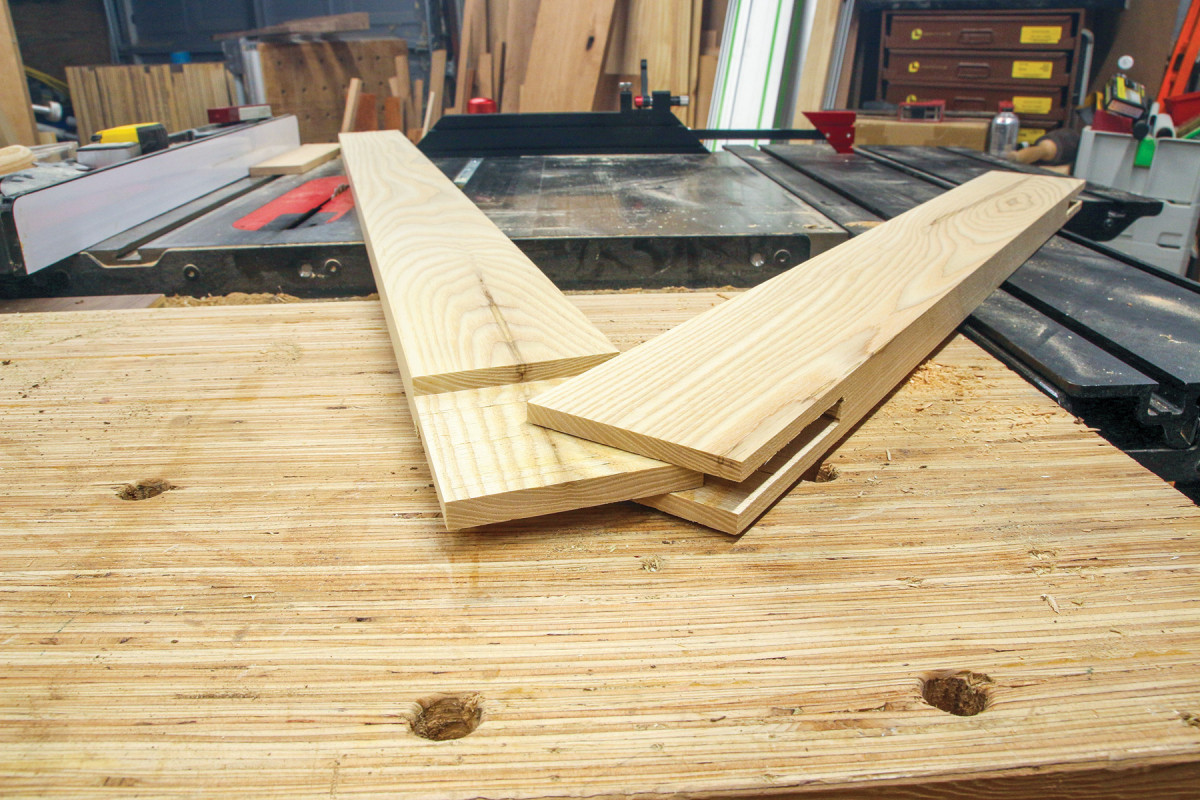
The fit off the bandsaw should be pretty close, though I still used a
shoulder plane and chisel to clean things up
Dry fit the joints and refine with a block plane and shoulder plane if necessary. Files and sandpaper are fine, too. Keep the shoulders of the tenon nice and square. Once you’re happy with the fit, rehearse your clamping procedure. For large frames especially, making sure all of the joints go together cleaning and that you end up with a square opening inside the frame are really important. I dry clamp, measure diagonals (the measurements should be identical in a square frame), then repeat the process with glue.
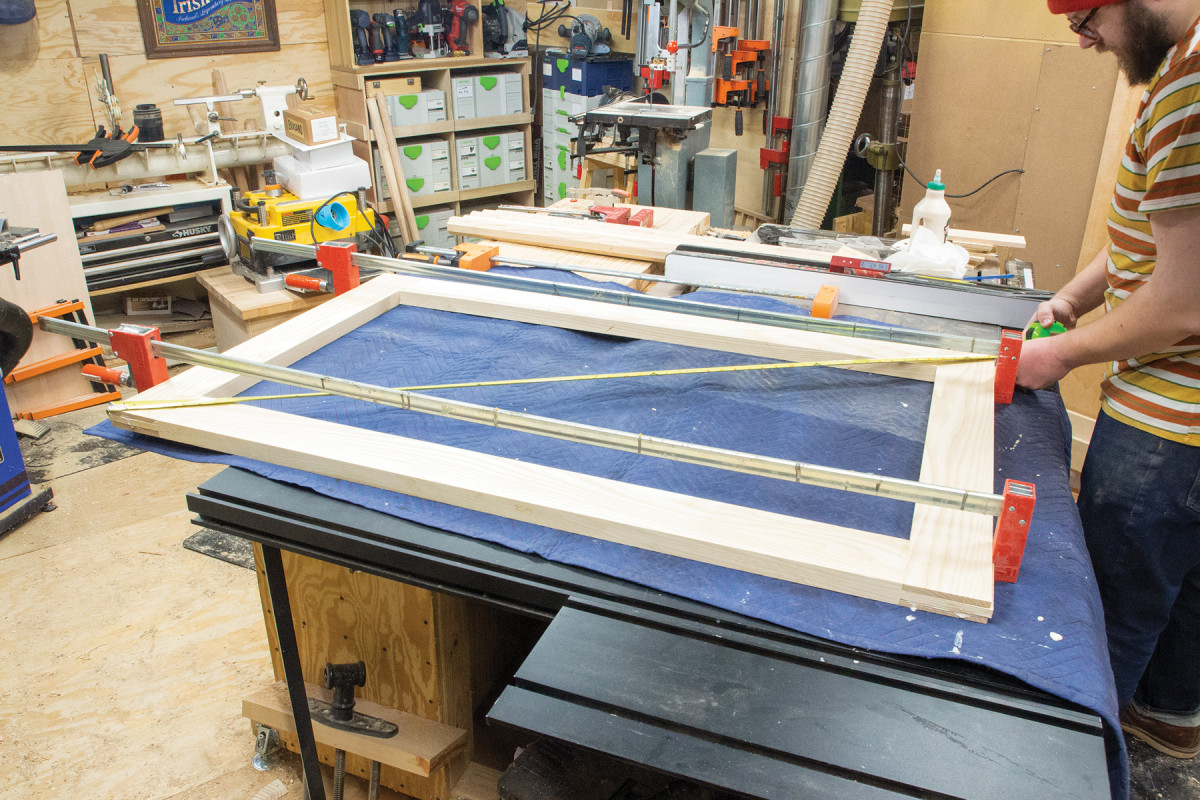
Add glue to the tenons and assemble the frame. Check for square by measuring the diagonals
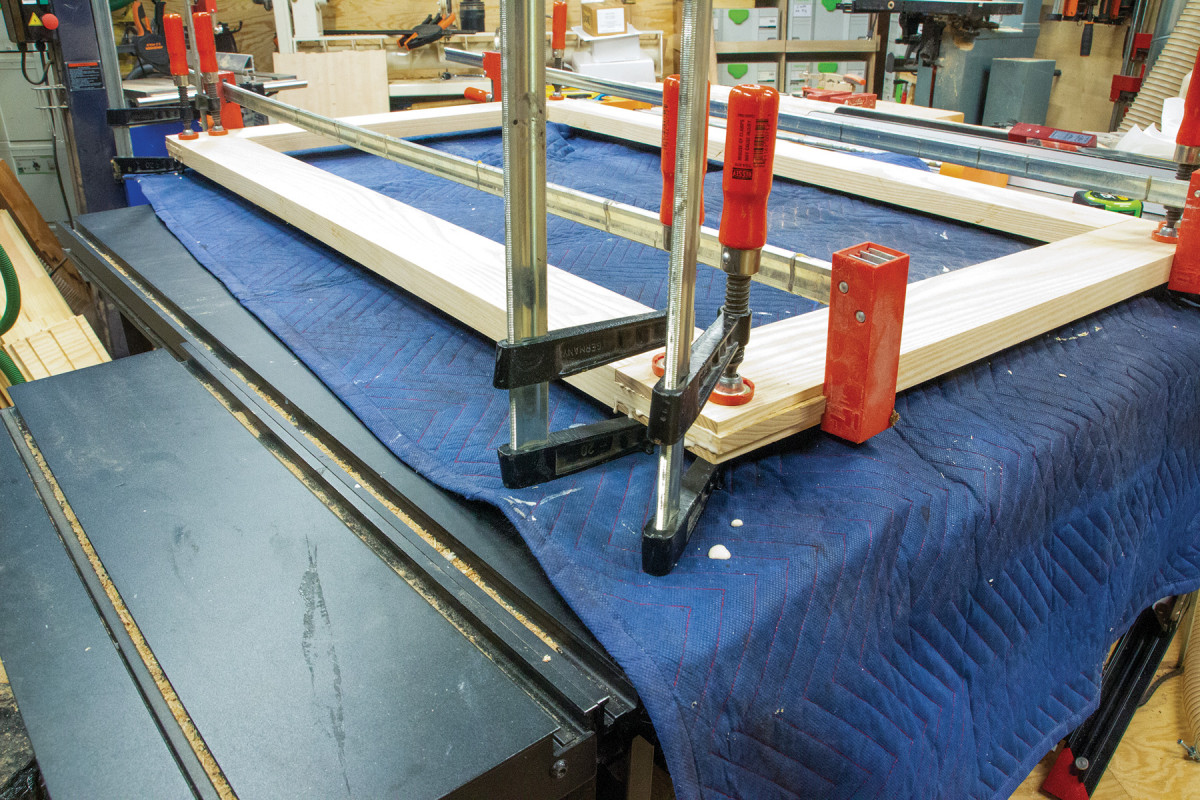
I had one joint that was a little loose, so I used a couple F-clamps to keep it tight while the glue cured.
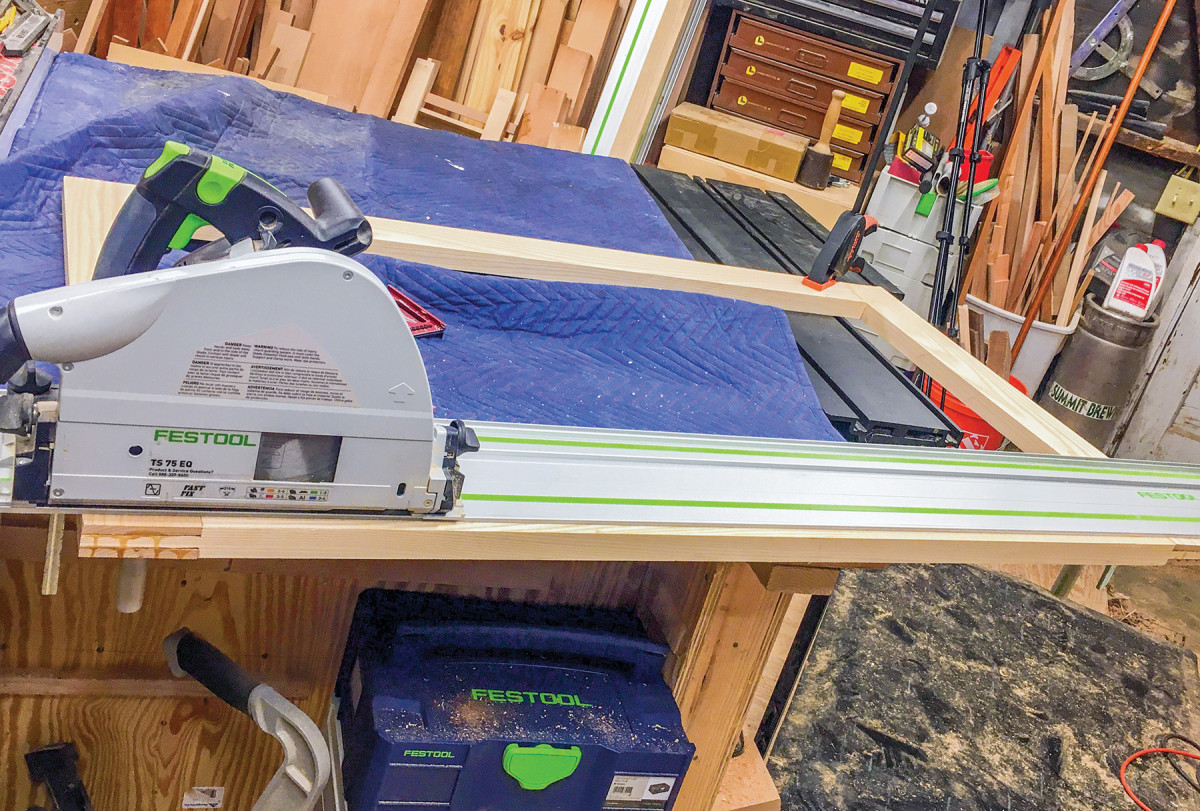
I trimmed the outside of the frame to final width with a track saw. As a bonus, it cleans up glue squeeze out, too.
I use Titebond III here because of the longer open time. I spread a layer of glue on both sides of the tenon, then insert it into the mortise, and repeat for each corner. Clamp and check for square. If your frame isn’t perfectly square, a couple of precision taps with a mallet or loosening and tightening clamps usually does the trick for me. Then, let the glue cure.
Finally, I added a small roundover to the top and bottom of the outside of the frame.
Once the frame has cured, refine the shape to your desired dimensions. I left the frame pieces about a 1/2“ over-wide, and I used a track saw and track to trim them to final width. This leaves you with clean joints on the ends. You may find some small gaps in the bridle joints. Fortunately, a small wedge, some glue and sawdust fixes those spots right up. I also added a small 1/8“ roundover with my router to both the top on bottom edges.
Turned Legs
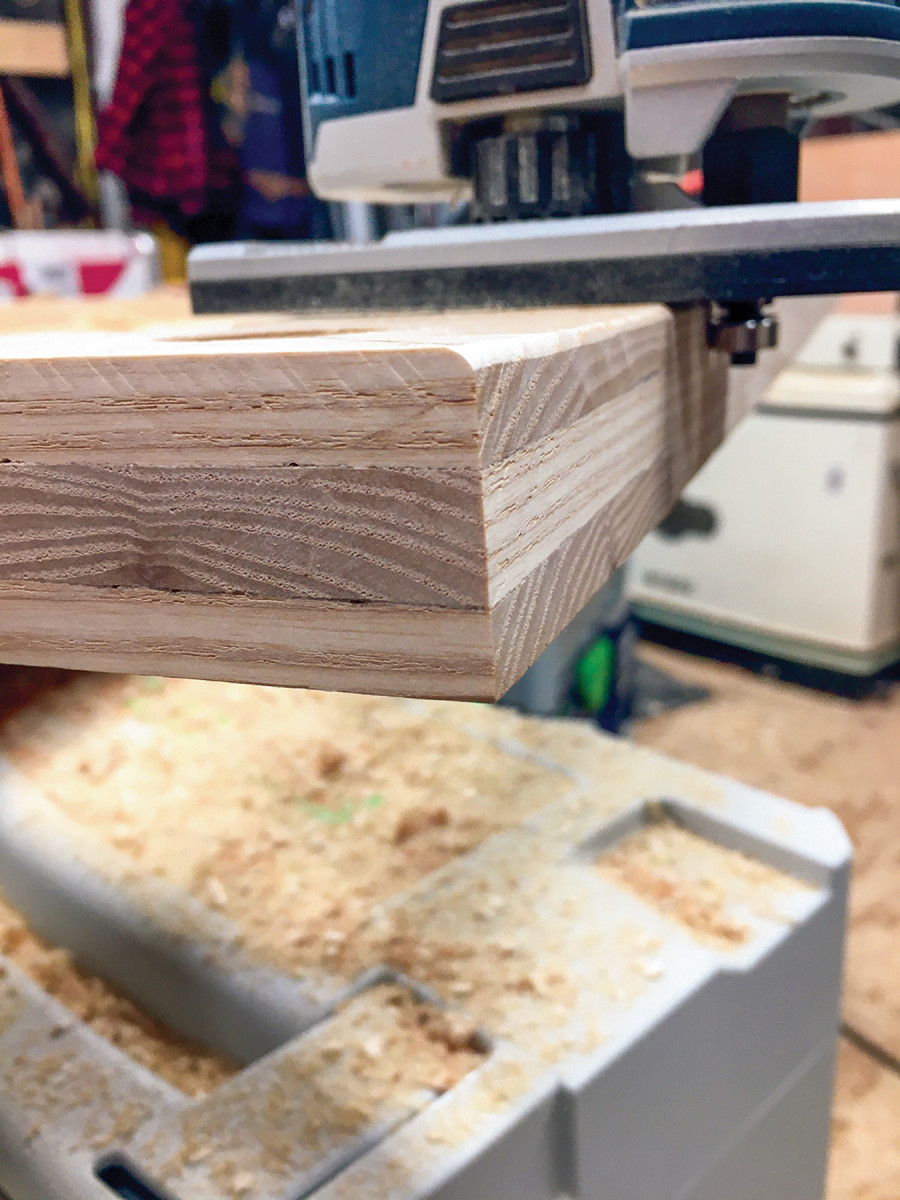
When possible, I cut the edges off turning stock on the table saw.
Start with 8/4 stock. I had a nice 9“—wide piece of 8/4 ash, about 4‘ long to work with. After squaring one edge at the jointer, rip the four leg blanks from the board. The easiest way to do this is use the board to set the width of the cut, then rip your leg pieces. You should have stock that’s roughly 2“ x 2“. Then, I set the blade to 45° and cut the four corners off each leg, leaving me with leg with eight facets. I do the same thing to prep the stock for the stretchers.
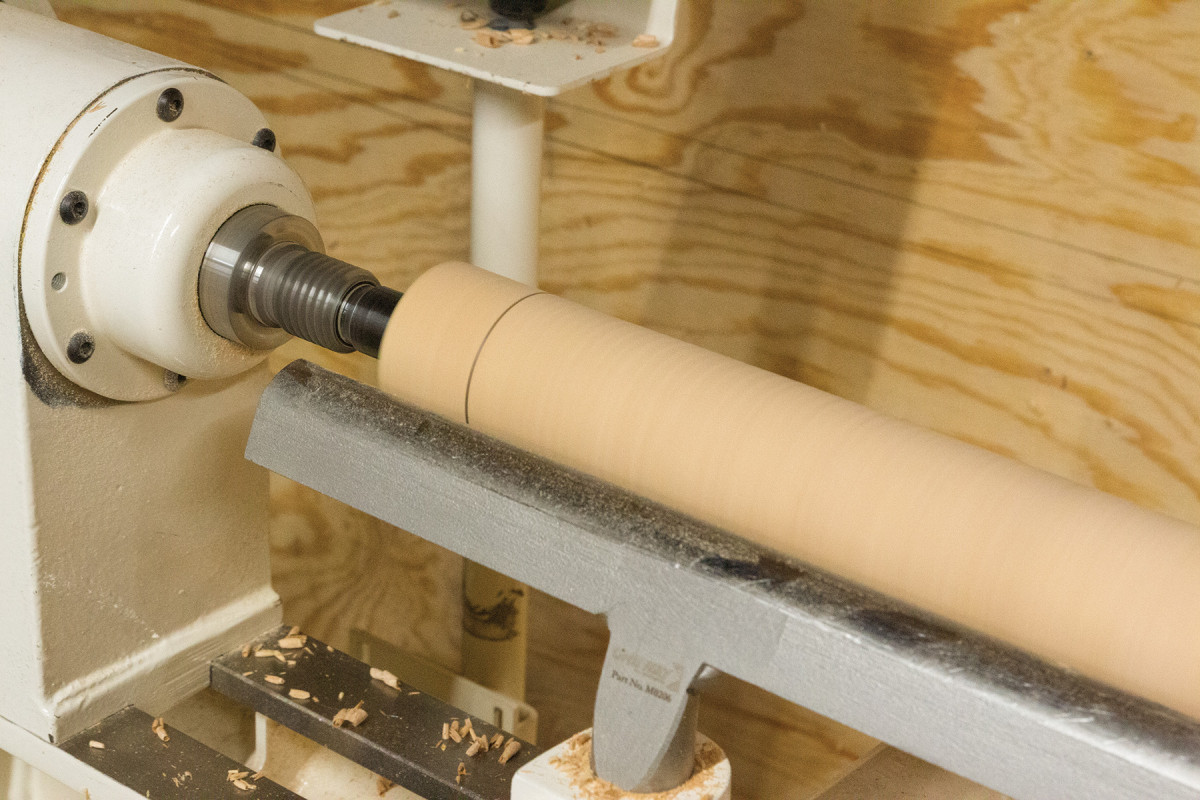
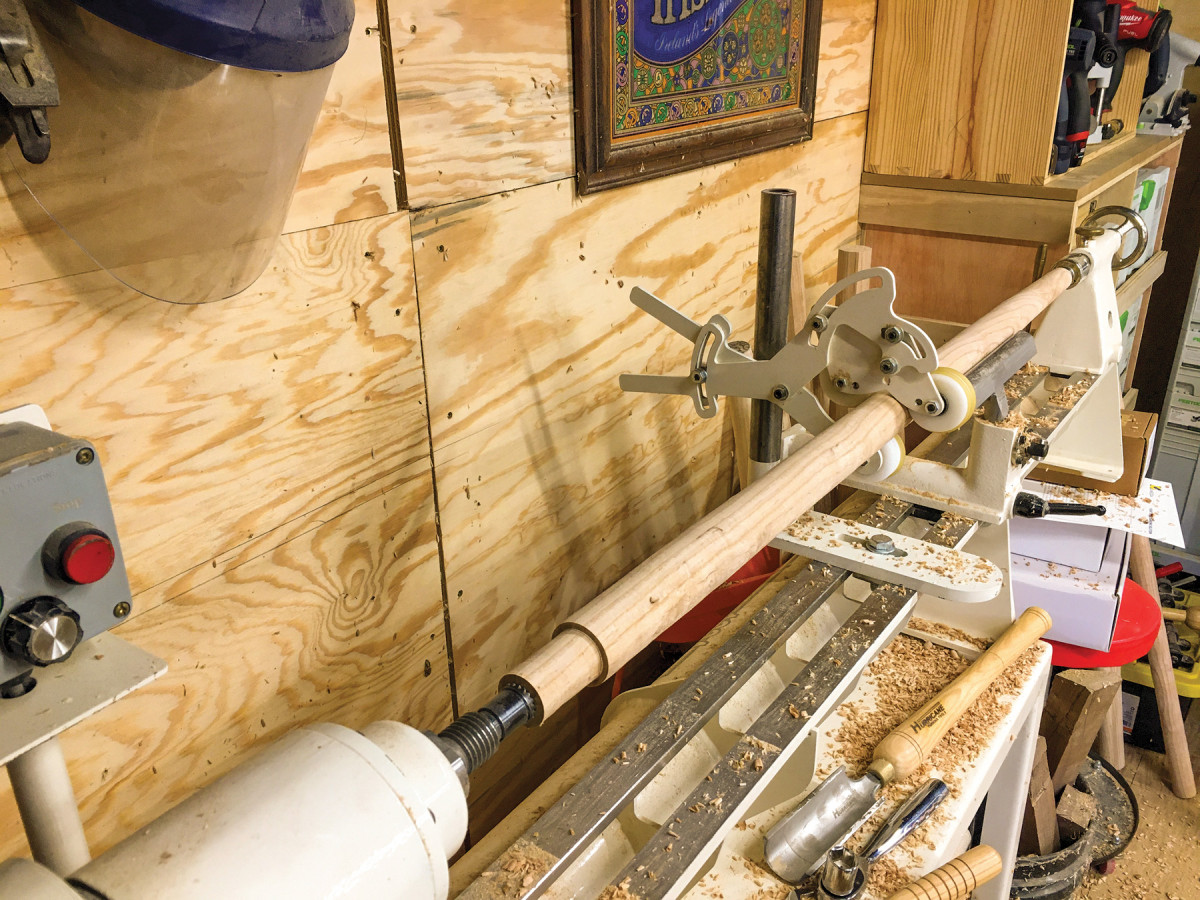
With these long legs, I rough out the center first, so I can get the steady rest in to support the leg
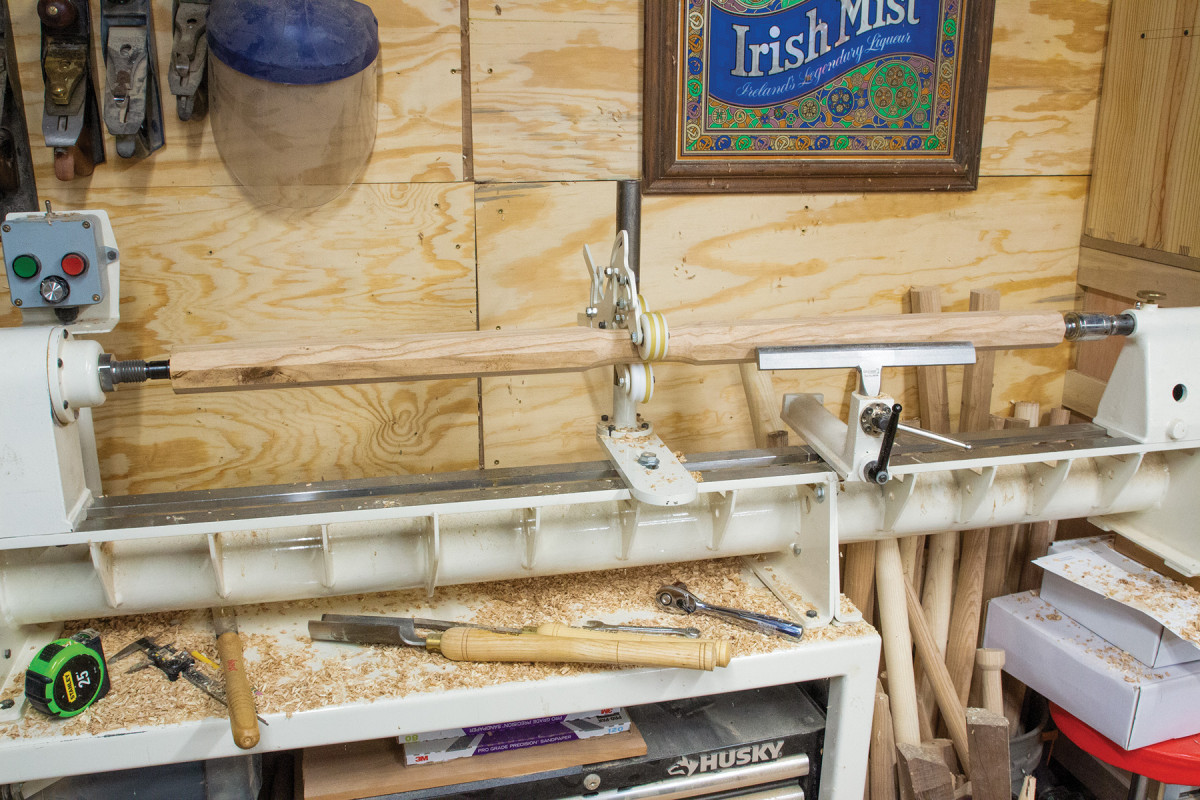
The steady rest keeps the leg from flexing while I’m roughing out the shape.
At the lathe, rough out the leg into a cylinder. With longer pieces on the lathe, a steady rest is very helpful. Basically, it gives your workpiece a third point of contact and limits flex in the turning. I’ll rough out the center of the blank,h add the steady rest, then rough out the rest of the leg. It takes a little finagling to coordinate moving the steady rest and tool rest as you move through the leg, but it’s much easier than dealing with your workpiece flexing.
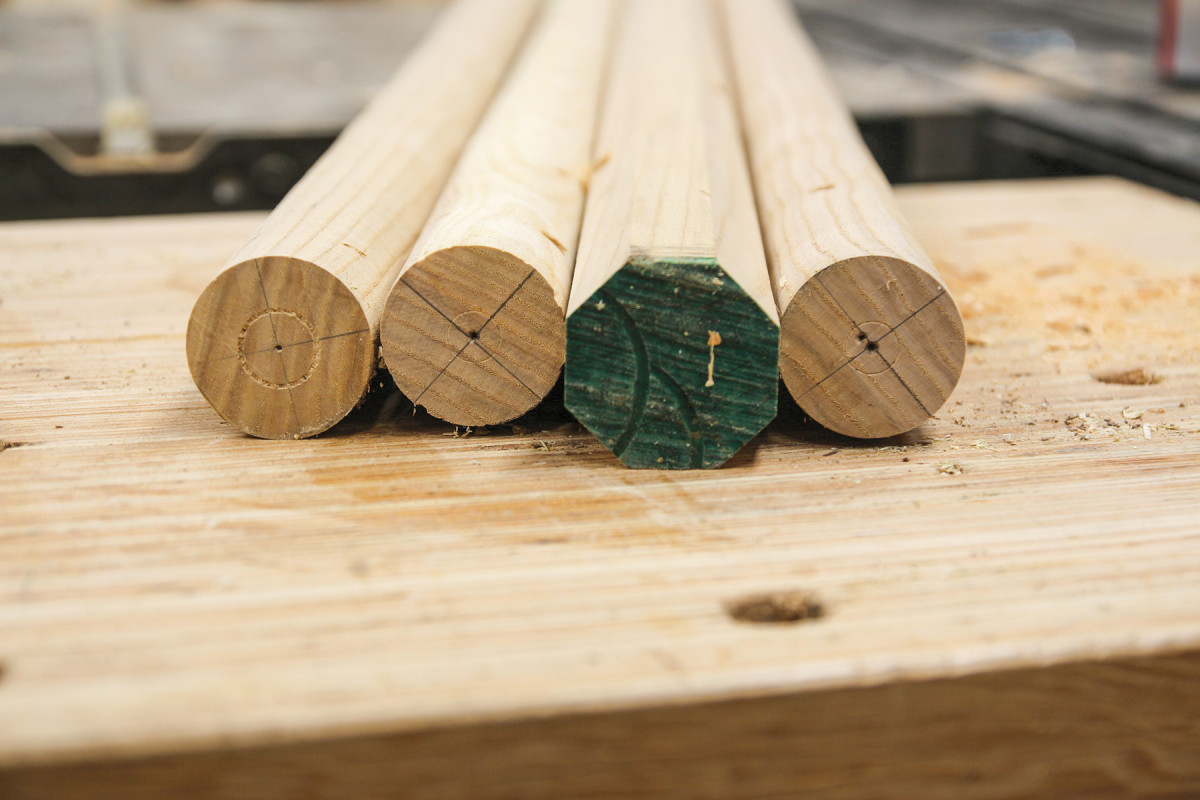
With the leg turned into a cylinder, I mark a line for the tenon.
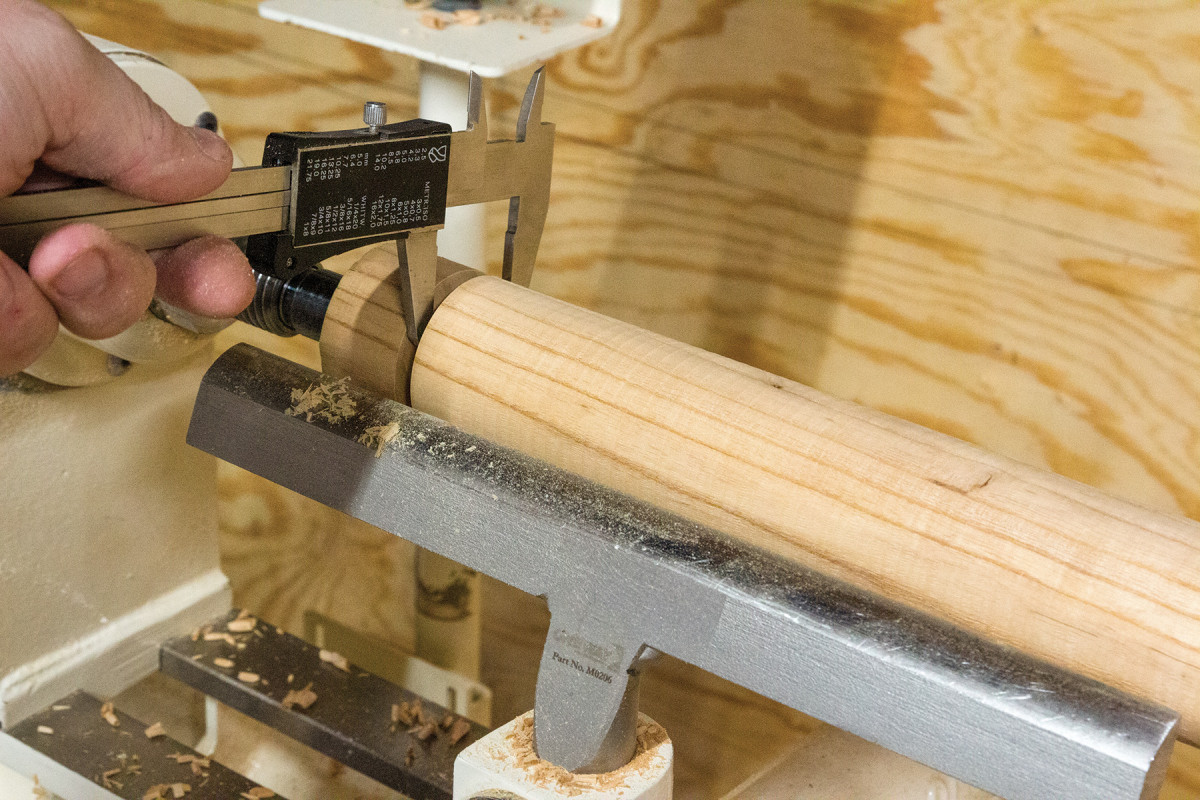
Use a parting tool to size the tenon, then turn the rest of it to match. I usually just use the parting tool to get the full tenon turned.
With the leg roughed out into a cylinder, lay out the 2“-long tenon at the top of the leg. Set your calipers to 1“ and use a parting tool to turn the tenon down to 1“ in diameter. I usually use the parting tool to turn the rest of the tenon, matching the same diameter as the initial cut.
The 1“ tenon is the only critical dimension on the leg. I tapered the foot of the leg down to about 7/8“, keeping the bulk of the leg just shy of 2“ in diameter. Repeat for the other legs, keeping in mind the critical tenon dimension, and eyeballing the rest. No one is going to be measuring your legs with a caliper to make sure they’re all exactly the same. If they look good, then they are good.
Turned and Planed Stretchers

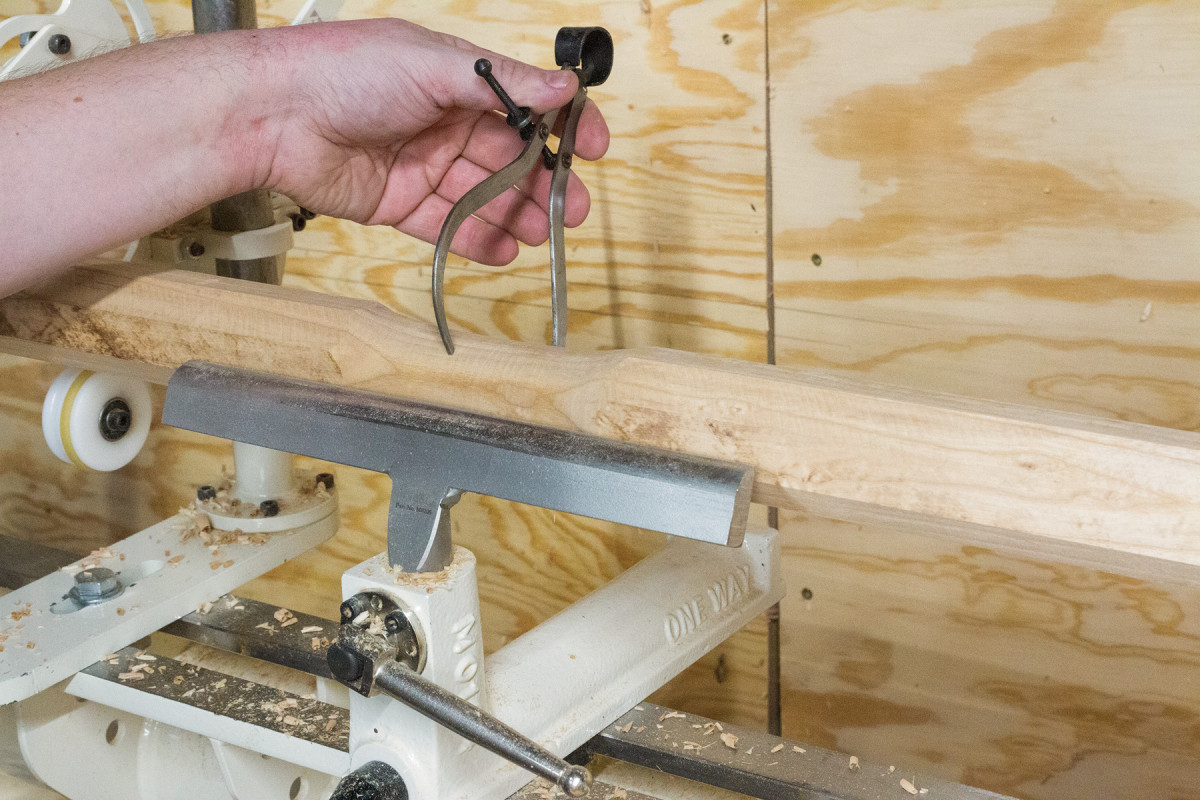
For the side stretchers, I still start in the middle, using a set of calipers to dial in the diameter. Then I taper toward the ends.
Next, get to work on the stretchers. Rough turn the blank into a cylinder, then taper it out towards the ends. These will be ending in 3/4“ tenons. I like to leave these a bit long. Again, the 3/4“ tenons on each end of the stretcher are the only critical dimensions. I try to leave more meat in the center of the tenon, then taper it out toward the ends.
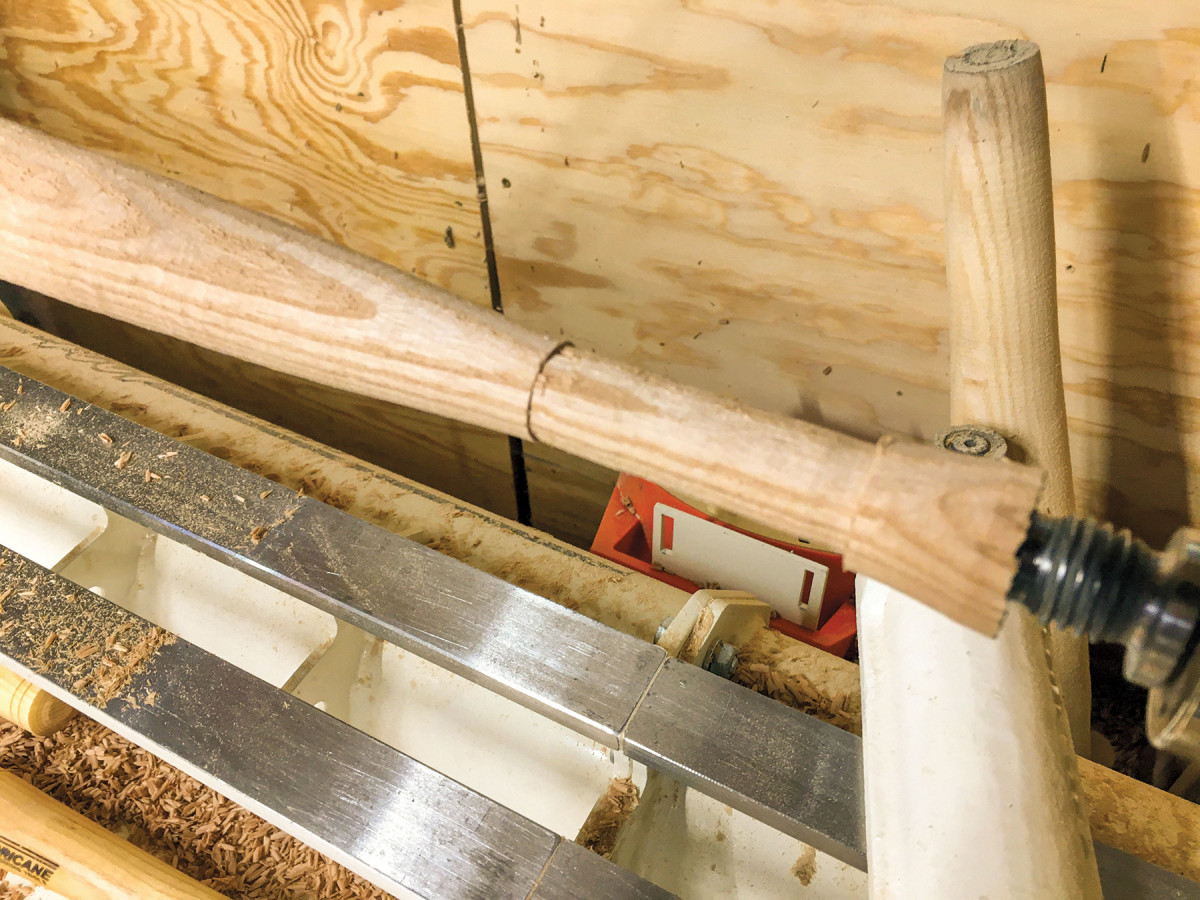
I taper the side stretcher down to an overly-long 3/4″ tenon. I give myself a little wiggle room here, leaving them long, so I can cut the stretchers to length during dry fit and assembly.
The center stretcher is likely too long for the lathe, so you’ll need to break out some hand tools. You can turn a square into a cylinder by just continuing to plane off the pointy bits. Starting with an eight-sided blank (like the leg blanks), I use my #5 jack plane to plane down the ridges. Keep planing and rotating, and eventually, you’ll have something resembling round.
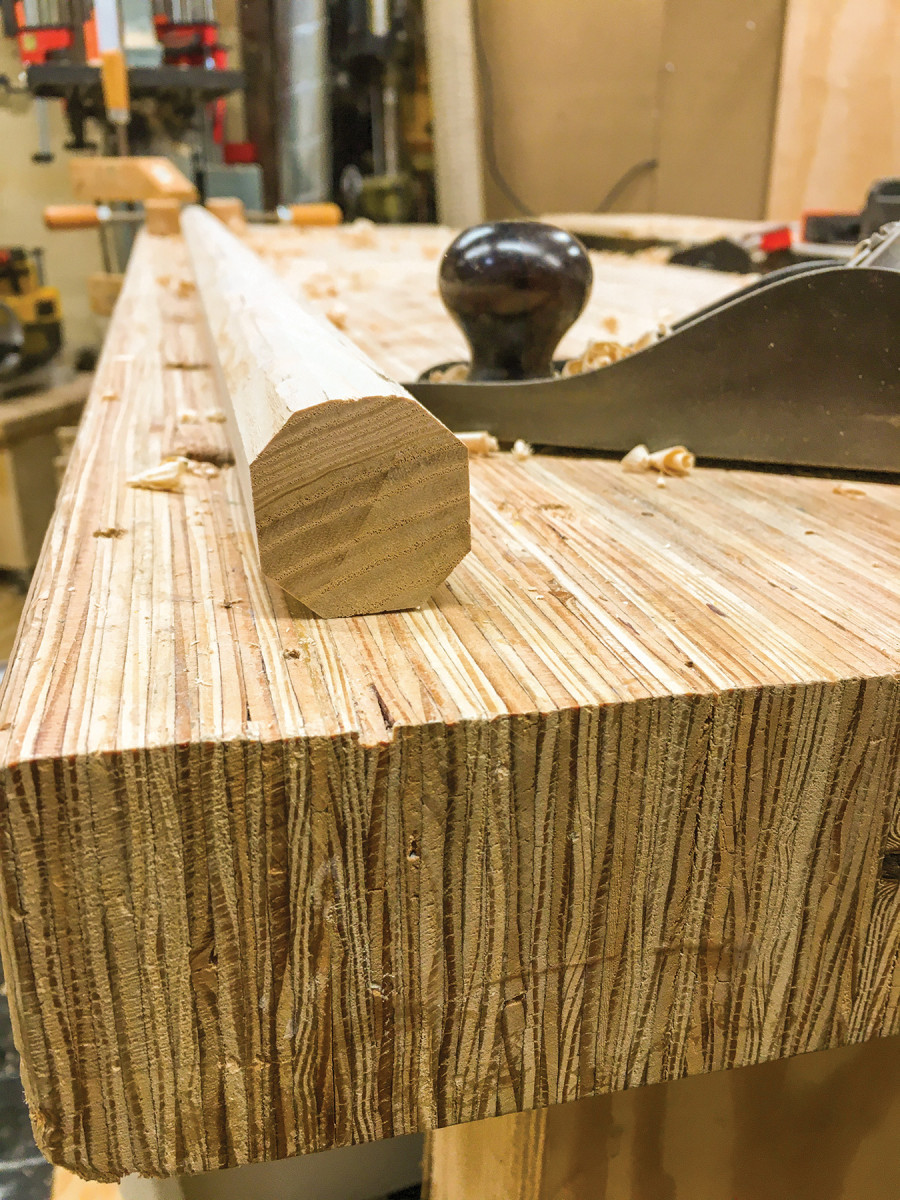
The center stretcher was too long for the lathe, so I rough out a blank on the
tablesaw then break out some hand tools.
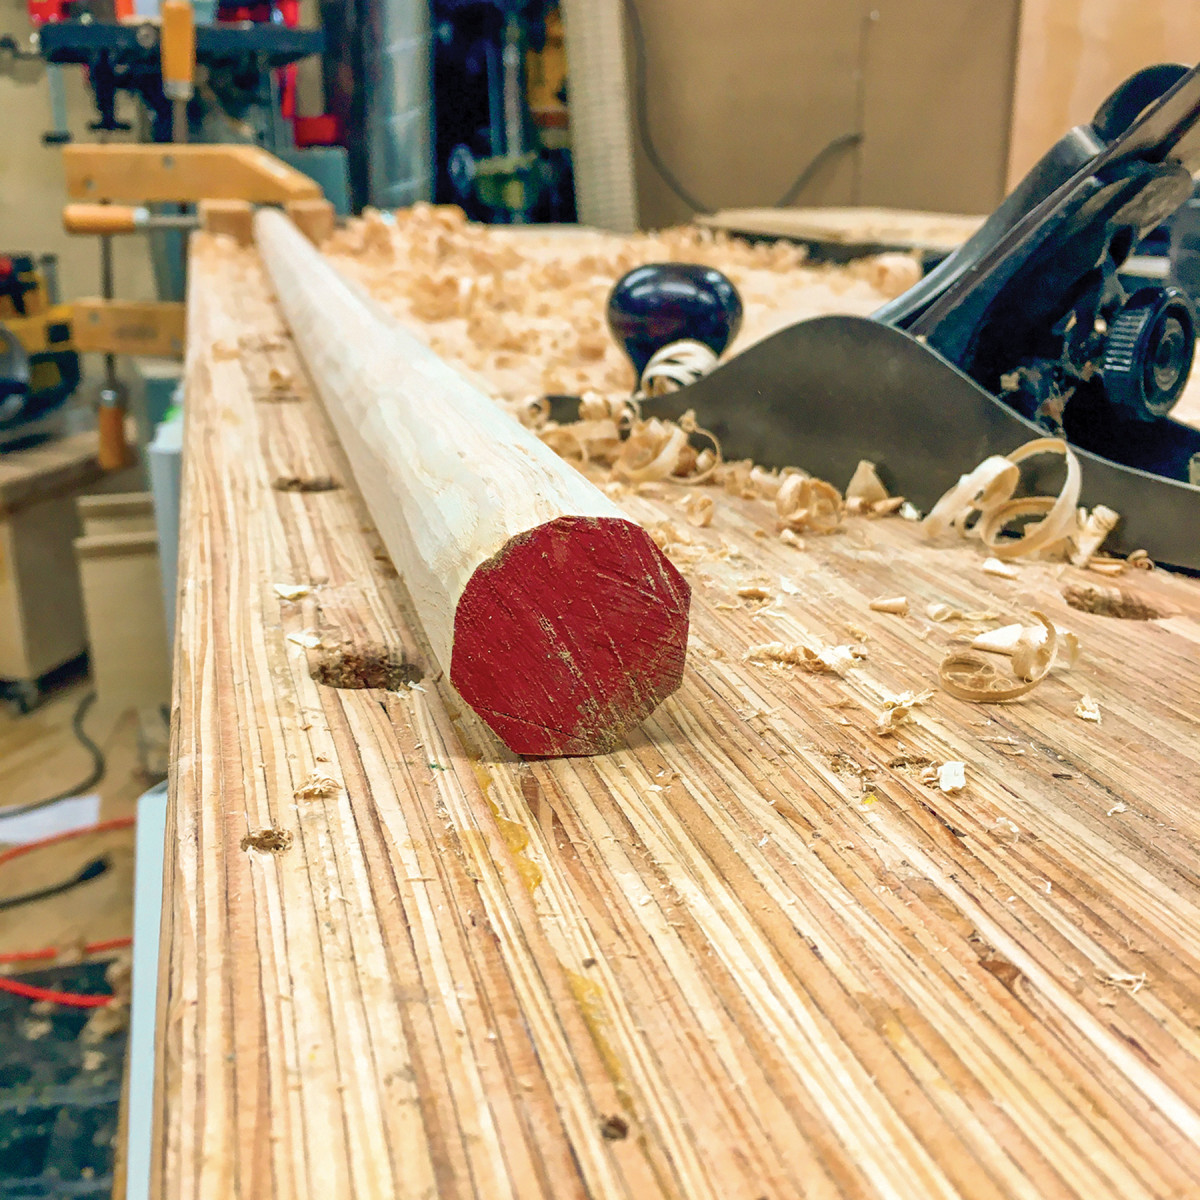
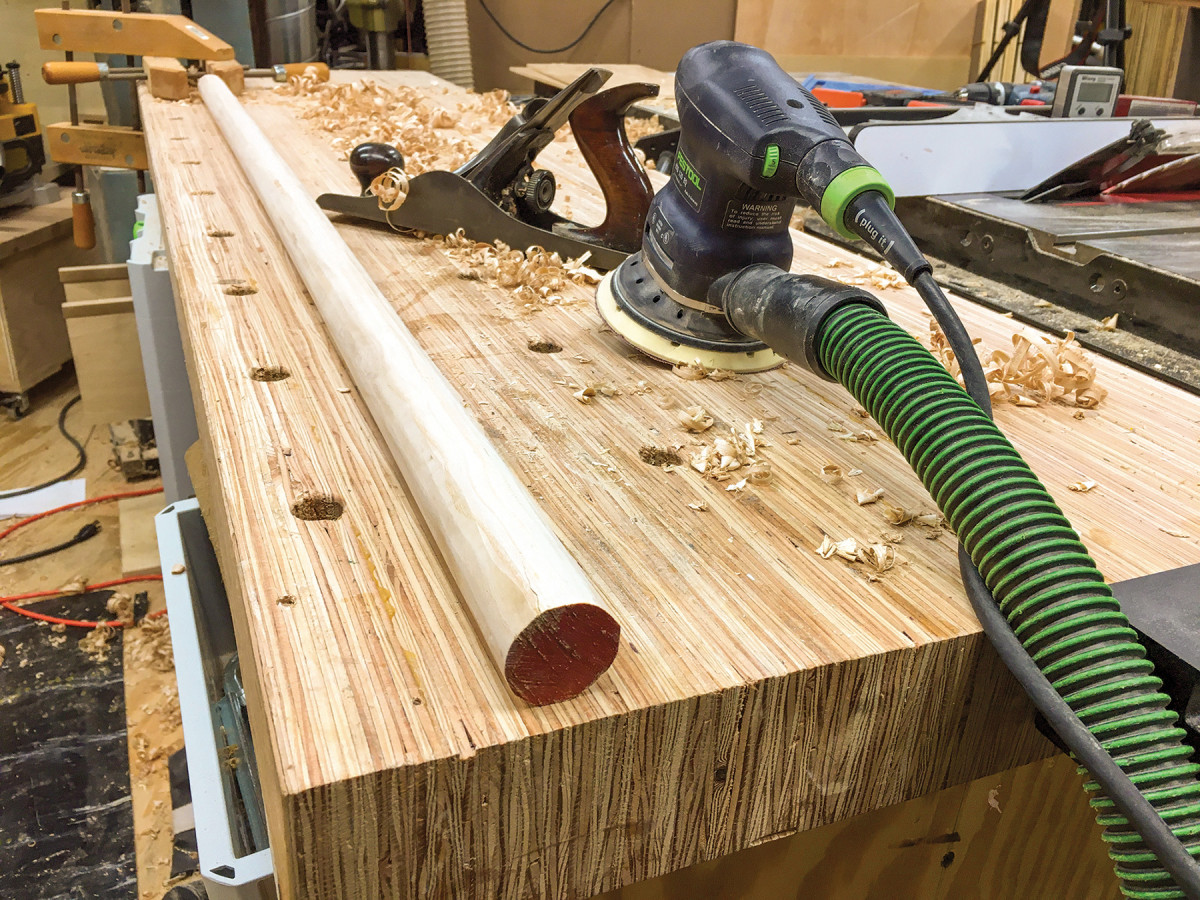
I use my No. 5 plane to plane down the areas where the facets meet, until the blank is roughly round. Then I use an electric sander to refine the blank as I roll it over the bench.
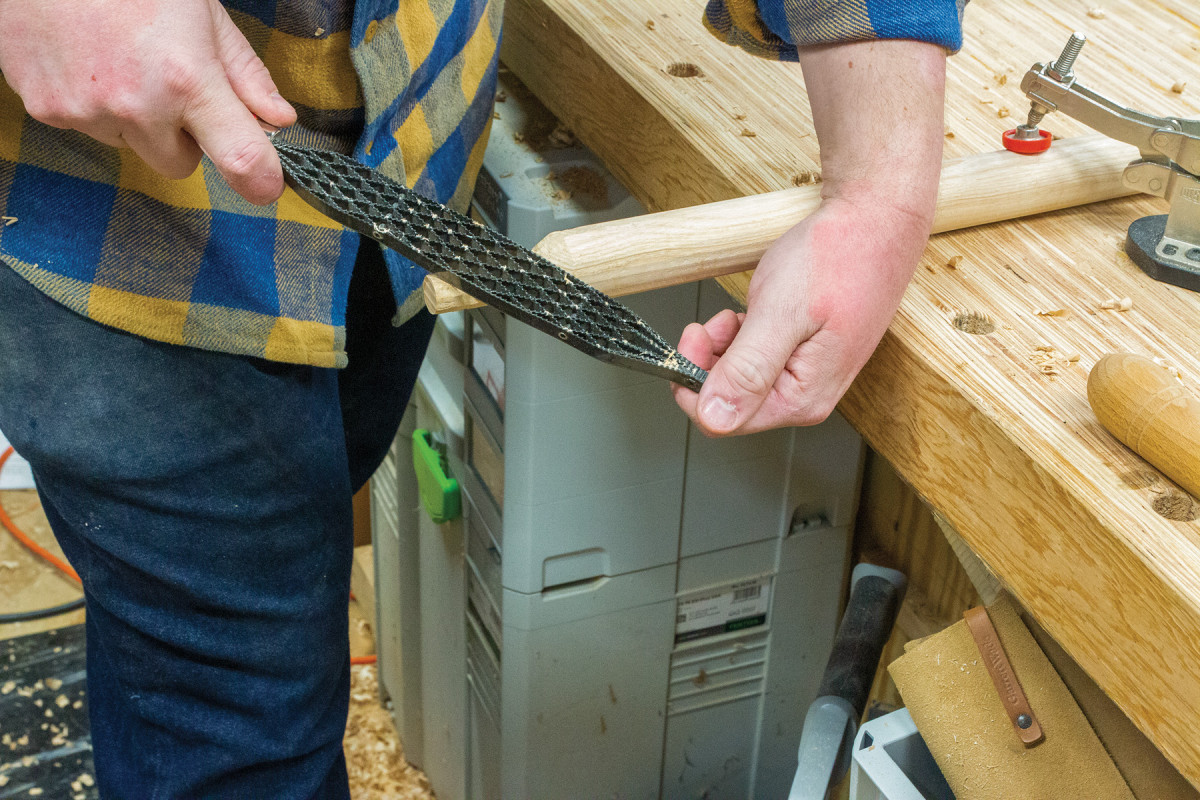
I used a drawknife to roughly shape the tenons, then cleaned it up with a rasp.
You’ll also need to shape 3/4“ tenons on the ends of this stretcher. I opted for a drawknife and a rasp to do that work. A 3/4“ tenon cutter would also be very handy here. Try to taper the ends out to 3/4“-diameter tenons, like on the side stretchers. Drilling a 3/4“ hole in a scrap helps check your progress.
Mortising
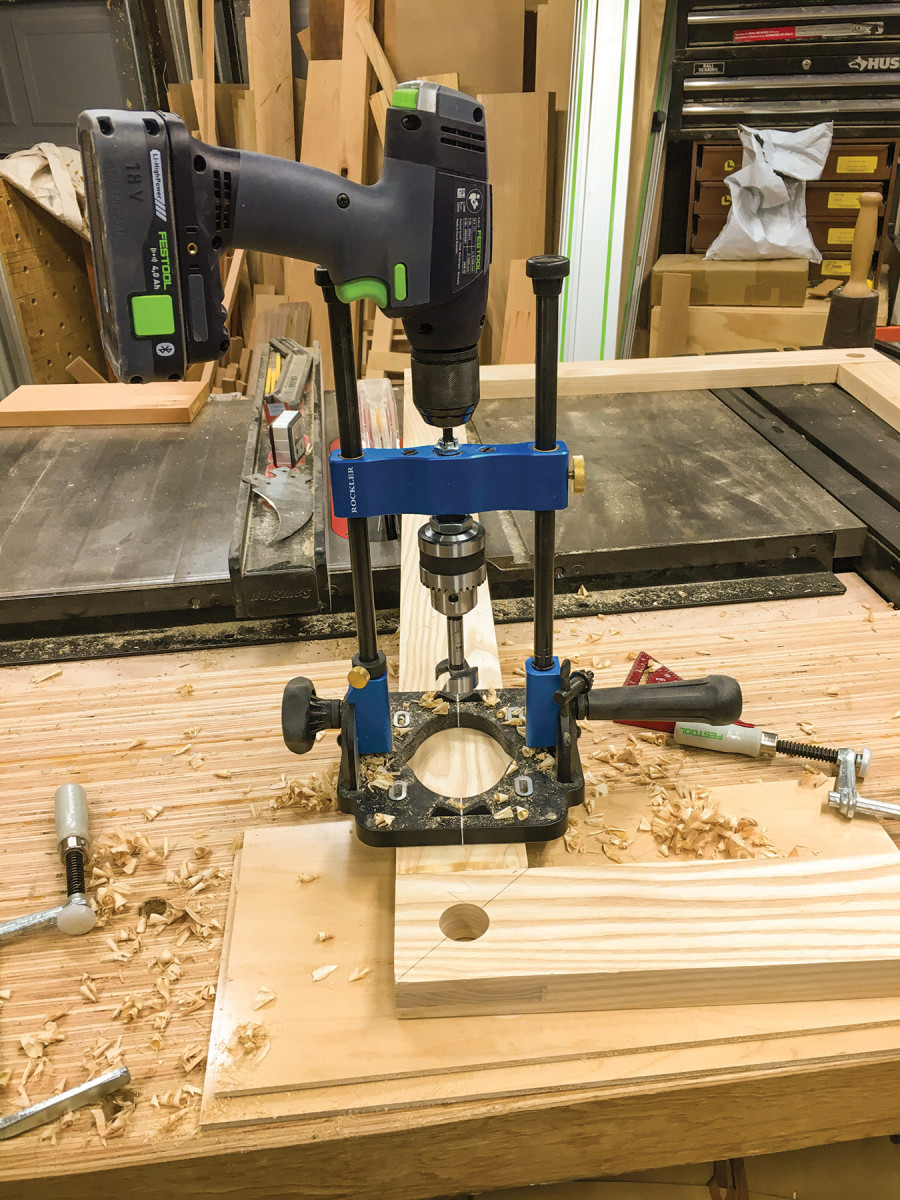
I used a portable drill guide to drill all the mortises
In this part of the build, I relied heavily on a portable drill guide. This one from Rockler is the best I’ve used, though it is somewhat pricey. I have used cheaper guides in the past, and they do the same job, but you lose a little bit of rigidity and repeatability. It’s way easier to bring your drill to the frame than it is to try and rig up support to do the job at the drill press.
Lay out your mortise locations in each corner of the frame. Use a 1“ Forstner bit to drill the mortises out (at 90°). Make sure to use a bit of backer board under the mortise to avoid blowout as the bit exits the frame.
The side stretches are located 12“ from the shoulder of the leg tenon. Mark the location of the mortise on each leg. Then, fit the legs into the top. Measure the distance between the two legs on each end of the frame. It should be the same (or very close). That’s the final length your stretchers need to be, plus about 2“ of tenon on each end. With that dimension, I head back to the lathe to make the final refinements on the stretchers, then cut them to rough length on the bandsaw.
Add the stretchers to the dry assembly and measure the distance between them at the center point of the stretchers. That measurement, plus 2“ of tenon on each side of the long middle stretcher, is the final length you need for that piece. With a 3/4“ Forstner bit, drill the mortises for the side stretchers in the legs. This drill guide has V-notches built into the base to keep the legs centered (a huge plus for this kind of work). Repeat to drill the mortises in the centers of the side stretchers.
At this point, I like to do a dry fit of the legs and stretches with the frame, to see how it’s all coming together. I kerf the tops of the tenons at the bandsaw to receive wedges, and during the dry fit, I just lightly wedge the tenons to keep things from falling apart during the dry fit. Ideally, you want your wedges to be driven perpendicular to the grain of the wood you’re wedging the tenon into. If you veer to far off that course, there’s a greater chance the wedge will actually split the whole piece, and that’s bad news.
Laminate Top
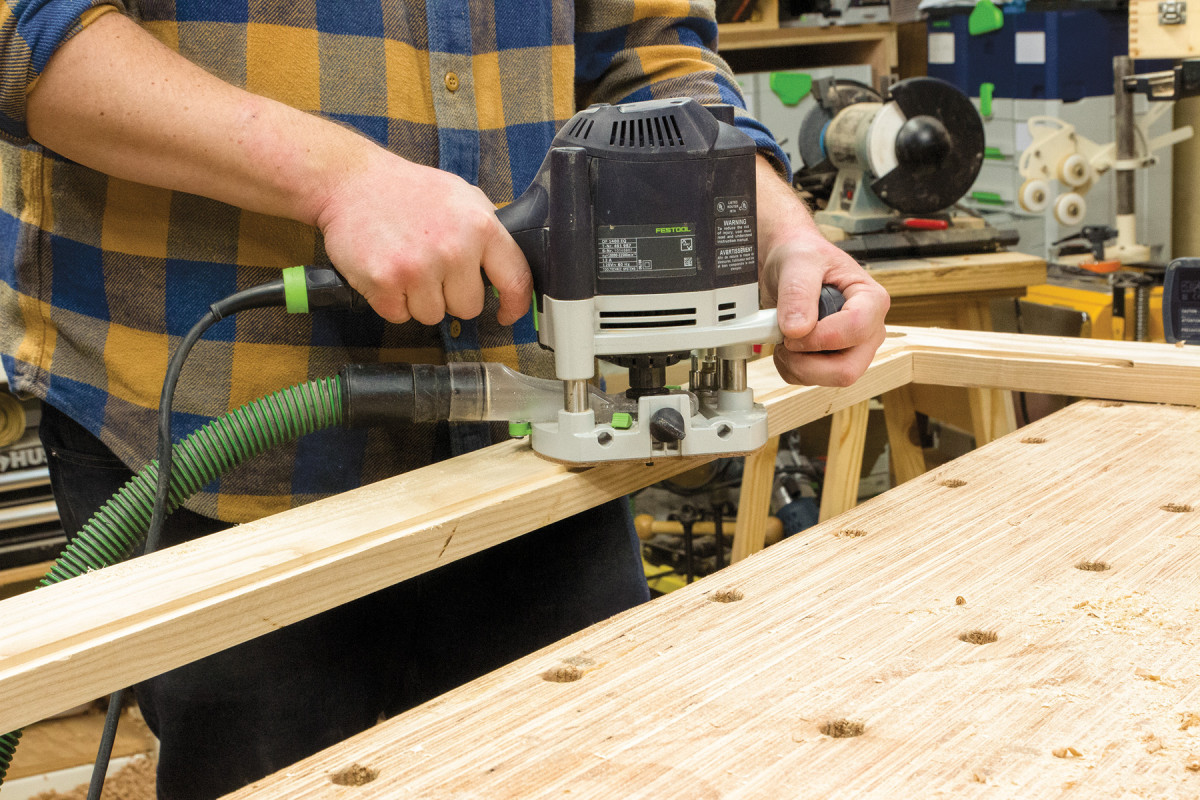
I cut a rabbet around the inside of frame with a router, then square up the corners with a chisel.
The top of the desk is just a sheet of plywood with a piece of laminate adhered to it. It sits on a 3/8“ rabbet inside the frame, cut with a router. That’s where we’ll start.
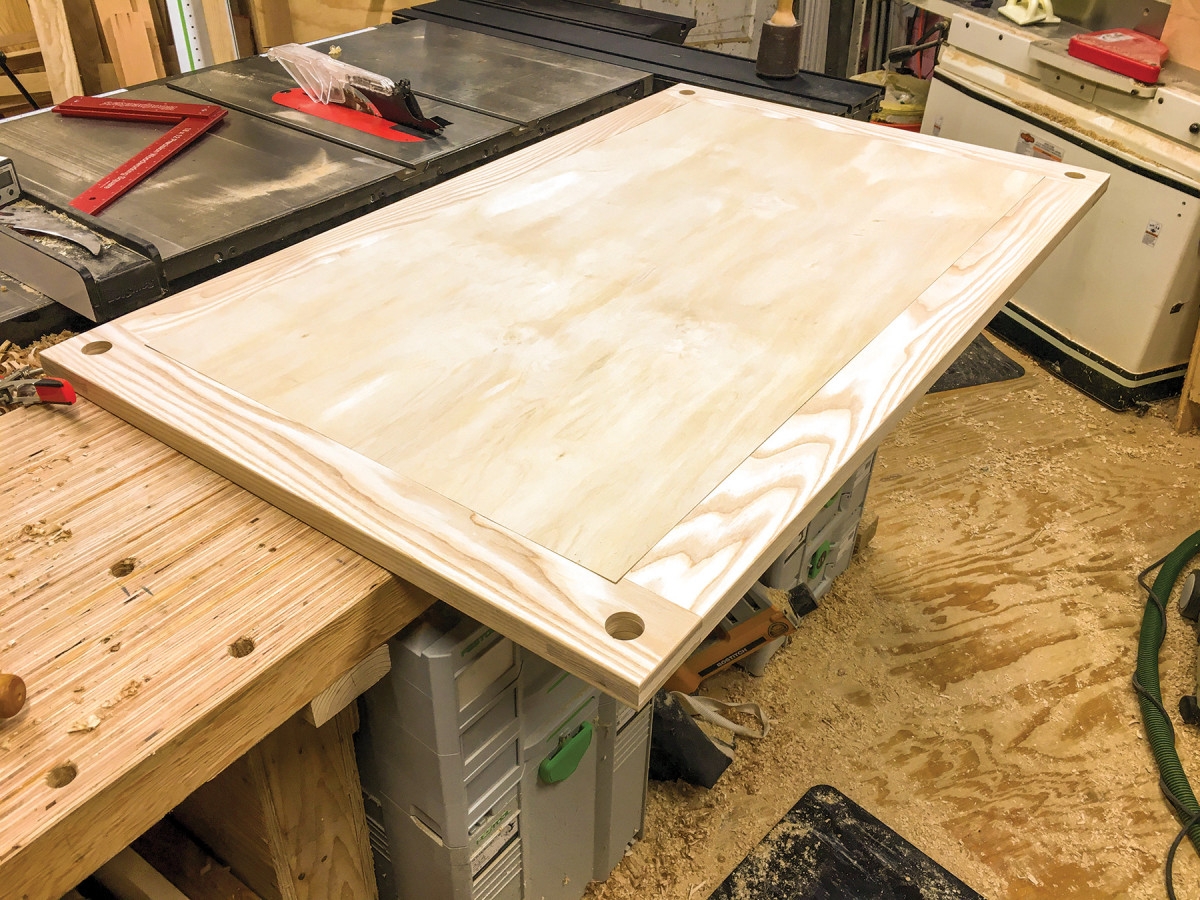
Cut the plywood desk top to fit.
Use a router with a 3/8“ rabbeting bit and cut a rabbet on the inside edge of the frame (make sure you know which side of the frame is the top). You’ll need to cut a rabbet that’s the same depth as the thickness of your plywood. I’m using 1/2“ plywood here, though it’s actually closer to 7/16“ thick. Cut the rabbet in multiple passes, using a plywood offset to check your depth. Once you’ve cut the rabbet to the depth of the plywood, that’s deep enough. The laminate isn’t very thick, and I want it to sit slightly proud of the frame. You could also choose to inset the panel a bit, but I was concerned about things getting caught on the edge of the frame in course of working at the desk.
The routed rabbet will have rounded corners, so you’ll need to square them up with a chisel. I used a square and pencil to mark the boundary, then chiseled it bit by bit to square it up. With the rabbet completed, the next step is to cut a piece of plywood to fit. The dimensions of the rabbet were pretty square, but one corner was just a hair out. So, I cut the plywood slightly oversize, then used a block plane to refine the fit so it fit snugly in the rabbeted opening. At this point, alignment is critical, so make sure to mark which corner of the plywood fits in which corner of the frame.
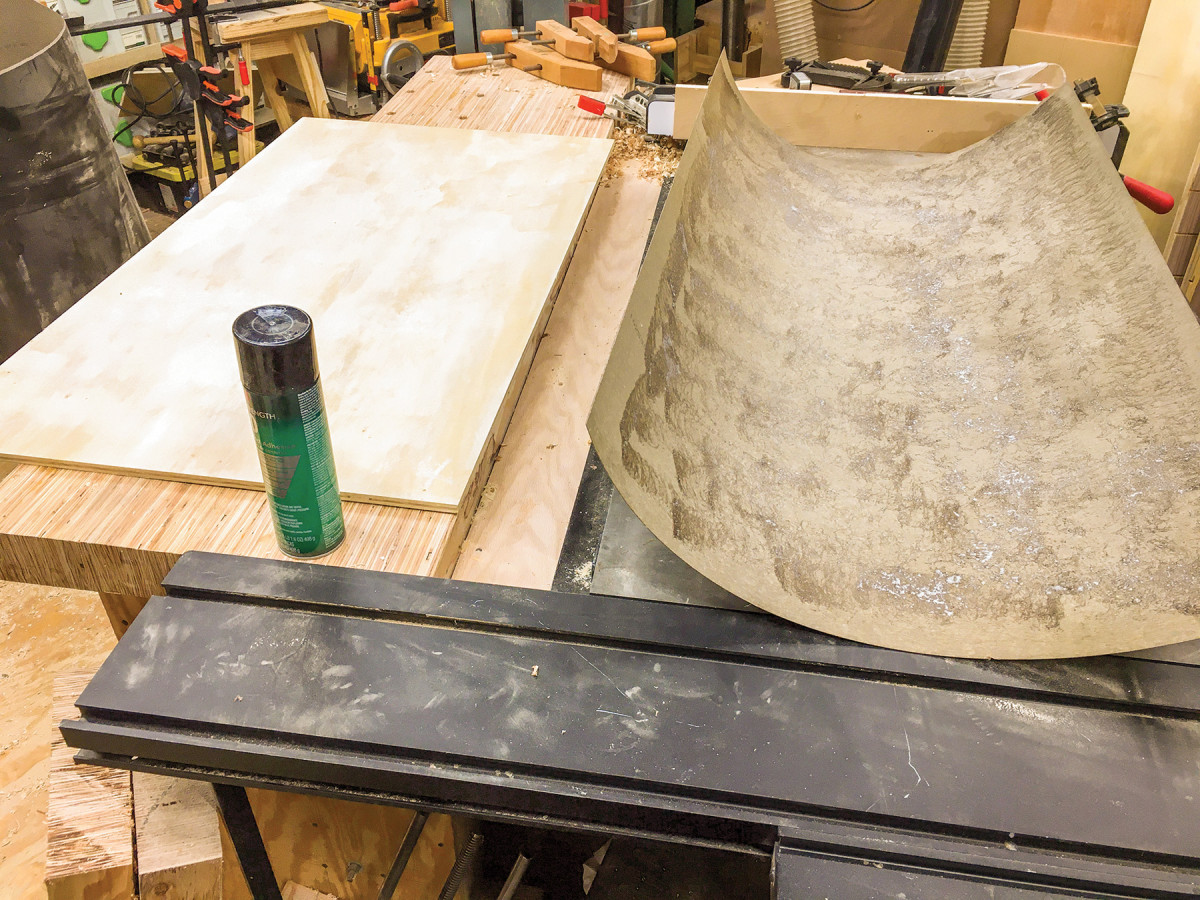
The laminate is cut slightly oversize. Apply a liberal amount of spray adhesive to both the laminate and plywood.
The trickiest part about using laminate is dealing with a floppy, 4‘x8‘ sheet. It usually comes rolled up, so I like to do the unrolling in my driveway and rough cut it down to size out there. When it’s more manageable, I’ll dial in the size a bit closer on the table saw. Laminate is very thin, so it’s likely it’ll sneak under your table saw fence as you’re cutting. Just clamp a piece of plywood to the fence, making sure it’s firmly on the table, and that seems to fix that problem. Leave the laminate about 1“ longer and wider than the plywood top—you’ll trim it to fit after it’s adhered.
With the laminate cut to size, use spray adhesive to attach the laminate to the plywood. Apply adhesive to both the plywood and laminate. Most spray adhesives say to let the adhesive tack up before you put the laminate on your substrate. Don’t be afraid to apply a lot of adhesive—you want good coverage.
Once the adhesive has tacked up (follow the directions on the can), carefully place the laminate onto the plywood. I used some workbench offcuts to help hold it down while things cured.
Then, lay the piece of laminate over the piece of plywood. Focus on alignment, making sure there’s a bit of overhang on all four edges. Once the laminate and plywood touch, they bond pretty quickly, so you really only get one shot at it. Go over the laminate with a laminate roller if you have one—or another item that will help apply pressure. I couldn’t find my laminate roller, so I use a bit of dowel to apply pressure around the edges. Then I stacked a few pieces of workbench offcuts on top before I left for the night, to keep good, flat pressure on the piece.
Trim the laminate to size with a flush-cut bearing router bit, then ease the edges with a bit of sandpaper. Freshly-trimmed laminate is
very sharp.
After the adhesive has cured and bonded, you can trim the laminate to size with a router and a bottom-bearing pattern bit. The bearing rides along the plywood edge, and the laminate is trimmed to the exact same size. It does leave a very sharp edge, though, so be careful. Right after I’m done trimming the laminate, I use a bit of sandpaper to just ease the edges slightly. Finally, make sure the whole thing still fits in the desk top frame.
Putting it Together
Dry assemble the base and frame. Grab your wedges and get ready for the glue-up.
This is the fun part. Grab your wedges, a mallet and glue—there are no clamps required. Start by dry-assembling all of the pieces (you can leave the laminate desktop insert off the side). Make sure all of the mortises and tenons align and go together easily. Once you’ve rehearsed, it’s time to make this permanent.
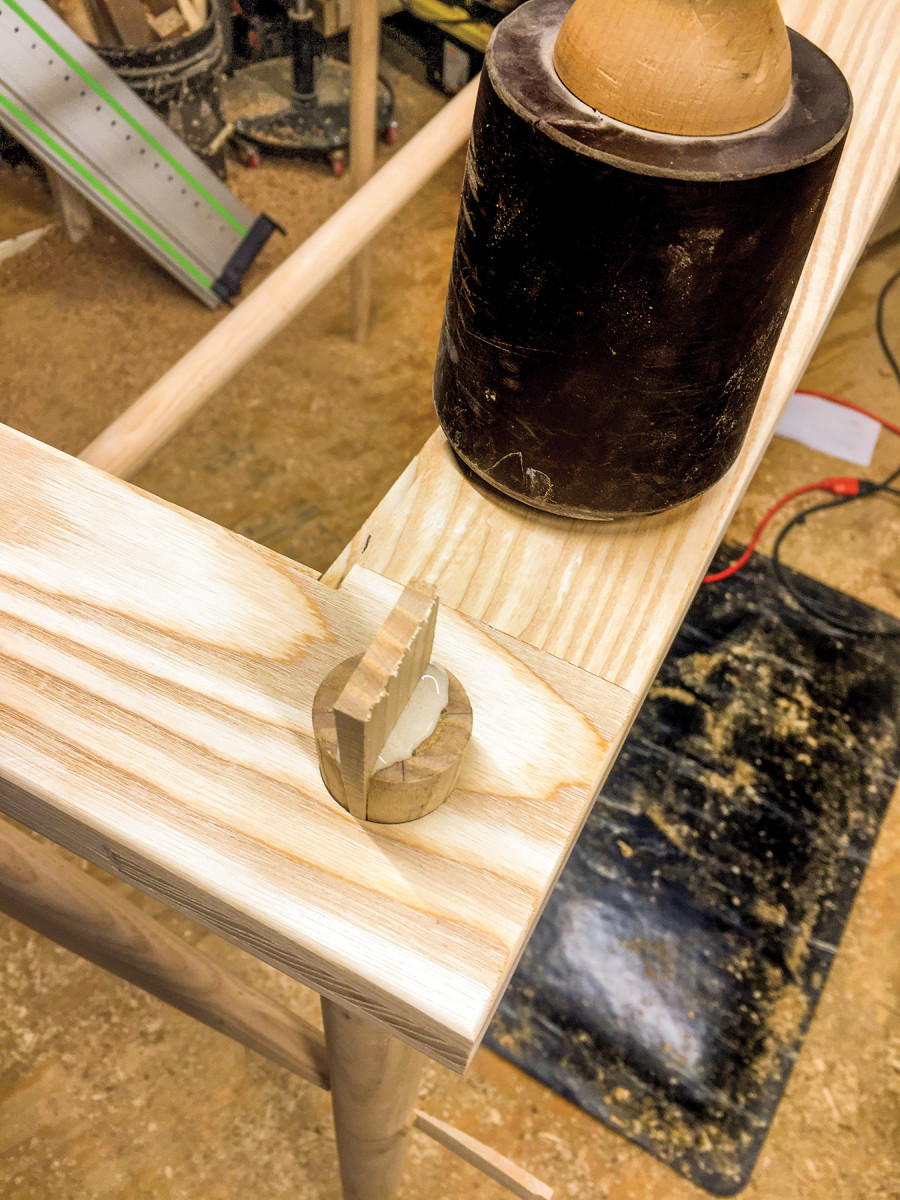
Apply glue to the leg tenons, then wedge them firmly into the mortise (applying a bit of glue to the wedge to hold it in place, too).
Start with the four legs. While everything is still dry-fitted, carefully lift the desk frame and apply some glue to the tenons. I did this two tenons at a time. Then, with the tenons firmly seated in the mortises, add a bit of glue to the end of a wedge, and hammer the wedge into the top of the tenon. You’ll hear a change in the tone of the hammering once it’s fully seated. Do this to the other the leg to frame tenons. Then move onto the stretchers. I didn’t glue the tenons for the stretchers—just used glue on the wedges and hammered them home. I did the side stretchers first, then the center stretcher.

Then I wedged the side stretchers, followed by the middle stretcher.
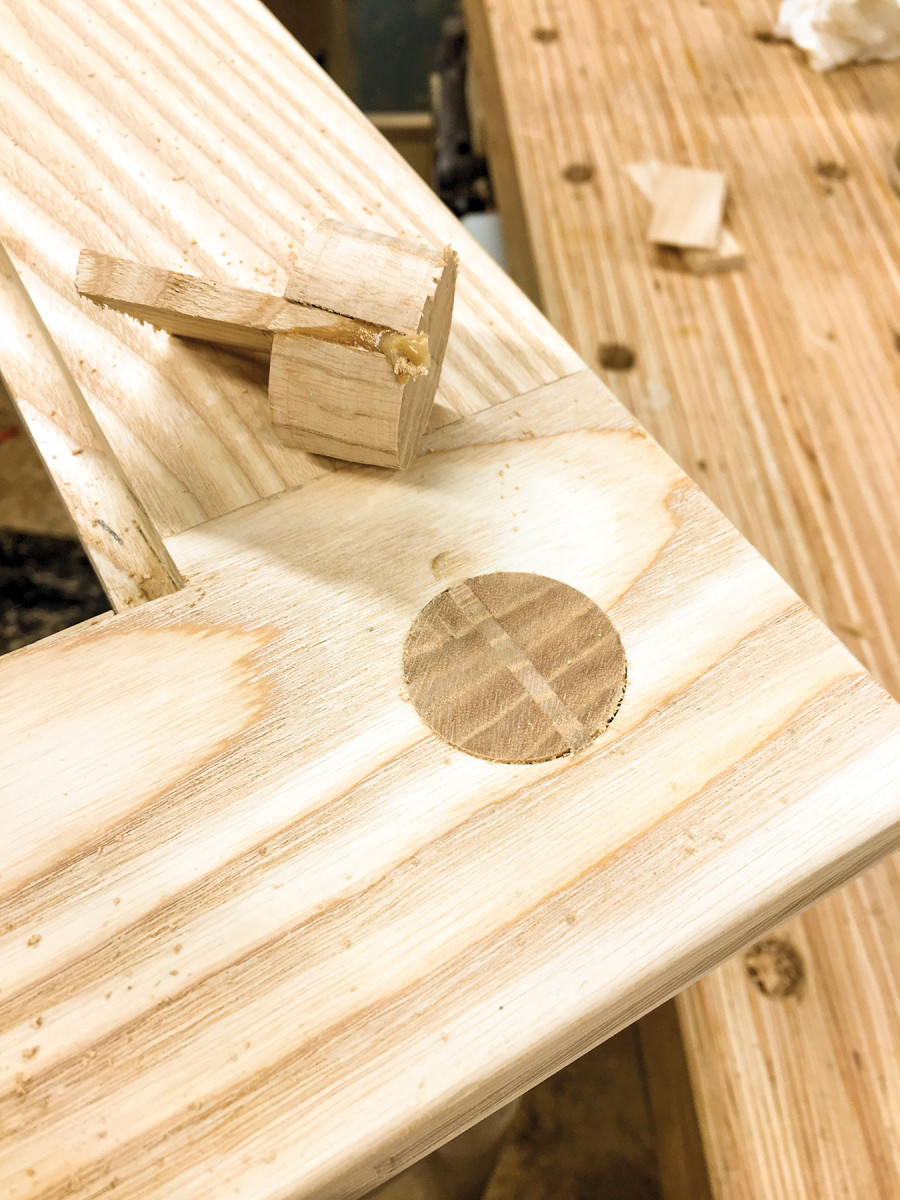
Use a flush-cut saw to cut the cured tenons, then a little sanding cleans things up.
Once the glue has cured, trim the tenons to finished length. I was able to trim the leg tenons pretty close to the top of the desk and flush them up with a sander. For the stretcher tenons, I cut them straight and then used a sander to blend them into the shapes of the legs.
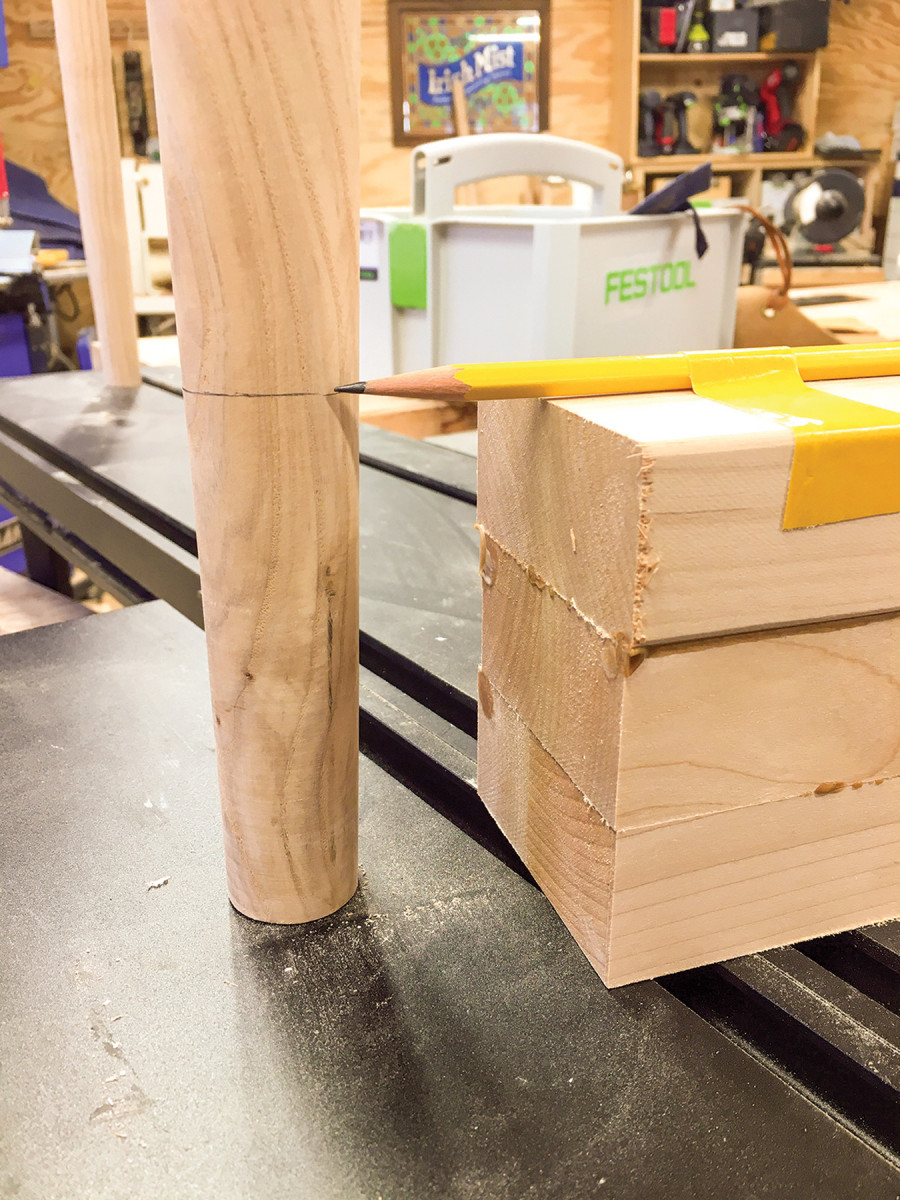
I marked the legs for their final height, using some scraps and a pencil to mark a line around the leg.
Finally, it’s time to cut the legs to length on the desk. Find a flat surface (I was just able to fit the desk on my table saw). First, figure out the ideal height for your desk. Like a workbench, it’s different for each person. Most standing desks fall in the range of 40“ to 44“. If found 42“ to be most comfortable for me (I’m 5‘11“). Measure down the leg from the top of the desk, and make a mark on one leg. Use a stack of scrap wood to build a guide block for marking around the leg, and mark all four legs for cutting to length.
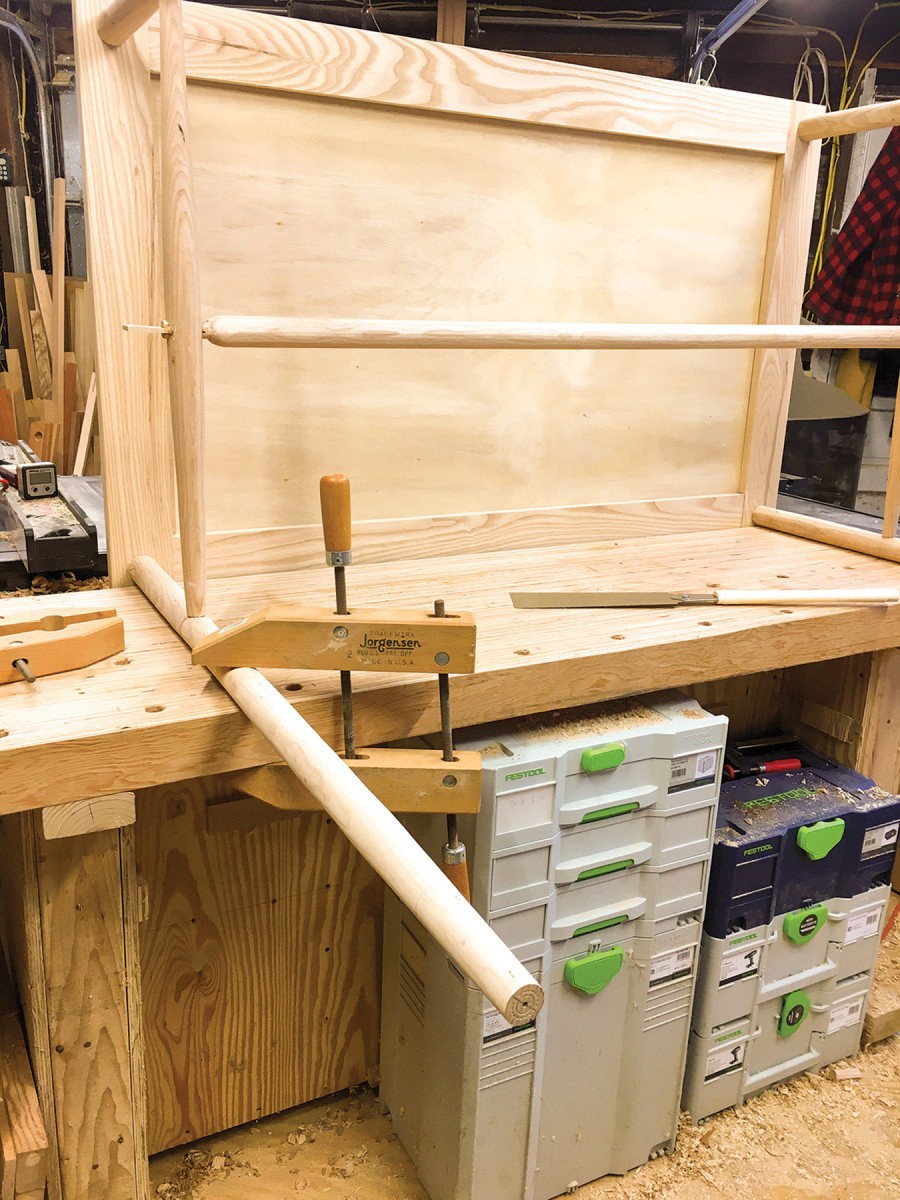
Then, I clamped the leg to my workbench and cut it to length.
Cutting the legs to length is always tricky. Clamp a desk leg to the top of your bench, and use a pull saw to make the cuts (I find a pull saw works better for me on these kinds of suspended cuts). Maneuvering a big piece in a small shop is a feat unto itself. After the cut, add a small chamfer to the bottom edge of the leg (I use a sander for this, too).
Finish
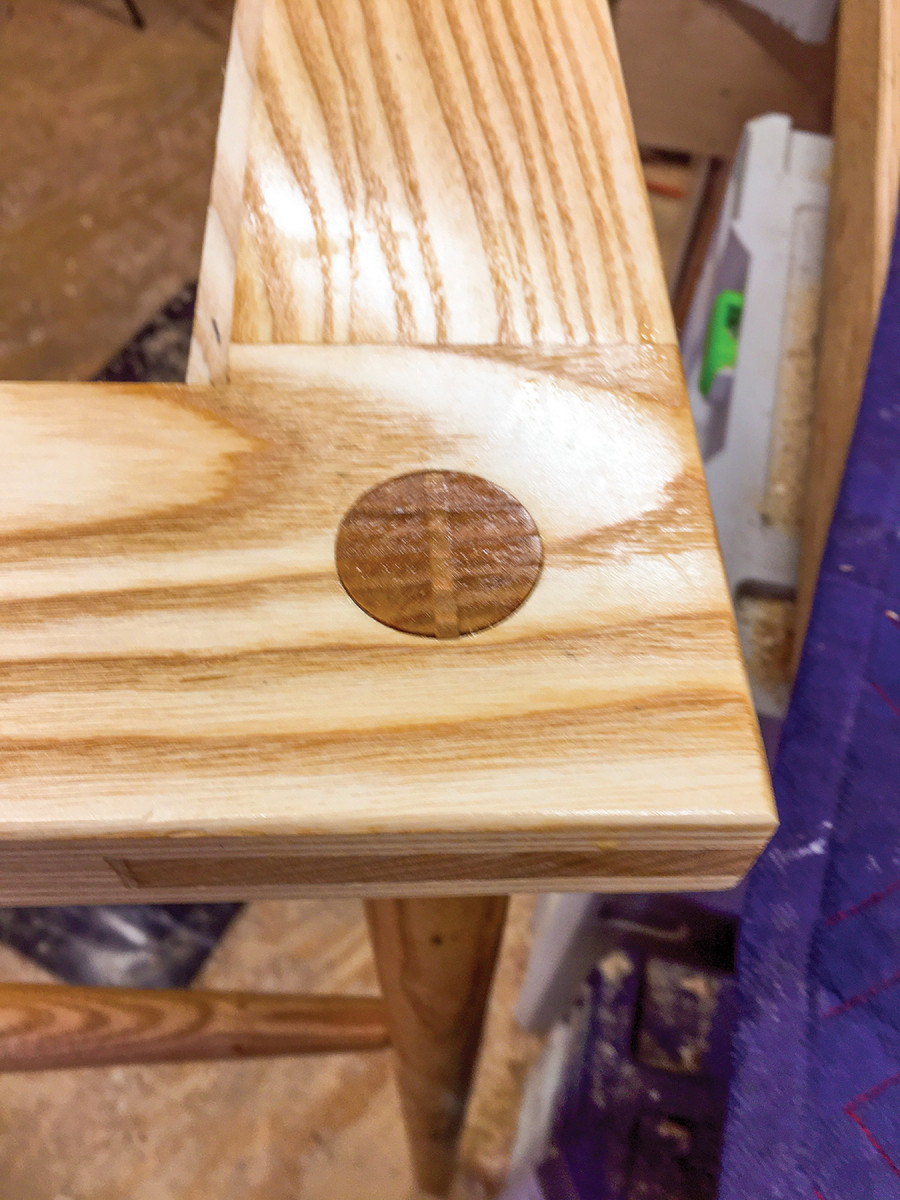
The most rewarding part, as always, is applying finish. The end grain of the tenon contrasts with the face grain of the frame.
Spend some time sanding the desk. I worked through the grits up to 180, spending extra time on the legs and paying close attention to the joints. Then I applied a couple coats of Briwax hard wax oil. It’s become my go-to finish for furniture—decent protection from dirt and stains, but not super noxious and easy to touch-up to boot. Plus, it’s a wipe-on, wait, wipe-off finish (very easy to apply). Finally, move the desk into your office and get to work!
Here are some supplies and tools we find essential in our everyday work around the shop. We may receive a commission from sales referred by our links; however, we have carefully selected these products for their usefulness and quality.


Hi. Great article, thanks.
I missed the part where you assemble the top to the frame.
Any recommendations for that? (gluing, clamping, others..)
Best regards,
Rafa Mijares
Love the article,but my eye was drawn to the what appears to be a laminate benchtop. I’ve not seen this before and I can’t seem to search out any info, so could enlighten me as what I’m looking at. If it is what it looks like it would be incredibly stable as well as incredibly heavy.
Looking for enlightenment,
Mike Powell
The top is made from LVL (laminated veneer lumber). I’ll publish a piece to the homepage tomorrow with a workbench using the same product and style of top.