We may receive a commission when you use our affiliate links. However, this does not impact our recommendations.
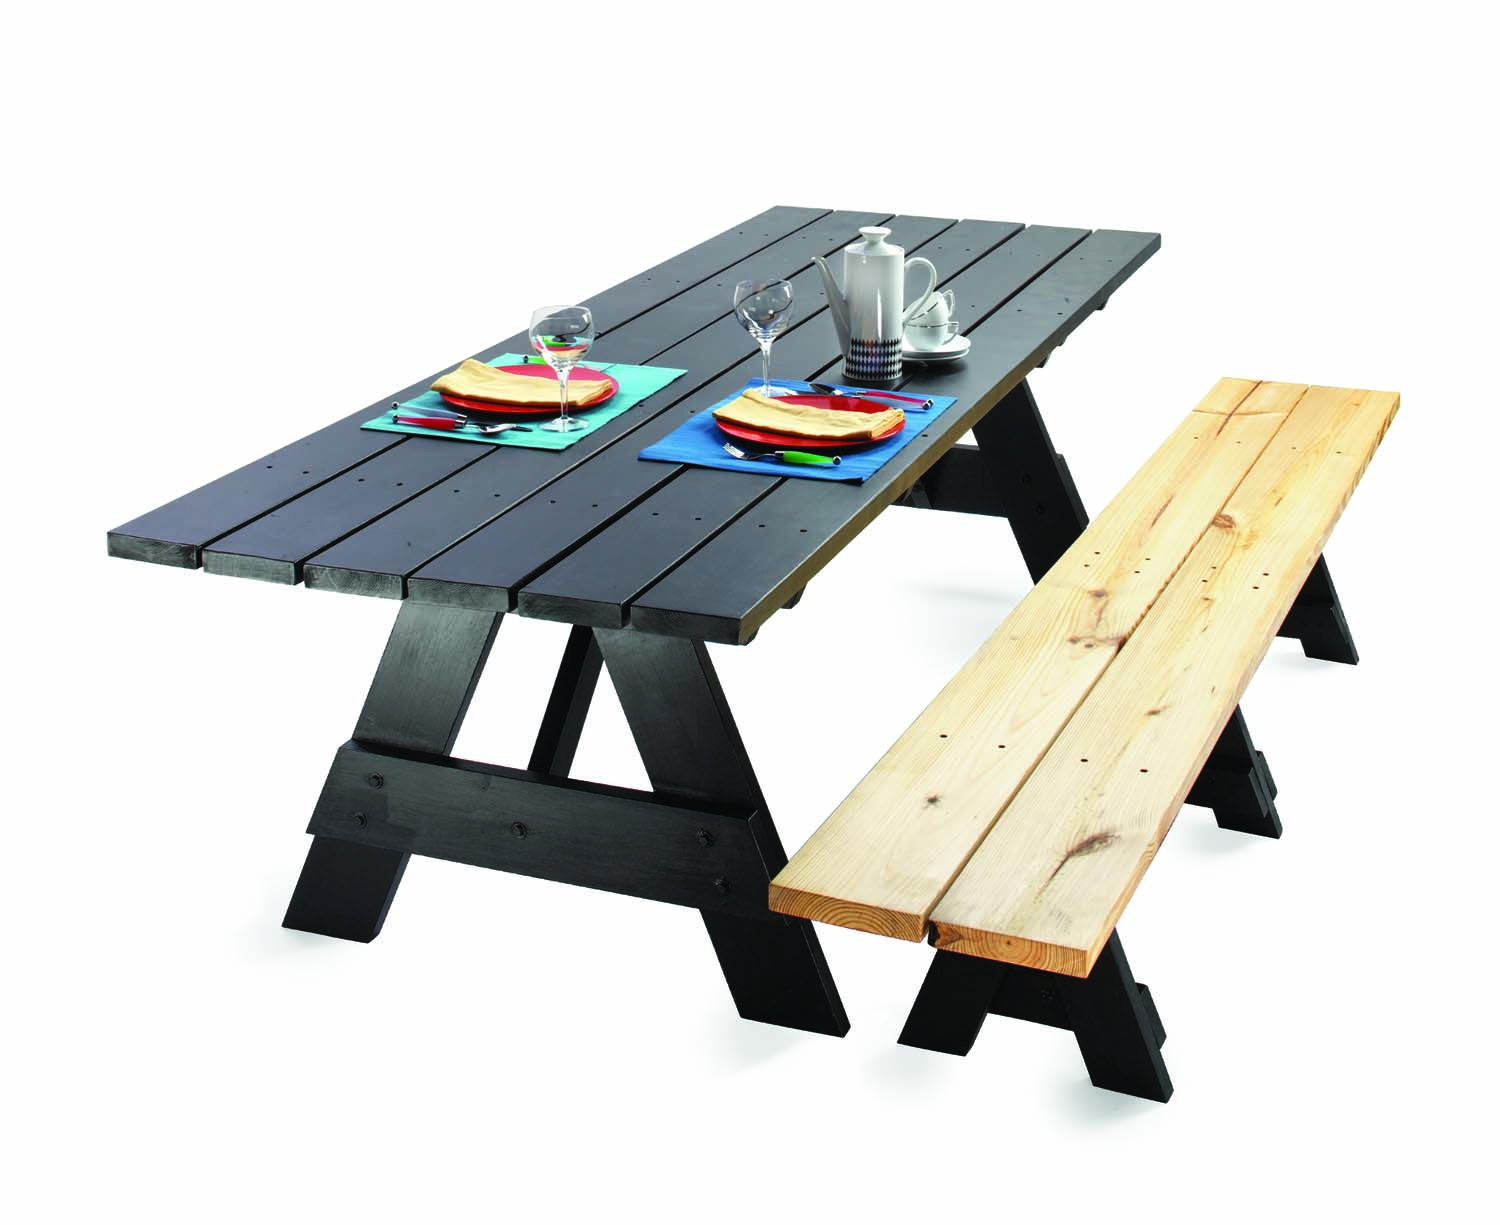
Urban chic. This pine table is destined for the dining room – but throw on a coat of spar varnish or exterior paint (or use pressure-treated lumber), and it will serve well on the deck, too.
This table is a picnic to build with dimensional lumber, screws and bolts.
I’m usually not intimidated by undertaking projects. We need some artwork for the new apartment? I can paint some vivid, abstract oil paintings. Hair is not the way I wanted it? I’ll trim it. Not the right color? I’ll dye it. Shirt too loose? Hand-stitch it. We need a dining room table? Well … I’ll drive us to Ikea.
The odd thing was, I shouldn’t have been intimidated about making something. I’m not a fan of measurements, but I can use them when necessary. Making a picnic table is a large project, true, but it wasn’t the size – or the numbers – that was intimidating.
It was the saws. And the splinters. What if I cut off a finger? What if I drilled through my palm like some sort of nightmarish woodshop stigmata scene? After telling my irrational and oddly descriptive fears to step aside, my husband, David, and I stepped into the Popular Woodworking Magazine shop. We went over some safety tips, reviewed the design for the table and got to work.
The miter saw was the hardest thing for me to get over. Sure it looks innocent, but the idea of pulling the sharp, quickly rotating blade down and toward myself seemed foolish, if not downright dangerous. I discovered that the key was to go slow. Not only did this make it easier and give me more control, it also made for a much cleaner cut.
Editor’s note: the Sketchup models of the table have been lost to time, but this video shows some additional details for the underside of the table as well as the bench.
Making the Cuts
 This picnic table is going to be our dining room table. After painting it black, I covered the tabletop with my favorite food and beer memorabilia I’ve collected as a food blogger, mostly six-pack covers. Then, to protect the stuff, we covered the tabletop with some thin Plexiglas. It looks great.
However, you might have different plans for your picnic table. Say, a picnic perhaps? In that case you’ll want to purchase pressure-treated pine or a rot-resistant species, such as redwood (pricey!) or white oak (still pricey). We used white pine, which was cheap. You can use white pine as well, as long as you paint the table and maintain the paint job. Our table is going to live a long, cushy table life indoors.

 The table requires about a dozen 2x6x8s, some 2 1⁄2” screws and some hex-head bolts, washers and matching nuts. Oh, and you’ll need a long afternoon or a few friends. I brought the beer – for after the work was done. Don’t drink and drill.
Odd Angle; Easy Cuts
To begin, pick out the six best 2x6s for the top and set them aside. Pick out the stock for your legs and set your miter saw’s table to cut a 22.5° angle. Lock it there. Cut your legs to length (use a stop-block to make sure they’re all the same size).
Design-wise, the table is better too short than too tall, especially if one of the members of your family is petite, like me. David is 6′ plus and I’m 5’2″ on a good day. It is easier for him adjust to a shorter table than for me to constantly strain upward. Now cut the bottom braces and top braces to length – they are identical and each end is cut at 22.5°.
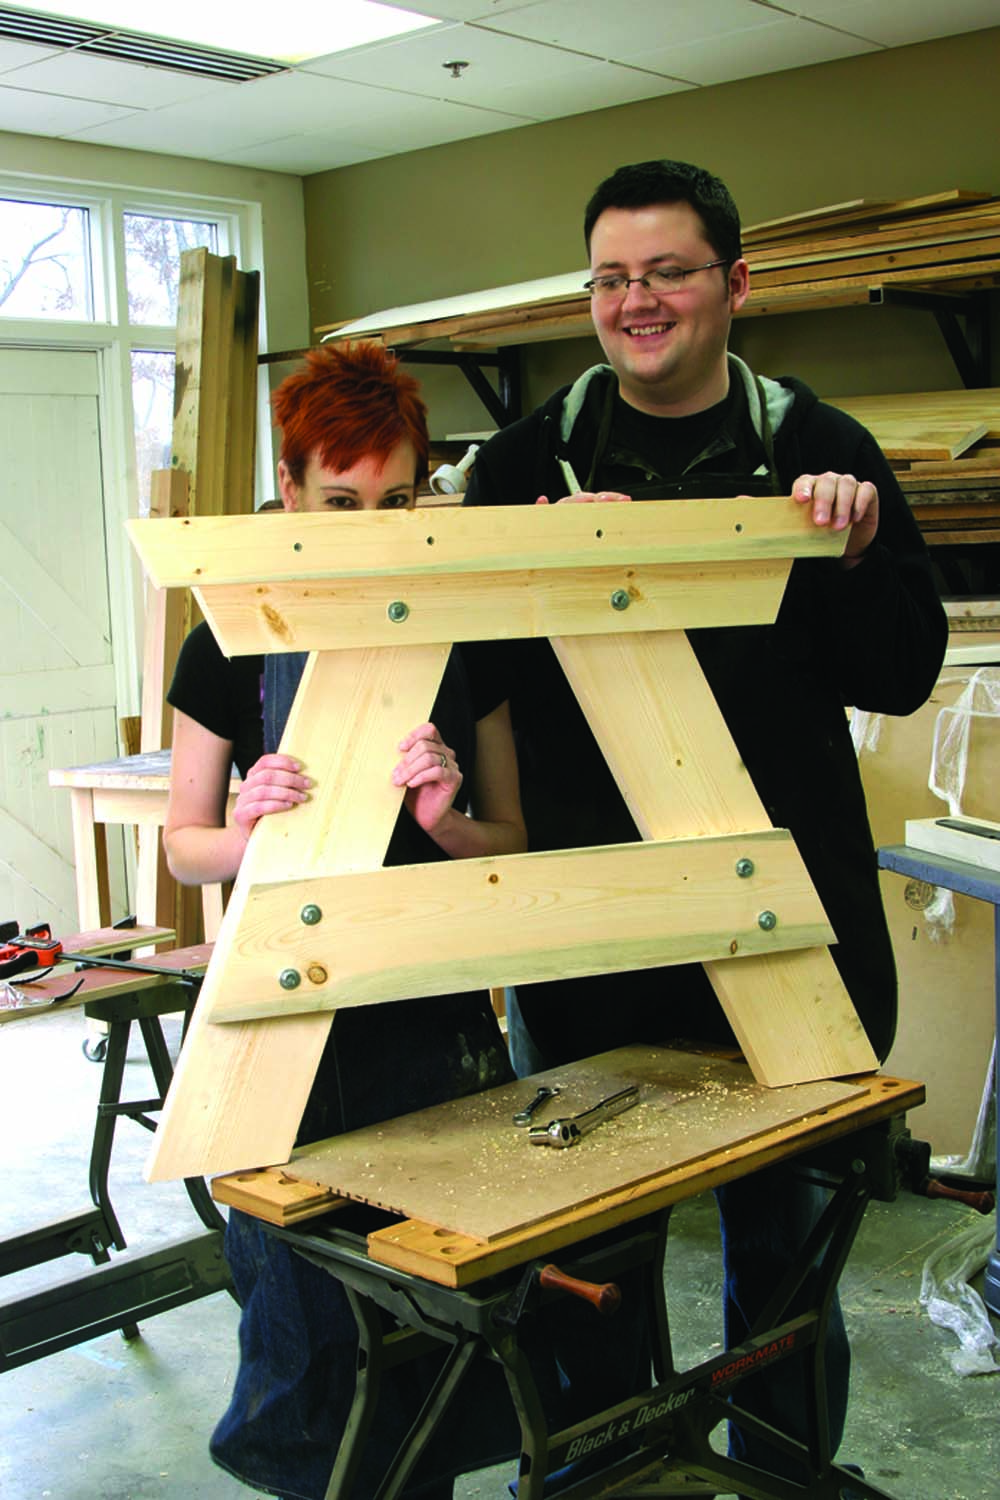
Ends are the beginning. Make the two end assemblies first. Then attach the top and diagonal braces.
After that, arrange each end assembly on your bench or garage floor. Place the legs so they touch at the top. Position the lower brace so the ends are flush to the legs and the legs touch at the top. Bolt the lower brace to the legs for each end assembly. Following that, place the top brace in place. Center it on legs and bolt it as well.
To make the narrower top cleats and diagonal braces, you’ll need to rip one of your 2x6s. Once you rip it to width, cut the ends to 22.5° on the miter saw. Glue and screw one narrow cleat to the top of each leg assembly. You’ll have two narrow cleats left.
Attach the Top
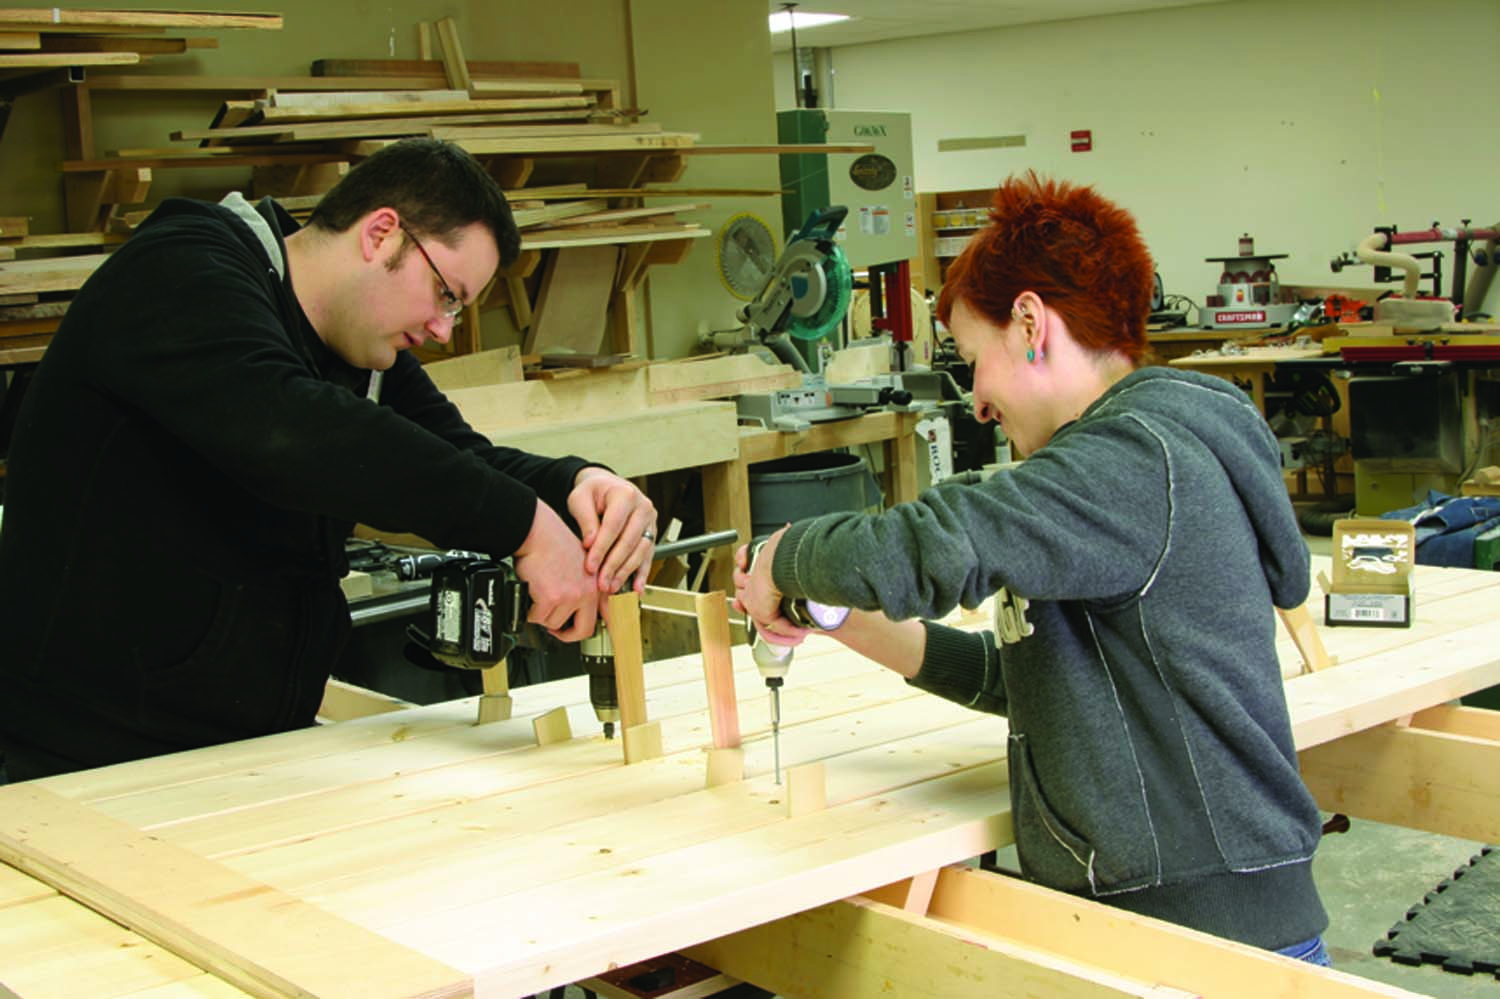
Spaced out. Use shims to space out your top boards. When the top looks good, screw it down.
To attach the top pieces, balance your end assemblies on the floor and space them 63″ apart. Put clamps on the feet to stabilize them. Space the top pieces out on top of the legs. When they look good, screw them down. Flip (easy now) the whole assembled thing over so the feet are sticking in the air like road kill.
Now cut your diagonal braces. These have a 45° angle on each end. Set your miter saw to 45° and cut them to length. Then fit them between the end assemblies and top. When they fit, screw the two narrower top cleats (remember those?) to the underside of the top. Then screw each diagonal brace to each narrow top cleat.
Two Bolts for Strength
To ensure your picnic table lasts, you should bolt the diagonal brace to the end assembly. We used 1⁄2” x 4″ hex-head bolts with washers and nuts. Drill a 1⁄2” clearance hole through each lower brace and through the diagonal brace (have a friend hold the diagonal brace while you drill the hole).
Now you need to cut a square notch in the diagonal brace so the washer and bolt have a flat area to sit on. Cut the notch with a handsaw and tighten the bolts.
Dessert
Almost done! The last few steps are just sanding and finishing. Be sure to break all the sharp edges using #120-grit sandpaper. If you are painting the picnic table, you can sand the entire project up to #120-grit and call it a day. If you are going to add some sort of clear finish (such as a deck stain), go up to #150 grit.
Though it was a big project, our rewards were great. I should not have been afraid of detatching any digits. In fact, the only injury I sustained throughout the entire project was a paper cut – from the wrapping on my chicken fingers when we broke for lunch.
Now we need some bookshelves for the apartment. I can do that! Let’s get started. I’ll man the miter saw. PWM
Laura (along with her husband, David) are the Cincinnati Nomerati – one of our favorite blogs in Cincinnati that covers food, beer and all other things tasty. Check it out at cincinnatinomerati.blogspot.com.
Here are some supplies and tools we find essential in our everyday work around the shop. We may receive a commission from sales referred by our links; however, we have carefully selected these products for their usefulness and quality.