


We may receive a commission when you use our affiliate links. However, this does not impact our recommendations.

Understanding the Why is just as important as the How.
Hand tools are a pleasure to use — if they’re sharp. Once you have a sharp tool in your hands, you’ll begin to realize why some woodworkers are so passionate about old ways of working wood. Slow is beautiful, after all.
I’ve been a hand tool enthusiast for years, and I can honestly say that learning how to sharpen a tool is just as important as learning how to handle it. It’s not something you master right away; sharpening is a skill that requires patience, practice, and persistence. This story is for folks who already know a bit about sharpening, and are ready to move on to the next level.
1. Sanding Belt Lapping Jig
 You can chew up a lot of sandpaper flattening a plane iron, a large chisel or the bottom of a plane. It makes sense to use paper that lasts a long time–like a sanding belt. But, if you cut a belt to lay open, it won’t sit flat, because its backing is too stiff.
To overcome this problem, I devised a jig that stretches a belt very tight. I only use it with coarse grits–60, 80, and 100–for tools that need a lot of metal removed from them. It’s double-sided, of course, so you’ll use the whole belt. It won’t slip when you’re lapping, because the abrasive on the bottom grips your workbench.
 I made this jig for the 6×48 belts that go on my combination disc/belt sander, but it could be any size. The body consists three pieces of 3/4″ MDF laminated together. After gluing, flatten the faces by rubbing the blank on sheets of sandpaper taped to the top of a tablesaw. Round the ends by making 45° cuts on both ends of the blank, then soften the sharp corners with a file. Cut off the short end and make opposing wedges to pull the belt tight.
2. Back Bevel Avoids Lapping
 Conventional wisdom holds that you must lap the back of a plane iron in order to get a keen edge. Well, it ain’t necessarily so. There is an alternative: skip the lapping and substitute a back bevel.
The process is quite simple. When it’s time to remove the wire edge formed by honing the bevel, place a thin object, such as a piece of plastic or a 6″ stainless steel rule, along one side of your finest stone. Rest the blade on this shim when you remove the wire edge. The shim elevates the blade just enough to form a back bevel of only a few degrees.

[Fig. 05] Back Bevel
- The back of your blade still has to be relatively flat, so that there are no gaps under the chip breaker.
- A few strokes on the finest stone should do the job. There’s no point in making this a large bevel, so long as it goes across the full width of the blade. Once your form a back bevel, you’ll have to continue following this method each time you hone.
- In order to maintain a constant angle, always place your shim and the blade on the same places on the stone.
- A back bevel raises the effective cutting angle of your plane. This helps reduce tearout, but it also makes the plane a little harder to push.
Credit for popularizing this technique properly goes to David Charlesworth, a well-known English cabinetmaker.
3. Blunt A Nicked Edge
 If your chisel gets a serious nick or ding, you’ll have to grind away a lot of metal to renew the edge. The best strategy for doing this is to adjust your grinder’s tool rest to 90° and blunt your tool like a screwdriver. Once you’ve ground past the damage, reset the tool rest at the appropriate grinding angle and have at it.
Consider this as an insurance policy. You’re much less likely to overheat and draw the temper out of a blunt edge than an acute edge.
 Overheating an edge is all too easy to do when you’re removing a lot of material. It’s not pretty. The steel turns blue–a definite sign of trouble. The blued portion is softened, and will no longer hold an edge. You have to continue grinding past the blued area to get to good steel again.
Blunting the edge is just a different way to get to the same place. You’ll have take off all that metal anyway, so you may as well do it without risking any further damage–a nick is bad enough!
4. What Type of Bevel Do Tools Have?

[Fig. 04] Types of Bevels
Single bevel
A blade with a single bevel is ground and honed at the same angle.
Double bevel
A blade with a double bevel is ground at a lower angle and honed at a higher angle. The difference between the ground bevel and the honed bevel is usually 5°.
Hollow ground bevel
A blade with a hollow ground bevel is ground on a wheel, creating a concave shape.
Microbevel
A microbevel is a very short bevel that is one or two degrees steeper than the honing bevel. The blade may have a single bevel or a double bevel.
Back bevel
A back bevel is an optional type of microbevel for a plane blade.
5. What’s the Deal with Microbevels?
A microbevel sounds like a pretty sophisticated concept, but the idea is really quite simple. A microbevel is just a very short bevel that’s honed at a slightly steeper angle than the rest of a tool’s bevel. You create it in the last stage of the honing process, using your finest stone.
Why bother? Well, a microbevel has two significant benefits. First, it gives you an extremely sharp edge with a minimum amount of effort. When you’re honing on your finest stone, each stroke doesn’t remove a whole lot of steel. There’s no point in making the whole bevel as smooth and shiny as possible, so it makes sense to concentrate your efforts right at the business end, where it counts. And that’s what happens when you raise the honing angle a degree or two.
A microbevel also makes your edge last a bit longer. Think of your blade as a wedge. A thin wedge is going to dull quicker than a thick wedge, right? A 35° edge, for example, will stay sharp longer than a 25° edge. So any increase in a bevel’s angle helps an edge stay sharp, even if it’s only a degree or two.
6. Angles to Remember

[Fig. 01] Common Angles
If you prefer to grind and hone your tools with a single bevel, just remember one number for each type of tool.
If you prefer a double bevel, make the grinding angle 5° less than the honing angle. A general purpose chisel, for example, is ground at 25° and honed at 30°.
The most widely used honing angle for a bench plane’s blade is 30°. I prefer 35°, because a steeper edge lasts longer.
7. A Bargain Honing Jig, and How To Improve It

Back in the Dark Ages, when I first learned how to sharpen, I bought a very simple and inexpensive honing jig made in England by Eclipse. Today, the same jig is widely available under many different brand names, and often costs less than $15. It works quite well–I’ve used mine for years–but I’ve made a few small refinements to it. The jig’s body is aluminum, so it’s very easy to modify using a file or disc sander.
Before getting to the improvements, let’s discuss how the jig works. It has two positions for clamping tools: an upper ledge for plane irons, and a lower pair of V-shaped grooves for chisels. To set the honing angle for either tool, you measure the distance from the tip of the blade to the body of the jig. If you want a chisel to have a 30° bevel, for example, you clamp it so the tip projects 30mm from the jig (the measurements are metric because the jig is English). If you want a plane blade to have a 30° bevel, you project it by 38mm, because it sits at a higher level in the jig than a chisel.
Here’s what you can do to make this good jig even better:
Flatten its face. For accurate and repeatable projection measurements, the two front faces of the jig must be square and even with each other. The easiest way to flatten the faces is by placing the jig on a disc sander’s worktable and gently pushing it into the disc (Photo 1).

1.
Widen the chisel slots. Many chisels don’t fit very well in the V-shaped grooves because their sides are too thick. Clamp the jig in a vise and use the edge of a 6″ or 8″ mill bastard file to widen the grooves enough to fit your tools (Photo 2).

2.
Make a projection jig. You don’t need a ruler to measure a tool’s projection–use a stepped wooden jig instead (Photo 3). It’s more convenient, more accurate and easily repeatable. I use a single projection for most chisels and plane irons: 30mm (about 1-3/16″). This creates a 35° bevel on a plane iron, rather than the standard 30° bevel, but that’s just what I want, because a 35° edge lasts longer.

3.
Add a microbevel setting. I added a second side to the projection jig for honing a microbevel. This side is 2mm (about 1/16″) shorter than the other side, which increases the bevel angle by about 1°. To sharpen an edge, I use the normal 30mm projection on medium and fine stones (side #1), then reset the projection to 28mm (side #2) and hone a few strokes on a superfine stone.
Form a back-bevel ramp. Adding a back bevel to a plane iron makes the iron easier to sharpen. To make a back bevel using this jig, you just turn the jig over and rest its top on your stone (Photo 4). Unaltered, the jig produces a back bevel that’s quite steep, so I used a disc sander to grind down the top of the jig, sloping from front to back.

4.
8. The Hollow-Ground Bevel–What’s the Big Deal?
The phrase “hollow-ground bevel” has been widely misused, and I’d like to set the record straight as to what it is, what it’s good for, and when to avoid it.
A hollow ground bevel is simply a concave bevel. It’s a natural result of using a grinding wheel. The wheel is convex, of course, so it always creates a bevel that’s concave.
A tool with a hollow ground bevel is easier to sharpen by hand, without the use of a jig. The biggest problem with honing by hand is holding the tool at the correct angle with every stroke. A hollow ground bevel helps you find and maintain that angle, so there’s no wasted effort.
With a hollow grind, you simply rock the tool up and down until it locks in place, resting on the bevel’s heel and toe. Two points of support make the difference–it’s much harder to feel the correct angle if the bevel were flat, rather than concave. That’s why we have arches in our feet-they make balancing easier.
 I often sharpen chisels by hand, without a jig, simply because it’s so easy. Ditto for plow plane and rabbeting plane irons that are awkward or impossible to hold in a jig. I do use a jig for honing standard-thickness bench plane irons, though. Even with a hollow-grind, their bevels are too narrow for me to maintain that correct angle every pass on the stone.
OK, so when is a hollow ground bevel not appropriate? Japanese tools and Western mortising chisels are the exceptions. Ideally, Japanese tools should be ground with a flat bevel, to maximize support of the tip. The steel of Japanese tools can be brittle, and without adequate support, a tip could fracture. Mortising chisels should be flat ground, too, or made slightly convex, for the same reason. To withstand heavy blows, their tips need to be as strong as possible.
9. Waterstone Mat
 When I switched from oilstones to waterstones back in the Paleozoic era, I thought that I could say goodbye to making a big mess while sharpening. Well, not exactly. Waterstones are messy, too, when you keep their surfaces flooded with water–as you should.
I’ve been looking for years for the best method of containing the mess, and modern technology has finally delivered: a rubber paver. It’s about 16″ square, 3/4″ thick, and made from recycled tires. Water beads up on it, and best of all, the surface is a bit rough and sticky, so stones stay put. You don’t need a holder or clamps or anything-just your stones and the mat.
Similar material is used for floor underlayment for gyms, so you may be able to scrounge some for free, but these pavers are now available at home centers. I’ll bet they’ll last forever.
10. Waterstone Maintenance
 Waterstones are renowned for cutting fast, but many require regular maintenance to keep them flat. This is no small thing–a flat surface is essential for producing a straight edge and to properly remove a wire edge.
Flattening is a must-do, routine chore. How often do you have to do it? Well, ideally you’d flatten a stone each time before you use it, but that may strike you as being obsessive. Flattening after a half-dozen uses is probably more realistic. But consider this: the longer you let it go, the more dished-out a stone may become and the more work you have to do to make it flat again.
The easiest and least expensive way to flatten a waterstone is to rub it on a piece of 220 grit wet/dry sandpaper, mounted on a piece of 1/4″ glass. The best source for this sandpaper is an automotive supply shop. Pick up a handful of sheets, because each one is only good for two or three uses.
When you flatten, use lots of water to keep the paper from loading. You don’t have to adhere the paper to the glass–the water will cause the paper to stick by itself.
If you really want to get the job done in a hurry, lap your stones on a fine diamond stone under running water in a utility sink. You’ll be done before you know it. If you’re really nuts about this, like I am, build a support so you don’t have to lean over too far.
11. Dress Those Wheels
 If your grinder shakes and vibrates, chances are that the wheels aren’t round. Sure, they’re more or less round, but they have be perfectly round for your machine to run smoothly. For truing a wheel, you need a wheel dresser.
If your wheels are full of metal particles and have a glazed surface, you’ve got another problem. All that metal makes the wheel cut slower and build up heat faster–a surefire recipe for drawing the temper from a tool. To renew a wheel’s surface, you need a wheel dresser.
You get the picture. A wheel dresser is a must-have accessory for any grinder. It removes material from the face of a grinding wheel the same way that a turning gouge shapes a spindle. As it cuts into the wheel, a dresser removes the high spots, making the wheel truly round. At the same time, it renews the surface by exposing fresh abrasive.
Before you dress your wheels, it’s a good idea to mark them all around with a pencil so you know when all the high spots are gone. To mark a wheel, rotate it by hand and hold a pencil against it.
There’s more than one type of wheel dresser, but my favorite is a T-shaped tool with a diamond face. To use it, adjust the tool rest to 90°, turn on the grinder, and gently hold the dresser against the wheel. It’s that easy. You’ll be amazed at the difference it makes.
12. Four Blade Profiles for Bench Planes

[Fig. 02] Plane Blade Profiles
Scrub plane. This tool is used to hog off lots of wood, fast. Its blade has a large camber, which is created on a grinder. (No honing is necessary.) The amount of camber depends on the wood’s hardness and whether it’s green or dry. A 1/16″ curve will take off shavings up to 1/16″ thick, just right for kiln-dried hardwoods.
Fore plane. This plane makes a large surface approximately level. (A fore plane is a 5, 5-1/2, or 6 in the Stanley series.) Its blade has a smaller camber, made on a grinder, which is also honed.
Smooth plane. A smoother finishes off a surface. Its blade has a very slight camber or none at all. The blade’s corners are rounded to prevent them from digging into the surface and leaving a series of steps. This rounding is best done on a grinder. The camber is created by honing only, not on the grinder.
Jointer plane. A jointer is often used to flatten surfaces that will be glued together. Its blade has no camber-it’s dead straight across. Block planes are sharpened with a straight profile, too.
13. Accurate Paring Requires A Flat Back
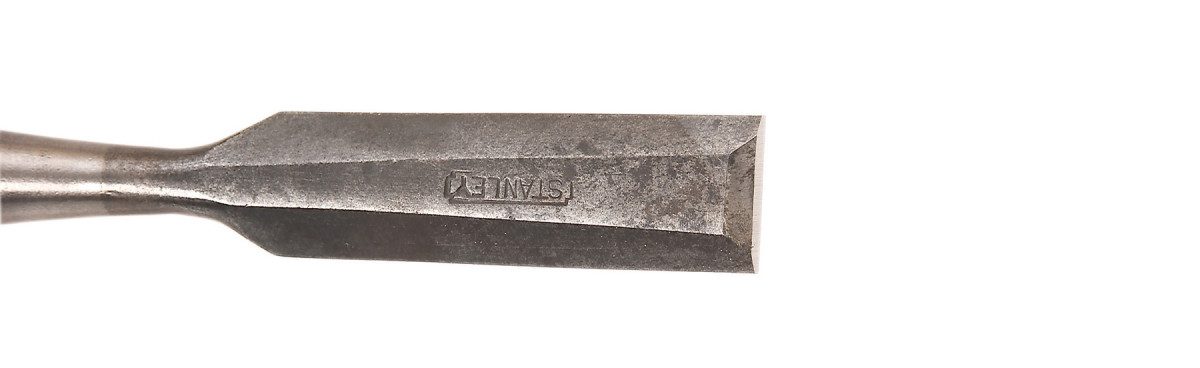
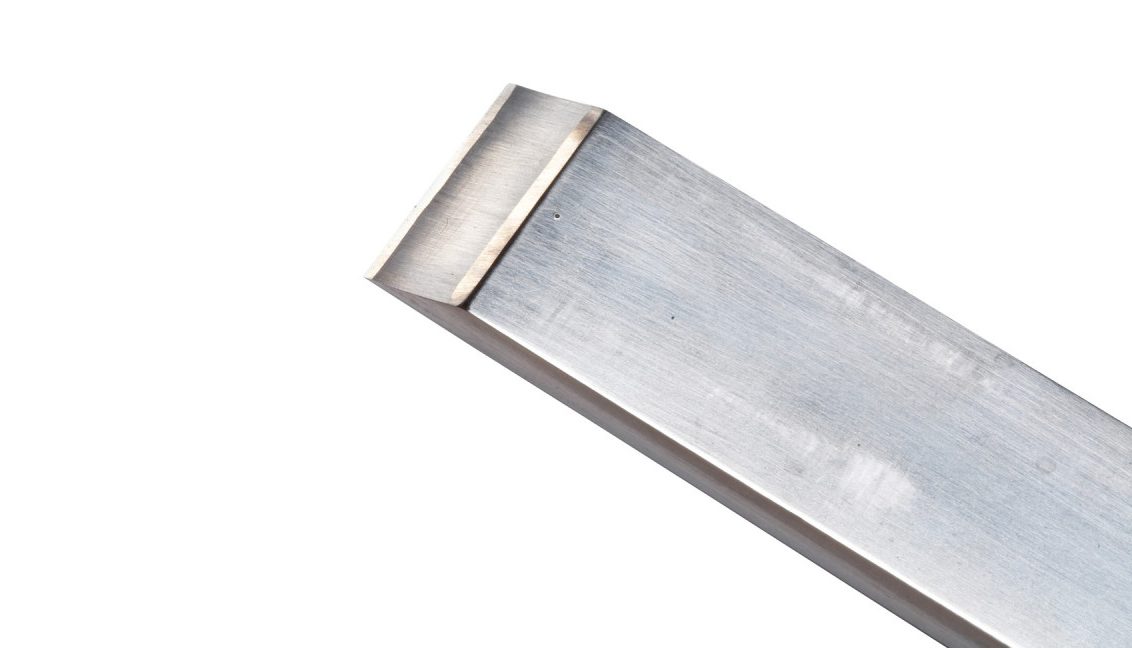
 Is the back of your chisel really flat? For accurate paring, it has to be as flat as flat can be, for at least 2 to 3″. Even though your chisel may look like it’s OK, it probably needs to be lapped to make it truly flat.
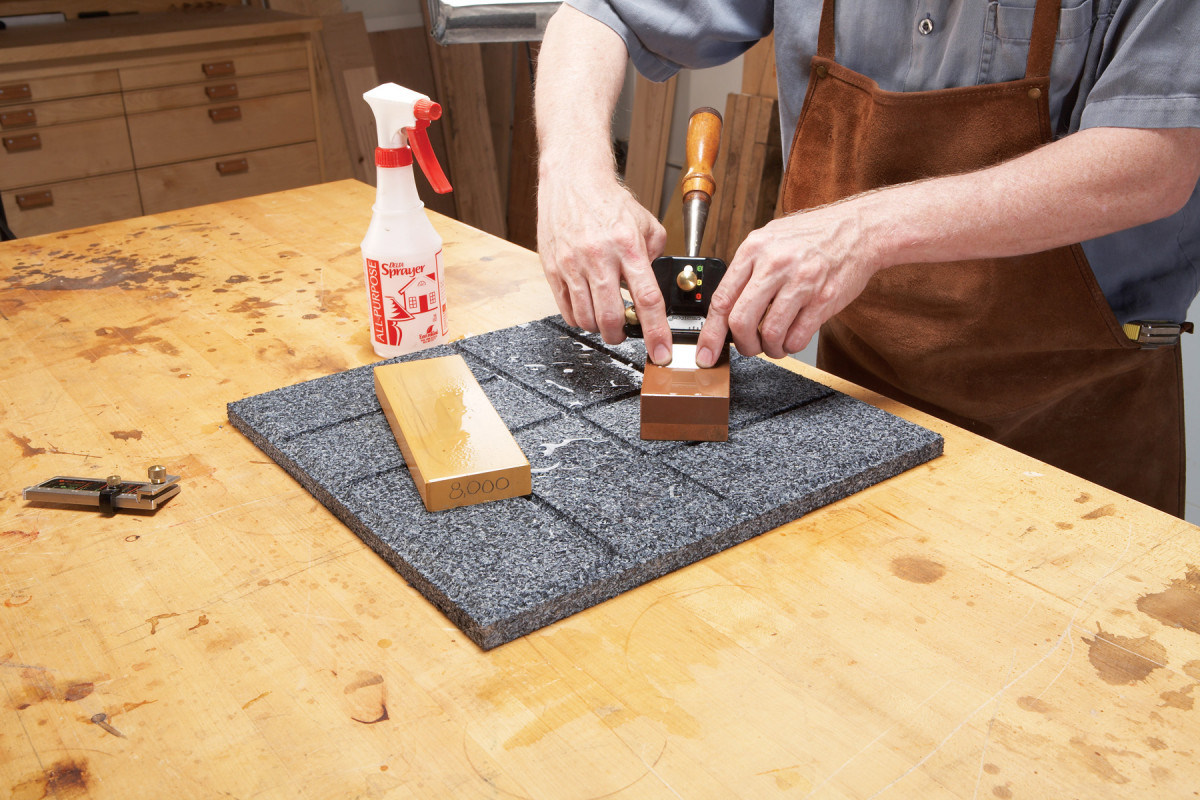
Lapping consists of two stages: flattening and polishing. First, you flatten the back by rubbing it hard on sandpaper that’s adhered to a flat surface. I’ve used a 1/4″ thick piece of glass, the cast iron wing of a tablesaw, or the bed of a jointer, but my favorite lapping surface is an inexpensive granite surface plate (see Source, below).
Start with 220 grit paper. Take a few strokes and examine the back. If it’s really bad, begin lapping in earnest with 80 grit paper. On most chisels, I start with 120 grit. If the back is pretty good, begin with 220 grit.
On your first grit, keep sanding until the scratches go all the way from corner to corner and 2 to 3″ up the length of the back. This completes the flattening stage.
In the next stage, polish the back with finer and finer grits. A complete sequence is 80, 120, 180, 220, and 320 grit standard paper. (You can go even farther, and save wear on your stones, by using 15 micron and 5 micron 3M PSA-backed Microfinishing paper).
When you switch to a finer grit, lap in a different direction, so the scratches make a different pattern. Keep lapping on each grit until the scratches made by the previous grit disappear.
Once you’ve finished with 320 grit, continue lapping on your stones–assuming they’re flat, too.
For abrasives, I prefer 3M’s PSA Gold, which is available in discs or rolls at auto supply stores. It cuts faster than any other paper I’ve tried and doesn’t require a sprayed-on adhesive.
14. Hone Scrapers with Diamonds

1.
A lot of folks use a stone to put the final edge on a scraper before turning its hook, but I prefer to use a diamond paddle. It cuts faster than most stones and obviously won’t develop a rut, which is always a danger when you continually run the edge of a scraper on a stone.
2.
I use an extra-fine diamond paddle, which is roughly equivalent to a soft Arkansas oilstone or a 1000 grit waterstone. While the diamond can’t make a scraper’s edge quite as sharp as a fine stone, it’s good enough for all but the most demanding work. I lubricate the paddle with some 3–In-One oil to float away the metal debris, so it won’t clog the paddle.
To hone the scraper’s edge, I position the scraper in a vise so that it’s level with a small stick. Resting the paddle on the stick ensures that the scraper’s edge will be exactly 90° (Photo 1). I also use the paddle to remove the wire edge formed by honing (Photo 2).
15. Vacuum Lapping Dust
 The best way to keep your sandpaper clean when lapping is to vacuum it. Sandpaper is much less efficient when it clogs up with swarf (a machinist’s term for metal debris). Removing the swarf every few strokes makes a tedious chore go faster. Cleaning the sandpaper with a stiff brush or an eraser works so-so, but a vacuum removes everything, almost instantly, with no mess.
16. Plane Blade Lapping Jig
 Lapping the back of a plane blade can be a lot of work. My fingers have complained very loudly, though, so I’ve tried many ways to hold the blade more comfortably. I’ve used a magnet, made a holder from a chunk of wood with a shallow dado in it, and worn gardener’s gloves–the kind that have rubber bumps all over them. Each method worked so-so, but I finally decided that the sharpening world needs another jig.
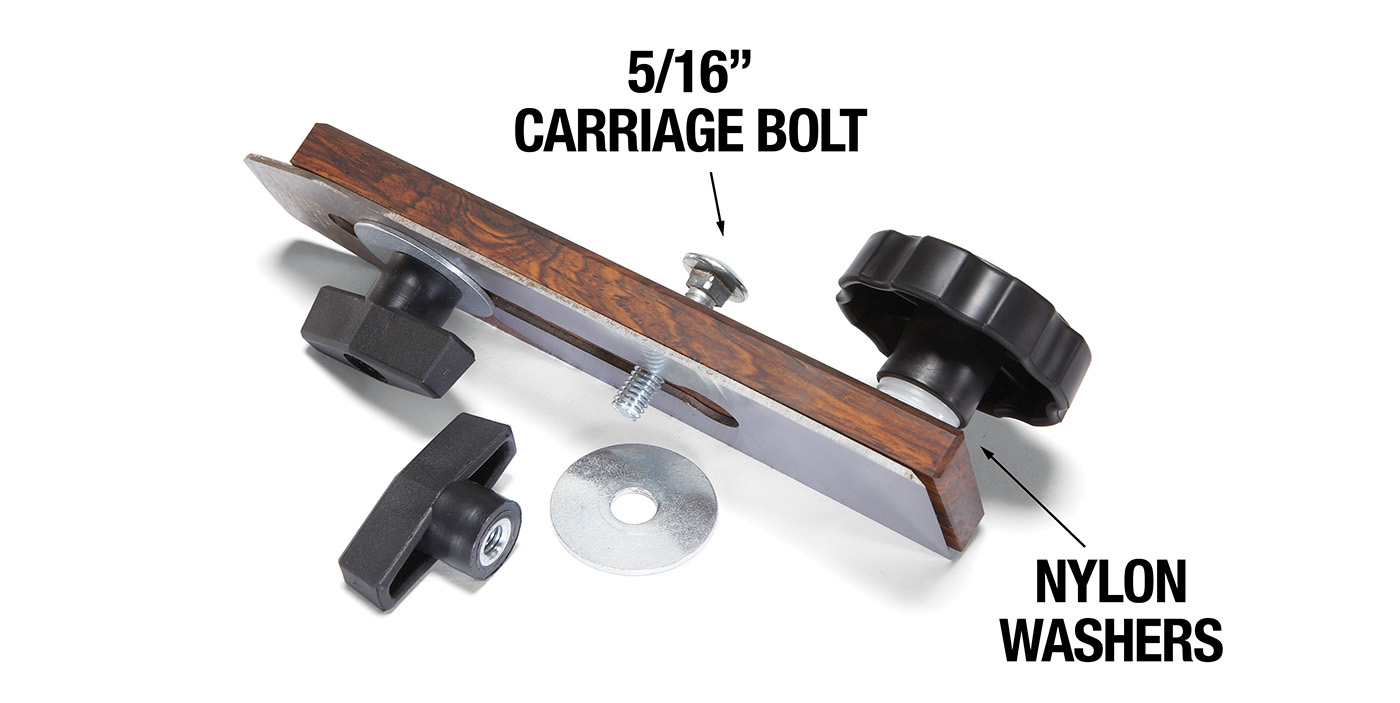 This one really does the trick. It allows you to put a lot of pressure right on top of the blade, without tipping it. Extra pressure makes lapping go much faster. The blade is fastened directly to the jig, and the knob is elevated on a stack of nylon washers to give you a good grip. The knob is threaded; it’s fastened to the jig with a 5/16″ flat head machine bolt.


