We may receive a commission when you use our affiliate links. However, this does not impact our recommendations.
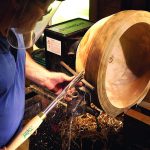
 The modern router didn’t arrive on the scene fully evolved; it descended from a hand-powered tool called the router plane. A quick glance at the router plane’s handles – and the tasks for which it was used – makes the family resemblance clear.
Though these tools went out of favor in the woodworking trades long ago, a finely tuned router plane is anything but a relic. They were replaced by their modern counterparts because they couldn’t match their production speed, not because they no longer worked.
A router plane is my go-to tool for trimming any small surface that needs to be in the same plane as its surrounding surface; a final adjustment to a dado or rabbet’s depth, or trimming a tenon’s cheeks.
Making this plane is a great introduction to tool-making. As you become more adept with your router plane, you’ll reach for it more and more, in many cases finding it faster than setting up a power tool. And there really is nothing more satisfying than using a tool that you’ve made yourself.
Make the Body
You can use any tough, hard-wearing species to make this plane. Hard maple is a classic choice. Start with a block that’s a little oversize, and then mill it to final dimensions.

1. Drill the hole for the thumbscrew on the back edge of the blank.
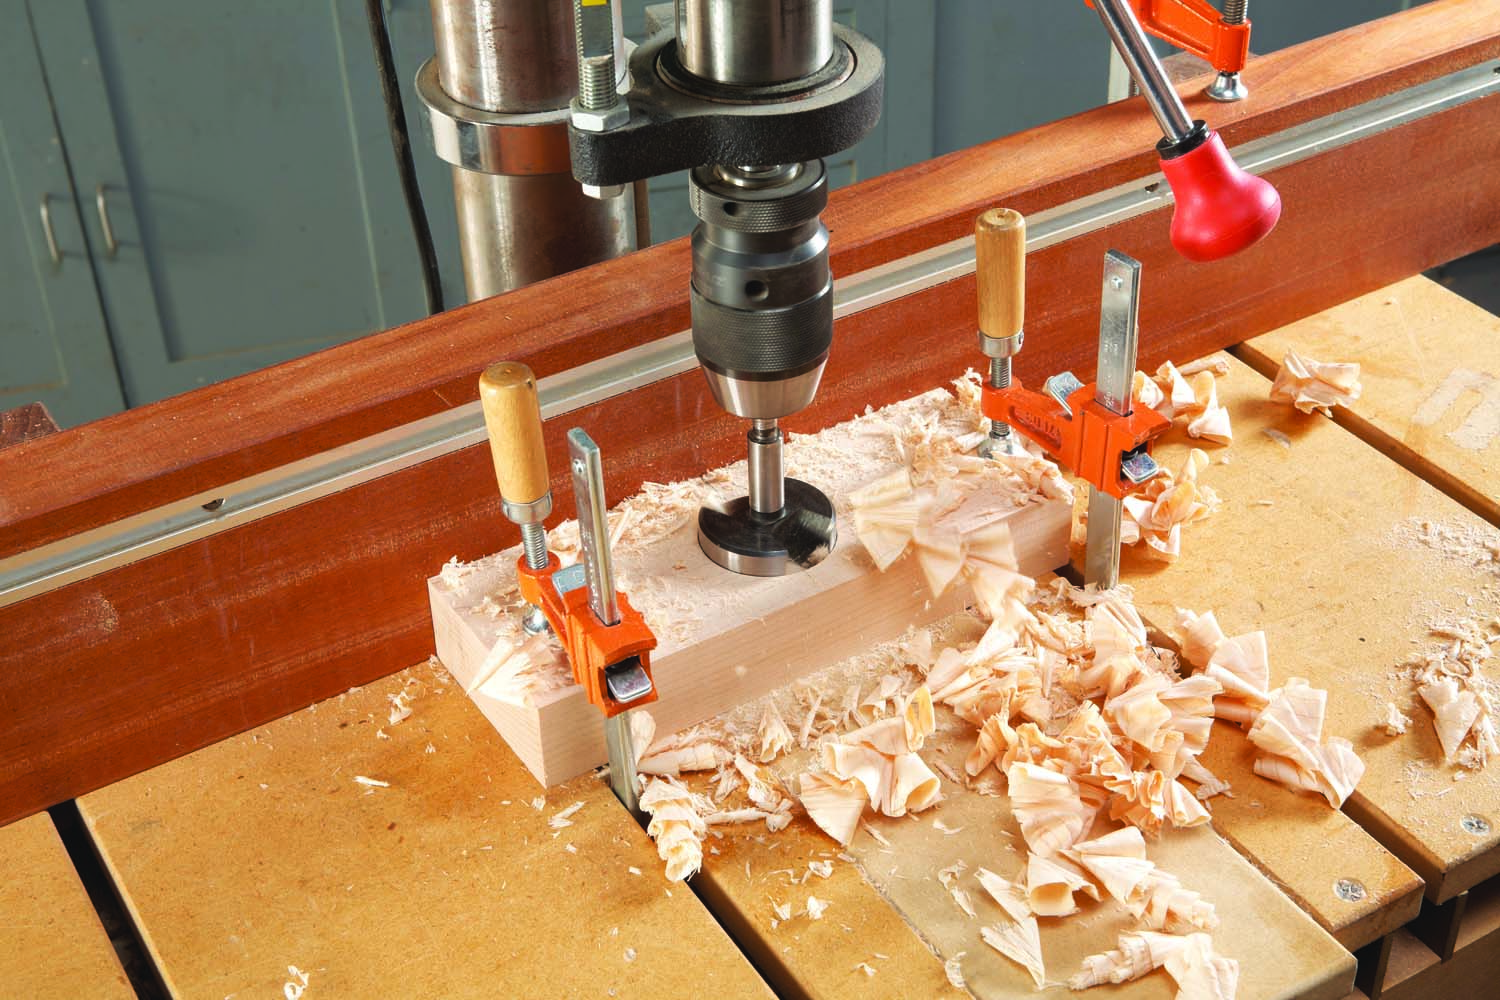
2. Drill the large throat opening in the body using a Forstner bit.
Drill the hole for the thumbscrew in the back edge of the body (Fig. 02 and Photo 1). Next, drill the 2″ diameter throat opening (Fig. 01 and Photo 2), followed by the two 1″ diameter holes (Photo 3). Use the pattern (Fig. 01) to draw the plane’s shape on your blank, and then cut it out on the bandsaw (Photo 4). Sand the plane’s body, and round over the corners of the top edges, so it’s comfortable in your hands. Don’t round over the bottom edges though, just ease them a bit.
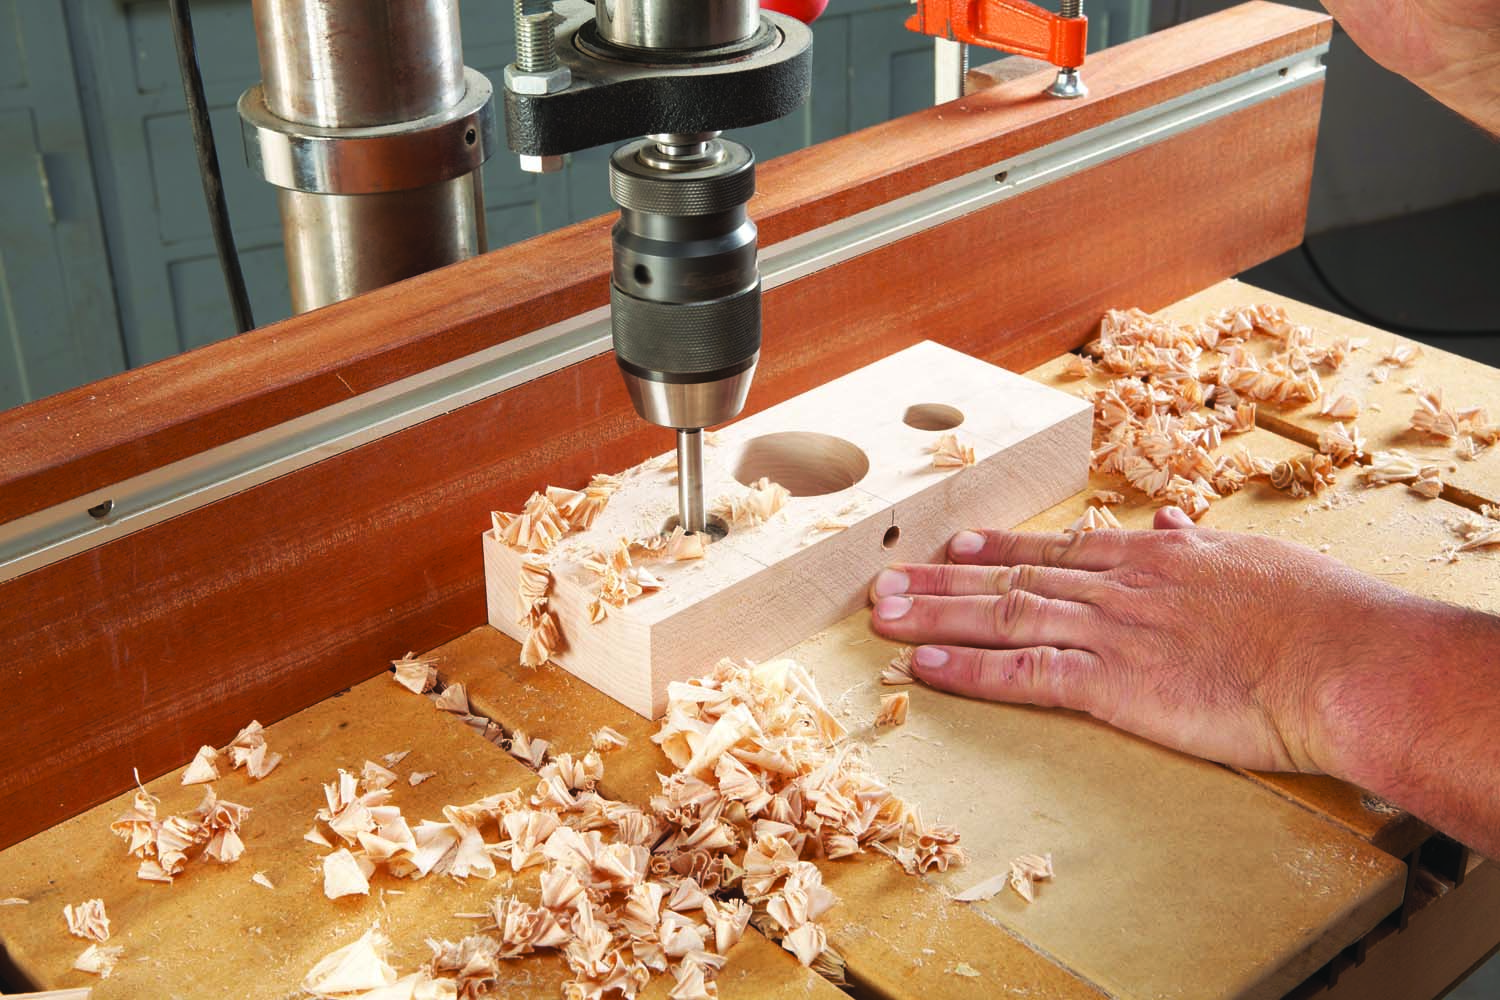
3. Drill the two smaller holes that define the insides of the handles, also using a Forstner bit.
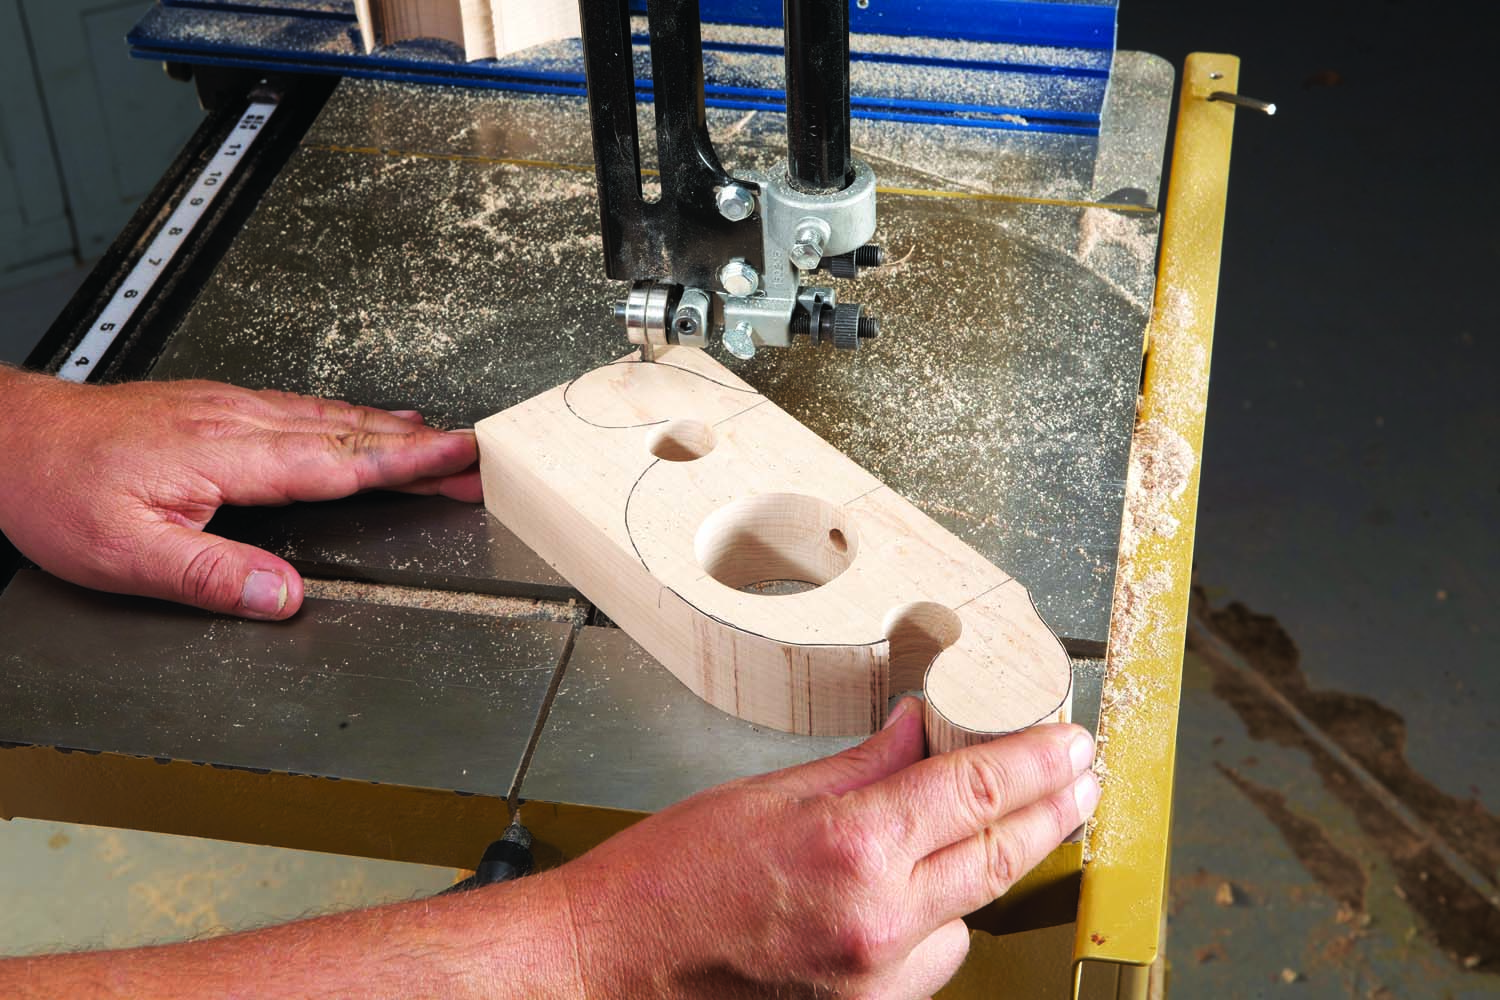
4. Bandsaw the body’s shape. A jigsaw or coping saw would also work for this.
Make the Cutter Holder
The cutter holder is made by drilling a hole in a beefy iron thumbscrew (see Sources, page xx). To hold the thumbscrew for drilling and filing, I drilled an 11/32″ x 2″ deep hole in the end of a wood block. Thread the thumbscrew into the hole. It’ll be tight, but that’s what you want. When you can’t turn the thumbscrew by hand anymore, stick the thumbsrew’s spade in your vise jaws and turn the block.
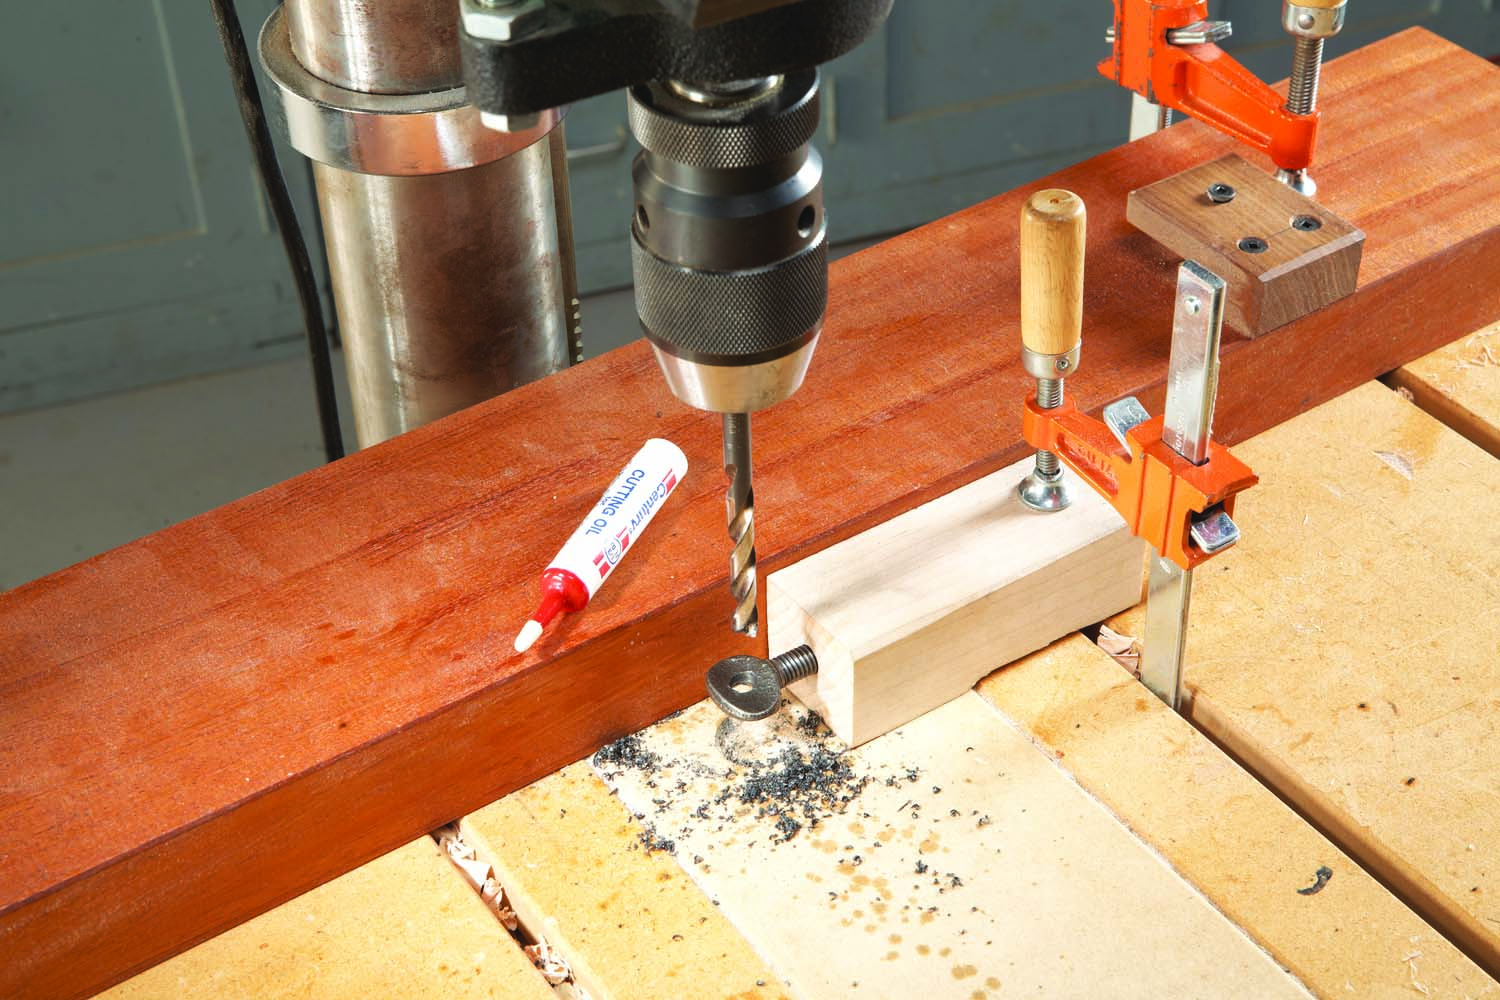
5. Drill a hole in the thumbscrew to hold the plane’s cutter. Use cutting oil and a holding block.
Drill the hole in the thumbscrew using cutting oil so you don’t overheat your drill bit (Photo 5). With a square file (see Sources) shape the hole to fit the hex key’s cross-section (Photo 6). This sounds more difficult than it is, so don’t sweat it. Perfection isn’t necessary and the malleable iron thumbscrew files easily.
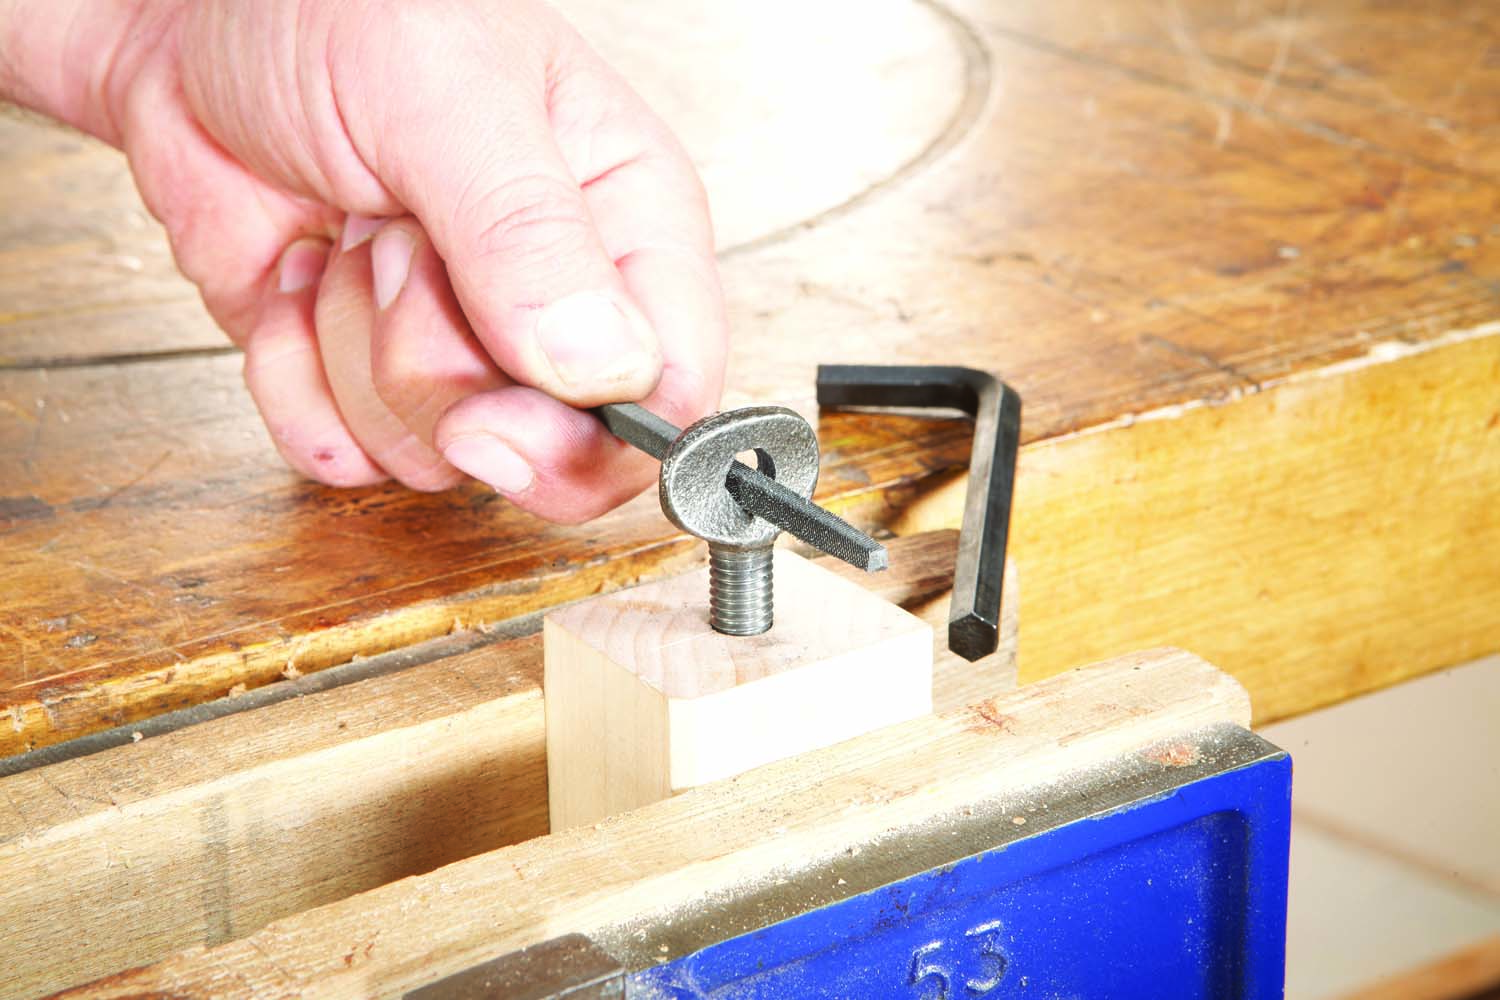
6. File flats in the thumbscrew’s hole to match the hex key’s cross-section.
To make it even easier, the file listed in the sources is the perfect size for this task. Start by filing one flat on the side of the hole opposite the threads. Do your best to make sure this first flat is square to the threads, as this is what holds the cutter square. Once you’ve made the first flat, roll the file one file’s-width either left or right and file the adjacent flat. Continue in this manner until you’ve come all the way around. Check the hex key’s fit often so that you don’t file more than necessary. The fit should be snug, so the cutter doesn’t move during use.
Make the Cutter
Make another block to hold the hex key for cutting and grinding. Drill a 5/16″ hole in the end, and then use a mallet to drive the hex key into the hole. Again, it’ll be a tight fit, but that’s what you want.
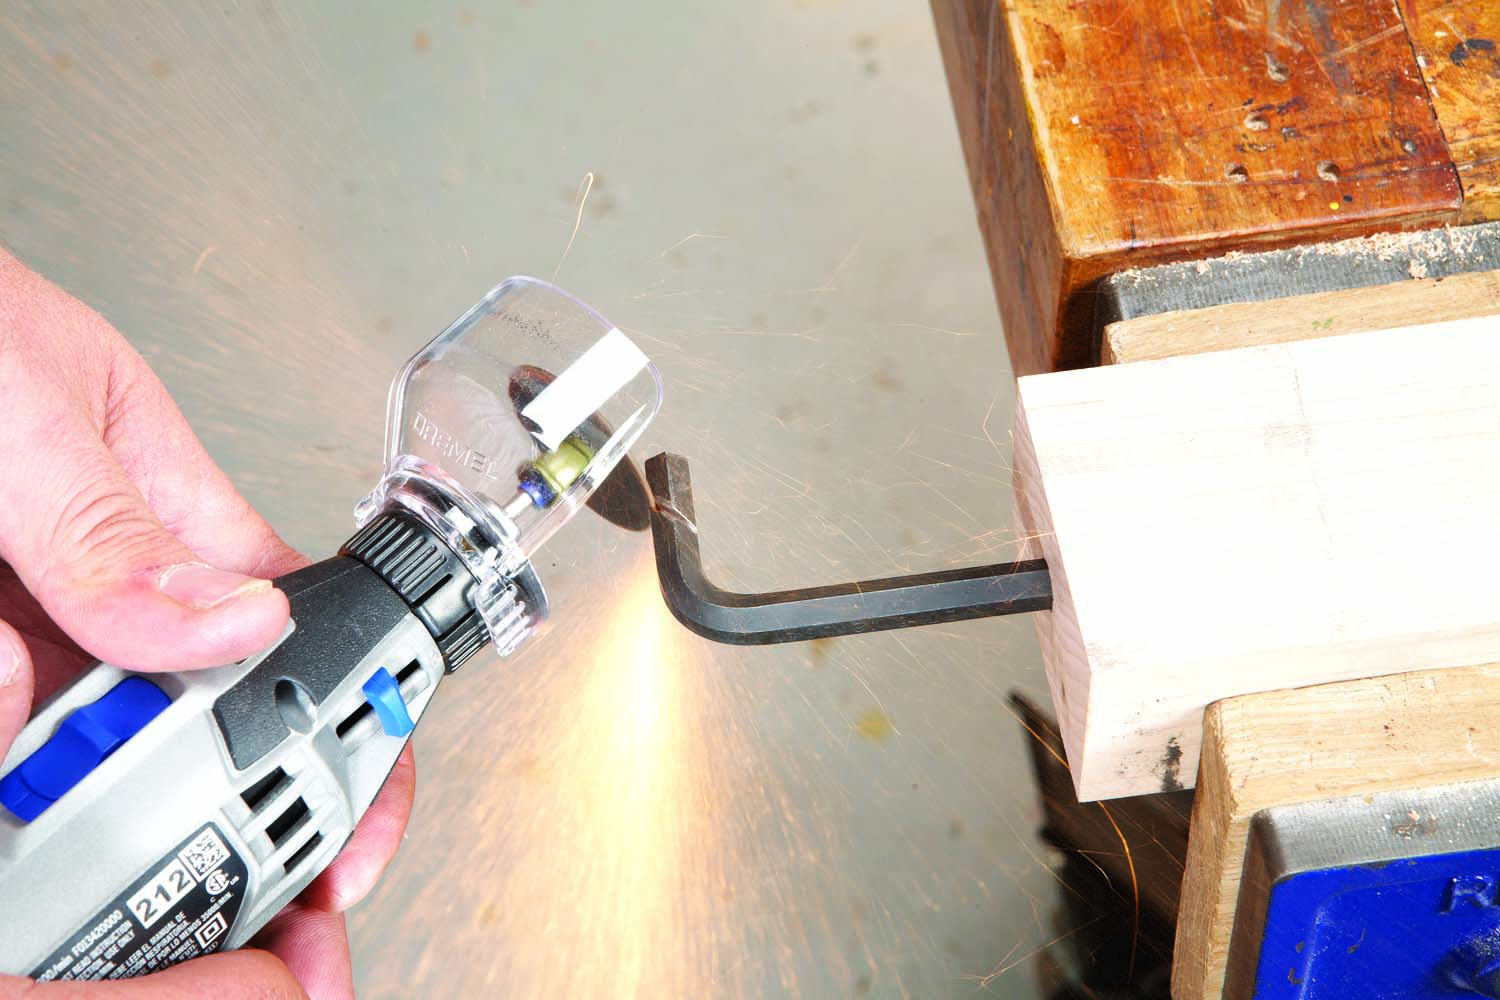
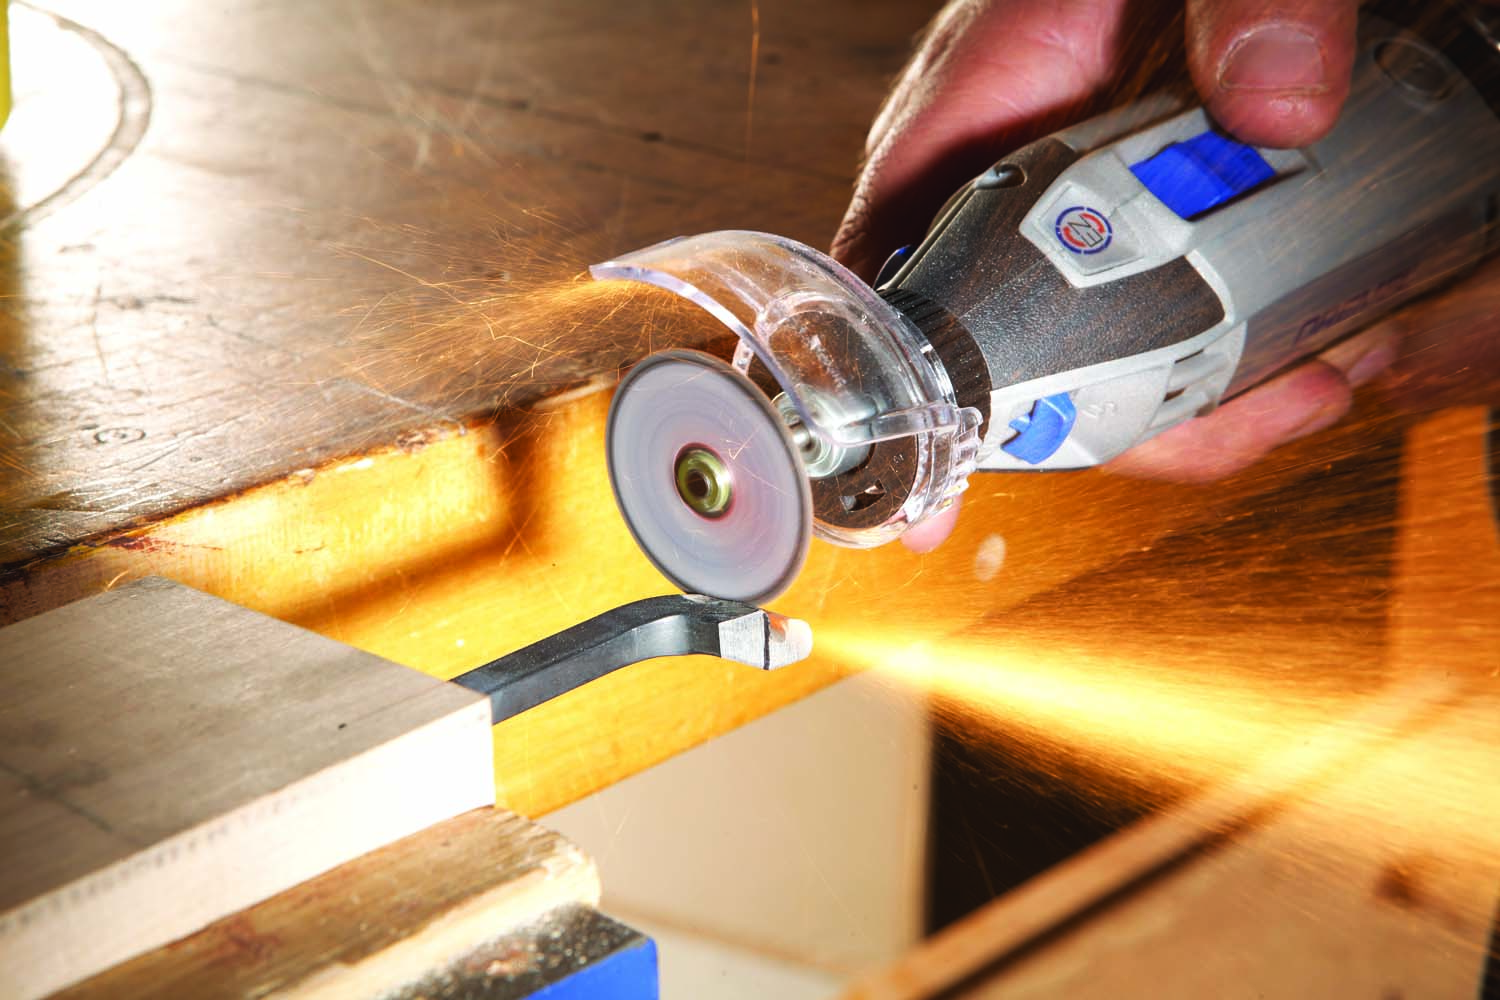
7. Form the cutter’s bevel angle by cutting off the waste at 30° using a rotary tool outfitted with an abrasive wheel.
Start by cutting the bevel angle (Photo 7). Since the hex key is hardened steel, you can’t cut it with a hack-saw. A rotary tool with a cutoff wheel works well.
Caution: There will be lots of sparks, so make sure there’s nothing flammable nearby.
The goal is to end up with the short end of the key about 1″ long. You could cut it to length first and grind the bevel later. Save yourself a step and cut off the waste at the 30° bevel angle. Eyeballing the angle is good enough.
8. Cut the bottom off of the hex key so that the cutting edge is the widest point.
Once you’ve made the bevel, cut off the bottom edge of the hex key (Photo 8). There are two things to consider when making this cut. First, the cutting edge needs to be at the widest part of the hex key; from point to point, not flat to flat. Second, the cut must angle upward away from the cutting edge (see Fig. 02). This relief angle ensures that when you’re using your plane, the only part of the cutter that contacts the work is the actual cutting edge. Cut off the long end of the hex key so that the cutter is about 2-3/4″ tall.
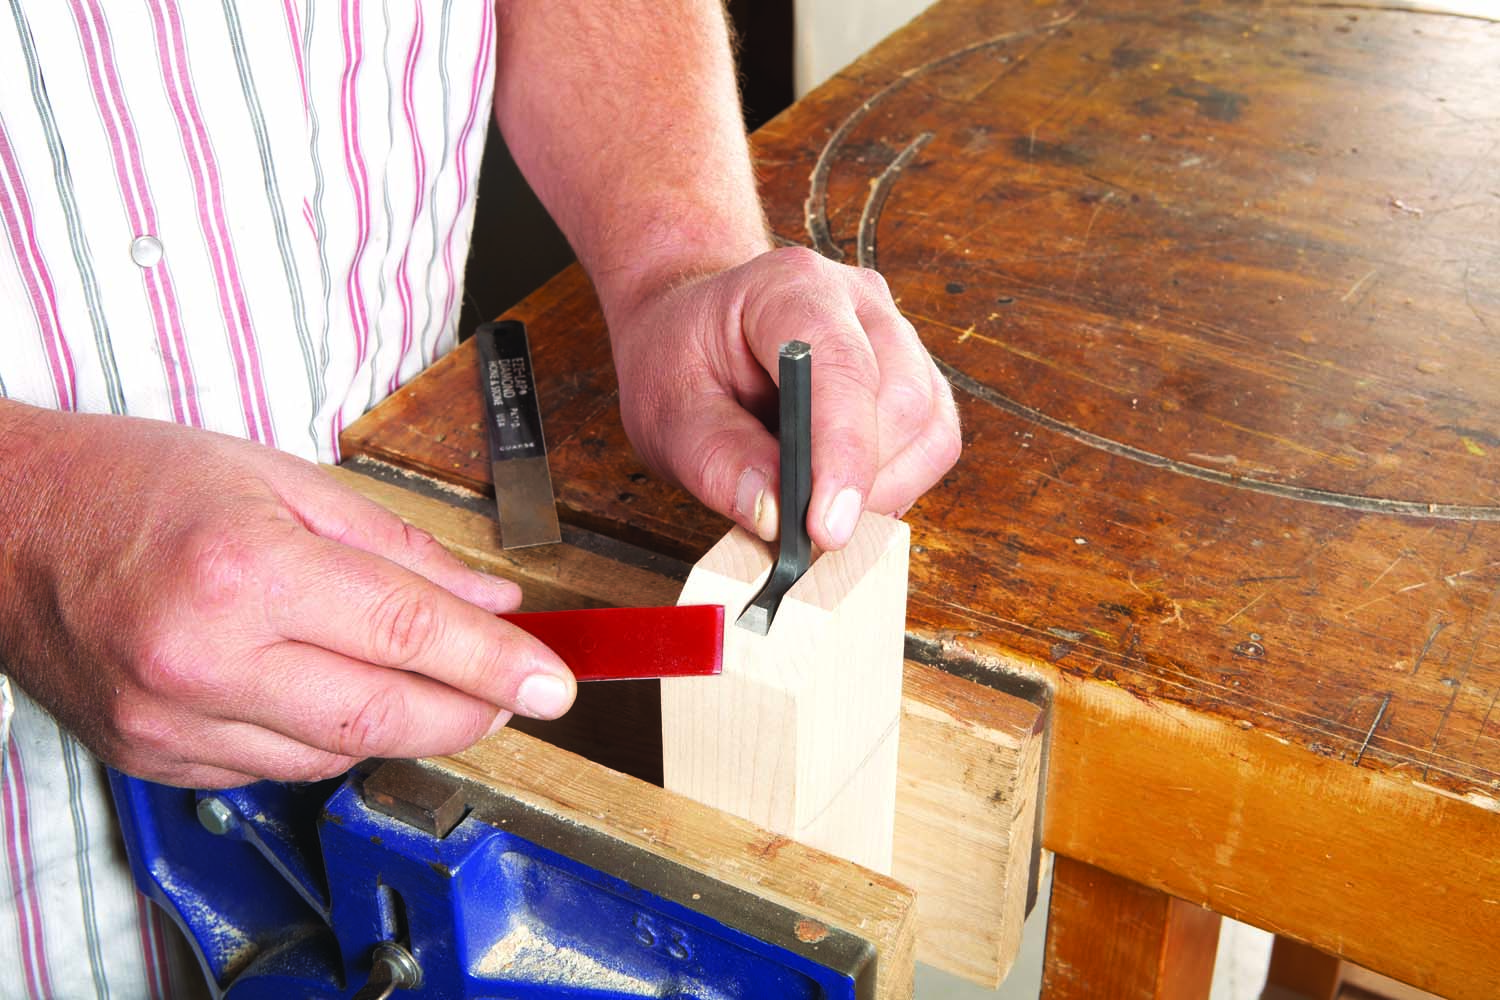
9. Sharpen the cutter using a guide beveled at 30° to ensure a flat, square cutting edge.
Sharpening a small, L-shaped cutter like this is tricky, so I made a guide block to ensure a flat, square cutting edge (Photo 9). To make the guide block, cut a shallow groove in the block that’s just wide enough to firmly hold the cutter. Cut a 30° bevel on the block’s front edge. Insert the cutter and slide it forward until it protrudes just slightly beyond the block’s bevel.
Diamond paddles (see sources) work really well for sharpening small, odd shapes; they’re easy to control, and give fast results. Start with coarse grit, and work your way up to super fine. Depending on how accurately you cut the bevel, sharpening should take less than fifteen minutes.
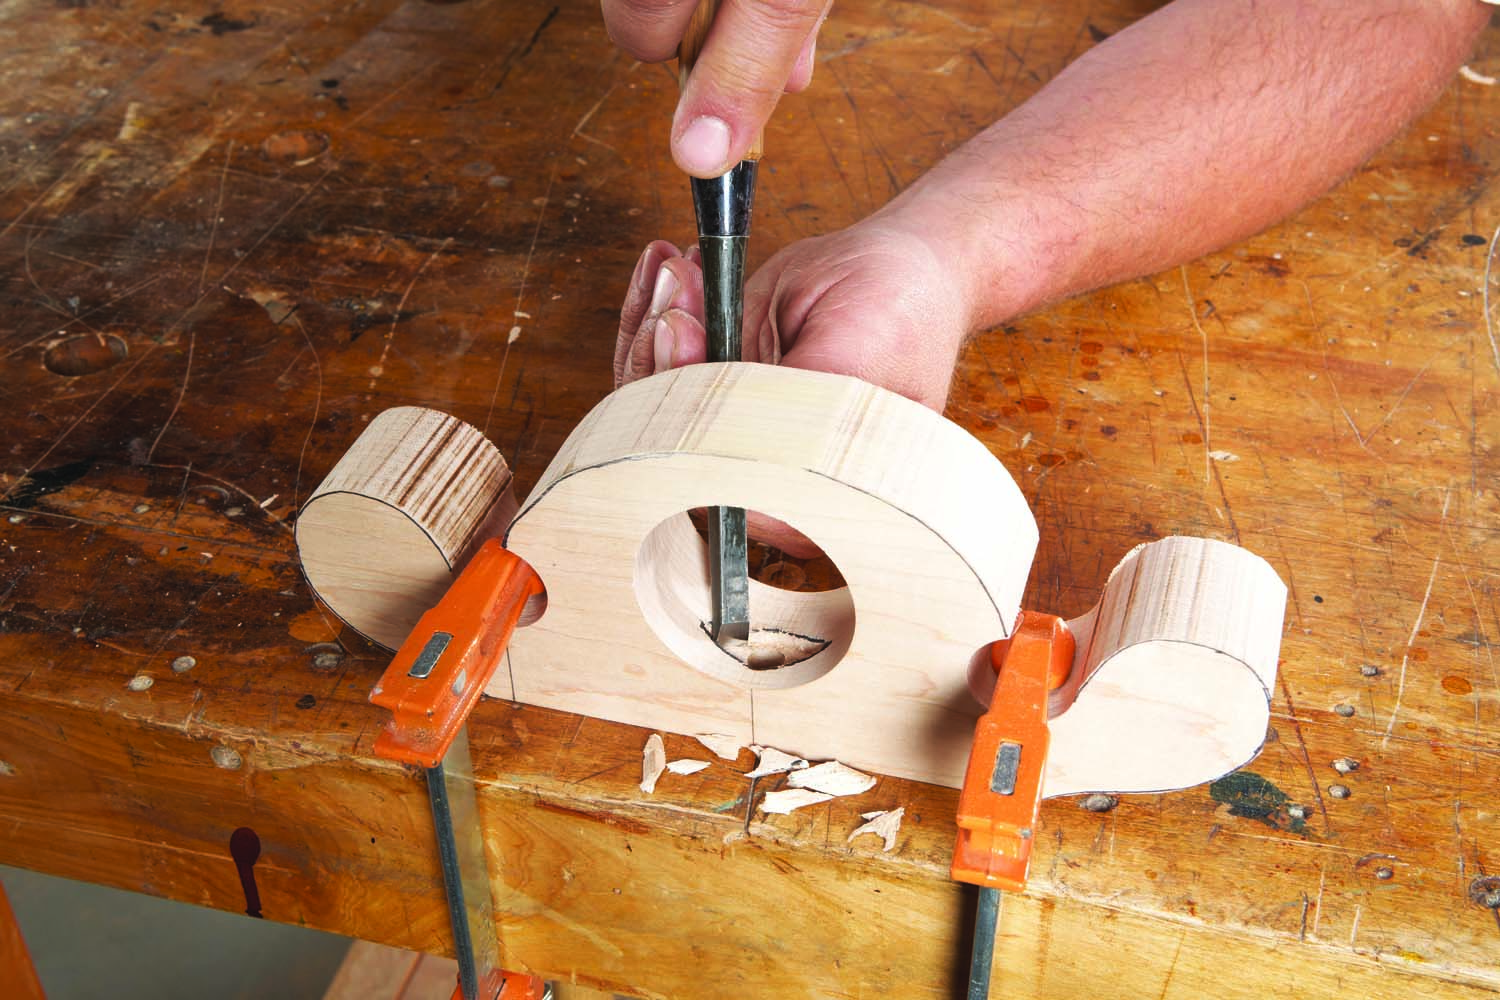
10. Excavate a recess for the thumbscrew’s head, deep enough to allow the cutter to bear against the body.
The last thing to do before using your plane is to chisel out a recess for the thumbscrew’s head (Photo 10). Cut the recess deep enough so that when you tighten the thumbscrew, it pulls the cutter firmly against the plane’s body. It’s a tight spot, but with a little patience, you’ll be done before you know it and ready to put your new creation to work.
Using the Router Plane
A router plane isn’t meant to hog off 1/4″ of material in one pass. Instead, you’ll take a light pass, reset the depth and take another pass, repeating as many times as necessary.
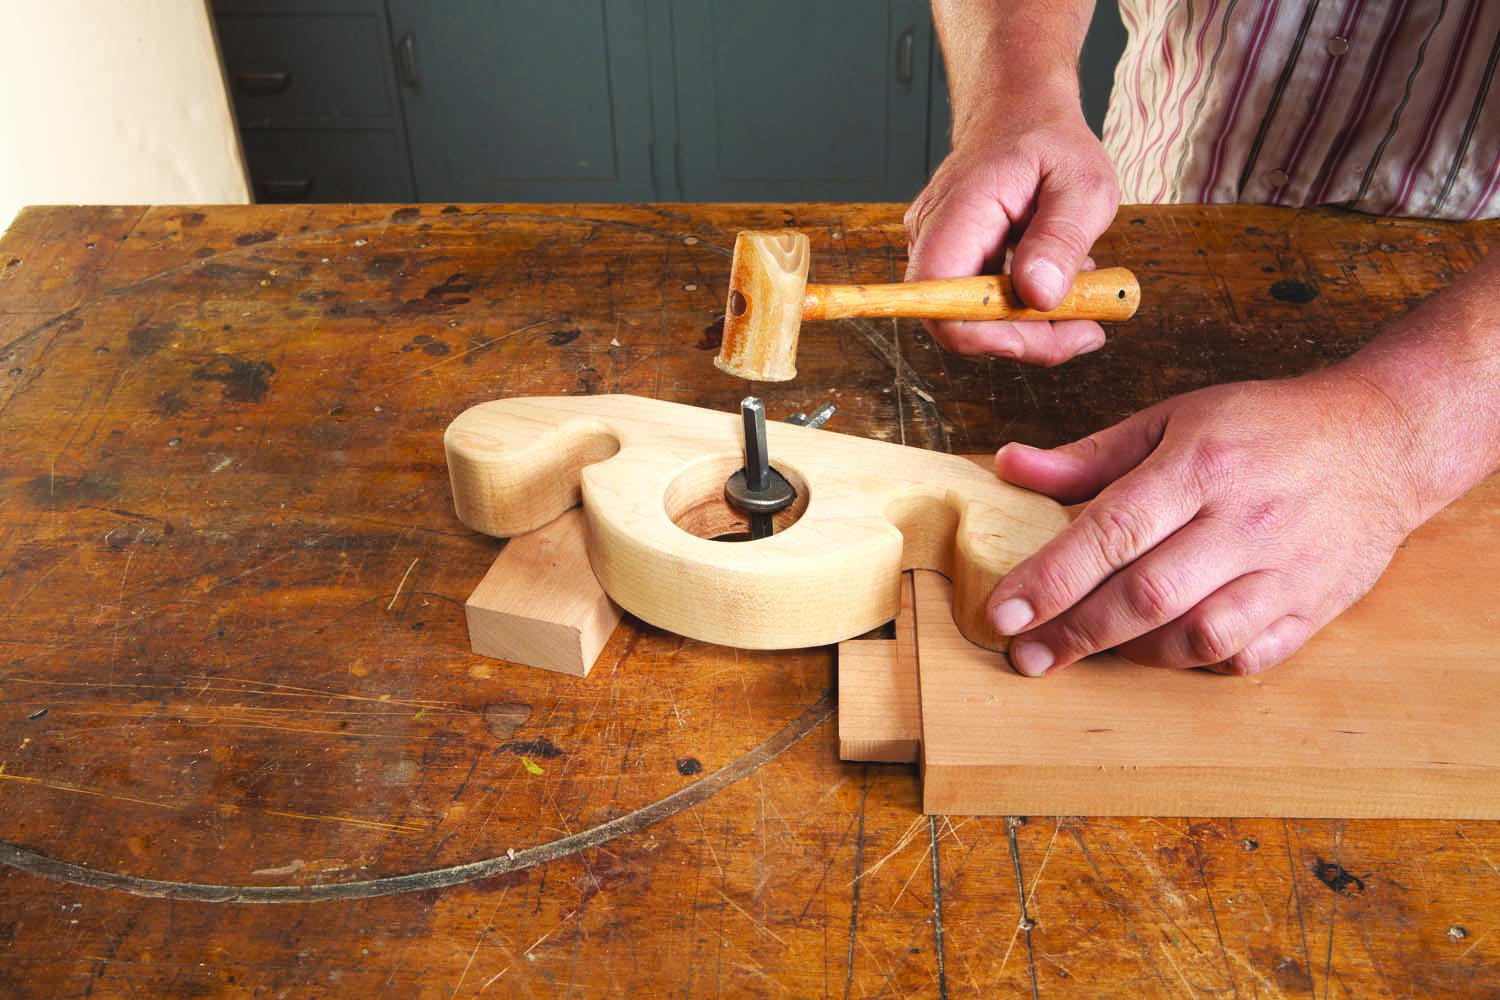
11. Tap the cutter’s end to increase the cutting depth. With the thumbscrew tight, a sharp whack will deepen the cut by a few thousandths of an inch.

Assemble all the parts, with the cutting edge slightly above the plane’s sole, so it doesn’t make a cut, and then tighten the thumbscrew. Use a mallet to tap the cutter until it just takes a shaving (Photo 11). As you gain experience, you’ll be amazed at how precise your mallet-driven adjustments become.
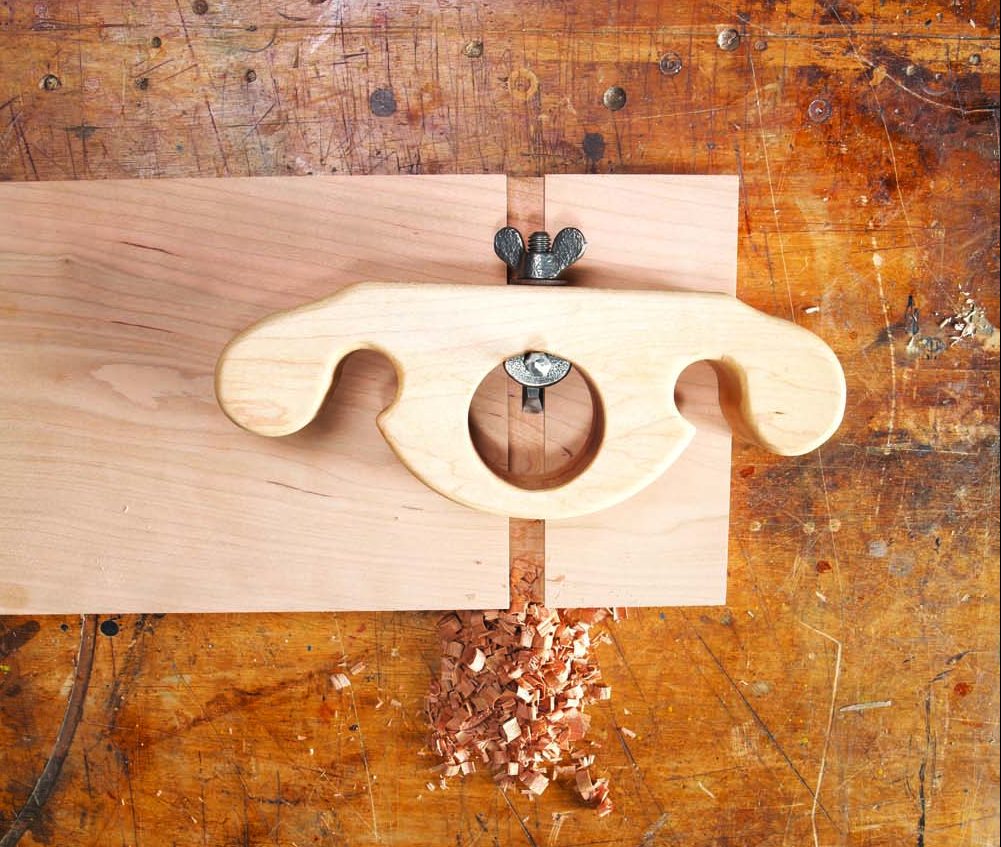
For trimming tenons, I used to reach for a shoulder plane until I learned the router plane method. The fundamental difference is that a shoulder plane rides on the surface being trimmed whereas a router plane rides on the surrounding surface. So, with a shoulder plane it’s easy to cut too deep, or not in the same plane as the face of your workpiece.
A router plane solves both of these issues; here’s how. Fasten a piece of scrap the same thickness as your workpiece to the plane’s sole. It works as an outrigger, supporting the plane’s end as you trim. Because you’re planing from the workpiece’s surface, the tenon is guaranteed to be co-planar. Since the cutter is suspended, it’s impossible to shave off any deeper than your last setting.
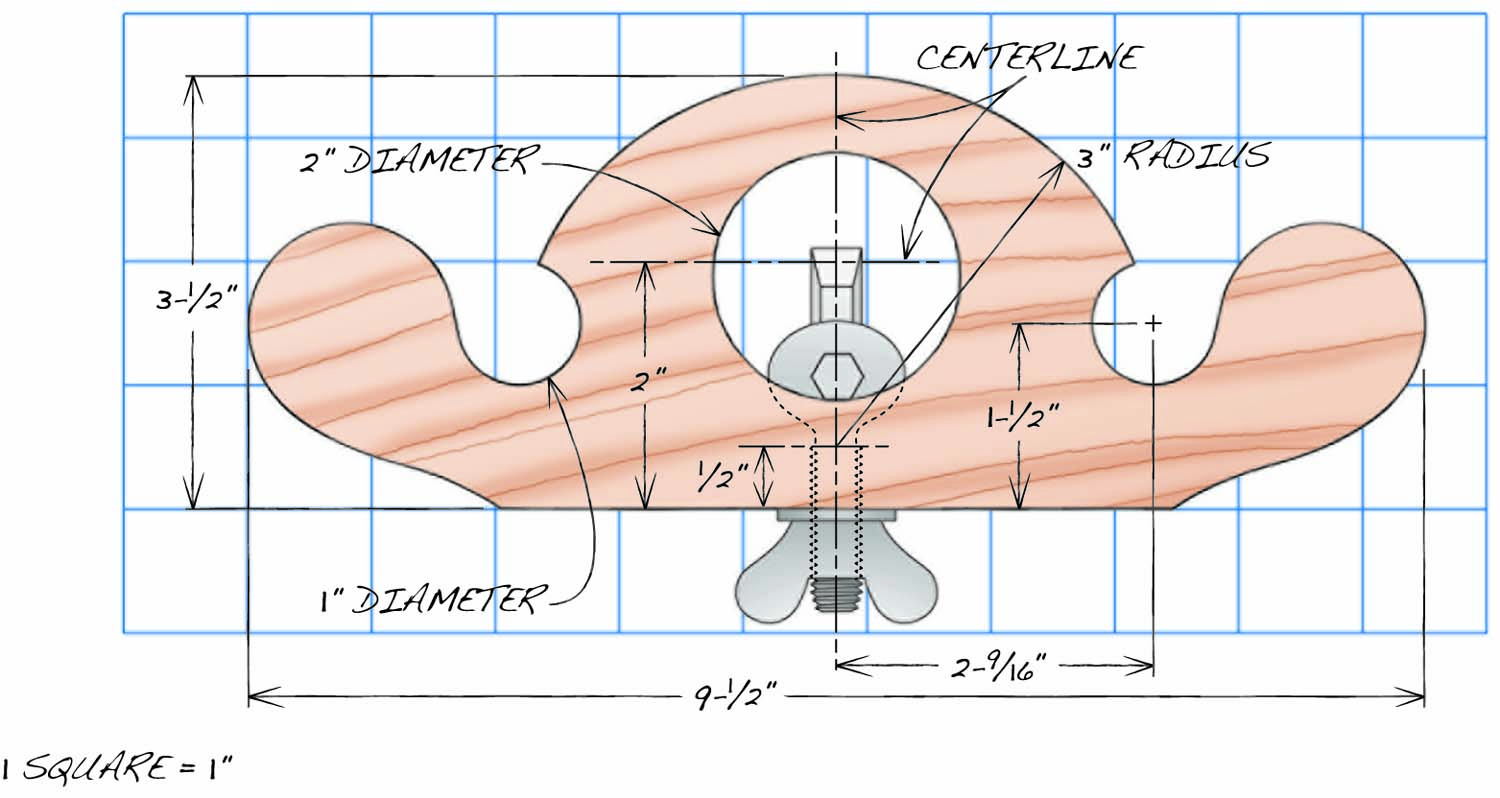
Fig. 01 Plan View
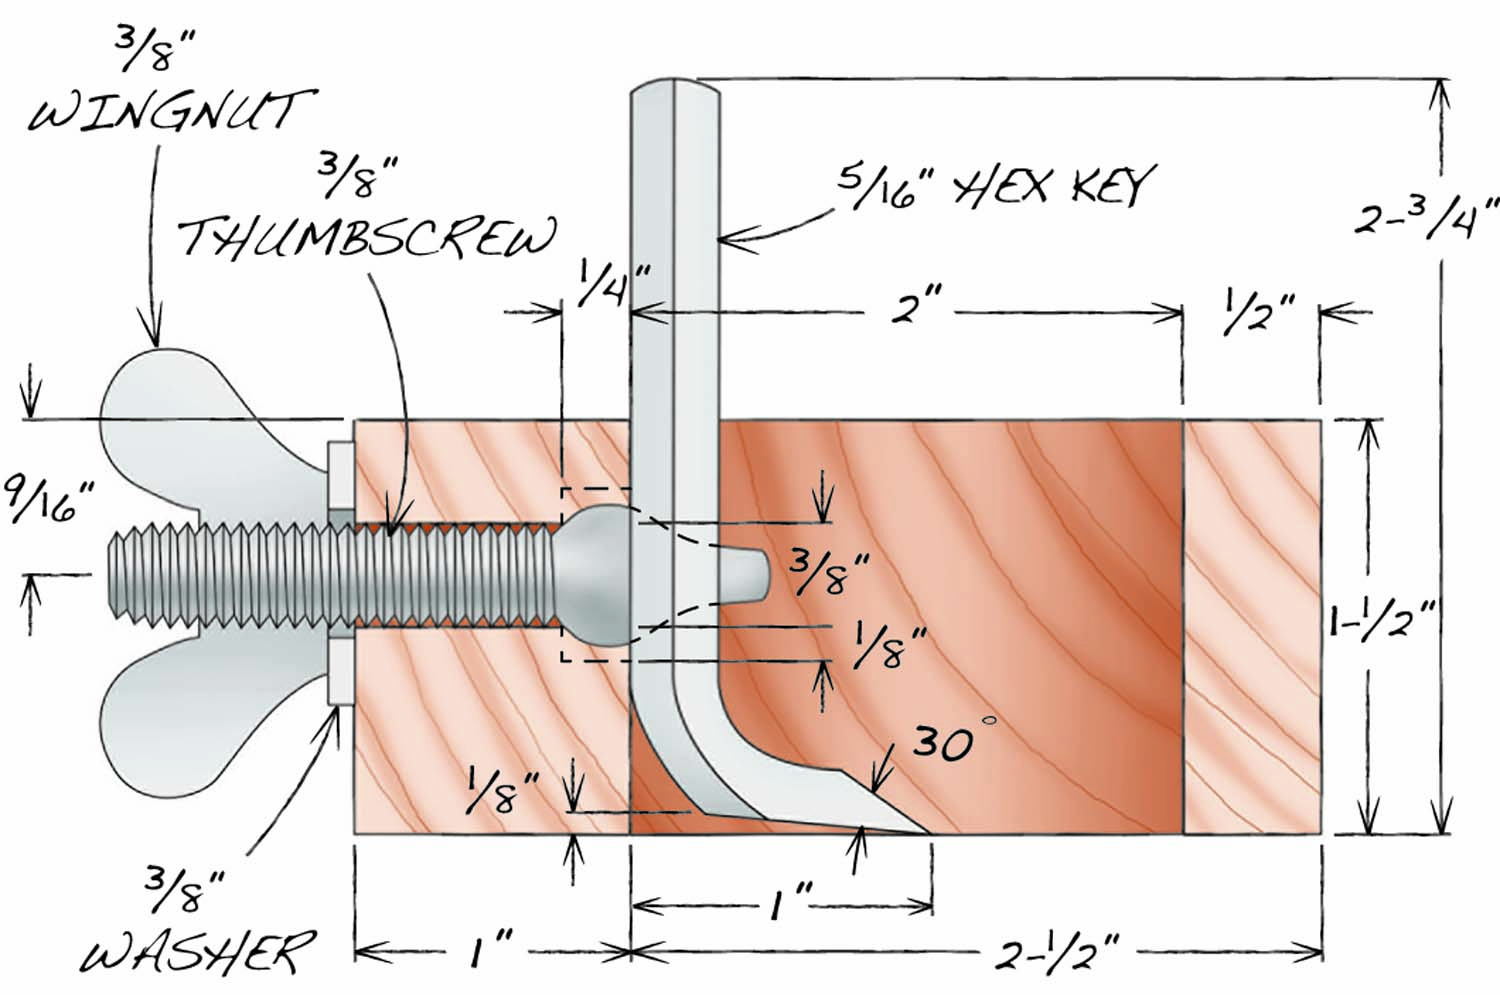
Fig. 02 Section View
Here are some supplies and tools we find essential in our everyday work around the shop. We may receive a commission from sales referred by our links; however, we have carefully selected these products for their usefulness and quality.