


We may receive a commission when you use our affiliate links. However, this does not impact our recommendations.
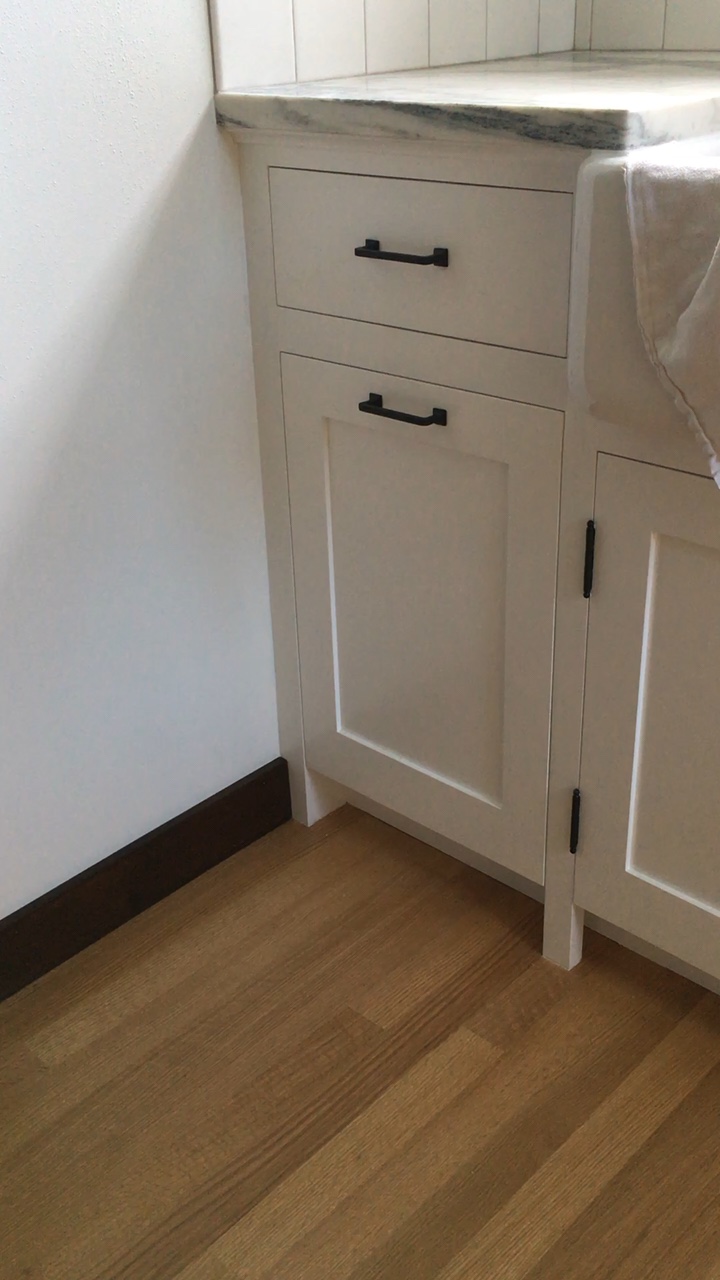
Yes, it has a drawer pull, but when your hands are covered in bread dough or meatloaf fixins, you can open it with your knee.
My most recent kitchen job called for a trash and recyclables container with hands-free opening. After researching current options, I bought a Blum Tip-On unit to add to the Rev-A-Shelf pullout made to slide on Blum Movento runners.
Everything seemed good until I tried to install this super-wonder hardware. I’d already installed the trash pullout in the cabinet I had built for it, which has an opening width of 15-1/4″–perfect for the 15″ opening model. The problem was that the instruction leaflet (one of those guides made to be understood by means of graphics alone, without the need for words that require translation) was less helpful than I’d hoped.
In an effort to save others the frustration I experienced, here are some tips gleaned from trial and error with the benefit of helpful advice from Blum’s customer service team. (As helpful as they are, it’s a challenge to describe such visual stuff in words over a phone line.)
Step 1
Pull the first runner forward until it is fully extended. Slide the trigger (the L-shaped piece) into the hole and rotate 90 degrees until you hear a click.
Problem: Which hole? With the unit already in the cabinet, no hole was visible.
Helpful hint: The slot where the trigger goes is just behind the back of the runner.
Note: The parts are stamped with an “L” and an “R.” Don’t try to mix them up. You will fail.
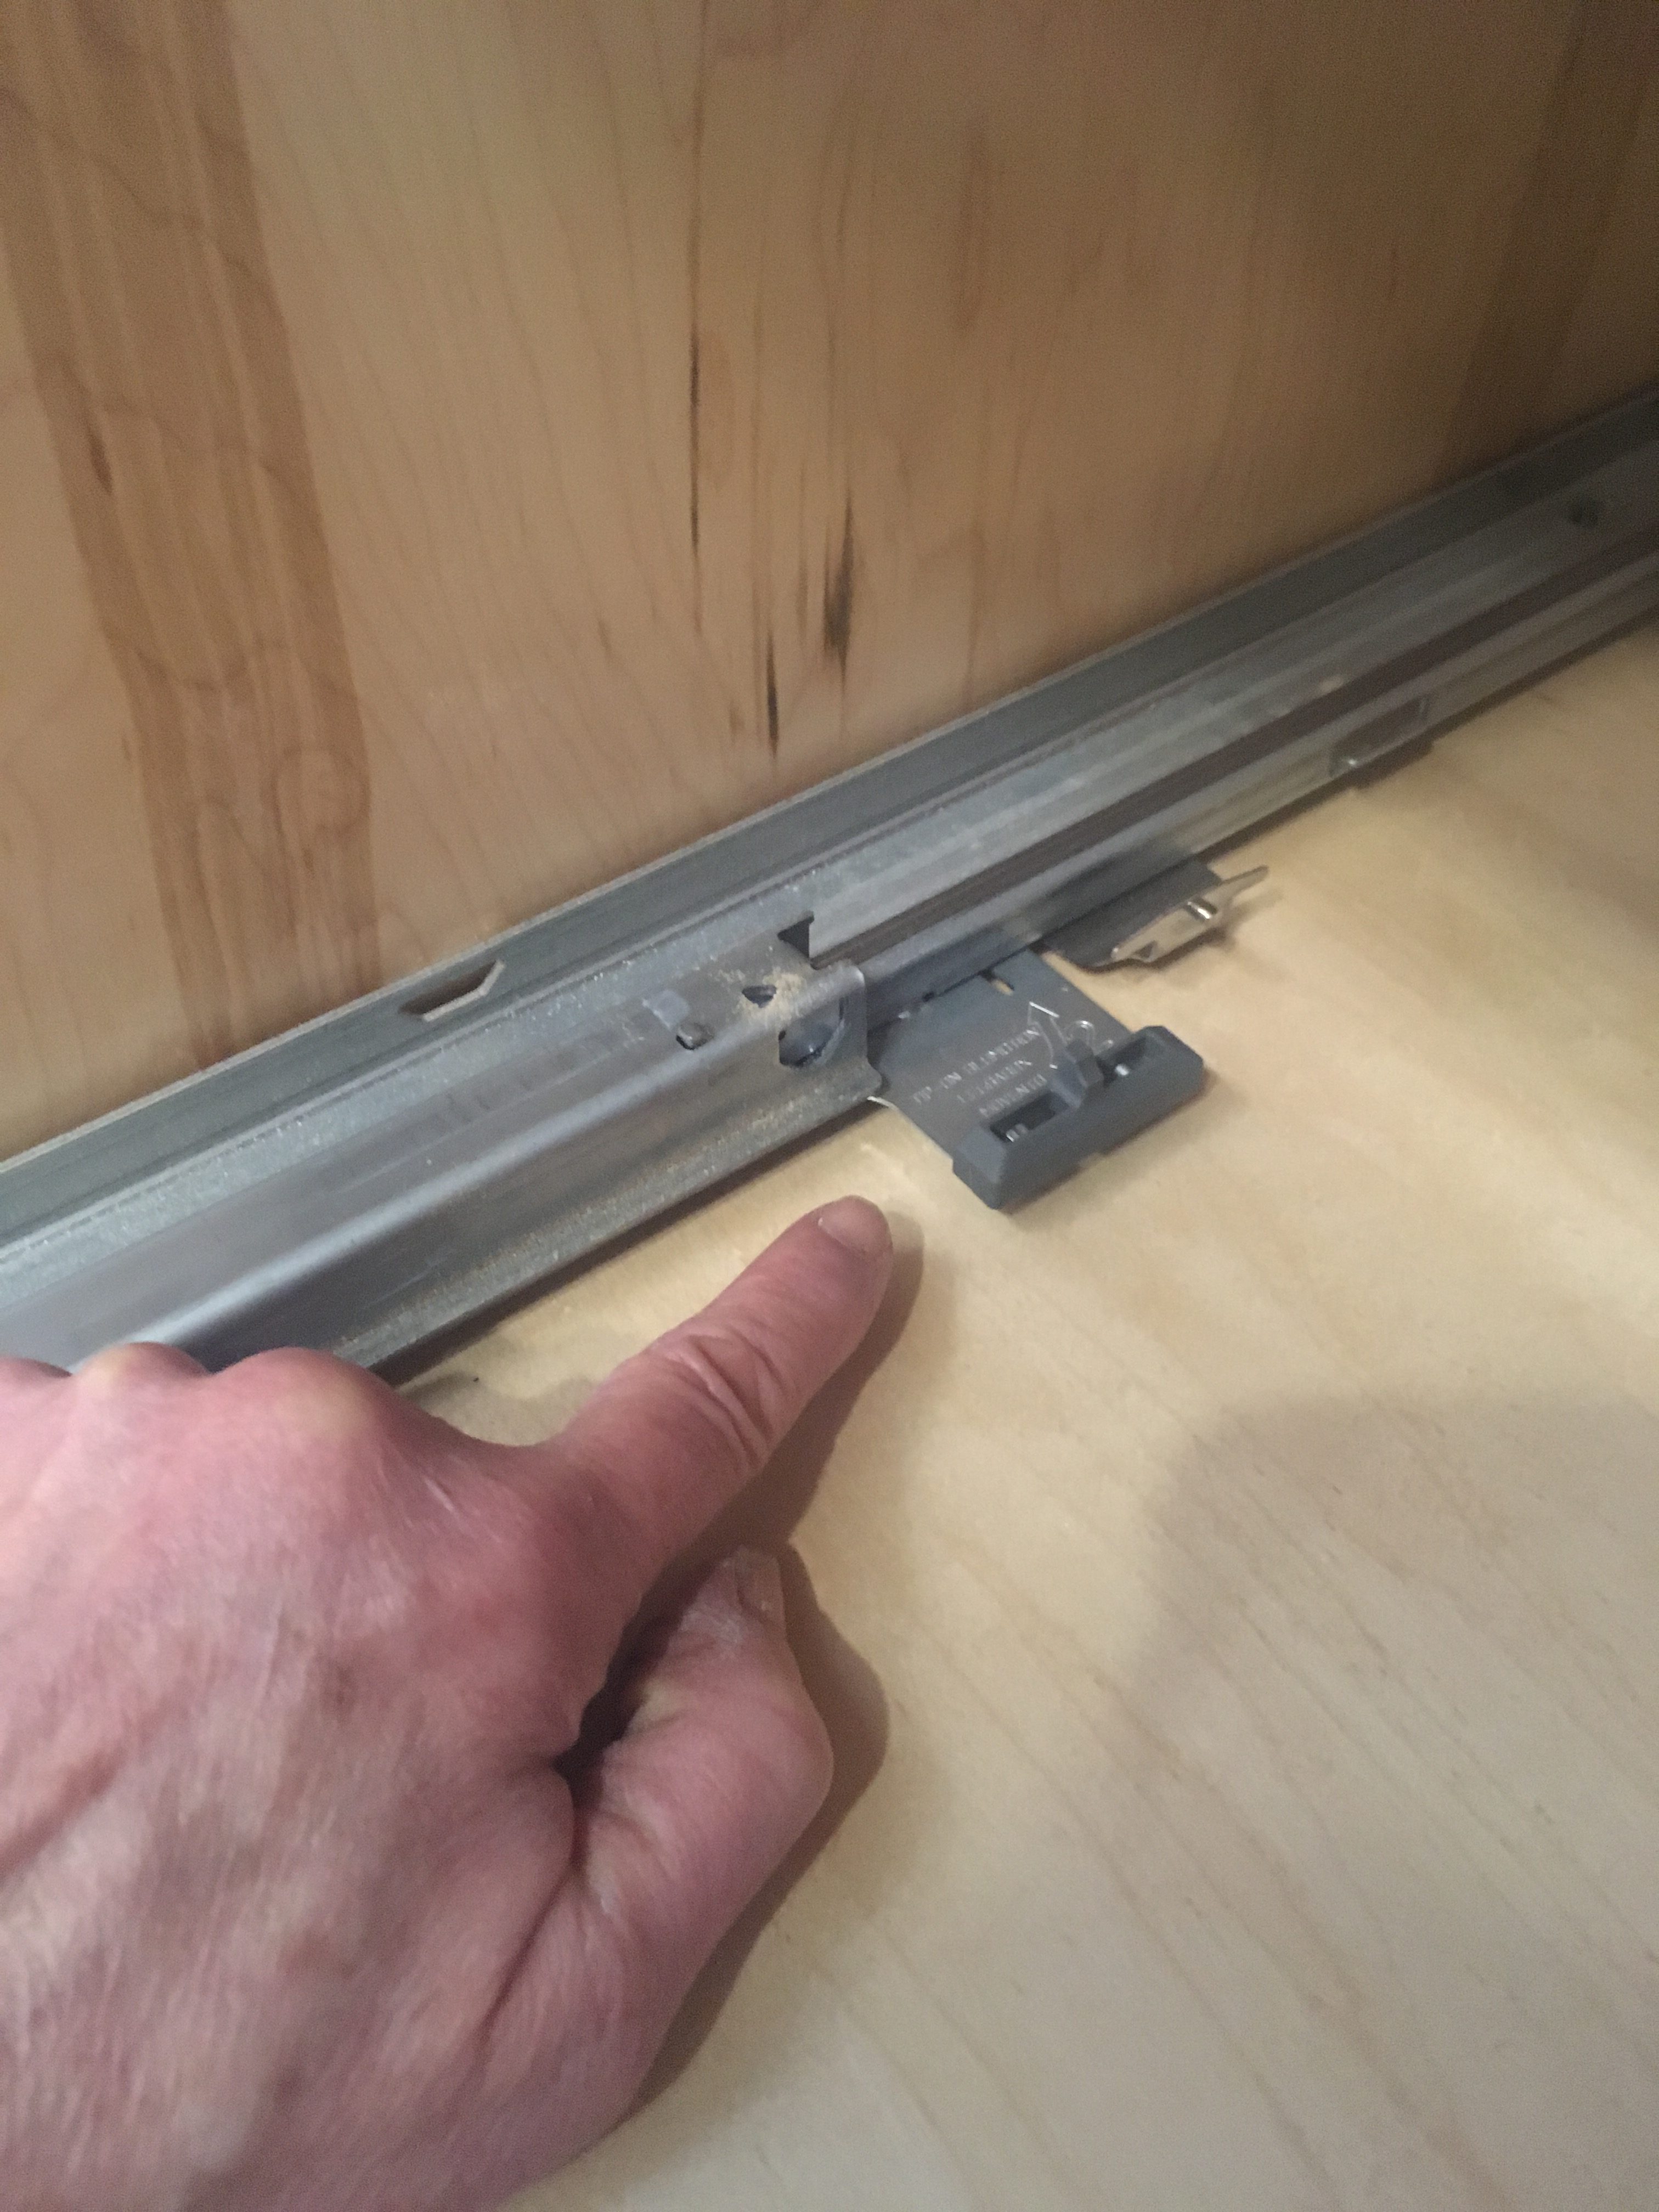
The left-side Movento runner with the left-side trigger in place. Note the location: The slot for the trigger is on the underside of the bracket–it’s not visible from above or even from the side. You need to feel for it. With the slide fully extended, use a finger to feel for the “head and shoulders” slot, then slide the little post at the top of the trigger into it and rotate 90 degrees until the ledge hooks in place with a click.
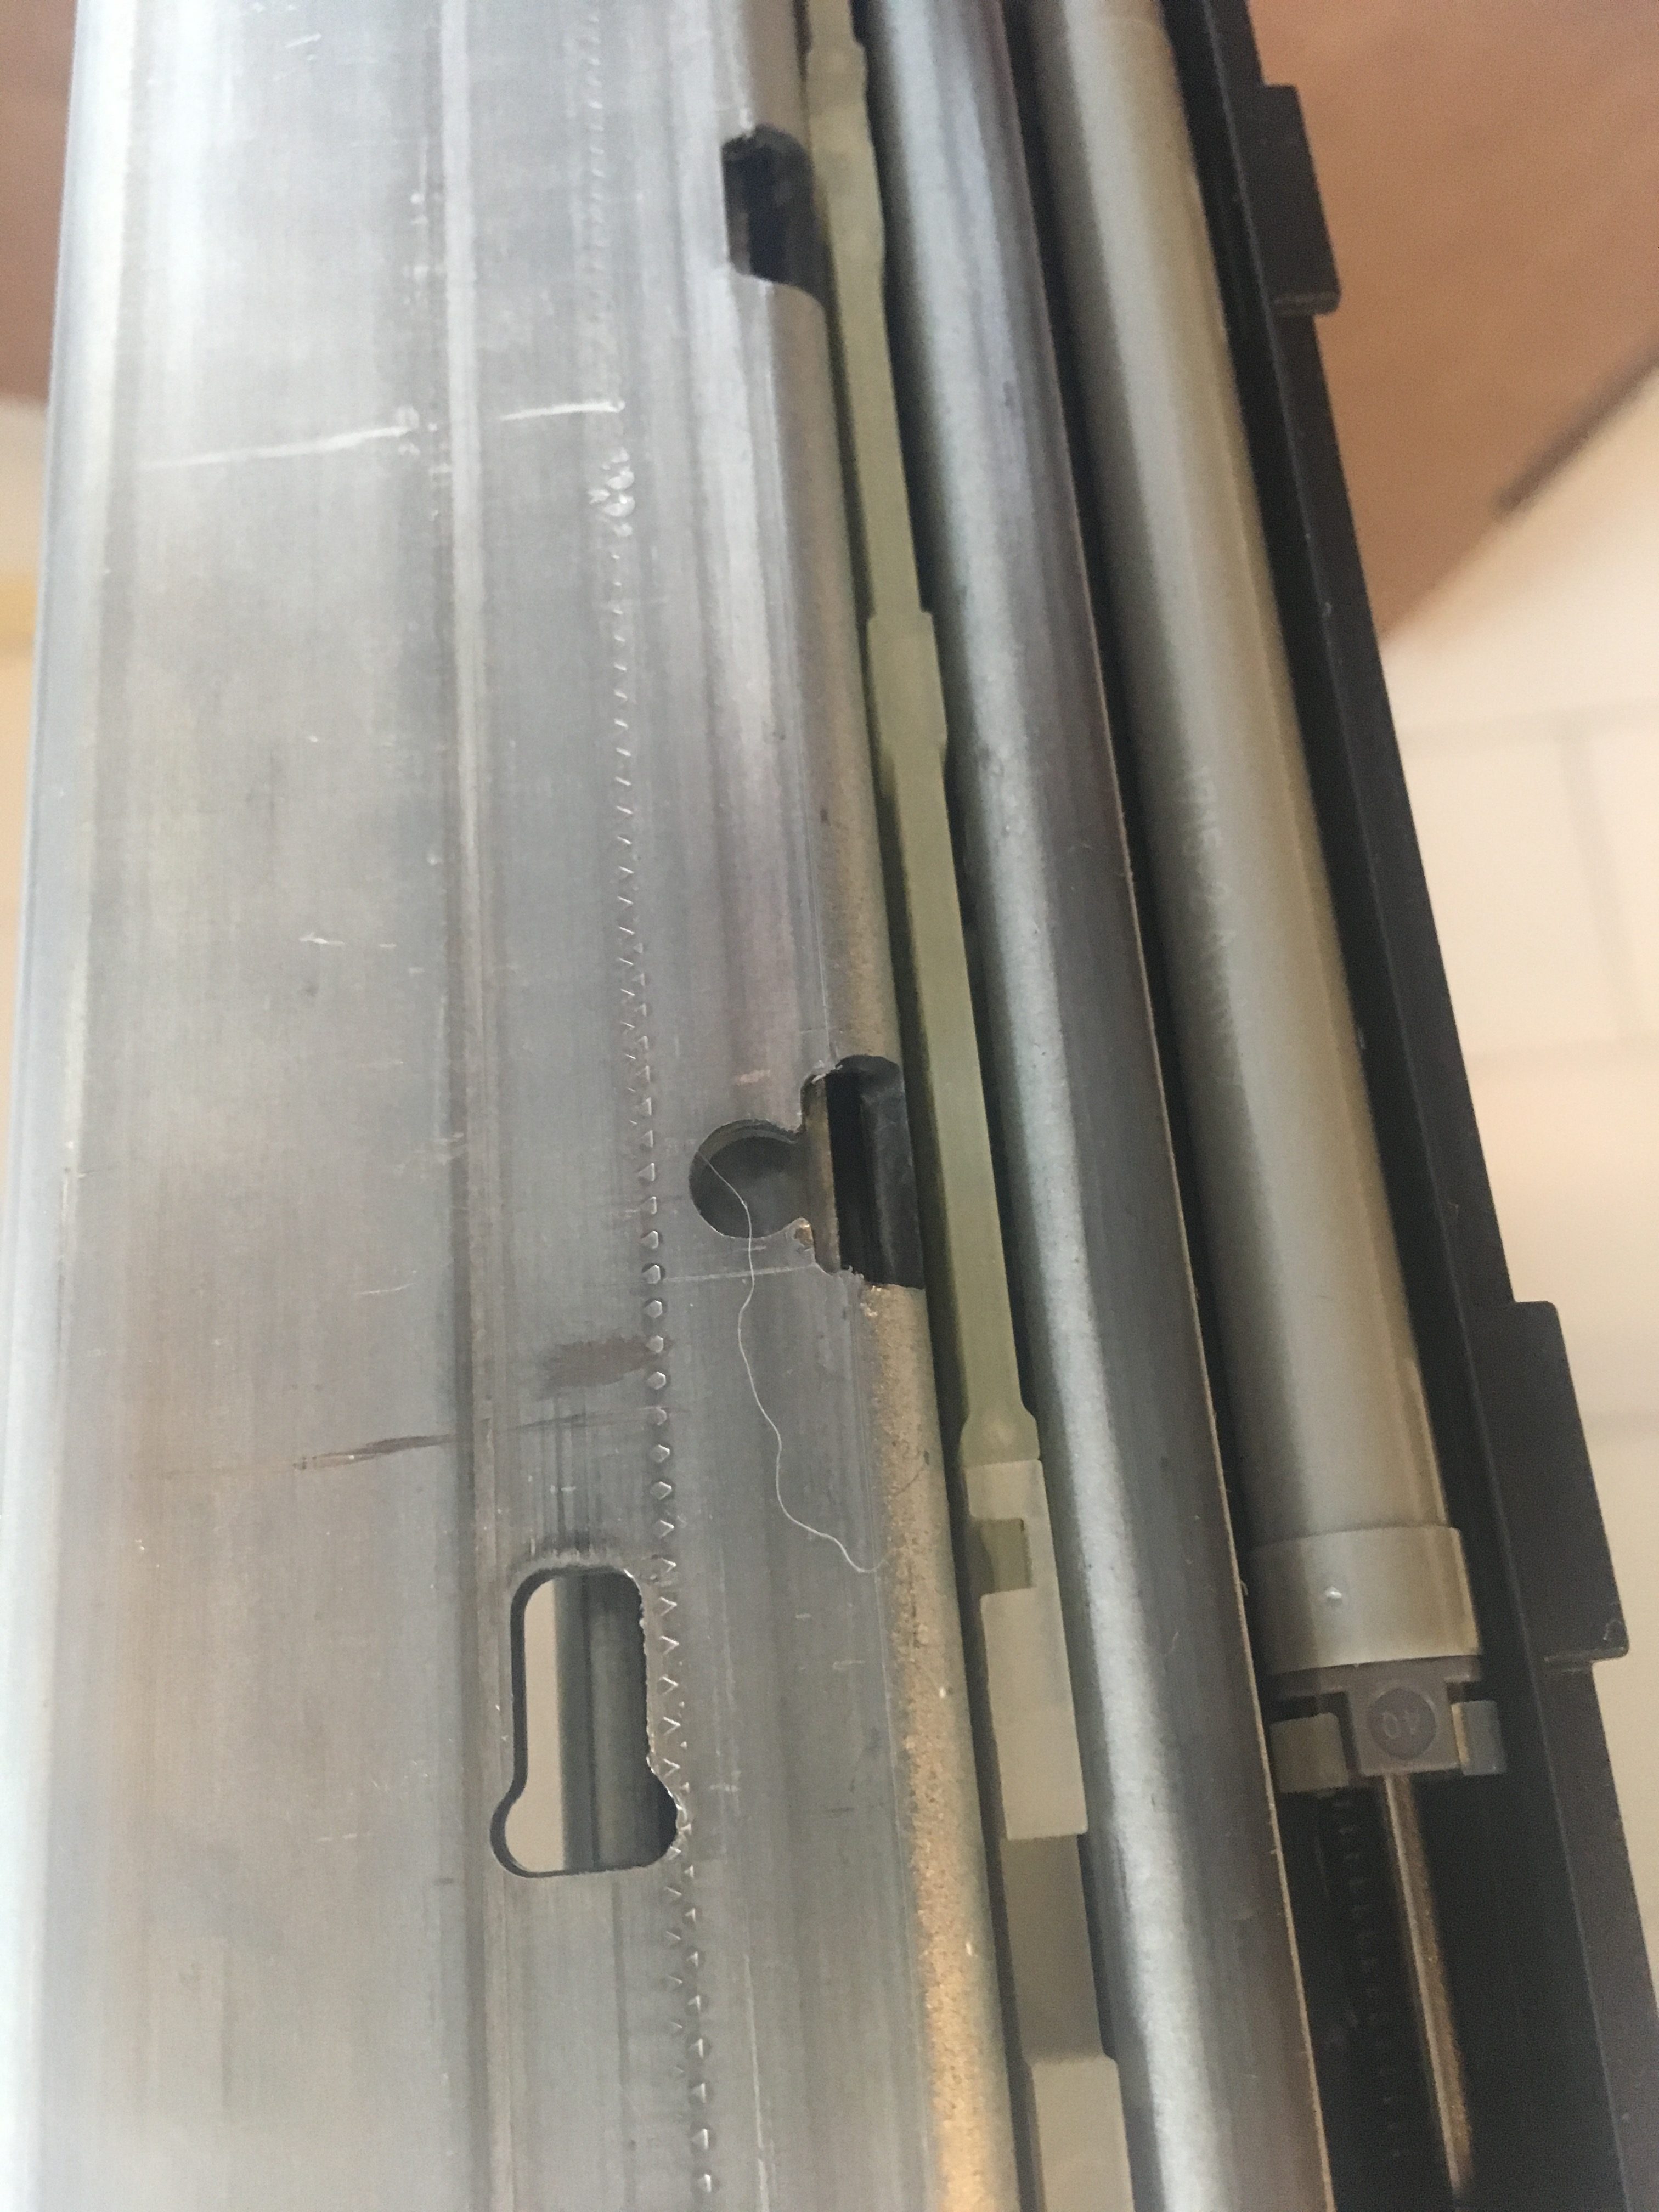
This is the “head and shoulders” slot you’re trying to locate. In this image we are looking at the slot from below, the idea being that if you have this visual aid to its shape and basic location (centered about 1″ behind the back of the fully extended runner), you will find it.
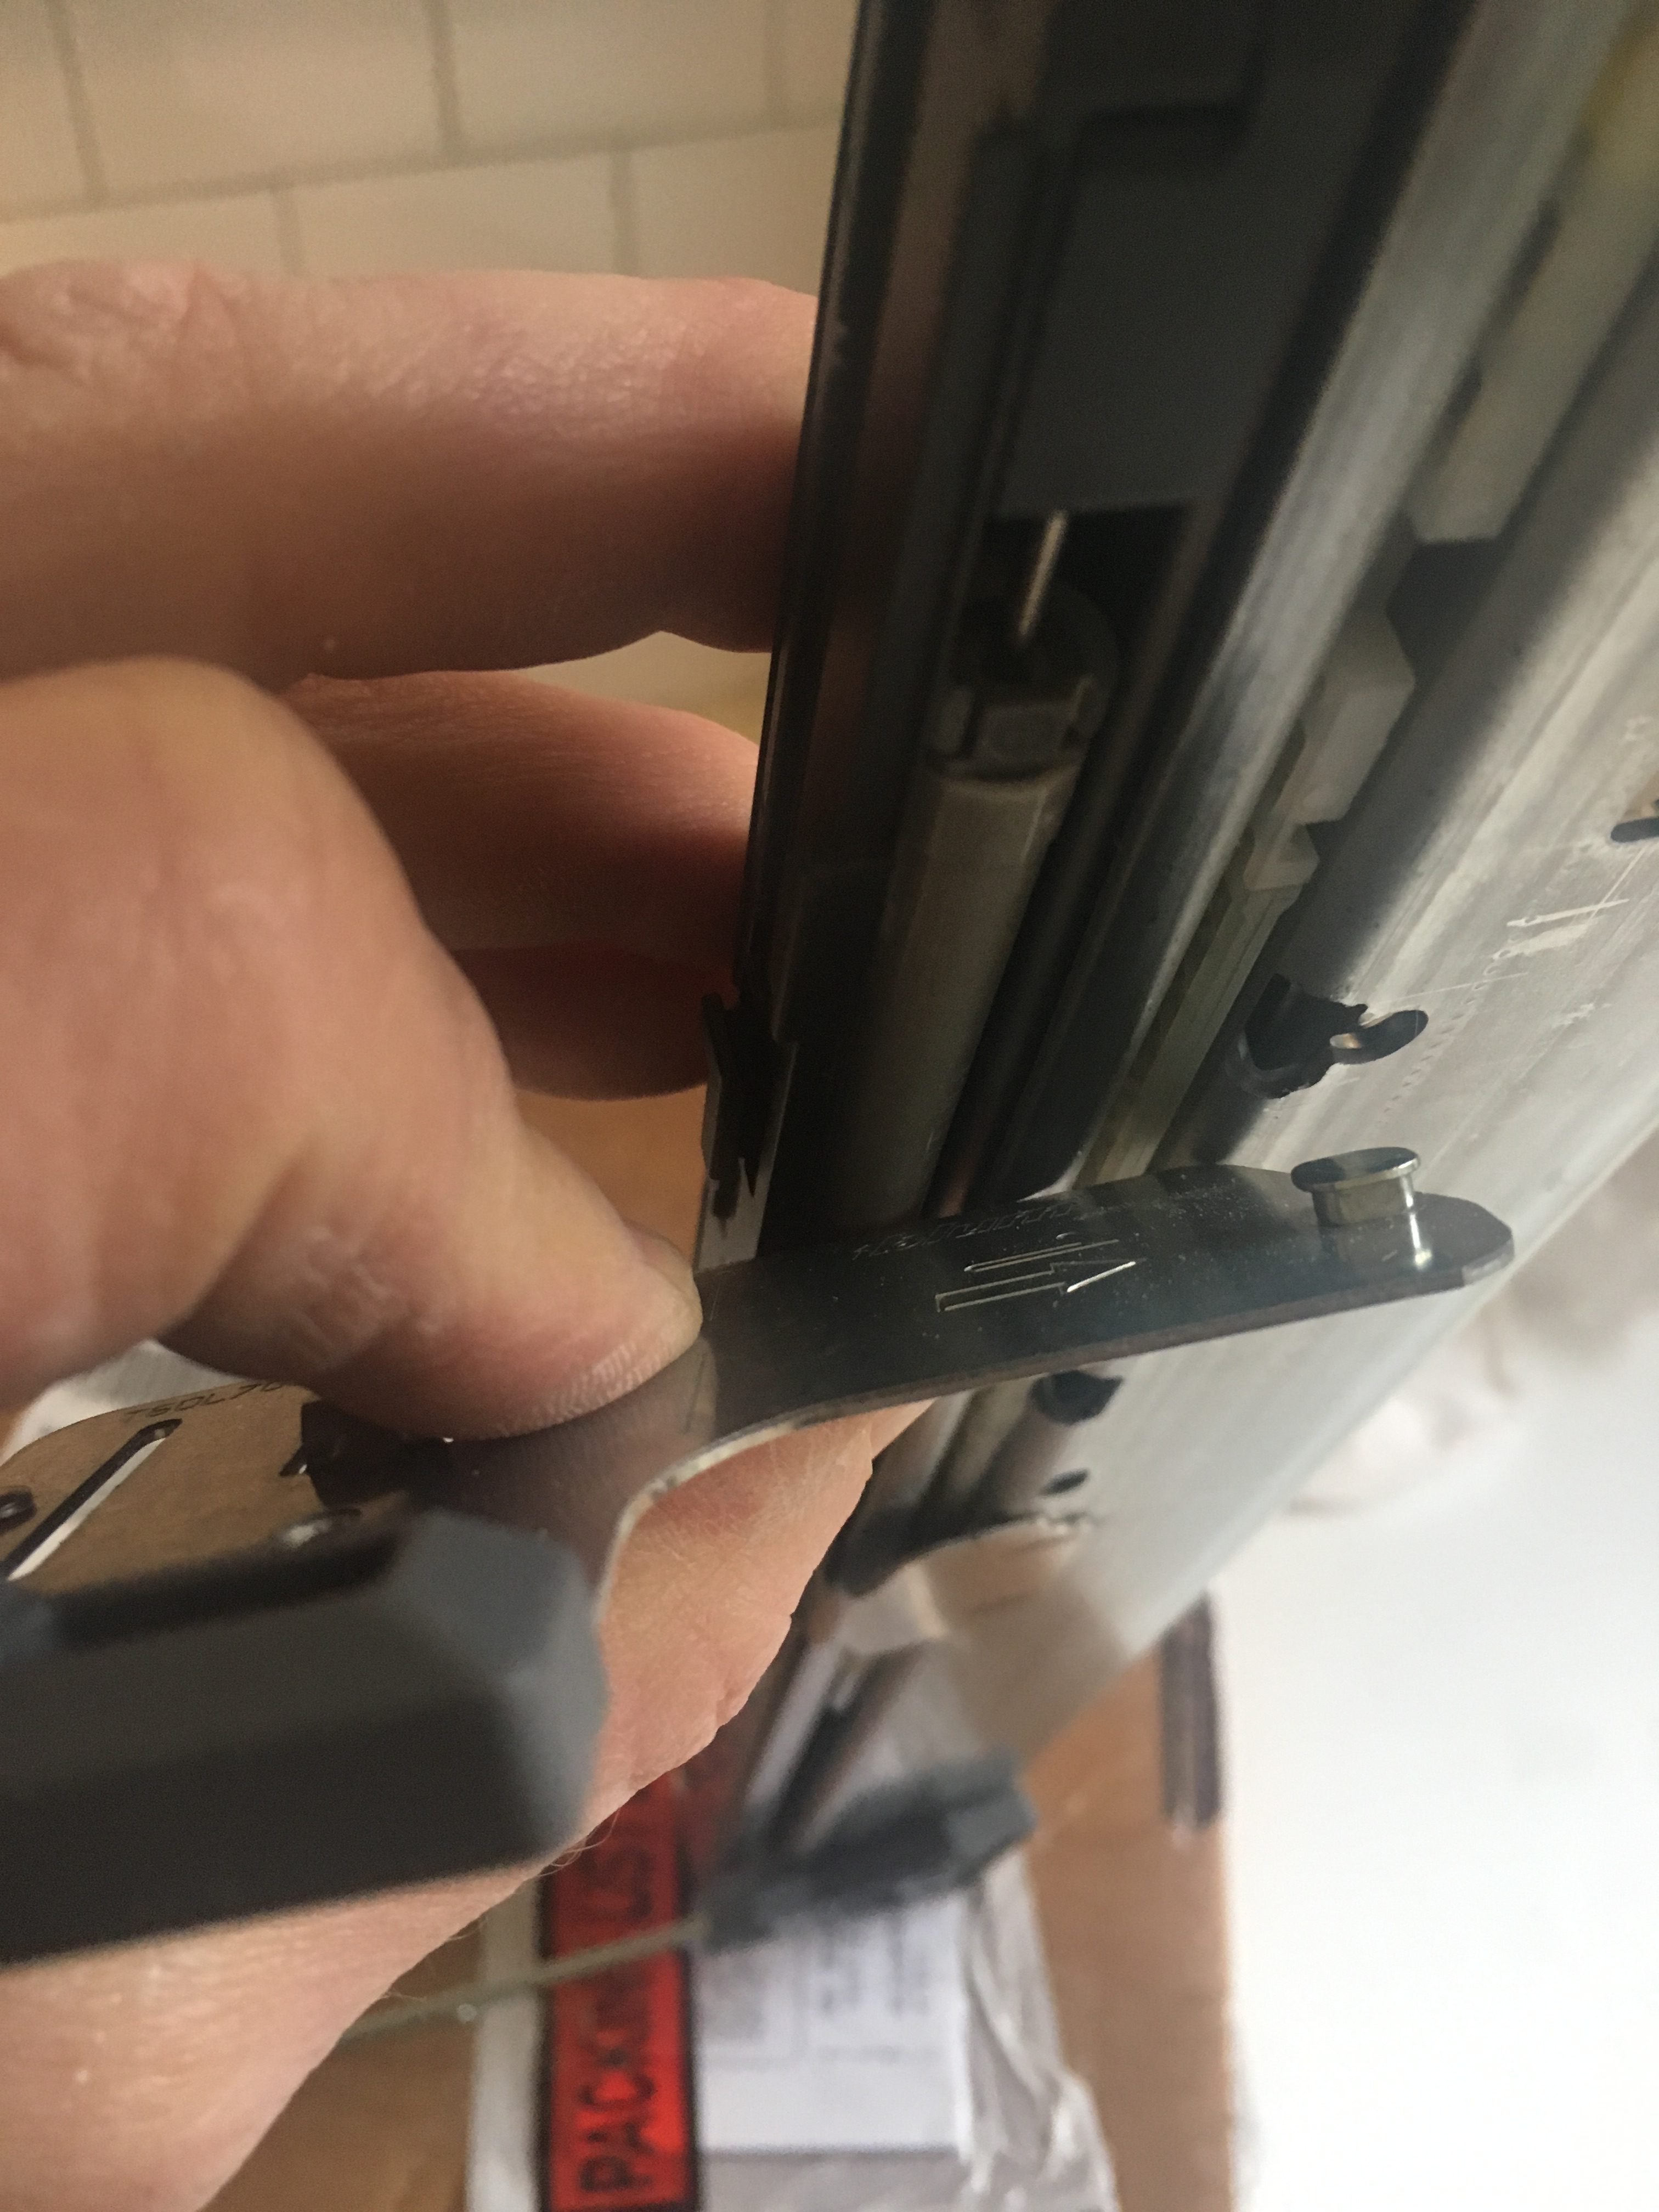
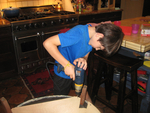
This picture is shot as though I was crouched in the back of the cabinet, looking slightly upward from the floor toward the left-side hardware. The idea is to show the post protruding up from the trigger plate, with its little flange that will engage with the head and shoulders slot in the underside of the runner’s bracket.
Got it? If so, high fives. That was the hard part.

Left and right triggers installed
Step 2
Now install the TIP-ON BLUMOTION unit. According to the instructions, this is simplicity itself. The only problem is (again) figuring out where it’s supposed to go. The instruction leaflet indicates the “unlocked” symbol as the place to start, with the “locked” symbol as the finishing place. Position the TIP-ON BLUMOTION unit with its front edge at the “unlocked” symbol and let it fall into place on the ledge. Slide it back gently. You will hear a slight click. That’s not the click you’re after; if you push the slide in now, the TIP-ON BLUMOTION unit will be pushed off.
Instead, what you must do is this: Once you’ve got the TIP-ON BLUMOTION unit basically situated, push it back firmly until the front edge reaches the “locked” symbol. You will hear a distinct click, and if you push the slide closed, the unit will not fall off.
I made a short, poor quality video in an effort to help others avoid the exasperation that I experienced. My apologies for the poor quality; I was holding my phone in one hand, above the action, while steadying the drawer slide between my knees and using my other hand to manipulate the movable parts. You can see the video here: the click
Step 3
If you added the Tip-On hardware to an existing Rev-A-Shelf/Movento unit, as I did, you should now be able to slide the wooden box (with its locking devices in place) onto the runners, wait for the locking devices to make their own “click,” and…go.
Here are some supplies and tools we find essential in our everyday work around the shop. We may receive a commission from sales referred by our links; however, we have carefully selected these products for their usefulness and quality.


Thanks Nancy. That was excellent. I never enjoy installing drawer guides. I wanted to install some of the type you used. Now I feel like it can be done without a big headache.
I’m so glad you found the post helpful. Thanks for letting me know. I hope your next drawer slide installation will go more smoothly. In my experience, especially in cases involving inset drawers, there is always some fussing to do after the basic installation, but the Blum hardware makes it easier than it used to be.