


We may receive a commission when you use our affiliate links. However, this does not impact our recommendations.
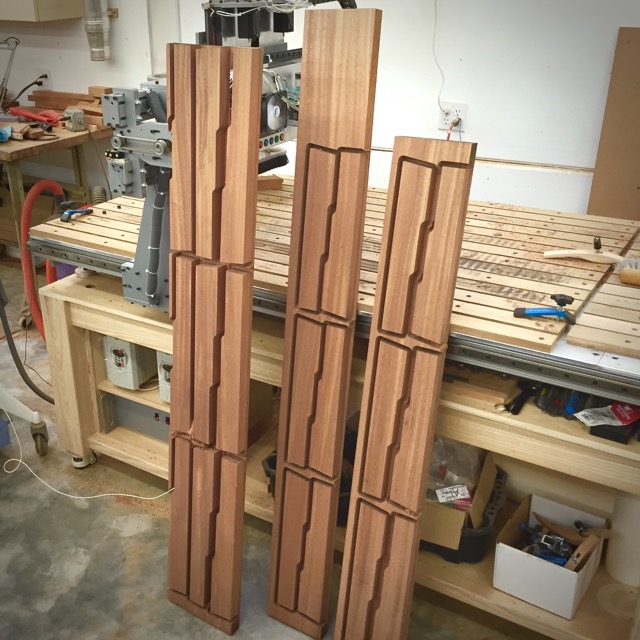
There are different ways to make multiples of furniture parts with a CNC. In this photo, I’ve laid out the parts in my CAD program to fit the boards that I had on hand.
Question: Why Not Make More Than One?
For every digital woodworker, sooner or later you’re going ask yourself an important question: If you’re going to the trouble of making something, why not make more than one while you’re at it? In the previous post, I gave an example of CNC part making by showing a shape being cut out of a board. It was a simple triangle, but it demonstrated two important benefits of a CNC. These tools have the ability to make accurate and difficult cuts. But, I hinted at another part making benefit: repeatability. I cut out eight of those triangles in less than 20 minutes.
A CNC’s accuracy benefits woodworkers when you need repeatability. They are excellent tools for making not just one part, but multiple, identical parts. So, instead of machining just one stool leg for example, why not make the other three legs at the same time? Or you might choose to make several stools, while you’re at it. Accurate part making on a CNC is something that can be multiplied.
There’s more than one way to make parts
Making more than one part at a time with a CNC is a big topic that I’ll cover in detail later on, but this is a good time to introduce the basic concepts and methods of making multiples. You have choices in how you approach this.
Like a lot of processes in woodworking, there’s more than one way to do this. In general, the methods are a combination of how you layout your drawings and how you set up your CNC machine. The same approaches would be valid if you were using a laser cutter.
The first method is to layout parts on a drawing of the board you’re cutting in your CAD program.
This method works just the way that it sounds. In your CAD program, lay out your parts on a drawing of the board you’re planning on cutting the parts from. Take the drawing of the individual parts and move them around and lay them out on a measured drawing of the board you’re cutting from until they fit, leaving extra room between the individual parts for the bit to travel and extra along the sides for clamping the board to the table. For example, with a 3/8” bit I leave at least a 1/2” gap between parts. Prepare the actual board as you normally would — making sure the board is perfectly flat on the bottom so that it won’t move when clamped to the table. Position the board in place and begin cutting.
The second method is to setup accurate part registration of blank stock.
If you set up the CNC, blank stock, and your cut properly, you can easily make multiple, identical parts. To do that, you need to first decide on an “origin point” that you reference to. Usually, that’s the position in your CAD drawing where the X and Y axes intersect. Then set up the same position on the CNC’s bed making that your CNC’s origin so that they match.
Next you setup stops on the table so that your blank stock is held at the same location every time. Then clamp, mill and repeat until you’re done.
An example of three parts being cut on a CNC at the same time.
Let’s take this idea even further
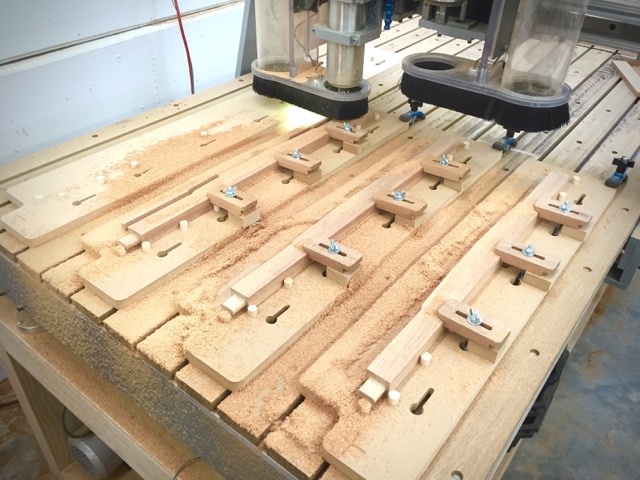
If you’re set up for it, you can take the idea of repeatability even farther. I regularly mill up to 8 identical furniture parts at a time on my machine. I can do this because my CNC’s table is laid out for pin-register accuracy and I make good use of a companion modular system of various clamping jigs and fixtures that I created to take advantage of it. Thus, I can have multiple, accurately placed positioning setups on my table and quickly mill several parts at the same time.
As I’ve said before, making accurate parts with a CNC is one of the best uses of the machine. And now you know that it’s not just about the accuracy of its cuts. The ability to produce multiple parts makes a CNC an even more useful tool in a woodworker’s workshop. The downside, of course, is that you’ll have fewer excuses to only make one of your latest woodworking creations.
Here are some supplies and tools we find essential in our everyday work around the shop. We may receive a commission from sales referred by our links; however, we have carefully selected these products for their usefulness and quality.


Good stuff… I agree, there are lots of different machine strategies for cnc programming. Typically it depends on the software!
Hi Rob
It sounds like you are looking specifically for instructions on using and setting up CNCs. I don’t exactly teach a general class as you describe but I do teach more focused classes on using digital technology, CNCs and getting best out of them in woodworking. As I’ve mentioned, working wood with these tools poses special challenges and so methodically setting up and running these machines are always an important part of every class.
I teach twice a year at the Marc Adam’s school in Indiana. Upcoming spring 2017 classes are a 2-day immersive intro for anyone curious about CNCs and woodworking and a 5-day hands-on class where we’ll take you through the entire process and build hall tables using these tools. The fall series are a bit more intermediate. A 5-day digital woodworking skills and techniques class to learn how to really put these tools to use and apply the skills in your shop with your own projects. This is followed by a 2-day class where we’ll make holiday gifts with CNCs and laser cutters.
You can get more details at the Marc Adams School website: http://www.marcadams.com
Do you have a course on how to set up and run a CNC machine