


We may receive a commission when you use our affiliate links. However, this does not impact our recommendations.
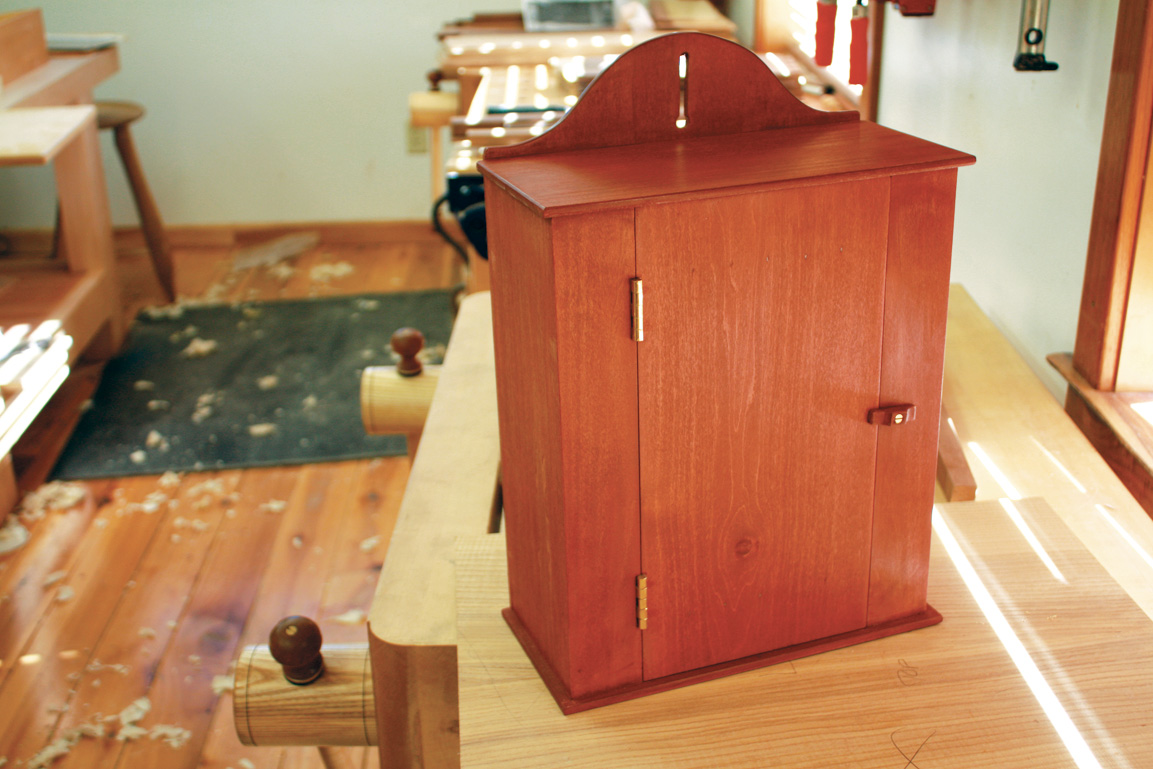
Simply red. The original cabinet is cherry with a varnish finish. It looks good in a variey of woods, including this poplar version with a red wash.
A classic form from the New Lebanon Shaker community is easy to build in a few hours.
If you don’t like nails, then perhaps you should turn the page. This small wall cupboard from the New Lebanon Shaker community bristles with them.
The carcase and stiles are nailed together with cut brads. The back is attached with clout nails. And the door is held flat with battens that are secured by clenched nails. I think the nails add to the piece, and, because there are so many different kinds, this project is an excellent introduction to 19th-century cut nails.
Quick Joinery – Quick Results
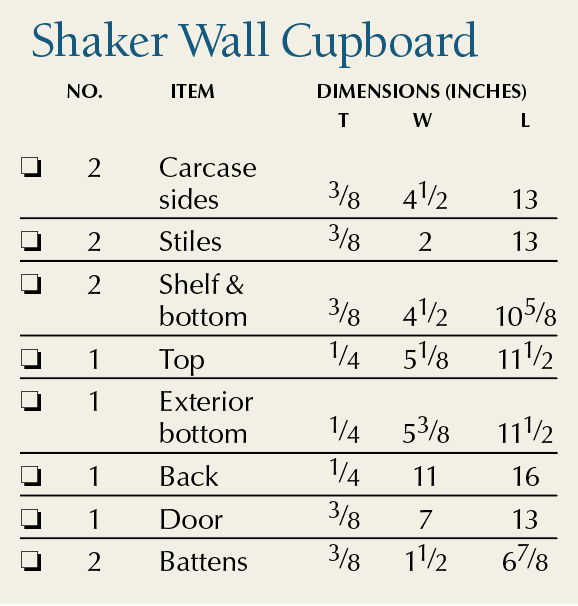
I’ve built quite a few of these cabinets in the last couple years because they are an excellent way to teach someone traditional joinery and they can be made quickly (my father received one last year that I banged out in a day).
Begin with the carcase. The carcase sides are the only pieces that have real joinery. Cut 3⁄8″-wide by
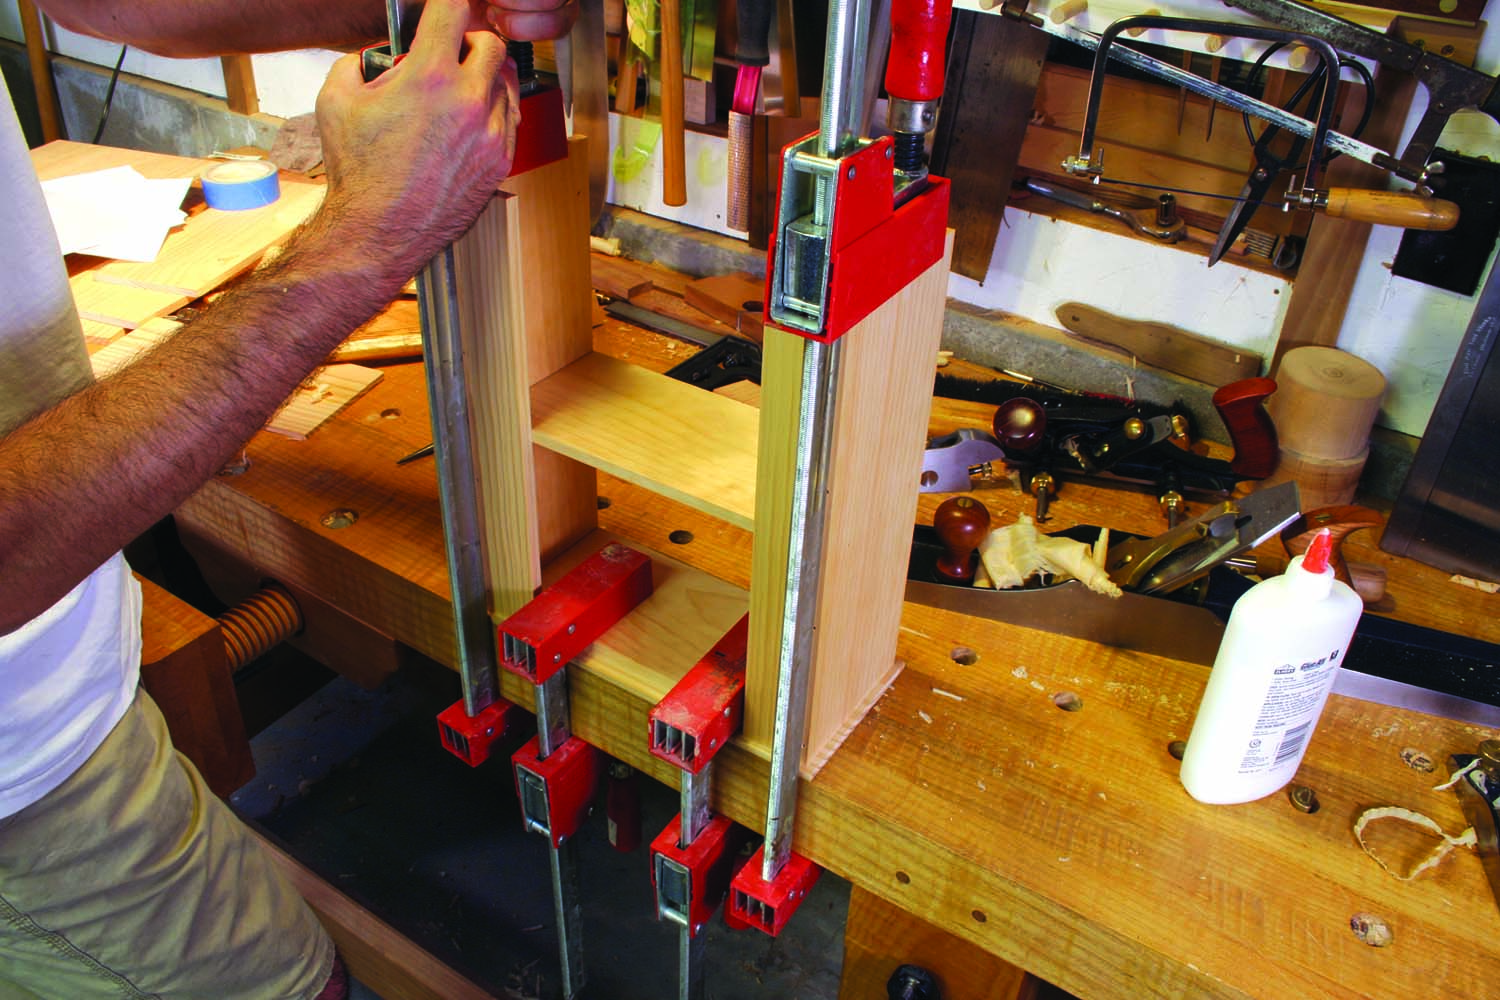
Get your bottom on. The thin exterior bottom piece is glued on. Clamp the assembly to your benchtop to help distribute the clamping forces.
3⁄16″-deep rabbets in the bottom edges of the sides. These receive the interior bottom piece. Cut 3⁄8″-wide by 3⁄16″-deep dados for the shelf.
Glue and nail the sides, bottom and shelf together. I used 2d cut headless brads that I set 1⁄32″ below the surface.
True up all the edges of the assembled carcase then fit the two stiles on the front. They hold the carcase square. Glue and nail these in place with 2d cut headless brads and set those.
The thin top and bottom pieces are each attached in an unusual way. First round over the front edge and ends of each piece. The thin bottom is merely glued on to the carcase. Note that the bottom extends 1⁄4″ beyond the back of the carcase, which creates a rabbet for the back. The top is glued and nailed to the stiles and carcase sides (don’t worry – it’s the back of the cupboard that handles all the weight).
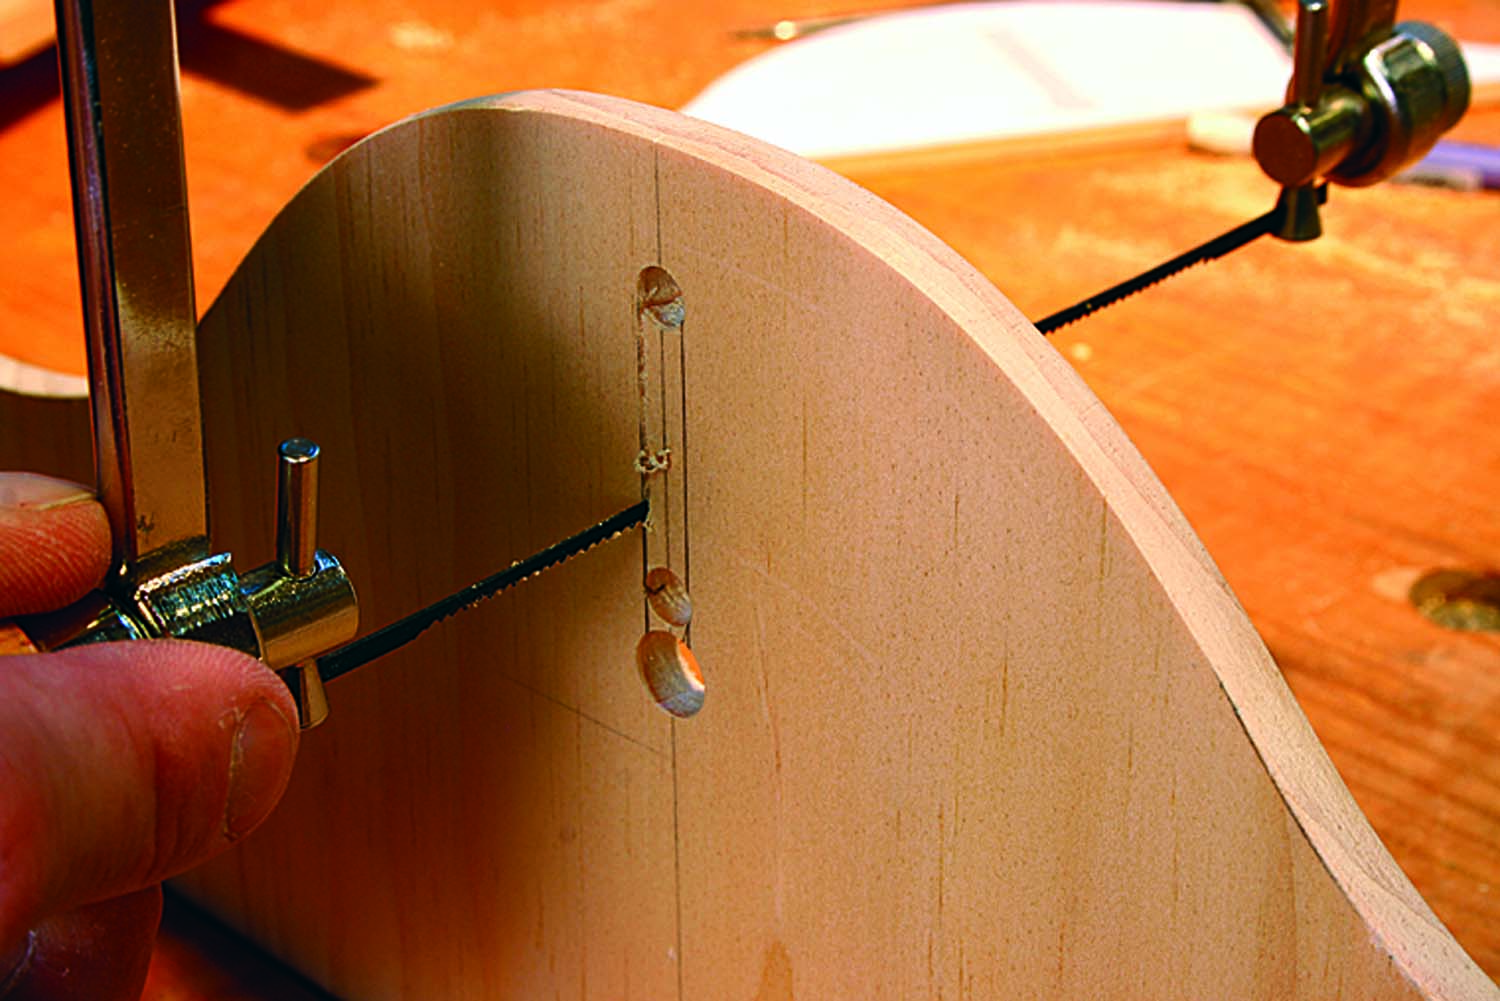
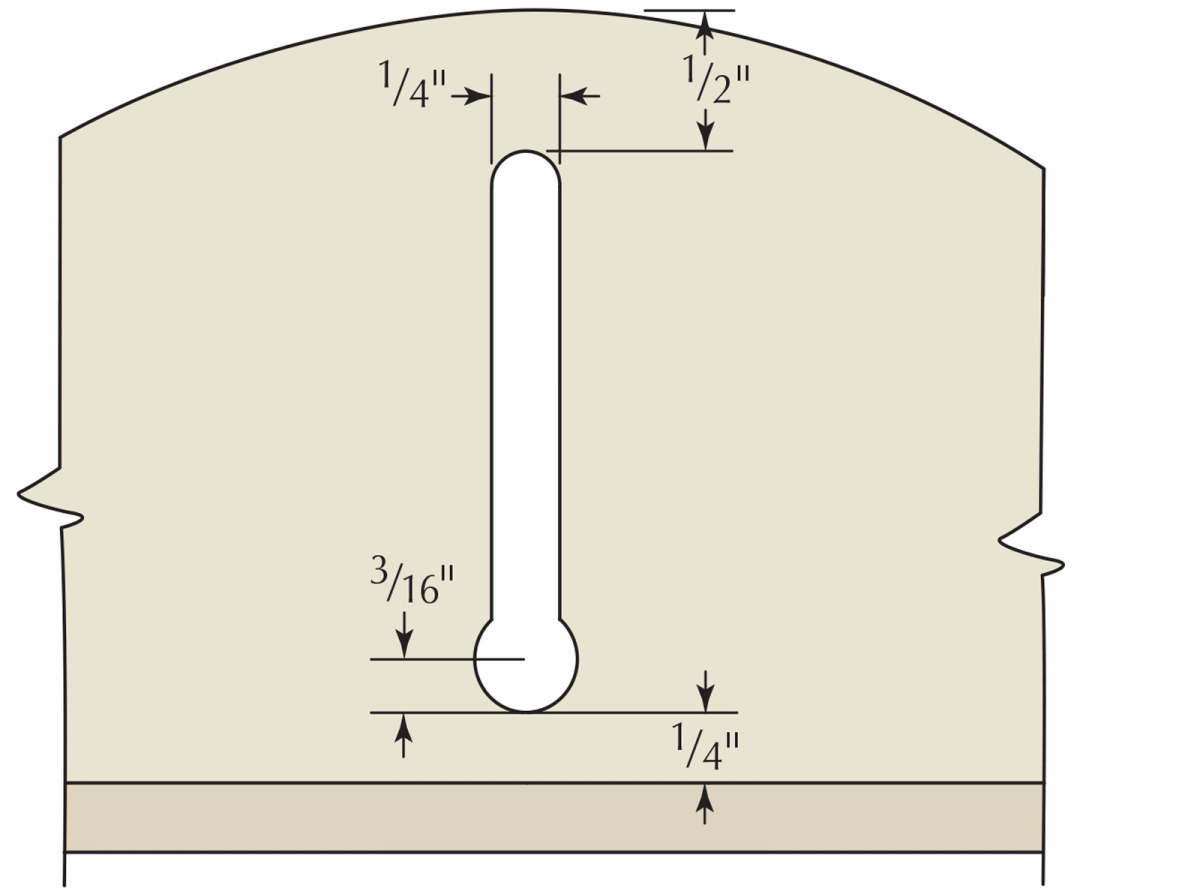
Connect the dots. Drill a 1⁄4″ hole for the top of the slot and a 3⁄8″ hole at the bottom. Connect the holes with a coping saw.
Now deal with the back. Cut the ogee shapes on the top of the back piece. Then cut the slot that allows you to hang this cupboard on a peg or nail. Here’s how. Drill a 1⁄4″ hole at the top of the slot. Drill a 3⁄8″ hole at the bottom. Connect the two slots using a coping saw. Attach the back to the carcase using 2d clout nails (no glue).
Keep Your Door Flat
The door is a flat panel of wood. If you don’t apply some cross-grain battens to the back, it will warp in short order.
So fit the door in its opening and cut the mortises for your hinges. With the door moving freely, remove it from the cupboard and drill pilot holes through the door and battens for nails.
You will clench these nails, which means you’ll bend them over on the inside of the door. I used 2d cut headless brads. Drive them through the front of the door and through each batten.
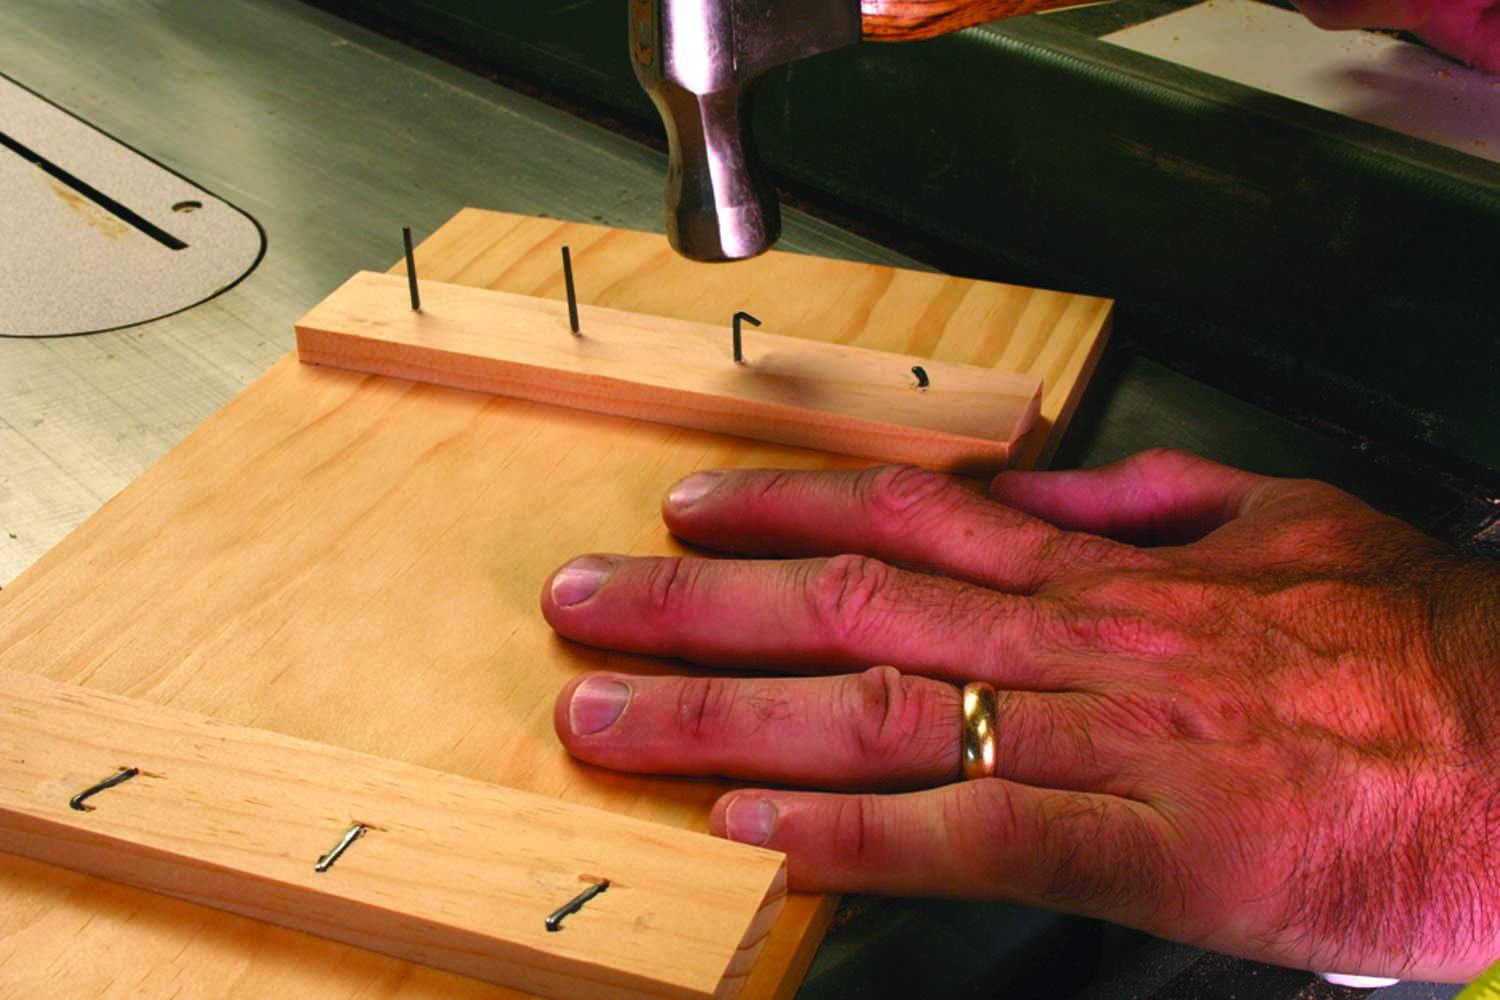
Clenching is a cinch. Drive the tips of your headless brads back into the battens while the door rests on a metal surface.
When all the nails are driven in, turn the assembled door over onto a metal surface and hammer the tips of the nails. This will bend them over into the wood, securing them. Then cut the hinge gains, hang the door and make a turn to hold the door closed. The original also had a little knob, which is best turned on a lathe.
While the finished cabinet will have too much metal to pass through airport security, I guarantee the nails will help your piece last as long as the original.

Here are some supplies and tools we find essential in our everyday work around the shop. We may receive a commission from sales referred by our links; however, we have carefully selected these products for their usefulness and quality.


