We may receive a commission when you use our affiliate links. However, this does not impact our recommendations.
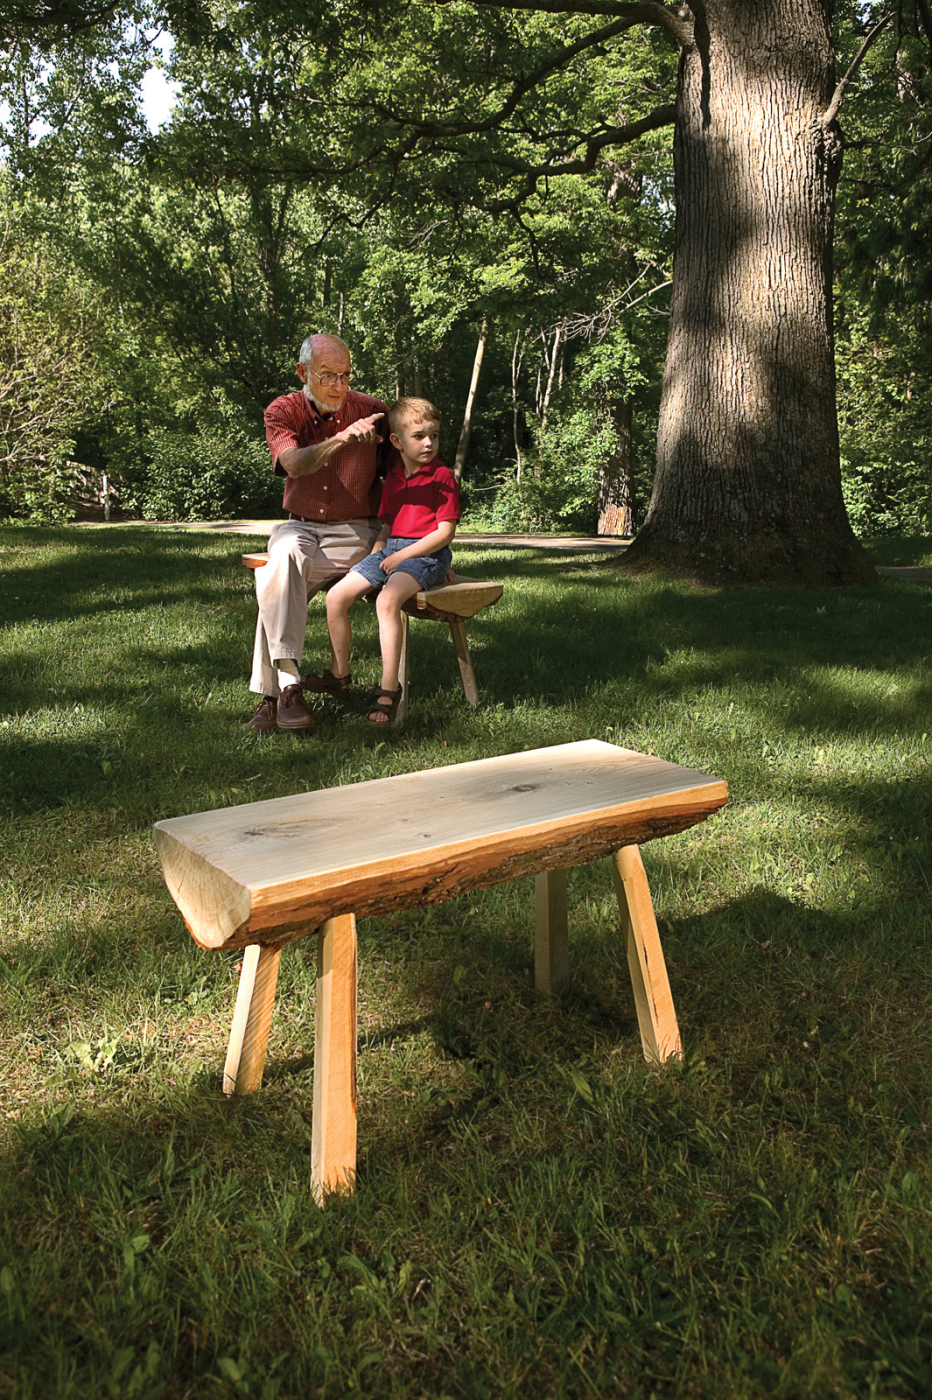 A slab from green wood, some sturdy legs and a sylvan setting are all you need.
 A slab from green wood, some sturdy legs and a sylvan setting are all you need.
Editor’s note: This article originally appeared in the June 2006 issue of Popular Woodworking Magazine.
“A slab like that can make up into a garden bench. Being white oak, they last.” The sawyer was making conversation while cutting my logs. It sounded interesting. “Well,” I replied, “let’s take a thicker cut next time so I can try it.”
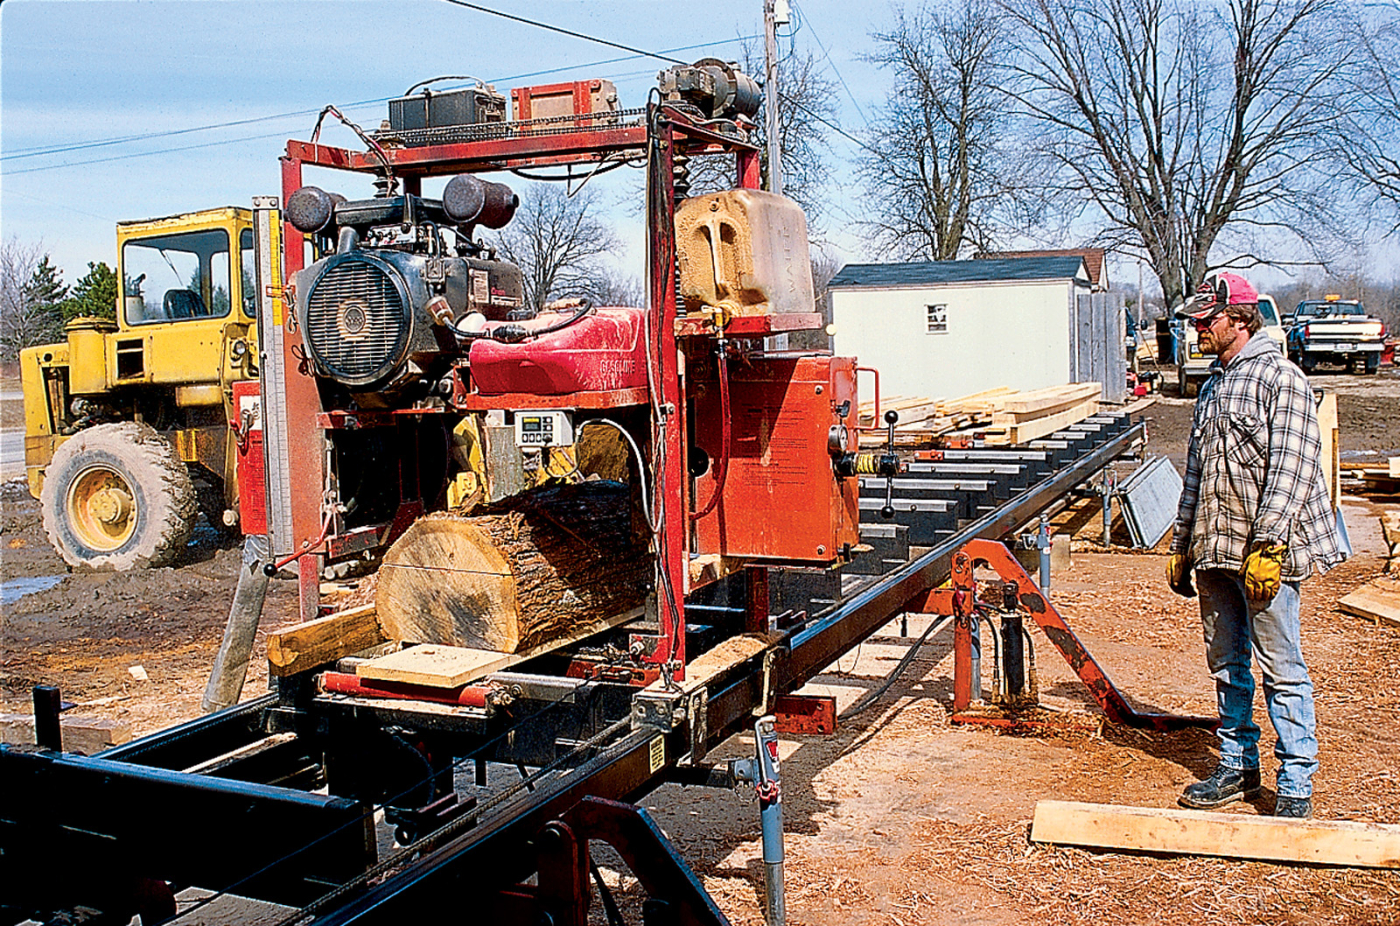
This short “orphan” log set on the mill will yield two oak garden benches.
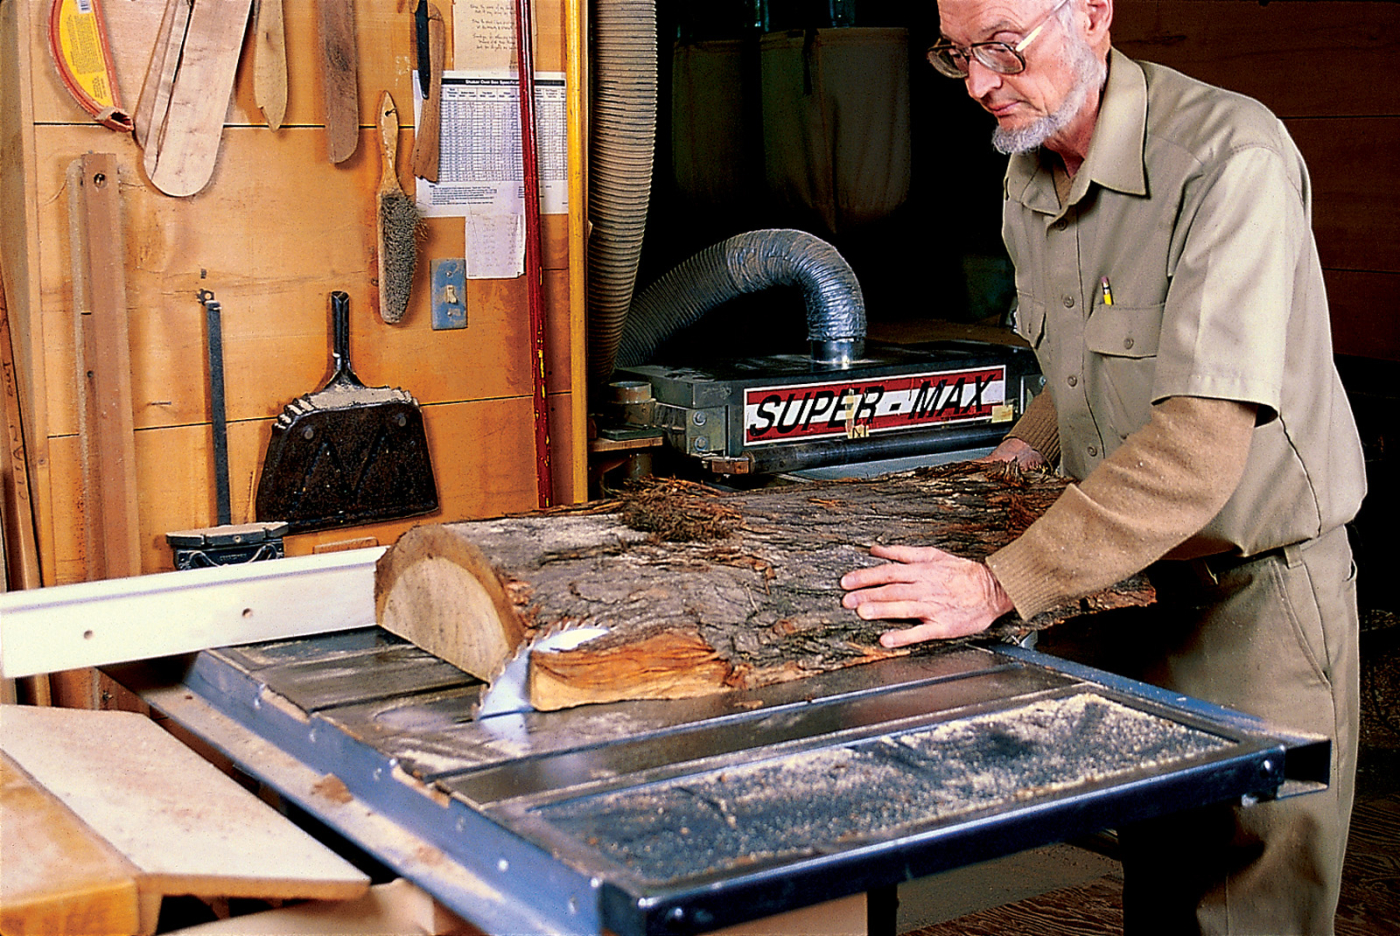
For a suitable slab you need to consider what to look for and where to find it. For size, a 4″- to 5″-thick bark-sided slab taken from a log about 20″ in diameter and 4′ long will do. Bark tends to slough off in logs cut when spring growth starts, so you might avoid that time of year.
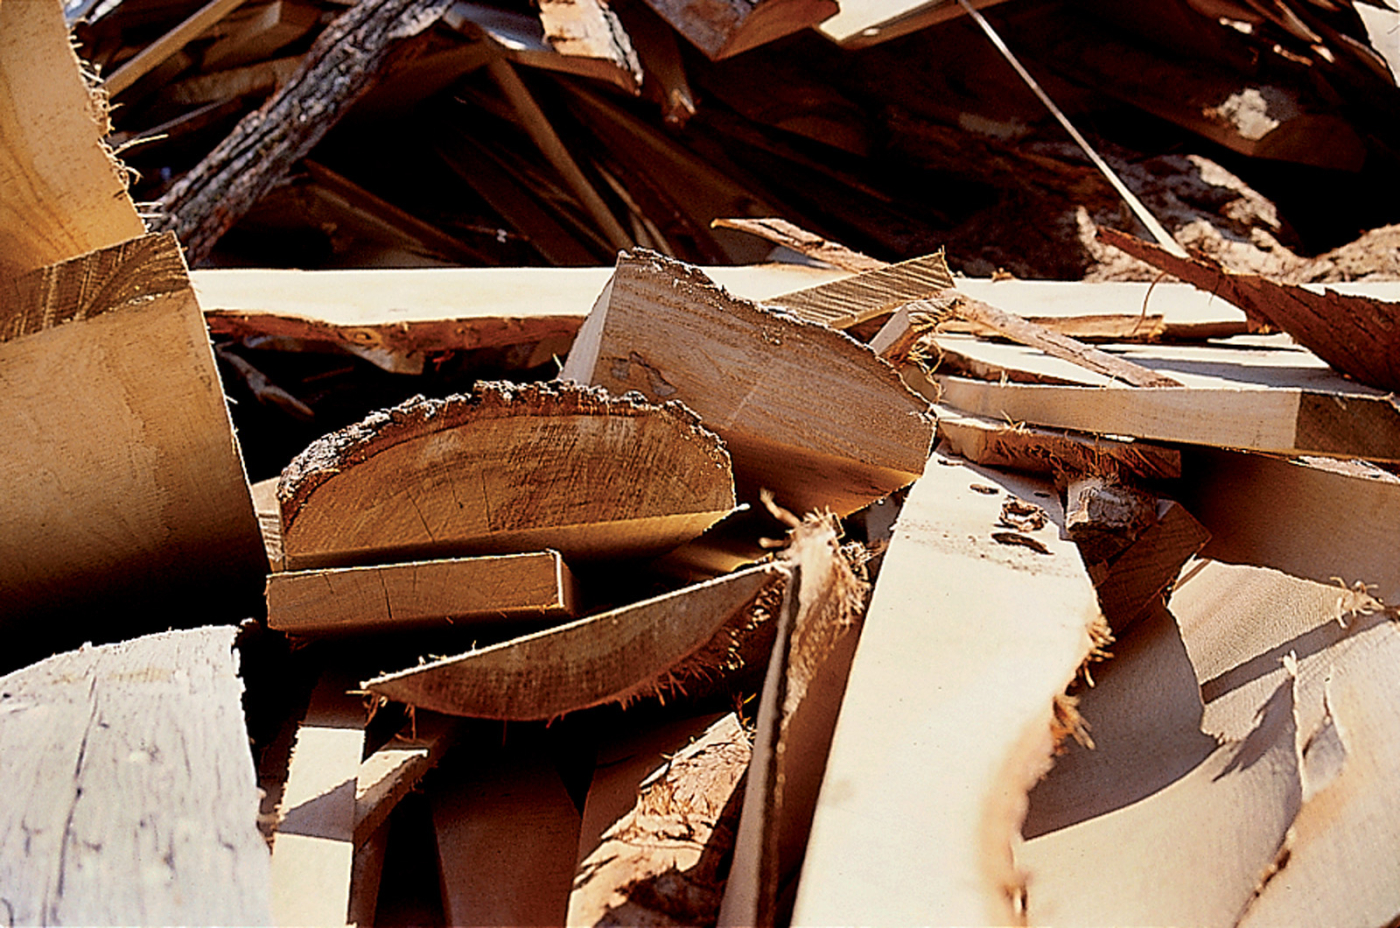
The lumber mill scrap pile may provide the slab top for your bench. Here are discarded bark-covered slabs. You can give it a better life than as a piece of firewood, which it’s destined for now.
There is a wide range of tree species that can work. I am surprised to find that a free-standing project like this bench will fare quite well when left to weather without any surface treatment. The ends of the legs, which stay damp most of the time, will rot, but it is a slow process. I have painted old motor oil on the leg ends to help, but leave the remainder to weather naturally. It seems suitable to the project.
Looking at a rot-resistance table in a wood technology book for what species to use would probably not be of much help since finding a slab is opportunistic. You use what you can find. I have garden objects of walnut, elm, apple, maple and oak, all of which work well. Basswood does not.
Where do you find such a slab, and how do you cut it? Logs are squared up for lumber milling. What you want is a slab from the bark edge that is 1″ to 2″ thicker than normal. Another way is to chain saw a slab from a 4′ section of log destined for firewood. All that remains to be done is to trim an inch off the sides to give a plank 12″ to 15″ wide.
Trimming the top to size can involve a variety of tools: table saw, circular saw or chain saw. Leave an edge about 1 1⁄2″ wide.
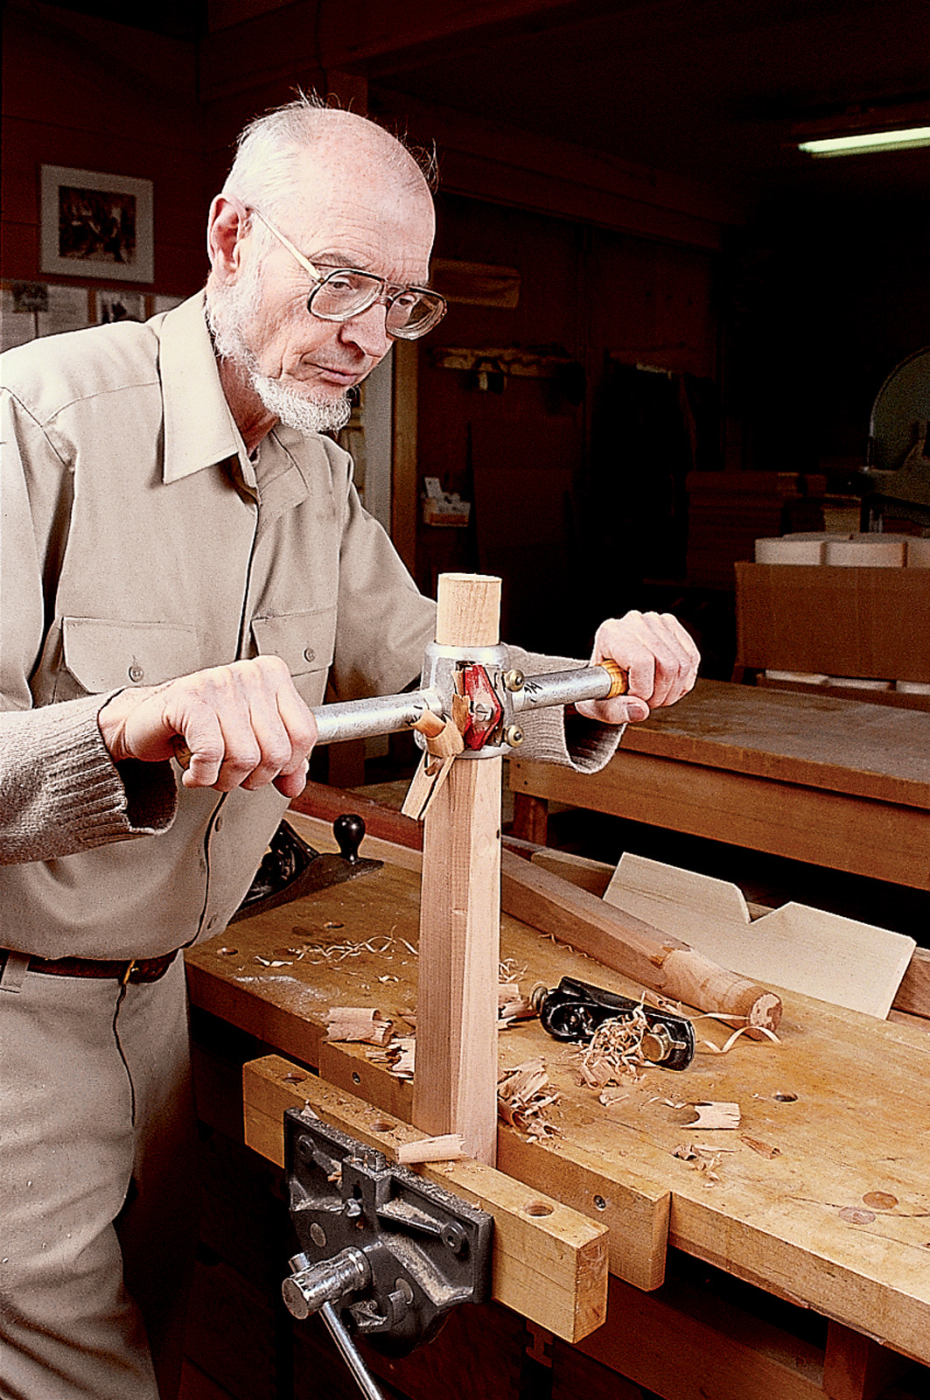
The bench’s top is made green. The holes tighten on the legs that way. There are two ways of doing the leg joint. One is to through-drill and wedge the leg end. The other is to drill a socket that does not come through the top surface. You need to accurately size the tenon end of the leg with this method. I use a rounder plane to give accurate tenons, but careful planing is possible with the use of a hole gauge made from a board drilled with the same drill as used in the bench’s top.
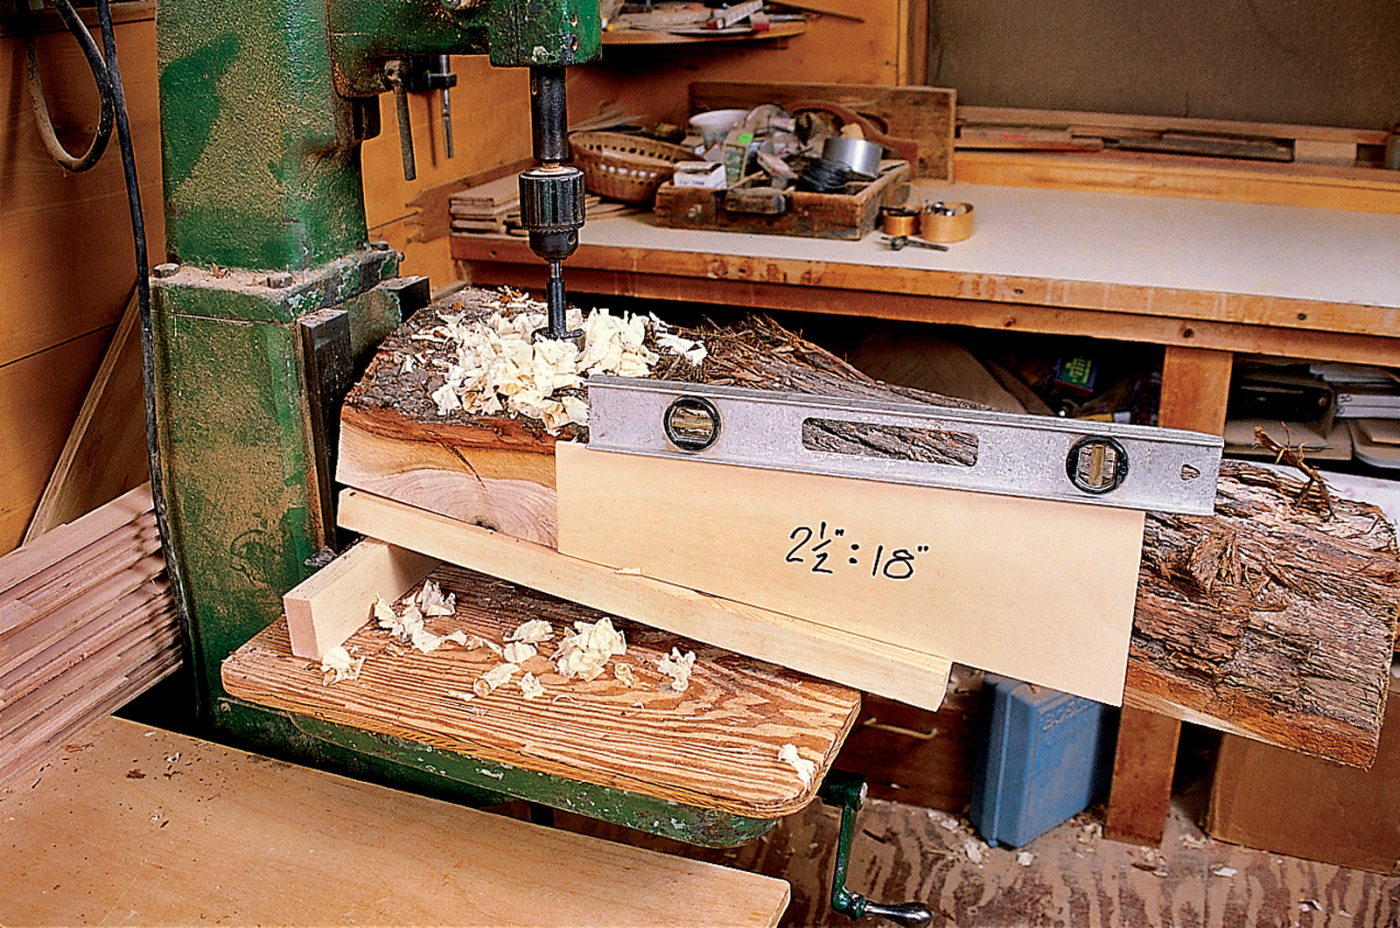
To achieve the desired leg splay, use a level on top of a board cut to the ratio of 21⁄2″ to 18″. This is the angle both end-to-end and side-to-side. The heavy slab rests on wood blocks to steady the drilling with a 1 3⁄4″ Forstner bit in the drill press.
Prepare the legs using a V-notched board and a stop block. Plane the 2″ x 20″ squares so the bottom remains square and the top end is octagonal.
When the through-hole method is used, you can beat the leg into place until tight, then wedge the end to lock it. That makes it more forgiving of tenon preparation. Shop tip: If you choose the through-hole-and-wedge method, have the grain of the leg run crosswise to the length of the bench, and the wedge do the same. My project used the hole-not-drilled-through method, and legs made from fairly dry wood.
The challenge of making this project is drilling the holes. You need a large drill, the angles are a bear and the slab is heavy. In fact, a green-wood slab is as heavy as an 80-pound bundle of shingles. For through-drilling, a 1″ auger may be your largest, but larger is preferred. For drill press drilling of socket holes, I used a 13⁄4” Forstner bit. (Be sure there is room around your drill press for drilling all your holes!) The hole angle is critical for any chair or bench. I used a splay in both directions of 2 1⁄2” in 18″. In the drill press, block up support for the slab and use a short level to achieve the correct angles. In hand auger drilling, cut a scrap of plywood at the 2 1⁄2“:18” run and rise to guide your drill.
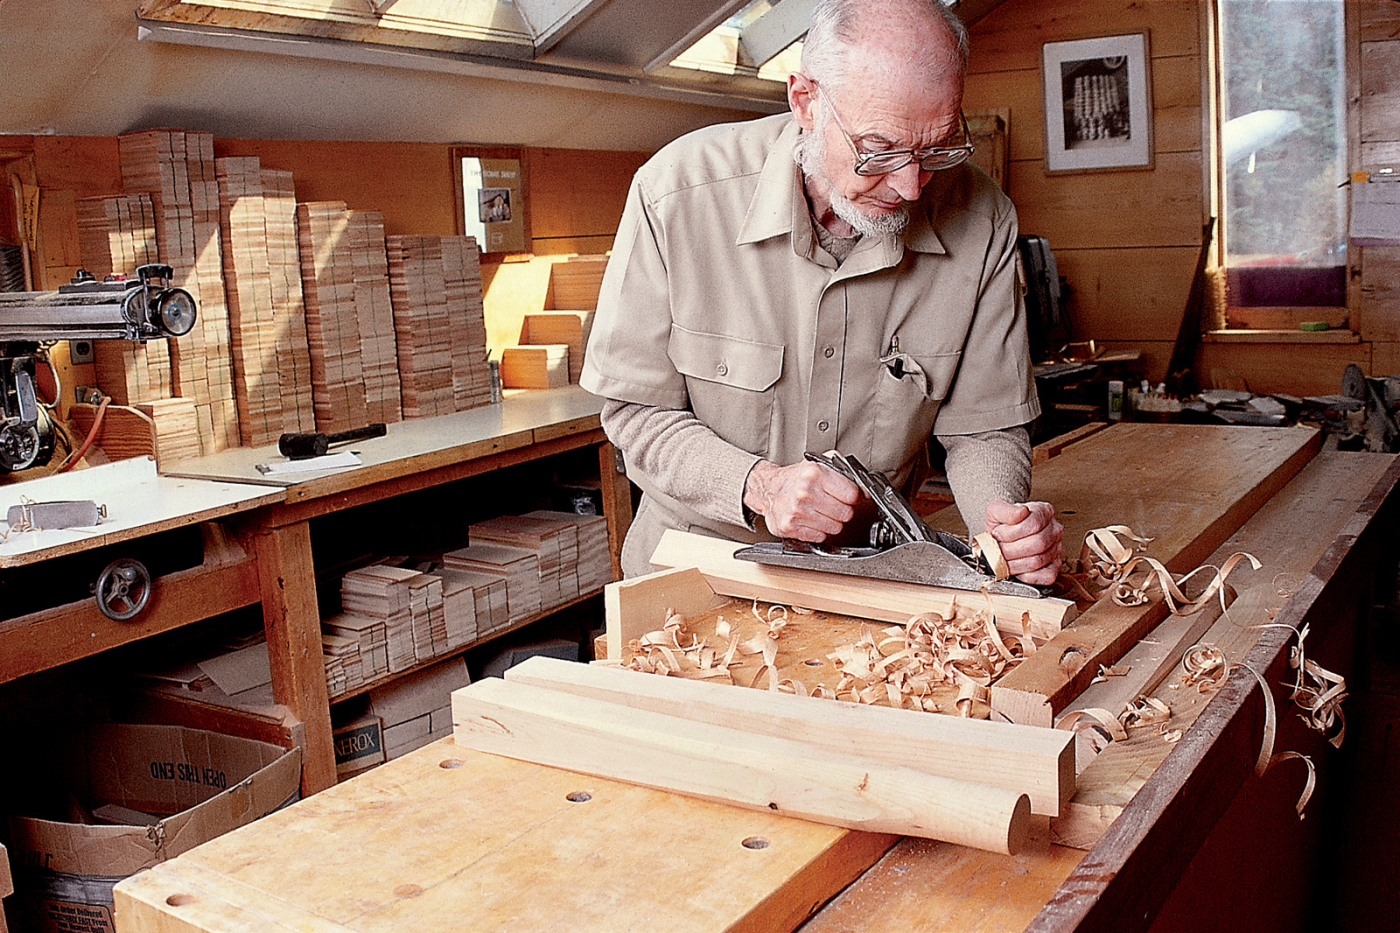
A rounder plane is a traditional tool for making tenons. They are made in a variety of sizes for chair posts and rungs as well as sizing tenons. They can be difficult to find but are very useful. The one shown here was from Ashem Crafts but is no longer manufactured.
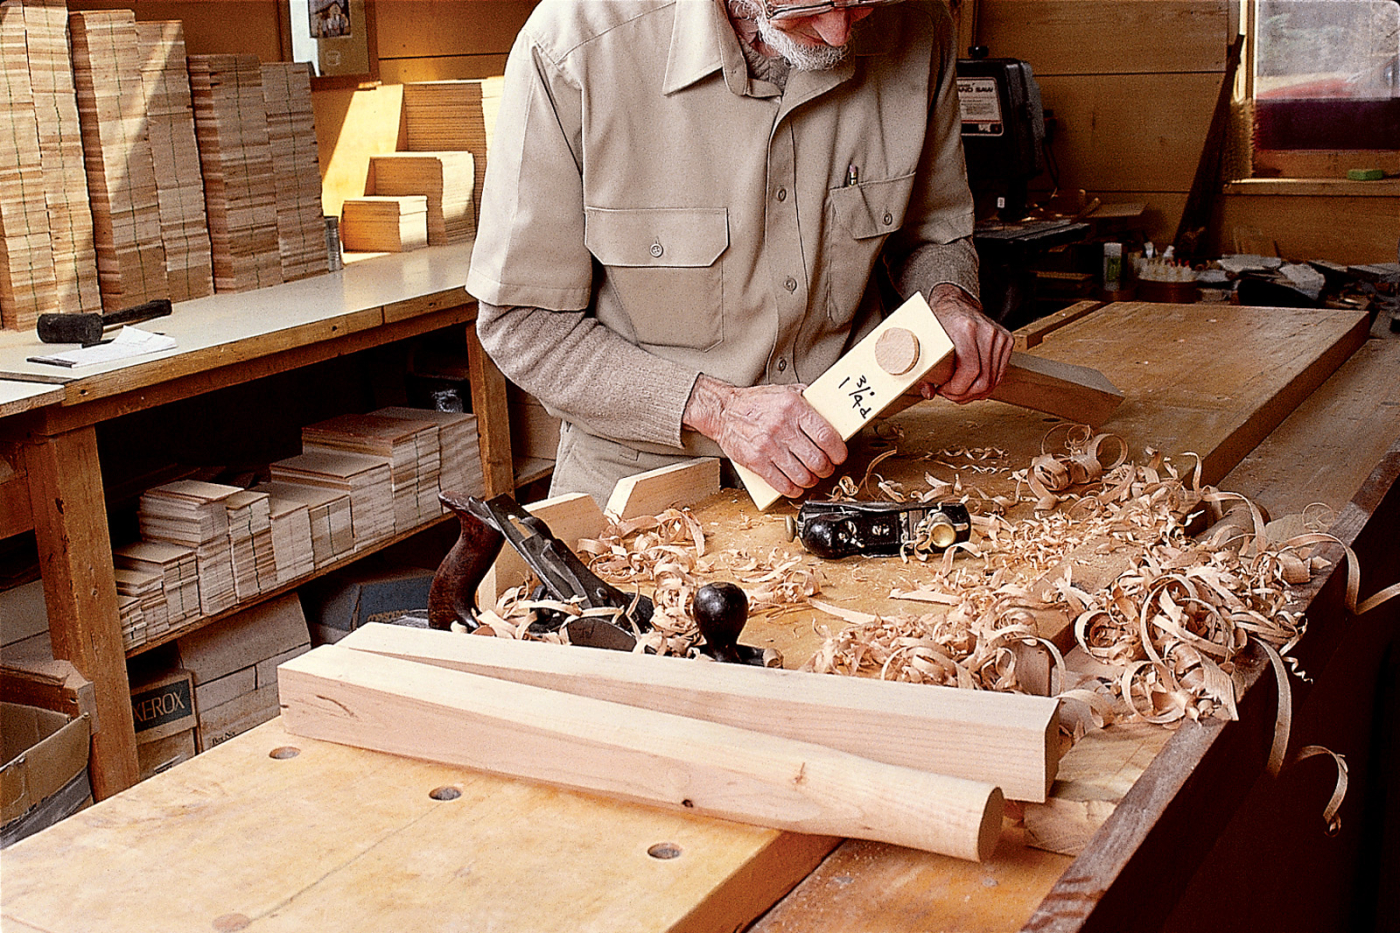
If you don’t own a rounder plane, you can use a block plane to form the tenon. Whichever method you choose, use a hole gauge to check the tenon’s size.
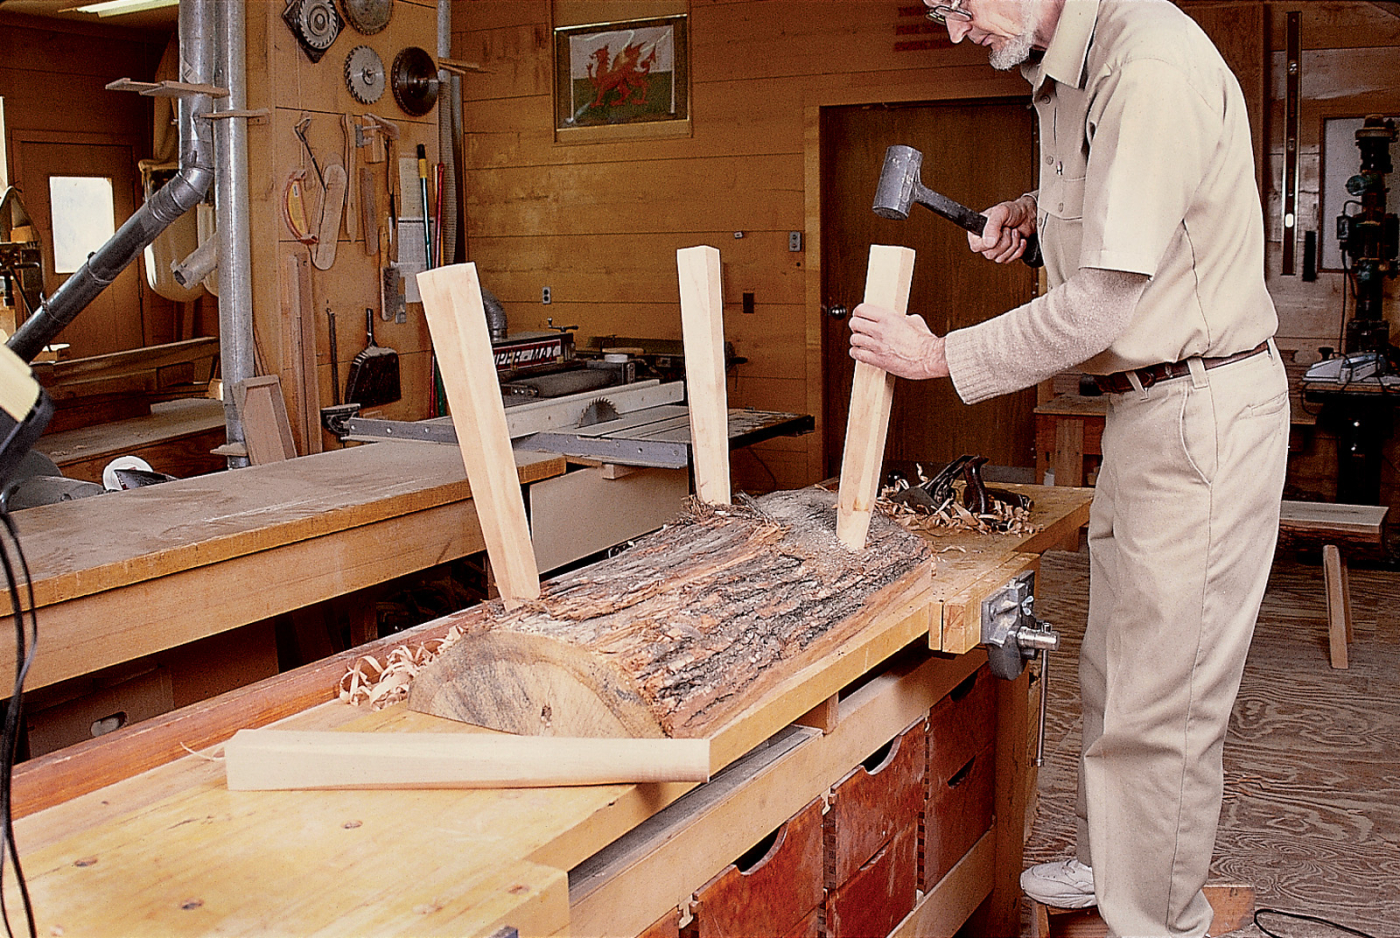
Hammer the legs into place. With this version of the garden bench with stopped holes, no glue or wedges are necessary, as the legs, being drier than the slab top, will hold tight as the top dries.
The legs are square at the bottom and octagonal at the top. I cut the legs from a rough 2 x 4 of white oak that was fairly dry. The actual dimensions were slightly more than 13⁄4” x 13⁄4” square, left rough, and cut to 20″ length. Plane the edges from nothing at one end to a flat sufficient for one octagon surface at the other. Shop tip: A board roughly 3⁄4” x 6″ x 12″ with a V-notch 11⁄2” deep on one side when clamped in your bench vise will hold the leg steady for planing. Clamp a stop to your bench for the other end of the leg. Now form the tenon using a hole gauge and block plane or a rounder plane.
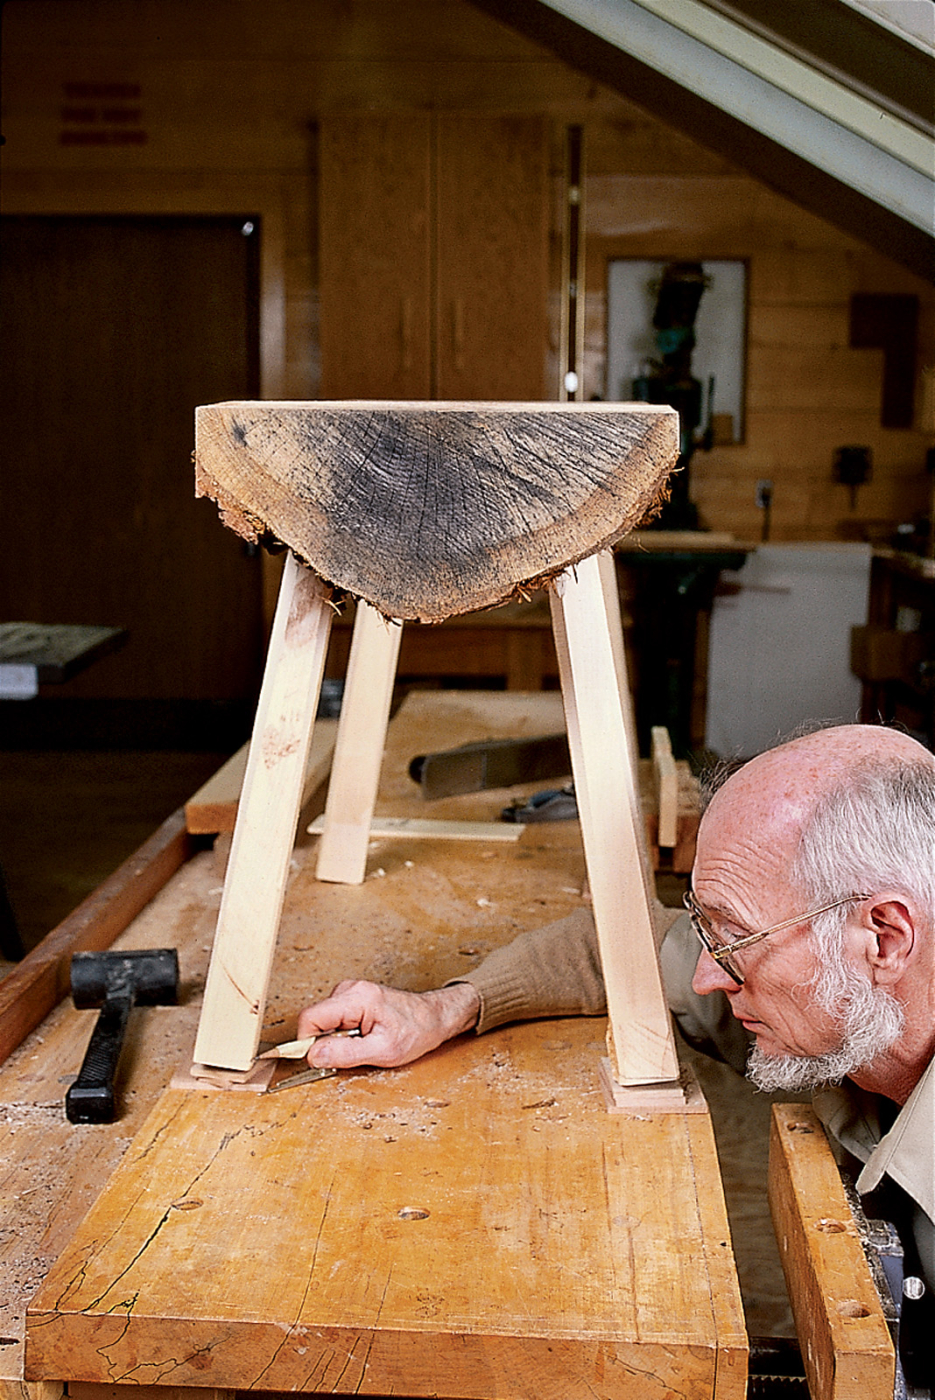
The final leg length is marked by leveling the bench (note the use of wood scrap under each shorter leg) and marking with a scribe. Cut along the lines and plane all sharp edges as the final step.
However you join the legs, the last step is to block up your bench level to the floor, and mark the ends for cutting the legs to the correct length and angle. Use a small wood block to guide your pencil, or a scribe (aka compass) to mark all around the leg ends. Cut to length. Plane all edges of the bench’s top and legs for comfort and enjoy.
Bonus: Slab Workbench
Woodworkers in the 17th century and before used a benchtop made from a single thick slab of wood. They were simple but effective benches. The frame supporting it bore the appearance of timber framing for barns and residences. The means of securing wood made much use of holdfasts and wedging because this was before the days of cast iron vises with quick-release jaws.
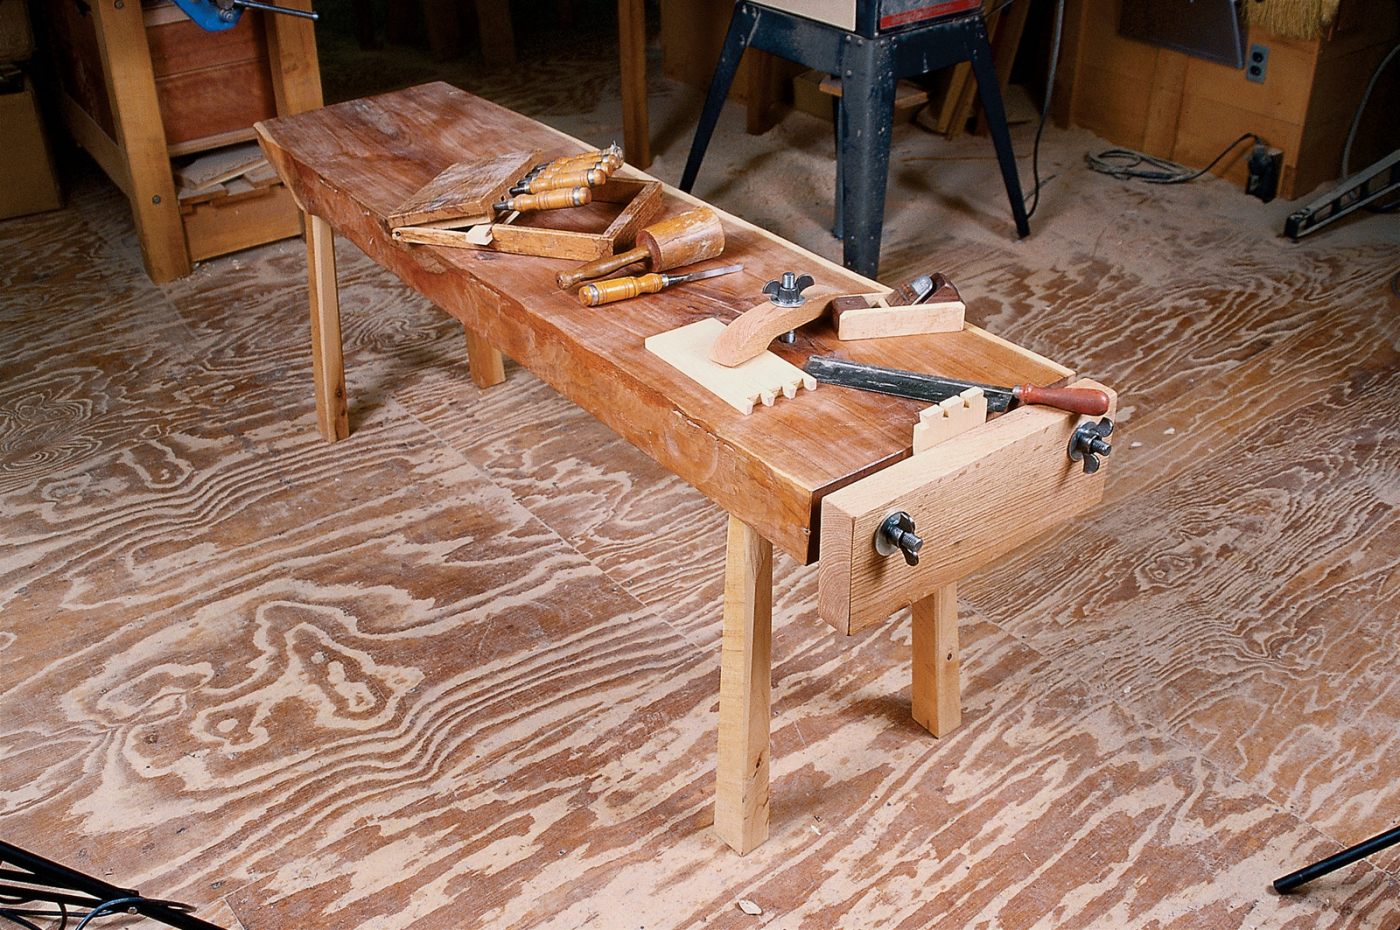
A workbench based on the same techniques harkens back to 17th-century craftsmen. The holdfast and vise use 5⁄8″ threaded rods and wing nuts. The vise is a 2″ oak face with a rod self-threaded into 1⁄2″ holes.
Techniques shown in the rustic garden bench can be used in fashioning a workbench as well. Rather than a bark-edged slab, the top makes use of a thick plank. The one shown in my bench was a piece set aside at the mill due to embedded nails. When a tree sustains a nail and grows around it, the iron will stain the wood. An alert sawyer will sometimes be able to stop in time before harm is done to the saw. In any event, the remaining cant is a problem. Nails can be dug out, or the problem section cut off. The thick remainder in my bench came from just such an encounter with a nail.
The legs are made and secured in just the same way as for the garden bench. When the slab dries, it will develop cracks that can be filled with epoxy filler. I have used regular epoxy thickened with wood sanding dust, or epoxy products are sold for auto body repair. The wood-colored paste looks better.
The holdfast and vise are made from 5⁄8“ threaded rod and wingnuts. The holdfast goes into a 3⁄4“ hole with a nut on the bottom as well as the wingnut and washer for adjustment on top. The vise is easier to make than you may think when you know that threaded rod can actually cut threads in a simple hole bored in hardwood. The trick is that the hole’s diameter must match the minor dimension of the rod’s threads. I used a 1⁄2“-diameter hole for a 5⁄8“-diameter rod. Drill the hole 3“ deep. Put a few drops of oil in the hole. Clamp locking pliers on the end of the threaded rod and turn it into the hole. Hack saw the exposed rod to a length of approximately 5“. That’s it. The vise jaw is a 2“ piece of hardwood with 3⁄4“ holes.
Here are some supplies and tools we find essential in our everyday work around the shop. We may receive a commission from sales referred by our links; however, we have carefully selected these products for their usefulness and quality.