We may receive a commission when you use our affiliate links. However, this does not impact our recommendations.
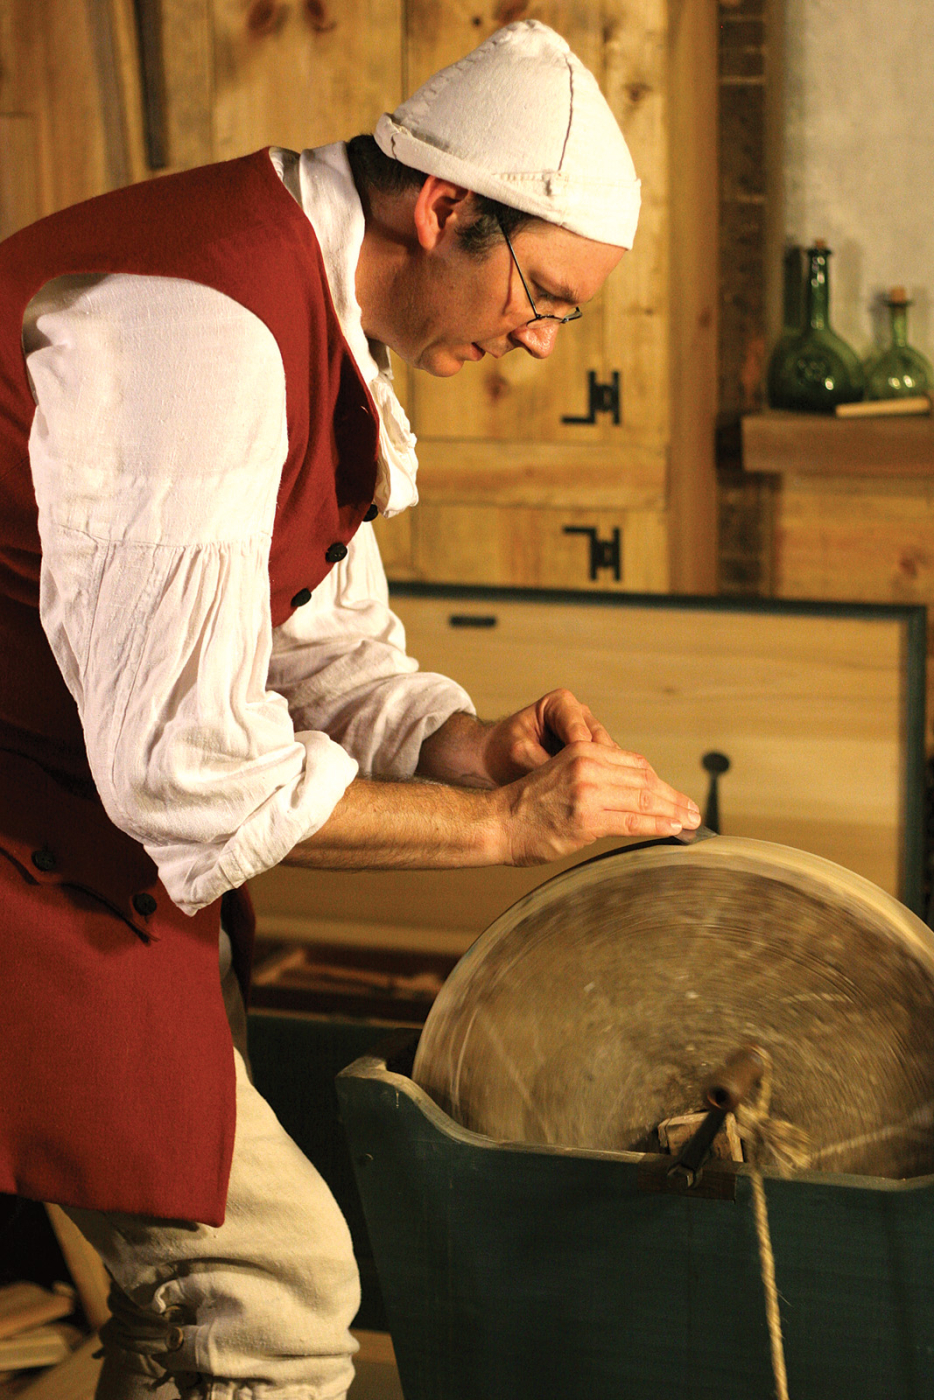
One way to learn how tools were sharpened in the 18th century is to try it. I experimented with period sharpening for nine months and was surprised by what I learned. Joseph Moxon describes this method of holding a plane iron: thumbs under, fingers on top. This is a good grip for freehand honing – especially when you are pushing a treadle 100 times a minute!
An experiment uncovers cutting edges of the past.
“How did they sharpen their tools back then?” I’ve asked this question myself and I have been asked the question, and I’ve never felt comfortable with any answer. We know that 18th-century woodworkers had grindstones and natural whetstones and that’s as far as any answer I’ve ever heard or given goes. I assume that the average 18th-century craftsman could produce an edge on his tools as sharp as modern woodworkers get. But is that true? Exactly how did period craftsmen sharpen their tools? What kind of edges did they get? To find out, I decided to purchase old whetstones and an old grindstone, make a period frame and give it a try.
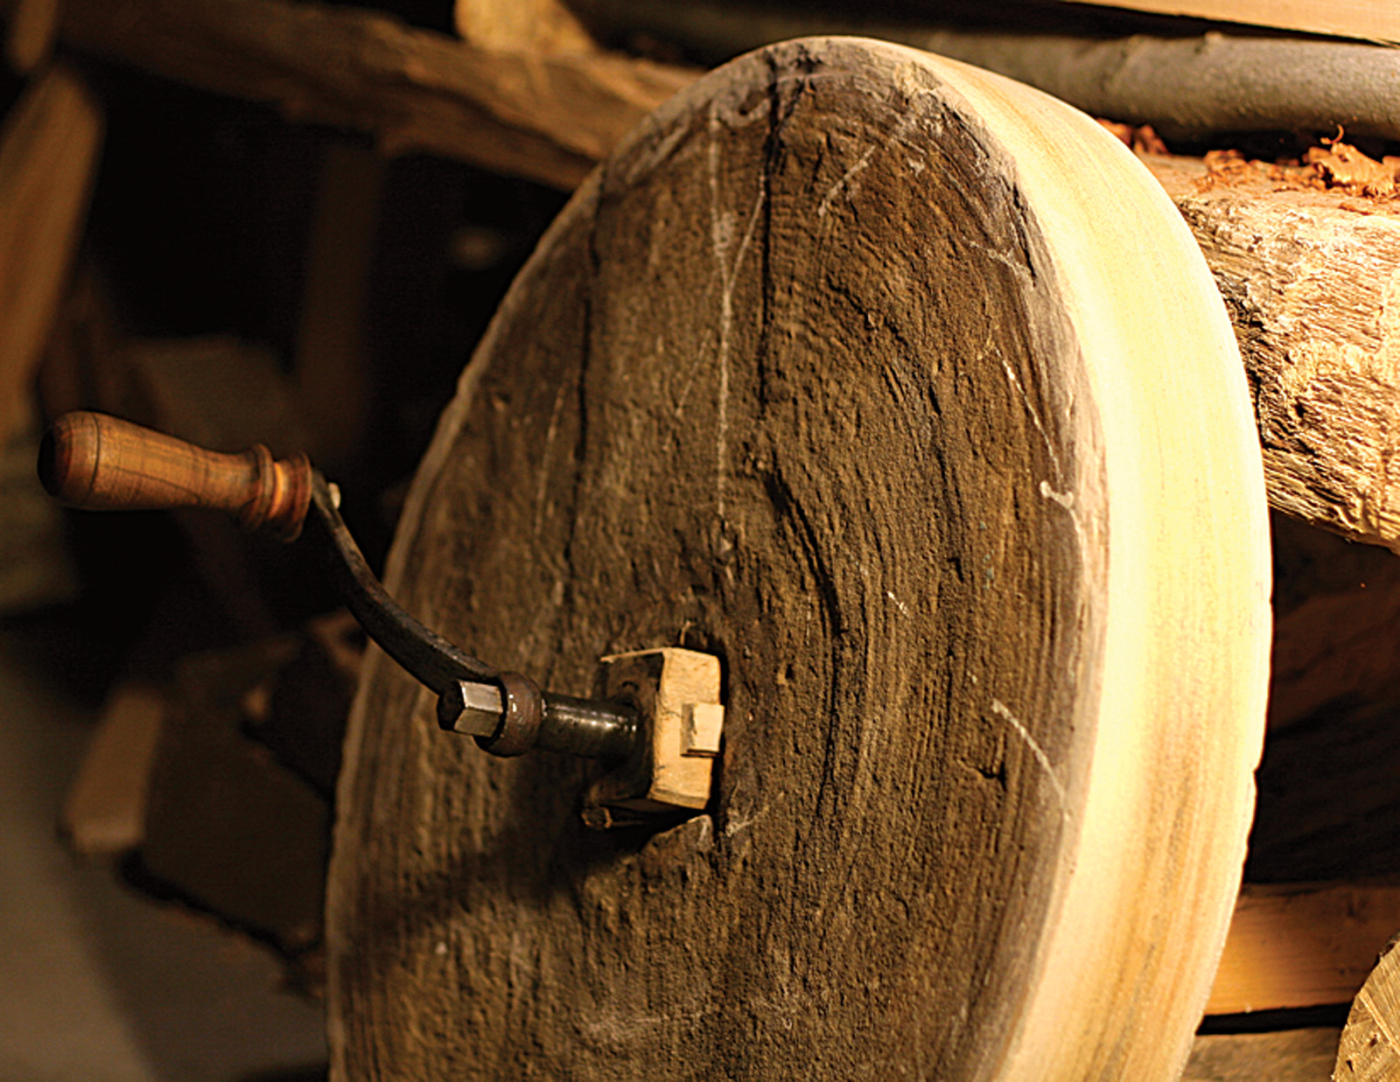
Formerly a rustic garden ornament, this stone appears to be rather primitively made and probably dates to the mid 19th century. Though inconsistent and difficult to work with, it has not been damaged by sitting in water. The other side of it is painted brown, no doubt a decorative touch. Oddly enough the paint may have preserved it.
Period Sharpening Gear
Old inventories of workshops often include grindstones. They’re encountered so frequently we can safely assume they were typical.
In addition to grindstones, craftsmen may have used sandstone or other abrasive “rubb stones” as coarse abrasive hones. Long before the widespread distribution of Arkansas oilstones, craftsmen had access to fine local, as well as imported, whetstones. André Roubo, an early French chronicler of woodworking, mentioned that his stones came from the Levant, an area presently identified as Israel, Palestine, Jordan, Syria and Lebanon. As this area was then controlled by the Turkish empire, such stones were also known as “Turkey stones.” From Roubo’s 1774 volume “L’Art du Menuisier Ebeniste:”
These stones come from the Levant; the best are those which are of fair color, of a tight grain, plain and very uniform: this stone has the defect to have small whitish veins, either in length, or in thickness, which are as many hard spots which prevent it to sharpen well … these stones are not [of] a very great size, and besides that they are fragile.
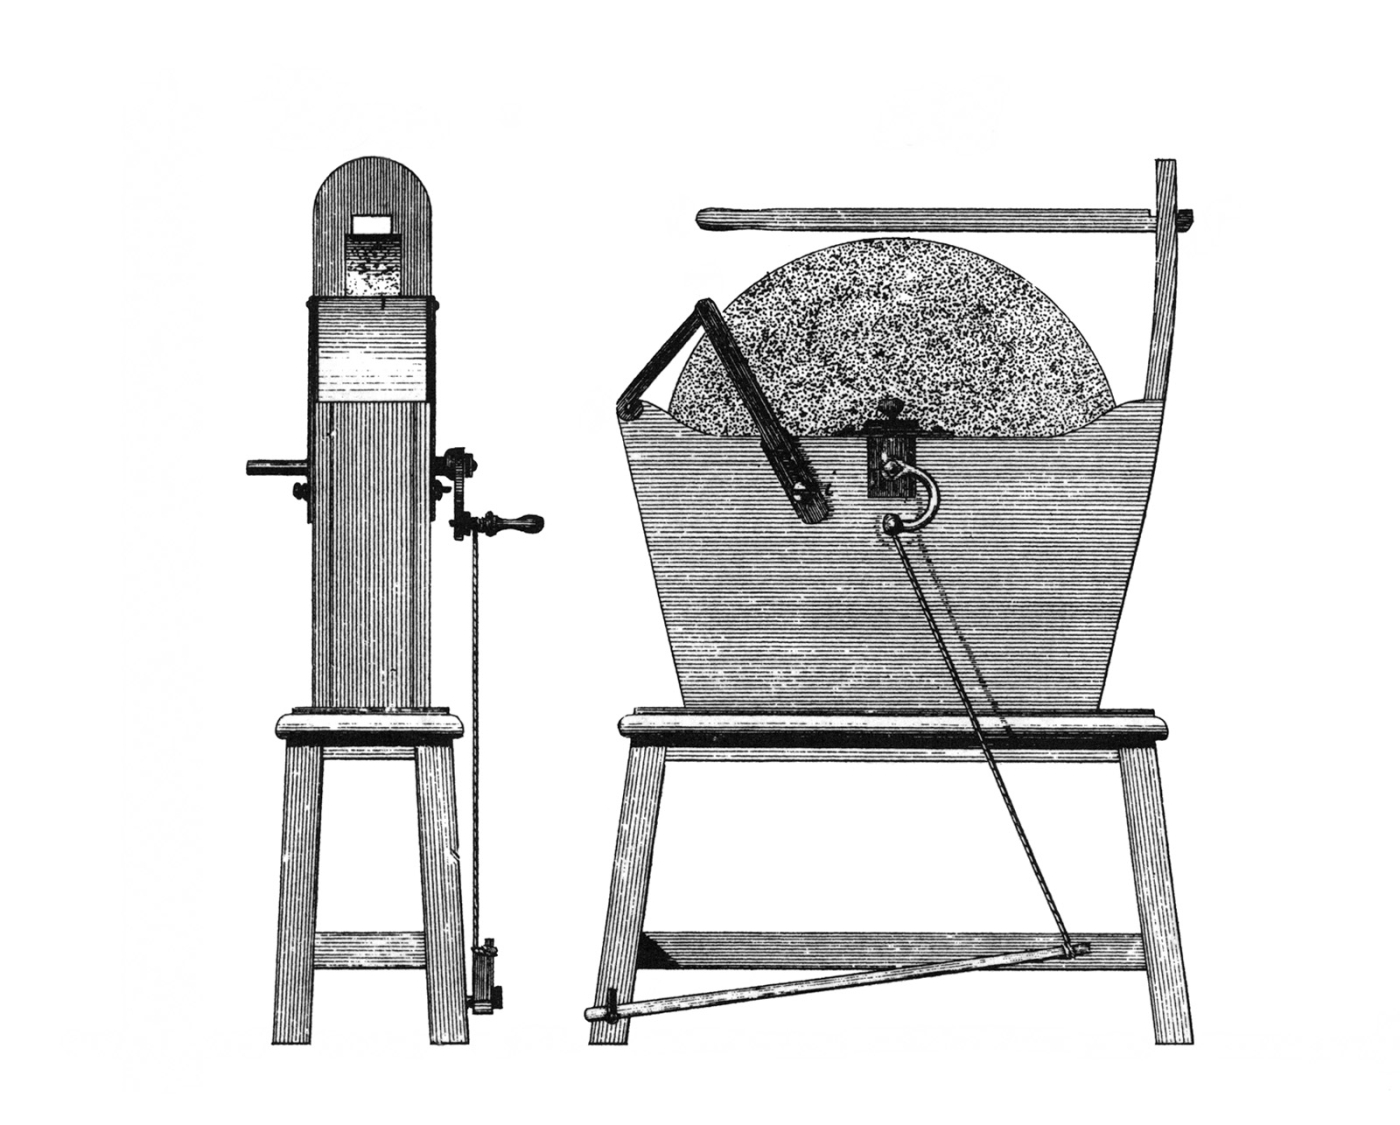
Roubo’s grindstone has several advantageous features only recently available to us. It features an integrated tool rest, water cooling, low speed yet plenty of cutting power via its high inertia, and a large-diameter wheel to produce a nice shallow hollow grind. The wide face of the wheel allows a nice straight edge to be ground without moving the tool whatsoever. Fantastic … until you actually try using it.
One hundred years later, in “Construction, Action and Application of Cutting Tools,” Englishman Charles Holtzapffel wrote:
There are three qualities of Turkey Stone, a dark blue to black variety and a lighter blue grey stone, both of which go to London … the third quality is much softer, almost white in color and easy to work, but it is very brittle, and consequently difficult to get in large and even pieces; this quality of stone is shipped principally to France.

When I built my version, I skipped the tool rest. My wheel wobbles from side to side and is out of round about 1⁄4″. My biggest concern, the effort required to turn the wheel at a usable speed, quickly became the least of my worries. This wheel easily spins at 120 rpm and will coast for over a minute! I was shocked. The brown half-bearing is lignum vitae.
When present in period estate inventories, grindstones and whetstones were highly valued. Oilstones in the Charles Plumley inventory were given a similar value to his handsaws, which were several times the value of a smoothing plane. Plumley’s grindstone rivaled his plow plane and his prized “yellow jaunders” jointer plane as the most expensive tool in the shop. It is not at all clear that period craftsmen had (or could afford) a range of whetstones of varying grits from which to choose. Rather, it seems that workmen were lucky to have a grindstone and one good whetstone – unless of course the workman happened to be French.
Technique
Between Roubo and Joseph Moxon, whose “Mechanick Exercises” was the first English book on woodworking, we have a pretty good picture of how things were sharpened in the 18th century. And that’s important because we shouldn’t assume they did things the way we do. But I was actually surprised by how similar their methods were to ours. See if any of this sounds familiar:
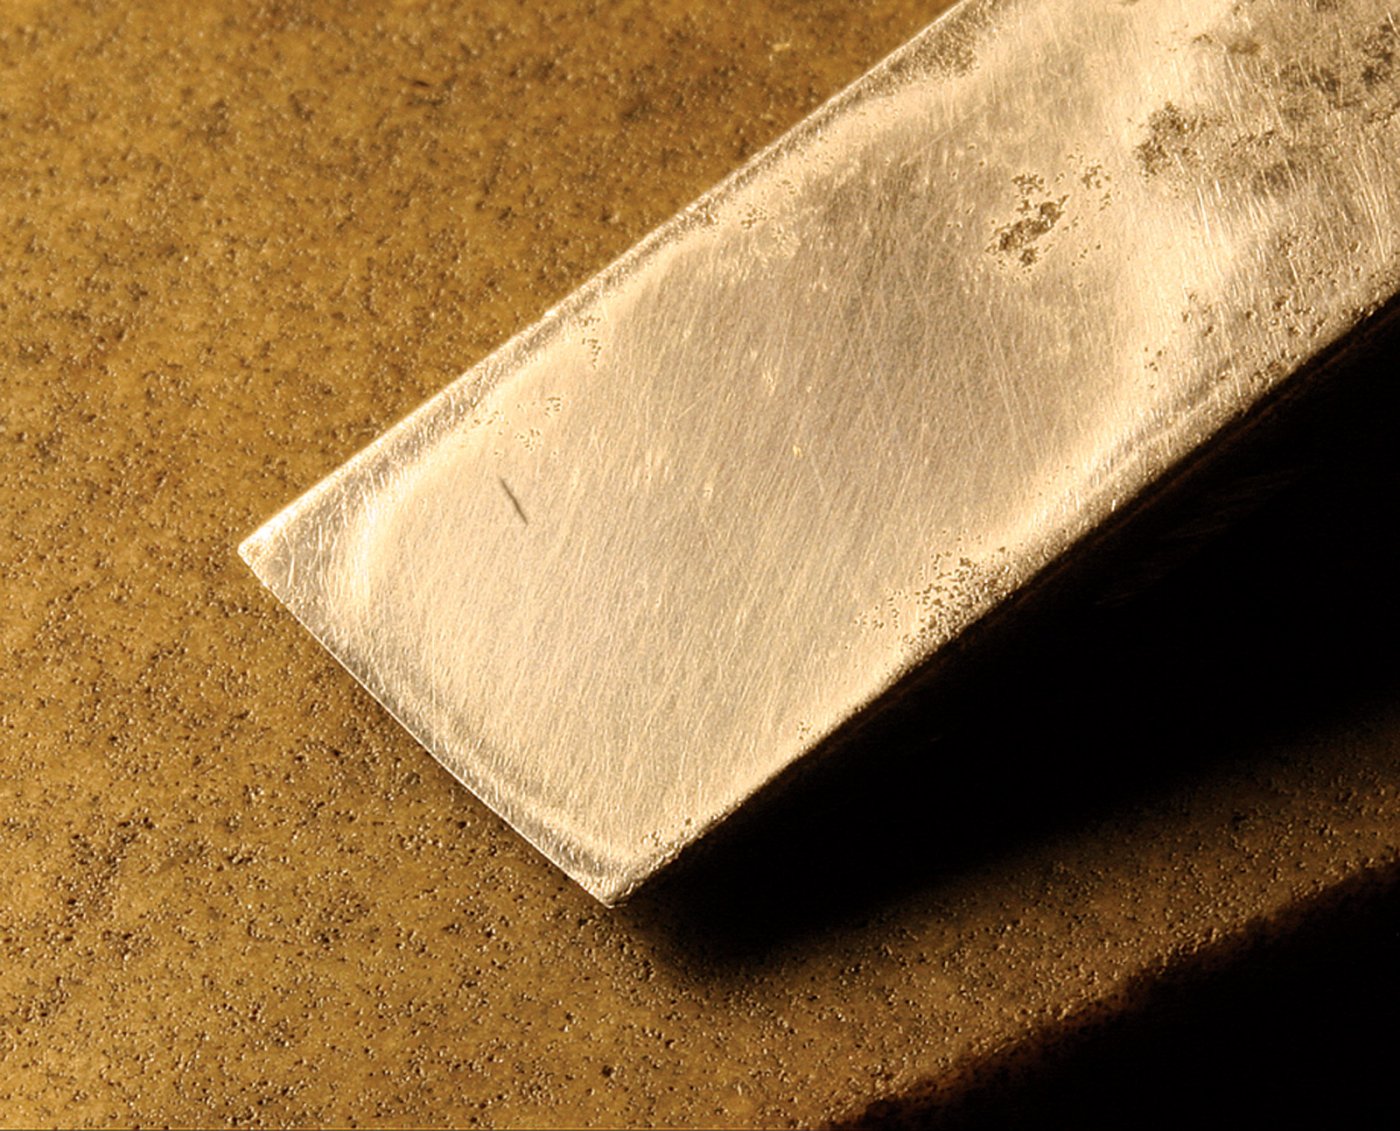
Sandstone leaves a surprisingly fine edge. It’s easy to see the secondary bevel I honed with a whetstone in this picture. The edge and entire breadth of the bezel is curved – a result of the shallow groove in my grindstone.
According to both authors, the basic process was to shape the edge with a grinder or coarse rubstone, then hone the edge until smooth. Moxon recommended 12° bevels for plane irons that work softwoods, 18°-20° for hardwoods. He believed lower bevels cut better, and higher bevels strengthened the edge. Moxon was also a fan of hollow grinding. This seems a sophisticated approach for 1687:
When you lift the Iron off the stone, to see if it be ground to your Mind; if it be not, you must be sure you place the Iron again in the same position on the Stone it had before; for else you will make a double basil (bevel) on your Iron: But if it be true set on the Stone, and steddily kept to that Position, your Basil will be Hollow, and the smaller your Grindstone is, the hollower it will be.
Later he talks about using a flat rubstone to grind:
And this they do so often, till they have rubbed the hollowness of the Basil to a flat, and then they grind it again upon the round Grind-stone.
Roubo felt it was important to hone with oil and keep the stone clean:
Oil is useful to sharpen tools on these stones, and it is good that they are always saturated, and that they are always very clean, because the dust which sticks forms to it a grease which spoils them, and prevent tools to take an edge.
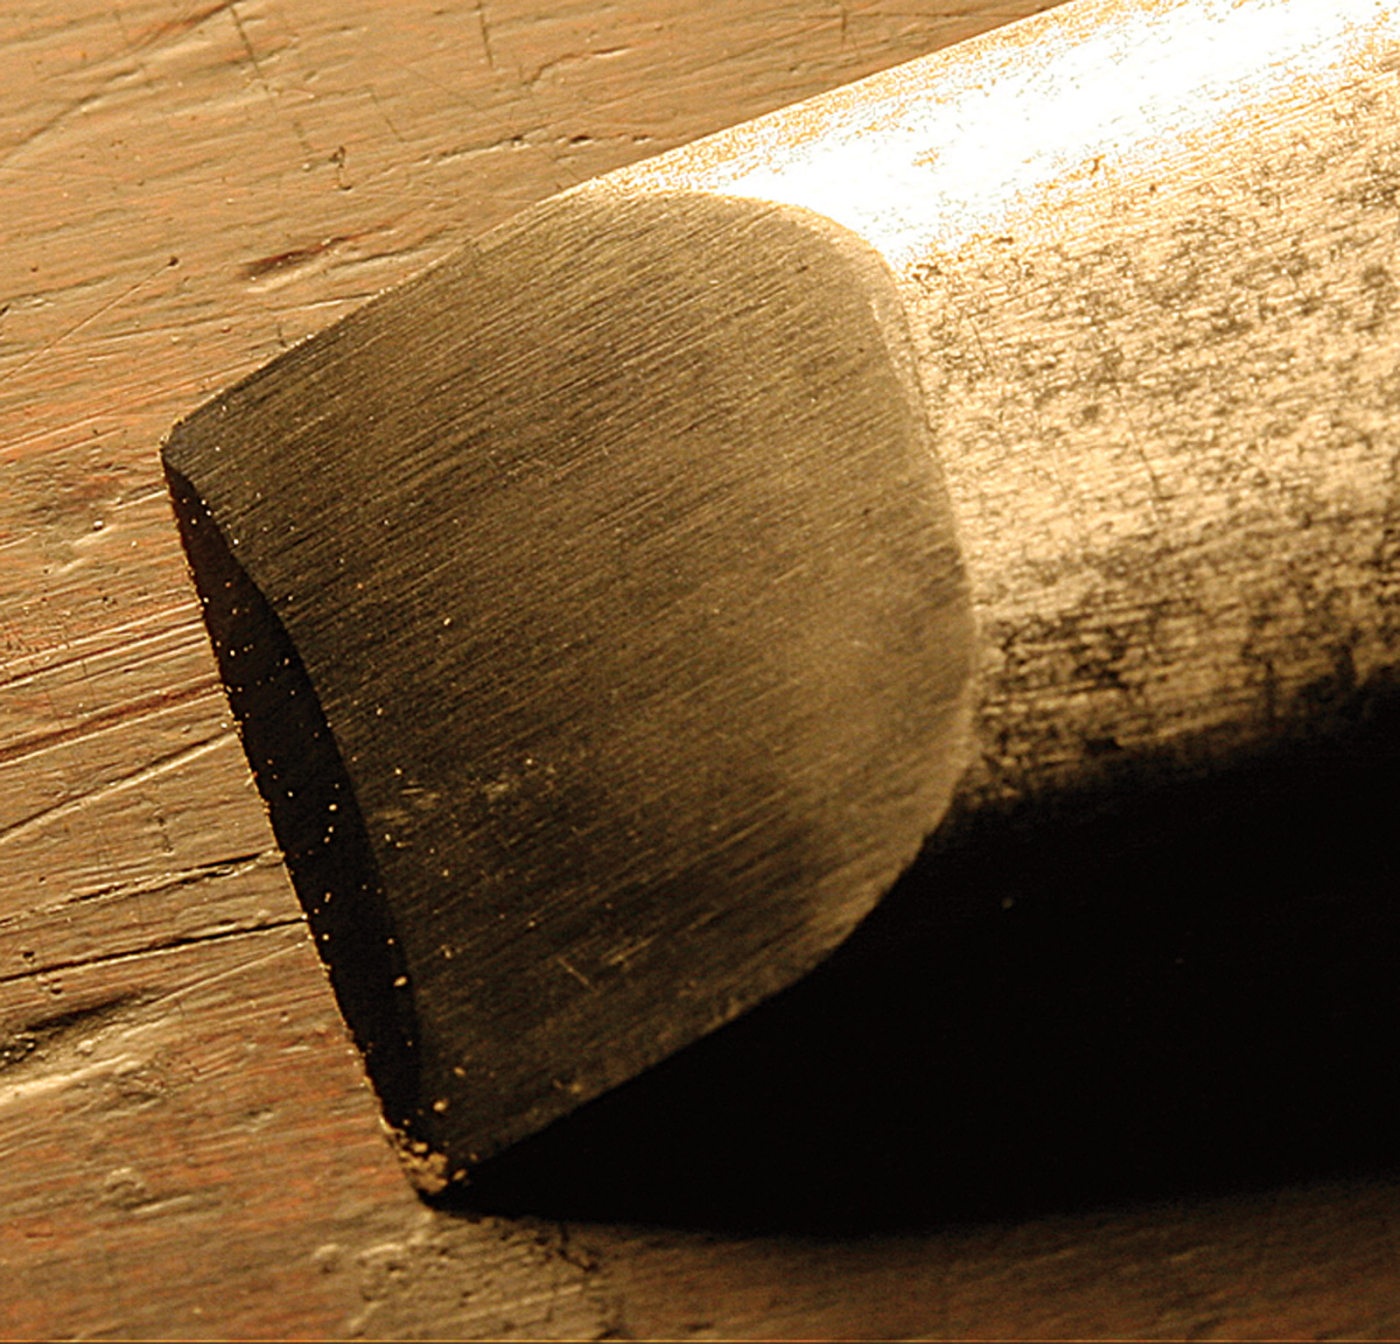
Not a great looking edge, is it? It’s a bit like the opposite of a Japanese chisel. This chisel had a flat back nine months ago. The dished whetstones I’ve been using are slowly wearing away the edges. When that dubbed edge is polished it will cut well, though.
Grinding
Operating my grindstone was surprisingly effortless. But the wheel was out of round, nearly impossible to fix and it wobbled from side to side. No tool rest worked, so all my grinding was freehand. Wet grinding, though messy, was nice because I could grind without risking the temper of my precious steel. The sandstone wheel is a slow-cutting abrasive but seems to cut better when soaking wet. Still, a dull 1⁄2” chisel took at least 20 minutes to grind. Sandstone left a surprisingly smooth edge. Theoretically, my 20″-diameter wheel should produce a little less than .003″ of hollow in a 1⁄4“-thick plane iron ground at 30°. I never saw any hollow on any tool I ground on it. My tools came off the grinder smoother than I thought they’d be, with flat or slightly convex bevels.
Honing
After the grinder, I took my tools to one of the many whetstones I used for this project. None was perfectly flat, but that didn’t seem to matter for the beveled side. All of the plane irons I sharpened were cambered and the chisels were too narrow to care about a little dish in the stone. But I quickly realized that none of these old whetstones was coarse enough, or cut fast enough to refine the ground bevel. I couldn’t practically remove the camber in the bevel.
Without the ability to hollow grind, and without the ability to fix the grind with a whetstone, period craftsmen probably had no choice but to grind low and hone a secondary bevel (as I did). Maybe this explains Moxon’s low angles.
The dished whetstones presented ever-increasing problems with my tools’ backs. I tried to do as little as possible to the backs, but creating some amount of back bevel was inevitable. I have seen many old tools with this sort of sharpening (and have lapped out many such problems). In use, I found no disadvantage in this sort of edge. The big advantage of flat-backed tools seems to have more to do with sharpening them than using them.
Conclusions
Despite a few problems with crumbling edges (possibly caused by insufficient polishing), I had little trouble with the tools I sharpened using the old gear. In general, they felt like tools I had sharpened on modern equipment and used for a few days. Not at their peak, but OK. I think it’s generally true that period craftsmen had tool steels every bit as hard as our own, but lacked the abrasives to hone them as we do today. As a result, I suspect they worked with tools that were not quite as sharp as ours and had edges that resembled a double-beveled knife.
Not all of these experiments have value to modern woodworkers. Perhaps this one fits into that category. But I guess if pushed I could say a few things that may help:
1) Our modern sharpening technique is based on good abrasives. We use essentially 21st-century abrasives on 18th-century metals. When our metals catch up to our abrasives (CPM-3V is one possible example of a very difficult modern metal to sharpen) we may need to revisit this article.
2) The shapes we hone may have more to do with sharpening than using. A flat back and hollow grind (the way I shape my edges) certainly isn’t necessary for use.
3) Based on this experiment, I’m no longer confident that my old tools sharpened with modern equipment are as representative of tools sharpened in the 18th century as I thought. This has caused me to reconsider the ease with which 18th-century craftsmen surfaced stock for example. Smooth surfaces in difficult woods may have required special attention. Either the craftsmen needed to spend extra time on his blades, or scraping or sanding (gulp) may have been required.
Extra: Period steel
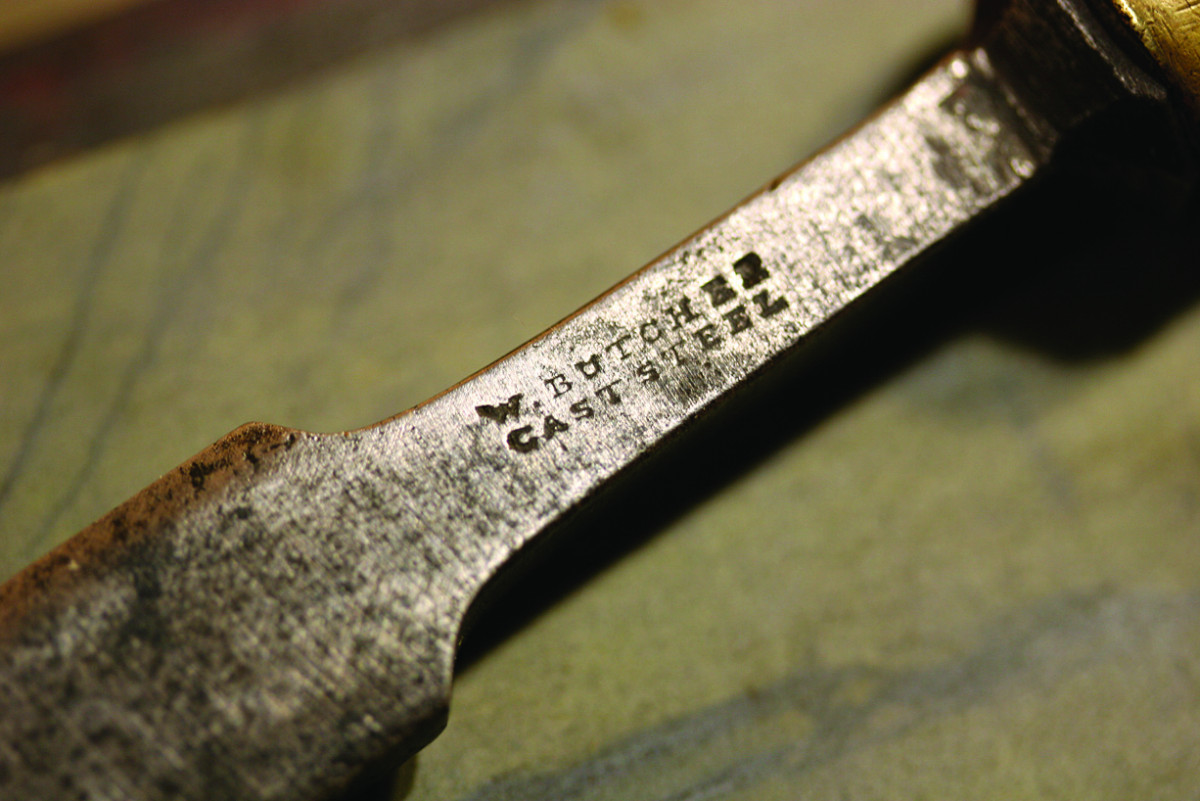 The type of steel used would certainly affect one’s sharpening experience. It is my understanding that 18th-century craftsmen could have worked with a wide variety of metals including relatively soft, case-hardened wrought iron, inconsistent cementation (a.k.a. blister) steel and cast steel. The latter two were often laminated to soft wrought iron (to save the cost of steel). Both were capable of achieving high hardness (Rc 65), though it’s unclear such a hardness was desired or achieved. I found laminated blades much easier to grind. All of the tools I used during this project were “cast” steel. “Cast steel” was not developed until mid-century and its widespread use is questionable after that. But, we know cast steel was commonly available in a wide array of edge tools by the century’s end. Cast steel is not cast iron, nor is the tool cast. Rather, the term refers to the method of manufacture of the steel itself. Iron was melted in clay crucibles, cementation steel was added and the molten metal was cast into ingots. While cast steel was a significant improvement over earlier blister steel in terms of its consistency (specifically carbon content), it’s not at all clear that it presented a significant difference in sharpening. — AC
This article originally appeared in the November 2006 issue of Popular Woodworking Magazine.
Here are some supplies and tools we find essential in our everyday work around the shop. We may receive a commission from sales referred by our links; however, we have carefully selected these products for their usefulness and quality.