We may receive a commission when you use our affiliate links. However, this does not impact our recommendations.

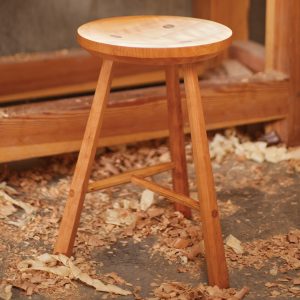
Kitchen display. A “bucket bench” is an historic form meant for holding stoneware and buckets. It’s a simple project to make, and traditionally it is painted.
A simple project from home-center wood is transformed with faux graining.
by Catharine C. Kennedy
Pages 51-54
August 2014
Faux graining is the art of illusion. Use this technique, and your choices aren’t constrained by what woods are available or what’s shown in the veneering catalogs (or your bank account); you are limited only by your imagination. With the use of simple tools and materials you can transform a modest piece of inexpensive furniture, such as this pine bucket bench, into a showpiece. It’s simple and fun – a great combination.
The Build
For this exercise, I built a traditional bucket bench using dimensional lumber purchased from a home center and a basic set of tools. (In fact, this project fits into the “I Can Do That” philosophy and tool set – see online extras for more on ICDT).
I got all the wood needed out of two 12′ 1x12s (which are, of course, 3⁄4” thick and 111⁄4” wide). All but the back piece and the lower rail are used at full width; the back piece and rail are ripped from a 1×12, which I did at the table saw. You could use a jigsaw for the rip, and run the shoe of the tool along a straightedge for a more-perfect cut. But no matter how you cut it, use a block plane to clean up the new-sawn edges.
For this project – with the exception of the sides – you can go ahead and cut all the parts to size per the cutlist.
For the sides, which are each 38″ in length, crosscut a 76″ piece of 1×12 and mark across it at 38″. That’s where you’ll lay out the curve cutouts for the feet, which is easier to do while the two halves are connected.
Set a compass or trammel points for a 33⁄4” radius and, starting from the center of your marked centerline, draw a circle.

Draw. Trammel points make quick work of marking the cutouts for the half-round feet.
Cut the piece in half on the centerline, butt the boards together and clean up the bottom surfaces as needed with a handplane or sandpaper. Then clamp them together and remove the waste.

Cut. I used a frame saw to cut the half-rounds; note the relief cut in the center. You could also use a coping saw or, of course, a band saw to make these cuts.
You may have a little cleanup to do on the cutout surfaces with rasps, files or sandpaper. Once satisfied with the curves, it’s time to move on to the mortises and tenons for the shelves.
Lay out and cut the mortises first (refer to the illustration for the mortise locations). There are only four on each side, so I used a chisel for this operation.

Whack ’em. With just four mortises to cut and in soft pine to boot, I used a chisel.
After the mortises are cut, show the two shelves to the side pieces and mark the tenon locations directly off the mortises. I used my dovetail saw to make the cheek cuts, and a coping saw to remove the bulk of the waste before chiseling to the layout lines.

Cut then cope. A dovetail saw makes quick work of the cheek cuts, and a coping saw removes most of the shoulder waste. The rest is cleaned up with a chisel.
 Before moving on to the paint, do a dry-fit to ensure the pieces go together and the joints are fit well.
Prepare to Paint
Of the various methods available for wood graining – oils, acrylics or vinegar – I far prefer to use the vinegar recipe. It uses materials commonly found in the home: sugar, vinegar and water…as well as powdered pigments (everyone has those at home, right? If not, they’re available at any decent art supply store). The formula is simple to use, very forgiving (it washes right off with a damp cloth) and non-toxic.
Here’s the recipe:
■ 1⁄4 cup of white vinegar
■ 1⁄2 cup of water
■ 1 teaspoon of sugar.

Pigments. I used three colors of pigment for this project: burnt umber, burnt sienna and raw sienna. Dry pigments are available at art-supply stores.
Stir the three ingredients until the sugar is dissolved, then put a small spoonful of pigment (for this project I used burnt umber, burnt sienna and raw sienna) into a separate, clean container. Add enough of the vinegar mixture to make a paste, stirring to remove all lumps, then add enough additional liquid to make the paste into the consistency of syrup. The thinner the mix, the more you can “work” it. Cap the container and put it aside for the moment.
Before you start grain-painting your bench, it’s good practice to make a sample board to try different techniques and brush patterns. This paint dries very fast, so it’s best to get familiar with it, and to work very quickly in small sections.

Tools. Feathers, sponges, brushes and even paper and plastic bags can be used for faux graining.
There are a variety of options for applying the graining. They can be as simple as wadded up paper toweling or plastic bags, progressing through brushes and tools specifically for graining. You know those old brushes you didn’t get quite clean enough and they hardened up? As long as the very tips aren’t caked with gunk, these crusties are really good for striations, as we will see.
Now Paint
The raw wood needs to be painted with an undercoat of acrylic paint on all surfaces and allowed to dry. (It doesn’t matter what color you choose – use your imagination while keeping in mind that it might show through in places.) Sand as necessary, and be sure to wipe off any dust. The standard painting practices of dropcloths or newspaper to protect your floor or bench apply here, as well as supporting the workpieces on sticks, blocks or cans.
If you’re going to add edge-banding and a center diamond as shown here, mask off those areas with blue tape before picking up your brush.

Grain. The bulk of the graining is applied with a very stiff, old brush to achieve a lined finish. Don’t aim for straight strokes; variation adds a lifelike look.
I think this simple project calls for somewhat plain grain – and that’s where I start. Using a very stiff brush to apply the stirred vinegar and burnt sienna pigment solution, I go the length of the board, in strokes about 6″ wide. Vinegar graining is a removal process – we are leaving what we want to resemble grain, so by gently stroking the brush down, the pigmented area “grain” is formed.
Absolutely straight brushing is not an asset here – you want to mimic the grain variation found in nature.
Next, coat over the adjoining section and repeat the graining until the board is complete. If you like the look of it, move on to the next piece; if you don’t like it, simply remove the paint with a damp paper towel and reapply it.

Stipple. Move a flat brush up and down to the surface to mimic veneered edge-banding.
When you are ready to move on to the edge-banded areas, reposition the tape so there is a scant bit of the grained board showing (rather than any undercoating.) It helps to use a flat brush the same width as the tape. On this piece, I stippled – that is, I moved a flat brush up and down – perpendicular to the edge, just as you would find on a veneered edge. For this, I used the vinegar paint with burnt umber pigment.
For the center of the inside back, I decided on an inlaid look. Here, blue tape is definitely your friend.

Sponge. A natural sponge, lightly dampened, deposits just enough color to mimic a bird’s-eye pattern if you touch it to the surface in a random pattern.
Use a pencil to lightly mark vertical and horizontal lines, and a diamond shape of a pleasant size. Run tape along the sides of the diamond and make sure the edges are down firmly. Once the tape is in place, use an eraser to remove your pencil lines, so they don’t show through.
I mixed more of the vinegar paint with raw sienna pigment for the light area, and used just a touch of the burnt sienna there as well for contrast. Start with the medium to light shade for the center section in a more random all over pattern, using a dampened natural sea sponge in random motion.

Stipple again. Use the same brush, color and technique as for the edge-banding to define the edges of the “inlay.”
For the grain on this back piece, I wanted a quarter-matched look, so I had to keep in mind which way the graining should run to mimic that. Here, I used the same color and brush as I did for the bulk of the project.
After these sections are dry, remove the tape and apply new tape to the outsides of these lines, to isolate the now-unpainted line. I used the darkest color as an edge banding, and used a small flat brush to remove pigment perpendicularly from the line. Wipe your brush on a paper towel frequently for best results.
Once you’ve finished the faux painting, you might notice that all your hard work looks flat and dull – but once the project is assembled, apply a coat of polyurethane or varnish, and the colors and graining will pop. PWM
Download the PDF below for the cutlist and illustrations.
Painted Bucket Bench PDF
Catharine graduated from the Carpenters’ Union Apprenticeship program, built wooden boats, worked in cabinet shops and was the lead carpenter at Hancock Shaker Village in Pittsfield, Mass., for 12 years. See her engraving work at catharinekennedy.com.


