


We may receive a commission when you use our affiliate links. However, this does not impact our recommendations.
 Significant changes in furniture came about as we moved from William & Mary (W&M) designs to those of the Queen Anne period. Generally we talk about cabriole legs and dovetail joinery being the big changes. Dovetails moved from clunky, chunky and evenly sized tails and pins to a more refined design as we clawed our way into the Queen Anne period – pins became thinner while tails grew wide.
It turns out that legs and joinery are not the only furniture-related items to make huge changes. Period hardware also fits into that category. The lowboy I’m building for the February 2014 issue of Popular Woodworking Magazine has early Queen Anne attributes, but it sports W&M hardware. The pulls have cotter pins to grip the bails instead of posts and nuts to capture the bail ends (the design we are more accustomed to using). Cotter pins are fine on some hardware such as tear-drop pulls, but it’s not something you would expect when plates and bails are part of the installation.
 In the photo at right you can see the parts that make up the hardware found on some of the pieces of W&M furniture, cotter pins and all. The thin, wire-like cotter pins seem fragile. How many bends can they sustain before succumbing to the stress and breaking? As I installed the pulls on the lowboy, there were a couple of times when the pins bent so easily that I thought I may have found the breaking point far too early.
Installation of the cotter-pin-held plate and bail is more involved. You begin by drilling your holes, then slip in the pins with the bail inserted into their heads. The pins are adjusted for length, then the ends are bent at a 90° angle before being driven into holes drilled into the back face of the drawer front.
 In the photo at left are the parts that make up a Queen Anne plate-and-bail design. This design is what I’m used to using as a period furniture maker working in the Queen Anne and Chippendale periods. This design stayed part of everyday use throughout the nearly 60 years that encompass the two periods in American history (approximately 1730-1790). The posts are robust.
Installation of the Queen Anne hardware also begins with holes drilled through the drawer front. But from there, the posts are slid in and a nut is thumbed on – a better installation is to countersink an appropriate hole in the back face of the drawer, then cut the post so it does not extend beyond the inside edge of the drawer front when assembled. This keeps the post and nut from catching any contents stored in the drawer.
 One of the designs appears much stronger than the other, but is it? There are pieces from both periods that have stood the test of time. Will we see a difference during our lifetimes? Who’s to say.
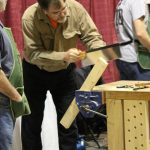
To the right is a photo of a cotter pin from the back side of a drawer front. I think I left the wires a bit long in this installation, but you get the idea as to how these pins are installed. If you would like to see a short video on this process, click here. Chris Schwarz installs ring pulls in a chest. His pin legs are wider than those found on period reproduction hardware, the installation is nearly identical.
For a detailed look at hardware found on Arts & Crafts furniture, pick up a copy of “Shop Drawings for Craftsman Inlay & Hardware, Original Designs by Gustav Stickley and Harvey Ellis,” by Robert W. Lang.
Here are some supplies and tools we find essential in our everyday work around the shop. We may receive a commission from sales referred by our links; however, we have carefully selected these products for their usefulness and quality.


“The pins are adjusted for length, then the ends are bent at a 90° angle before being driven into holes drilled into the back face of the drawer front.”
Is there a photo available showing the above treatment of the cotter pins on the interior of the drawer?
Thanks