


We may receive a commission when you use our affiliate links. However, this does not impact our recommendations.
 I really like Japanese style saws and I especially appreciate their contribution in the classroom. First, thanks to their ingenious tooth geometry, and the fact that they are so thin compared to their Western counterparts, they are easy to use and require little effort when pulling through a cut. Secondly, their teeth are hardened to a higher degree than their Western brethren’s which makes them usable for an exceptionally longer period of time before a need for blade replacement arises. And thirdly, because they are so thin they can be led into a very narrow “v” trench to guide my students when sawing across the grain (implementing the Paul Sellers technique) – Western style saws will require a wider trench which will demand more time to create. More info on the Paul Sellers’ cross-cutting technique you can find here.
But as we all know, no meal comes free and Japanese saws are no exception to the rule. Because of their remarkable thinness and teeth hardness they can bend easily when careless users hit a knot, try to saw too fast, or abruptly jam the saw in the kerf. In addition, because the teeth are hardened and their geometry is so complex the saws are not sharpening-friendly – which means that when the saw eventually dulls out, or if too many teeth break, the saw blade will have to be replaced.


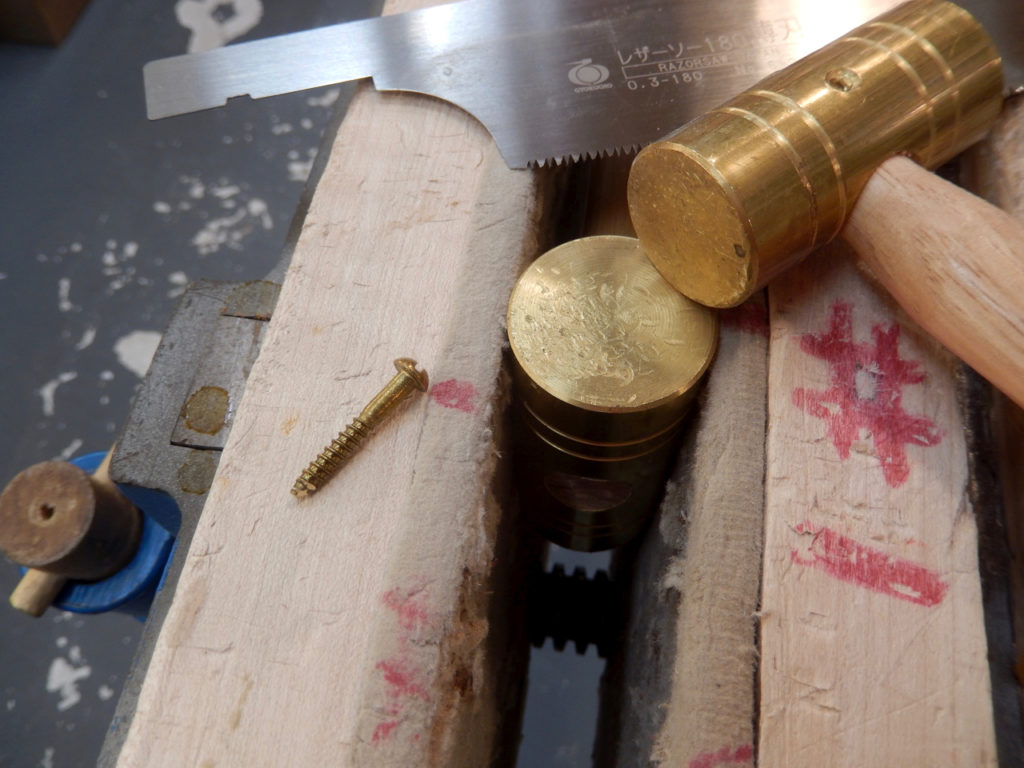
When one of our low ranking TPI (Teeth Per Inch) Japanese saws suffers a teeth trauma or a bend, I place it over a brass hammer’s face, and with a second brass hammer coerce the deviant tooth to fall back in line. This BTW reminds me of a story from my childhood…


Growing up in Israel in the 70’s, my public elementary school had an on-board nurse and also a basic dentist’s office that operated two days a week. I remember the giant dentist who administered extractions and filled our cavities (in the eyes of a seven-year-old child every above average tall man looks like a Gulliver.) This guy was especially known for his direct and unorthodox approach for the extraction of loose baby teeth. At the end of a routine check-up, and if a “ripe” baby tooth revealed itself he would tuck one of his gigantic thumbs into the “victim’s” mouth and with one decisive swing, pop the tooth loose. Though his approach never failed, us kids always trembled before entering his office.
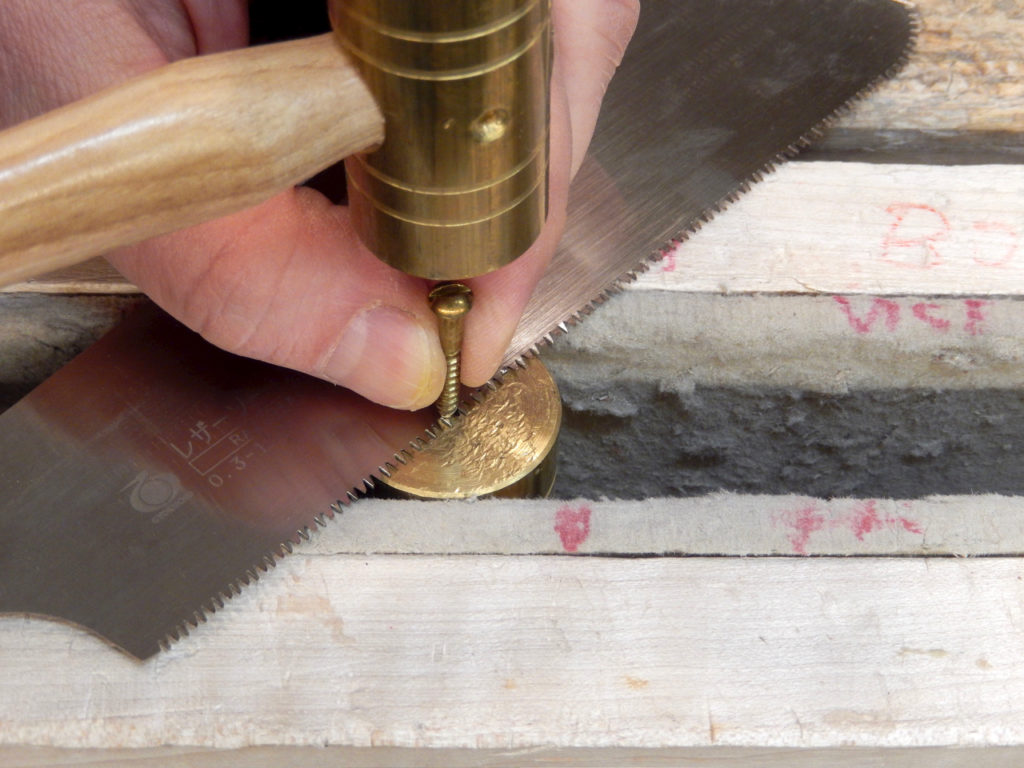
Getting back to saw teeth…what if we have just a few small teeth out of line on a saw? Here a more surgical approach is in needed. To bend or reset the “cowlick” tooth, I file flat the tip of a brass screw, set it over the tooth and hit it back home. You can of course re-shape a brass bolt or an old brass key. And if you want to be fancy, or in cases where you find yourself in need of setting saw teeth more frequently, buy a brass pin punch, then if needed you can file its tip into a narrow triangle and send it to work.


Notice the off-set teeth in need of correction.
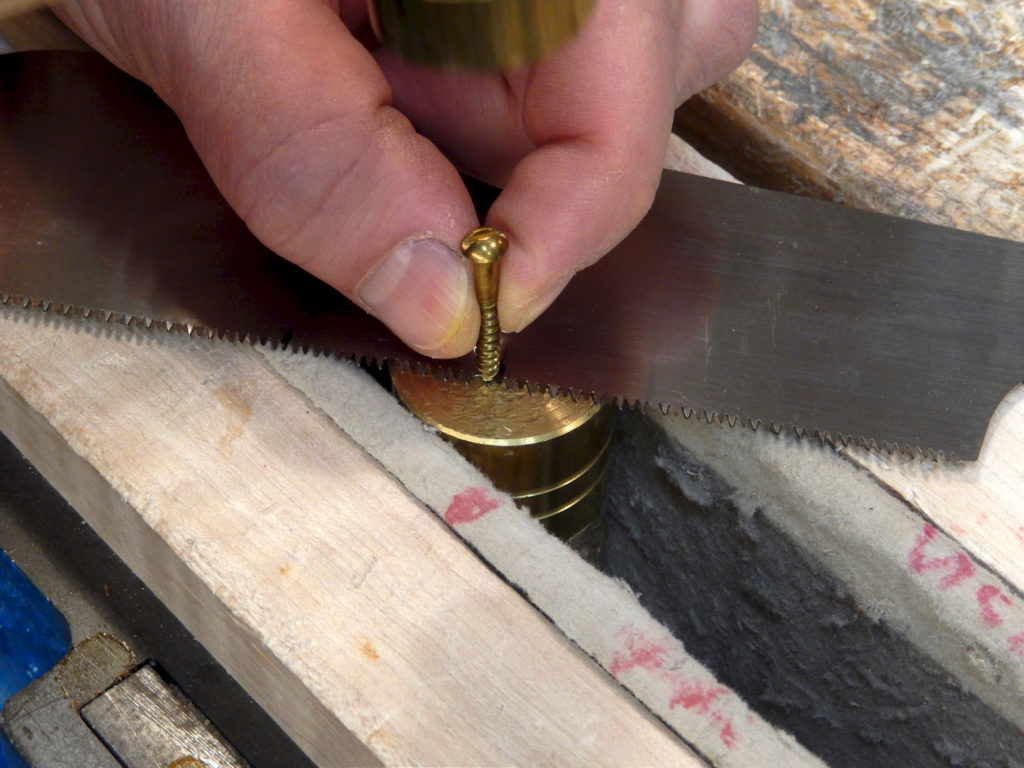
To bend or reset the “cowlick” tooth, I file flat the tip of a brass screw, then I set it over the tooth and hit it back home.
![]()

Our brass hammers are made by Grace, USA. A nice and inexpensive alternative is made for Harbor Freight. A makeshift anvil made of plastic or hardwood end-grain will work too.
– Yoav Liberman
Here are some supplies and tools we find essential in our everyday work around the shop. We may receive a commission from sales referred by our links; however, we have carefully selected these products for their usefulness and quality.


