


We may receive a commission when you use our affiliate links. However, this does not impact our recommendations.
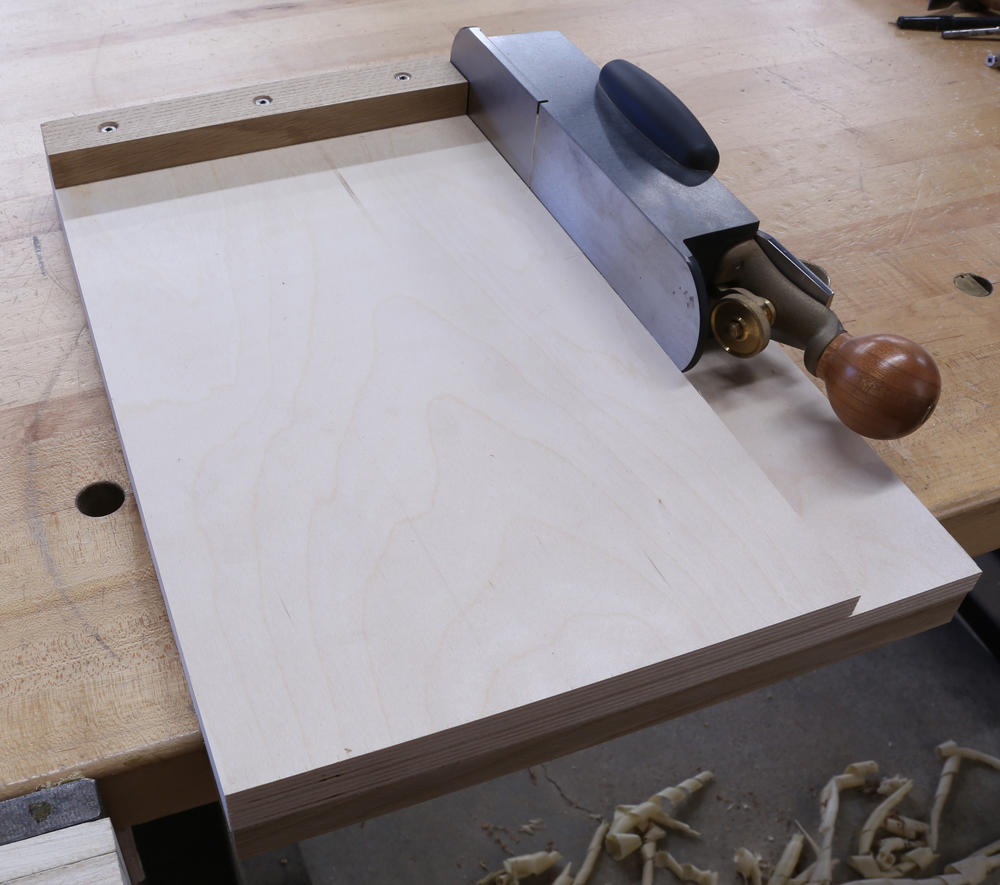 Some time ago I posted about the Lee Valley Shooting Plane. In that post I used a shop-made shooting board. That will be the subject of today’s lesson…err, blog post.
When I made the quick video about the Lee Valley plane, I had no shooting board in the shop. I was still in the midst of moving from Pennsylvania and mine were either packed away somewhere or still to be packed. This meant, in order for me to show the plane in use, I had to make one.
The process for making a shooting board is fairly easy and doesn’t take long. You just need to make sure you work accurately or the thing will be useless when you’re done. I’m very much a blended, or hybrid, woodworker so this means I won’t be making my shooting board entirely by one method or the other. Because my shooting board is made out of Baltic birch plywood, the preponderance of tools used in its creation will be electrified.
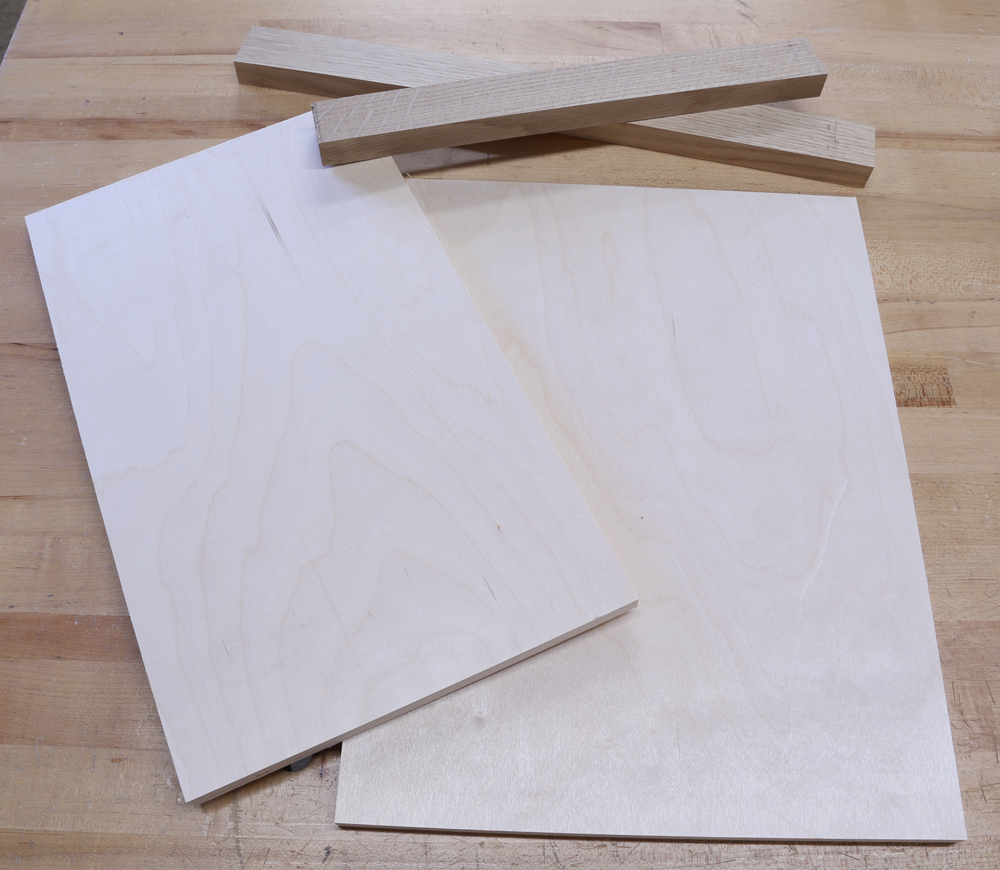 I started by looking around the Popular Woodworking Magazine shop for a scrap of 1/2″-thick Baltic birch plywood. Why Baltic birch? The answer is simple: It’s stable. The more plies you have in plywood, the more stable (wood theory 101). The 1/2″ material I’m using has nine plies making it relatively stable. This means, once I’ve finished my shooting board, I won’t spend massive amounts of time adjusting it every time I need to use it. When you pick the material to build your shooting board, just keep in mind the more stable the material the less fussing and adjusting in the future. This doesn’t mean you will never have to make adjustments – they’ll just be smaller and less frequent. Hopefully.
You can make a shooting board any size you want, but it doesn’t have to be monstrous unless you have a specific need. I’m just building a generic shooting board for everyday use in the shop. (I’ll put together a specialty shooting board or two in a future post.) This means the basic size of board will be approximately 12″ X 16″. If you want to make yours a couple of inches larger or smaller (and Bill, this one’s for you), knock yourself out.
I start by cutting the plywood to 16″ long. Off that piece I rip a piece 12″ wide and another 9 1/2″ wide. These will form the base of my shooting board. Make sure the sides of each board are parallel and the ends are square. If they’re not, I use my edge trimming router jig from the November 2013 issue (#207) to make them perfectly square. The only reason to make them square is that it makes easier to set the fence later in the construction process.
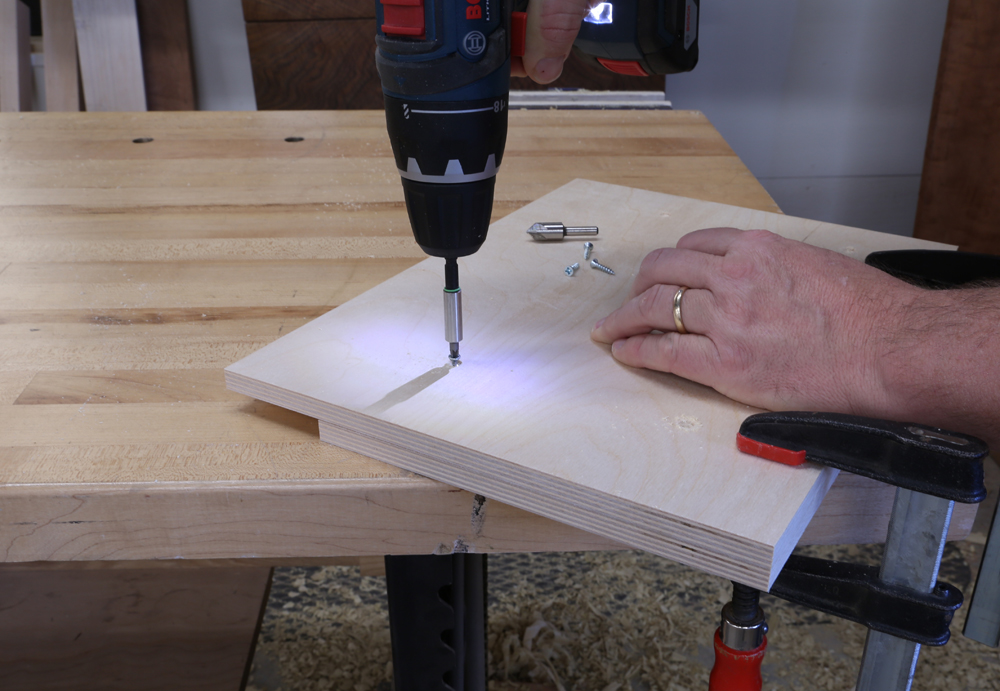 The two pieces of plywood need to be sandwiched together to create a fence and chute for the plane to ride along. I use 3/4″ flat-head screws to attach one piece of ply to another. Drill some pilot holes through the wider piece and countersink them on the side slated to be the bottom of the shooting board. I like to clamp the two pieces together to get the alignment perfect before I drive the screws.
The only things left are the fence and the hook (which holds the shooting board to the edge of your bench). I’m using 3/4″ quartersawn white oak (thankfully I’ve got Bob Lang in the shop so there’s always QS white oak floating around the scrap bin) but you can use a different hardwood or even 3/4″ Baltic birch. The reason I’m using real wood is that it’s easier to adjust (just a stroke or two with a tuned shoulder plane and you’re back in business) with seasonal changes than the ply – but is subject to greater change. So the trade-off might not be worth it. You’ll have to decide for yourself.
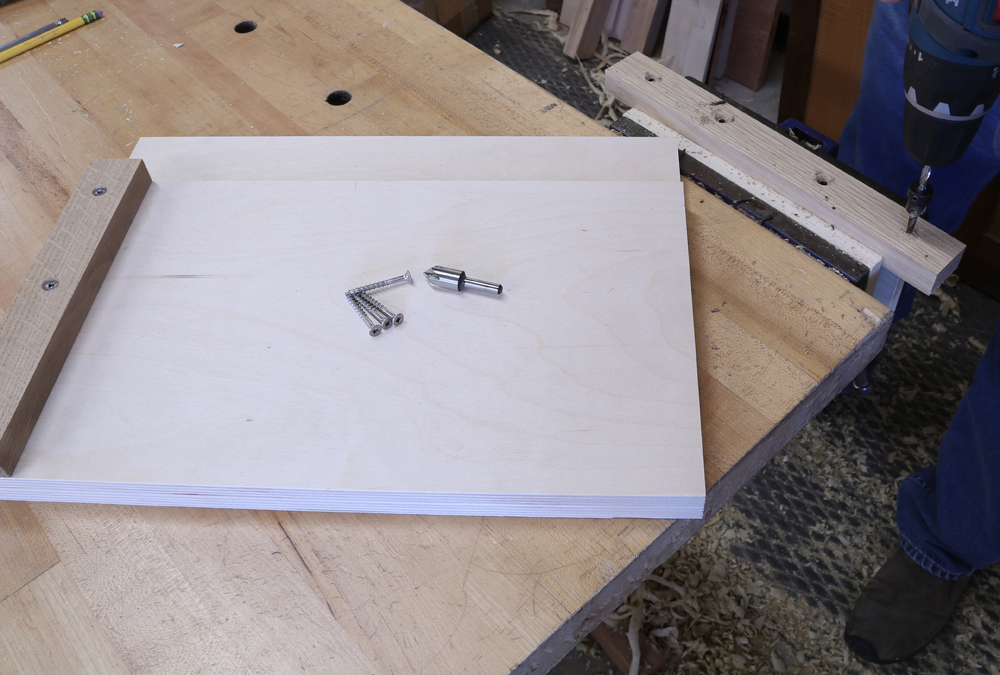 With the fence and hook pilot holes drilled, it’s time to attach them to the plywood sandwich. Because you’ve taken the time to ensure the edges of the plywood are straight and the ends are exactly square, all you need to do is clamp your straight fence material flush (provided your fence material is parallel…you did make it parallel didn’t you?) with the ends of the plywood sandwich (one on top and the other on the bottom at opposite ends). For a bit of additional hold, you can use some double-sided tape between the fence and the plywood. It adds grip and is reversible in case you need to replace the fence or make a major adjustment. Drill and countersink the pilot holes and attach the fences with some screws, double-check the fence for square and you’ve got a simple, accurate, inexpensive shooting board.
Here are some supplies and tools we find essential in our everyday work around the shop. We may receive a commission from sales referred by our links; however, we have carefully selected these products for their usefulness and quality.


Just wanted to say that I was on the woodnet site one day and offered a completely benign response to someone in a conversation and Chuck Bender interrupted to roll his eyes at me in some childish attempt to make himself seem like a woodworking god or something. I dont like the guy. Wont read his articles, but I wanted people to know his character for what it is.
Chuck, I just wanted you to know that I read all of your blogs , so keep knocking me out!
We need you and Glen to set up some classes at your Popular woodworking shop.
Hope your enjoying your new home and job.
Bill