


We may receive a commission when you use our affiliate links. However, this does not impact our recommendations.
 Toddlers can be risky creatures, endangering themselves as well as your property. They are notorious for putting themselves in the most precarious situations such as rolling down the stairs, knocking their heads into furniture corners and trying to bite and swallow EVERYTHING – our baby boy Asher is no different.
While I constantly find myself preempting his risky experimentation, I am, or so I believe, able to protect him from the heavy hand of gravity (i.e, falling down our stairs). My solution to this was to build a gate using reconfigured parts from an old crib. This is the story of Asher’s very spacial Checkpoint Charlie.
My decision to use reclaimed materials should not surprise anyone who is privy to my work, as I am a notorious re-user of abandoned objects and furniture. I discovered the old crib on the streets of Manhattan a few years ago. It was tossed away, left on the curb awaiting its last voyage in the belly of the New York City Sanitation truck when I spotted it and decided to save it, believing it could be used by our future baby. Well, my thoughts and hopes did not turn out exactly as I anticipated.
Our baby arrived two years later and when it was time to assemble his crib, I noticed that some of the hardware was broken or missing. My mother-in-law did not wait long and bought us a brand new crib the next day. Nevertheless, I decided to save the old crib in hopes that I could make some use of it in the future.
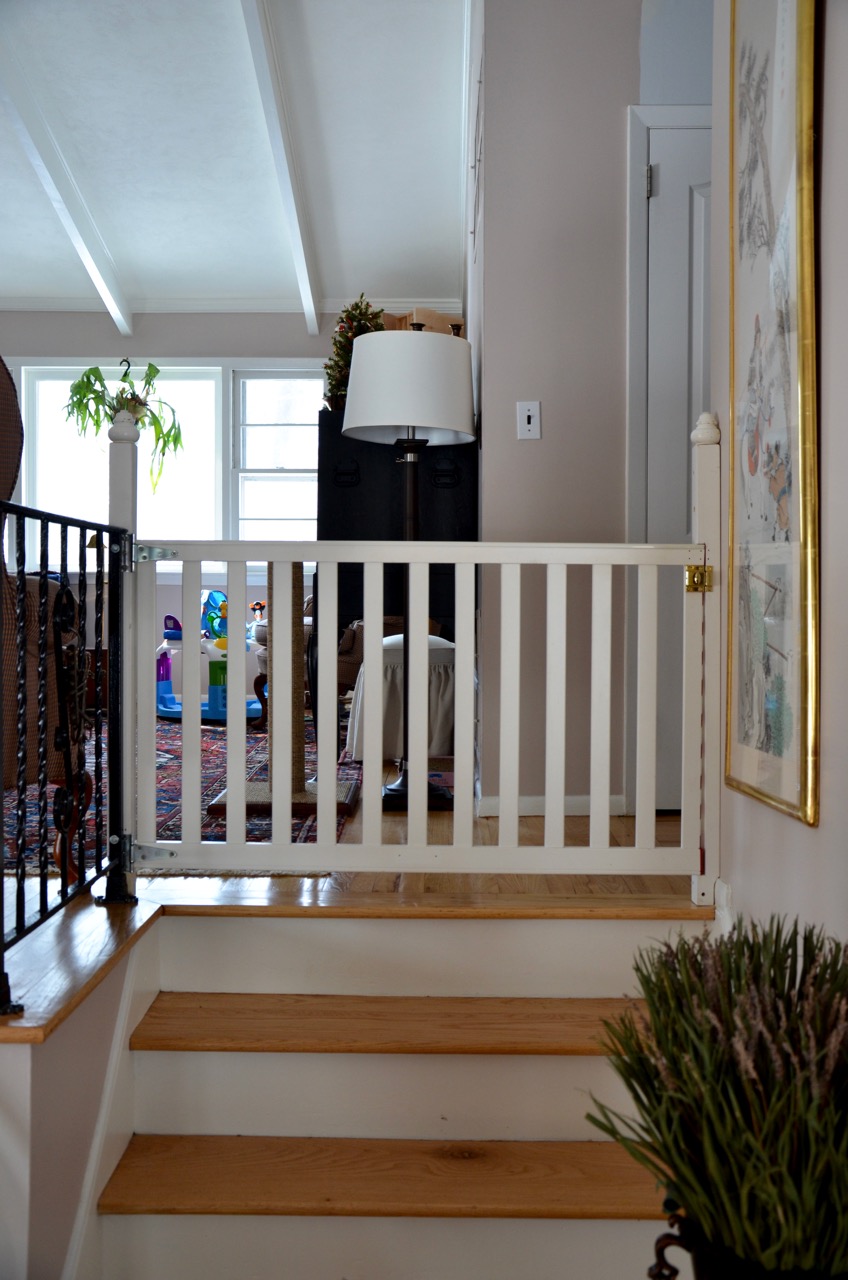
Indeed an opportunity arrived when 10-month-old Asher began crawling and we needed to install a gate to prevent him from tripping down the stairs. After searching the online world for a toddlers/pet gates it was clear to me that all the products I saw, although well-built, would not address our particular needs. All the gates that I looked at were narrow and their total width, including one or two flanking extensions were too short for our wide staircase. My solution was to build the gate myself using reconfigured parts from the old crib.
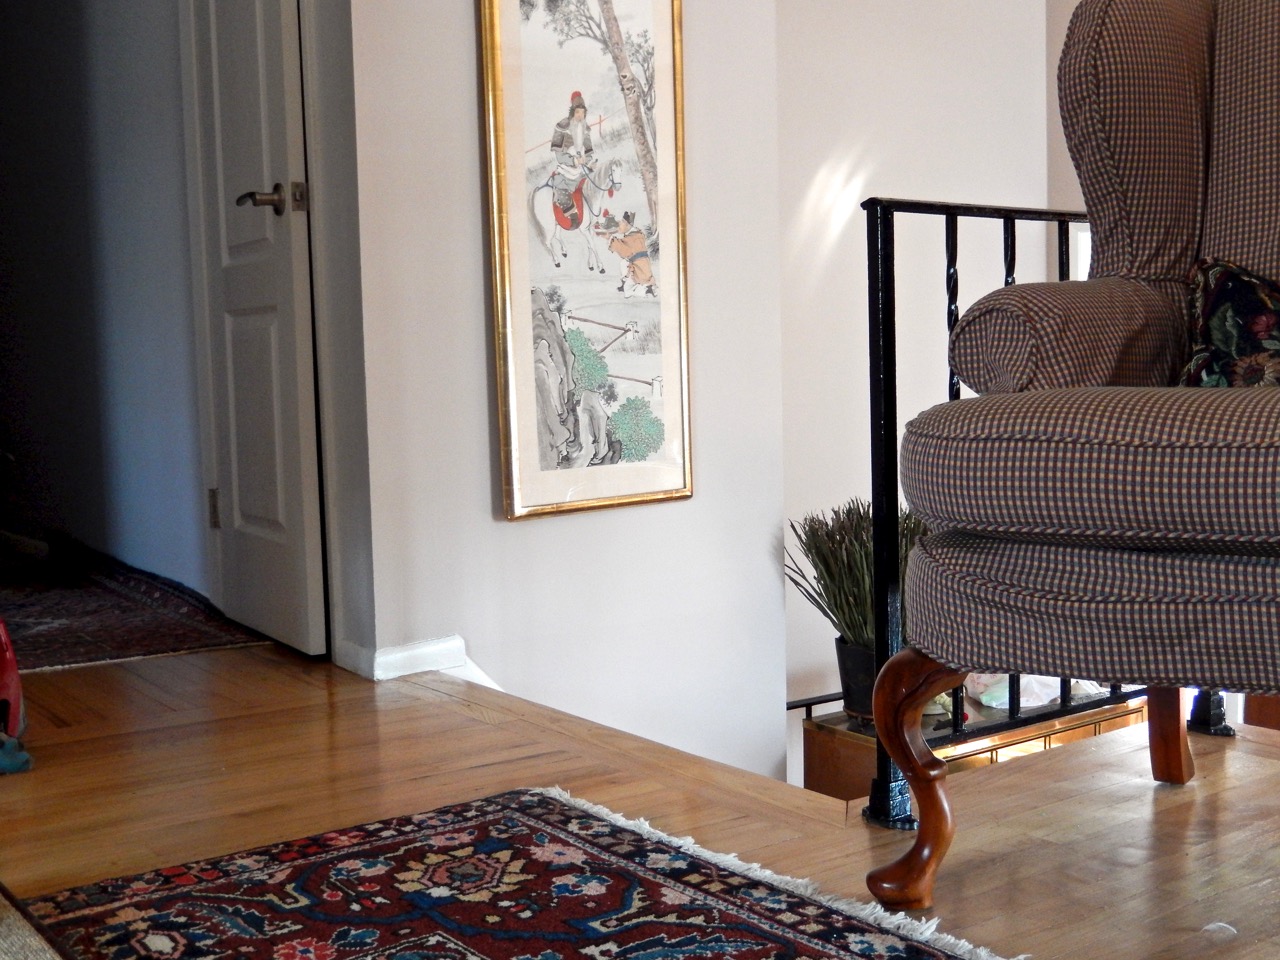
Our staircase before I installed Asher’s gate
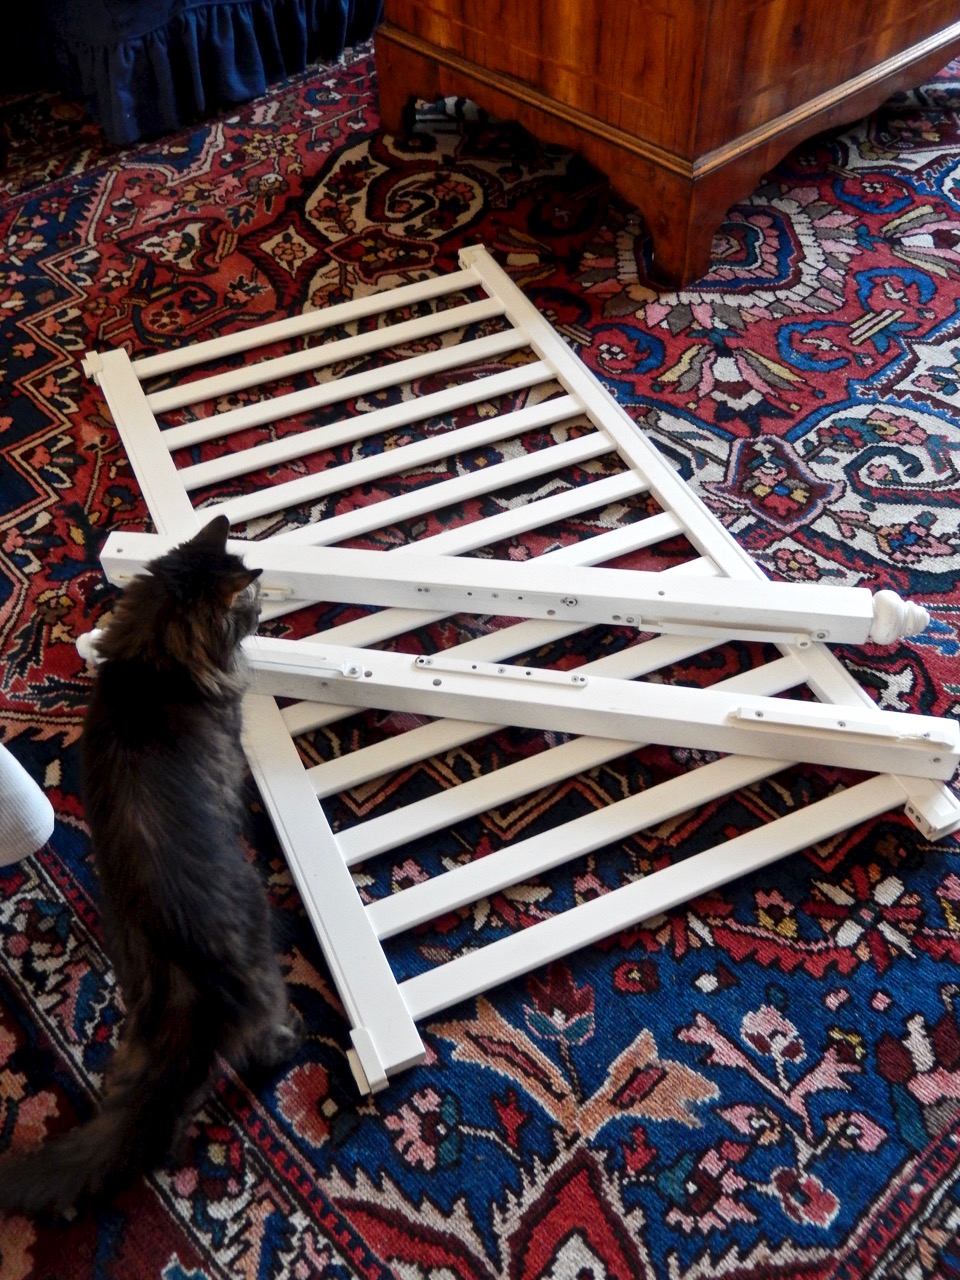
Parts from the old crib that I incorporated in the gate project.

Two of my sketches depicting early details.
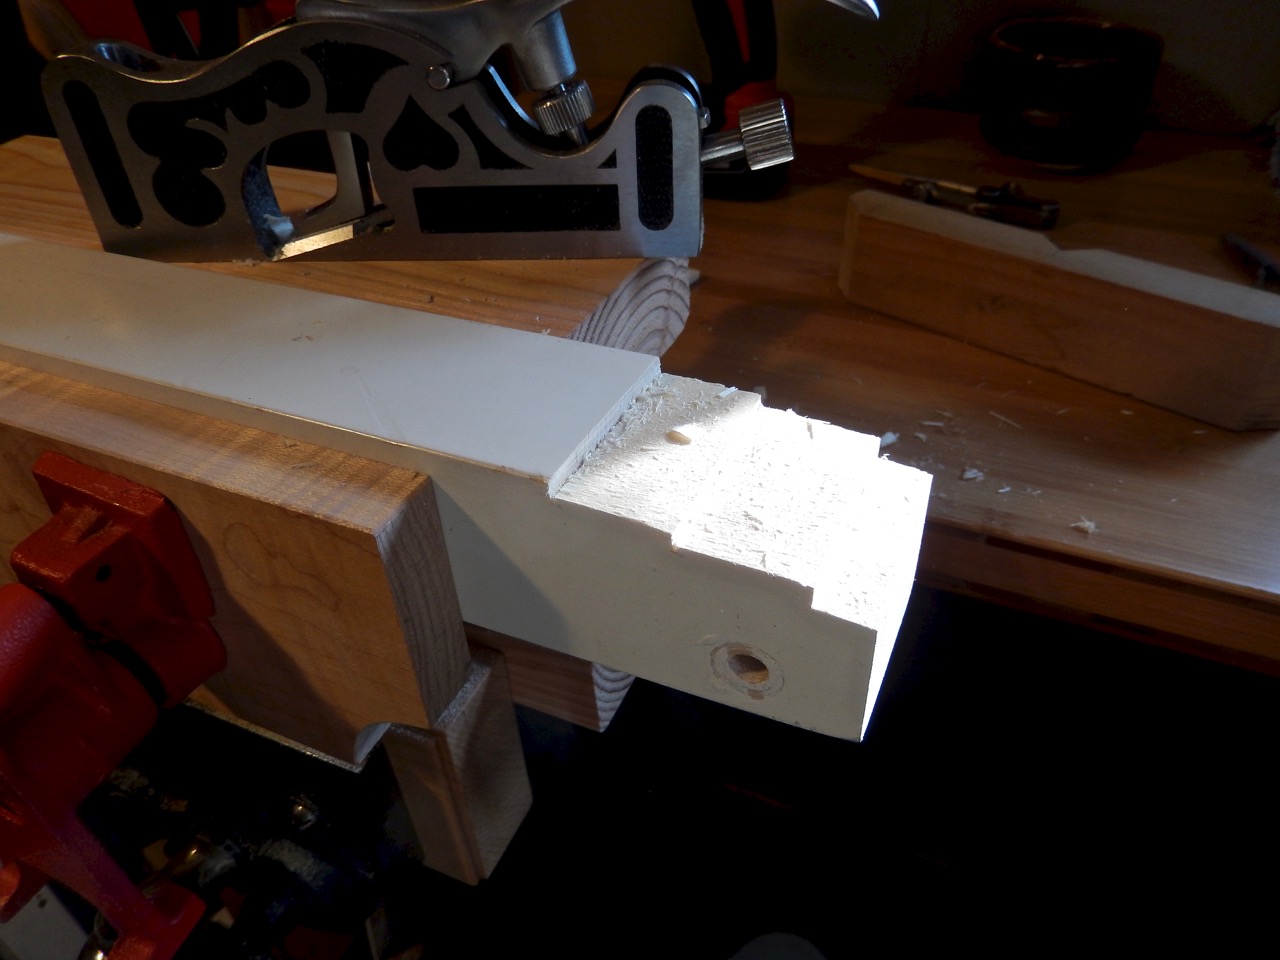
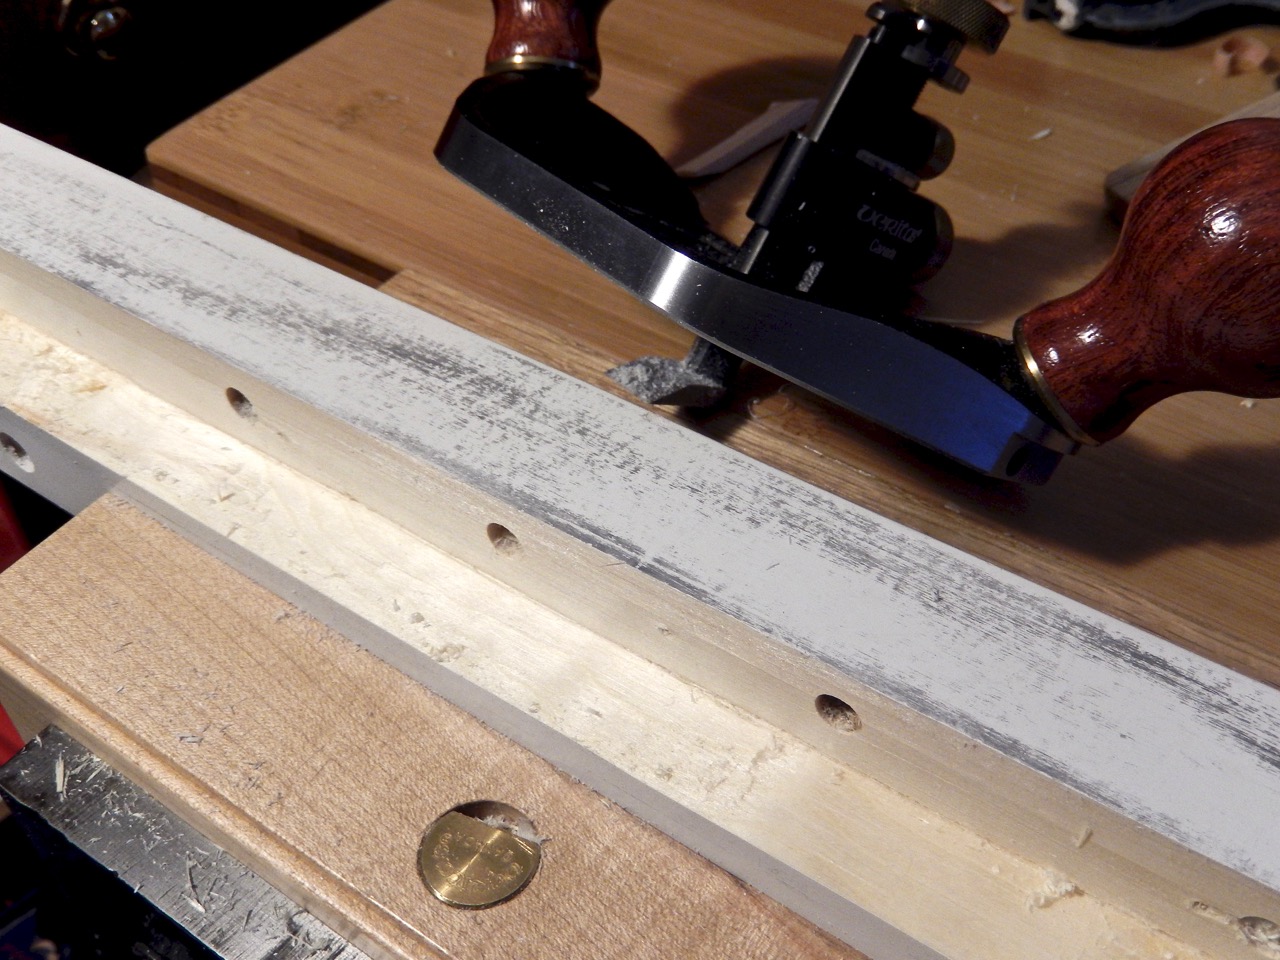
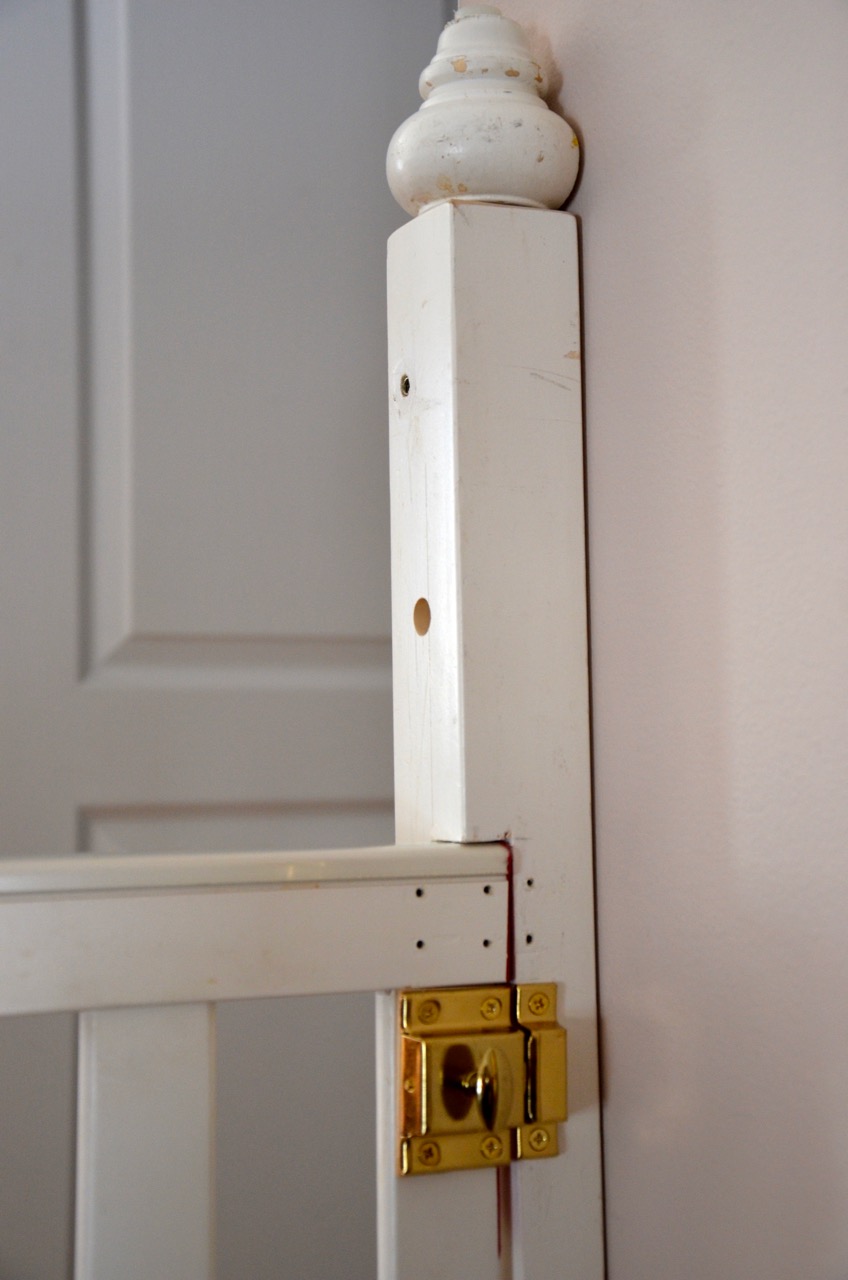
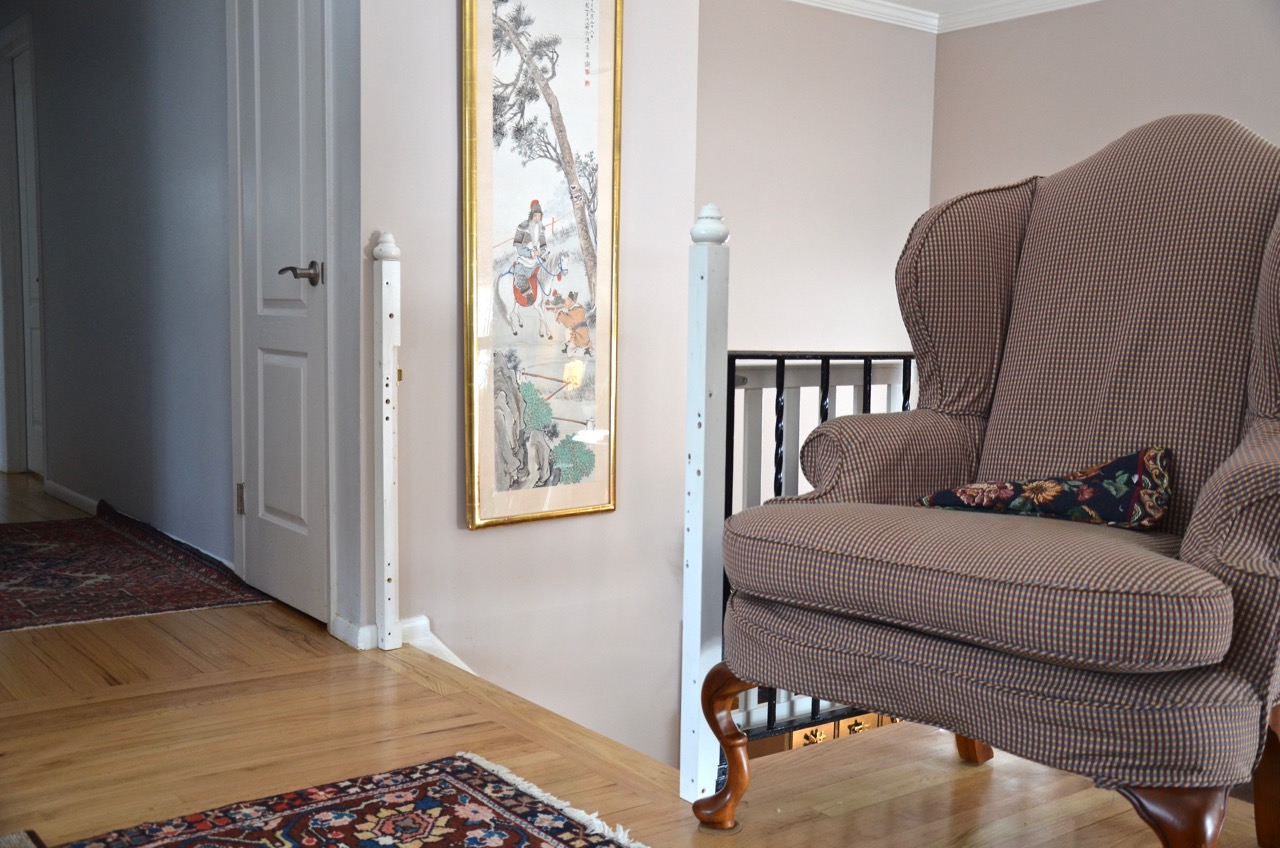
I measured the staircase width, examined the crib’s parts including the long white “ladder” rail and realized that I wouldn’t have to do many adjustments to turn it into the perfect gate. I also decided to incorporate two of the crib’s legs as the new gate stiles. Instead of keeping their bun feet in the down position I inverted them to have the feet become makeshift finials. I did have to tweak the legs a bit. I cut their bottoms to fit snugly against the baseboards, and sawed off a slice from one bun foot to ensure that the stile was flush with the wall.
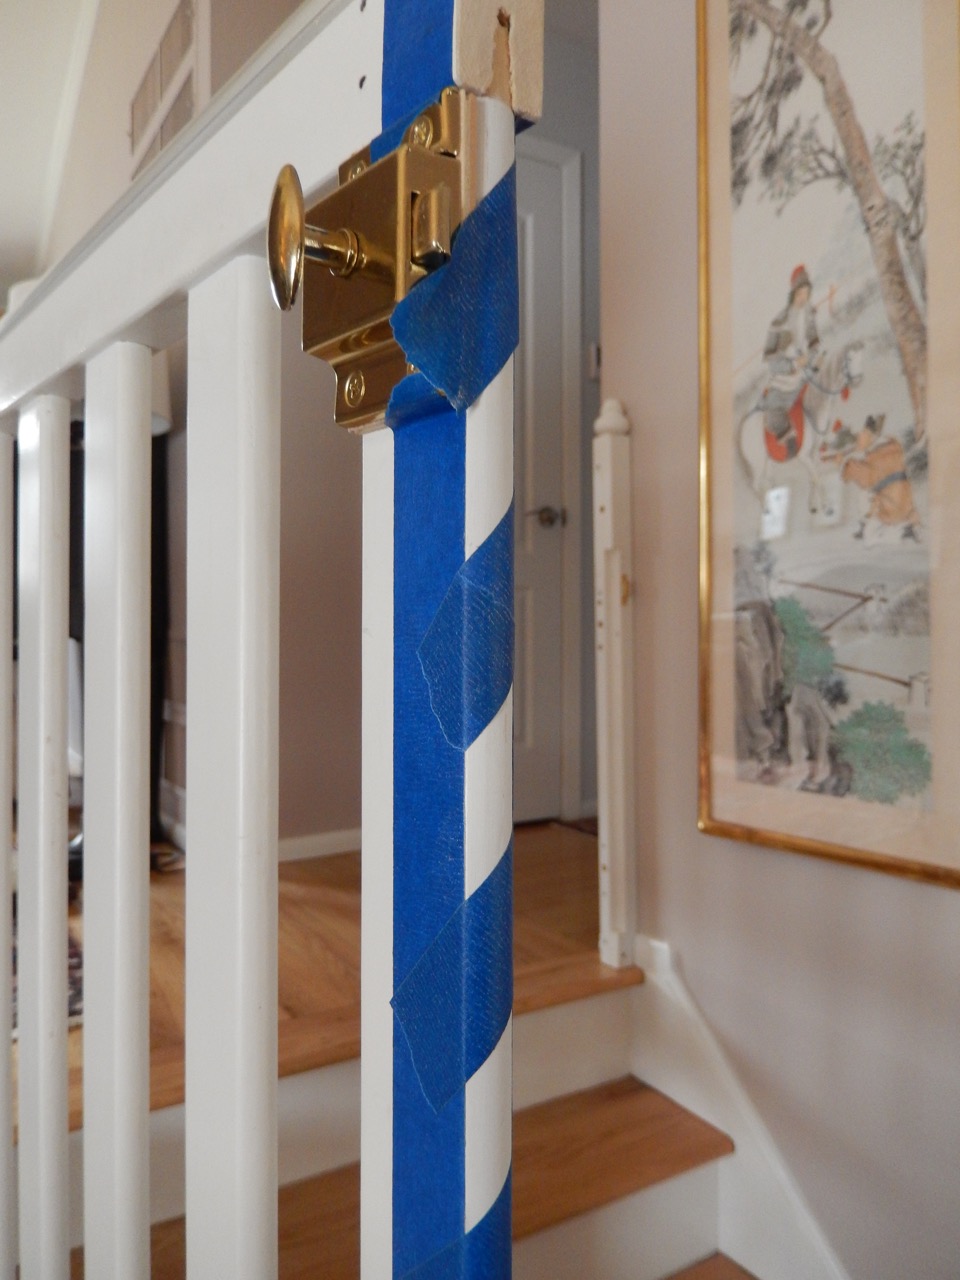
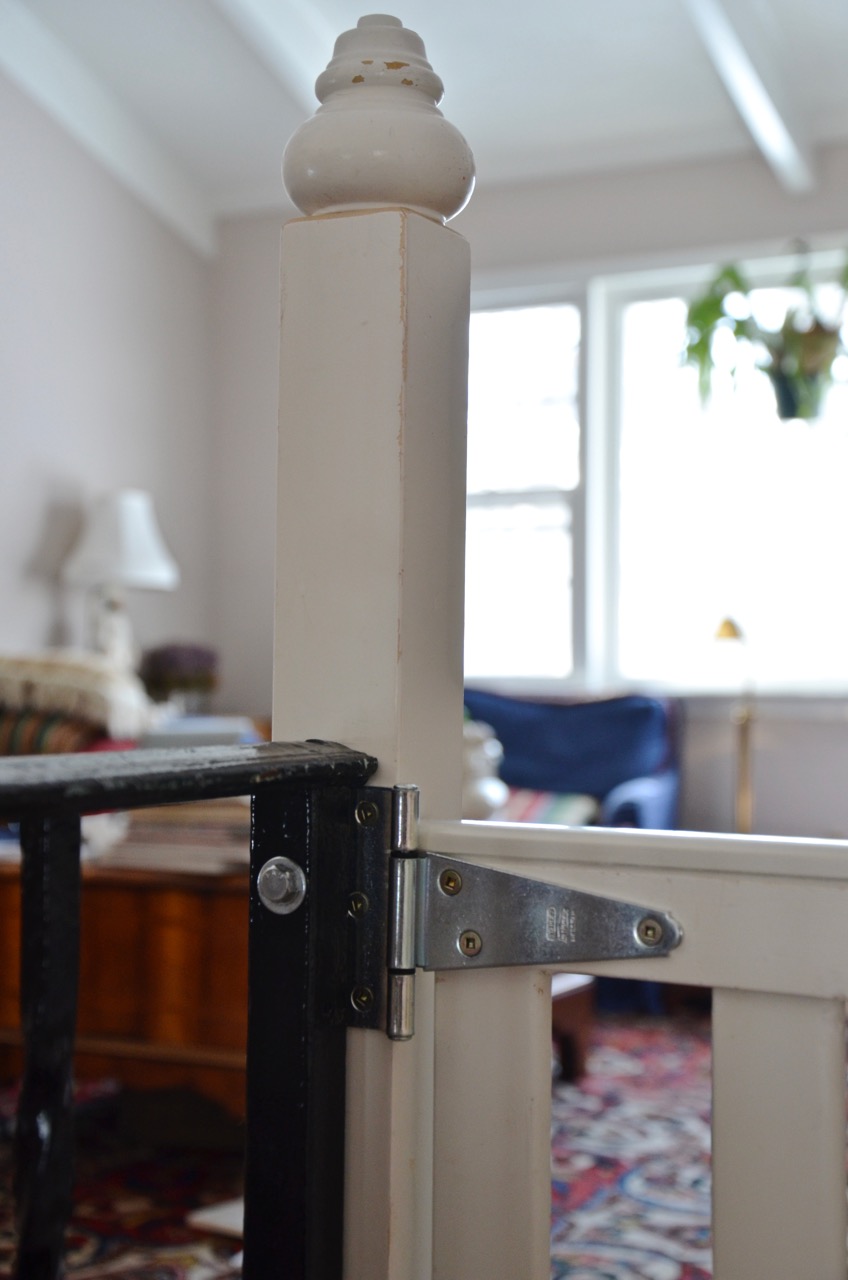
 Then I made a plan for anchoring the legs/stiles to the wall and to the steel rail that fences our living room landing. I used regular wood screws on the stile that faced the wall (the screws went straight into the studs), and leg bolts to tie the opposite stile to the steel tubing of the rail.
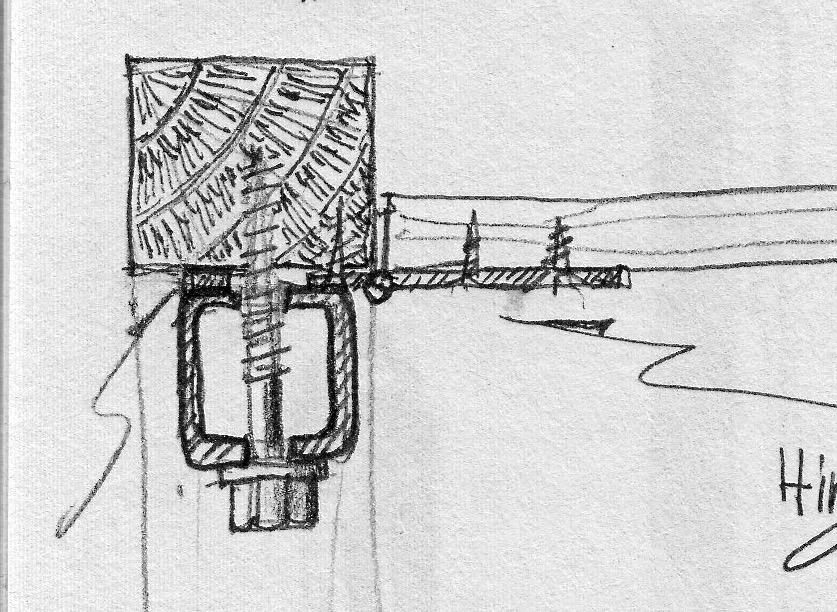
Detail of the connection between the stile, the gate’s hinges and the steel rail that fences our living room.
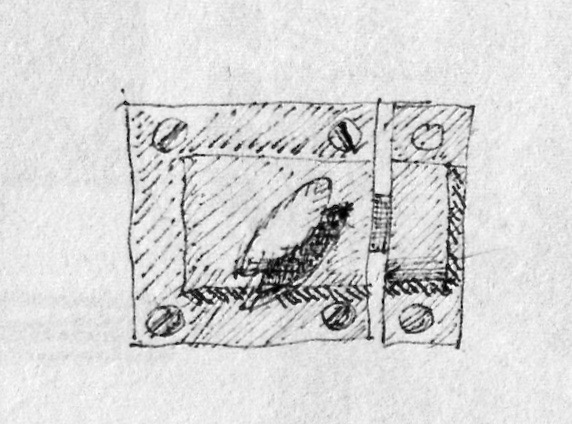
The next thing to do was to decide how to support the gate on the stile that was anchored to the wall, opposite the hinge side. I knew that our boy would at some point try to tuck his feet in between the wooden uprights of the gate and stand on it, which will put a lot of leverage on the gate’s catch and consequently force the gate to open. Therefore I have to make some sort of a ledge or recess to support it when it is shut. I contemplated three alternatives, (see my drawings below), and chose the one that looked the most elegant. The one I chose also protected the gate from being puled backward into the landing.
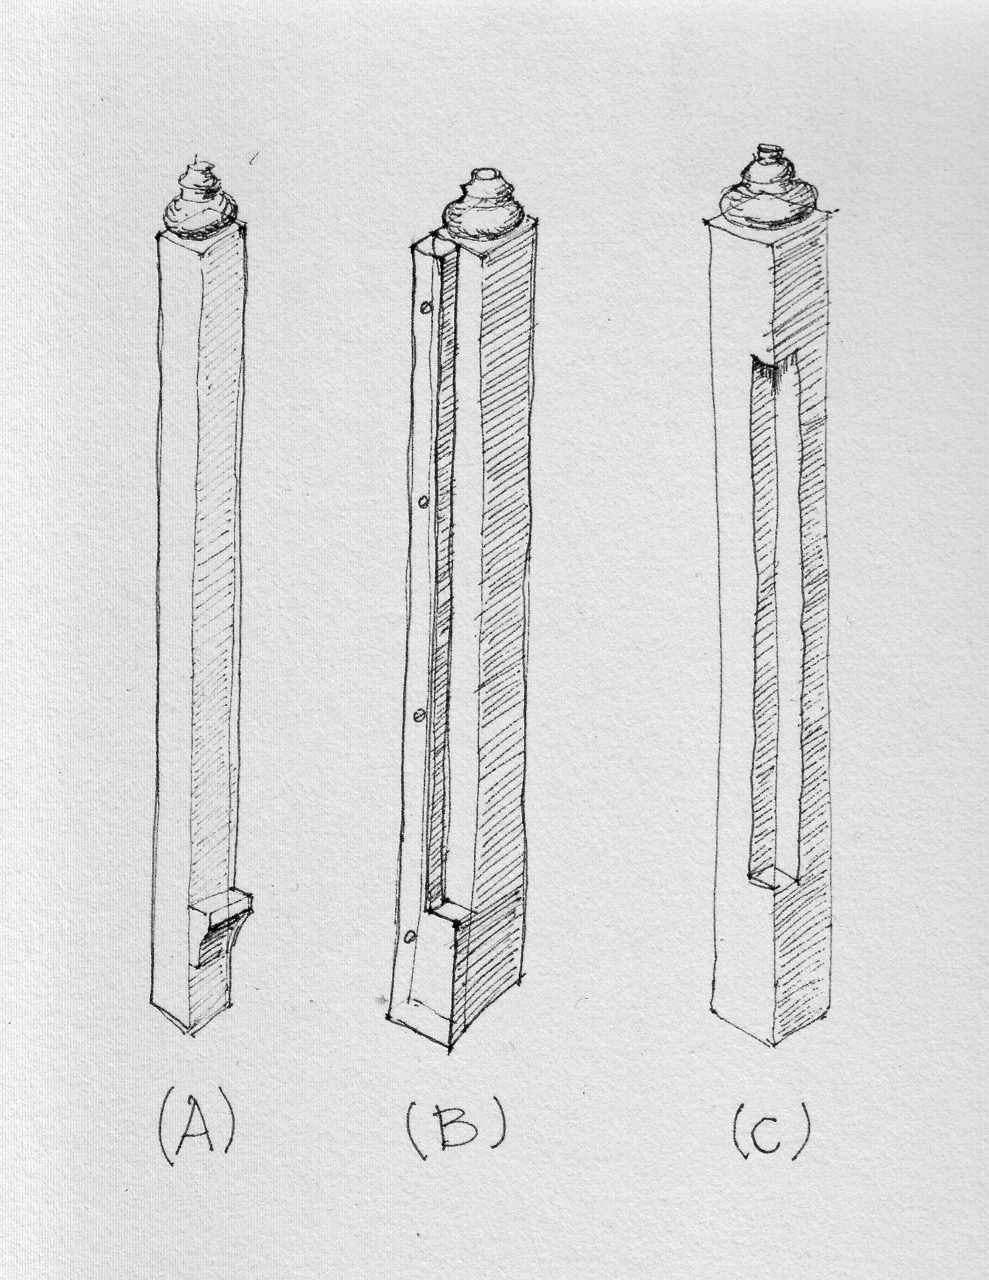
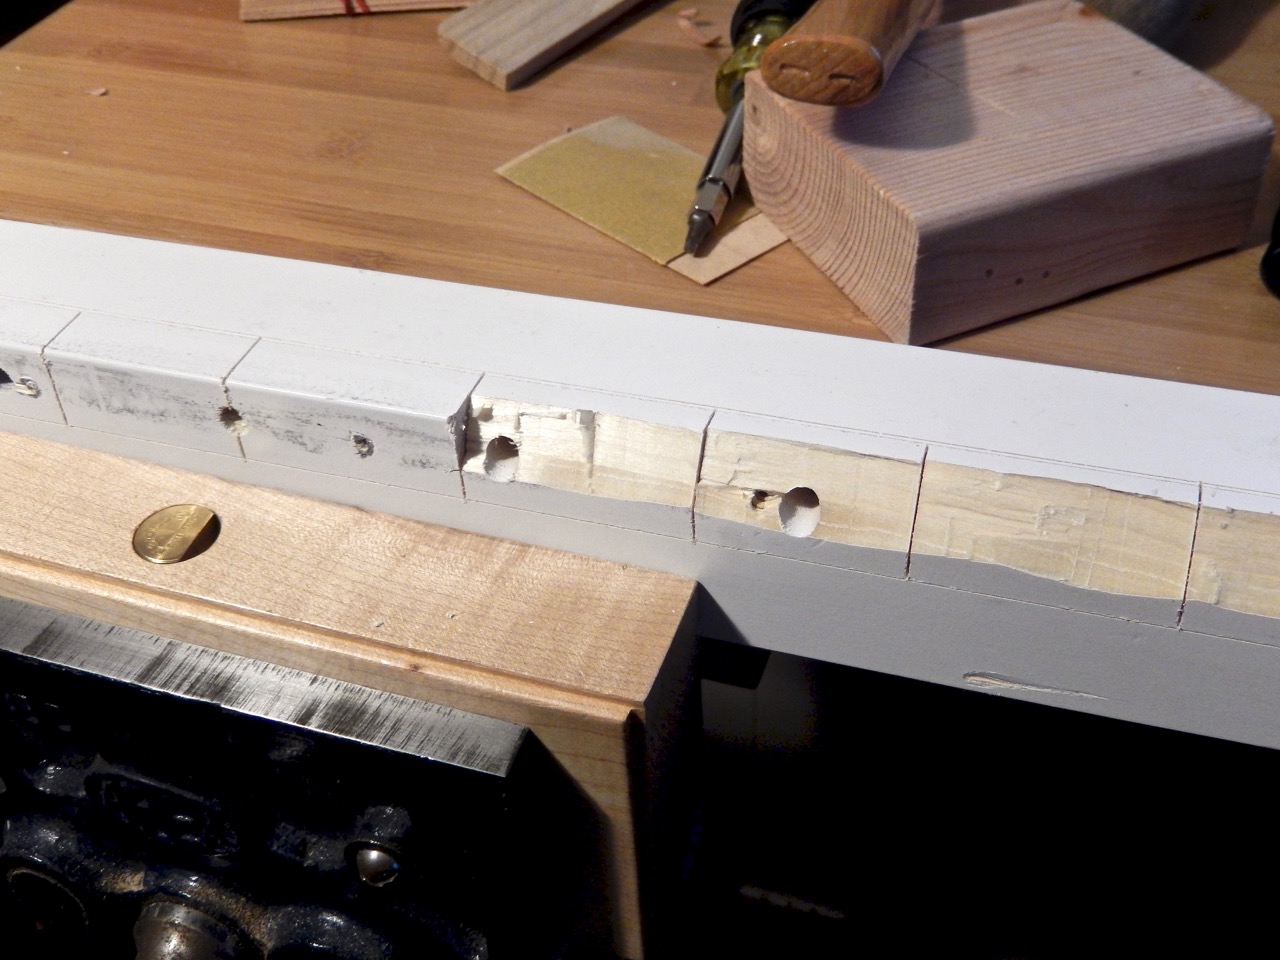
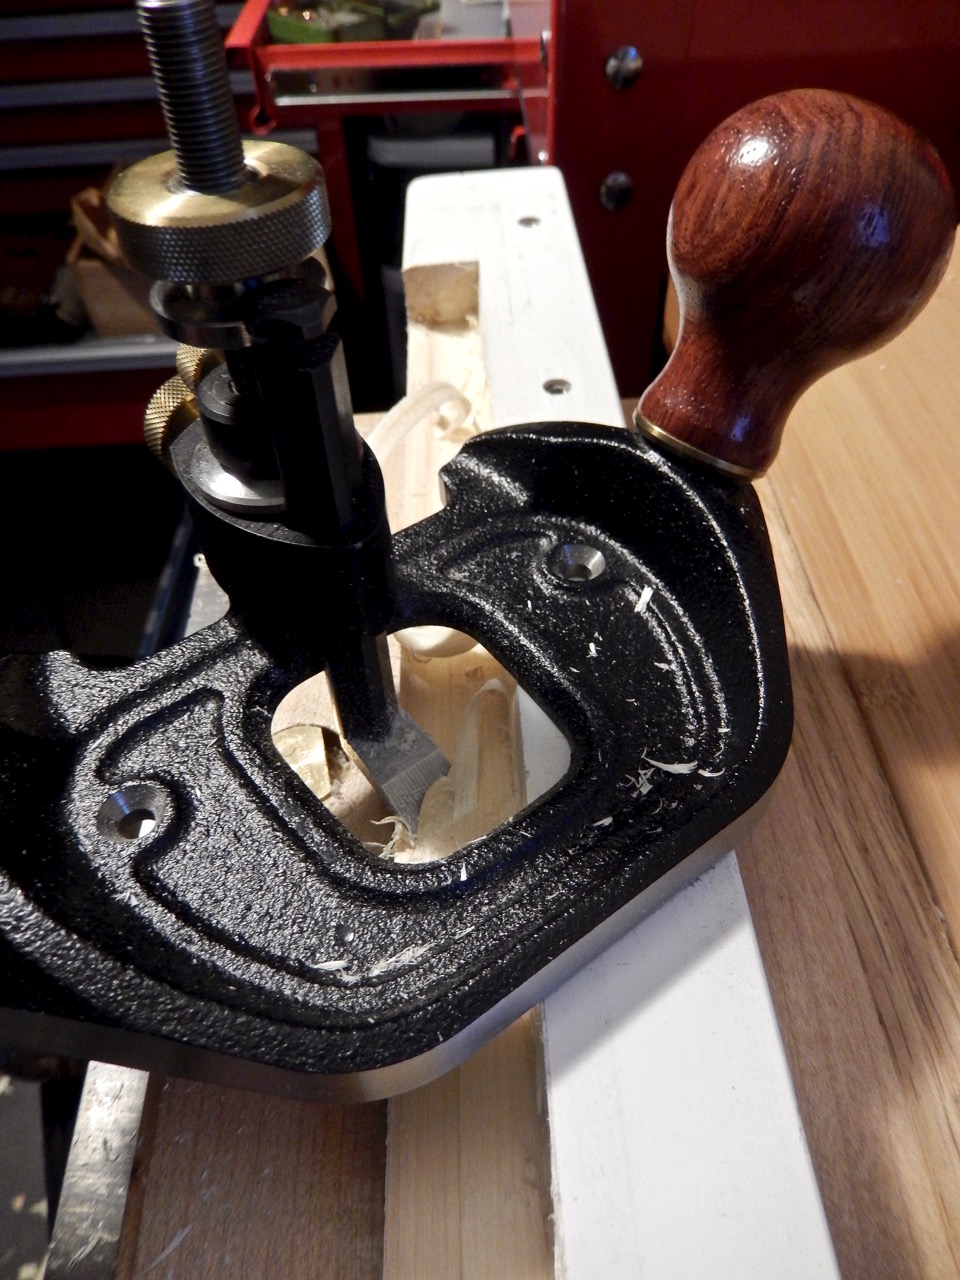
To cut away the stopped recess (C) I used a saw, chisel and a router plane. Then I cut the gate to length, affixed the hinges and installed the stiles. Last came the steel utility catch which I bought at Lee Valley.


Asher’s gate catch
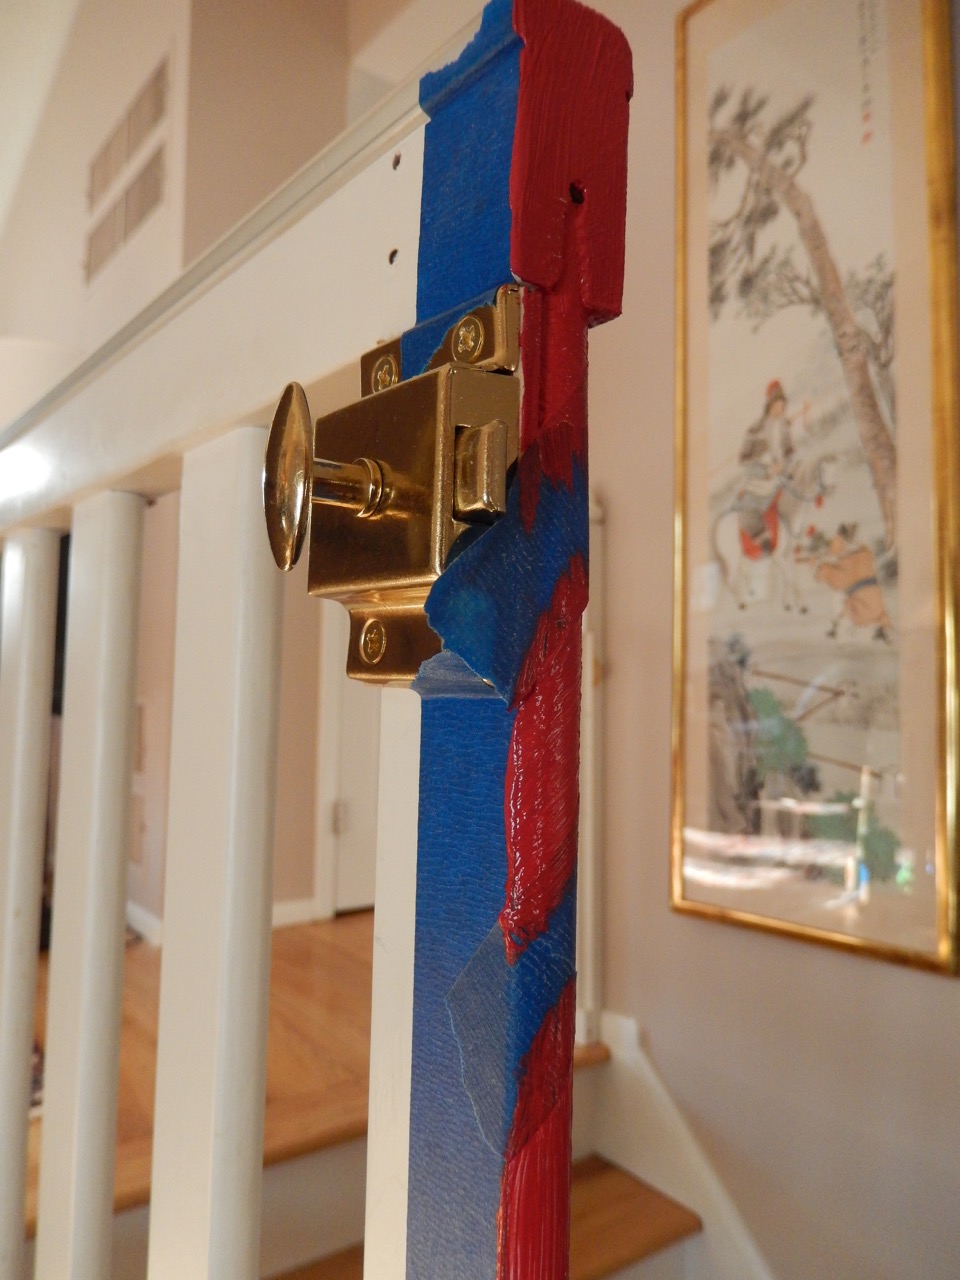
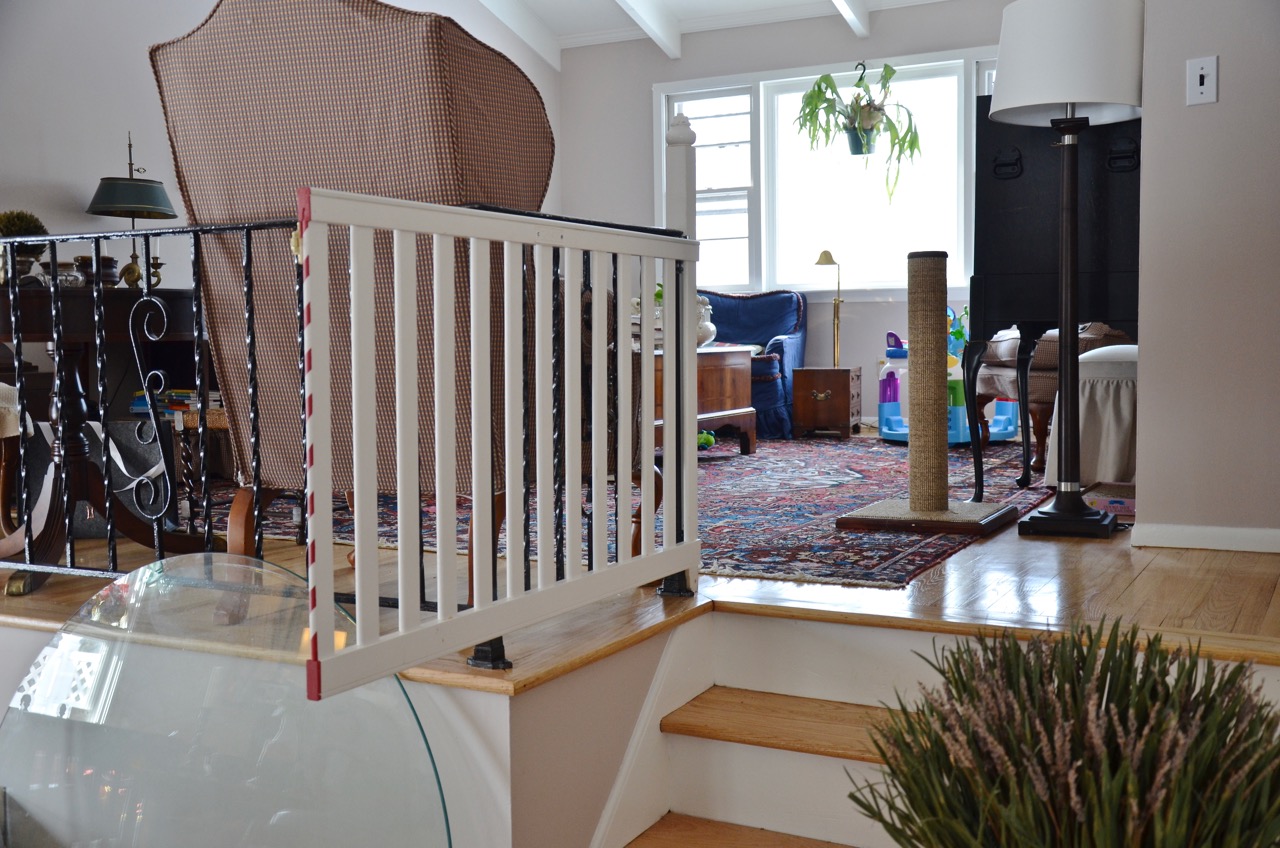
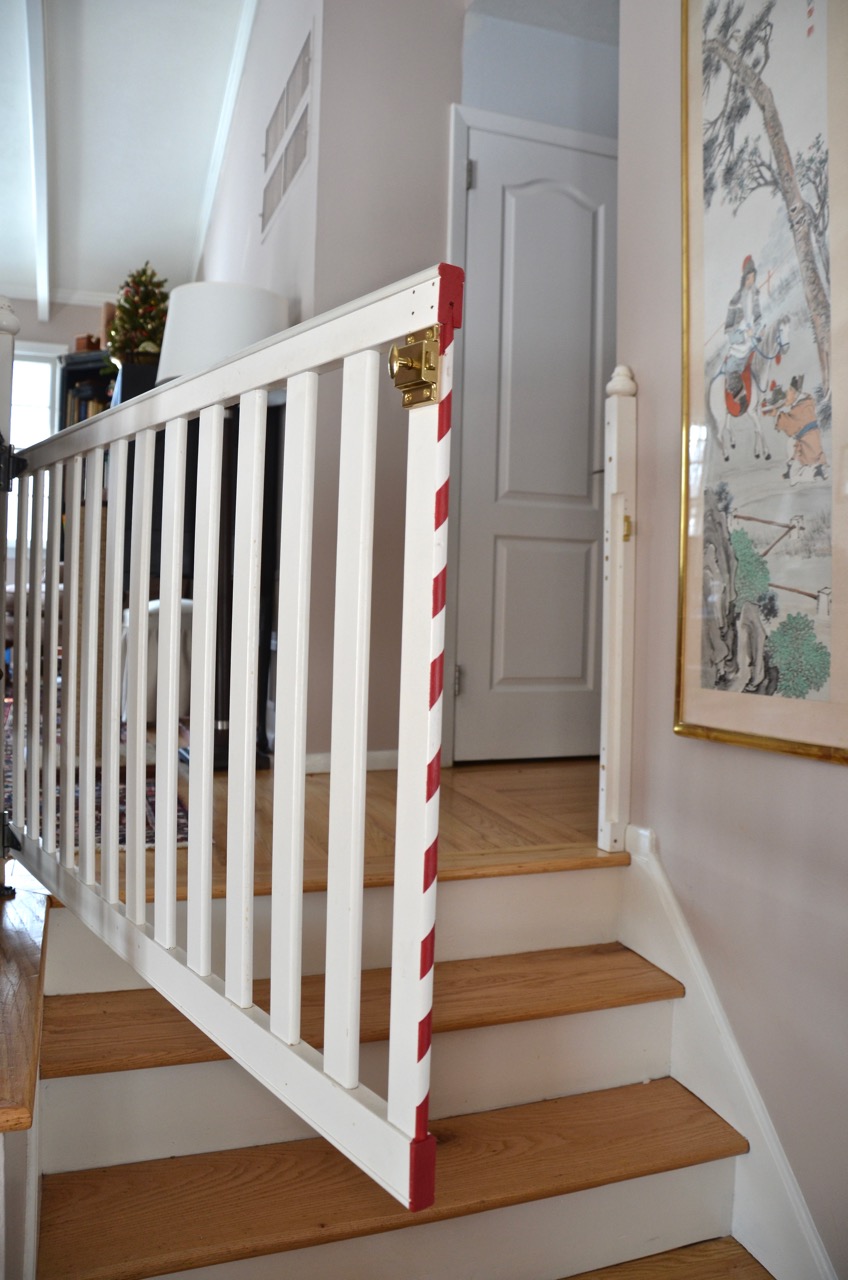
After everything was in place, I decided to add one more detail: to paint the edge of the gate with diagonal red stripes to highlight and alert us from banging into it when it is fully open.

Using masking tape I laid out the red parallelograms pattern.

I mixed acrylic paint to obtain a color that looked most striking.
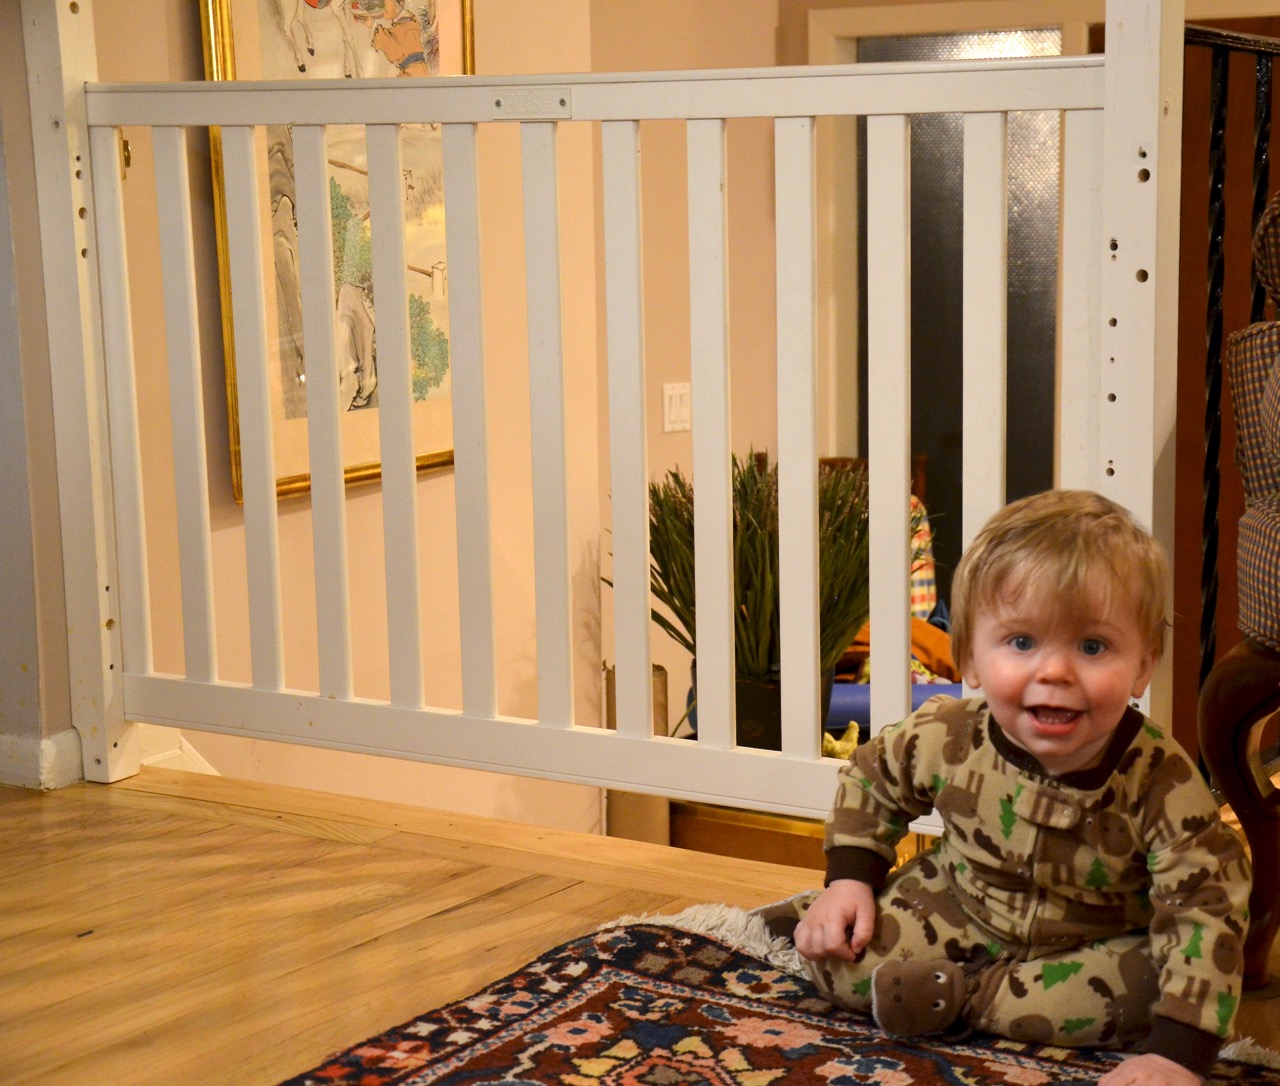
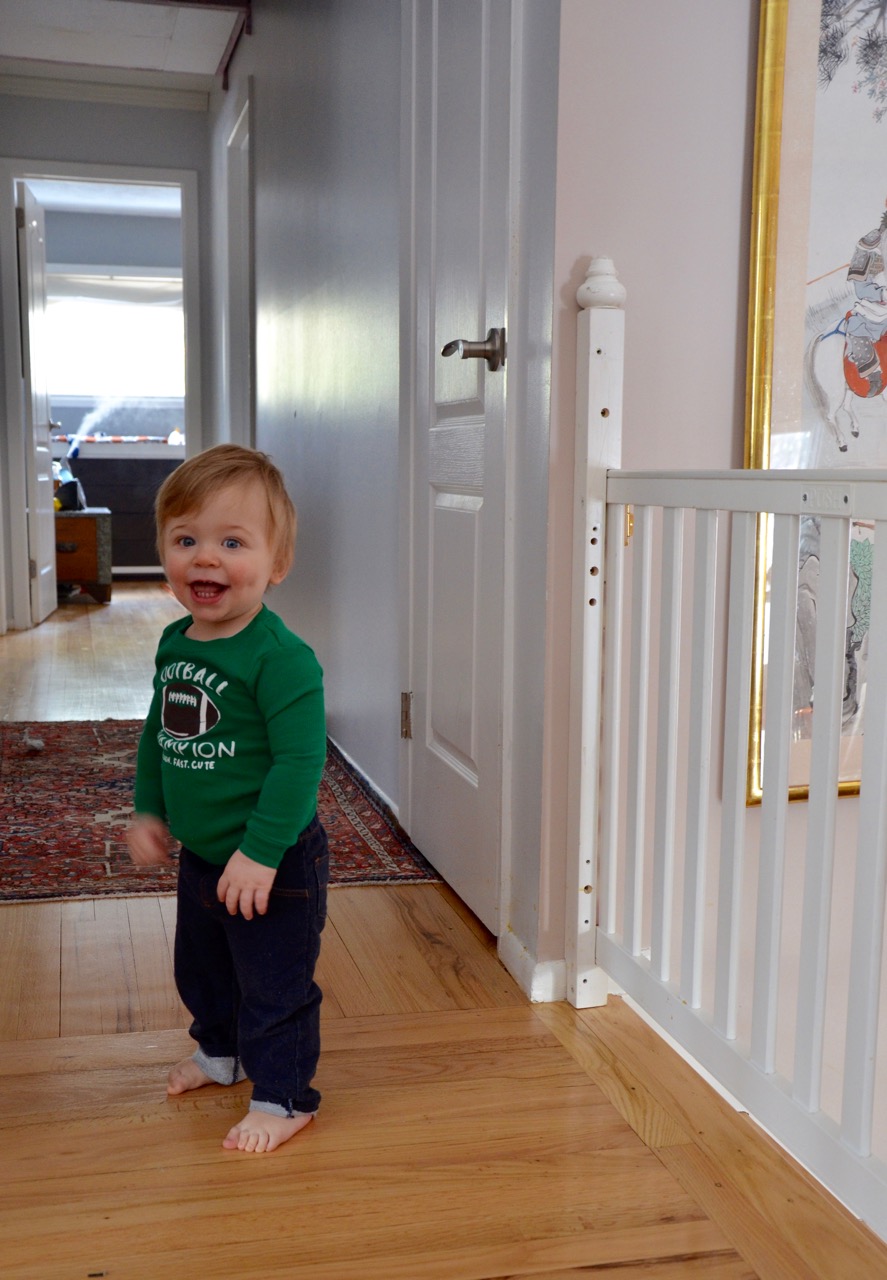
 Asher loves his new gate and so do we, though our cats think it is annoying. At some point when I have more time I will fill all the old hardware holes with filler and repaint the gate. I may even cut the gate into two parts and add another set of hinges in the middle to allow it to fold completely against the steel rail, but in the meantime the gate does its job very well and it fits into our living room in the most organic way, almost as if it’s an original fixture.

Here are some supplies and tools we find essential in our everyday work around the shop. We may receive a commission from sales referred by our links; however, we have carefully selected these products for their usefulness and quality.


Let’s see, “Toddlers can be risky creatures, endangering themselves as well as your property. They are notorious for putting themselves in the most precarious situations………..”, let us know in your blog how long it took your son to figure out how to open the latch and make his way out to the furthest point on the gate cantilevered over the steps. Toddlers can be very ingenious.
Very nice design.