


We may receive a commission when you use our affiliate links. However, this does not impact our recommendations.
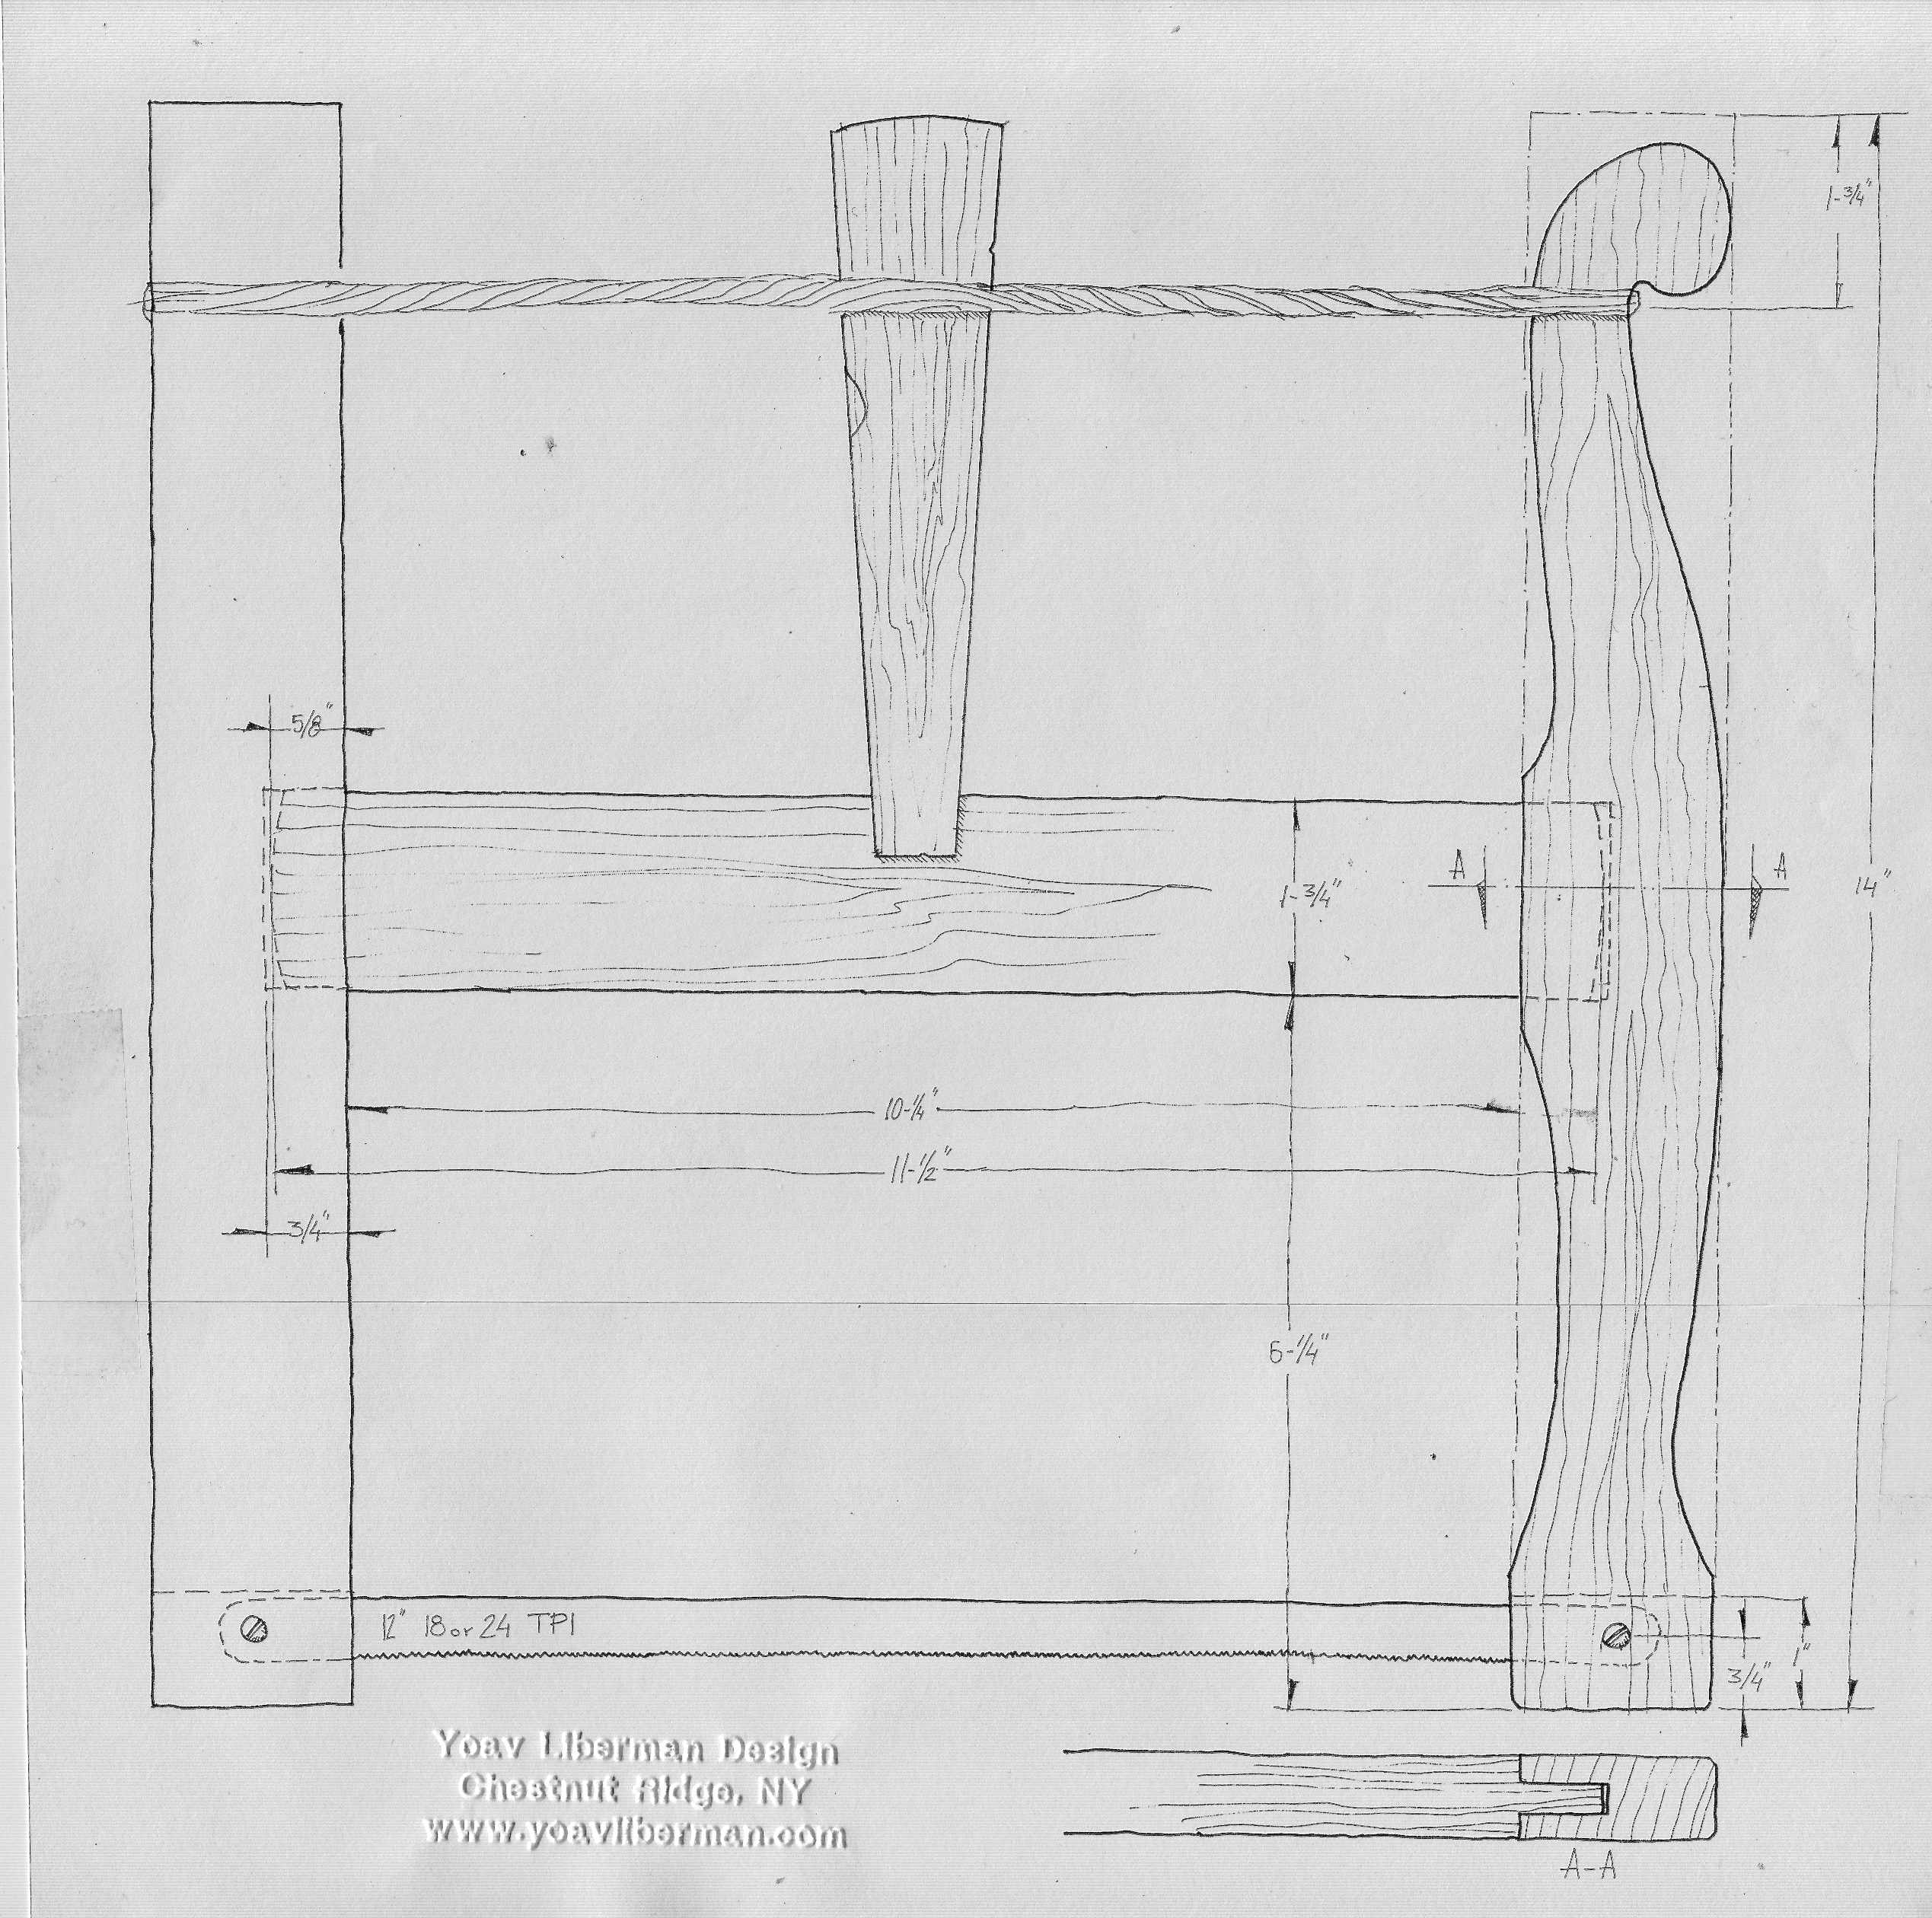
You can download this drawing at the bottom of the page. Pin this!
The frame saw that I devised for my students is, among other things, a great exercise in woodworking joinery. It teaches the student the importance of what I call ‘interdependency’. I use this term to describe the symbiotic relationship between two elements, in this case a joint, and their pivotal role (pun intended) in the success of the design, as accurate execution of our mortise and tenon joint will ensure the functionality of saw. Unlike many mortise and tenon joints that are glued together and may hide major mistakes, such as over excavation, loose gaps or chipped away wood, ours will be seen when the saw is dismantled and might hinder its performance when it is tensioned into action. Our saw’s joints are dynamic joints that need to pivot a few degrees in one plane only, and if they are poorly made, it might bring the whole project down.
Laying out the mortise
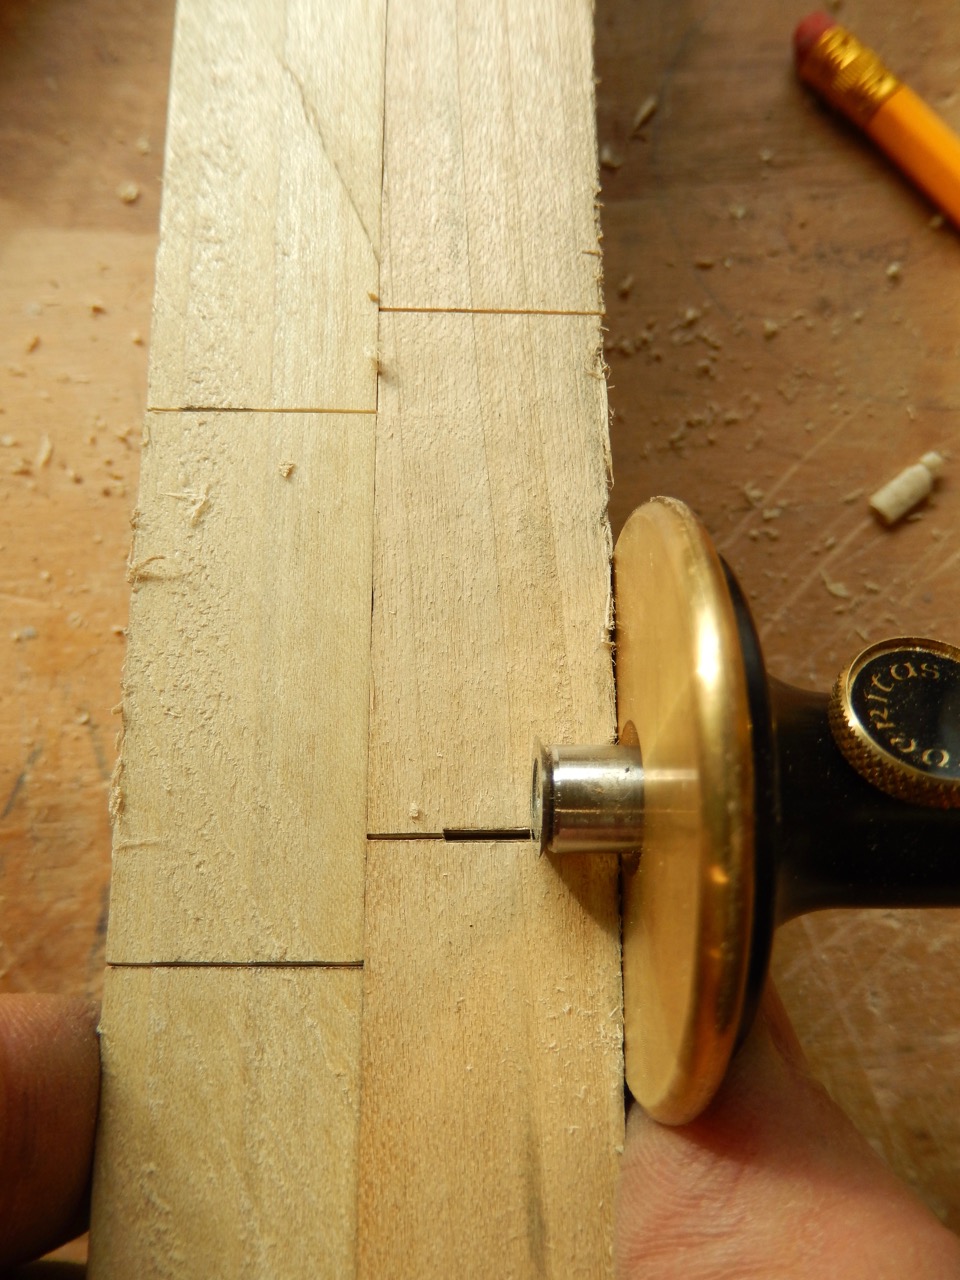
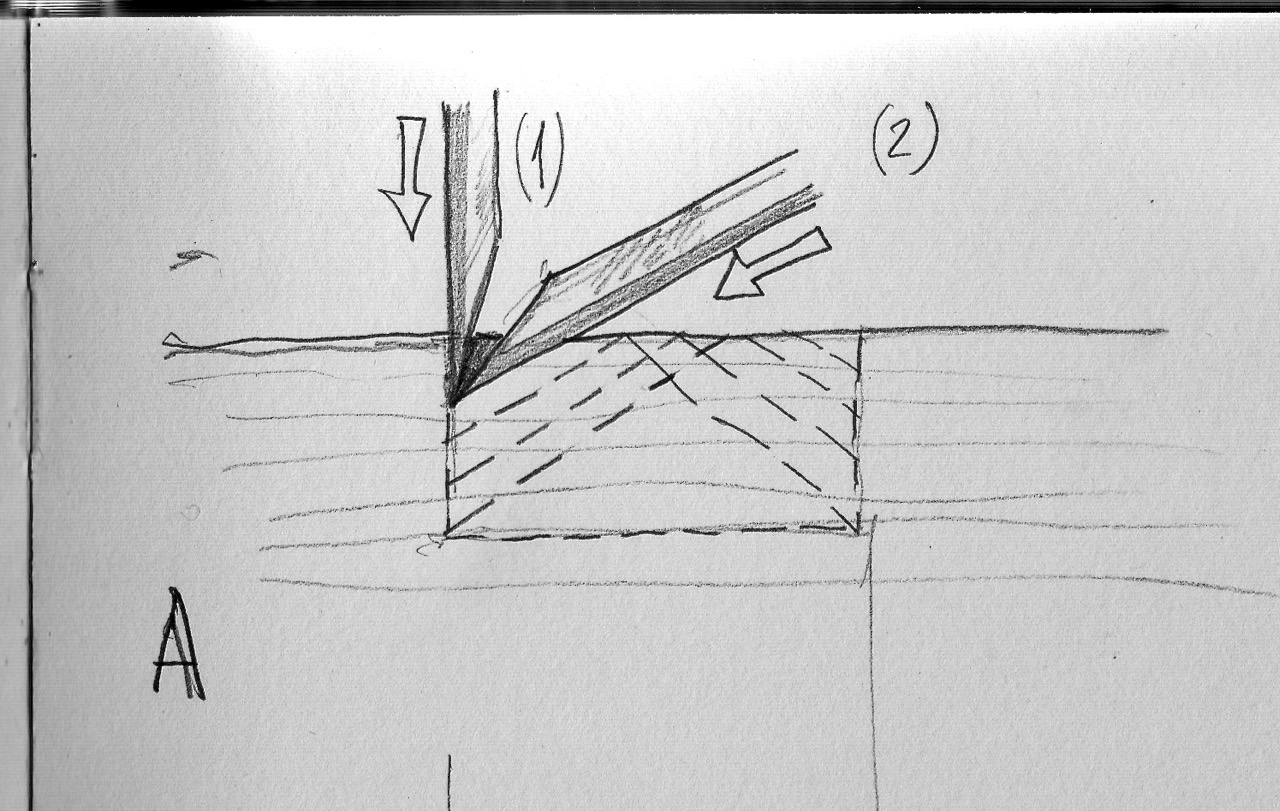
Using a square and a knife I scored two lines across the saw arm’s which indicates the mortise’s length. Then I carefully placed my 1/4” chisel in the middle of one of the lines and stabbed the wood decisively. I find that when I show this to my students, some are anxious that they might not land exactly in the middle without proper measuring, so I tell them what my first woodturning teacher, the late Andy Motter told me: “Use the Jedi technique” that is, trust your senses, aim and execute. I monitor my students actions when they do this for the first time, and only if they make a huge mistake, I tell them to try again.
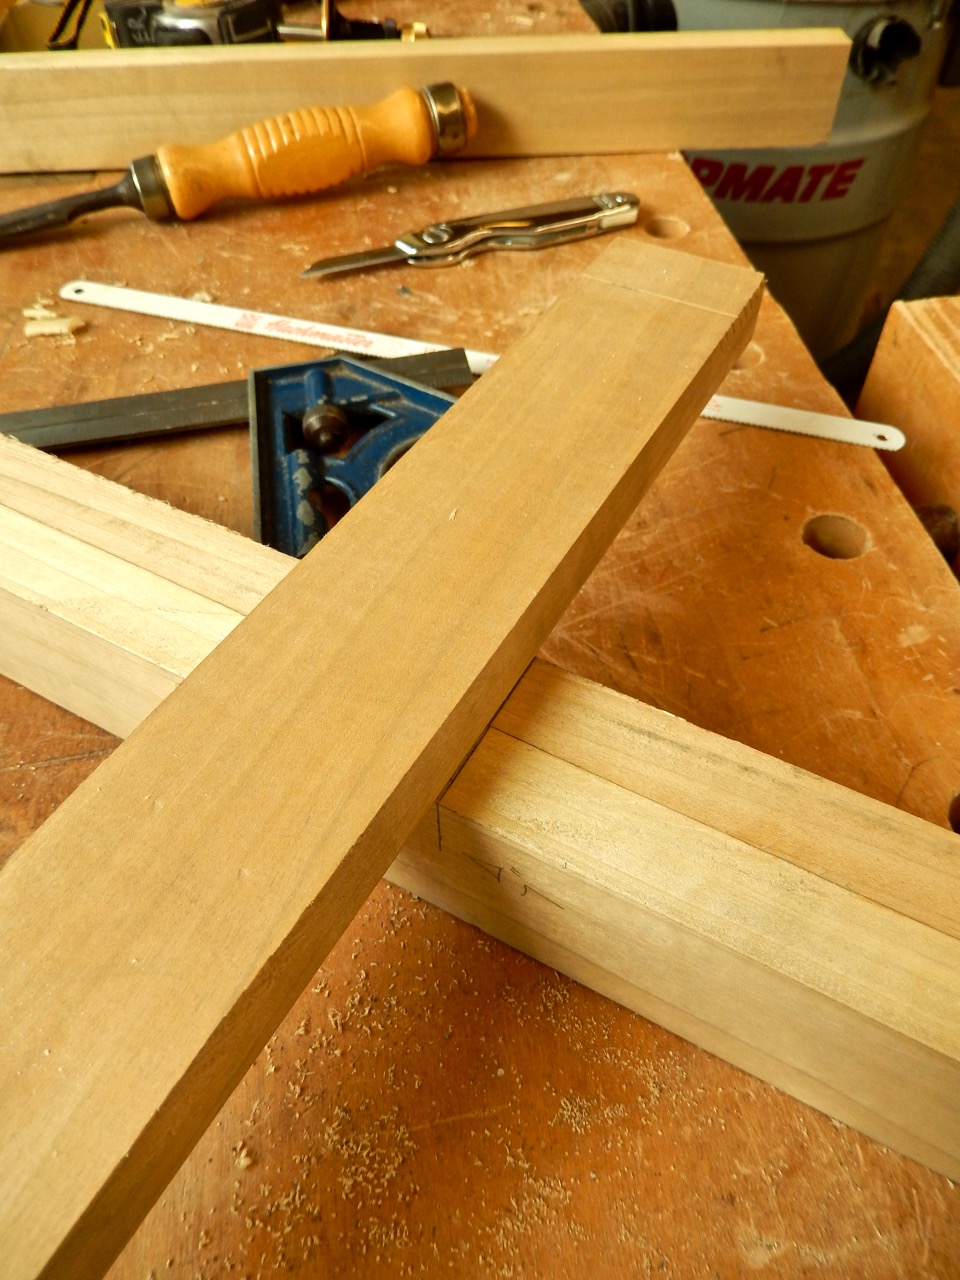
Instead of consulting with my drawings for the length of the mortise, I relied on the width of the saw’s central beam as an indicator for the mortises’ length. Remember, I intend to cut two tenons at the end of the beam to fit into the mortises in the arms. After transferring the beam’s width dimension I used a square and a marking knife to score the lines across the saw’s arms.
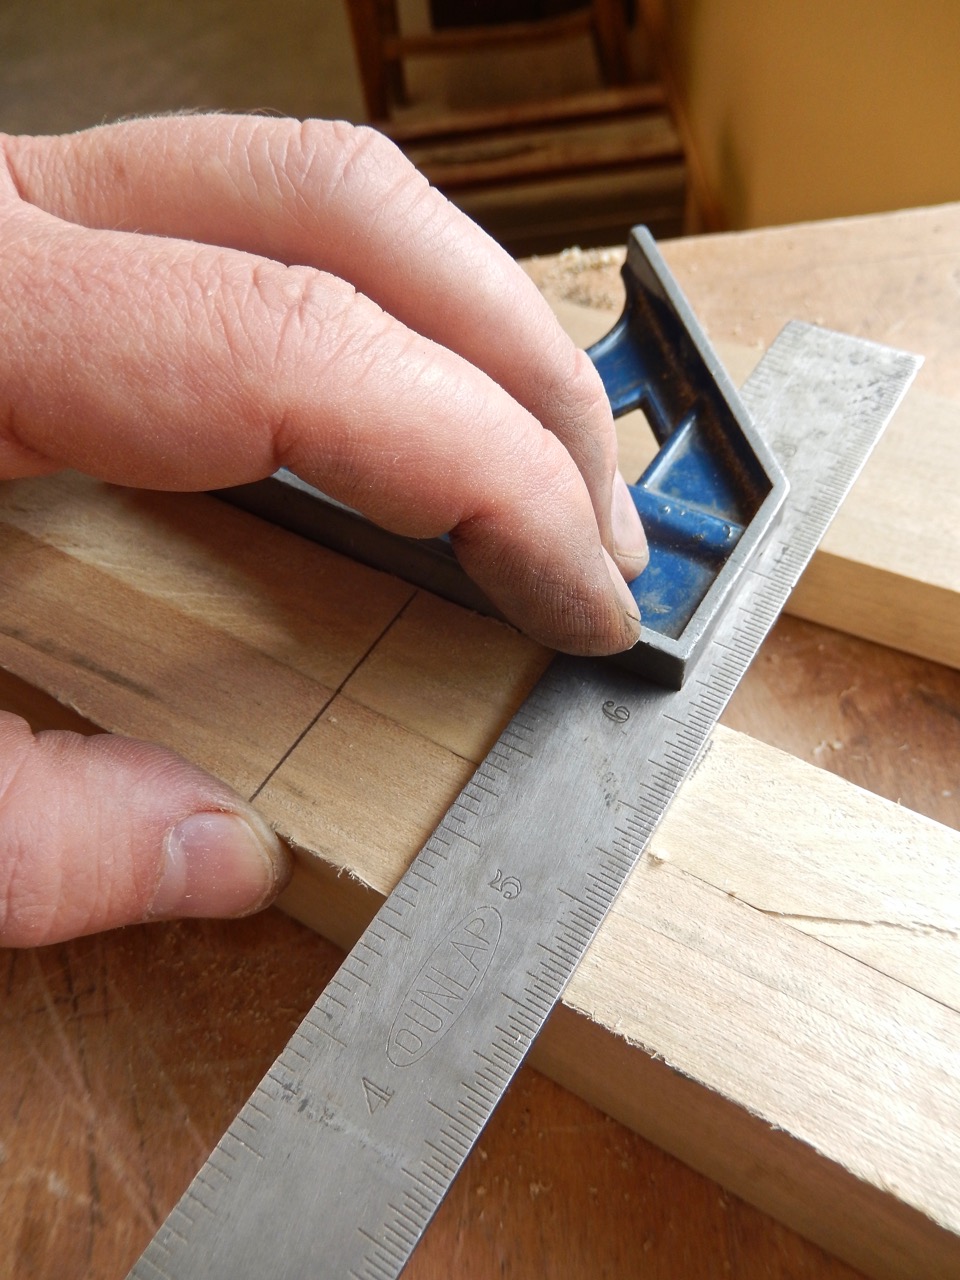

When I felt that my stab mark was pretty much centered, I opened my cutting gauge until it reached the beginning of the stab mark from one face of the arm. I locked the setting and scored the first line. Then I checked the distance from the other face to the stab line to see if I landed on its end. If I find that the gauges blade scores inward into the stab mark I adjust the setting, retrieve the blade until it corresponds to the end of the mark and score the second line.

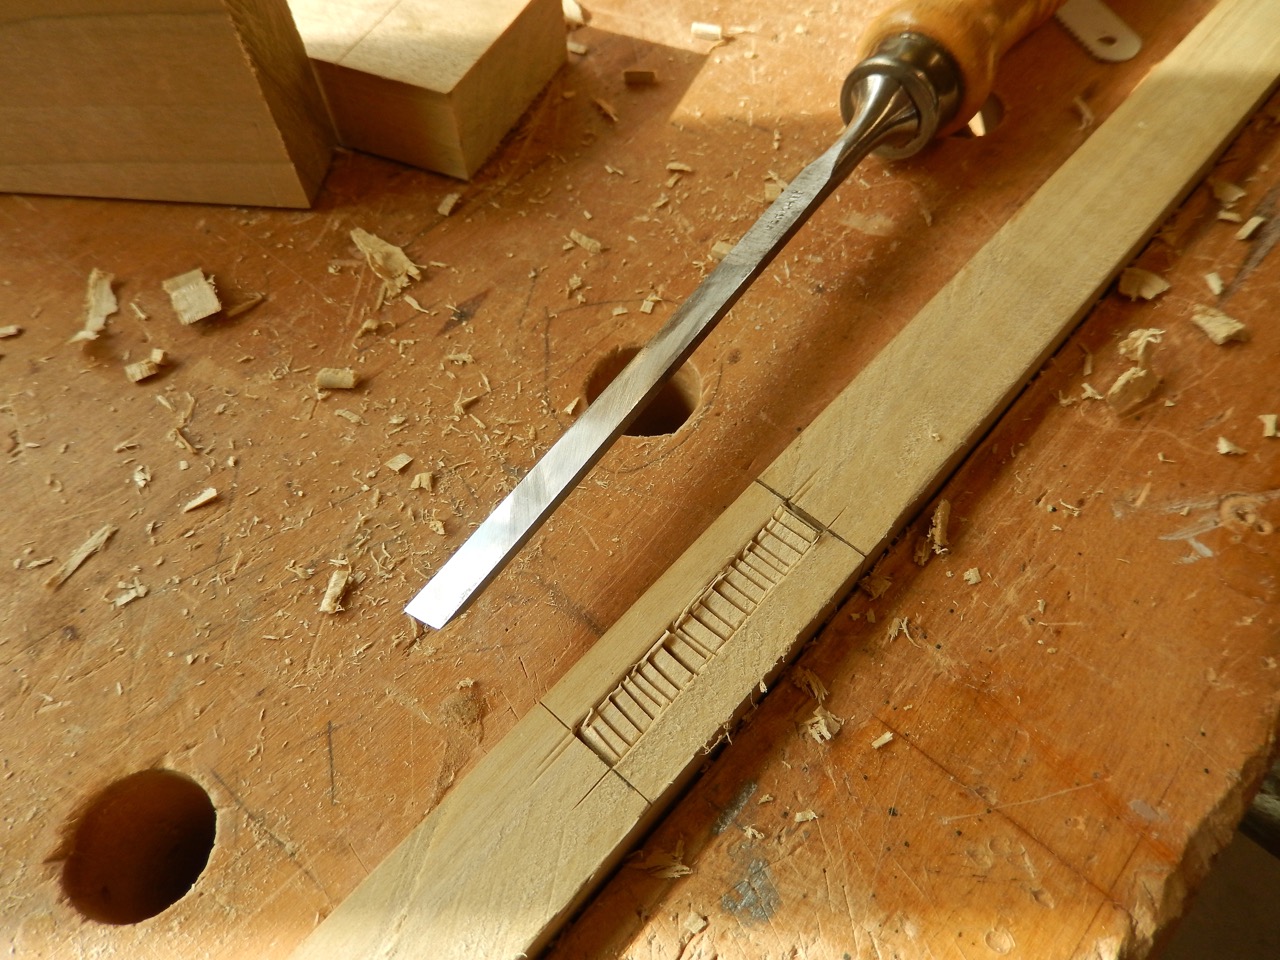
Finally, I was ready to excavate the mortise. There are many schools of thought as for the right way to bore a mortise with only a chisel (mostly using a mortising chisel). Since we don’t have any mortising chisels in school I have to teach my students a way to do this using bench chisels, and that means that the process is slower but also less strenuous on the tools.
To excavate my first mortise on this project I used a very common technique, stabbing along the mortise length and then digging the fibers up while working the chisel bevel down. From time to time I pared down the mortise’s end walls and at the conclusion of the process I pared down the side walls using a 1” wide chisel.

 When my students started to make their own mortises, I noticed that some students produced messy mortises. Some of the messiness is attributed to the lack of visual understanding of what exactly happens down there in the mortise, while others find it difficult to scoop up long strands of fibers from the bottom of the mortise using the bevel down technique. In any case I knew I needed to look for a better approach. After spending some time with my books and more time combing the internet, I think I found the right technique for us. It is based on a youtube video by Marc Adams (see below).
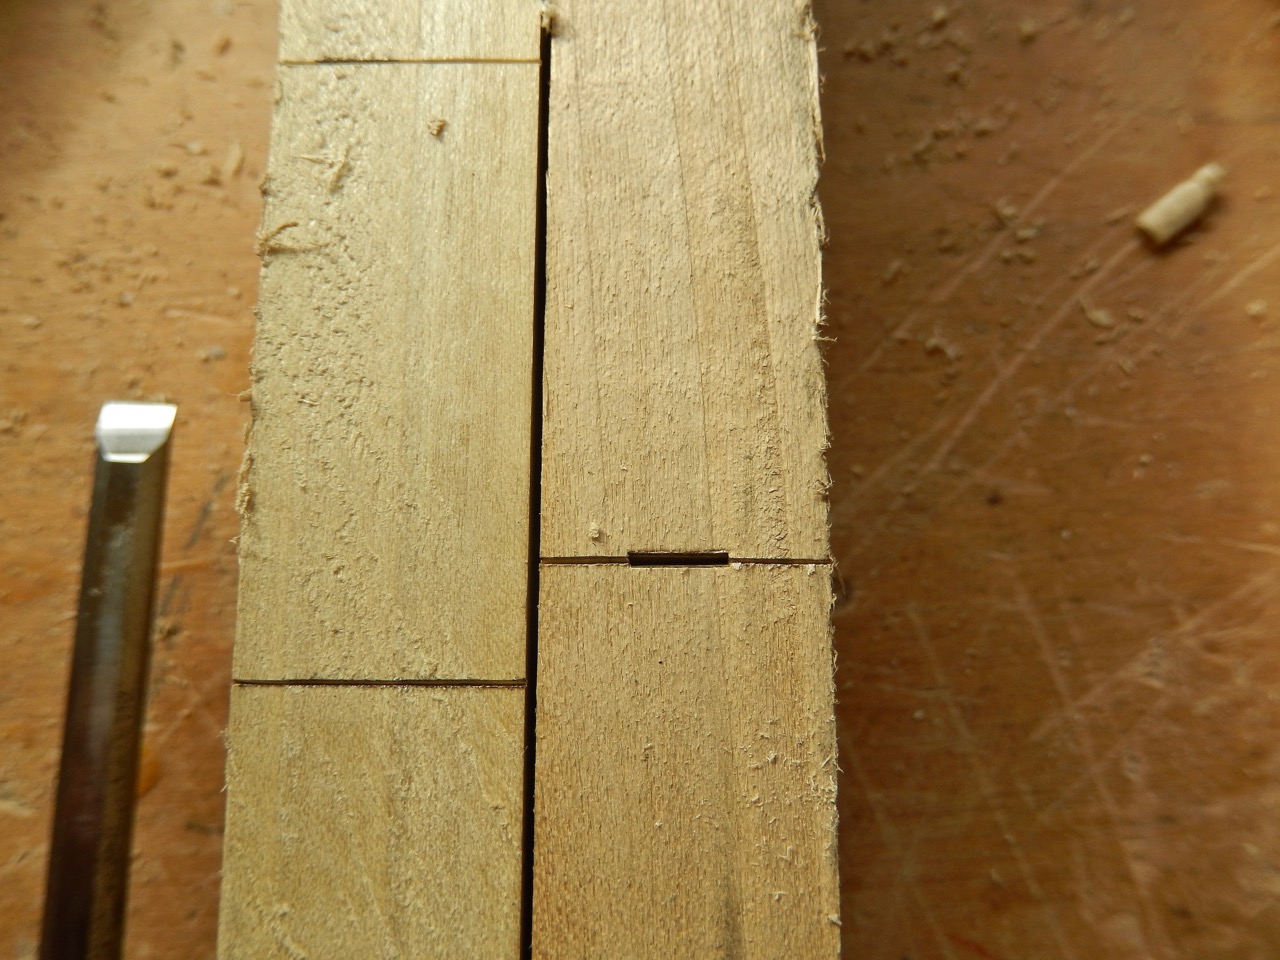
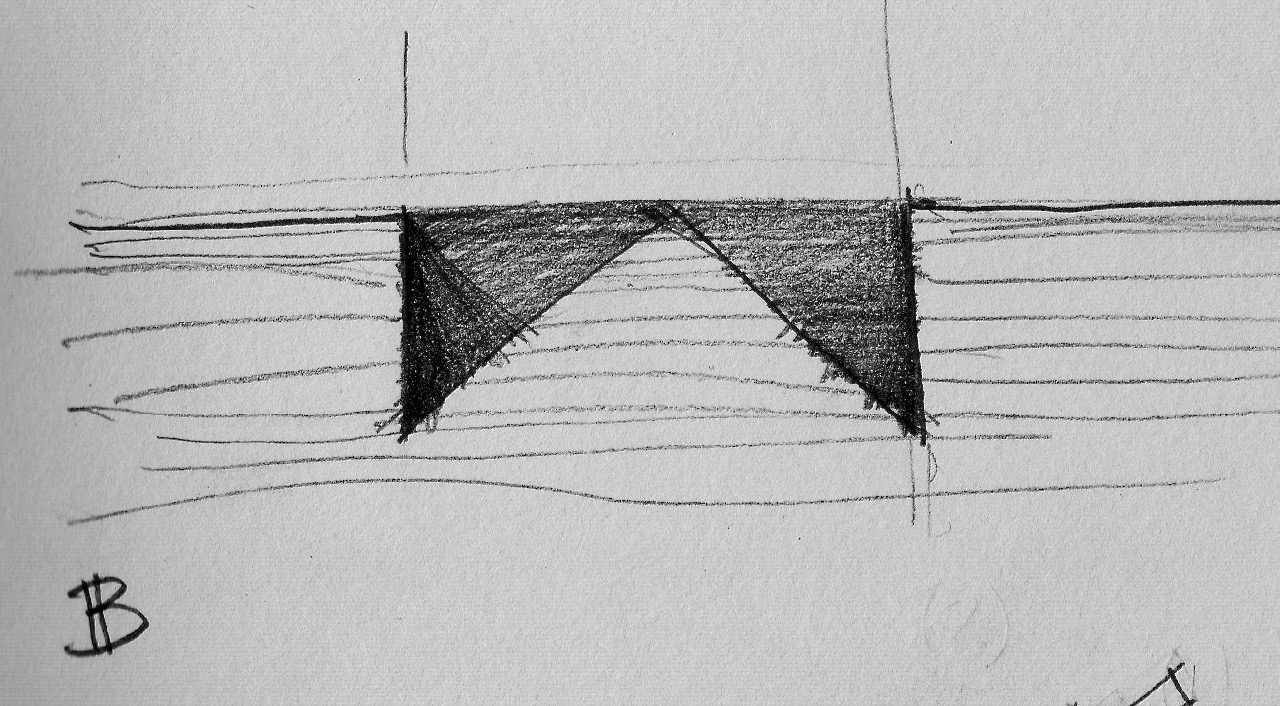
Mark begins his mortise by relieving a beveled frame inside the mortise’s perimeter.
To make the beveled frame inside the mortise’s perimeter, stab vertically (the bevel of the chisel facing inward) on the borders of the rectangular layout.
Then hold the chisel bevel up at an acute angle and pare towards the stabbed demarcation you created earlier . Work around the perimeter until a beveled ramp is formed.
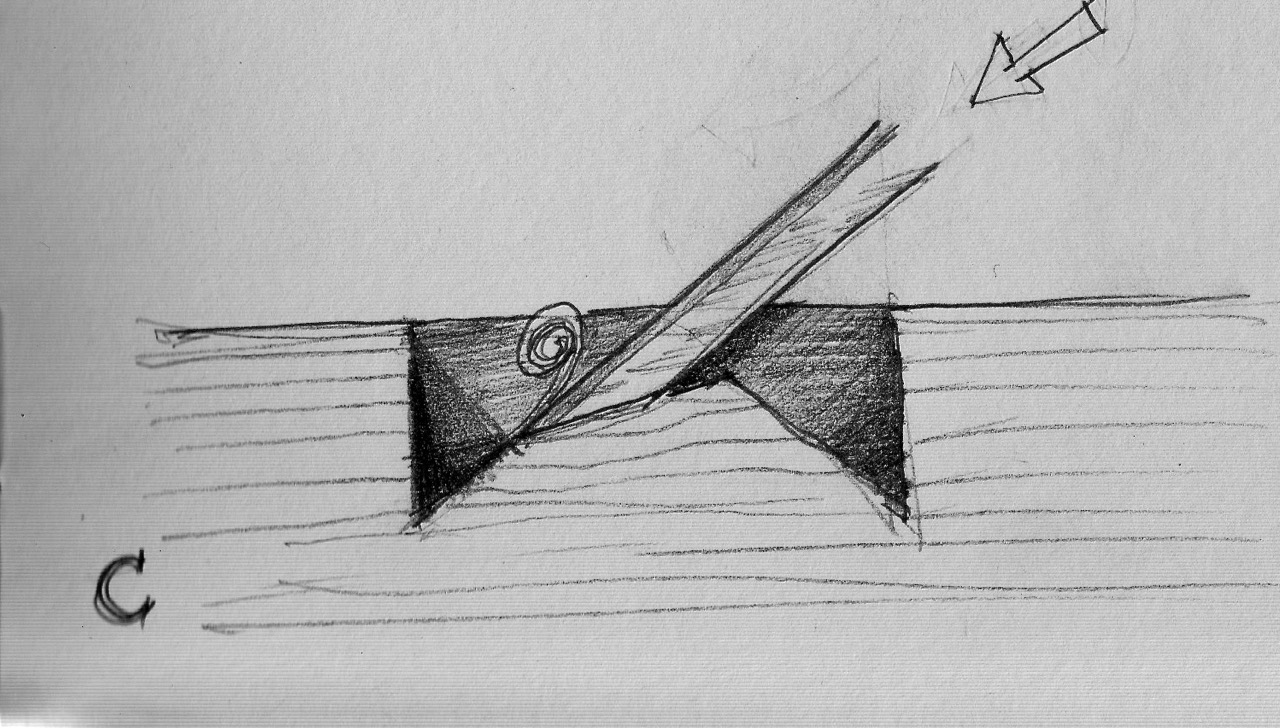
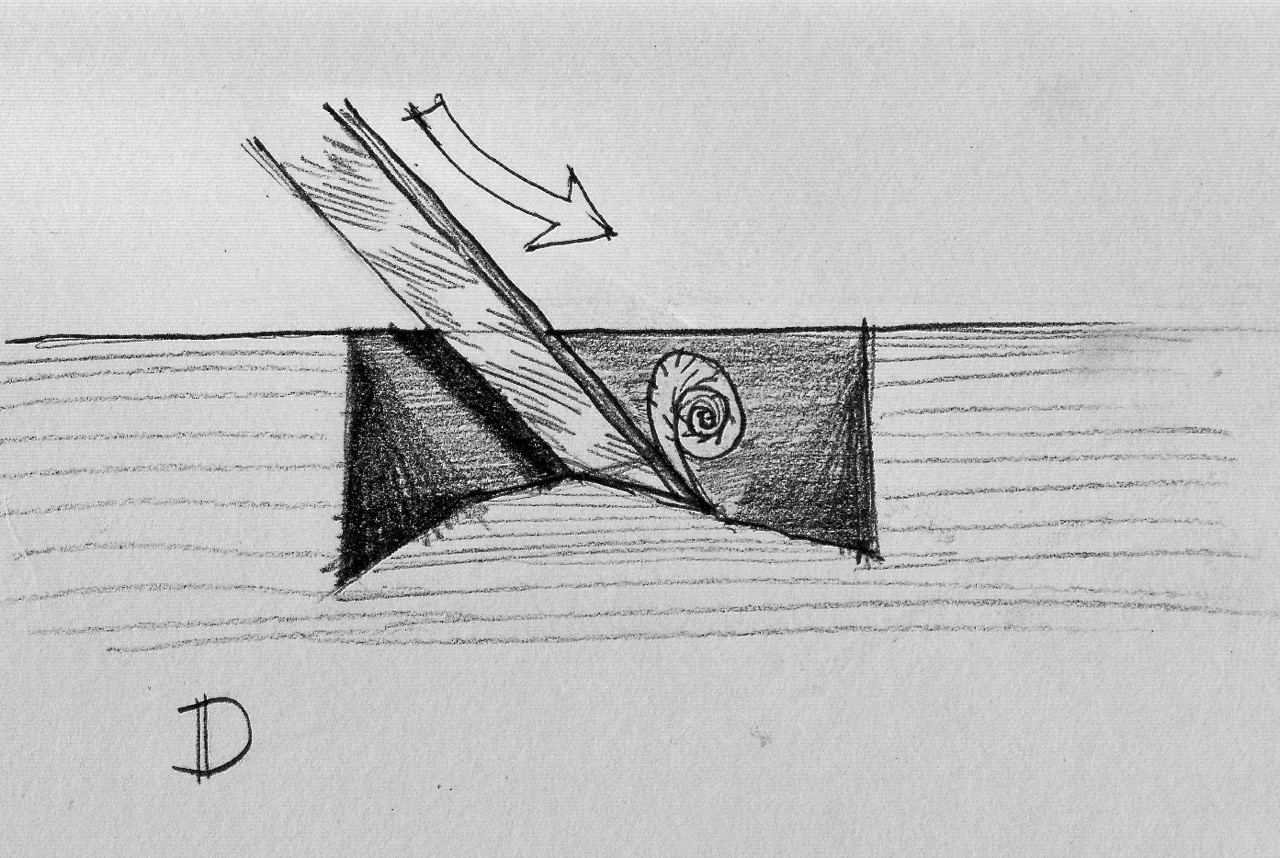
Then he cuts out four triangular cavities on each of the mortise walls. He alternates his chisel between 90°, (the chisel’s back is flush with the walls) and pares down at an angle of 45° or lower (bevel up) towards these walls. After the triangular cavities are excavated he begins to level down the pyramidal shape in the middle of the mortise, this time holding the chisel bevel down. At the end he pares down and smooths the mortise side walls using a wide chisel.

I think that this technique helps the student realize, through an incremental method, what the steps are towards success. Each step ends with a defined geometry and only once that has been achieved, you can continue towards the next step.
Watch Mark demonstrating his technique in this video.
Next time I will talk about cutting the tenons…
Click here to download the frame saw drawing…
Here are some supplies and tools we find essential in our everyday work around the shop. We may receive a commission from sales referred by our links; however, we have carefully selected these products for their usefulness and quality.


The best mortising video I’ve seen is this one by Paul Sellers: https://www.youtube.com/watch?v=q_NXq7_TILA
He does it twice, once with a “pig sticker” and once with a bevel edge chisel which was faster and cleaner.