


We may receive a commission when you use our affiliate links. However, this does not impact our recommendations.
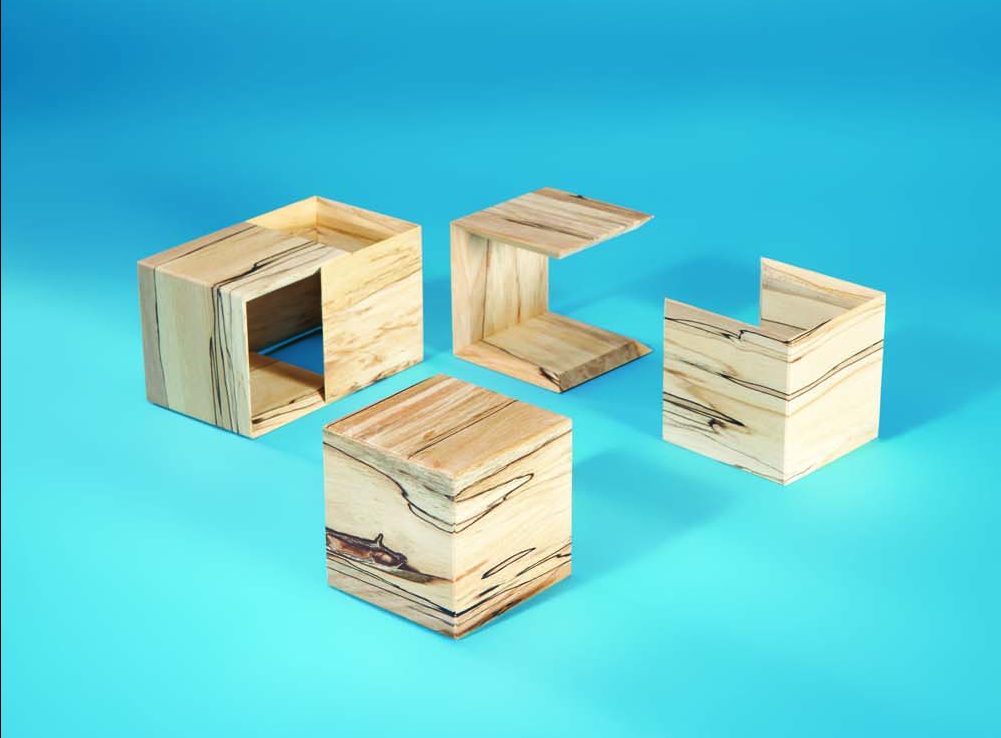
“How does it come apart?” You’ll be asked this question each time you hand one of these cubes to a friend. You’ll answer, “Well, you just hold it like this, then pull.” Your ability to read wood grain will quickly identify which sides to grab—they’ll be mystified.
That’s just one of the small pleasures in making these airy nothings. They really don’t have a purpose other than to tickle your fancy.
Start with a strip of wood that’s 1/8″ or 1/4″ thick, 2-1/2″ to 3″ wide and 24″ long. Its edges must be straight and parallel. Although you can certainly mill the wood yourself, it’s much easier to buy pieces that are pre-cut to these dimensions.

Photo 1. Set up a stop block for cutting the cube’s pieces from one long strip. Cut the first piece about 1/4″ extra long, then turn it sideways to position the block.

Photo 2. Cut the strip into six pieces. The strip is marked with a long, tapering triangle so you can reassemble the pieces in the correct order later on.
Draw a long triangle on the strip before cutting it into pieces. This mark will help you re-assemble the pieces in the same order later on. Set up your saw with a crosscut blade, then cut the strip into pieces that are precisely square (Photos 1 and 2).

Photo 3. Set up the tablesaw for mitering each piece. You’ll need a subfence and a support piece. A locking bar that nests in the saw’s miter slot prevents the support from sliding.

Photo 4. Mark the thickness of your stock on the subfence. Adjust the position of the fence so the blade, tilted to 45°, cuts a hair below this line.
Set up the saw for cutting miters around all four sides of each piece (Photos 3, 4 and 5). This is a finicky operation—I found that riding the pieces on a stout support board, held in place with a locking bar, worked best.

A locking bar.

Photo 5. Saw all four edges of each piece. You don’t want the miters to come to a sharp point—a very narrow, uncut edge should remain.
You might think that the pieces should have sharp edges when you’re done, but that’s not practical on pieces this small. A sharp edge would dive right into the kerf cut into the subfence, ruining each cut. It’s far better to leave a blunt edge, one that’s only about 1/64″ wide. Sneak up on this setting, moving the fence a little bit farther from the blade each time (this widens the cut).

Photo 6. Arrange the pieces in the correct order, then divide them into two sets of three. Align the edges of each set against a block, then tape them together.
Arrange the pieces back in order, then tape them together (Photo 6). Wax the inside faces and outside miters—this makes removing glue squeeze-out much easier during assembly. Glue the inside miters, then slide the cube together and tape it shut (Photos 7, 8 and 9). Wait overnight, then remove the tape and sand the cube’s corners and faces.

Photo 7. Turn over each set and rub paraffin wax on the inside faces and outer edges of the three pieces. Apply glue on the edges that are taped together.

Photo 8. Fold the two sets and slide them together.

Photo 9. Tape the cube shut, so all the joints are tight. Let the glue cure overnight, then see if you can figure out how it comes apart!
You’ll probably have to make a few practice cubes to master the technique, but if all has gone well, the cube’s joints will be invisible—and it will slide apart with a most satisfying sound.
Here are some supplies and tools we find essential in our everyday work around the shop. We may receive a commission from sales referred by our links; however, we have carefully selected these products for their usefulness and quality.


