We may receive a commission when you use our affiliate links. However, this does not impact our recommendations.
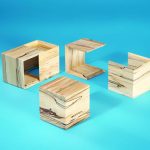
 This quick project is finished before you start. How’s that? Well, bear with me: You put finish on all of the parts before you actually cut any joints. It’s as simple as 1-2-3.
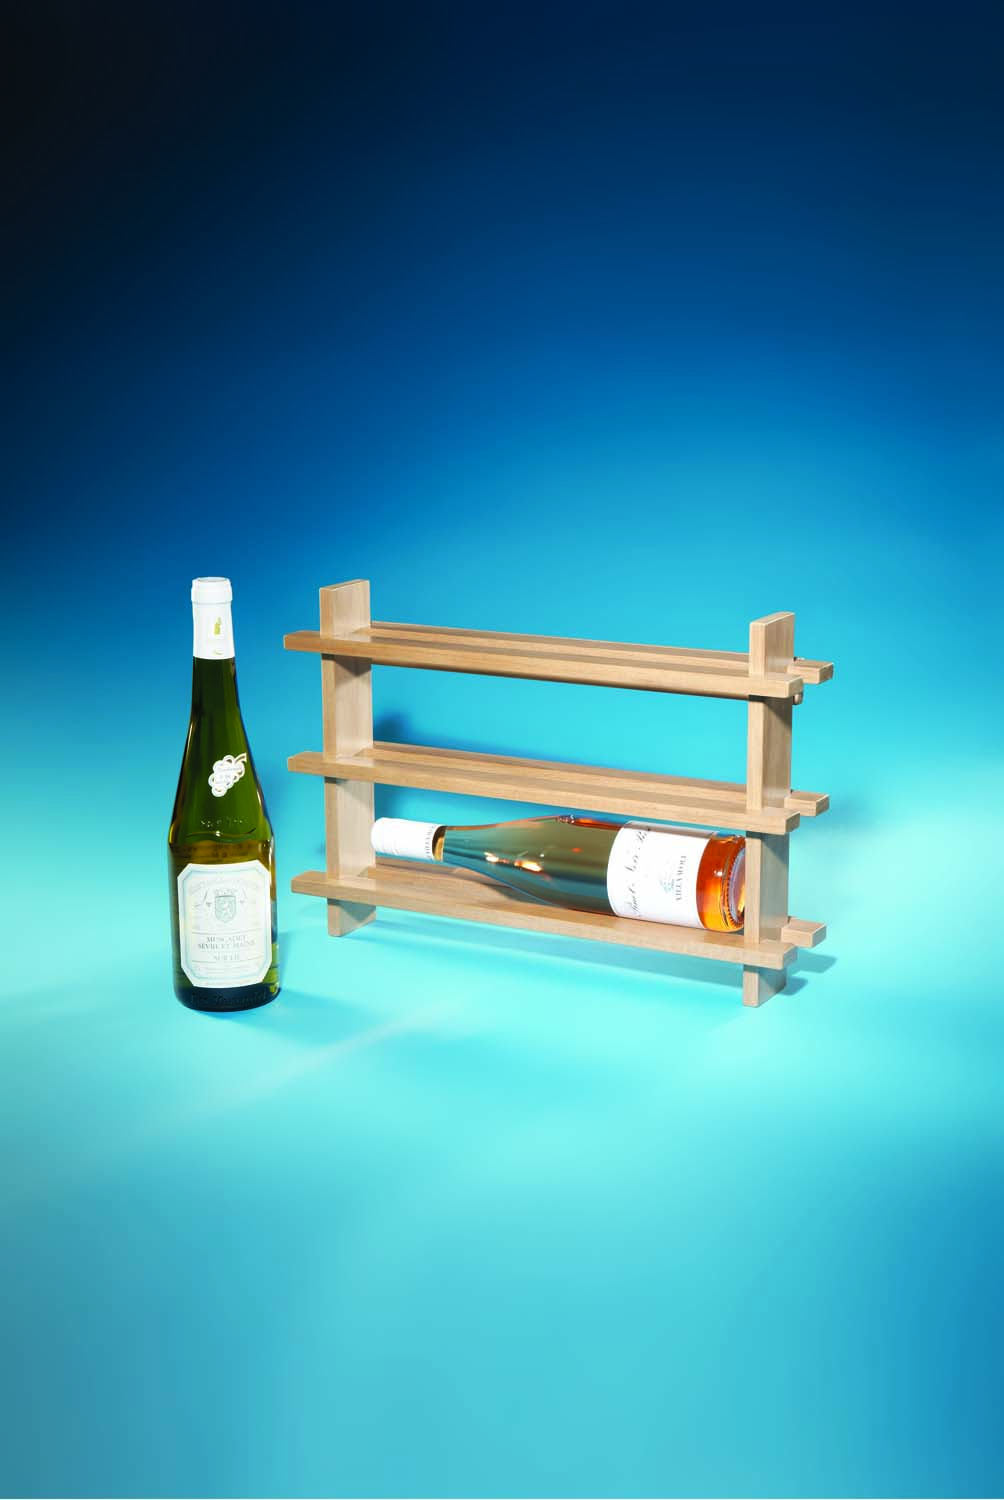
This wine rack hangs on a wall. It’s sized to fit under a bank of kitchen cabinets, but you could easily make a taller version for holding more bottles by lengthening the rack’s sides and adding more shelves.
I built this unit from a few offcuts of kiln-dried walnut. These pieces were sapwood throughout—wood that I usually throw away. Their pale grey color is perfectly suited for this project, however. The rack recedes to let the wine bottles take center stage.
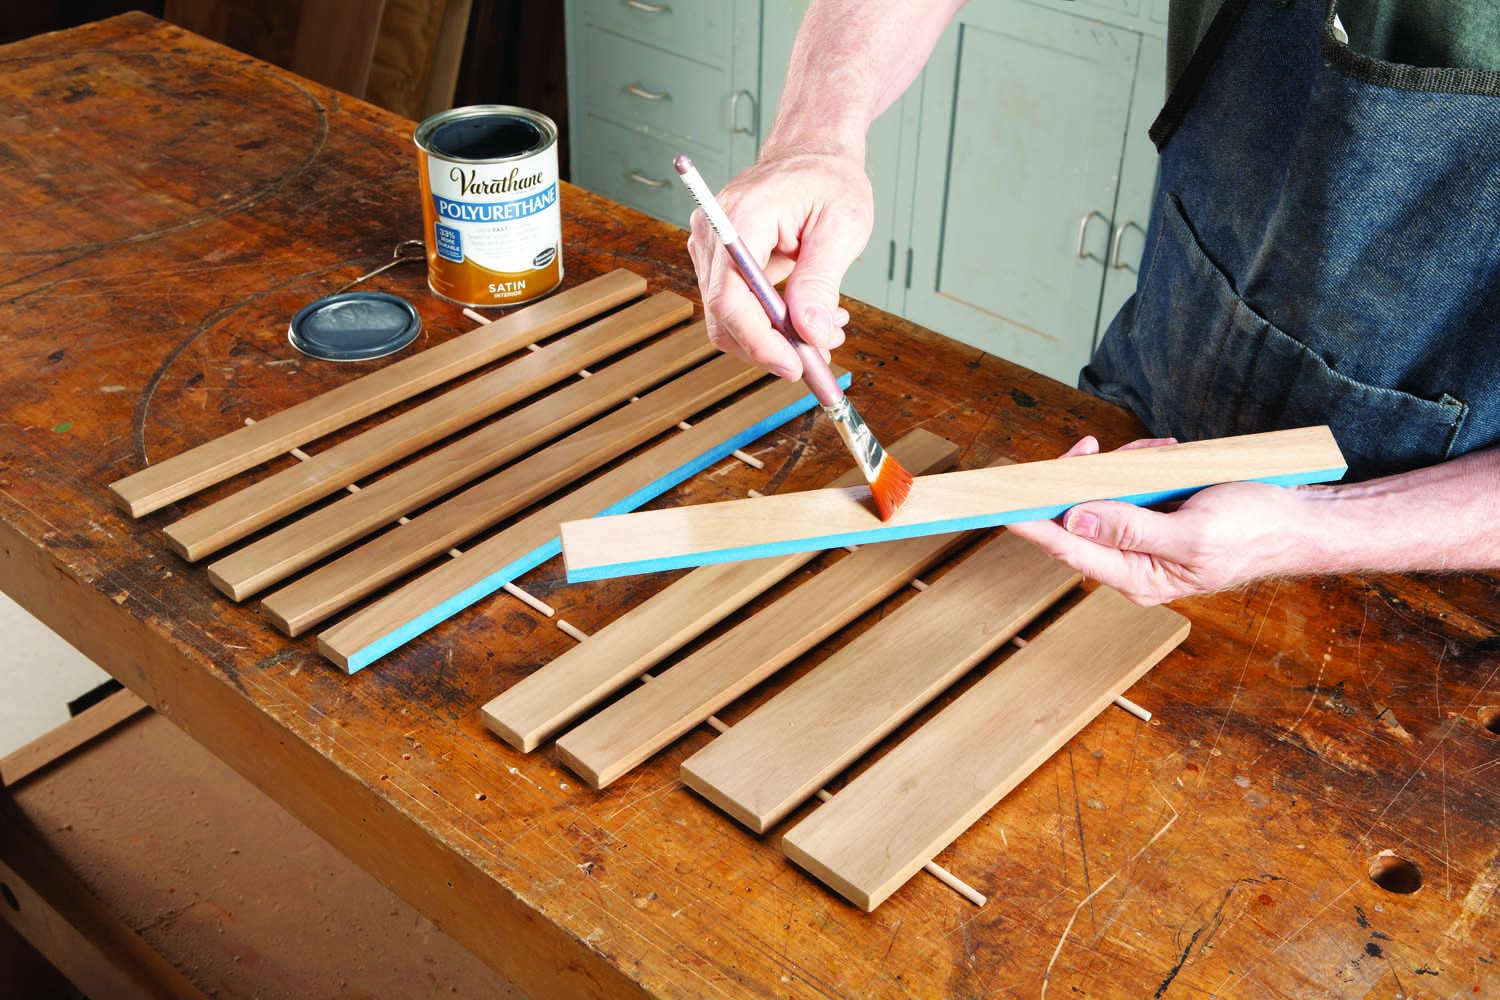
Photo 1. Apply finish to all of the pieces after you cut them to final size. Tape the back edges of two shelf pieces; these surfaces will be glued to the rails later on.
Start building the rack by cutting the sides (A), shelves (B) and rails (C) to final size. Put tape on the back edge of two shelf pieces. Trim the tape flush with a utility knife. Sand the surfaces and round the edges of every piece with 120-grit paper. Apply three coats of finish (Photo 1). I used a water-based poly because it didn’t darken the wood. This type of finish dries very fast; you can apply one coat to each surface in a single session.
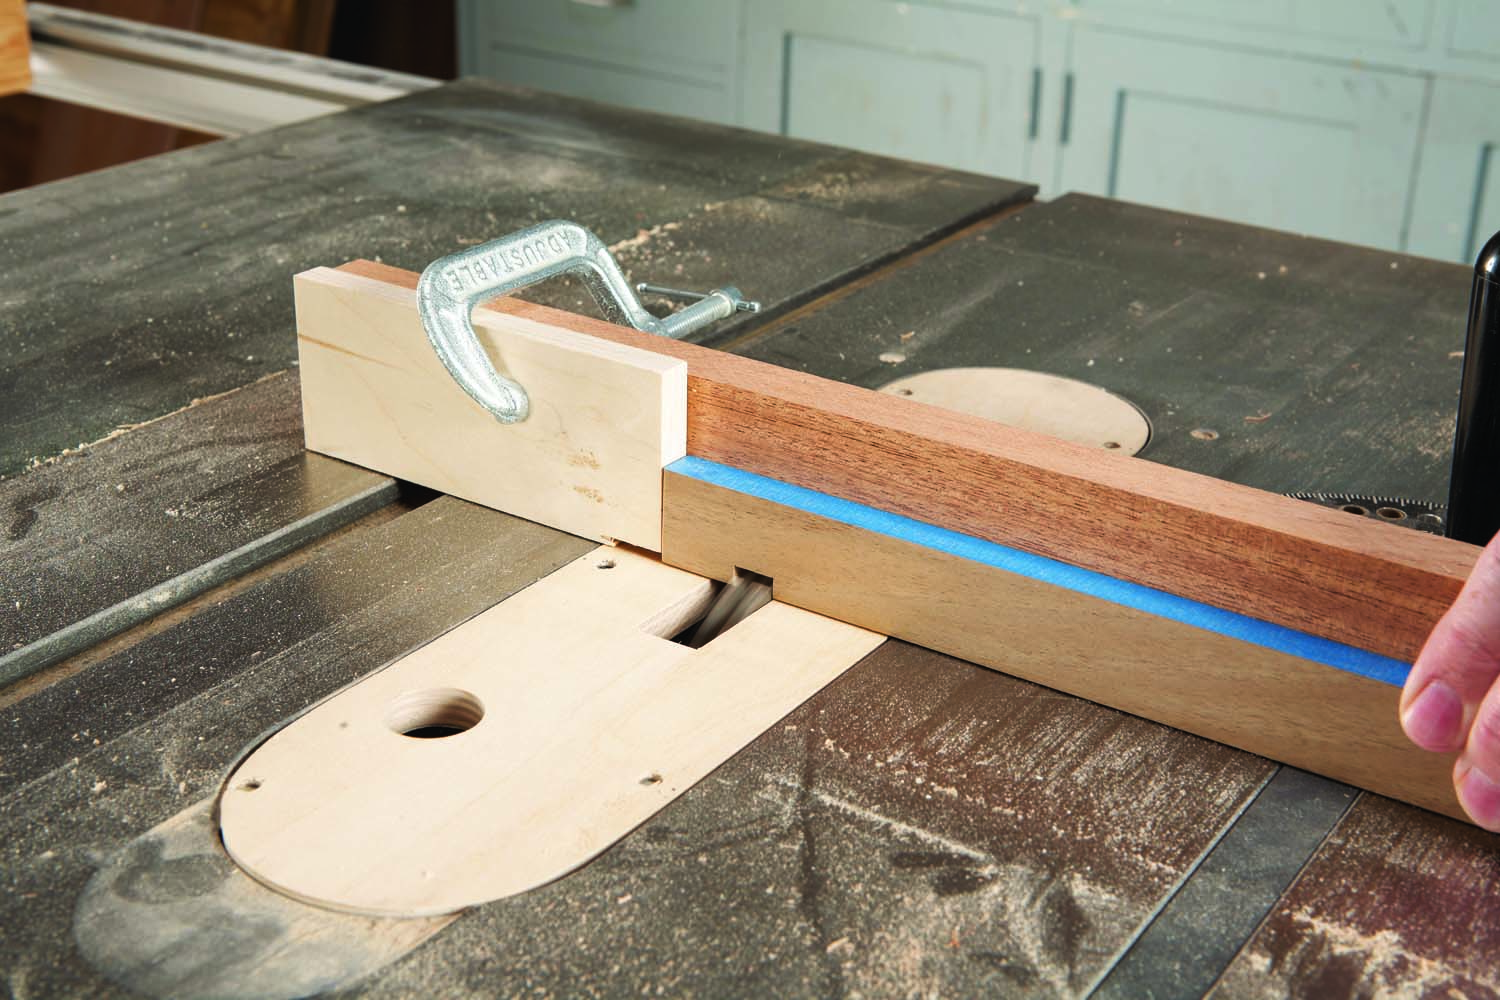
Photo 2. 2 Cut notches in the shelf and side pieces using a dado set. All of the notches are the same width and depth.
Next, cut notches in the sides and shelf pieces (Photo 2 and Figs. 02, 03). Adjust the width of your dado set to match the thickness of the wood. Raise the blade 1/4″ high and use a stop block to cut each set of notches. Mark the bottom end of the side pieces. When you cut notches in the middle of these pieces, place the marked ends against the stop block.
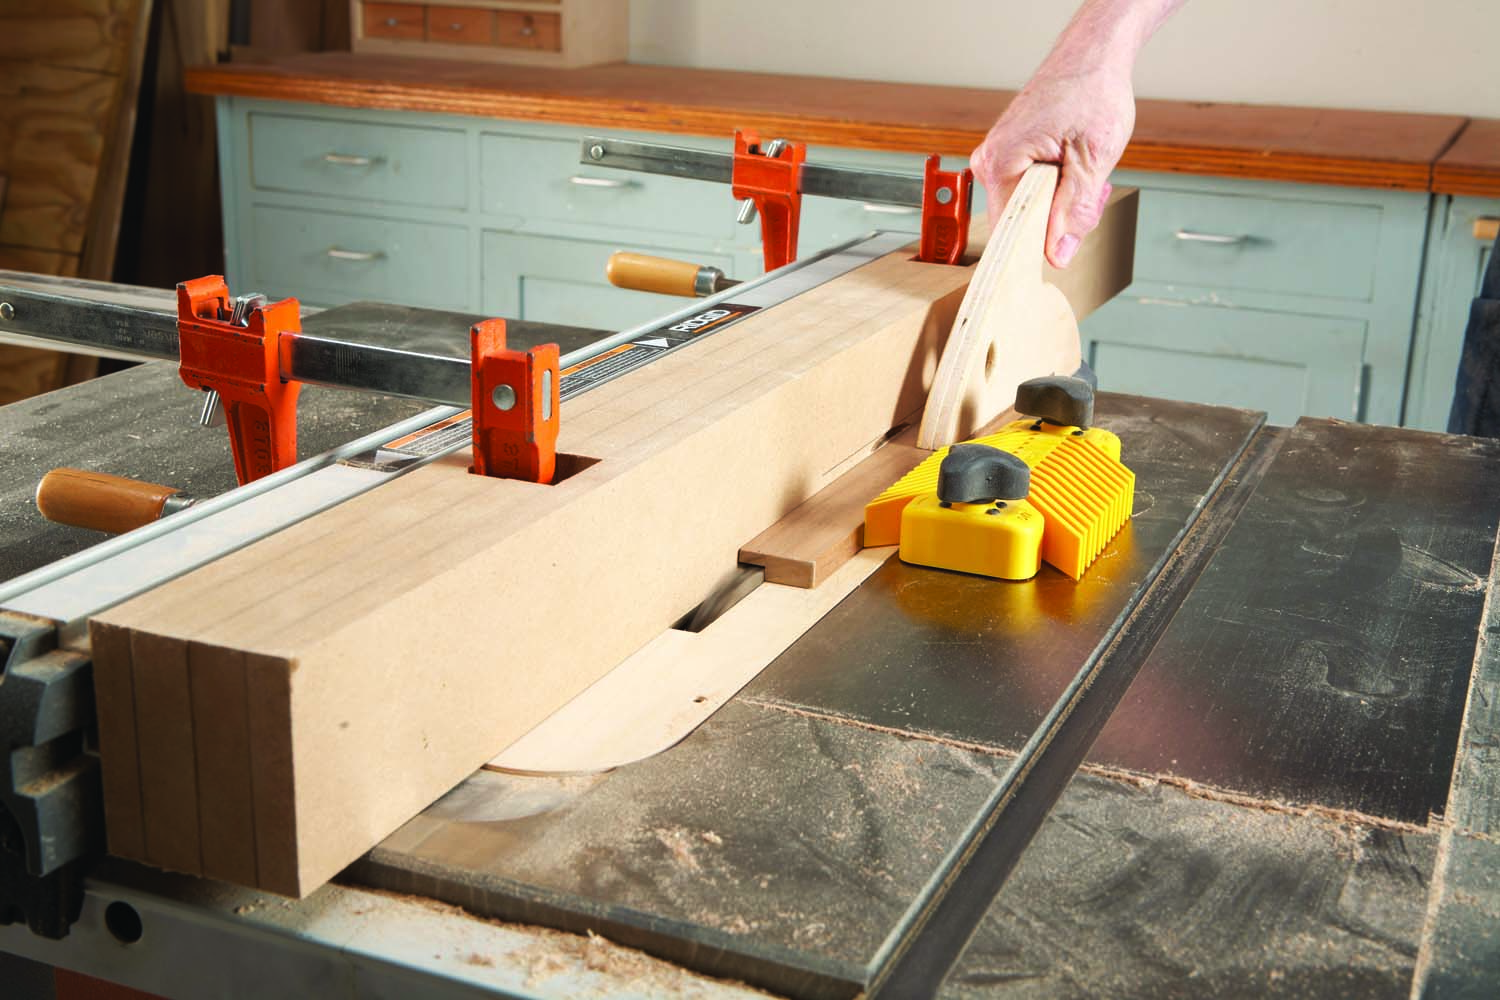
Photo 3. Rabbet the inside faces of the rails using a subfence. On this fence, the clamp heads don’t get in the way—they nest in holes between the fence’s 1/2″ thick layers.
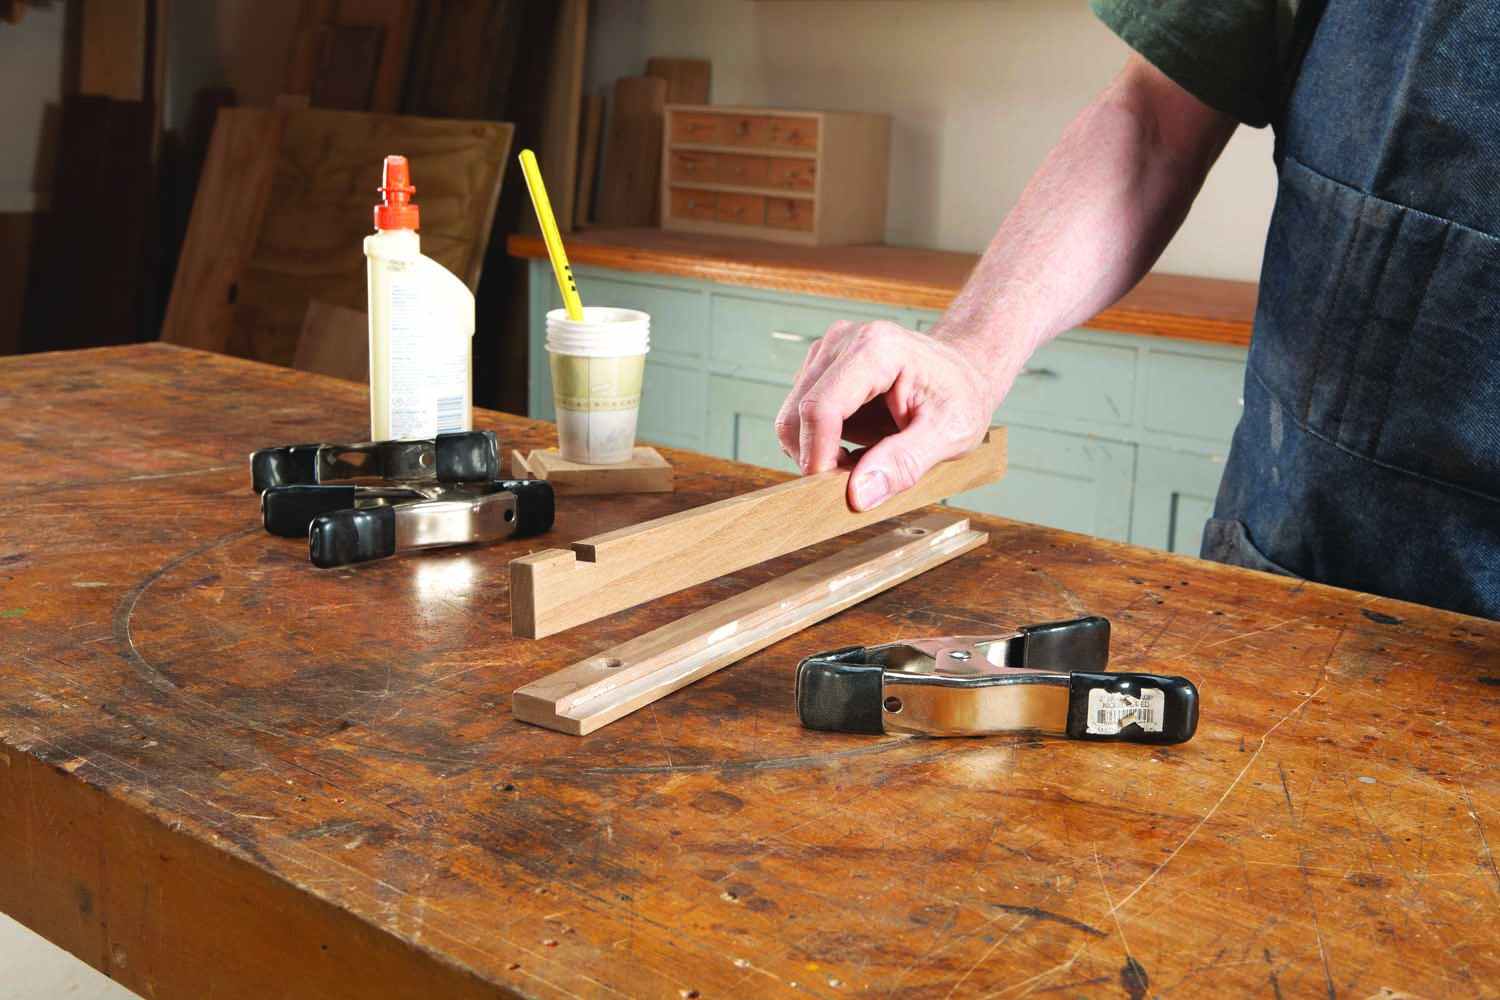
Photo 4. Glue the two shelf pieces to the rails. Of course, you have to remove the tape from the shelf pieces first!
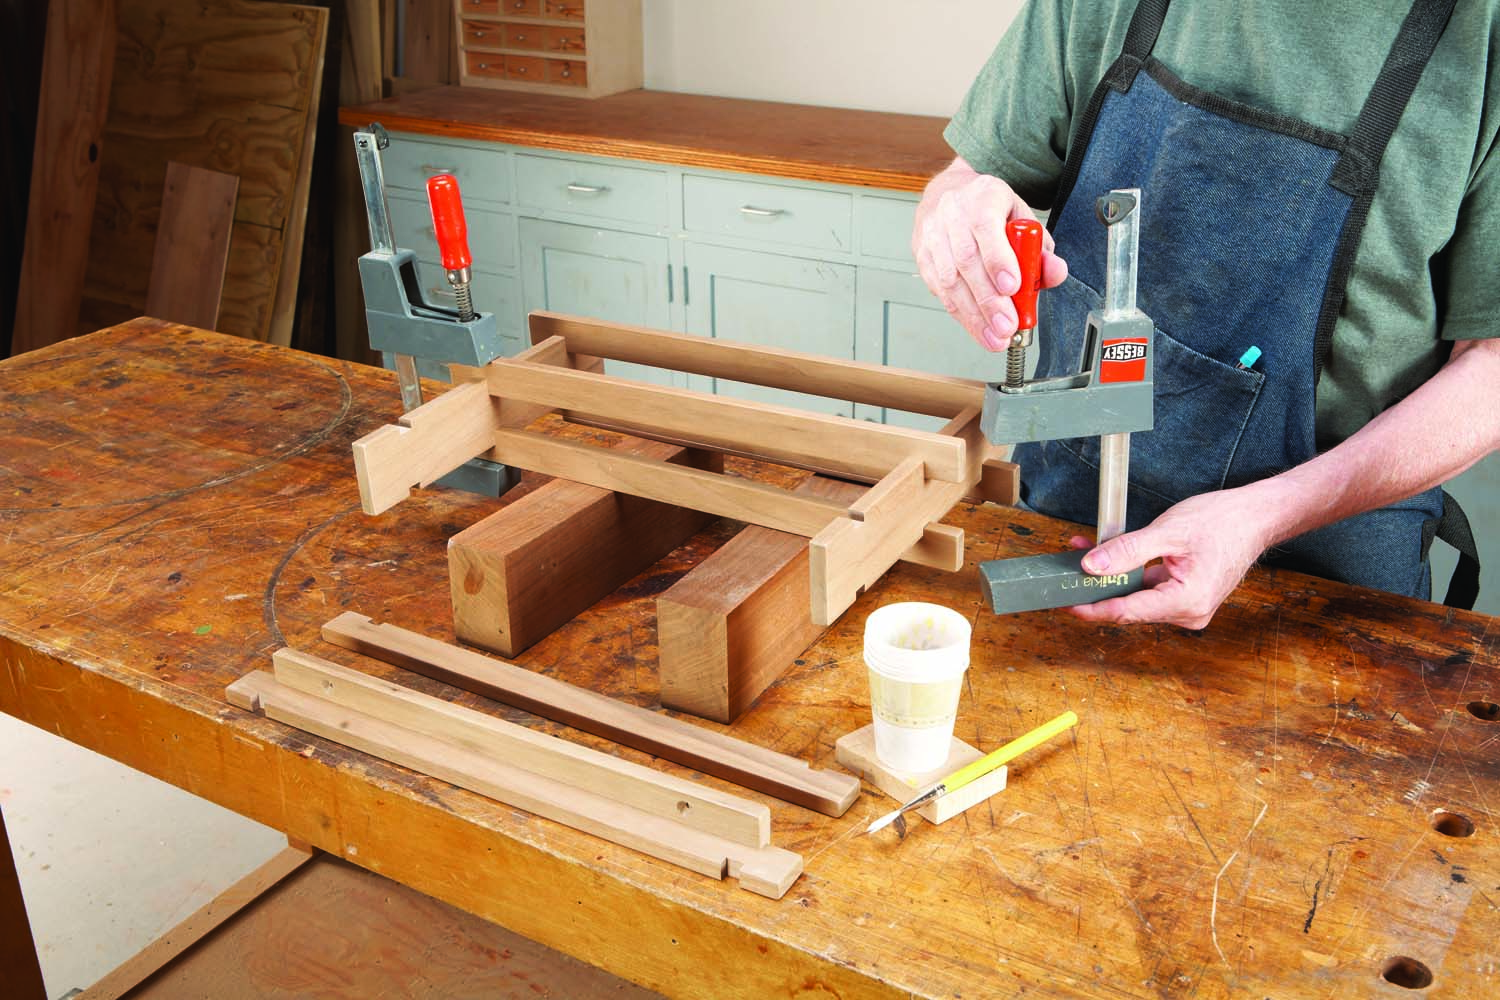
Photo 5. Glue all of the shelf pieces to the ends of the wine rack. It’s very easy to clean up glue that squeezes out of the joints—it will pop right off the finish.
Cut rabbets in the rails (Photo 3 and Fig04). The rabbets are the same width and depth as the notches, so you don’t have to adjust the dado set. Drill holes in the rails for mounting the rack to a wall. Remove the tape from the two shelf pieces, then glue the rails to these pieces using spring clamps (Photo 4). Reinforce these joints with small screws (Fig. A). Glue all the shelves in place (Photo 5). That’s it!
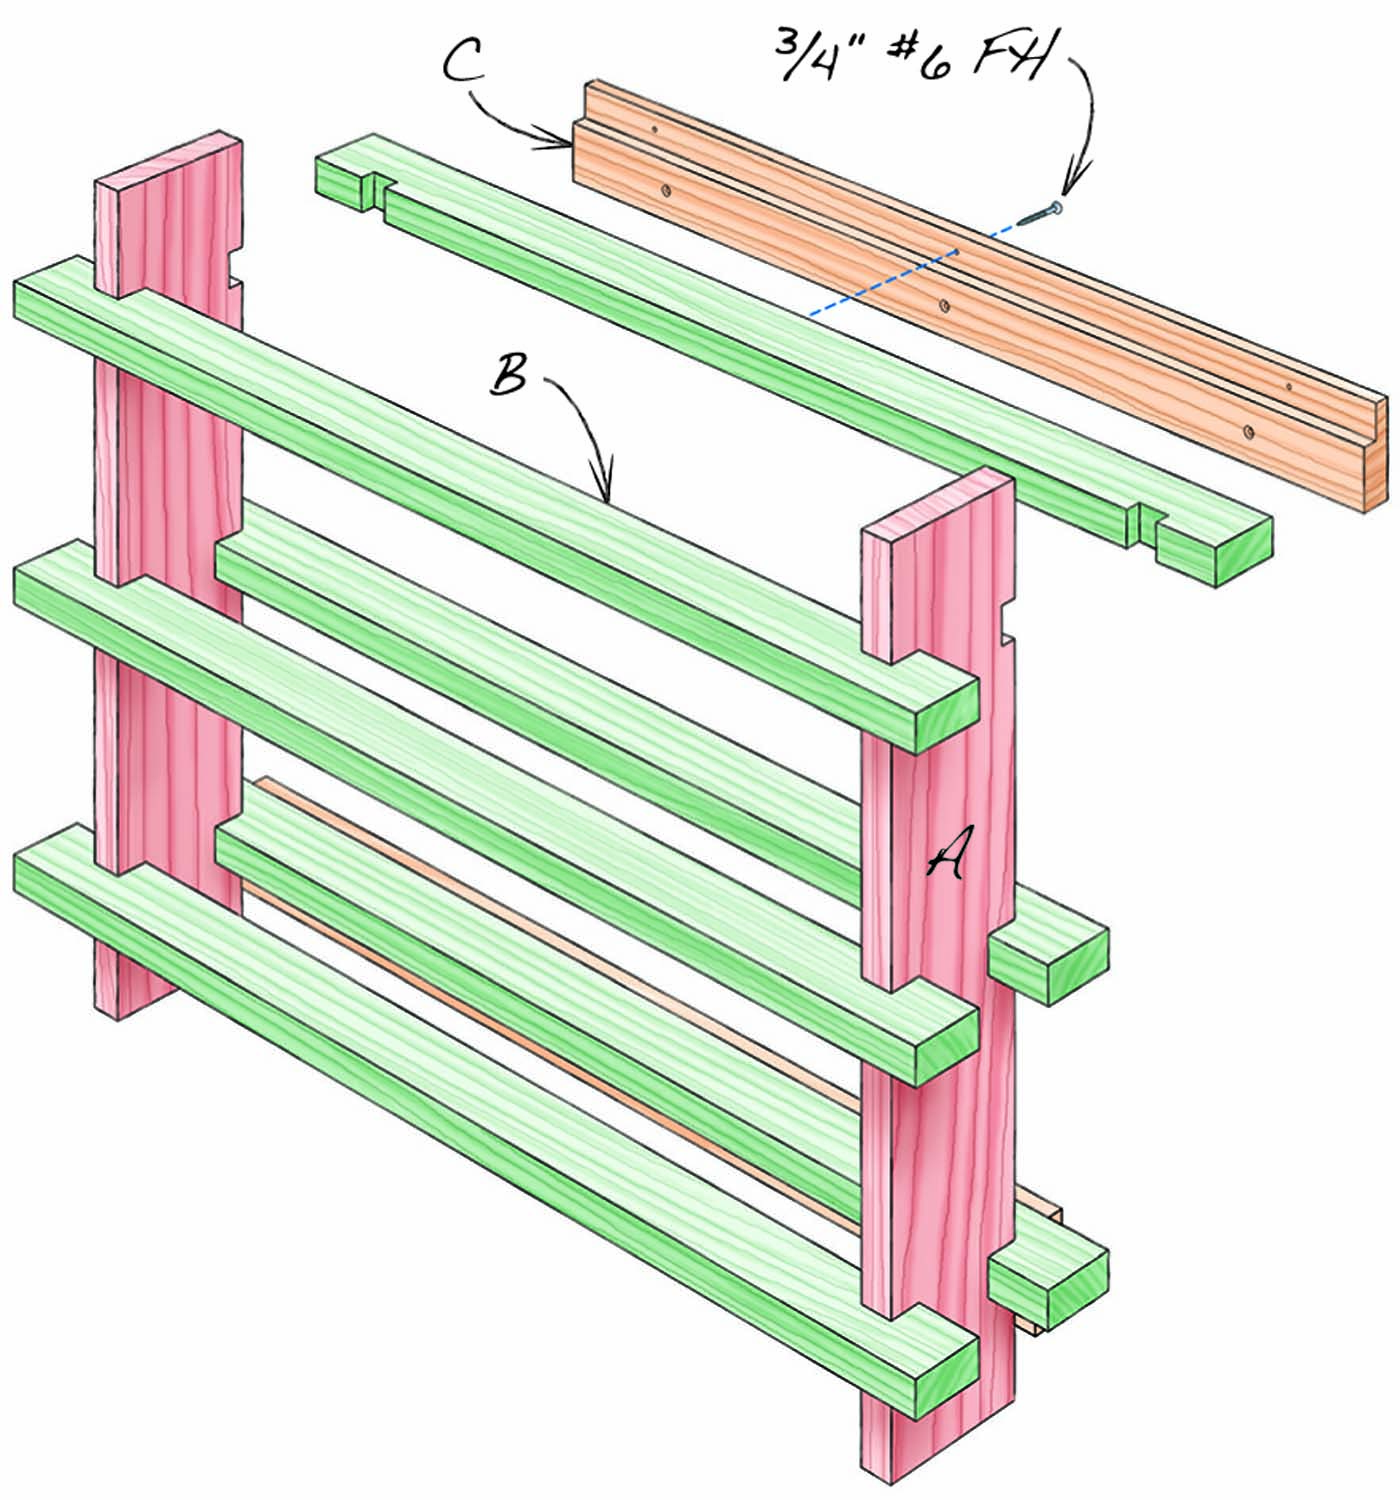
Fig. A. Exploded View
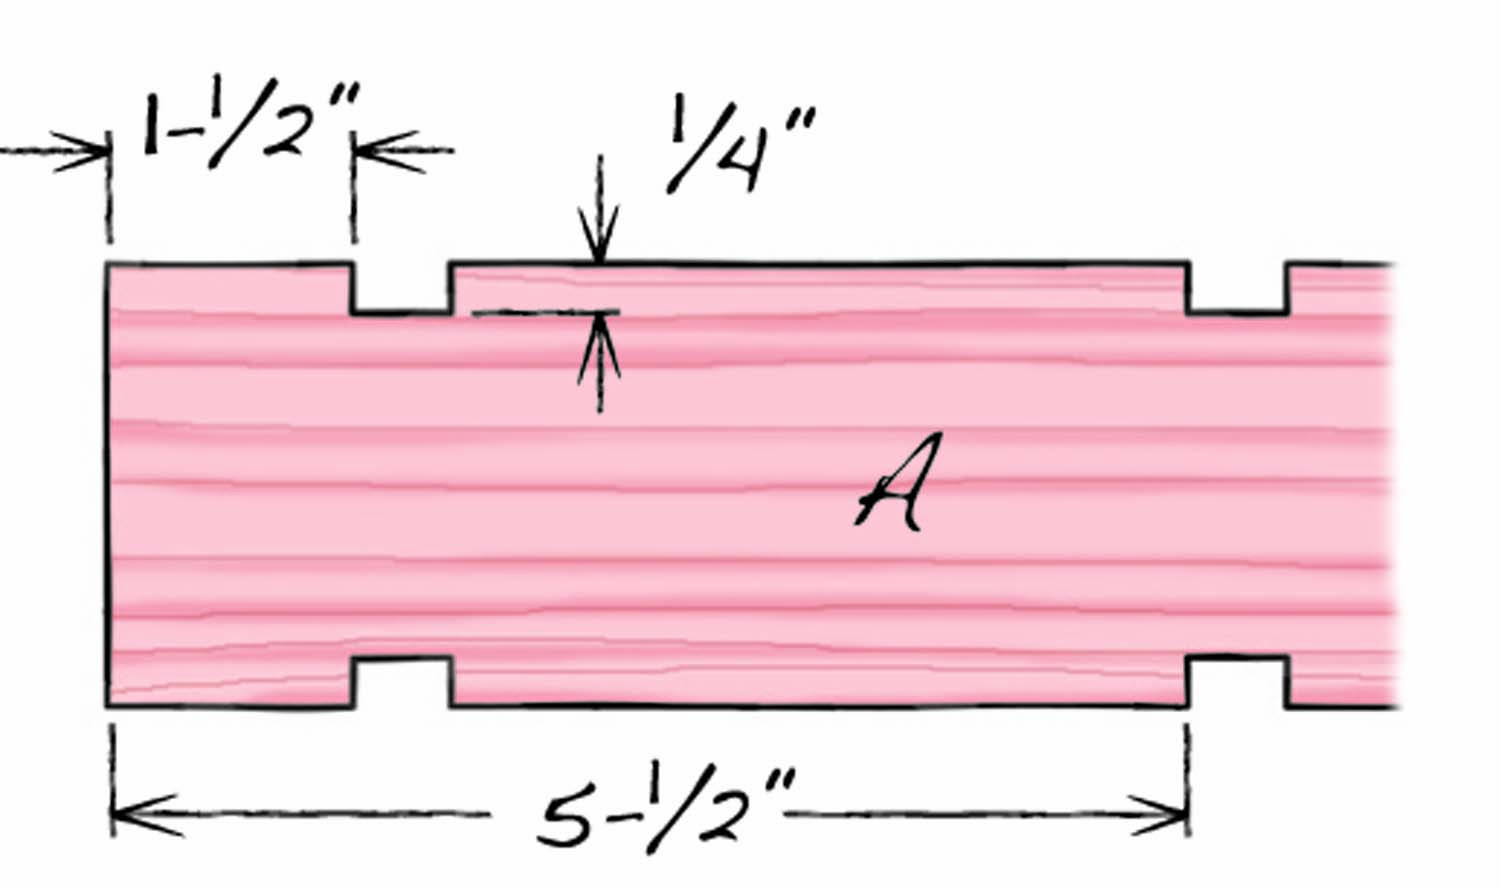
Fig. B. Side Details
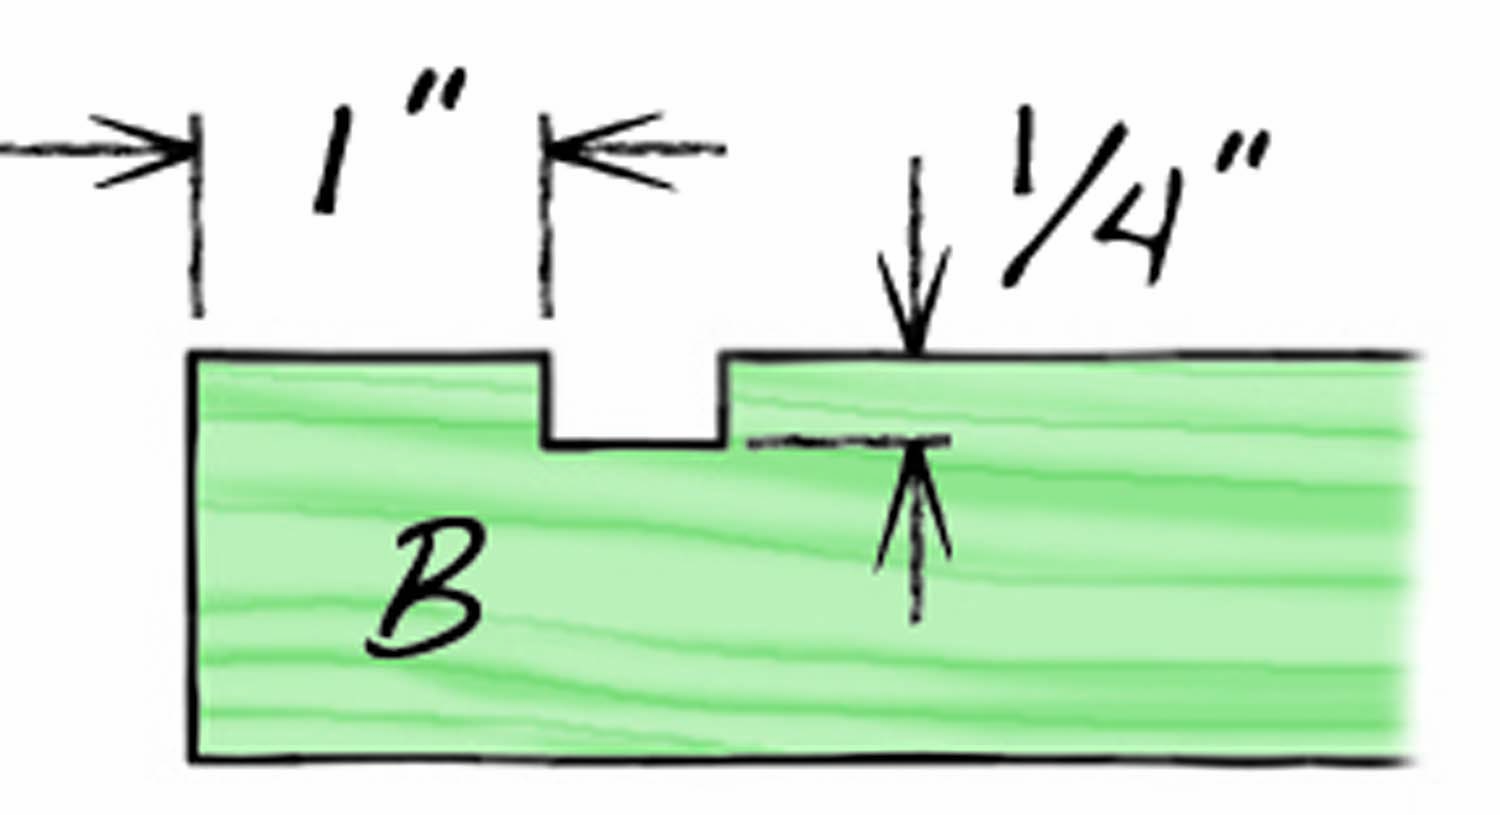
Fig. C. Shelf Details

Fig. D. Rail Details
Cutting List
|
Wine Rack |
|||
|
Overall dimensions: 11-1/2″ H x 17-1/4″ W x 3-1/2″ D |
|||
|
Part |
Name |
Qty. |
Th x W x L |
|
A |
Side |
2 |
1/2″ x 2-1/4″ x 11-1/2″ |
|
B |
Shelf |
6 |
1/2″ x 1-1/8″ x 17-1/4″ |
|
C |
Rail |
2 |
1/2″ x 1-3/8″ x 15-1/4″ |
Here are some supplies and tools we find essential in our everyday work around the shop. We may receive a commission from sales referred by our links; however, we have carefully selected these products for their usefulness and quality.