We may receive a commission when you use our affiliate links. However, this does not impact our recommendations.
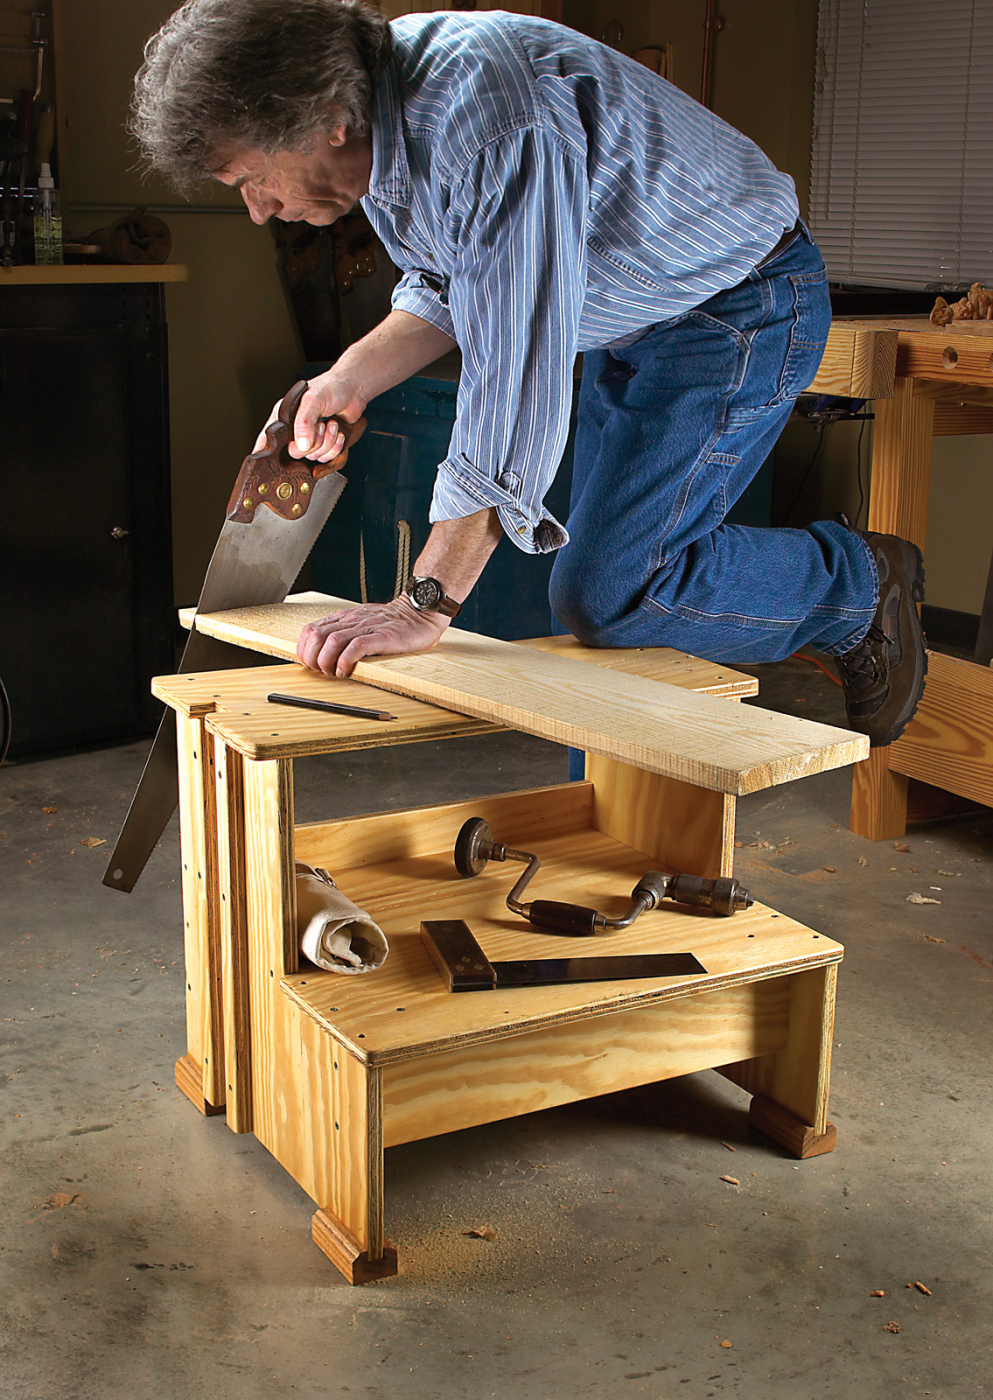 This simple afternoon project is perfect for handsawing, holding doors for planing, organizing tools and giving you a leg up. It will quickly become indispensable.
 This simple afternoon project is perfect for handsawing, holding doors for planing, organizing tools and giving you a leg up. It will quickly become indispensable.
My simple plywood two-step in the old tool shed had reached the end of the road. Looking at it you could see a pile of old wood ready for the burn pile. I saw in it a project that recalled 45 years of working life. It was more than just memories that came to mind. If it was time to recycle the old stool then it was important to document what had been a most useful object, and perhaps make a successor to it before its last rites.
My time in home building and remodeling went back to four summers during college. I learned the trade of carpentering before the modern era of specialization, the days when a small carpenter crew did everything from the first framing to a completed house ready for painters. It was a good education. The shop stool represented a sort of rite of passage into the world of construction.
That first summer I was too busy learning the ropes as the new kid to understand the significance of a shop stool. I borrowed someone else’s when a task was at ceiling height. The second summer I was more confident of what was required on the job. After all, they had hired me back.
One day the boss suggested I stop by his shop to make a shop stool. It sounded helpful to me, but looking back on it from the perspective of years later I can see its significance. It marked my acceptance as a man who could use an on-site bench to do his work. From now on along with my growing box of tools, the back of my car held my very own work stool, something some newer member of the crew would ask to borrow. That pile of old plywood ready for the burn pile was to me a badge of rank, hard won during months of work on the job.

Here is the old stool after a life of usefulness, now on the burn pile to be returned to basic elements of the universe and to be recombined into a new generation of materials. Note the badly worn corners where the plywood feet gave out. The attachment of the hardwood “shoes” as I describe in the article will extend the life of your stool.
So what was so special about the shop stool on the job? The place at which you work is an important extension of the tools you use. This is as true of home building and remodeling as it is in the workshop. In fact this shop stool is an asset in either your shop or on the building site.
• It serves as a stable two-step work platform.
• It’s a mobile work surface for cutting and assembly.
• It holds doors on edge for planing tasks.
• Two stools will replace the need for sawhorses.
• It keeps tools in one place where they are easier to find and transport to a new work site.
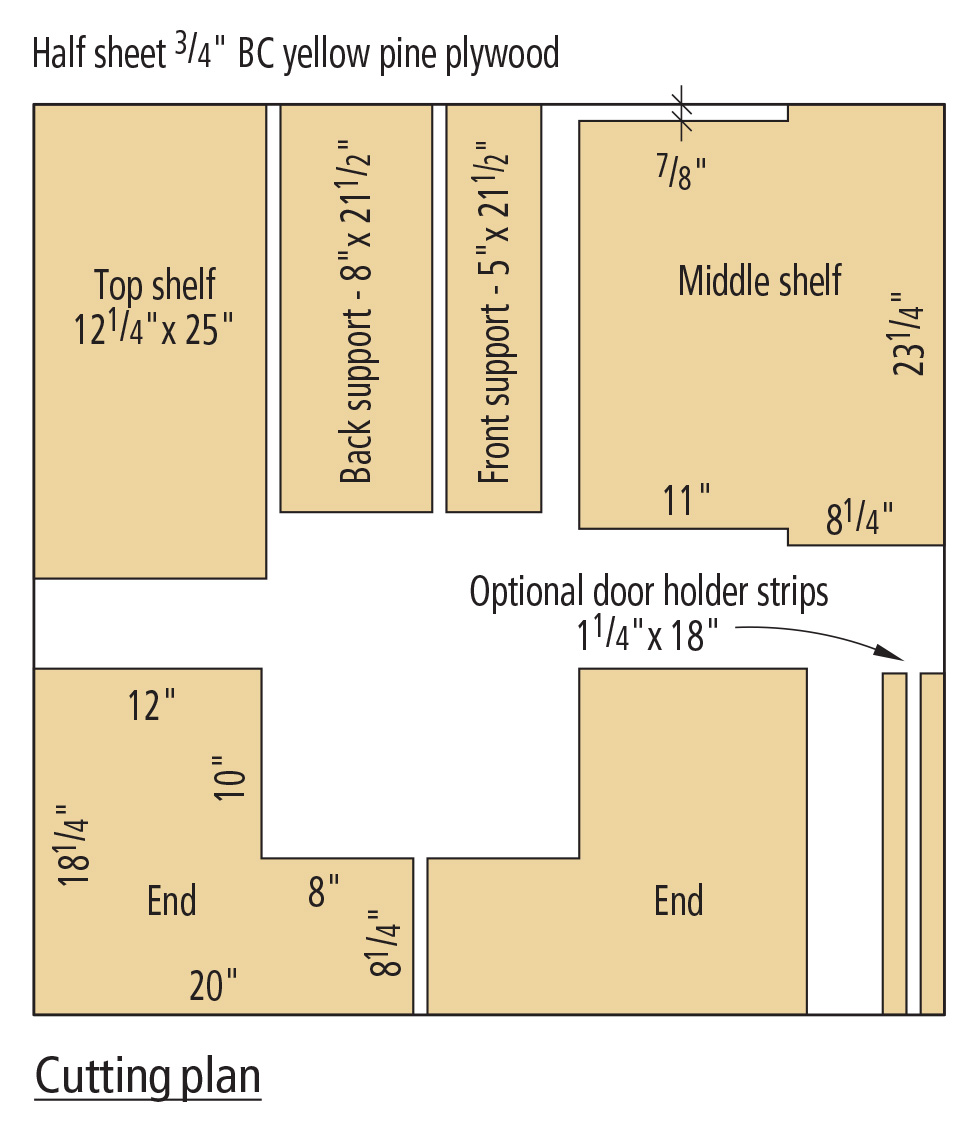
All of this is from a half sheet of 3⁄4” plywood and some deck screws. Recalling all the ways the shop stool gives good service made me realize how important it was to record its dimensions. I inherited mine from men of experience on the job. There is no better school of design than experience. So here it is for you, too.
 Construction Steps:
 Construction Steps:
1. After cutting all the plywood pieces, round over all the exposed edges in the stool using a 1⁄8″-diameter roundover router bit.
2. Assemble pieces using tapered drill and countersink to pre-drill for 15⁄8″ deck screws. Start with the front and back supports on the middle shelf.
3. Cut 4′-long hardwood blocks for the feet with a groove to fit 3⁄4″ plywood. Adjust the thickness of the blocks to make the stool level and glue them in place.
4. Finish with a sealer coat of polyurethane and thinner mixed 50/50.
Construction Tips
While plywood is a stock construction item, I found that its quality varied considerably and that taking time to shop for a sheet with reasonable finish, free from major voids, and not warped, paid off. Some of the best plywood these days comes from yellow pine and is the BC grade with one good face. Pick the best you can.
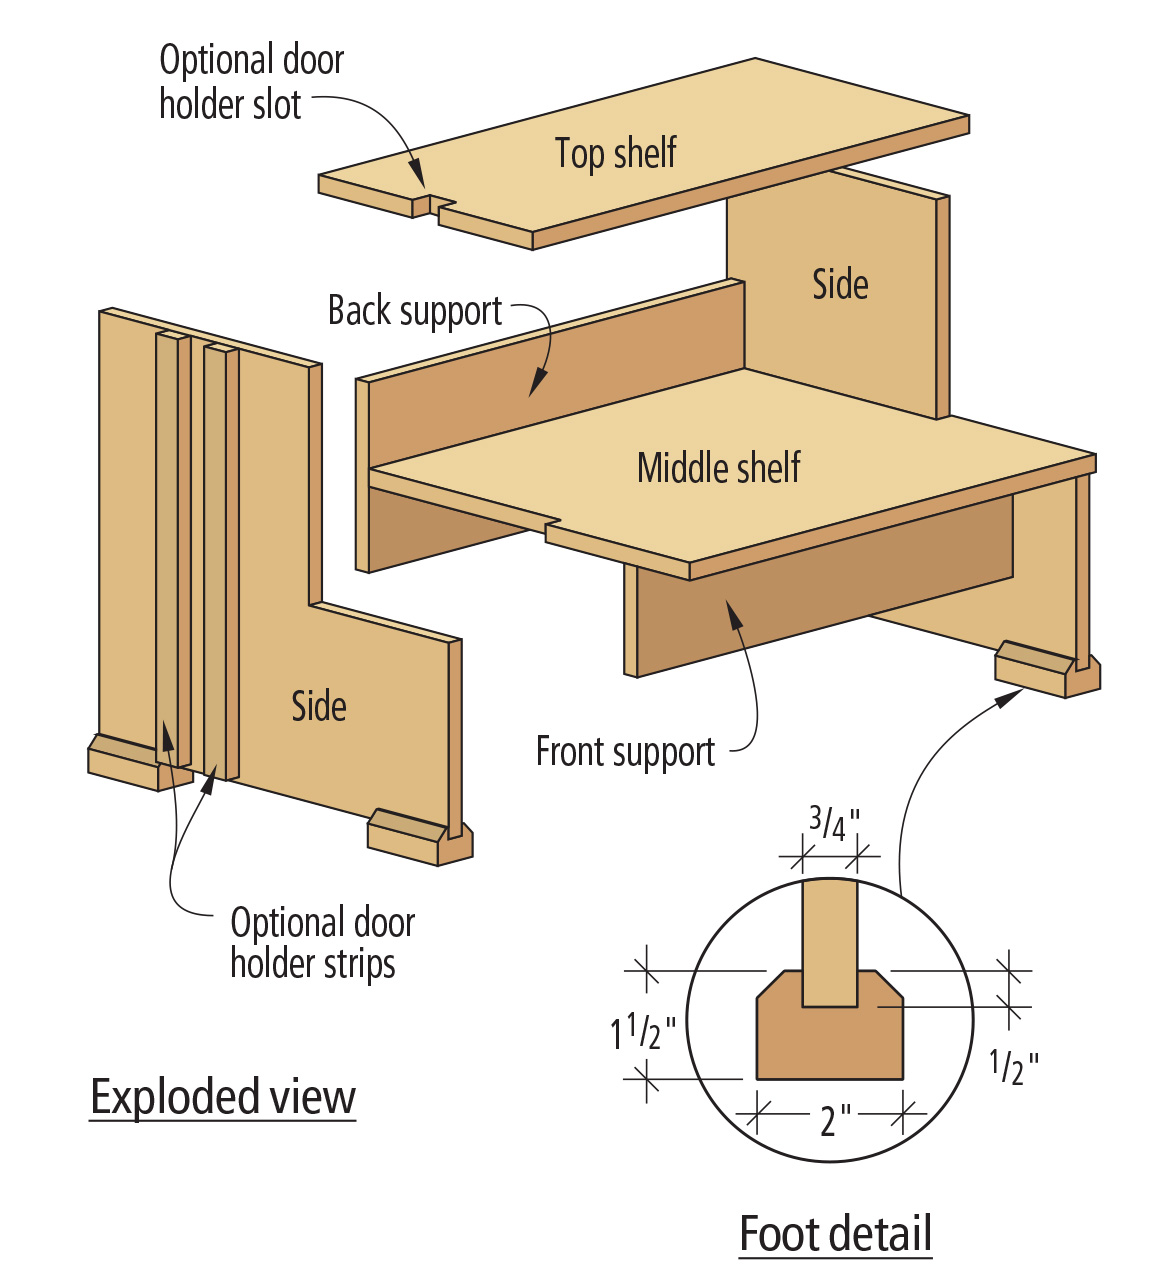
The illustrations and cutting plan give you direction. Start by screwing the 8″ back support to the middle shelf, and then screw the 5″ front support under the middle shelf leaving it centered with 7⁄8” exposed at each end. With these in place, the sides will screw to the middle shelf more easily. The top step goes on and you are done. It’s that simple.
The door holder slot, if desired, is added to one side. And there is one more addition that will add years of life to your shop stool. I found that the plywood feet abraded away with use, as you can see in the picture below. As that happens, the stool loses stability as well. So I made some simple hardwood blocks. The blocks are made from a piece of 11⁄2” x 2″ with a groove 3⁄4” wide by 1⁄2” deep routed into the wider face. Cut these into four pieces 4″ long and glue them onto the sides.
One further use of the stool comes at noon – all the guys sitting around the work site with their lunch pails open!
Here are some supplies and tools we find essential in our everyday work around the shop. We may receive a commission from sales referred by our links; however, we have carefully selected these products for their usefulness and quality.