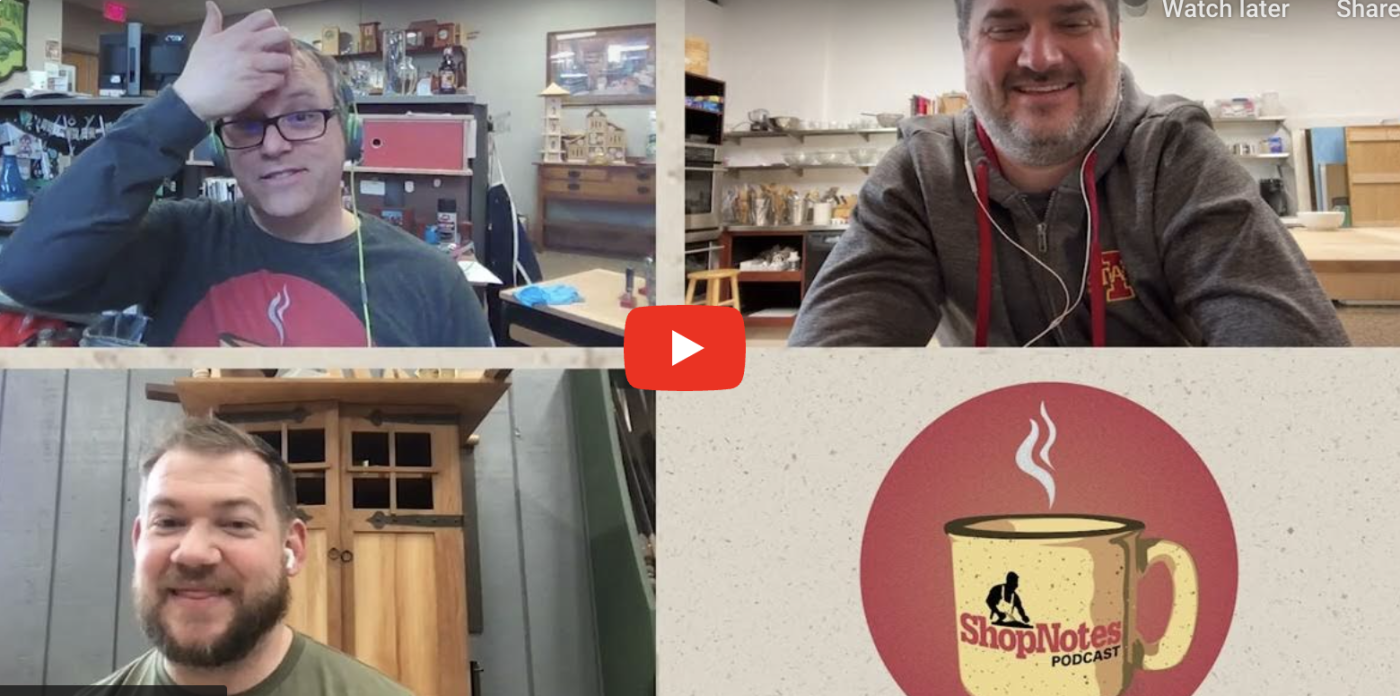
Search
Navigation
Blogroll
Archive
| | Sun | Mon | Tue | Wed | Thu | Fri | Sat | | 31 | 1 | 2 | 3 | 4 | 5 | 6 | | 7 | 8 | 9 | 10 | 11 | 12 | 13 | | 14 | 15 | 16 | 17 | 18 | 19 | 20 | | 21 | 22 | 23 | 24 | 25 | 26 | 27 | | 28 | 29 | 30 | 1 | 2 | 3 | 4 | | 5 | 6 | 7 | 8 | 9 | 10 | 11 |
| | 
|
 Monday, May 14, 2007
Tool Test – Ashely Iles Carving Tools
From August 2006 Popular Woodworking
Good Steel and Good Handles
Last summer and fall I extensively tested several carving gouges from English toolmaker Ashley Iles. Midway through the testing, I was impressed enough to go out and buy several additional gouges. Both the long-handled “London” pattern and short-handled palm tools were comfortable in the hand and nicely finished with beech handles and excellent quality steel. 
They compared favorably to the Pfiel gouges I already own, have a nicer finish on both the handle and blade, and are competitively priced. I was particularly impressed with the condition of the blades. Many new carving tools look nice, but the shininess is due to overbuffing. The Ashley Iles blades were accurately and finely ground so only minimal honing was needed before using them. In use, they held their edges very well. Hundreds of sizes and sweep patterns are available, as are several different sets. You also receive a discount by ordering six or more chisels.
— Robert W. Lang
More information on Ashley Iles tools from Tools for Working Wood
Share your experience with this tool by leaving a comment
Read other entries by Robert W. Lang | Read other Tool Tests
5/14/2007 9:50:43 AM (Eastern Daylight Time, UTC-04:00)
|
|
Tool Test - Powermatic PM2000 Table Saw
From August 2006 Popular Woodworking
Features and Performance for Serious Woodworkers
My first look at the newest cabinet saw from Powermatic was last year when the company was still working out some final details. At the time, the most difficult concept to grasp was how the PM2000 would fit into the product line alongside the Powermatic Model 66 cabinet saw that has become an industry standard. In short, the Model 66 is designed for more physically demanding millwork situations, such as ripping hardwood lumber all day long. The PM2000 incorporates features that will appeal to a furniture maker who switches between setups throughout the day.

Let’s look at a few of those new features on the PM2000. First off, it has an integrated mobile base. See it in the picture? You won’t! It’s built into the cabinet of the saw. To use the mobile base you pull the blade-tilting wheel (on the right of the cabinet) away from the saw to engage a second geared mechanism. That handle then becomes the adjusting handle for the mobile base. It lifts the saw only a fraction of an inch off the floor, but it’s enough to get things moving (please pardon the pun). After use in our shop for a month or so, we’ve noticed that the thread pitch on the mobile-base lift requires more turns than we’d prefer and there seem to be some concerns with dust getting into the threads, affecting the ease of movement. Powermatic representatives agree and both of these items are under consideration for an upgrade.
Another question we had was about the “mobility” of the saw when a 50"-fence rail and extension table without casters is added. We were told (and we checked) that once the saw is raised onto its casters, the extension table can be lifted easily enough (again, a fraction of an inch is enough) and the saw can essentially be steered from the extension table without causing any harm to the saw.
Powermatic improved the blade-changing process as well, by adding an arbor lock that allows one-wrench blade changes, doing away with the stick that we all end up jamming against the blade to make the change. The lock is easy to use and a nice feature.

The arbor lock works by sliding the spring-loaded red lever toward the
blade support until the tooth engages one of the notches. A single
wrench is then used to loosen (or tighten) the arbor nut.
The third major change (and our favorite) is the addition of a true riving knife. For those unfamiliar, a riving knife is a steel plate mounted behind the blade that raises and lowers with the blade (see photo below). Essentially it’s the splitter part of the guard, but it stays in place without the guard, providing an extra level of safety when using the saw. In our opinion this is a table saw addition that’s way overdue. At press time the riving knife will only be available as an accessory, but we hope that will soon change. Powermatic has also added a dust shroud around the blade to improve dust collection and included a good quality miter gauge.

The black riving knife serves as a splitter to keep the saw kerf in the
wood from closing after the cut, which could pinch the blade. The top
of the riving knife is always just below the blade height, so it can
remain in place when making grooves and dados.
We tested the 3 horsepower, single phase, 220-volt model with the 30"-fence rail system. You may prefer the 50" rail set in your shop, but we felt the balance between mobility and capacity was best in this model. Conveniently, we had a 5hp Model 66 sitting in the shop at the same time, so we were able to compare the motor performance between the two saws.
I ripped a few pieces of 3"-thick white oak on both saws and found very little difference. Neither sliced like a hot knife through butter, but they also showed little difficulty in handling the task – a strong positive statement for the smaller motor on the PM2000. A 3 hp Model 66 is $150 more than the PM2000. Other accessories that will be available for the PM2000 include zero-clearance and dado-insert plates. Because of the riving knife design, the PM2000 uses a different size throat insert than the Model 66. To sum up, we like the PM2000 performance and the features it offers to both the home and professional woodworker. As a “next generation,” it stands proud alongside the Model 66.
— David Thiel
More information on the Model 2000 Table saw from Powermatic
Share your experience with this tool by leaving a comment.
Read other Tool Tests
5/14/2007 9:35:07 AM (Eastern Daylight Time, UTC-04:00)
|
|
Tool Test - Lie-Nielsen Medium Shoulder Plane
From August 2006 Popular Woodworking
Exquisite!
I’ve long been a fan of large shoulder planes and have many miles on my Lie-Nielsen 073, which I bought the first day it was available. So I wasn’t sure I needed the company’s new 3⁄4" shoulder plane when I ordered it. Surprisingly, the medium shoulder plane gets as much use as the bigger tool. The 3⁄4" width gets this tool into the bottoms of dados to clean out the unevenness or junk left by coarser tools. At 2.3 pounds, it weighs almost two pounds less than its bigger brother, which makes it a bit easier to wield when working narrow stock and small rabbets.
 And, of course, it excels at its primary job – trimming tenon shoulders and cheeks. Like all Lie-Nielsen tools, the medium shoulder plane is made to high standards. I placed a straightedge on the sole and it revealed that it was perfect. Then I placed a machinist’s square on the sidewalls to check their orientation to the sole. If the sidewalls aren’t perfect to the sole the tool will never work quite right. Both sidewalls were dead-on perfect all along the tool’s body. The real surprise was the iron. With most tools, I’ve come to expect some serious work to flatten and polish the unbeveled face of the iron. Lately, I’ve found Lie-Nielsen (and its competitor, Veritas) to have irons that require almost no work. This one took a scant five minutes to sharpen and go. That’s worth something in my book.
Which brings me to the price: $175. You might be able to buy a vintage Preston, Record or Stanley shoulder plane for a bit less, but I ask you: How will you true up the sole or sidewalls if they’re not perfect? With the modern tools, you can send back the ones that aren’t perfect. And for those of us who prefer woodworking to metalworking (a show of hands, please) the price is incidental. Especially when you take into account this is the last one you’ll ever have to buy.
— Christopher Schwarz
More information on the Medium Shoulder Plane from Lie-Nielsen
Share your experience with this tool by leaving a comment.
Read other entries by Christopher Schwarz | Read other Tool Tests
5/14/2007 9:14:21 AM (Eastern Daylight Time, UTC-04:00)
|
|
Tool Test - Triton MOF001KC Router
From August 2006 Popular Woodworking
In a world of mid-sized routers offering both a fixed and plunge base, the Triton MOF001KC is a competitively priced, dedicated plunge with lots of features. It’s a scaled down version of the 31⁄4 hp TRC001 plunge router, and offers all of the same features.
The MOF001KC has three plunge modes: free plunge, handle winder and micro adjust. The free plunge is just as it sounds and is selected by fully depressing the orange “plunge mode” button in the center of the right handle. The lever lock now controls the position of the plunge. To use the router with a more controlled plunge action, release the plunge mode button and pull the winder clutch ring (positioned on the inside of the right handle) toward the handle and then rotate the handle to move the motor up or down. Micro adjust is possible when in the winder mode by turning the micro-winder knob at the top of the router. The plunge options take a little getting used to, but once familiar, I found them handy.
The MOF001KC is also designed for use in a router table. When in place, the micro adjust is accessed through the back with the included winder handle. When changing bits (in or out of a table) the collet is easily reached by fully extending the collet through the base. When fully extended, a collet lock engages so only a single wrench is required. Another feature for table use is the ability to easily remove the return spring, making in-table height adjustments easier.
The Triton router is outfitted with efficient at-the-base dust collection and a below-the-base dust shroud. The variable-speed motor is equipped with soft start and a power switch door that remains in the open position when the router is on. Both are good safety features. The router also comes with 1⁄4" and 1⁄2" collets, a seven-piece template guide kit, fence and circle cutter.
I found the MOF001KC router a bit loud (91 decibels), but it performed well. It’s slightly larger than some of the competition, but overall felt good during use. The many features are an advantage, but may seem overwhelming until you become familiar with them.
— David Thiel
More information on this router from Triton
Share your experience with this tool by leaving a comment.
Read other Tool Tests
5/14/2007 9:02:14 AM (Eastern Daylight Time, UTC-04:00)
|
|
Tool Test - Veritas Bevel Setter
From August 2006 Popular Woodworking
At first blush I looked at this tool and said, “Twenty-five bucks for this?” Then I took a closer look and realized how many things it will do. I now believe it’s $25 well spent. Actually it’s only $24.50, but let’s not quibble. To understand this tool, think of the bevel setter as more of a Swiss Army Knife for angles. You can set a sliding bevel accurately to 1⁄2° anywhere between 0° and 60°. Or you can use your sliding T-bevel to gauge an angle and then use the setter to find out what that angle truly is.
 Flip the sturdy 3" x 7" stainless steel blade over and you’ve got setups for seven of the most common dovetail angles, as well as settings for 12 polygon miter angles. And just for good measure, they’ve added a scale on each long edge marked in inches (by 1⁄16") and millimeters respectively.
The indicator marks on the bevel setter are etched and the finish is excellent. The machined aluminum fence moves smoothly and locks effortlessly with a knurled brass knob. Non-mar pads on the back of the fence keep the blade looking nice. The folks at Lee Valley/Veritas continue to stretch their imaginations and offer tools that a woodworker will not only want to own, but will use constantly. The bevel setter is another in that line of tools.
— David Thiel
More information on the Bevel Setter from Veritas
Share your experience with this tool by leaving a comment
Read other Tool Tests
5/14/2007 8:23:56 AM (Eastern Daylight Time, UTC-04:00)
|
|
Tool Test - Dado Wiz
From August 2006 Popular Woodworking
Dado Wiz Zeros in on Perfect Fit for Dados or Grooves
Our staff has an ongoing discussion about the best way to make dados. Whether using a dado stack or router, the trick is getting the dado or groove the proper thickness to match the material. I prefer using a router; that’s why I was pleased to learn about the The Dado Wiz (the black plate shown at right) locks to most clamps and guides (5⁄8" thickness maximum). Temporary pins are put in place on the Wiz and a sample piece is used to adjust the guide to perfectly fit the shelf or divider material.
The included brass template guide and your 1⁄4", 3⁄8" or 1⁄2" router bit is then used to make two passes (one up, one back) to make a perfectly sized groove or dado with a single setup. The Dado Wiz slides on your guide during the cut, controlling the position of the bit. The Dado Wiz efficiently answers a need when routing dados. It does come at a price that’s a little steep, but if you prefer routed dados, this jig belongs in your shop.
— David Thiel
More information on the Dado Wiz from Woodline
Share your experience with this tool by leaving a comment.
Read other Tool Tests
5/14/2007 8:16:15 AM (Eastern Daylight Time, UTC-04:00)
|
|
 Thursday, May 10, 2007
Tool Test - Bosch PS20-2 Pocket Driver
From October 2006 Popular WoodworkingBosch Pocket Driver Offers Pint-sized Power
I don’t care how many cordless drills you own, if you like tools, you’re going to need one more. The Pocket Driver elicits the same response from everyone who sees it: “It’s cute!” And that it is, but the really nice part is that it performs as well.  Powered by a 10.8-volt lithium ion battery (two included), this drill performs like a good 12-volt model, and it weighs only 4.4 pounds, fitting comfortably in the palm of your hand. Bosch boasts the drill will drive 100 3" screws. Honestly, I stopped at 75 1-5⁄8" deck screws (comfortably sunk below surface depth in treated pine) because that’s more than enough proven power out of a drill that I wouldn’t even use for that task. This drill is designed to be handy, whether dropped in a work belt, shop apron or any number of drawers around the house. Its size lets you work in tight or awkward spaces (think about installing drawer slides) while still providing lots of power. I did find one thing to pick on. The LED light is a nice addition, but because of its location the clutch ring keeps the light from shining on the actual impact point for all applications. Who cares? Buy one! — David ThielMore information on the PS20 Pocket Driver from BoschShare your experience with this tool by leaving a comment Read other Tool Tests
5/10/2007 2:35:01 PM (Eastern Daylight Time, UTC-04:00)
|
|
Tool Test - Chester Toolworks Birdcage Awl
From October 2006 Popular WoodworkingA Bigger Birdcage Awl
Birdcage awls are outstanding and accurate tools for installing hardware. In essence, they are a boring tool: Place the tip where you want your screw and twist the tool back and forth. When you’re done, you have a perfect tapered hole for your screw. Birdcage awls are outstanding and accurate tools for installing hardware. In essence, they are a boring tool: Place the tip where you want your screw and twist the tool back and forth. When you’re done, you have a perfect tapered hole for your screw. 
Even with a cordless drill/driver on my workbench I’ll choose the awl when pinpoint accuracy matters, as it almost always does when installing hardware. The tool has become an endangered species of late, and so I was delighted to learn that Chester Toolworks has begun making an elegant and hard-working version. The square-shaped shaft on this birdcage awl is thicker (3⁄16" square) than most examples I’ve encountered, but the hole it makes is perfect for most cabinet hardware. The handle is shaped to nestle in your palm and the small bead by the tool’s ferrule also helps you apply the right downward pressure.
These tools are handmade by Dave Anderson and can be handled in a variety of woods, including snakewood and ebony (shown). Anderson also makes a line of scratch awls, marking knives and bowsaws, all of which are finished to the same high degree.
— Christopher SchwarzMore information on the Birdcage Awl from Chester ToolworksShare your experience with this tool by leaving a comment
Read other entries by Christopher Schwarz | Read other Tool Tests
5/10/2007 2:23:50 PM (Eastern Daylight Time, UTC-04:00)
|
|
Tool Test - Hitachi M12V2 Plunge Router
From October 2006 Popular WoodworkingHitachi Revamps an Old Friend with Mixed Results
For the past 17 years, the M12V plunge router from Hitachi has been a staple in many professional and home shops, often serving as the tool of choice for router tables. Hitachi decided it was time for a makeover, and the M12V2 is the result. What’s the difference? The M12V topped out at 20,000 revolutions per minute (rpm), while the V2 has an extra 2,000 rpm. Hitachi has reworked some ergonomics on the tool and, of course, the V2 now wears the distinctive tennis-shoe body molding like the company’s other new tools.  What Hitachi hasn’t done is to significantly improve the tool. The plunge depth-adjustment mechanism is easier to use and more accurate. The variable-speed control wheel has been moved from the top of the router to the right handle, which improves the ergonomics during handheld operations. The router does offer plenty of power, and the soft-start feature is great for safety and comfort. The reworked collet lock is an improvement over the old design, and the grip ergonomics are an improvement as well. However the M12V spends a considerable amount of time in a router table. The tool’s switch placement now complicates router-table usage. We found a wobble in the motor-to-column fit that will affect precision plunge operations, such as cutting a mortise. And we were disappointed by the lack of through-the-base depth adjustment that has become almost standard on routers used in tables. During testing we ran the router in a free-plunge mode (for cutting a mortise) and found that the quick-adjust lever for plunge depth rotated to the locked position due to vibration. This locked the motor in the down position and caused a problem coming out of the cut. A fix for this free-spinning lever is necessary. In the end, we think the router’s table application has been short-changed. And while some performance has been added, the ergonomic changes are a mixed bag with another two pounds added to the tool’s weight. Add a higher (though still competitive) price and the M12V2 is not the redesign we might have hoped for. — David ThielMore information on the M12V2 Router from HitachiShare your experience with this tool by leaving a comment. Read other Tool Tests
5/10/2007 2:14:21 PM (Eastern Daylight Time, UTC-04:00)
|
|
 Wednesday, May 09, 2007
Leigh Dovetail Jigs: New Design, Affordably Priced
 Leigh Industries, maker of the Leigh jig, was the reason I found myself going to Port Coquitlam, British Columbia, which is just east of Vancouver in Canada. Leigh invited a number of woodworking magazine editors to a 2008 product launch.
No matter how often hand-cut dovetails are discussed, most woodworkers won’t attempt or accomplish this technique. They want a jig to do the job. And, many feel the purchase price of dovetail jigs is a bit limiting. That’s what the product launch was about. Leigh is set to introduce three new versions of their dovetailing jig in July 2007 – all at competitive prices that are well below the current models.
The Leigh Super 12 (12" cutting length with a MSRP of $199) allows you to produce through dovetails and half-blind dovetails, both variably spaced, as well as sliding dovetails. In addition, box joints in two sizes (5/16" and 5/8") can be made. And for the first time with a Leigh jig, you can make half-blind dovetails in a single pass by using a simple spacing attachment and a nylon rod that fishes through the fingers to adjust the depth-of-cut. Both are supplied with any jig. 
The Leigh Super 18 (18" cutting length with a MSRP of $259) has the same features as the 12" model. However, with this jig you can purchase the finger joint template ($149) to create finger joints (with 1/8" through 5/8" fingers) and create the most popular of the Leigh's Isoloc joints by purchasing the necessary template ($159). This will be the only 18" dovetail jig on the market, as of posting time.
With the Leigh Super 24 (24" cutting length with a MSRP of $329) you get the standard dovetail jig package set for 24" board widths. That's a savings of $200 in comparison to the Leigh 24" D4R, the company’s flagship dovetailing jig. And you can create the finger joints (Templates are priced at $169) and all the Leigh Isoloc joints (Templates are priced at $199) with optional purchases.
If you’ve used Leigh jigs before, you know that tweaking the pins and tails is sometimes required to achieve the best fit. With early models, woodworkers had to adjust the bit height to tighten or loosen the fit of the joint. In recent history, Leigh developed a bushing that had a 5º slope on its sides. The adjustment, made in .001" increments, was achieved by turning the bushing to either increase or decrease the depth of the bushing as it rode along the jig. This bushing continues to be used for all Isoloc joints.
However, the new jigs have a new method for adjusting the fit of the finger joints and the half-blind dovetails. Again it has to do with the bushing, but this time the patented bushing is – wait for it – oval in design. As far as I know this is new to woodworking. Turning the bushing (called the E-Bush with .001" increments) adjusts the cut – or simply rotate your router-holding position once you’re comfortable with the process.
Additionally, Leigh is introducing the VRS (Vacuum and Router Support), which you’ve probably seen in recent advertising. This attachment, backward compatible with the company’s earlier jigs, is a welcome addition for jig users. Router dust collection is significantly increased while the ability to leave the router positioned on the jig saves you time and wear on your router. The MSRP for the VRS is $65 - $76, depending on the length needed.
By the way, the street price on these new jigs is expected to be, on average, some $20 less per item.
Look for more in-depth information in Popular Woodworking magazine about these jigs when the units are available for review. I’ll point out differences between the old and new jigs, and discuss a few patented accessories Leigh is including with the Super jigs.
In my next blog entry, I’ll give you a behind the scenes look at Leigh Industries including a new machining center, the number of employees that keeps the company running smoothly and possible future growth.
— Glen D. Huey
Read other entries by Glen D. Huey
5/9/2007 11:51:41 AM (Eastern Daylight Time, UTC-04:00)
|
|
Tool Test - Craftsman Digital Readout Plunge Router
From November 2006 Popular Woodworking Adding a digital readout to a plunge router is more useful than adding a laser, but this digital feature alone might not be reason enough to give up your old plunge router. The Craftsman #17517 allows you to set the depth of your cut in 1⁄64" (or 0.1mm) increments and see the results in a lighted LCD window on the front of the tool. This clever function is surprisingly accurate and easy to learn to use. You simply touch the router’s cutter to your bench, press a button to zero out the digital scale and then turn a dial to set the depth of cut you want. (The readout is in fractions or in millimeters.) You then lock the setting and start routing. One warning on this feature: the millimeter scale on this tool actually is finer than the imperial scale so you might be tempted to “go metric.” The digital function works best with the router used handheld – it’s less than perfect with the router mounted in a router table. Also, I think it’s too easy to accidentally “zero” out your setting when you intend to simply turn off the digital readout. And while the router holds its setting fairly well in use, you can knock it loose by plunging with excessive pressure. So take it easy. Regarding the router’s other features, I liked the soft-grip handles and the soft boot for the dust collection hose – too bad the dust chute clogged immediately every time I used it. The router offers a nice 10'-long cord, a spindle lock for one-wrench bit changes and a motor that ramps up gradually and is variable in speed from 15,000 to 25,000 rpm. The 10-amp motor itself is gutsy enough for most workshop tasks, and is (like most routers) too loud to be used without ear protection (89 dB up to 100 dB). The router comes standard with both 1⁄2" and 1⁄4" collets. For me, the router would be more appealing if the digital readout could be switched to decimal fractions, the router were more friendly in the router table and if the dust chute functioned well. However, for the first digital-readout router I’ve ever used, I can say that I’m intrigued by what’s next — Christopher SchwarzMore information on the Digital Readout Router from Sears Read other entries by Christopher Schwarz | Read other Tool Tests
5/9/2007 8:46:04 AM (Eastern Daylight Time, UTC-04:00)
|
|
Tool Test - Hock Tools Plane Kit
From November 2006 Popular WoodworkingBuild a Wooden Handplane – in a DayMaking your own woodworking tools can be rewarding – but it can also be time-consuming and thus takes you away from building furniture. Several years ago I felt exactly this way when I built five metal planes from kits. However, you can have the best of both worlds: building furniture and the occasional useful woodworking tool. Hock Tools sells a wooden plane kit that you can assemble in less than a day if you please. The $98.50 kit comes with pre-cut parts – a maple body and a jarrah sole – plus a sweet 11⁄2"-wide iron and a beefy chipbreaker made by Hock. The kit is designed to make a low-slung plane like the ones popularized by craftsman James Krenov, but because the body is wood, you can make any plane you please. I used the kit to make a Roman-style plane, with its unusual through-the-body grips, and the kit worked brilliantly for that.  To build any style plane with this kit, here’s what you do: First glue the two maple sidewalls to the two center blocks using four included dowels to keep the parts in line. Then glue the sole to the body and add the cross dowel that secures the cutter with the wedge (which is included). Then comes the fun part: Shape the 11"-long body using a band saw, rasps and knives. Sharpen up the cutter, open the plane’s throat with a pocket knife, flatten the sole on some sandpaper and go to work. Honestly, most of the time invested in making this handplane is in allowing the glue to dry. Building your own plane – even from a kit – is a fast way to learn a lot about plane mechanics. You don’t need to do much tuning on the plane, but the work you do have to do is quick (because the body is wood, not metal) and enlightening for any handplane user. My Roman-style plane came out great and is a blast to use. — Christopher SchwarzMore information about the Plane Kit from Hock Tools Read other entries by Christopher Schwarz | Read other Tool Tests
5/9/2007 8:37:47 AM (Eastern Daylight Time, UTC-04:00)
|
|
|