


We may receive a commission when you use our affiliate links. However, this does not impact our recommendations.
Resawing can be a wild ride.
You never know exactly what’s going to happen when you cut open a board! Just getting your tablesaw or bandsaw to work right can be an adventure, too. Resawing often pushes those machines to their limits.
If you’ve tried resawing, and have had only had limited success, I hope that I can help you. I’ve been a professional woodworker for umpteen years, and now run a school devoted to fine woodworking, the Philadelphia Furniture Workshop. I’ve taught dozens of students how to resaw–folks who came to class with many tales of frustrating experiences, but left with a solid grounding in how to succeed. You can, too.
Why resaw?
Here are four ways you can improve your woodworking by mastering the art of resawing:

1. Resawing can produce stunning results, such as these bookmatched boards for a large table. You can achieve the same effect–with smaller boards, of course–in your home shop.
• Make bookmatched panels and tops. When you cut down the length of a board and lay the two pieces side by side, you’ll see that they are mirror images of each other–sort of like a folded inkblot. They’re “bookmatched.” It’s an effect that can be quite stunning, particularly when your pieces have irregular figure (Photo 1). Before you saw, you can get an idea of what the bookmatch may look like by holding a mirror alongside your board. Bookmatched boards are widely used to make panels, cabinet sides, and most notably, beautiful tabletops, such as those made by the famous craftsman George Nakashima.
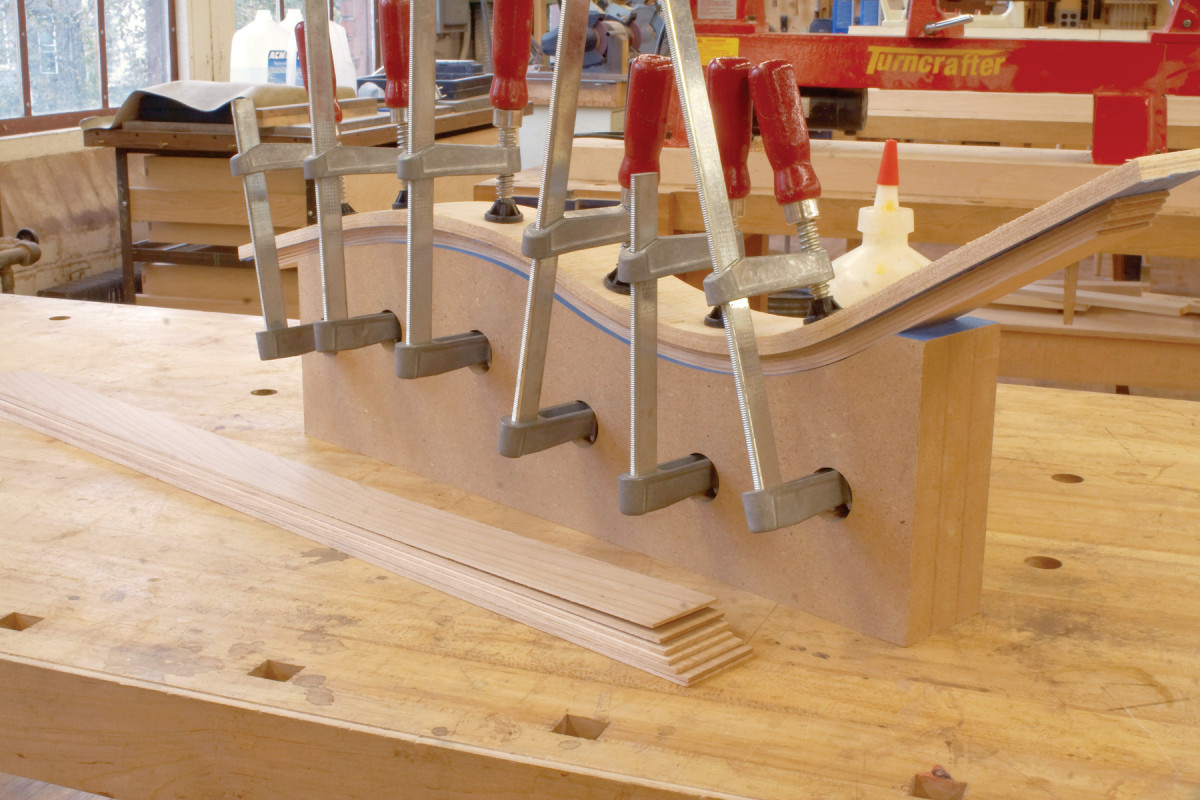
2. On a much smaller scale, resawing is also used to make strips for bent laminations. All of these strips were cut from the same board; by putting them back together in the same order, the glue joints will be almost invisible.
• Make bent laminations that look like solid wood. Bent laminations are made by gluing a number of thin strips over a form (Photo 2). The most efficient way to make these strips is by resawing thicker wood. If these strips are randomly arranged, the lamination may look like it’s obviously made from many layers; by using resawn strips, you can essentially re-assemble the original board by stacking the strips in the same order that they were cut. The layers all blend invisibly into one another–as if the bent piece were solid wood.
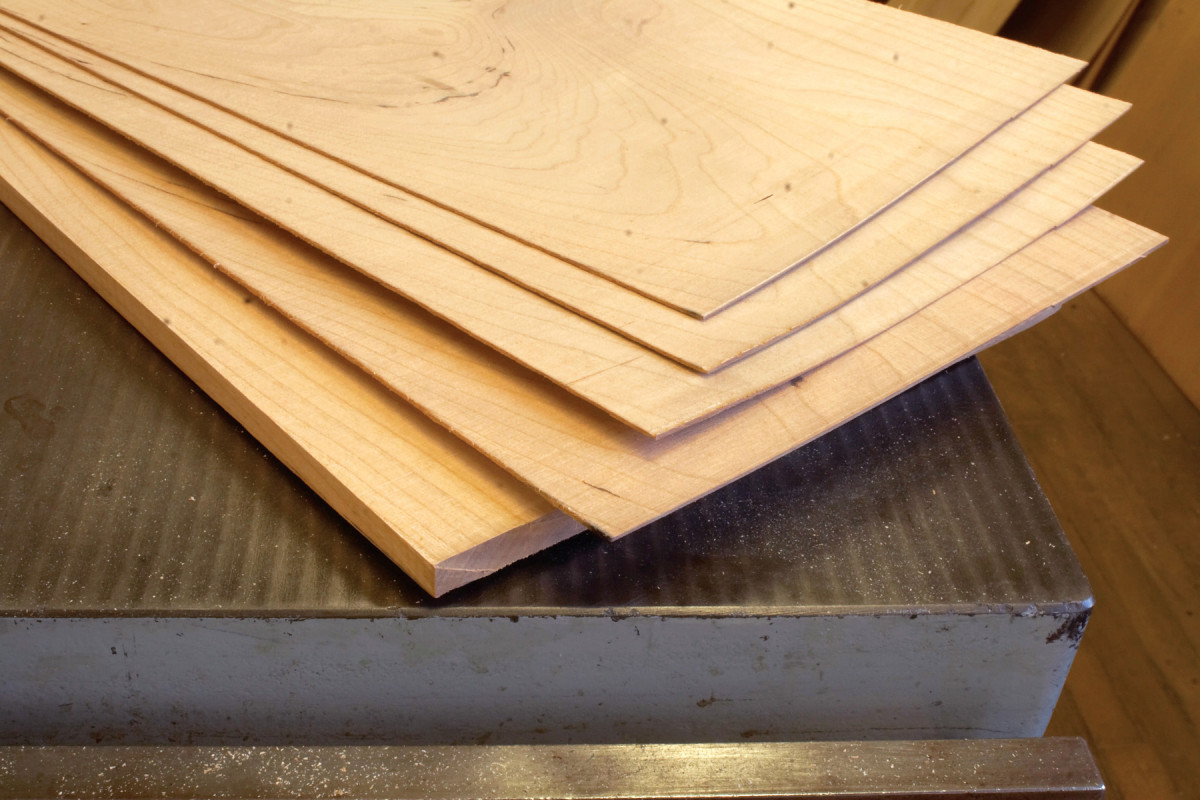
3. Mastering the art of resawing allows you to make your own veneer. You can saw it thicker than commercial veneer in order to make a more durable surface.
• Make extra-thick veneer. Veneering is a way to employ beautiful, but unstable, wood in your furniture. However, most veneer isn’t available over 1/32″ thick. By cutting your own (Photo 3), you can make veneer for tops and edges that’s more durable than the thin stuff.
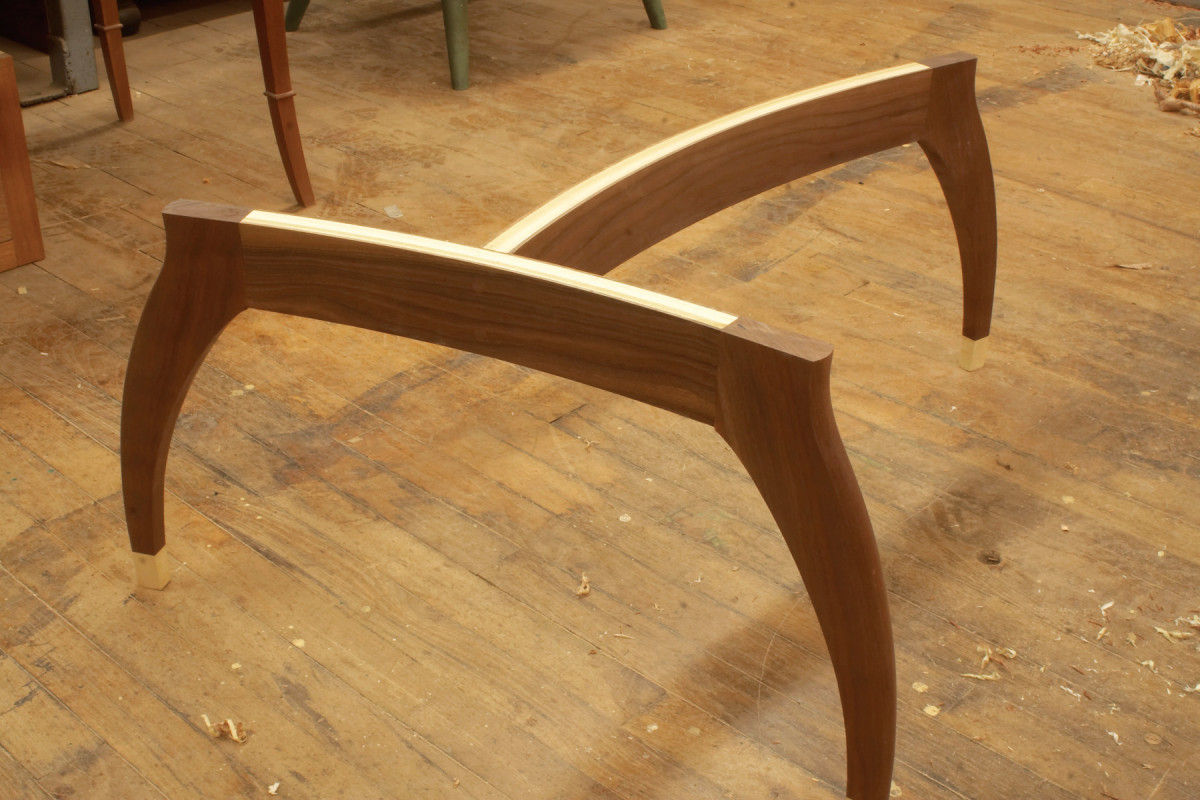
4. Resawing also allows you to “stretch” a special board. These legs are solid walnut, but the rails are faced with thick veneers, created by resawing the same board.
• Stretch special wood. You can make one board go a long way by resawing all or part of it into thinner pieces (Photo 4). If that board has a unique look, resawing it allows you to mix veneered and solid pieces, maintaining uniformity of grain and color throughout a project. You can also salvage material that would otherwise end up as waste.
Choosing your stock
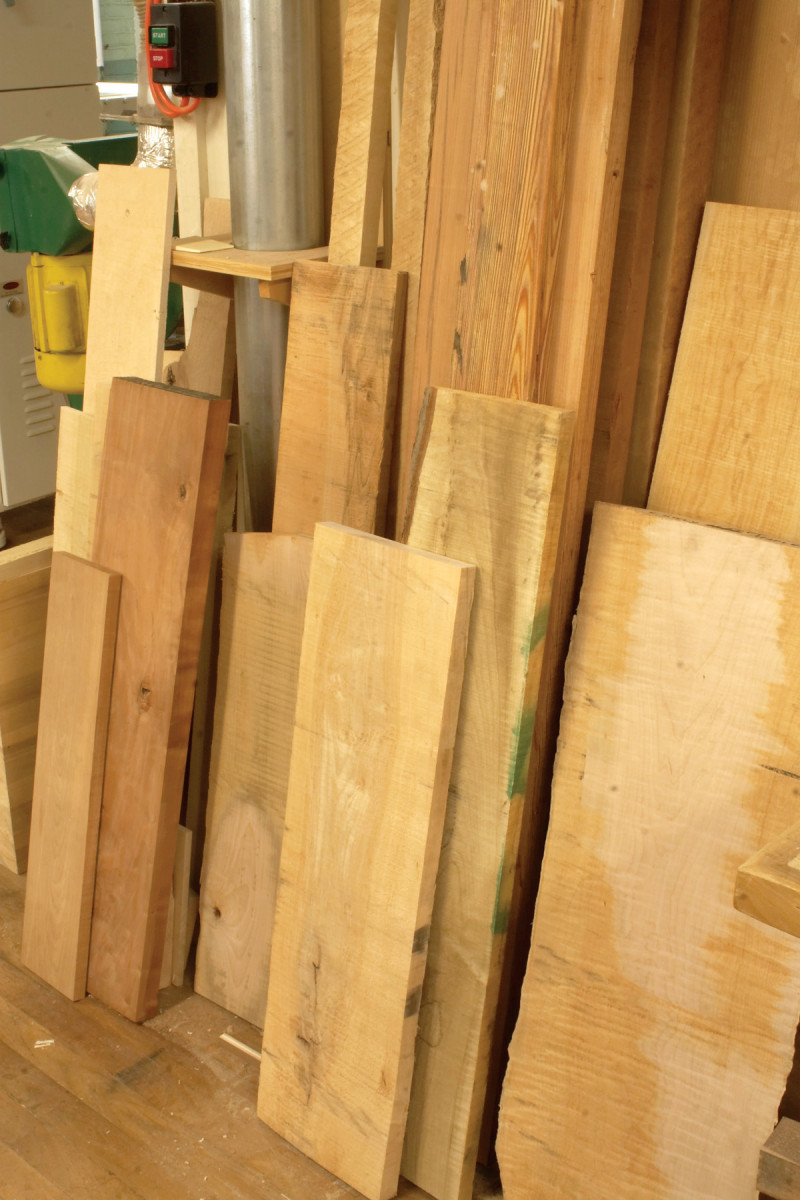
5. Good material is essential for success. Your wood should be dry and free from defects. Knots and other flaws make re-sawing more difficult–but it’s still possible.
Most stock for resawing should be dry, having 6-13% moisture content (Photo 5). Kiln-dried wood should be fine, but check air-dried wood with a moisture meter. If your material isn’t dry, it won’t be stable. If it’s not stable, it won’t remain flat after resawing.
There are no guarantees that resawn boards will stay flat, however. No matter how dry the wood is, or how stable the species is reputed to be, sometimes a board will cup or bend right off the saw. There’s no sure-fire way to predict whether a board will warp before you saw. If the first board off your pile warps, assume the rest may warp, too. Resaw the next pieces thicker, if you can, or settle for thinner pieces, once they’re jointed and planed.
Consider how your resawn pieces will be used. A bookmatched crotch slab can make a spectacular tabletop, but wild material like this can be a little unpredictable–you never know if it’s going to stay flat. A slab-topped table won’t suffer much if the top twists a little, so go ahead–take the chance. But be wary of using resawn pieces for door frames or thick door panels. If these pieces warp, you’re really in trouble.
Preparing your stock
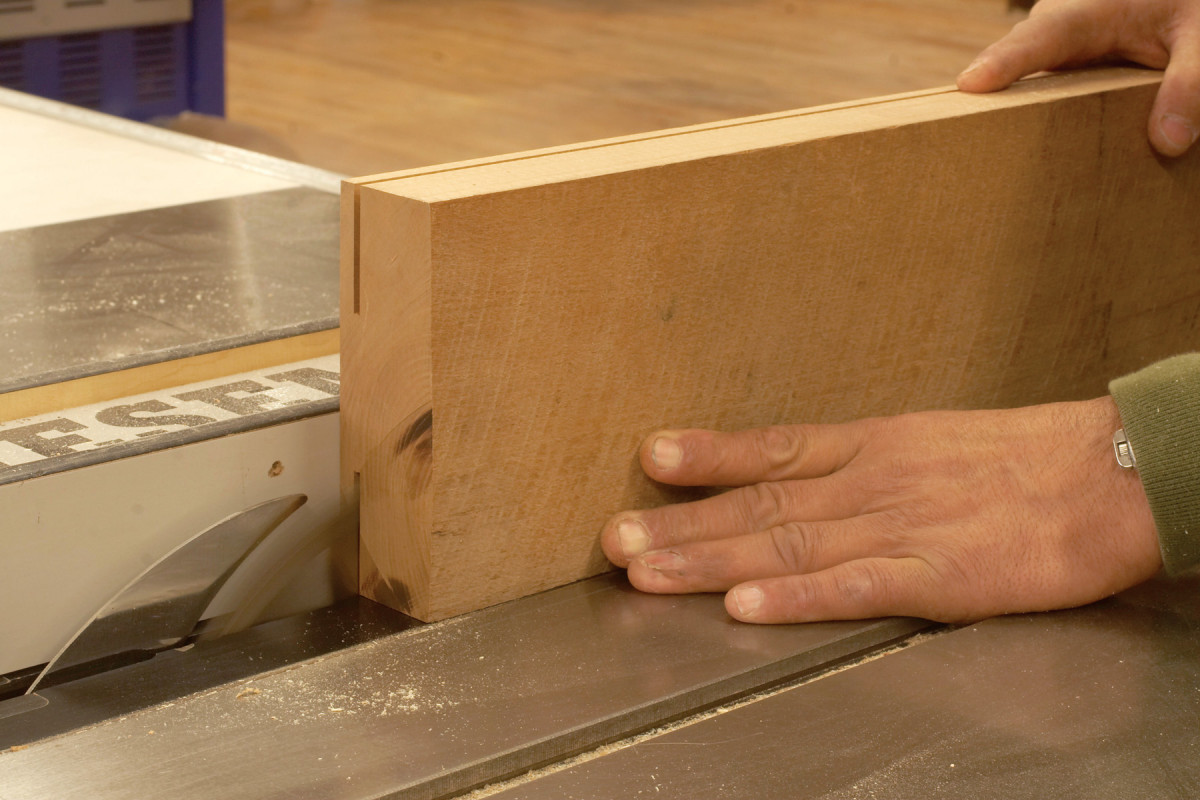
6. For the best results, flatten one face and square one edge of a board before resawing it.
Let’s say you’re starting with rough lumber. To get the straightest cuts when resawing, and to minimize waste, mill at least one face and one edge of your boards before you begin (Photo 6). If you’re resawing a board into more than two pieces, it’s usually a good idea to re-joint the face of the board after each cut.
How much should you allow for waste? If I don’t expect my lumber to move much after resawing, I’ll add 1/8″ for cleaning up. If I need 1/2″ thick material for drawer sides, for example, I’ll re-saw it at 5/8″. Adding in the saw kerf and initial jointing, I need to start with 5/4 material (1-1/4″ thick) for these drawer sides. The lesson: You can’t get two 1/2″ thick pieces from a 1″ thick board. Adding an extra 1/8″ is playing it safe. It’s definitely possible to resaw with a smaller margin, but you’re taking a chance that one or more pieces won’t clean up at the thickness you originally intended.
If I’m pretty sure that a board is going to warp after resawing, I’ll add 1/4″ rather than 1/8″. In any case, I usually resaw in stages, letting a board sit for a few days between cuts. It can move the way it wants to, and then I re-flatten it before going back to the bandsaw.
Of course, resawing strips for laminations doesn’t require such wide margins. For strips, add an extra 1/32″ to 1/16″.
Using the tablesaw
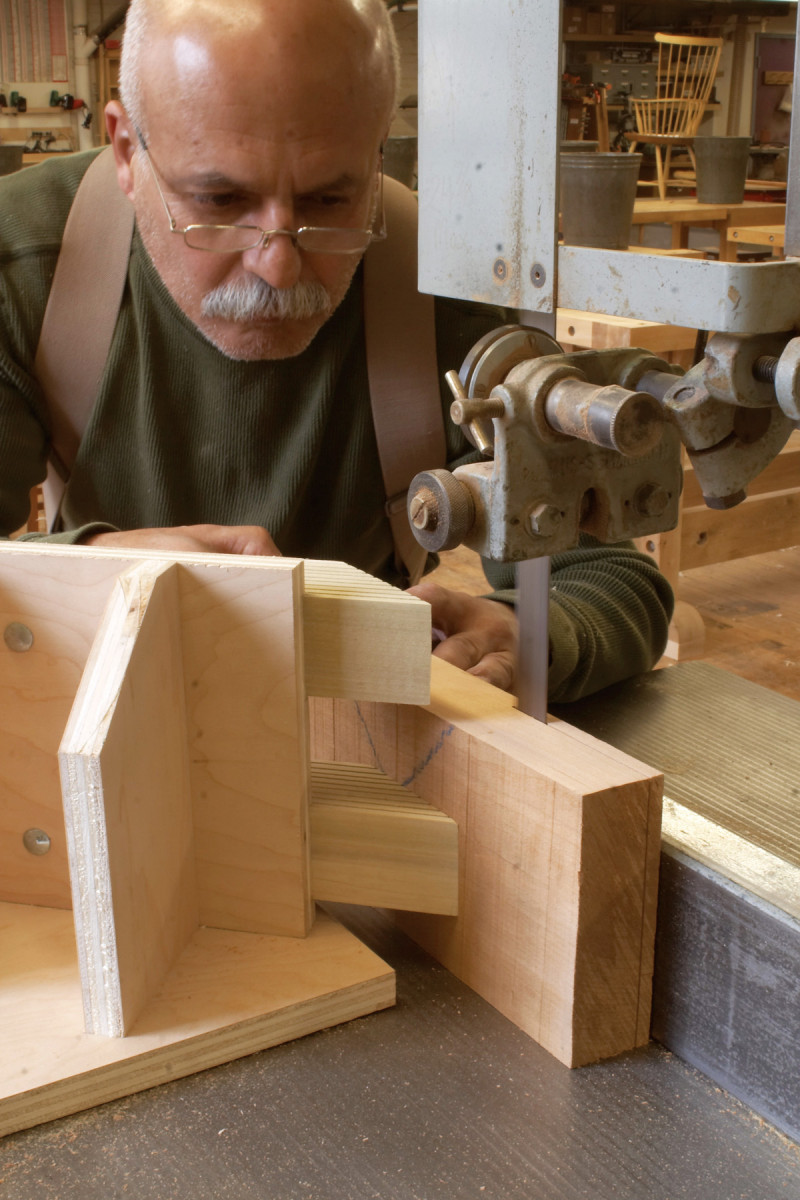
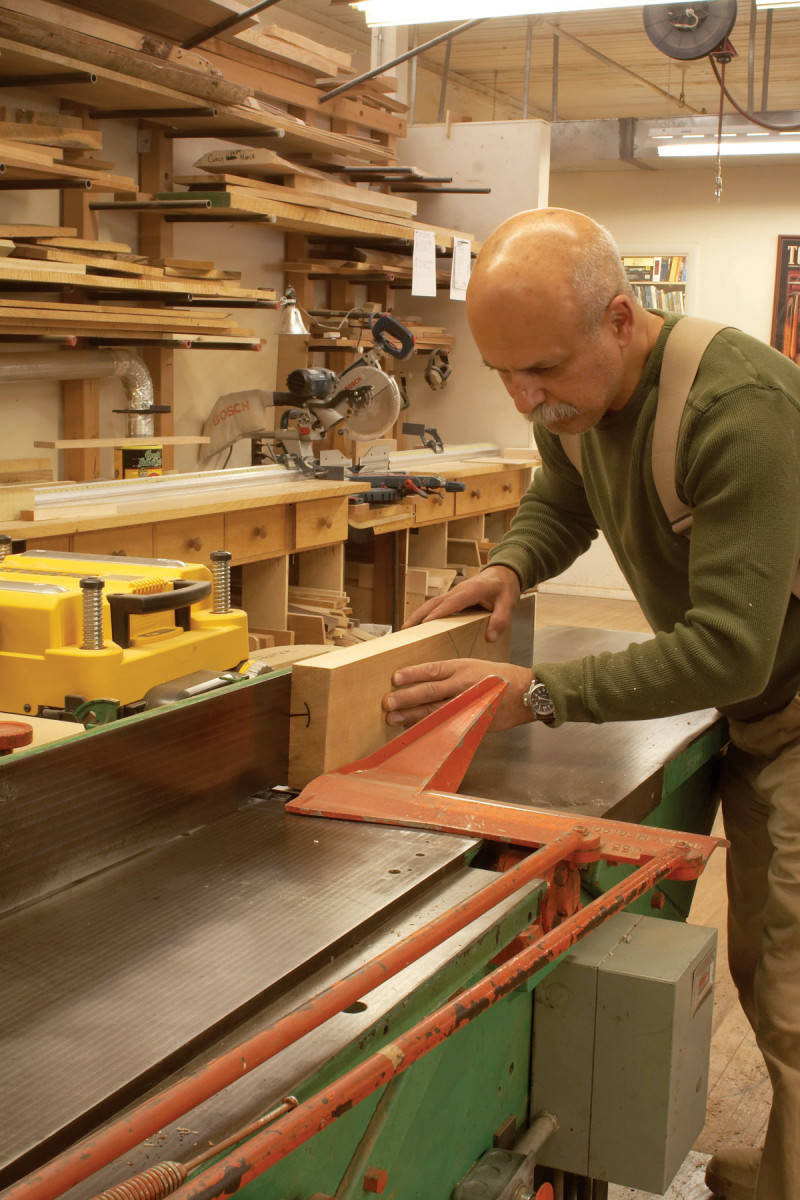
7. If you don’t have a bandsaw, you can use a 10” tablesaw to resaw boards up to 6” wide. Make a shallow cut from both sides, then gradually raise the blade and repeat until the cuts meet.
You can get pretty good results by resawing on your tablesaw (Photo 7), but there are a few things you should know before trying it.
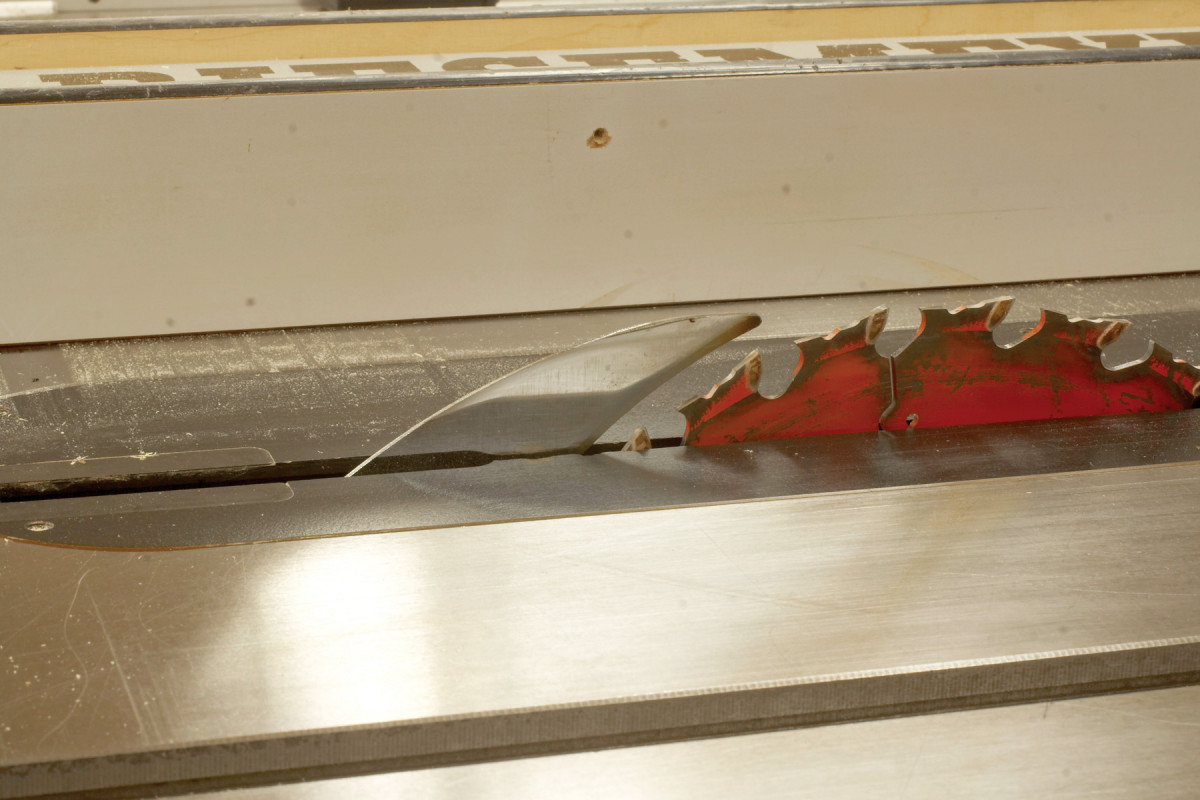
8. Be sure to use a riving knife or splitter behind the blade when resawing a board. Both of these devices prevent the cut from closing up, which could cause the board to kick back at you.
First, think about safety. You should use a splitter or riving knife to avoid kickback (Photo 8). If your pieces are fairly narrow, and you can cut all the way through them in one pass, the splitter that came with your tablesaw will work fine. But if you’re making non-through cuts on wider pieces, this splitter won’t work. Your best bet is to add a short splitter to a shop-made throat plate.
A riving knife will work for through and non-through cuts. It rises and falls with the blade, and can usually be adjusted to sit just below the top of the blade. Most older saws do not have a riving knife, and are difficult to upgrade with one; new saws are required to have a riving knife.
Still thinking about safety, it’s a good idea to use a zero-clearance throat plate when resawing pieces less than 1/4″ thick. The throat plate’s narrow opening supports your workpiece throughout the cut and prevents thin offcuts from wedging themselves between the blade and throat plate.
Choosing the right blade can ease the strain on your saw’s motor, particularly if the motor has less than 2 hp. For re-sawing hard material, use a 18-tooth ripping blade. This will give you clean, straight cuts–without burning or binding. For soft wood, a 40-60 tooth combination or general-purpose blade will be fine. As you cut, listen to your saw. It should run smoothly and quietly (more or less), and not generate an ear-splitting racket or a blinding cloud of smoke.
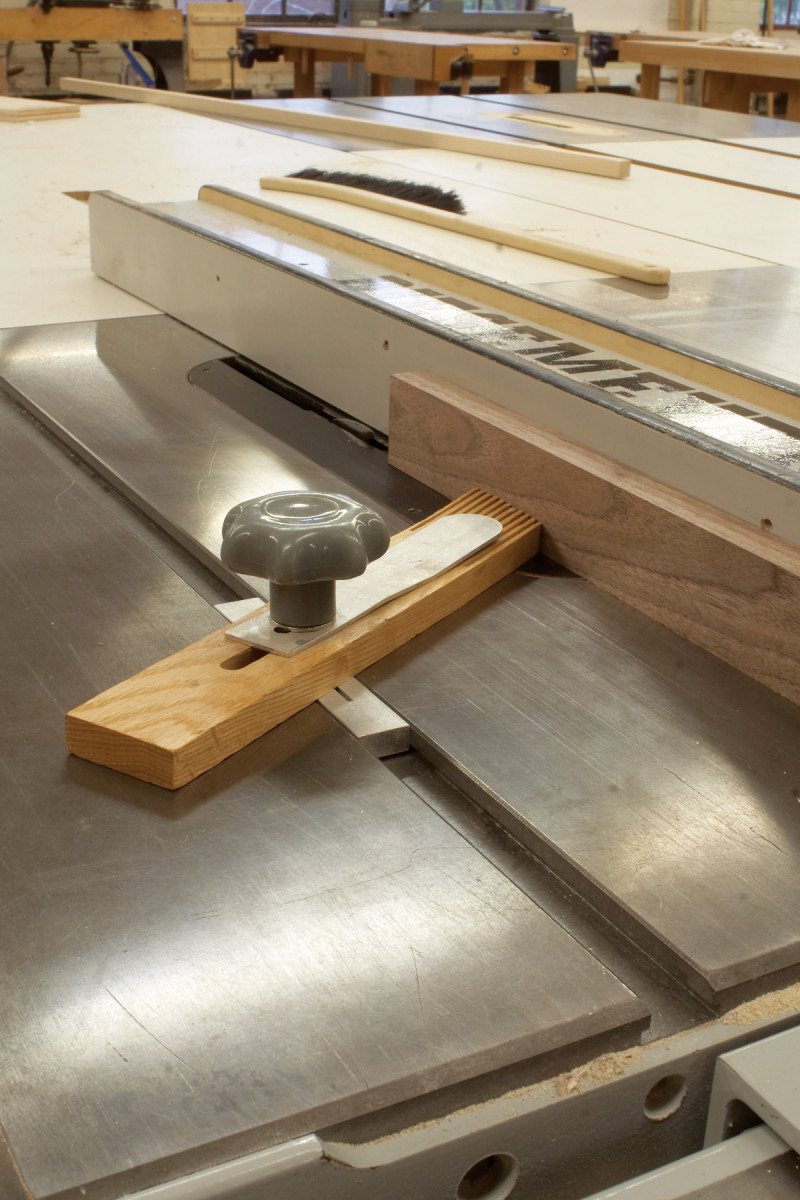
9. You’ll get a more accurate cut by using a featherboard to hold the workpiece tight against the fence. This featherboard locks into the saw’s miter slot.
I also use a featherboard and a push stick (Photo 9). The featherboard helps maintain a straight cut (see Sources, at bottom), which minimizes waste. (After all, you’re already losing a saw kerf’s worth of wood with each cut!) Without the guard in place, a push stick is essential for keeping your fingers safe.
How well does the tablesaw method work? Pretty good–but it’s not perfect. In my experience, no matter how carefully you guide and support the material during the operation, your cuts probably won’t line up perfectly and will require some clean up.
10. Partially resawing a board on the tablesaw might be a good idea even if you do have a bandsaw. Your final cut may be straighter, and your bandsaw’s motor is less likely to bog down.
One last note: Starting to resaw a board on the tablesaw may be the most effective strategy for you to resaw wide boards on your bandsaw (Photo 10). If you have a 14″ or smaller bandsaw, with a 1 hp or smaller motor, this is definitely the way to go.
Using a bandsaw
The bandsaw is the ideal machine for resawing. It can handle much wider boards than a tablesaw, and, using a narrower blade, yield thicker resawn pieces–or more of them–from one board.
In helping you to succeed in using the bandsaw, there are three topics I’d like to talk about: your saw, selecting the blade and adjusting the saw, and choosing a fence and setting it up.
Any bandsaw can resaw a board, but the more powerful the saw’s motor, the better the job it can do with wide boards. Most 14″ or smaller saws have 120 volt motors, which can produce up to 1-3/4 hp. While that’s adequate for resawing a board up to 12″ wide (adding a riser block to a 14″ saw increases its capacity from 6″ to 12″), you have to feed at a slow and steady rate to avoid bogging down the motor. When the motor slows down, the blade has a greater tendency to wander–and that’s not a good thing.
Bandsaws that are 16″ or larger generally have 240 volt motors, from 2 to 5 hp. This extra power really helps (try one once and you’ll see!), but a larger saw offers another advantage: You can use a wider blade. The wider the blade, the less tendency it will have to wander, because there’s less chance it will bend backward and twist, causing a wandering or bowed cut.
No matter what size your saw is, it’s a good idea to add or build an outfeed table to support boards over 3′ long. To get that ideal, straight cut, your workpiece needs that support, just like on a tablesaw.
The blade
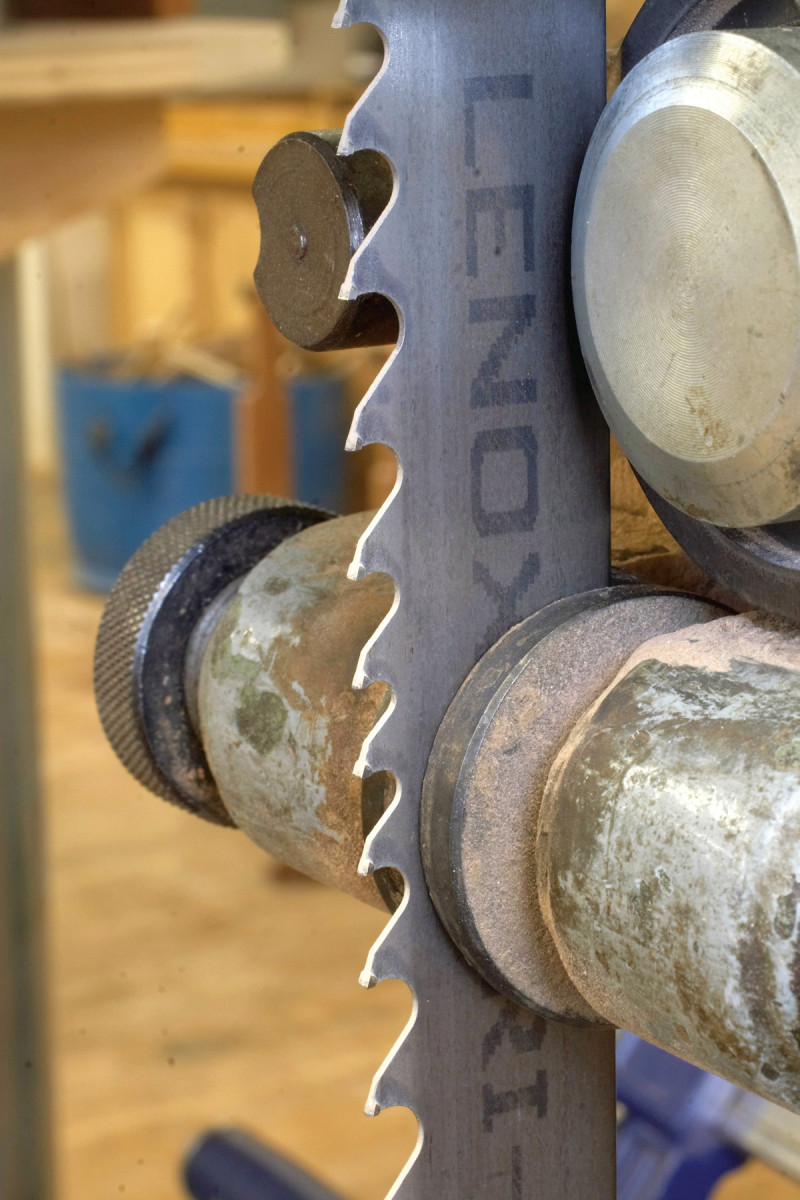
11. Use a bandsaw blade that’s as wide as your machine can handle. It should have hook teeth with deep gullets to efficiently clear debris from the cut.
Use the widest blade your saw can handle (Photo 11). For most 14″ saws, this will be a 1/2″ blade. Many 14″ saws can accept a 3/4″ blade, but you have to watch what you’re buying. Many 3/4″ blades are .032″ thick–too thick for 14” wheels–and will break prematurely from metal fatigue. If you want a 3/4″ blade, look for one that’s .025″ thick. Most stock 1/2″ blades are .025″ thick.
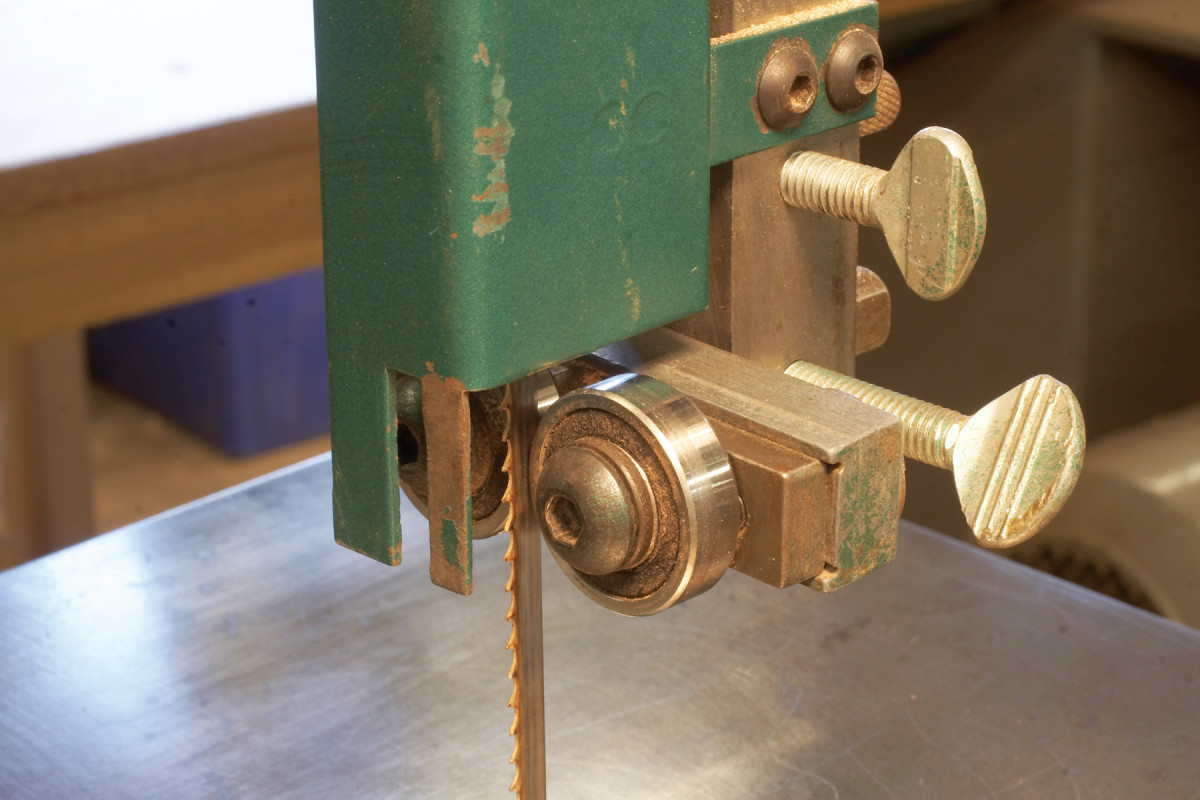
12. Before you resaw, make sure that the guides and thrust bearing are within a paper’s thickness of the blade. Check the guides and bearing under the table, too.
Now, about the blade’s teeth. Using the wrong blade for resawing can lead to a small disaster. A blade that’s too fine will have a hard time clearing sawdust from the cut. The blade will get very hot, which can distort it and produce an uneven cut–or even cause the saw to stall. I use an aggressive hook-tooth blade, with 3-6 tpi. A hook-tooth blade has large gullets and teeth configured to efficiently remove sawdust from the kerf. The cut surfaces might be a littler rougher than if I had used a finer blade, but the resawn material will be flatter and of more uniform thickness.
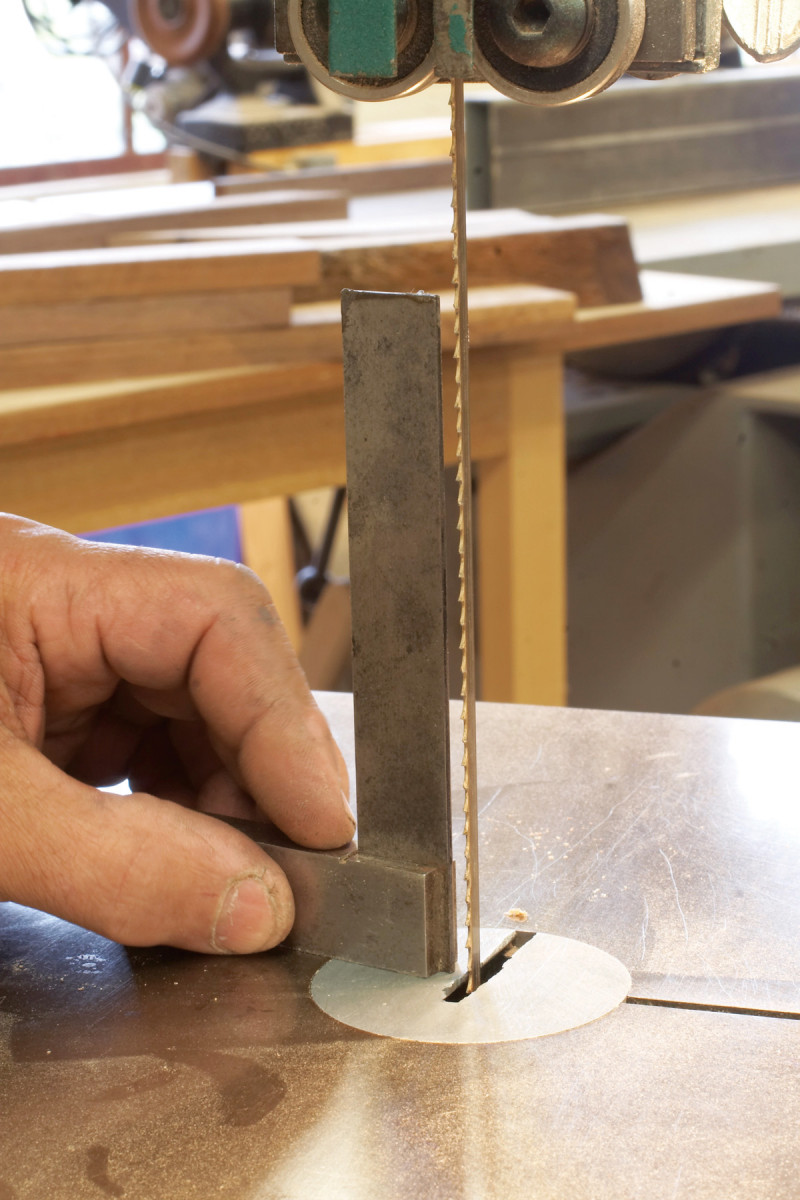
13. Lift up the guidepost and check that your table is square to the blade. For a critical operation like resawing, it’s best not to take anything for granted!
When you install the blade, adjust the tension according to the scale on the saw; there’s really no need to over-tension the blade. Position the side guides and thrust bearing one paper thickness away from the blade (Photo 12). Raise the guidepost and make sure that your table is square to the blade (Photo 13). Then lower the guidepost so the guides are no more than 1/2″ above your workpiece.
Resawing Logs
 Did you know that you can resaw a log? Resawing is a great way to convert small logs and tree limbs into useable lumber. At the Philadelphia Furniture Workshop, the woodworking school I help run, we bandsaw green logs to build Windsor chairs. The traditional method is to split the logs, but bandsawing gives us a better yield.
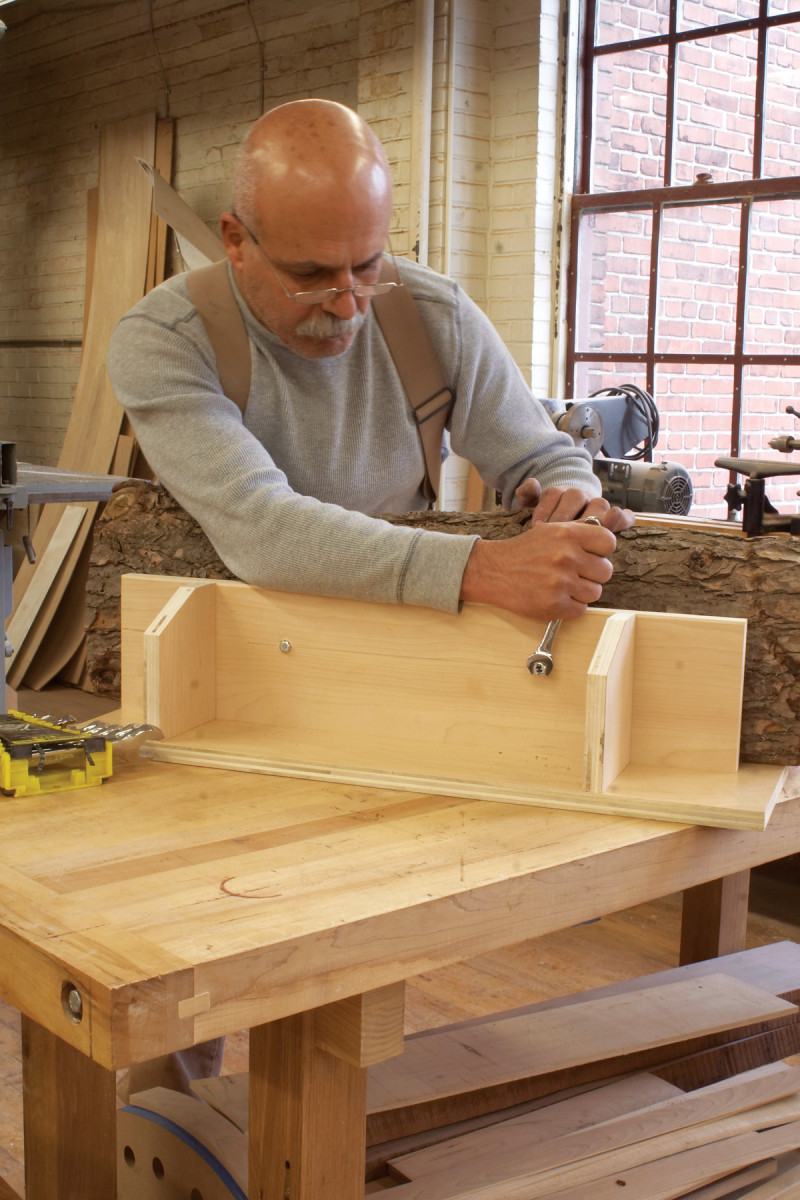
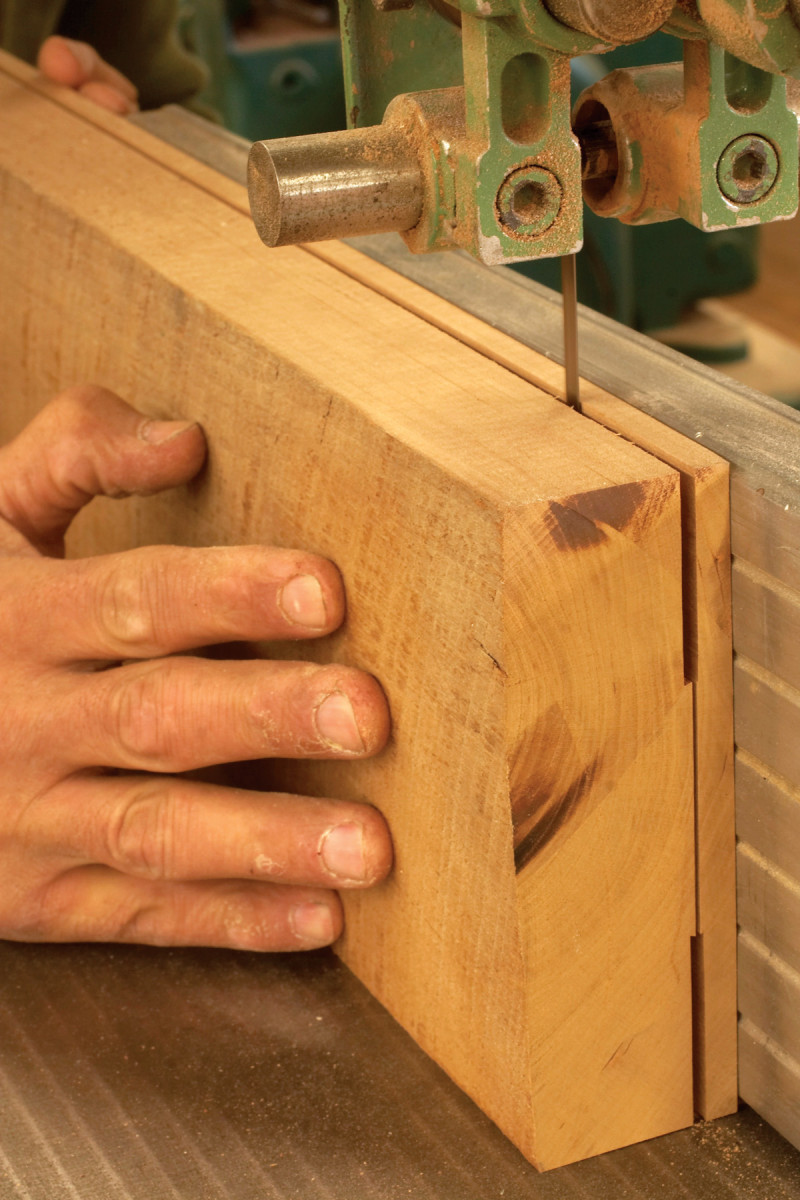
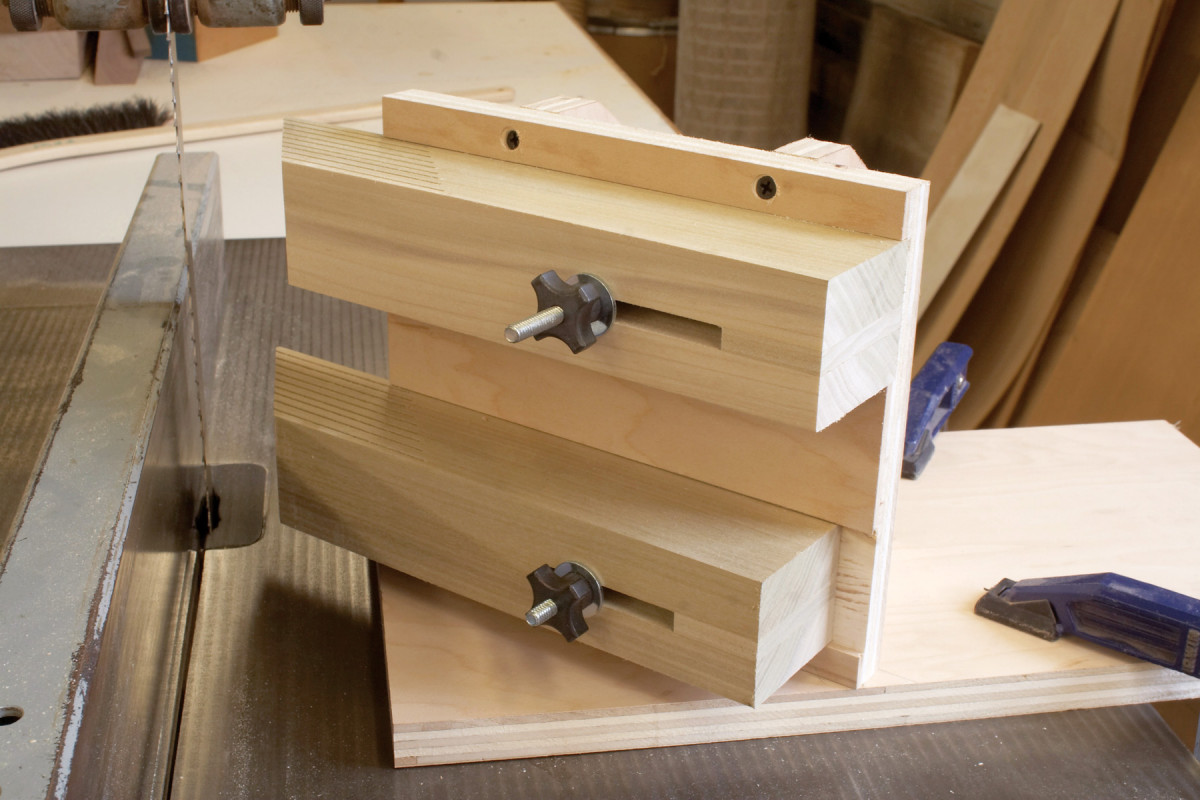
When sawing a log, be sure to fasten it securely to a carriage.
The trick is to support the log so that it doesn’t roll. I use a shop-built plywood carriage that’s braced for strength. I nest the log into the corner of the carriage, then fasten the log to the carriage’s vertical face with a lag screw (see photo, above). After making the first cut, I unscrew the log, turn it 90°, and screw it to the carriage again. Once the log has been squared, I treat it like any other board with a jointed face and edge.
The long fence
If your requirements aren’t exact, you don’t need a fence at all–you can guide the material freehand. However, in order to perform this operation safely, don’t freehand boards that are over 6 times taller than they are thick. A 1″ board, for example, should be no more than 6″ tall, standing on edge on the saw. The wider the board (and the higher the cut), the more unstable freehand cutting becomes.
Using a fence is safer than sawing freehand and should yield more accurate results. The only limit in board width is what your saw can handle. There are two types of fences: long and single point. I use both, depending on the situation.
14. To make the straightest cut possible, use a long fence. Ideally, the fence should be almost as tall as your board to prevent the board from tipping.
A long fence extends the full length of the table. Some manufacturer’s long fences are OK, but a long fence should have three key features: 1) it should have or accommodate a tall face; 2) for a 14″ or smaller saw, it should be adjustable to compensate for drift (more on that below); and 3) there should be some provision for tilting its face to be exactly parallel to the blade.
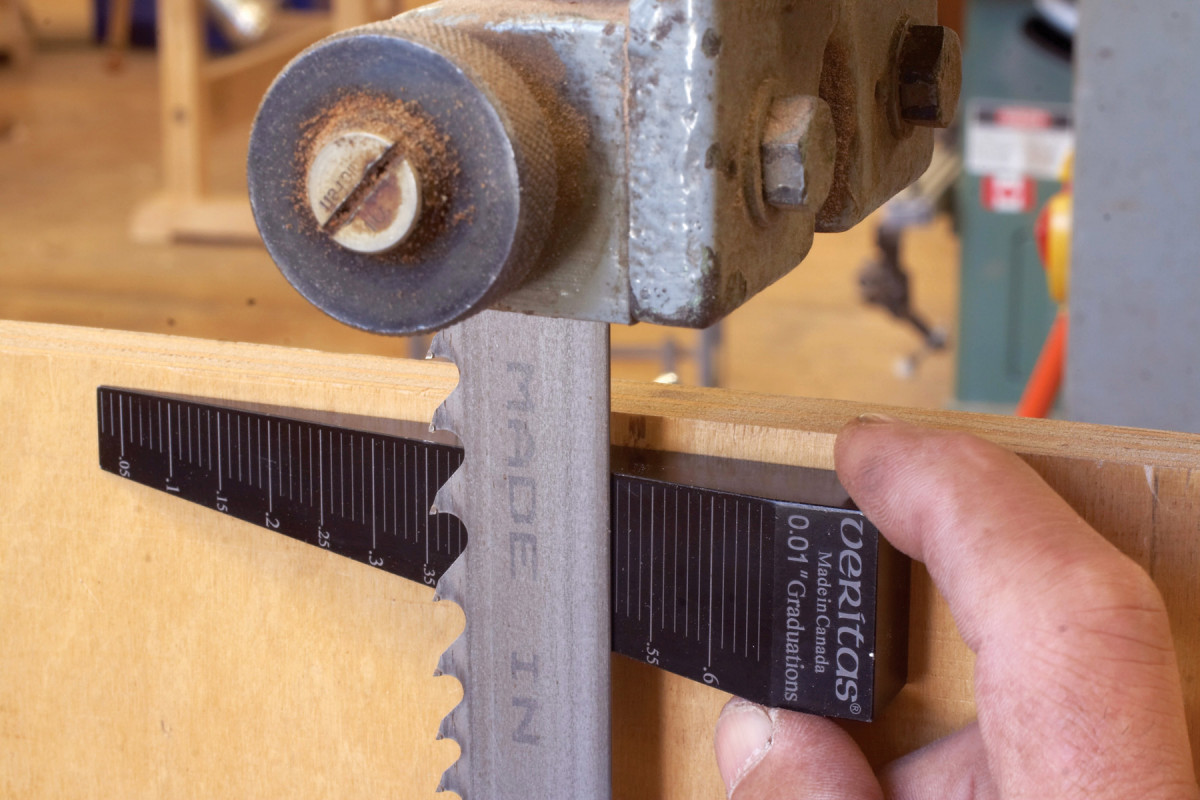
15. Make sure that the fence is exactly parallel to the blade. I use a graduated tapered gauge to measure the distance from the blade to the fence at both the top and bottom of the cut.
We use a pretty simple homemade fence in my shop (Photo 14). It has leveling screws at each corner of its base to ensure perfect alignment with the blade. I use a commercial tapered gauge to adjust the fence (Photo 15; see Sources), but you could use a ruler, square, or just a wooden wedge.
16. A tall featherboard helps you produce straight and smooth resawn boards of a consistent thickness. Having two arms, this featherboard works well for bearing against a roughsawn face.
To get the best results, I often use a featherboard with a long fence. This indispensable shop fixture firmly presses the material against the fence as it passes the blade, ensuring uniform material thickness–and keeps my fingers safely away from the blade. My favorite featherboard has two adjustable arms (Photo 16). For narrow boards, I either remove the higher arm or push it out of the way.
Whether you use a featherboard or not, pay attention to your fingers near the end of the cut. To get your hand out of the way, push the board with a hooked push stick or a piece of scrap. Alternatively, stop pushing, walk to the opposite side of the saw, and pull the board through.
Compensate for drift
There’s one major hassle in using a long fence, and that’s the issue of drift. On a tablesaw, you set the fence parallel to the blade and saw away. On 14″ and smaller bandsaws, the best position for the fence may be a bit skewed to the blade (16″ and larger saws usually don’t have this problem). If you set the fence in line with the blade (parallel to the table’s miter slot) the cut may want to wander, or “drift.” The trick is to figure out what this drift angle is before you set up your fence. Don’t be tempted to fight drift–learn to compensate for it.
Begin by scribing a line parallel to the edge of a 12″ long board. Feed the work into the blade, following the scribed line. As you progress with the cut, you may have to angle the board to keep to the line–that’s the drift angle. About 2/3 through the cut, stop cutting and draw a line along the edge of the board, onto the bandsaw’s table. That is your drift line. Adjust the angle of your fence to this drift line.
The single-point fence
17. A single-point fence is an alternative to the long fence. It’s easier to set up, but you probably won’t get an absolutely straight cut.
I often use a single point fence when I only have a few pieces to cut, or when a board is thick enough that I can afford to let the cut wander a little bit.
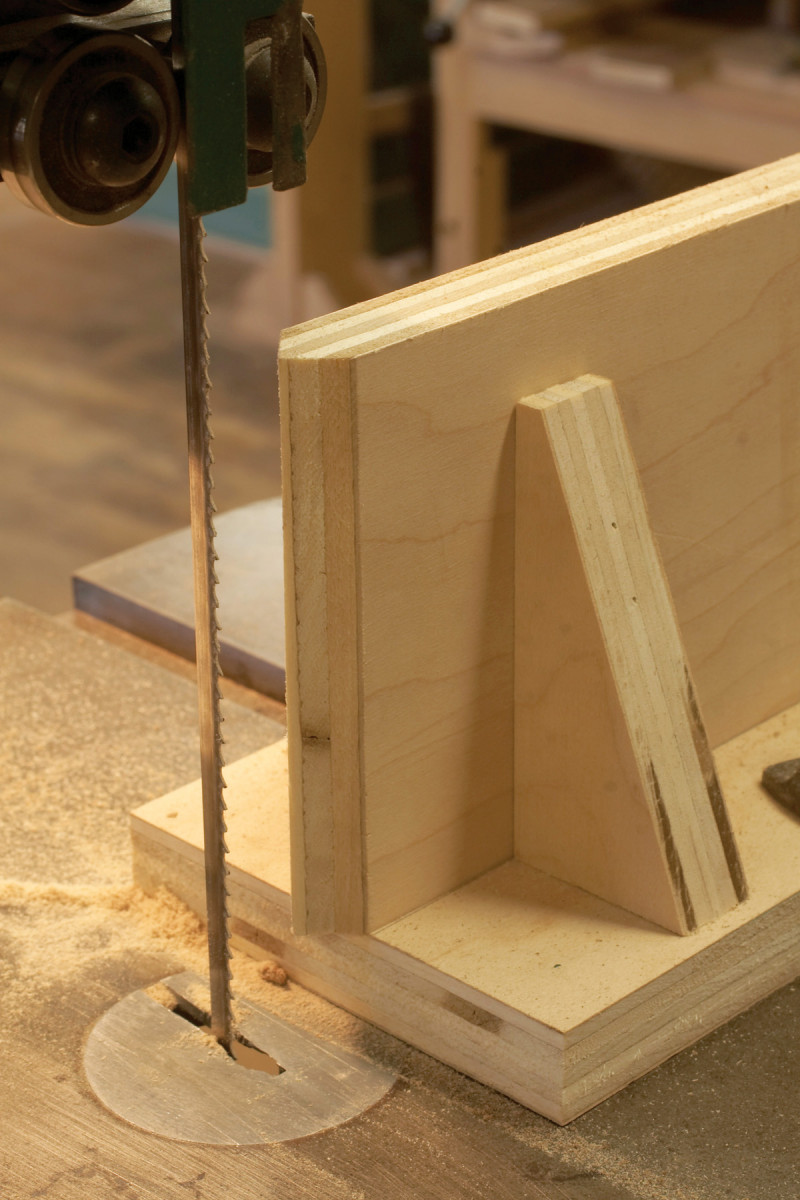
A single-point fence only contacts the material at one place, where the blade’s teeth engage the wood (Photo 17). This type of fence is very easy to make–just be sure to round over the fence’s nose. When you clamp the fence to your saw’s table, align the nose with the saw’s teeth.
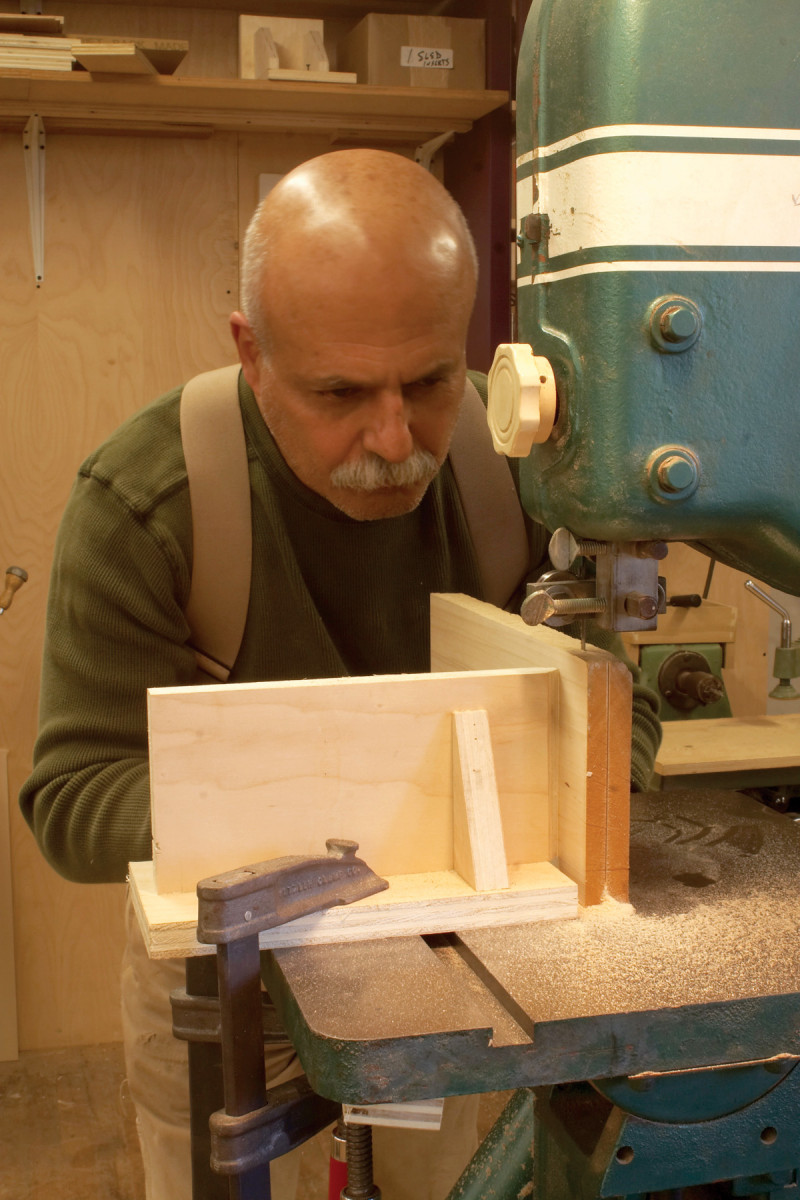
18. When using a single-point fence, steer your work from side to side until you find the angle at which the blade cuts straight down the line.
Why the rounded nose? It’s a pivot point. It allows you to compensate for drift as you saw (Photo 18). Instead of angling the fence, you angle the board. This makes a single-point fence much easier to set up than a long fence on 14″ and smaller saws. The downside is that your cut won’t be as straight as with a long fence, so you’ll get minor variations in the thickness of your resawn pieces.
Sources
Lee Valley:
Veritas Fractional Tapered Gauge
Here are some supplies and tools we find essential in our everyday work around the shop. We may receive a commission from sales referred by our links; however, we have carefully selected these products for their usefulness and quality.


