We may receive a commission when you use our affiliate links. However, this does not impact our recommendations.
An Homage to the Past by Embracing the Present.
Over the years it has become apparent that all projects are not created equal. Although, they all seem to come with their equal share of challenges and complexities. It never fails, no matter how much preplanning is implemented, there always seems to be an issue that materializes past the point of no return.
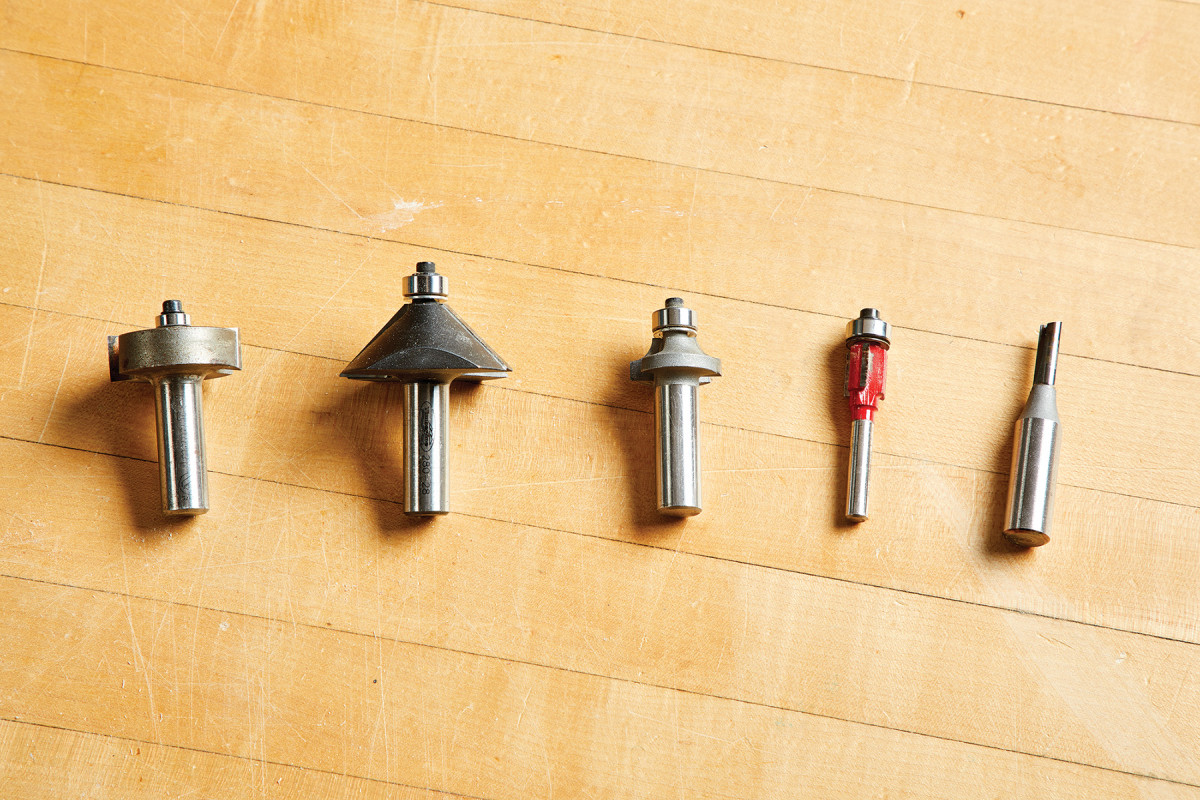
1. Much of the joinery and shaping for this cabinet is cut with a router and these five bits: a rabbeting bit, a chamfer bit, a rounder bit, a pattern bit and a straight bit.
For years, my remedy to this was to destroy and discard any signs of what I deemed a failure of personal effort. Allowing such a blunder to become public was inconceivable. It wasn’t until later in my woodworking design career that I realized that these “mistakes” were paramount to the process of learning and development.
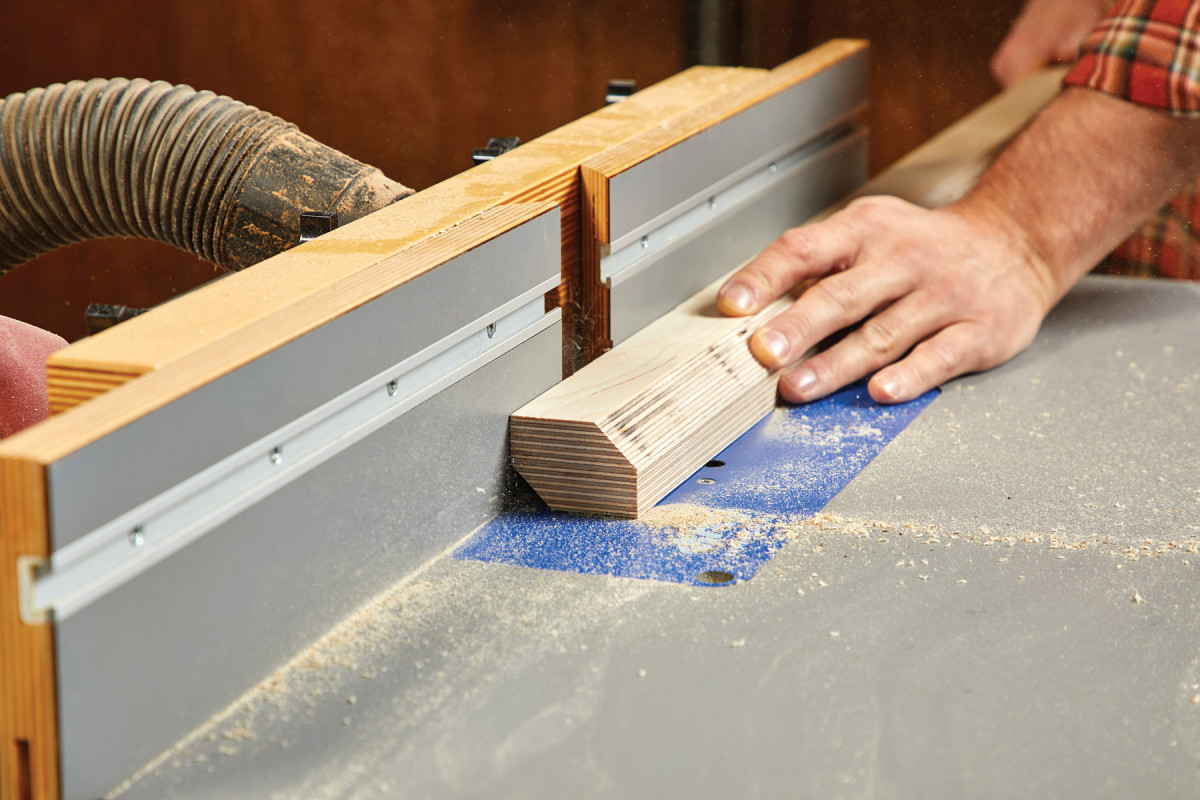
2. Attach two leg pieces back to back with double sided tape, then cut the 45° edge on both, using a bearing-guided chamfer bit.
Not only is it important to confront these miscalculations, it’s the resolve from these faux pas that generates the “ah-ha” moment(s) within the discipline of design. This project, being no exception to the rest, happens to be a model example of this realization.
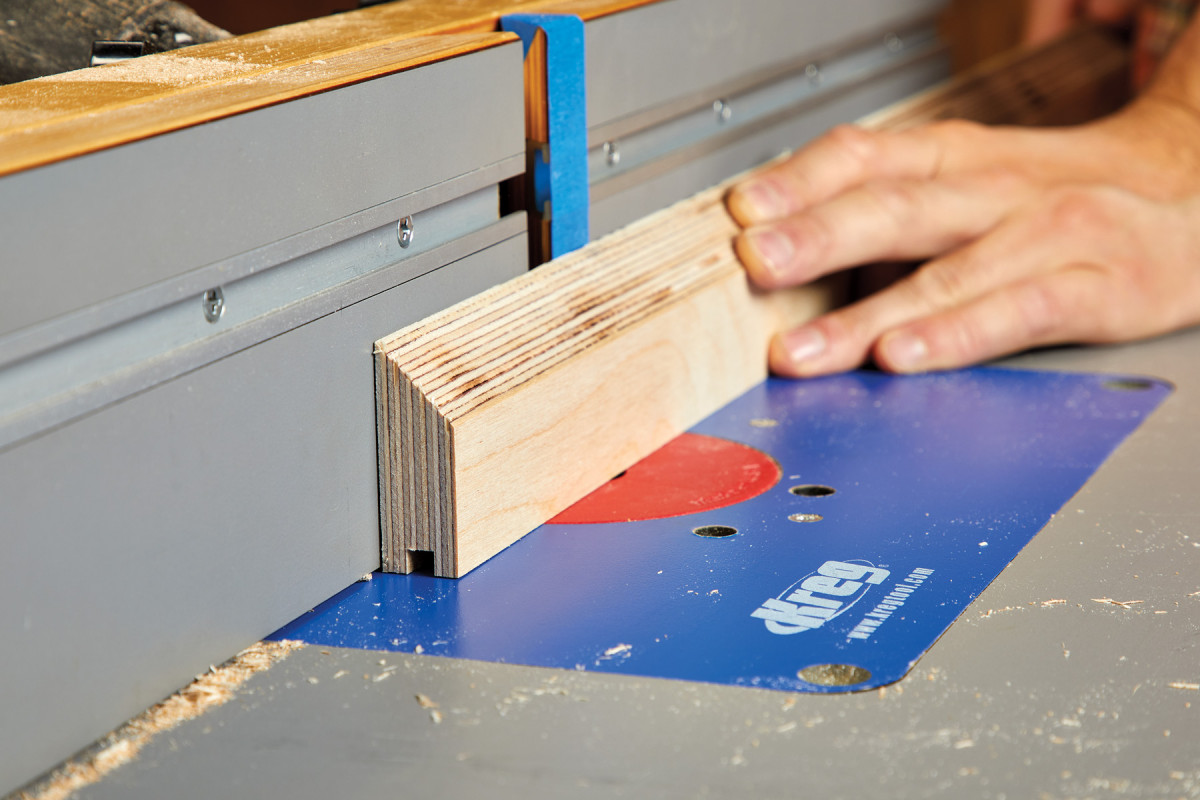
3. Then, rout the stopped grooves for the panels with a 1/4″ straight bit.
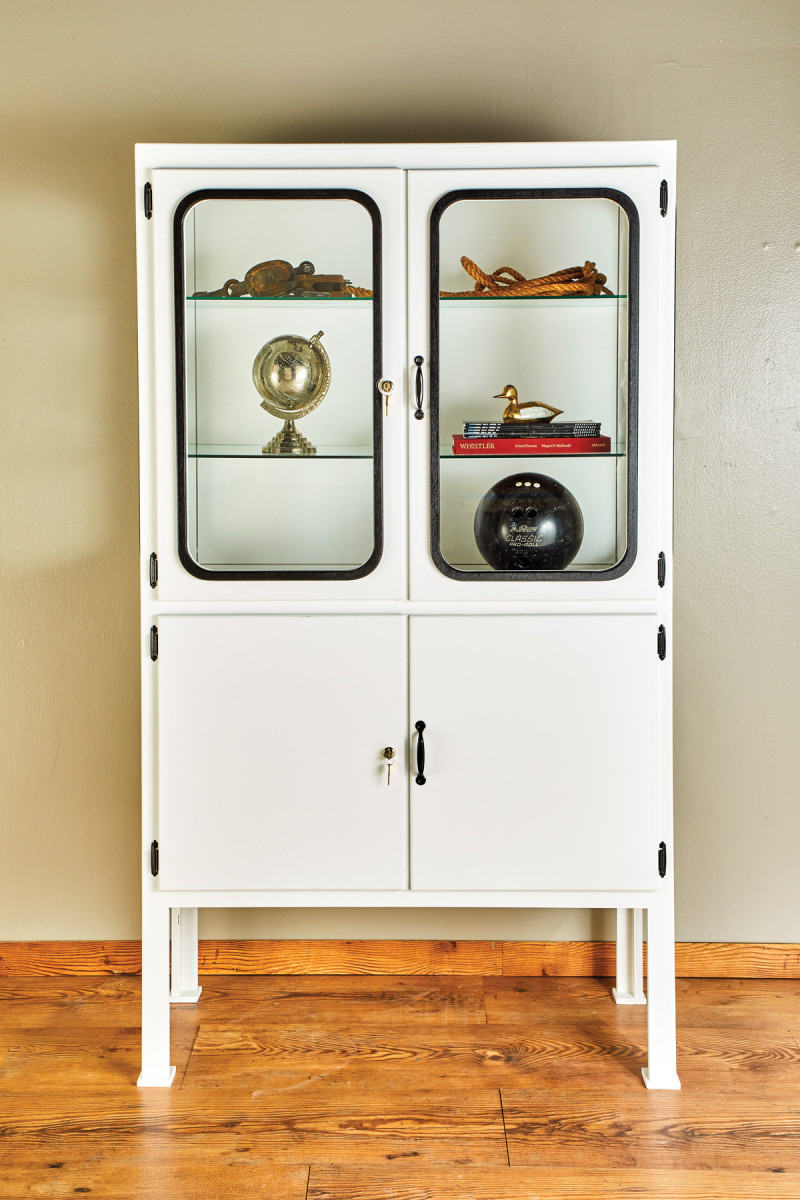
Initially inspired by 20th century medical equipment, this pharmacy-styled cabinet evolved from an acute case of modern nostalgia and an impulse to reverse engineer.
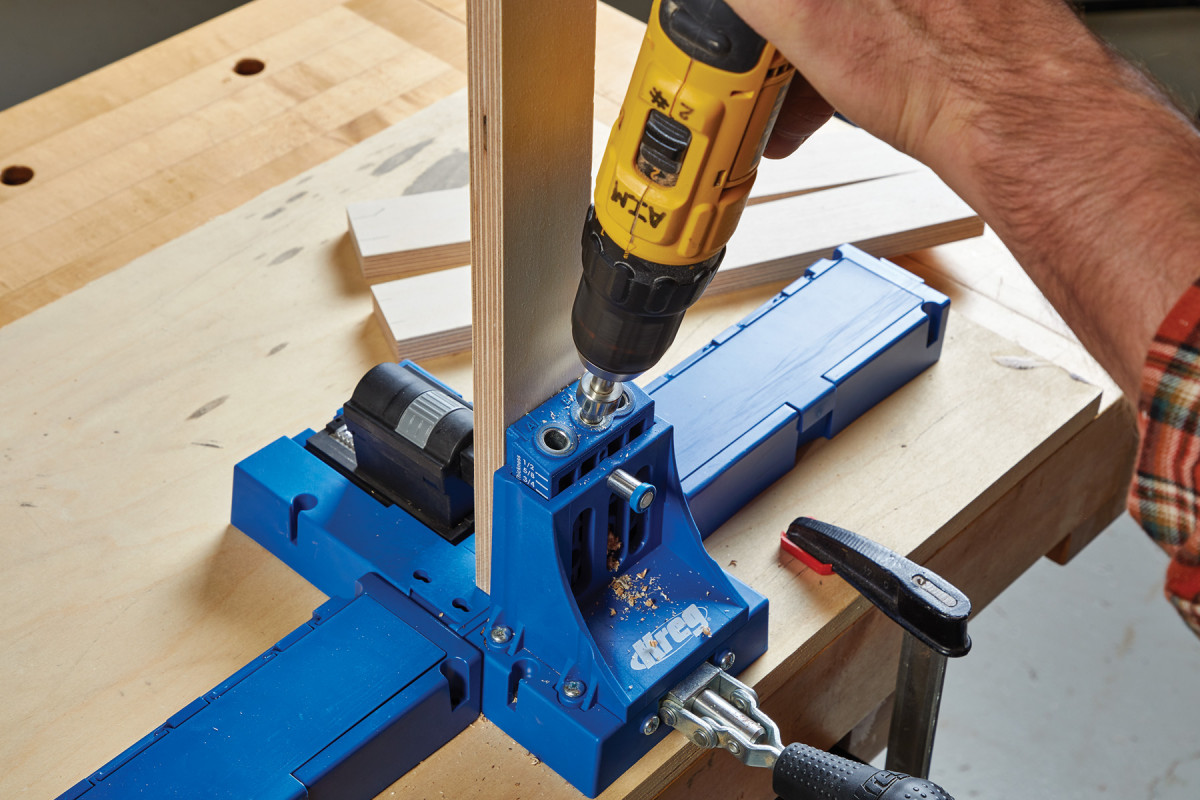
4. Pocket hold joinery is used for nearly all the joinery, including attaching rails and stiles for frame and panel construction for the body of the cabinet.
The self-imposed objective then became focused on incorporating modern building materials and techniques to achieve a look of the past while making sure a woodworker could build it. The original cabinets were made from metal. This one’s primary medium is Baltic birch plywood.
Stretchers and Legs
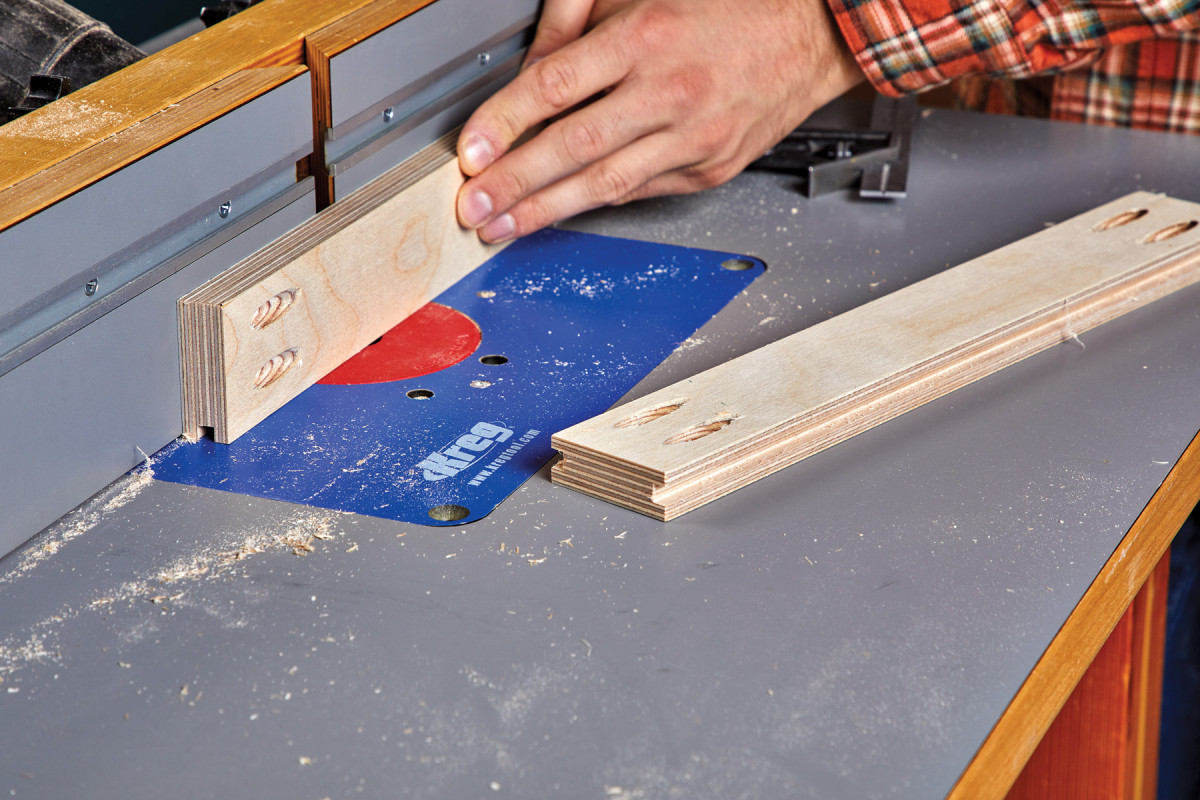
5. Pay attention to the position of the pocket holes in relation to the grooves cut at the router table.
Begin by cutting the eight pieces that comprise the four legs of the cabinet. Since all of the leg blanks and stretchers are the same 2“ width, take the time to cut all of the stretchers to their final dimensions.
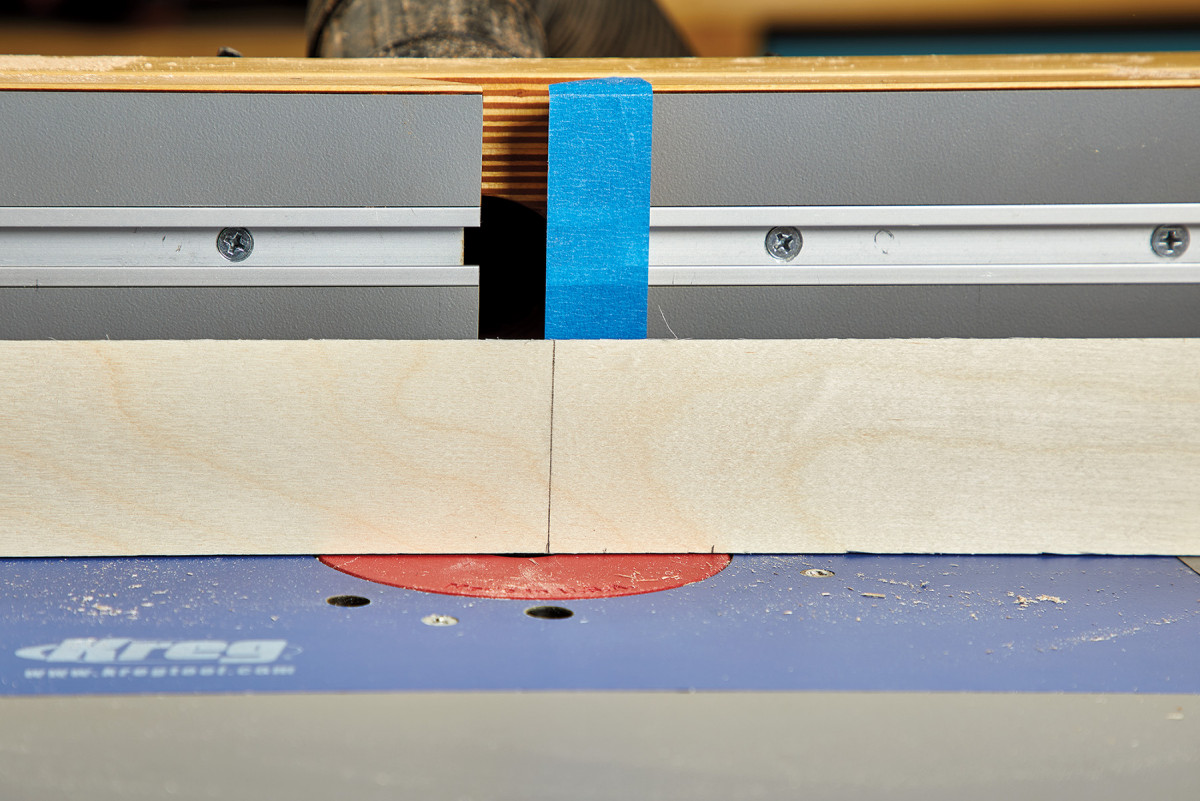
6. To cut stopped grooves, I mark the fence of the router table with a piece of tape, measure the offset from the router bit, and mark my pieces accordingly.
Once this is complete, move over to the router table. Using a 13/4“ chamfer bit with a bearing, double-stick tape two of the leg blanks together. By doing this you are creating a surface for the bearing to accurately ride on while simultaneously streamlining the chamfering process.
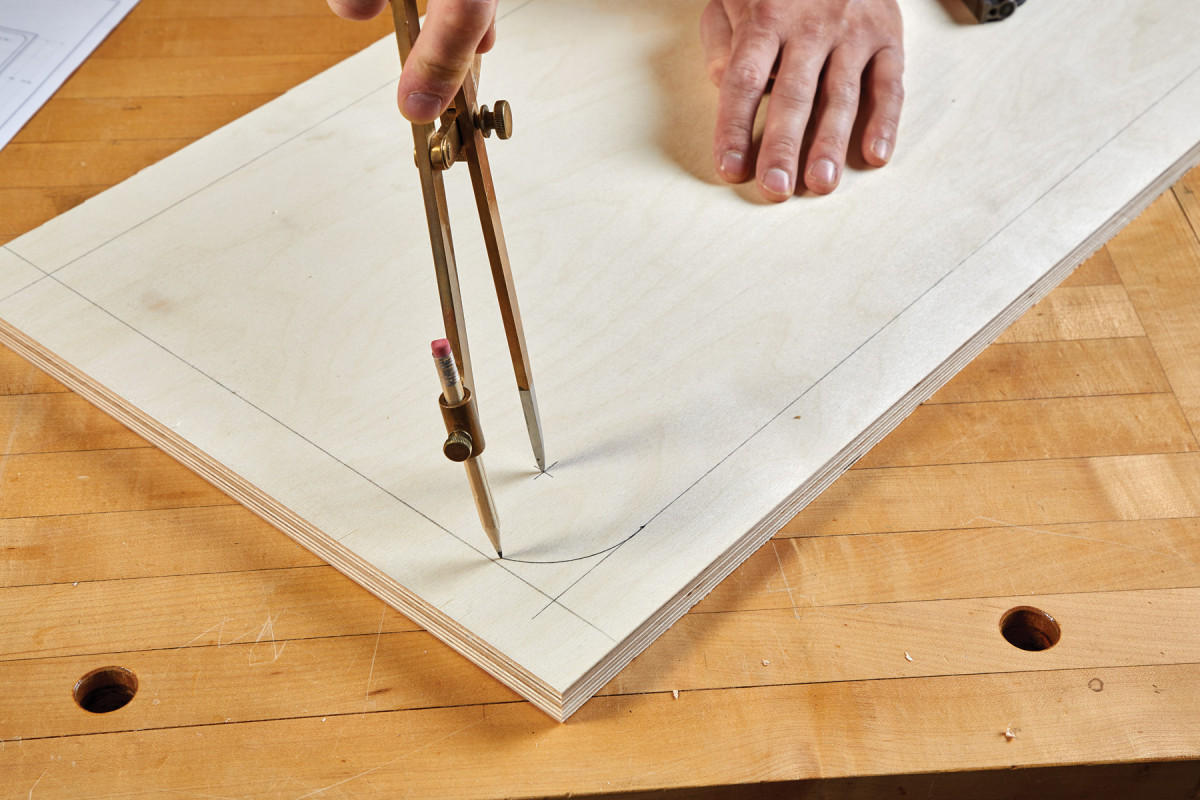
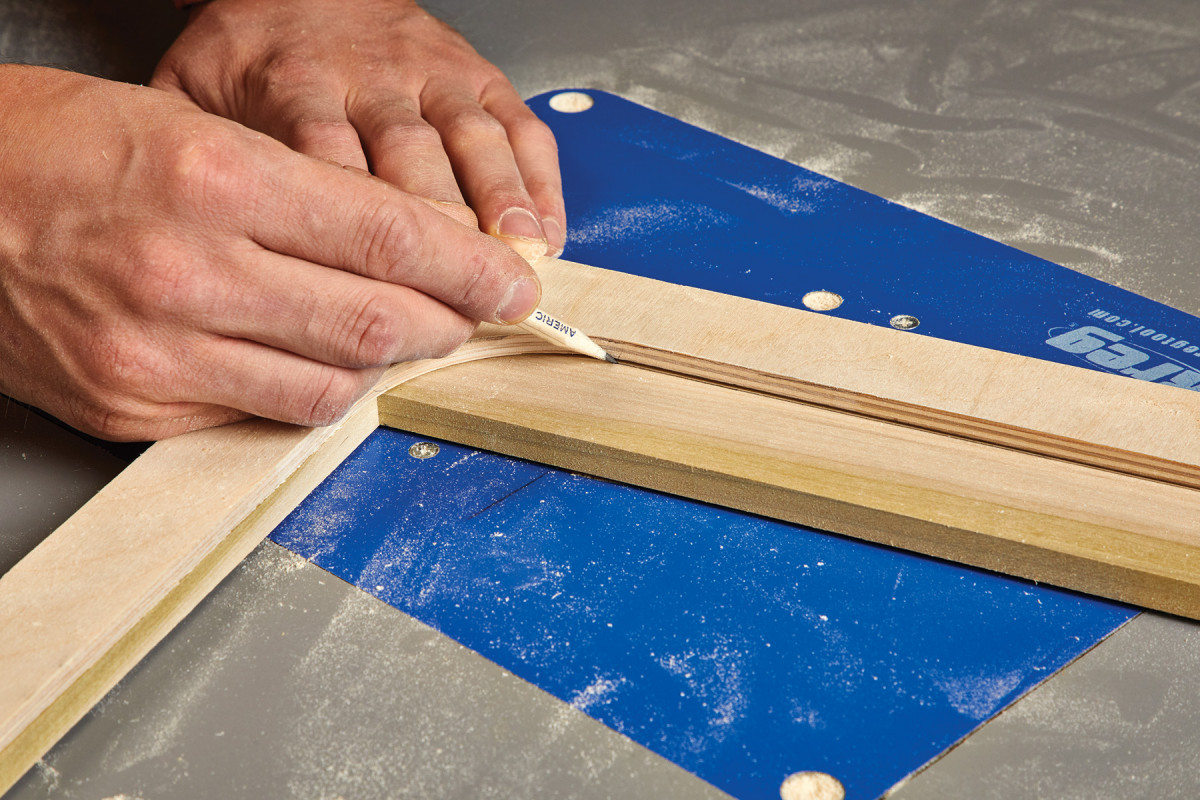
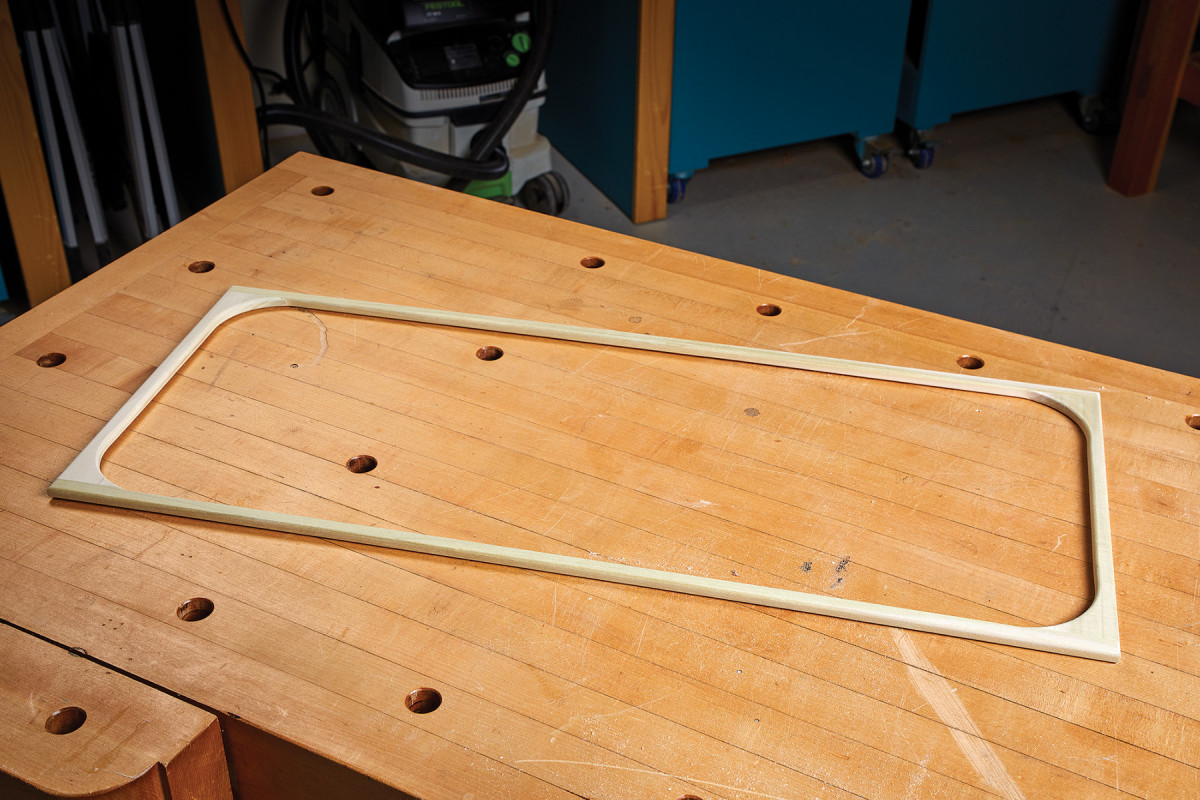
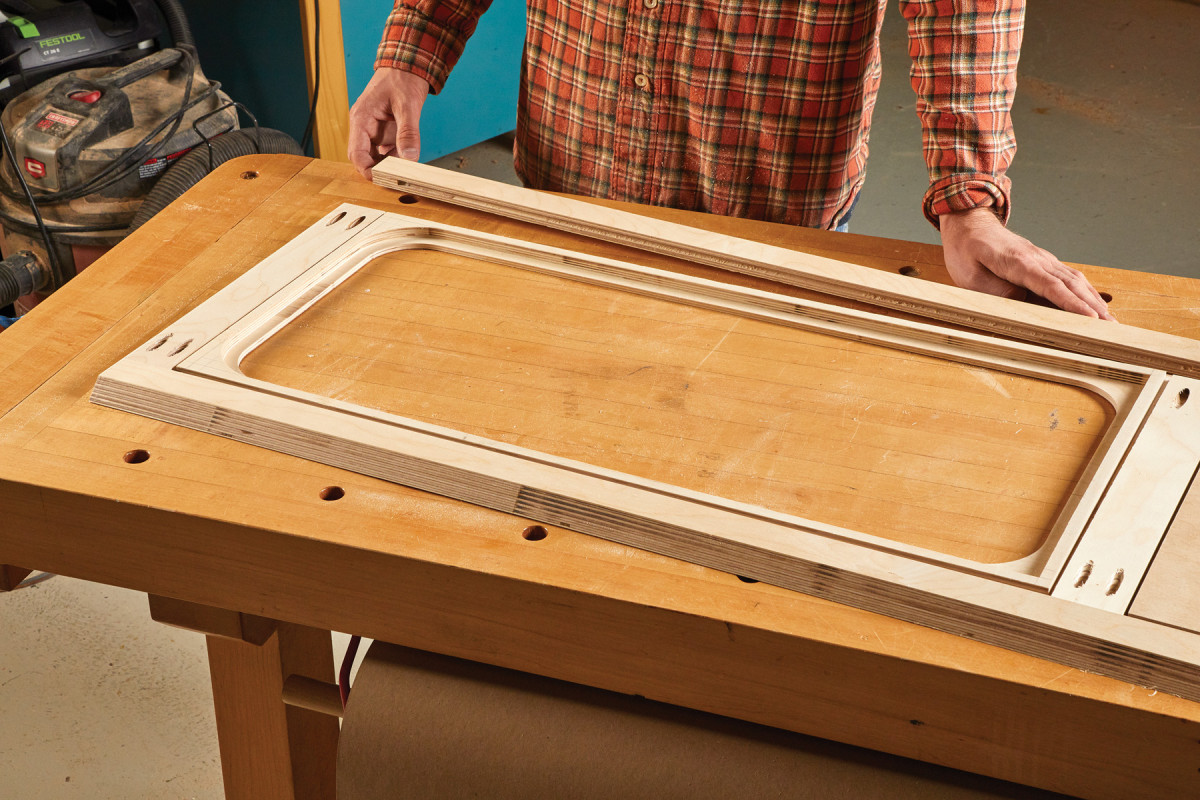
7. The glass doors and side panels are the trickiest part of the build, but they follow the same construction, starting with a piece of 3/4″ plywood. Spend the time to get this part right. Begin with the layout, using a compass to draw the inside radius in each corner of the opening.
Run one side through, then rotate the two conjoined pieces 180° and make another pass. Repeat this process for all four legs.

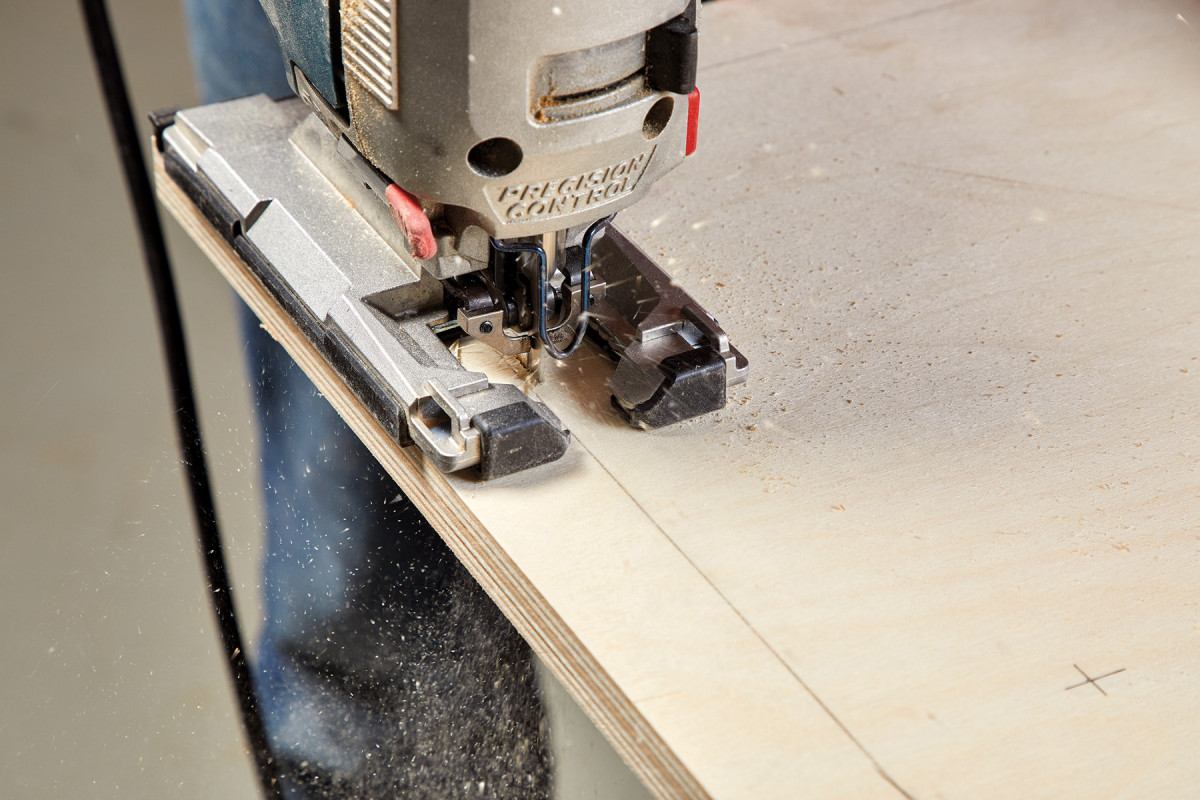
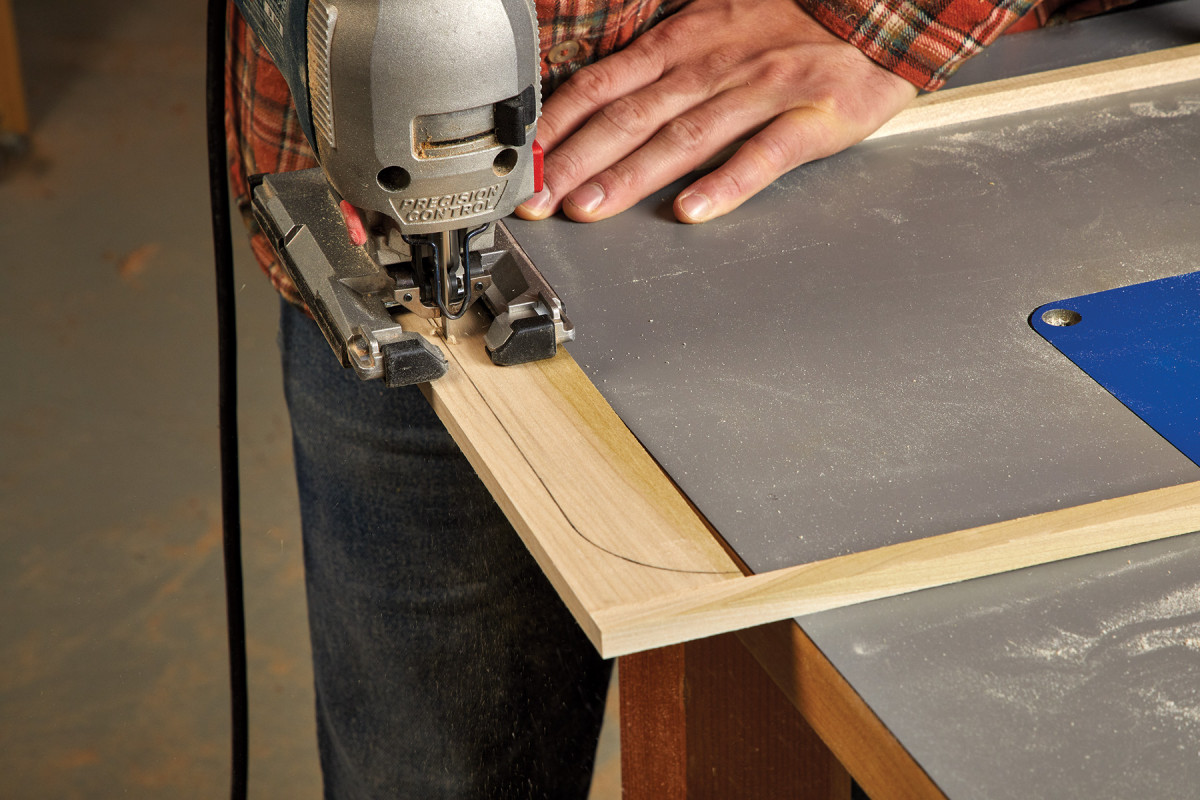
8-9. Drill a starting hole, then use a jig saw to cut out the opening. With the first pass, I cut close to the line, staying inside the cut. Clean up the curves at the spindle sander.
 While still at the router table, switch out the chamfer bit for a 1/4“ straight bit. It’s time to start routing the stopped grooves that accommodate the panels. Begin by marking a line 131/2“ up from the bottom of six of the eight pieces that comprise the four legs. This line will serve as a registration point as to where to make the stop.
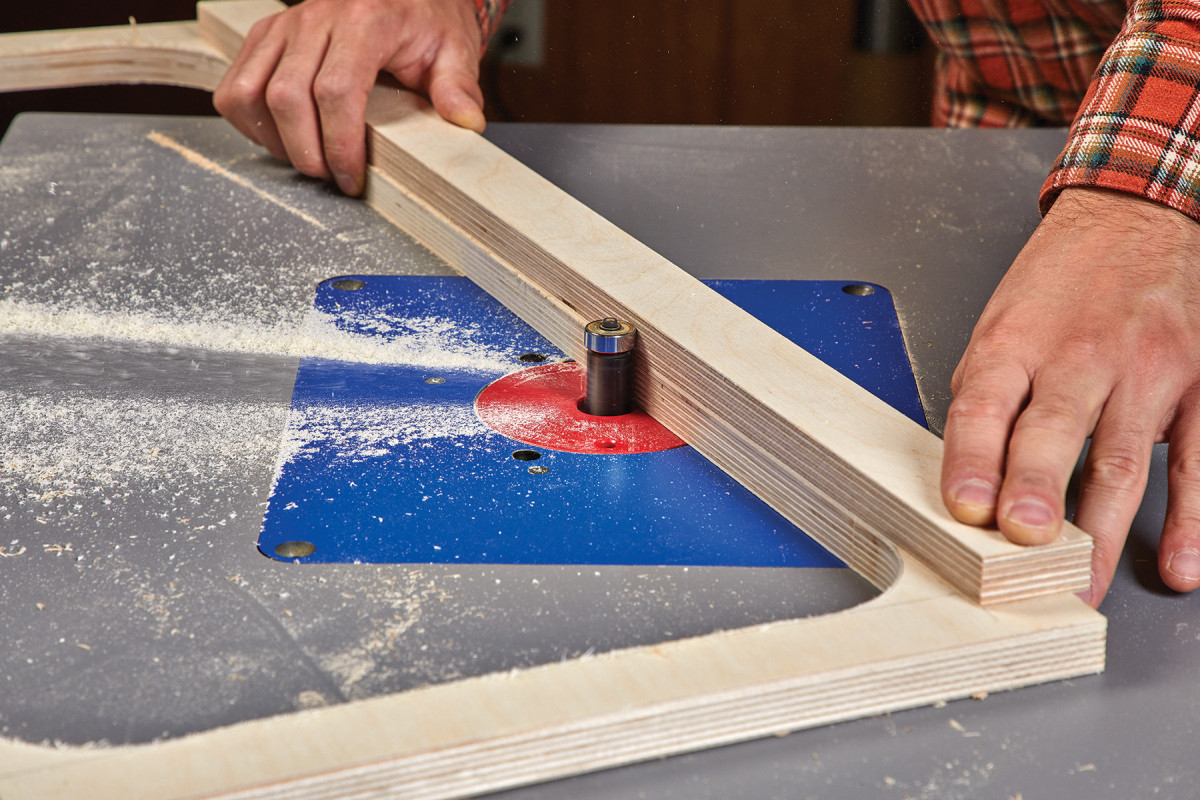
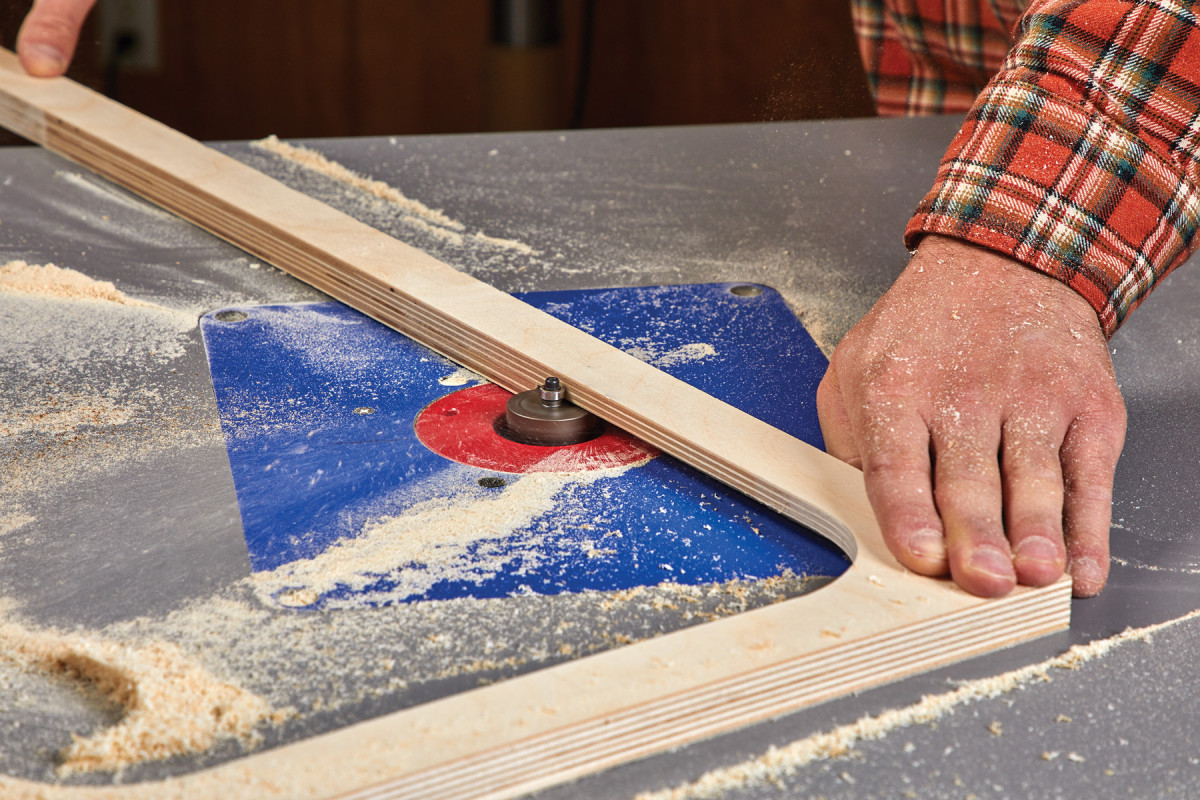
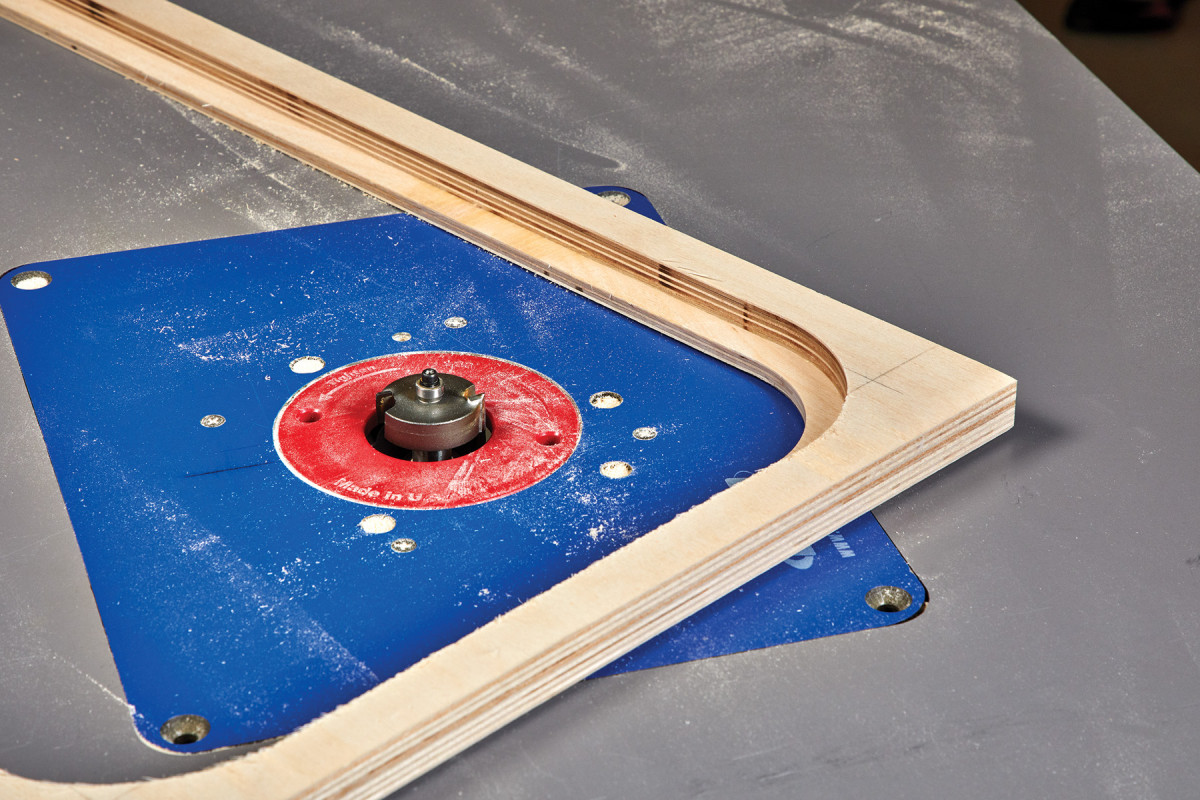
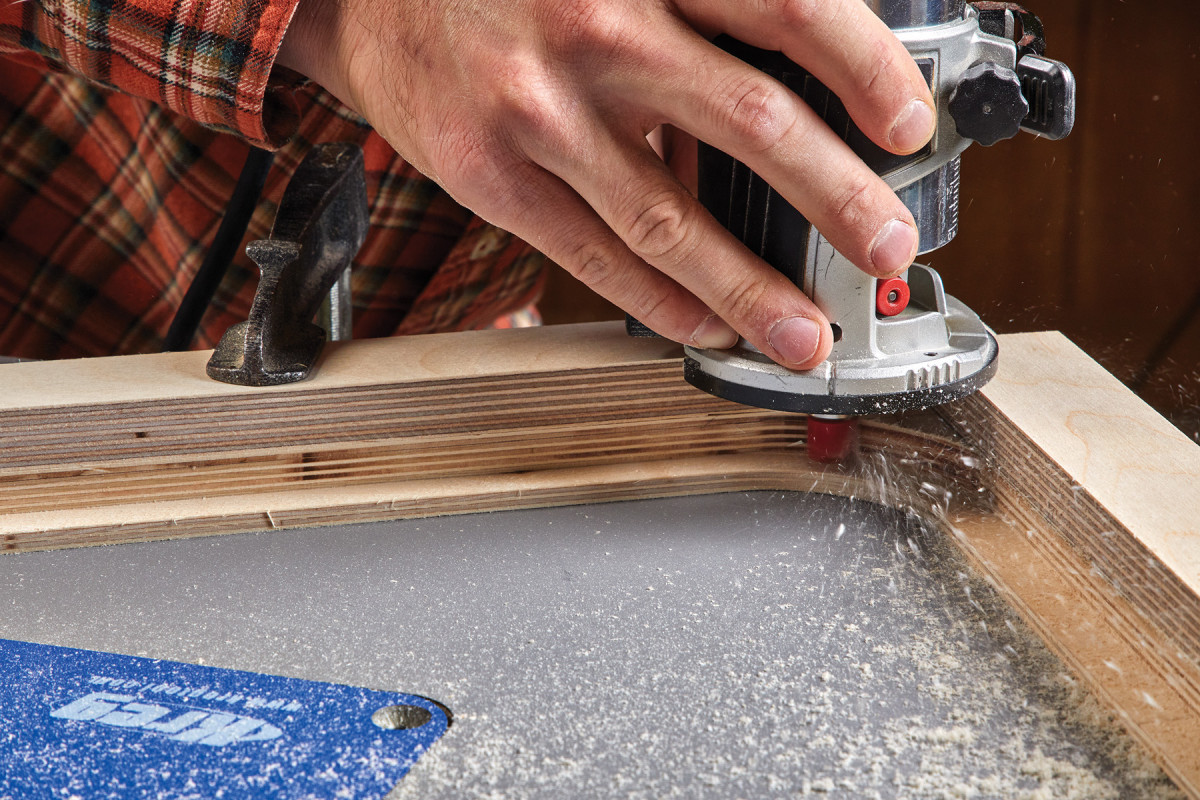
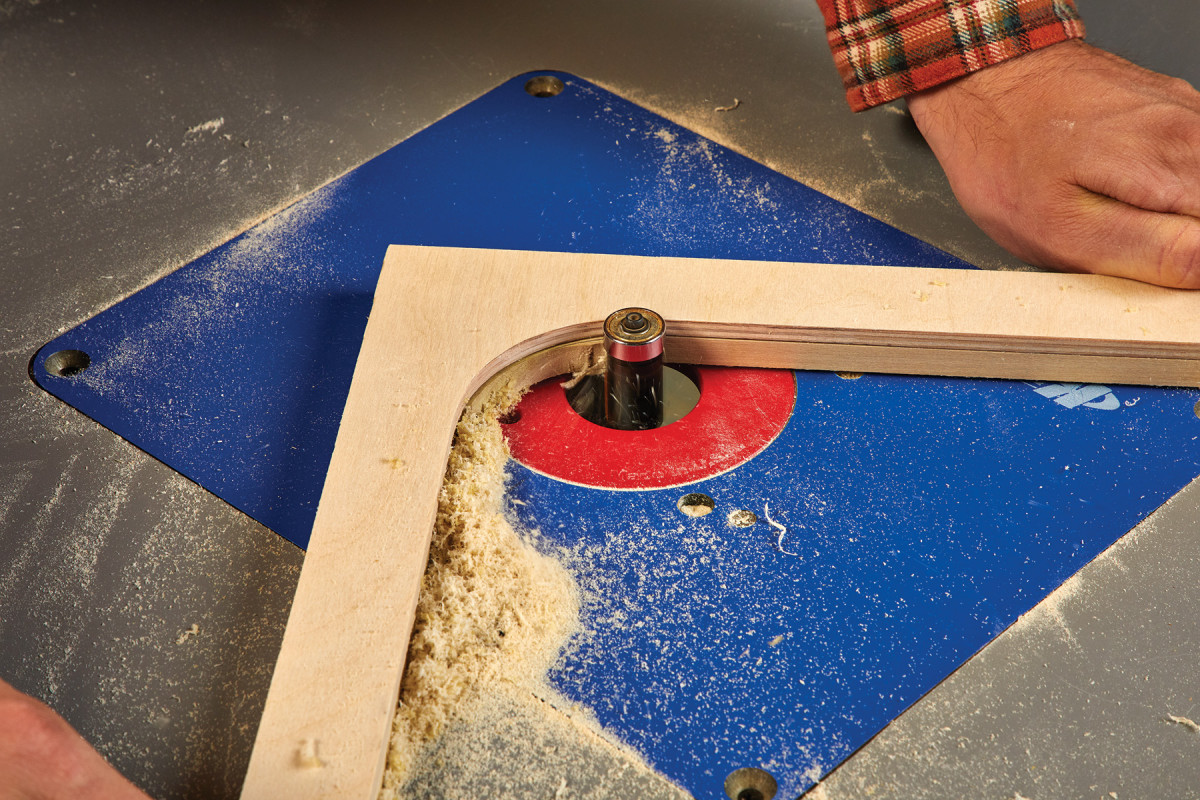
10-11. I attach a straight piece of plywood with double- sided tape to use as a reference for a bearing-guided pattern bit. This gives perfectly straight lines.
 Now make another mark on the router fence directly above the router bit to correspond with indication line on the legs. Rout the groove on six of the eight pieces and set the legs aside. With the 1/4“ straight bit still set up, rout the grooves on all of the stretchers that accommodate the panels.
Dressing the Panels
12-13. With the openings finished, install a 1/2″ rabbeting bit on the router table and rout a the recess for the glass and retainer. Rout in two or three passes until the rabbet is 1/2″ deep.
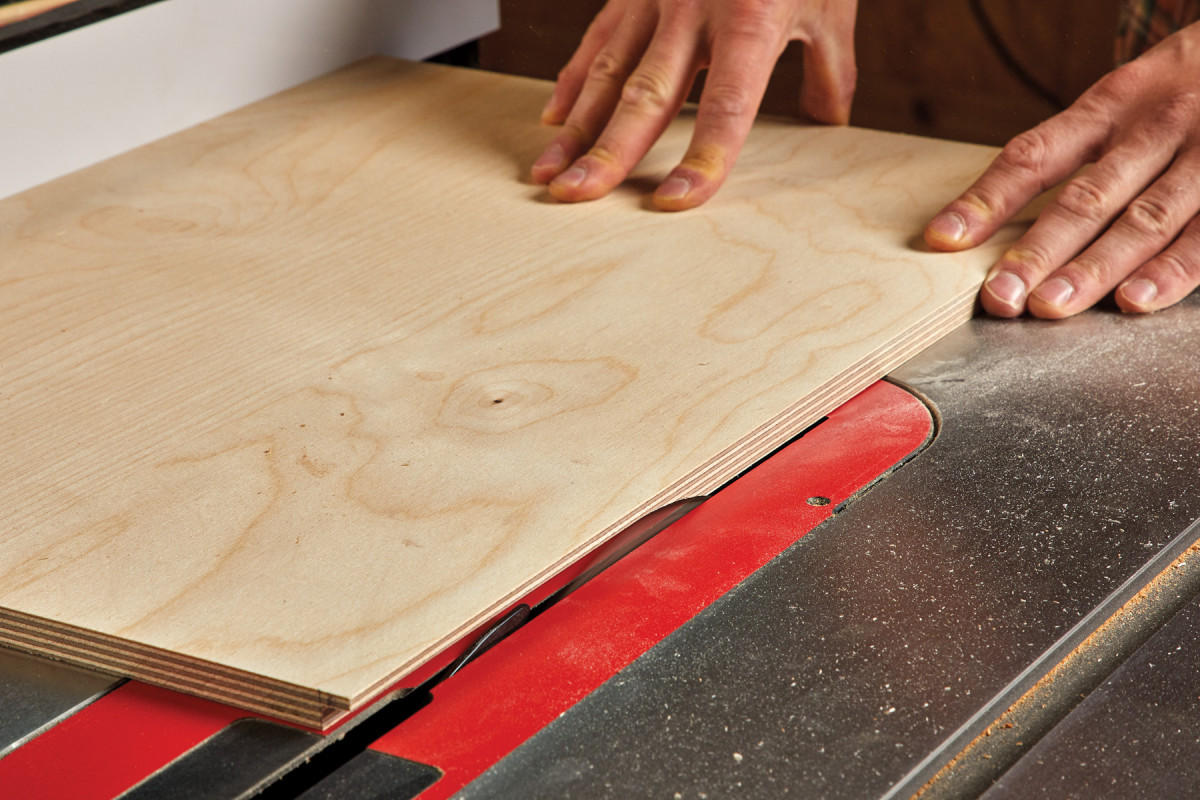
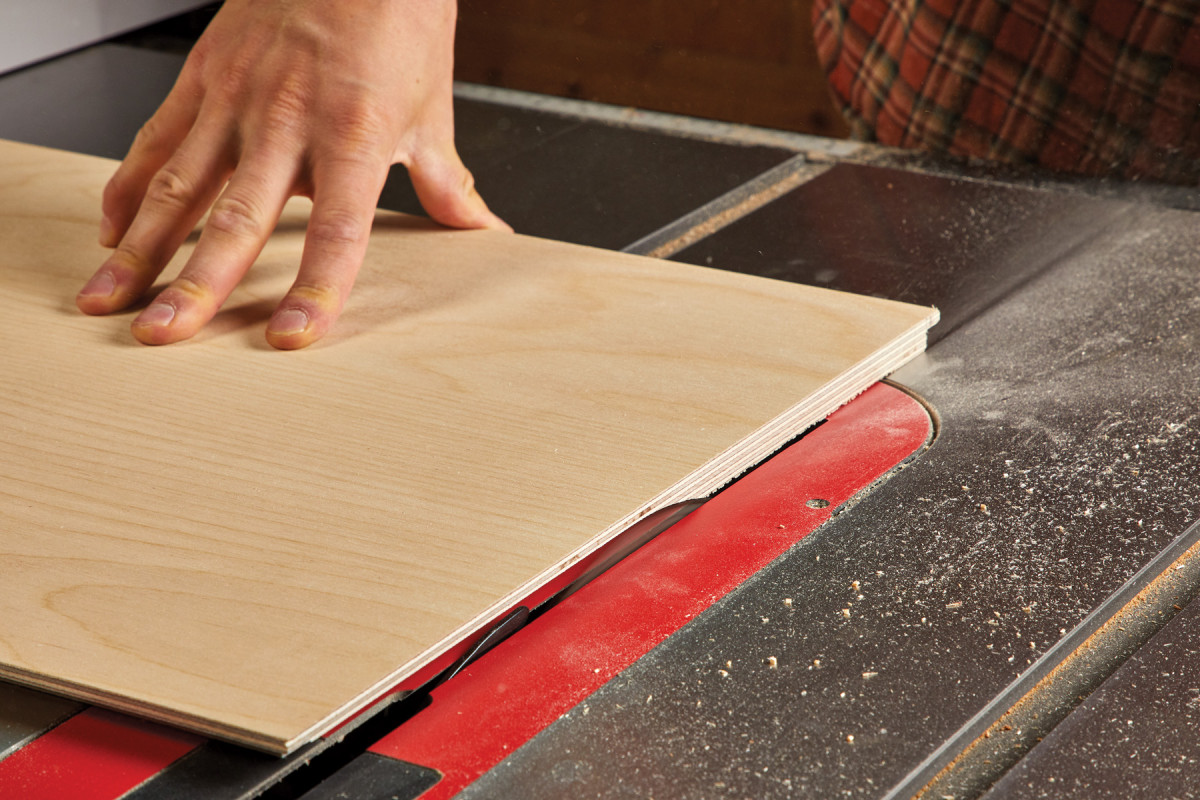
 Take this time to cut all of the panels for the casework to their final dimensions (including both upper as well as lower doors). While still at the table saw (using a flat kerf blade) start by cutting a 3/8“ wide by 1/2“ deep rabbet around the edges of all six frame panels.
14. The glass will have square corners, so I make a quick 90° corner jig to rout the bulk of the waste with a pattern bit.
Once completed, take the two 3/4“ thick (upper left and right case panels) and make a 1/2“ x 1/2“ rabbet cut on opposite side on all four edges. Before moving on, check the fit of rabbets in their respected grooves.
A Pattern, of a Pattern, of a Pattern
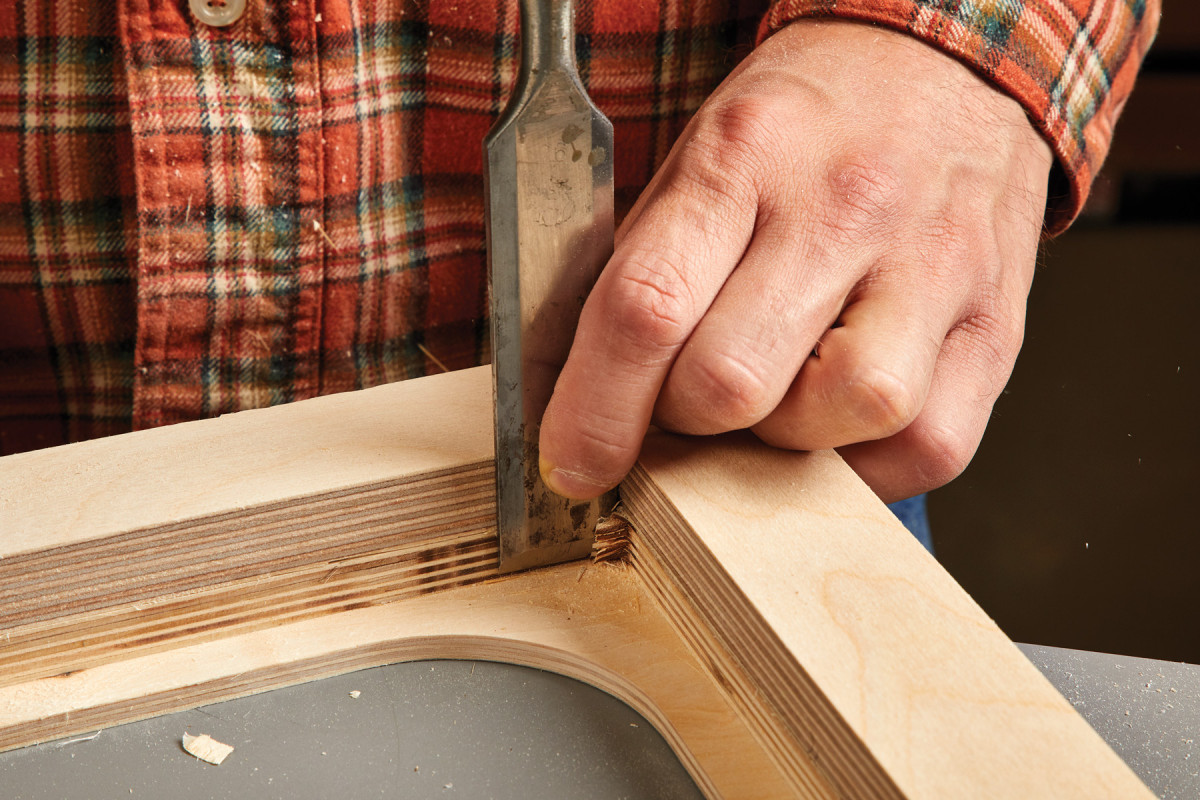
15. With the jig still attached, I use a chisel to square up the corners.
To create the openings for the two side panels as well as the two doors, start by laying out the area that will be removed.
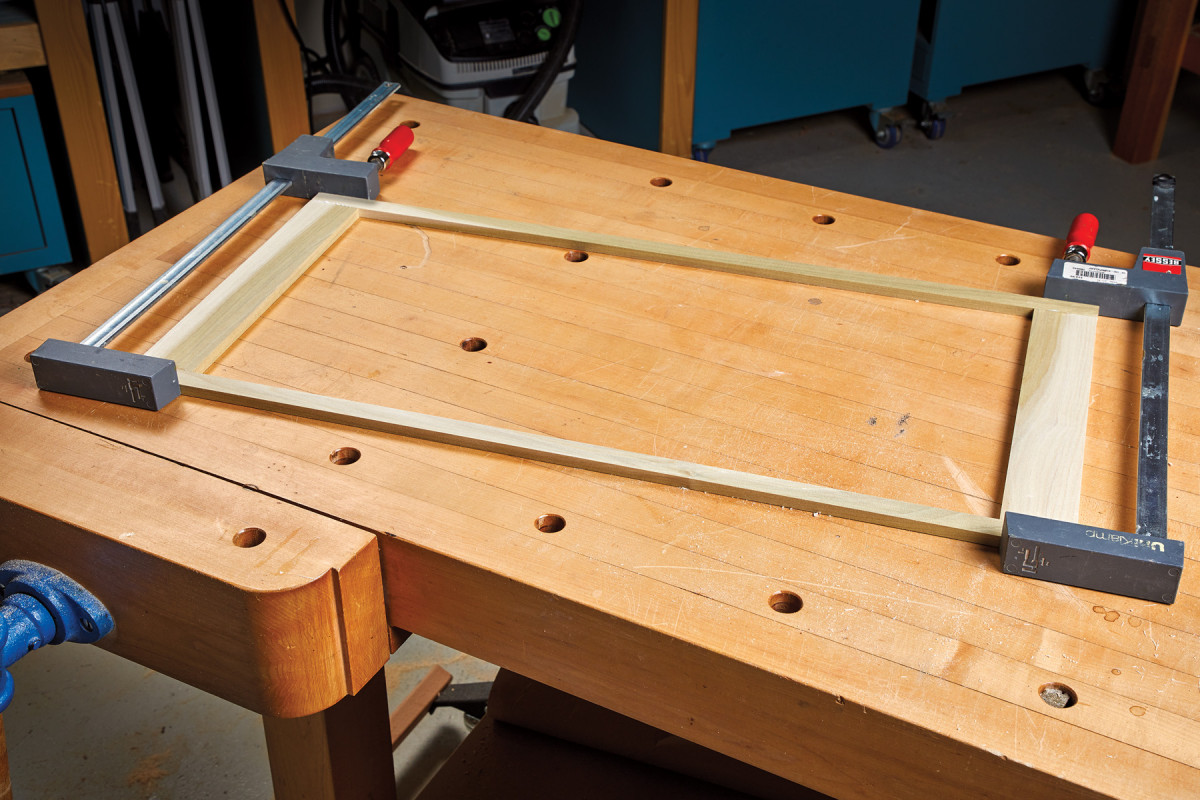
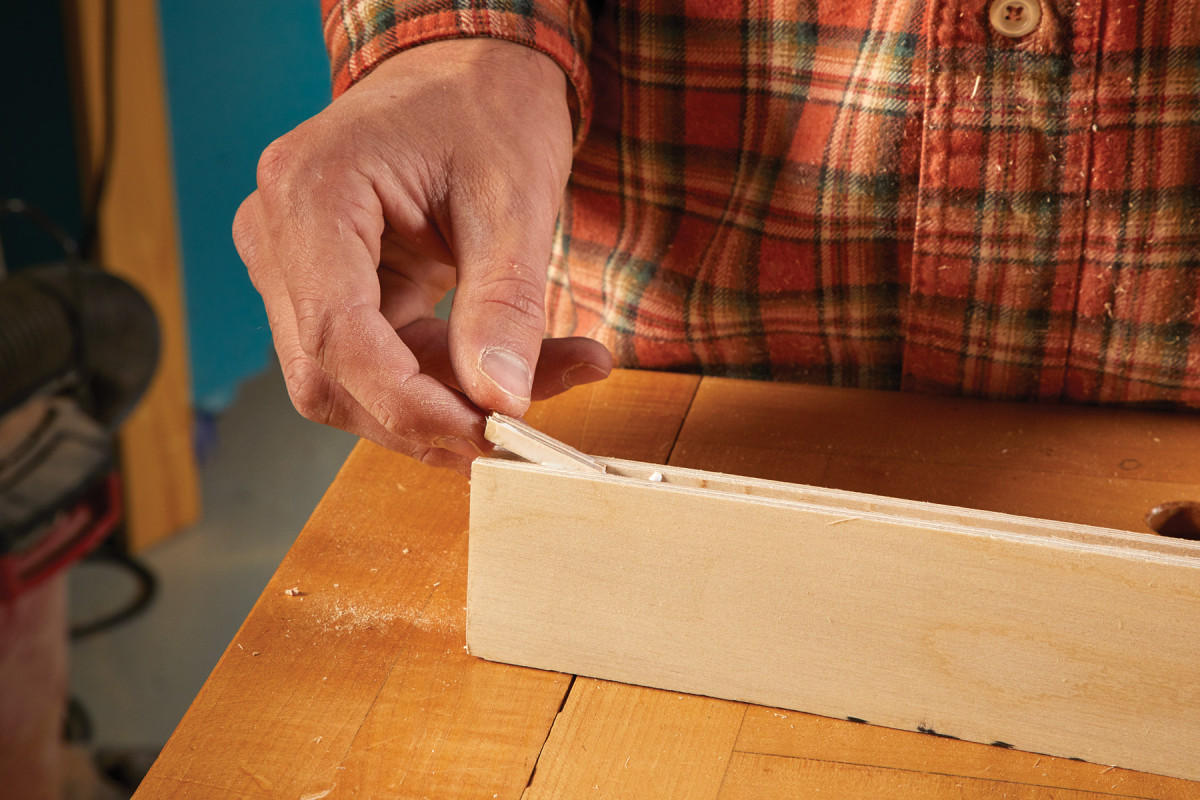
16-17. The glass retainer is solid wood. The stiles are cut to their final dimension before glue up, but the rails are left wide to accommodate the inside radius.
 Using a combination square, draw a line 11/2“ in from the outside edge on all four sides. Then, create a 2“ radius layout line on the four corners using a compass. Proceed to do this for all four panels.
18. Tit the retainer in the rabbeted back of the door. Trace the opening onto the retainer.
Once complete, drill a hole large enough for a jig saw blade to pass through. Following the layout lines, cut shy (approximately 1/16–1/8“) from the referenced border. Clean up the radiused corners over at the spindle sander.
19. Rough cut the retainer with a jig saw, staying inside the line.
From here, attach a square scrap piece of wood to the work piece along the designated layout line. This square piece will act as guide to flush trim the irregularities left by the jig saw on the straightaways. Repeat this step on all four sides of each of the four panels.
20. Use a pattern bit to flush trim the retainer, using the door as the pattern.
Using a 1/2“ rabbeting bit, follow the interior contour of the cutouts you just created. The final depth of cut is 1/2“ deep, so making a few passes (even though its Baltic Birch) will help ensure accuracy as well as prevent potential splintering.
21-22. The retainer fits the back of the door. It will hold the glass in place against the rabbeted edge of the door.
 Since the glass retainers are rectangular, the radiused corners will need to be squared up. Switch out the rabbeting bit for a flush trim bit.
Diameter is mildly arbitrary here, just so long as the bit length accommodates the cut. The technique used here mimics that of the one used to trim up the straightaways on the initial cutouts. Attach a couple of scrap pieces of birch to the work piece to use a template to clean up the corners. A small radius will inevitably remain, so square up the corners using a bench chisel.
23. The non-glass panels are just plywood. The top of the case is a 3/4″ piece of plywood, rabbeted to fit snugly in the opening. The rabbet is 3/4″ wide and 1/2″ deep (to fit the 3/4″ plywood rails and stiles). Getting his piece dialed in is key to the structure of the cabinet and makes final assembly go quickly.
Now that this is complete, it’s time to start gluing up the frames that compromise the glass retainers. As shown (see photo 17) the two rails are cut to their final dimensions, while the stiles are oversized to accommodate the 2“ radiused corners.
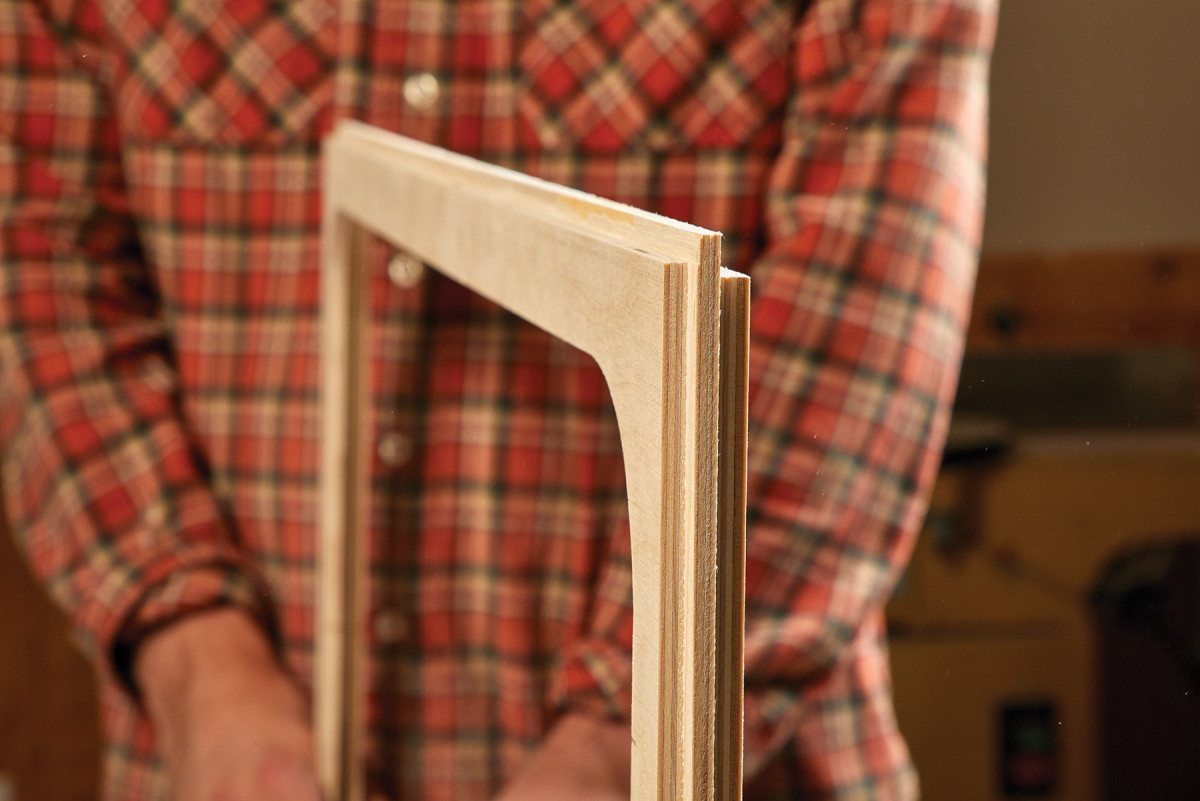
24. The inset solid panels are 1/2″ plywood, rabbeted to leave a 1/4″ x 1/4″ tongue that fits in the grooves of the rails and stiles.
Once these are glued up, place them within the recess and trace the profile of the cutout onto the stile. Remove the excess waste (while the retainer is still within the panel) using a jig saw. Flush trim any remaining waste using the panel as template. Repeat this step for all four panels.
25. The glass side panels are also get this rabbeted joinery detail. They are fit similar to the solid panels.
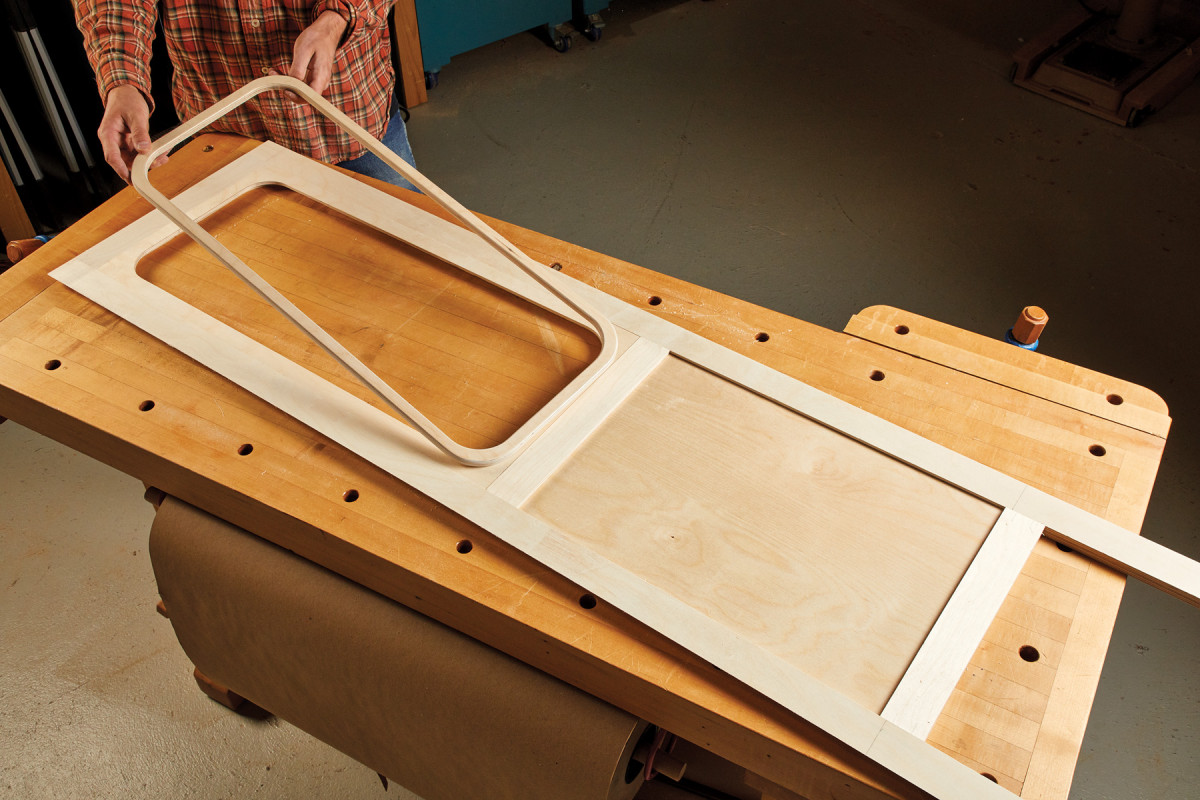
The final step is to create the faux gaskets that will be applied to the outside of the glass openings. Start by cutting 1/2“ Birch plywood panels that are 1“ longer as well as wider than the openings cut for each panel. Using a compass, mark a 21/2“ on all four corners of the gasket panels. Once drawn, attach the gasket panels to the outside of the two doors as well as two side panels equally space from all four sides. Flip the panels over and drill a hole large enough for the jig saw blade to pass through. Rough cut the interior waste and proceed to flush trim the remaining over at the router table.
26. The rails will have 1/4″ x 1/4″ openings at their tops/bottoms. Glue in some scrap here. Paint will hide any defects.
Pull the gaskets away from their respected panels and cut the outside 21/2“ radius with the jig saw (or bandsaw). Clean up any chatter left by the blade with either a spindle or belt sander. With the faux gaskets in hand, give the two outside edges a 1/4“ round over.
Pocket Hole Construction
27. Begin assembly by starting with the cabinet sides. I attach the stiles to one rail, then slide in the panels.
With a bulk of the labor behind, it’s time to start drilling the pocket holes that make-up a majority of the cabinet’s construction. Begin by marking about 5/8“ in from either side. This should allow enough room to accommodate the stretchers that possess grooves.
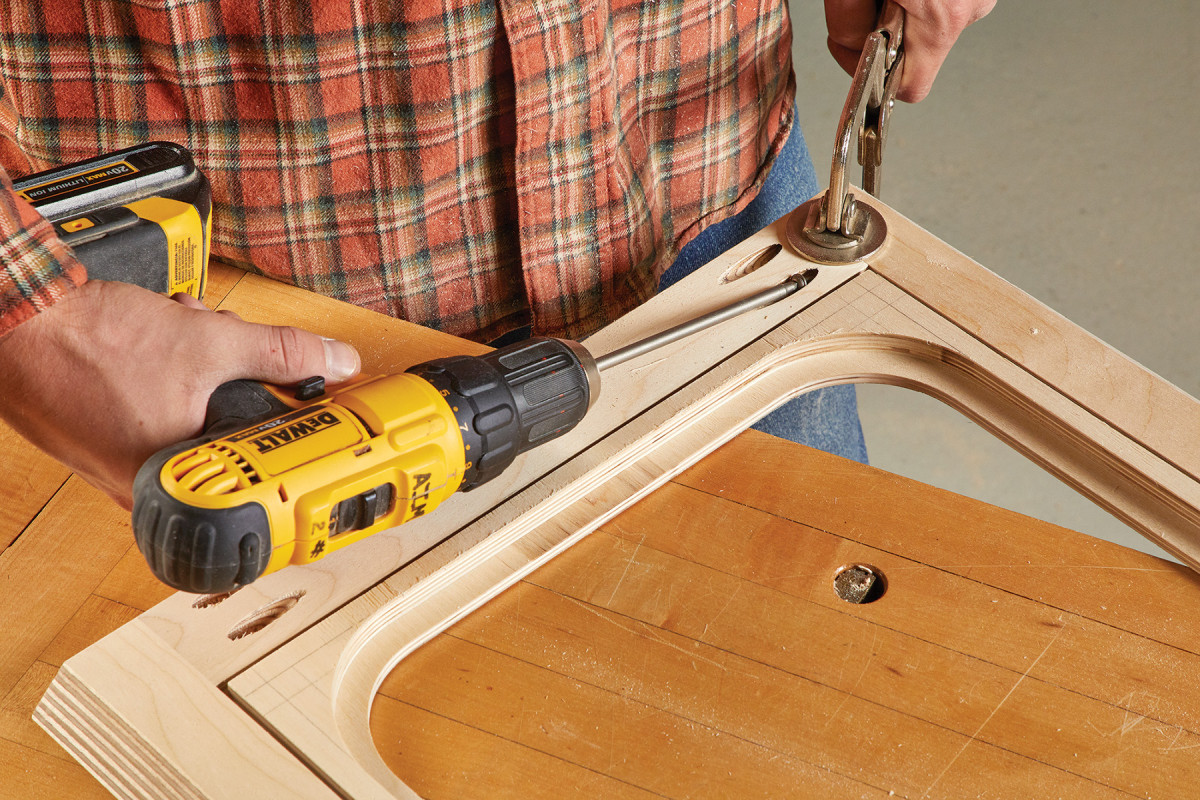
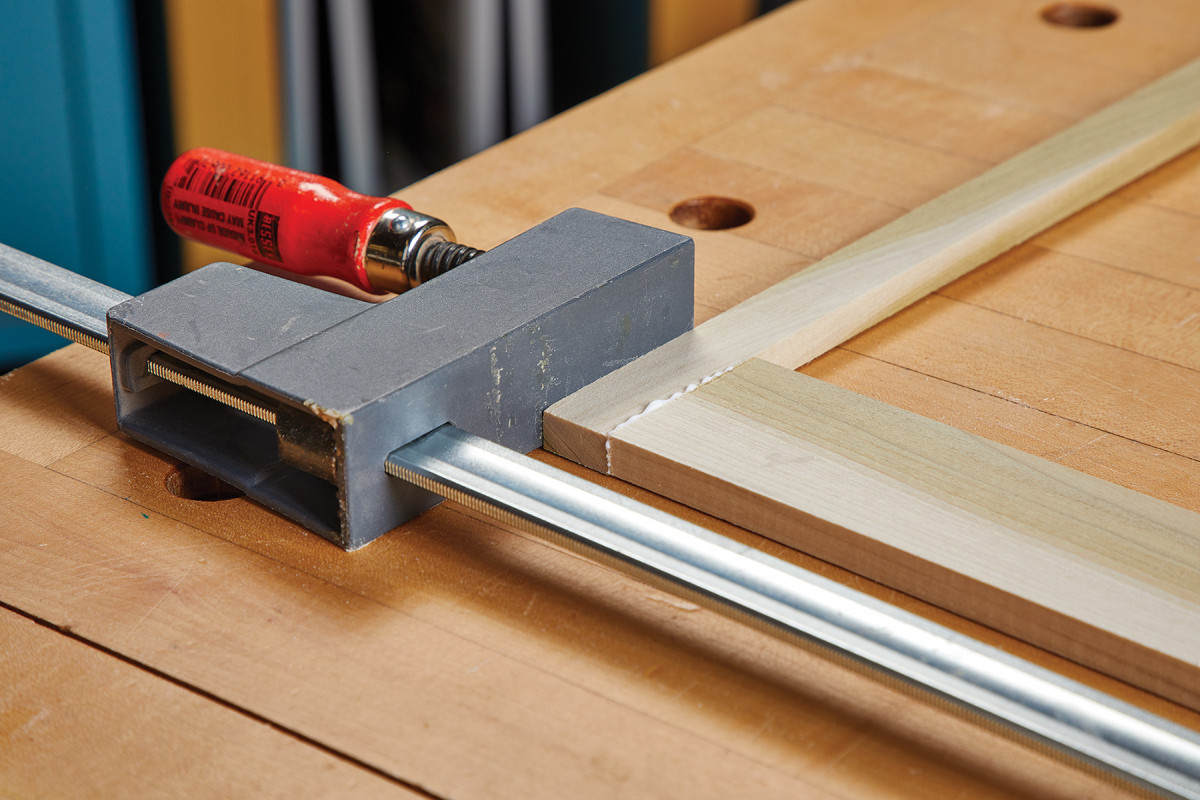
28-29. Then, I start at the top and connect the other rail, keeping things flush and square as I got. Sometimes pocket holes have a tendency to misalign as you’re drilling, so a clamp helps keep the surfaces flush.
 Set the appropriate depth stop on both the pocket hole jig as well as on the bit collet and begin drilling. Repeat this step on all horizontal stretchers along with the two front vertical stretchers that divide the doors.
Drilling for Shelf Pins
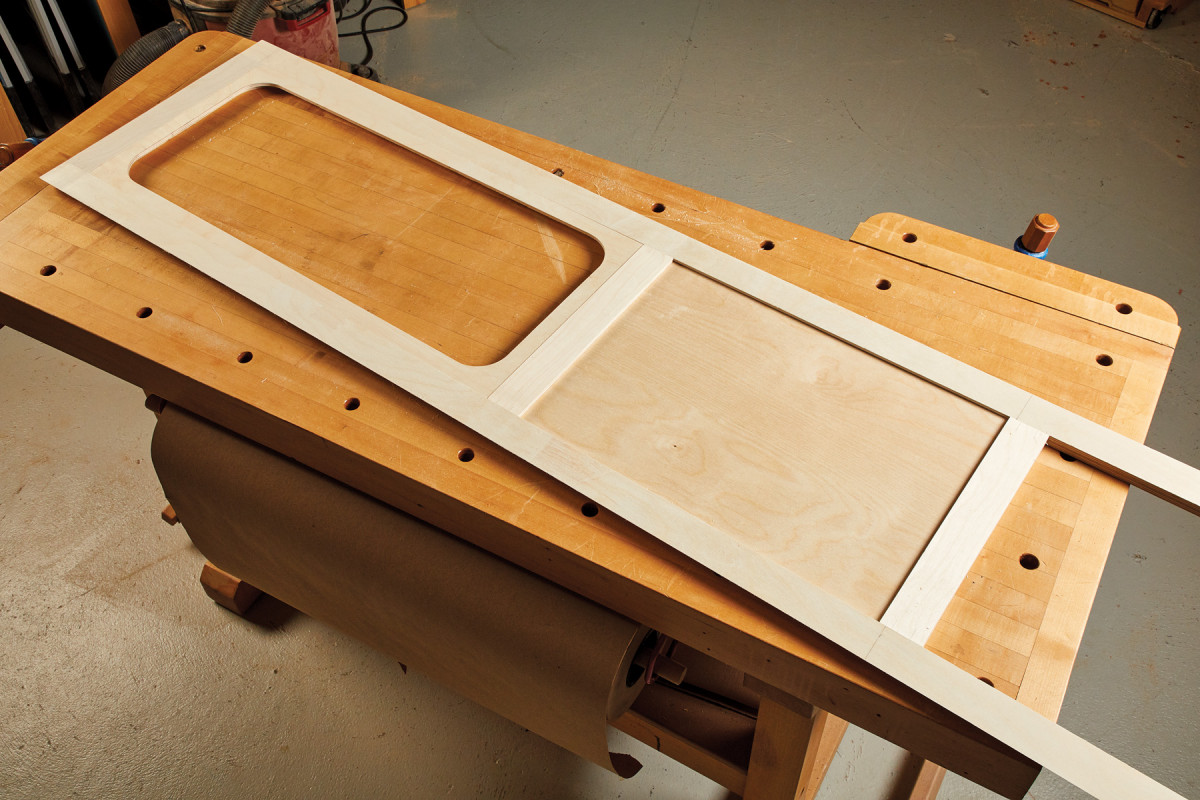
30. Flip the side over and you will see the seamless look–no exposed joinery.
Since the intended purpose of this cabinet is at the discretion of the builder, so is the location as well as the quantity of shelves. If you desire to follow the project to a ‘T’, the layout in the plans provides plenty of room for adjustment. Whether using a Shelf Pin Jig by Kreg or Rockler, or creating them with something shop-made, it’s much more accessible to do prior to assembly.
Panel Assembly
30. Flip the side over and you will see the seamless look–no exposed joinery.
The assembly is pretty straight forward. Begin by constructing the two sides. Ensure that the 1/8“ reveal on the inside of the panel visually consistent around all of the edges of both panels and proceed to screw the stretchers to the legs. Follow a similar procedure for the back as well as the front assemblies.
Once this is complete, you humbly may need to exercise your ability to ask for a helping hand during assembly. Run glue on all of the faces with a mitered edge. With the help of your willing assistant, bring the four sides together using a series of band clamps. With the clock of the open time running, check alignment of all the miters and ensure the interior of your case is square.
Unruly and stubborn by nature, miters can often times use some
alternative persuasion. If need be, do not hesitate to clamp some square blanks in the corners of the case using spring clamps or Quick Grips. The alternative, (or rather the peace of mind) is to fill any small voids with wood-putty or latex caulking during the finishing process.
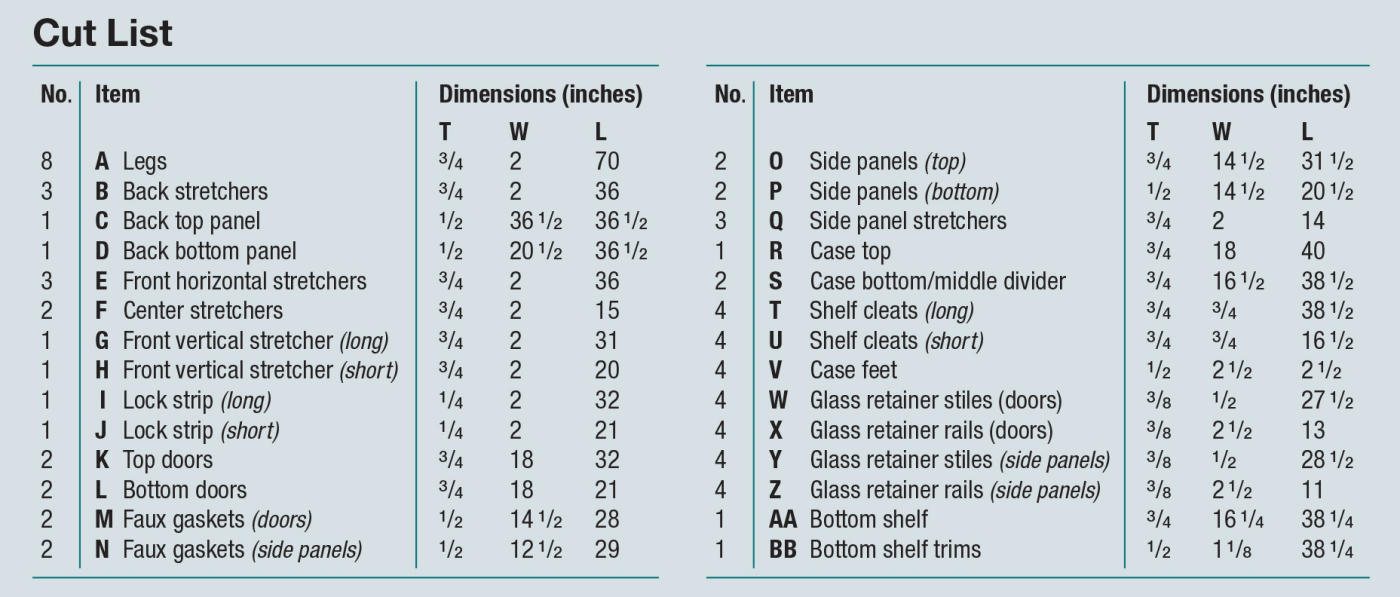
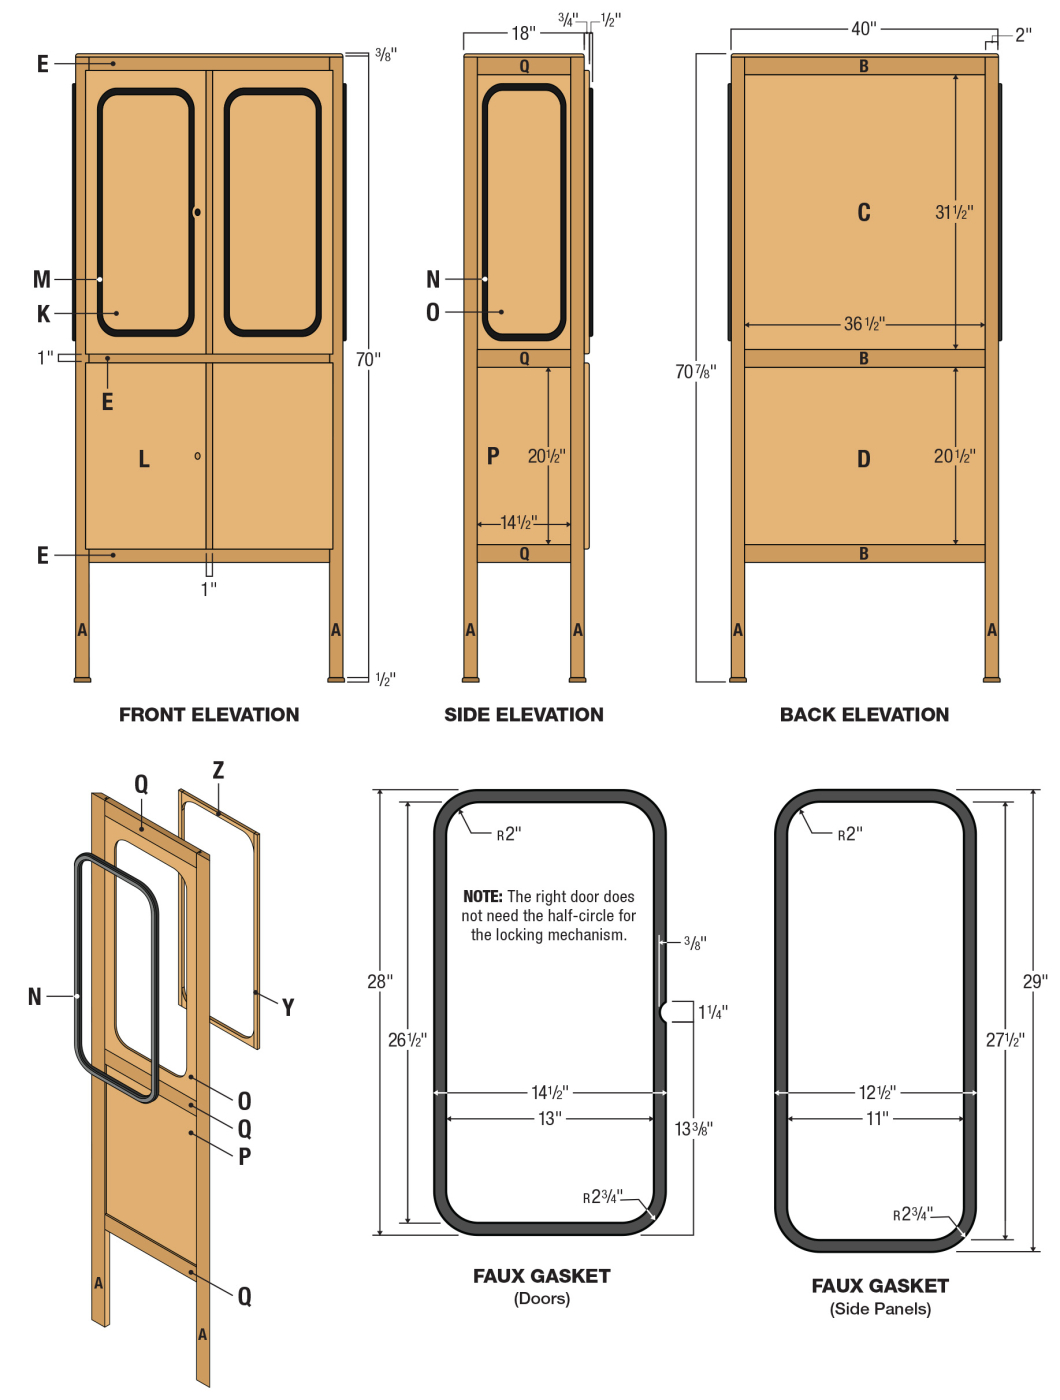
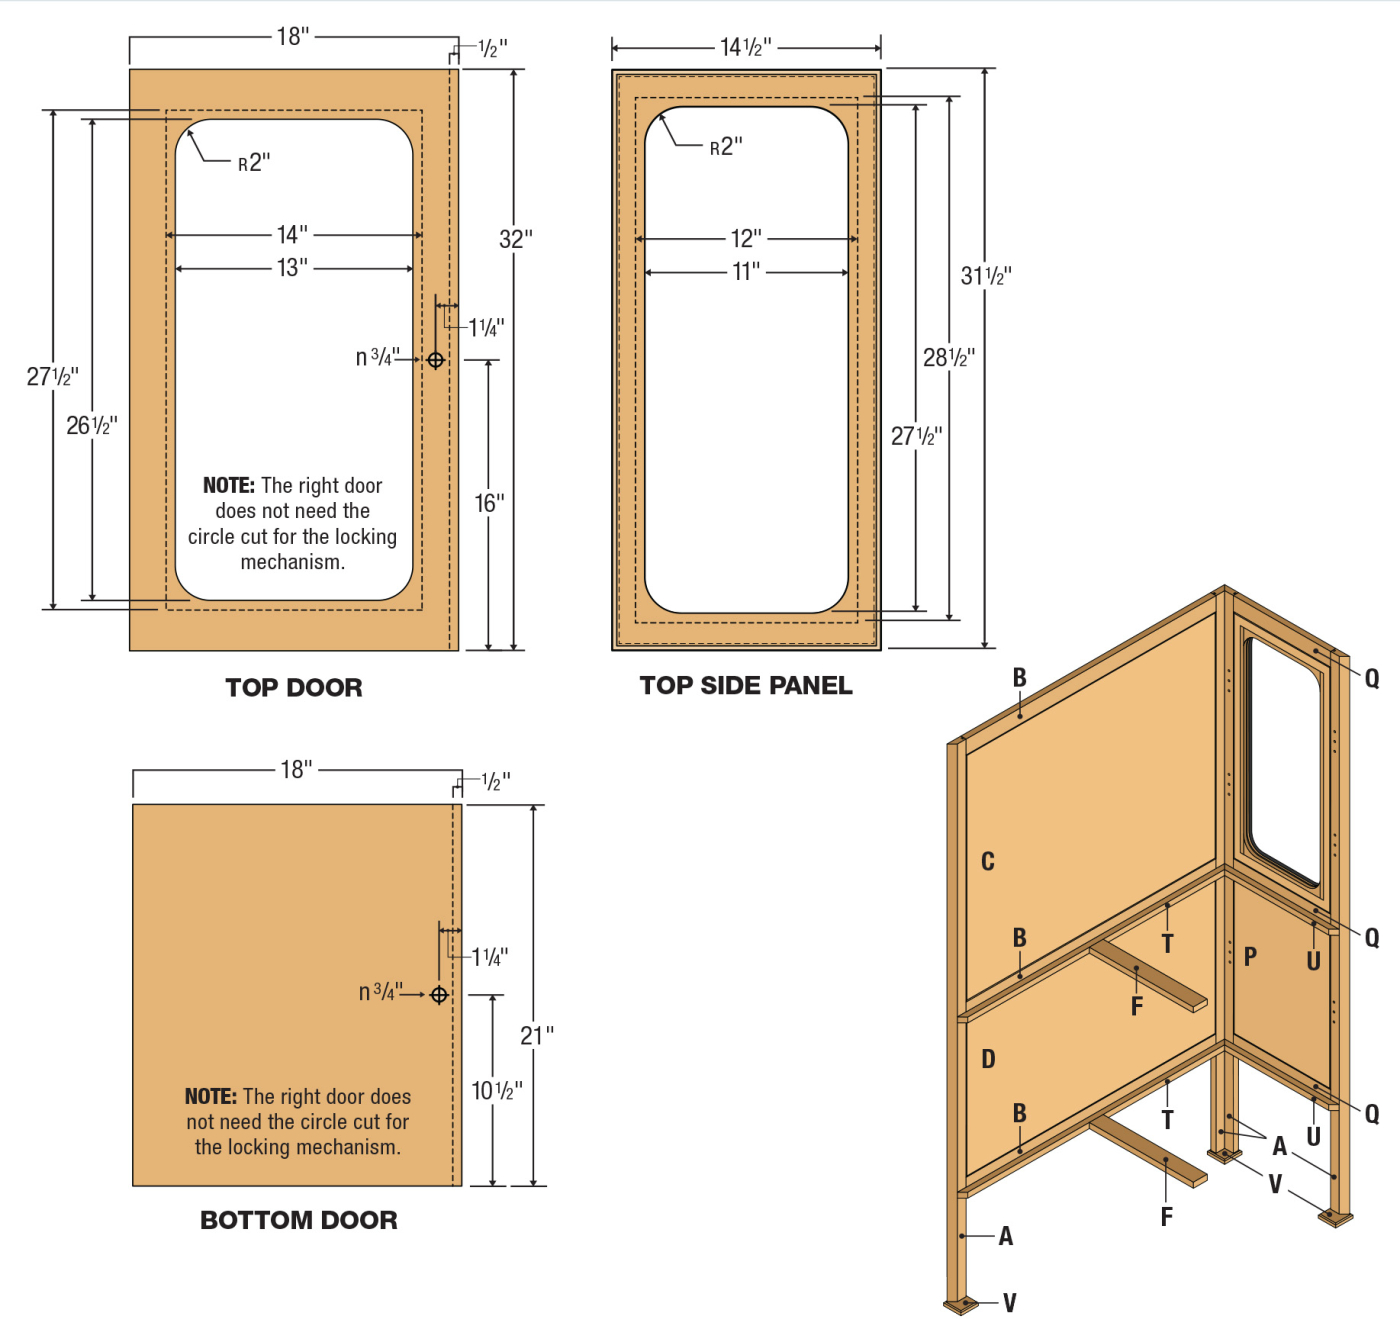
Retro Pharmacy Cabinet Cut List and Layout
 Top, Middle, and Bottom Application
This is where having a square case becomes our friend. Much of this cabinet derives its core rigidity from the top, middle, and bottom sections. Start by scabbing on the cleats that hold the case middle as well as the bottom in place. Once these are in place, continue to by screwing these panels in place using a series of #8 screws.
The top is attached in a similar, yet slightly different manner. Starting with a 3/4“ piece of plywood, cut it down to its final dimensions. While still at the table saw, reset the blade height and cut a 3/4“ wide by 3/8“ deep rabbet around all for sides. Since a snug fit is desired, sneaking up on the measurements is always encouraged. Once installed, proceed to screw the top to the case.
Don’t Forget the Feet
Employ the help of the assembly liaison for one last favor and tip the cabinet on its back upon the closest available work surface. Constructed from 1/2“ plywood, cut four square pieces to 21/2“ x 21/2“. Predrill two countersunk holes on each foot and proceed to attach one to the bottom of each leg using #8 screws.
Lock & Hinge Installation
With the cabinet construction complete, it’s time to start fitting the hardware. Even though the doors are an overlay, face frame self-closing hinges were used. With plywood not always being the nominal thickness (usually about 1/32“ thinner) choosing face frame hinges as opposed to half overlay hinges provided more flexibility with placement.
To create the recess for the hinges, construct a jig to be used in conjunction with a hinge mortising router bit. And although face frame hinges are not required to be mortised, this process was implemented to correspond with the locking mechanism that will be installed.
Now that are hinge locations are placed, our attention moves towards the locking mechanism. This system (functioning in two parts) uses a traditional cam lock in tandem with a corresponding rabbet joint. The first step is to locate the center on each door and drill a 3/4“ hole to accommodate the barrel of the cam lock. Second, take the four doors and cut a 1/2“ wide by 1/4“ deep rabbet on the sides that face one another. Cut two strips of 1/4“ plywood to the lengths of each door by 2“ wide. These two strips will now be glued into the rabbet that was created on each of the two right doors.
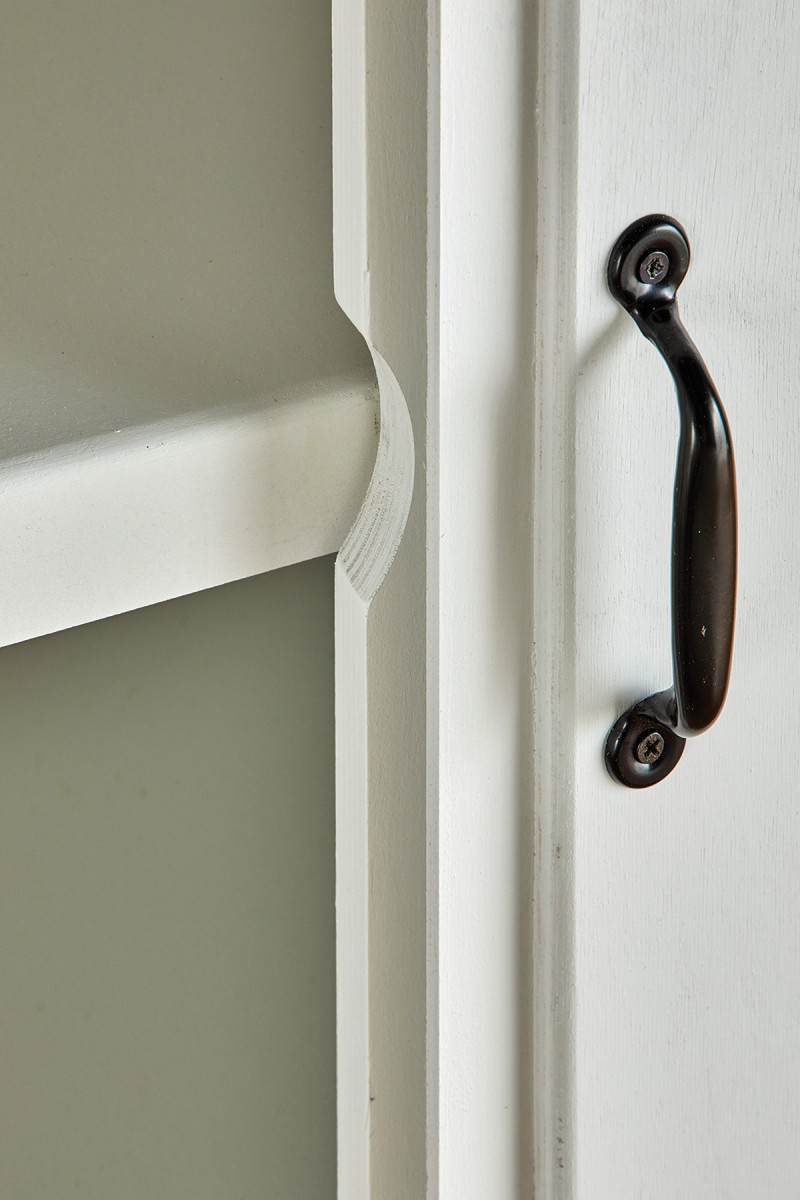
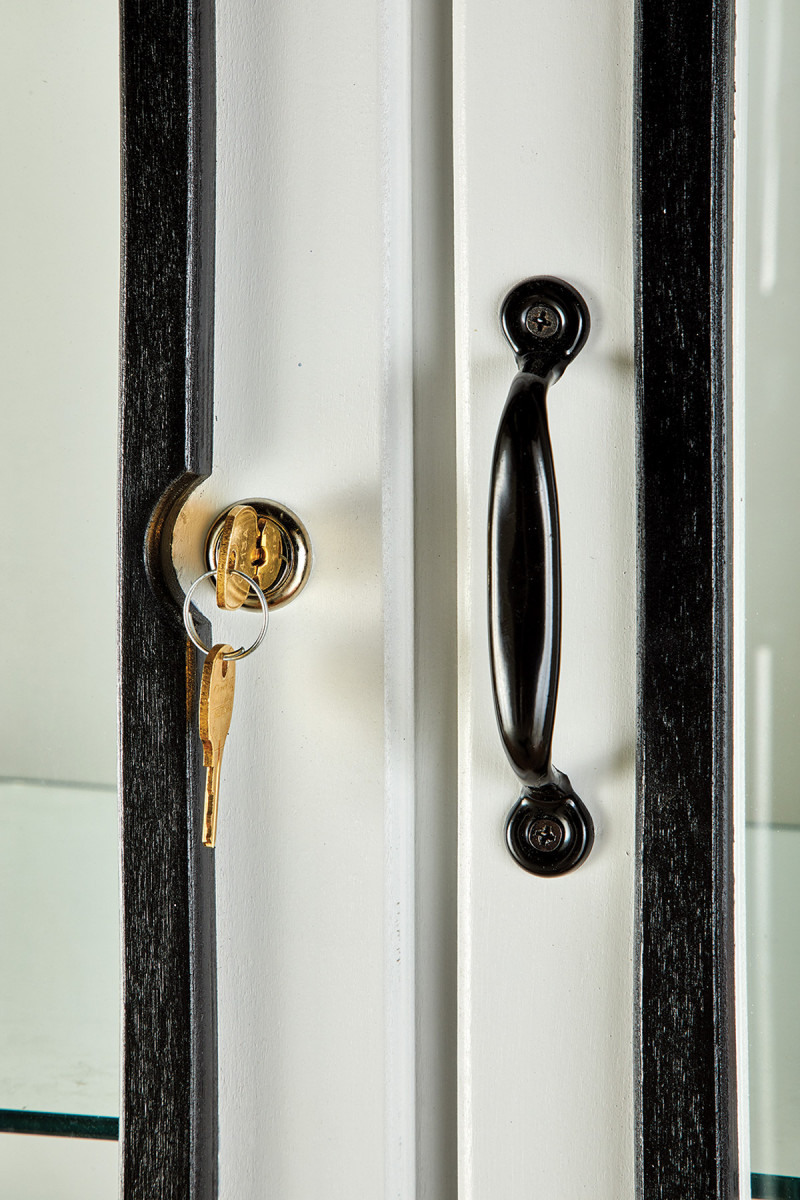
32-33. The lock hardware was tricky to fit within the confines of the skinny door rail and center rail of the cabinet, but a little careful cutting yielded a solution I could live with. It almost looks intentional.
Working Through Mistakes
There always seems to be at least one unaccounted for misstep (typically with hardware). In this case, the layout for the Cam Lock impeded with its ability to properly engage. A simple cure was to cut a concaved profile on both center stretchers where the cam engages on the backside. Since everything is held together with pocket screws, the two center stretchers were able to be removed and altered.
Metallic Finish
To achieve the desired finish, a couple preparatory measures were taken before paint was applied. Take this time to fill any small gaps or cracks using wood filler. Once this has cured (two to six hours) proceed to apply a coat of sanding sealer. Sand this coat smooth (with #220 grit) after it has fully dried. This sealer coat provides a smooth, non-porous substrate for the paint to be applied. Continue by painting the cabinet, glass retainers, as well as the faux gaskets. To further mimic the metallic appearance, a latex-based satin enamel was applied.
Attaching Hardware, Glass and Gaskets
Now that the paint is fully cured, begin by applying the faux gaskets to the four panels. This was done using PVA glue with a series of spring clamps. On the inside of the panels, place the 1/8“ glass (remember to undersize glass dimensions by 1/8“ on each side) and pin nail the retainers in place. Since the shelves have the potential of holding objects of mass, opt for 1/4“ Tempered glass. Finish by installing the shelf pin sleeves, shelf pins, locks, handles, as well as door hinges.
With your new cabinet complete, ready to be admired, the only thing left to do is to establish its rightful place and purpose within your home. Whatever you choose to put inside it, remember that your “ah-ha” moment, when it arrives, may not come easy–but that the lessons it contains will serve you for a lifetime. PW
Here are some supplies and tools we find essential in our everyday work around the shop. We may receive a commission from sales referred by our links; however, we have carefully selected these products for their usefulness and quality.