We may receive a commission when you use our affiliate links. However, this does not impact our recommendations.
Pedestal Picnic Table
One day in the shop and you’re ready to party!
By Jean Bartholome
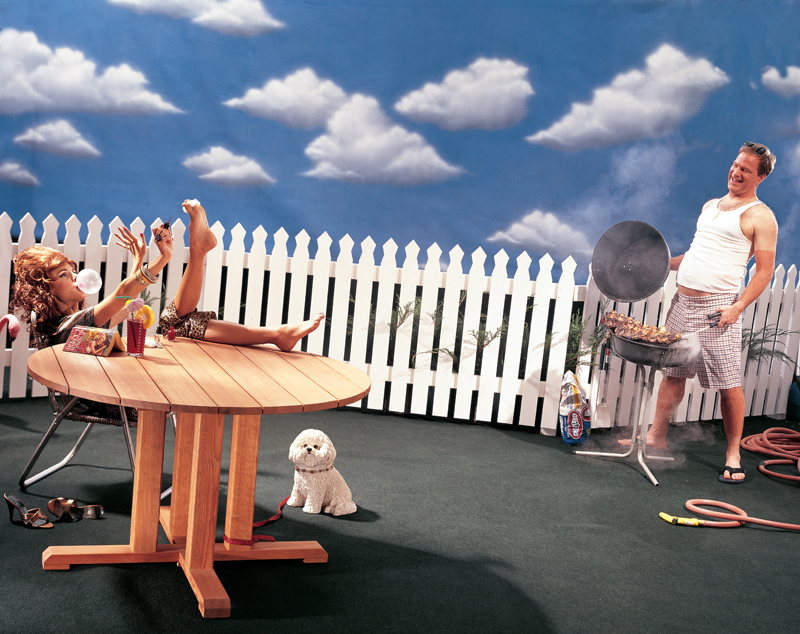
If you’re looking for a picnic table that’s simple to build but looks great on your deck or patio, here’s the design for you.
Its pedestal support ensures that no one can complain about “having the leg.” The round top is fastened from below, so unlike many other tables, this one has no screws or nails visible on the top. The pedestal, joined with threaded rods, is simple to retighten if rain and sun combine to loosen it. The 48" dia. top easily accommodates six people.
What it takes to build
You’ll need one unusual tool to build this table: a 1/2" dia., 12" or longer “ship auger” bit (see Sources, below). It’s used to drill the long holes through the legs of the pedestals without wandering off course (Photo 3), and is often available at home centers for around $20. Unfortunately, a spade bit with extension just won’t do the trick.
We used clear, vertical-grain redwood for our table because of its wonderful appearance, but it has gotten very expensive in recent years. You can substitute construction-grade redwood or cedar, if you pick it out carefully. If you choose pressure-treated wood for your table, be sure to use plates and cutting boards so food doesn’t come into direct contact with the wood. Expect to spend $90 for enough cedar to build the table, and more for redwood. The vertical-grain redwood we used cost $350.
Building tips
The main steps to build this table are shown in the photo sequence. After building the table, we can also offer these tips:
• When you’re cutting the four pieces of 4×4 that make the pedestal legs (part D), it’s more important to have the ends flat and square, and all four pieces the same length, than to make them exactly the length given in the Cutting List. So if you need to trim them a bit, go ahead.
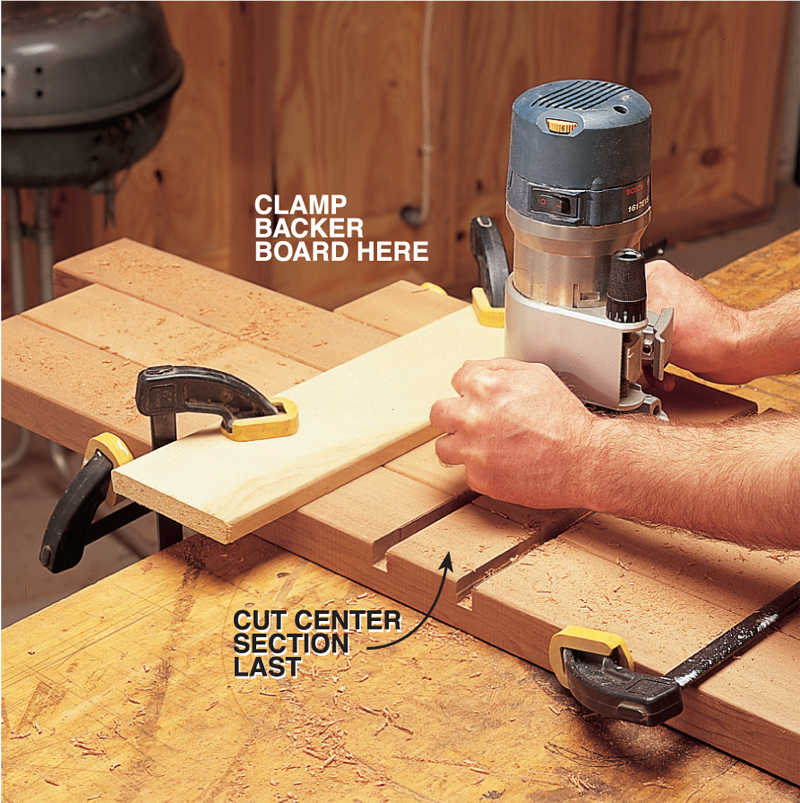
• When you’re cutting the boards for the top, be sure to cut the longest pieces (H) first, then use the remaining pieces to cut parts F and G. There are few things more frustrating than chopping up a long board, only to find you still need to get a long piece out of it.
• This tip is a chestnut, but it’s useful on this project: Before you cut the threaded rod for the base, screw a nut onto it. Cut the rod, file the cut end smooth and then back the screw off. It will clean up the threads nicely.
• It’s a lot easier to sand the pieces of the base before you assemble them.
• It’s fine to finish the whole table after it’s assembled, but for maximum longevity, put a weather-repellent finish on all the parts before assembly, making sure the finish soaks well into the end grain. Or you can skip a finish entirely and let the table age to a natural gray color.
Source
(Note: Product availability and costs are subject to change since original publication date.)
Irwin Tools, irwin.com, 12" dia. x 17" L
Ship Auger bit, #47408.
Cutting List

Materials List

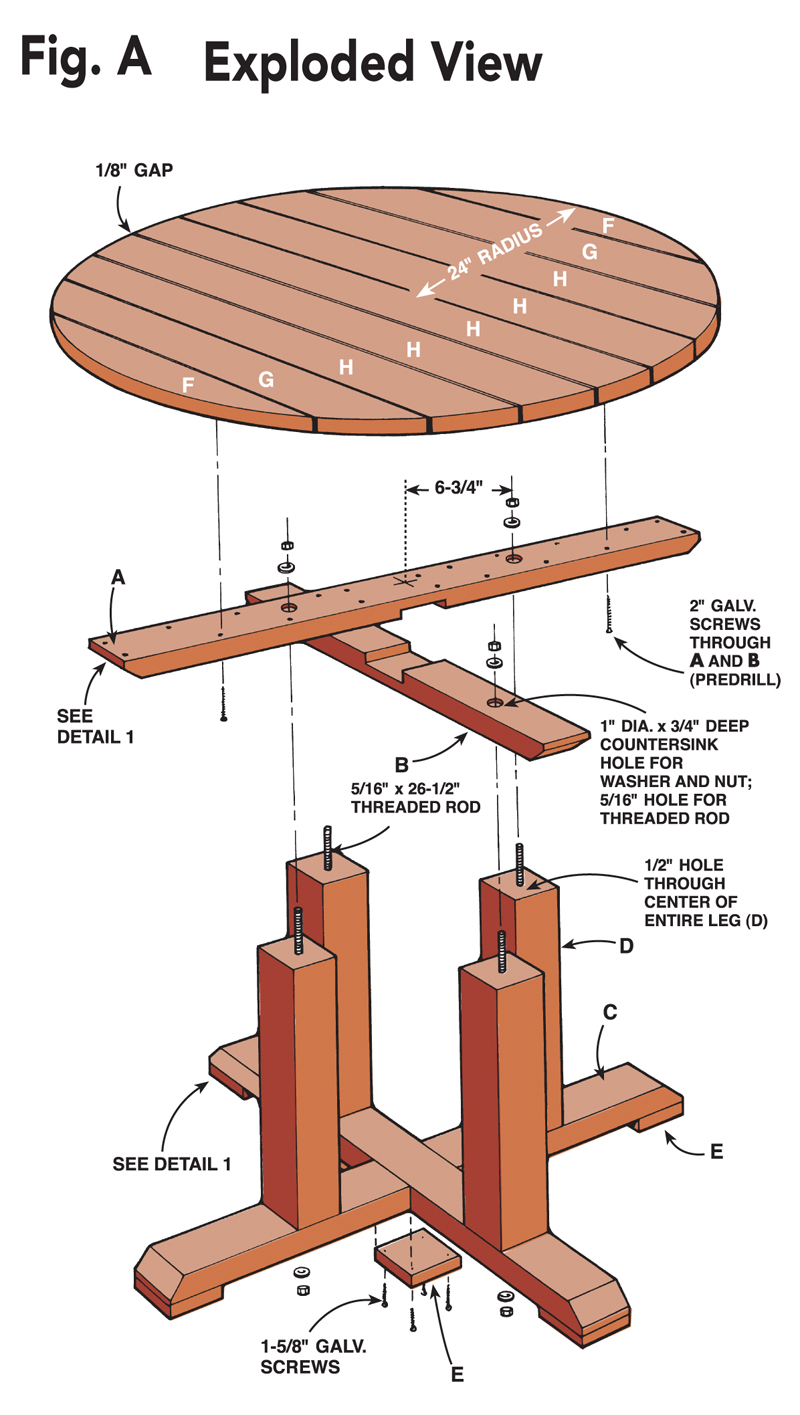
Fig. A: Exploded View
Detail 1: Underside of Tabletop

This story originally appeared in American Woodworker June 2000, issue #80.

Click on any of the images to view a larger version
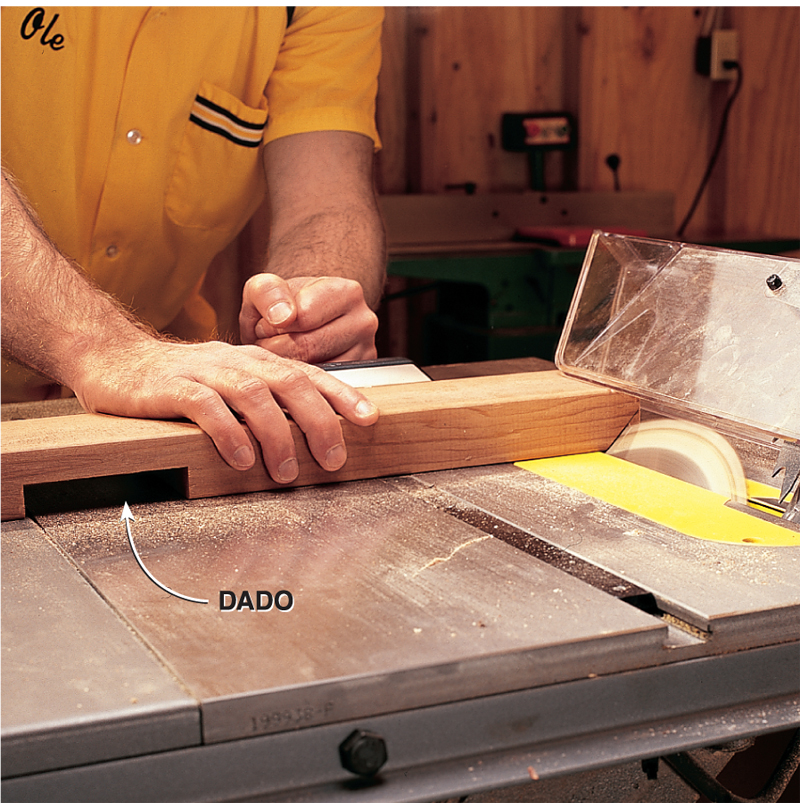
1. Cut dadoes in the four boards that will form the top and bottom “x” on the pedestal. Cut the dadoes all at once, making them half the thickness of your boards so a lap joint is formed. Cut the dado a little undersized in width, then sneak up on the final width, using a scrap of the lumber to test the fit. It should be a snug, sliding fit.
Oops!

We forgot to clamp a piece of scrap at the end of the boards we cut, and this is what happened—“blow out.” Luckily, we were able to hide the damage. The moral: clamp a piece of scrap wood at the end of the cut as a backer board.
2. Cut bevels on the ends of the four boards. Be sure the bevels are on the same side as the dado on two of the boards, and on the opposite side from the dado on the other two. When the two “x”s are assembled, all the bevels should face up. Drill the 1" counterbore holes in these parts on the non-beveled sides. Then drill the 5/16" holes.

3. Drill a hole through the center of each pedestal leg, using a 12" “ship auger” bit. Drill in halfway from each end, using a guide block to help the bit go in straight. I know it seems impossible that these two holes will meet, but the special design of the drill bit prevents it from wandering. It works, even when you’re drilling by eye.
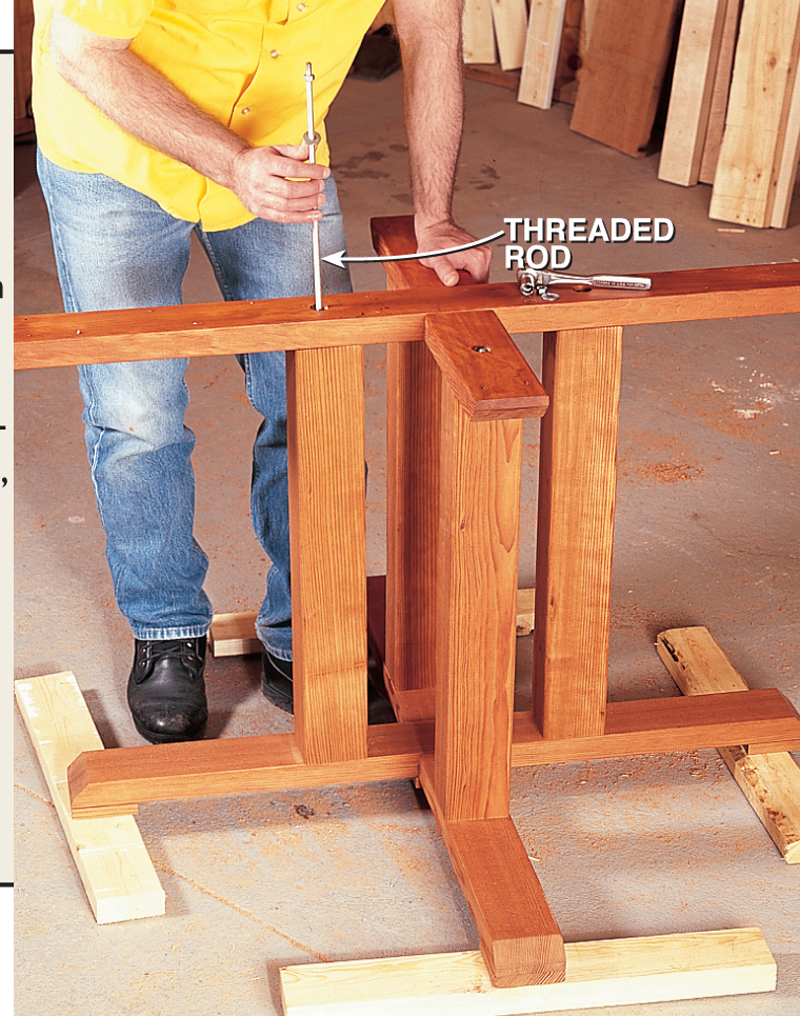
4. Assemble the base on blocks so you can hold the nuts on the bottom. Tighten the nuts from both ends. Fill the 1" holes on the top with brown caulk so water can’t collect in the hole. Glue and screw the small feet on the ends of the base.
Tip: For outdoor furniture it’s important to finish the pieces before assembly. That way the finish penetrates all surfaces, especially the end grain. The only exception is areas that will be glued.
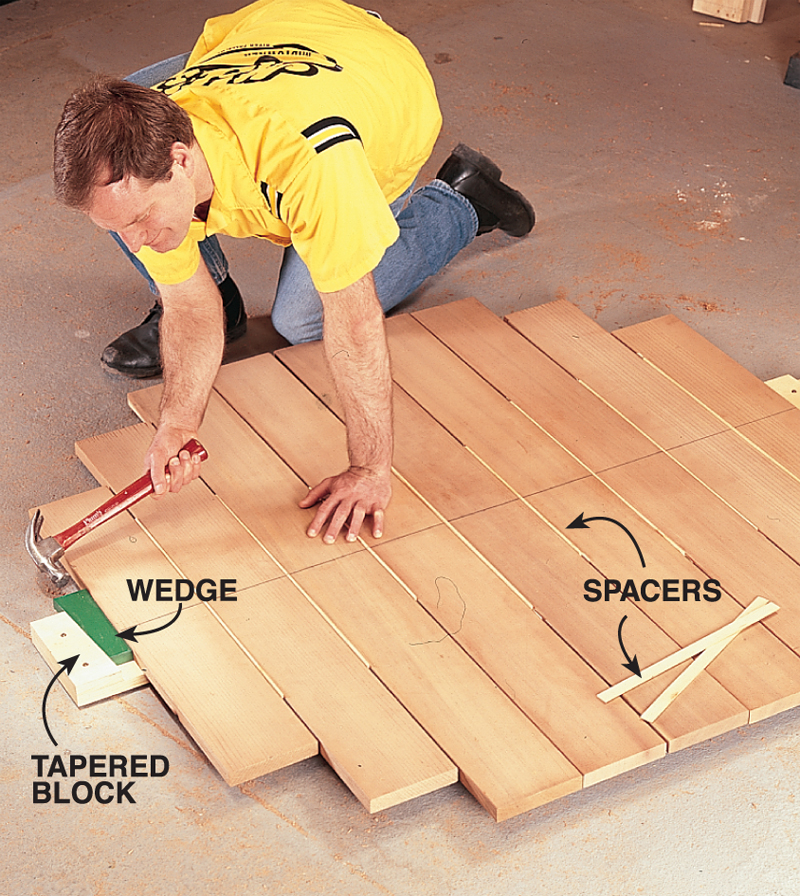
5. Clamp the top boards in a simple jig, bottom side up, with 1/8" spacers between the boards. A line drawn on the middle of each board beforehand makes them easier to align.
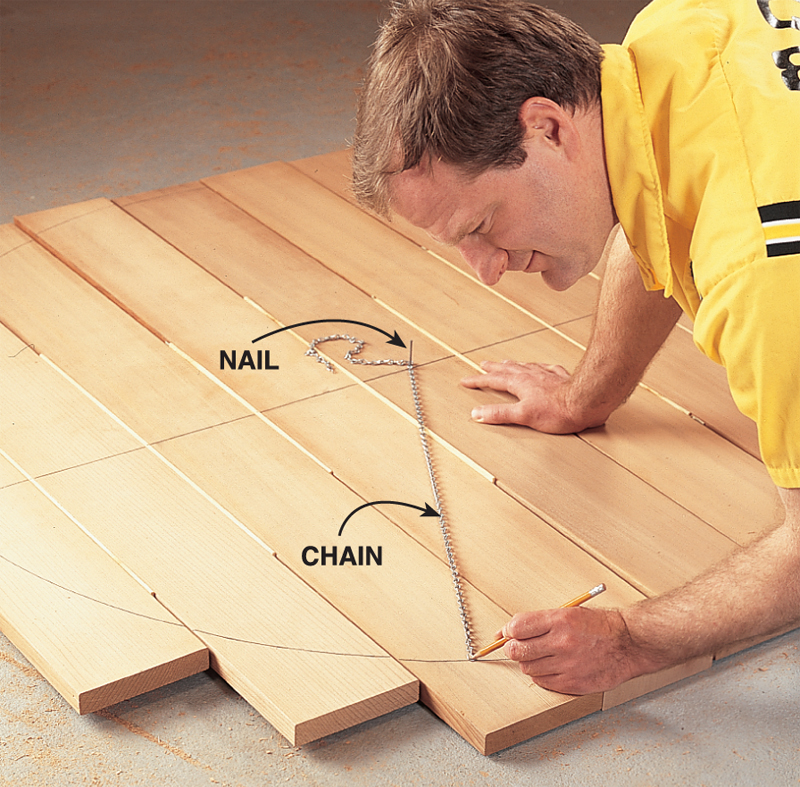
6. Draw a circle using thin wire or chain and a nail in the middle of the center board. Take the boards out of the jig, cut out the arcs with a bandsaw or jigsaw and sand the ends. Put finish on the top boards and reassemble the top, including the spacers, on the clamping jig. You’ll need to reattach the end block of the jig, because the top is now smaller.

7. Attach the base to the top. Set the upside-down pedestal assembly onto the top boards and screw it down. Cut the cleat boards (J and K) and screw them down as well. Flip the table over, remove the spacers and you’re done.
Here are some supplies and tools we find essential in our everyday work around the shop. We may receive a commission from sales referred by our links; however, we have carefully selected these products for their usefulness and quality.