


We may receive a commission when you use our affiliate links. However, this does not impact our recommendations.

Anyone who has read this blog for more than a week knows I have a thing for campaign-style furniture and the work of André Roubo, the 18th-century French woodworker and writer.
Like many other 18th-century furniture writers, Roubo wrote a bit about campaign-style furniture, including beds, tables and chairs. I hope to build one of his chairs and a table some day, but the Roubo campaign beds look a little nuts to construct.
Turns out, they are indeed nuts to build.
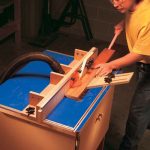
Maryland furniture maker Bryant White made copies of Roubo’s campaign bed for Fort Ticonderoga, which was built by the French starting in 1755. Bryant sent me some photos of the cool beds and some commentary on their construction and hardware. I’ll let him take over the story from here:
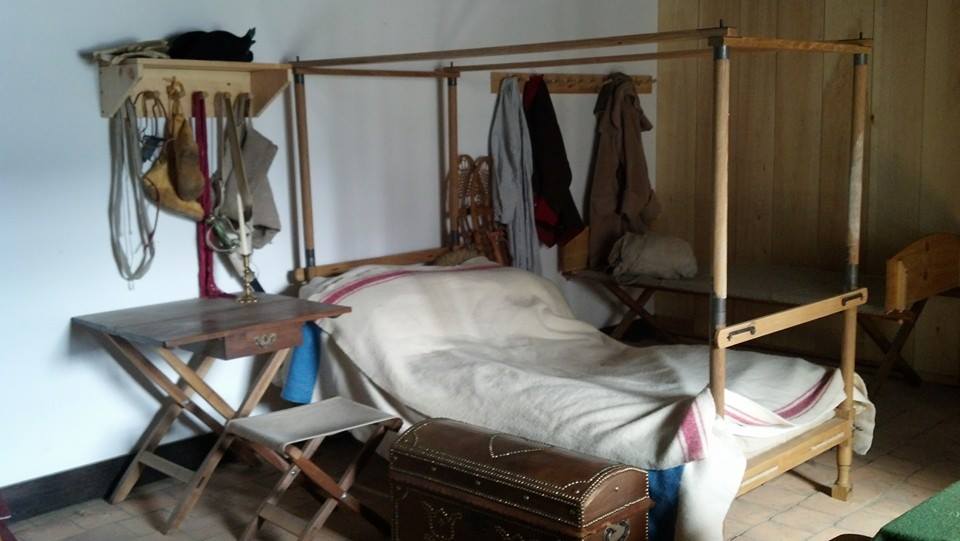
“Fort Ticonderoga has been updating its image over the past couple of years from a ‘pay to see the displays and old stuff’ to a quality living history fort. Many of those involved are young history majors who have working knowledge in trades such a sewing, shoemaking, military life etc. They try to be as 100 percent accurate as they can to the Fort’s history. They also go out to schools and involve kids in their program for a better understanding of America’s past.
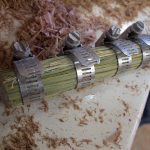
“Anyway, they choose to show either British or French occupation depending on the year and they needed some accurate French-designed furniture. My contact there, Cameron Scott, provided me with images of original paintings depicting rough camp furniture and Roubo’s designs. After sorting through three different beds we decided these would be the most practical and cost-effective. I then scaled them to a practical size for height and length. Working with blacksmith Jymm Hoffman we came up with the specifics for the hardware. There’s a lot of hardware!
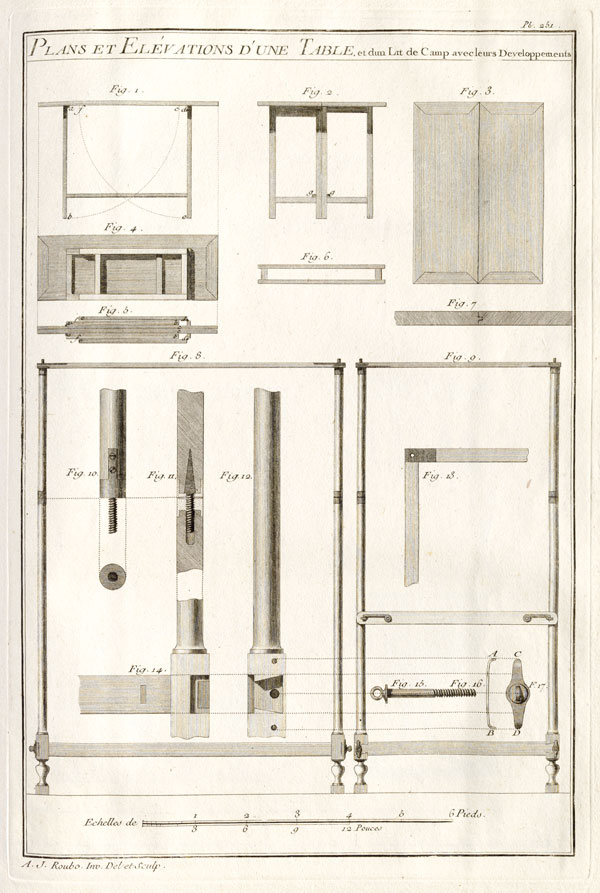
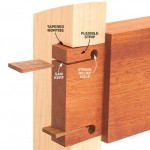
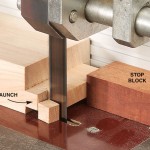
“When it came the actual bed construction, I chose oak for strength, price and availability. The posts come in two 30″ sections that screw together. This was done by inserting a coupling nut into the end of one post and screwing a double-ended screw with a wood screw in one end and a machine screw on the other end into the top post. The lower 8” of the post is turned like Roubo’s design. The rest of the bed is very close to Roubo’s design except where the half-lap dovetail is shown we decided on just a square lap to eliminate chipping of the dovetail. Because his original design does not indicate how the bedding is to be attached we decided to go with a rope bed.
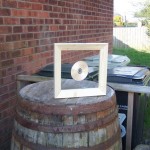
“The most challenging part of this was accurately boring the holes straight in the end of the posts. It was also very time consuming fitting the reinforcing caps on the ends of the posts. The last complication was trying to build this bed as accurately as possible while trying to avoid flaws in the design. And the best part is that I might be one of the first people to build these beds. Plus they really get used instead of just sitting in a display!”
I think the beds are very cool and will have to make a trip up to the fort to check them out. Be sure to check out Bryant’s web site, including his gallery. If you like 18th-century designs, you’ll enjoy it. And Bryant highly recommends Jymm Hoffman in Pennsylvania if you need a blacksmith for authentic hardware,
— Christopher Schwarz


Here are some supplies and tools we find essential in our everyday work around the shop. We may receive a commission from sales referred by our links; however, we have carefully selected these products for their usefulness and quality.


Chris,
I received my copy of Campaign Furniture earlier this week, I’ve plowed through more than half of it already despite frequent re-reads of sections as I try to absorb new (to me) techniques. Truly excellent work, as usual, and I am pleasantly surprised to find I enjoy it as much as The Anarchist’s Tool Chest. Thanks to you, Megan, and the rest of the team for the great work, and I look forward to trying my hand a few pieces.
For others reading this, I really recommend this new book whether or not you think the genre interests you. As with the rest of Chris’ writing and teaching, the book covers a lot more than the title suggests. Campaign furniture gets covered in detail, of course, but it is also used as a vehicle to discuss many other things, such as wood properties, joinery technique, and furniture design in general. On top of that, the book itself lives up to the superior quality we’ve come to expect from Lost Art.
-Matt
MARYLAND!!!
Very cool stuff. I’d love to see a video of how it folds.