We may receive a commission when you use our affiliate links. However, this does not impact our recommendations.
Forget plastic or metal pans – a wooden one looks nicer and works better.
Some time during the last 25 years of prowling around workshops, museums and antique stores, I spotted a wooden dustpan. The encounter made me slap my forehead – why do I have a plastic pan when I could build a wooden one from scraps?
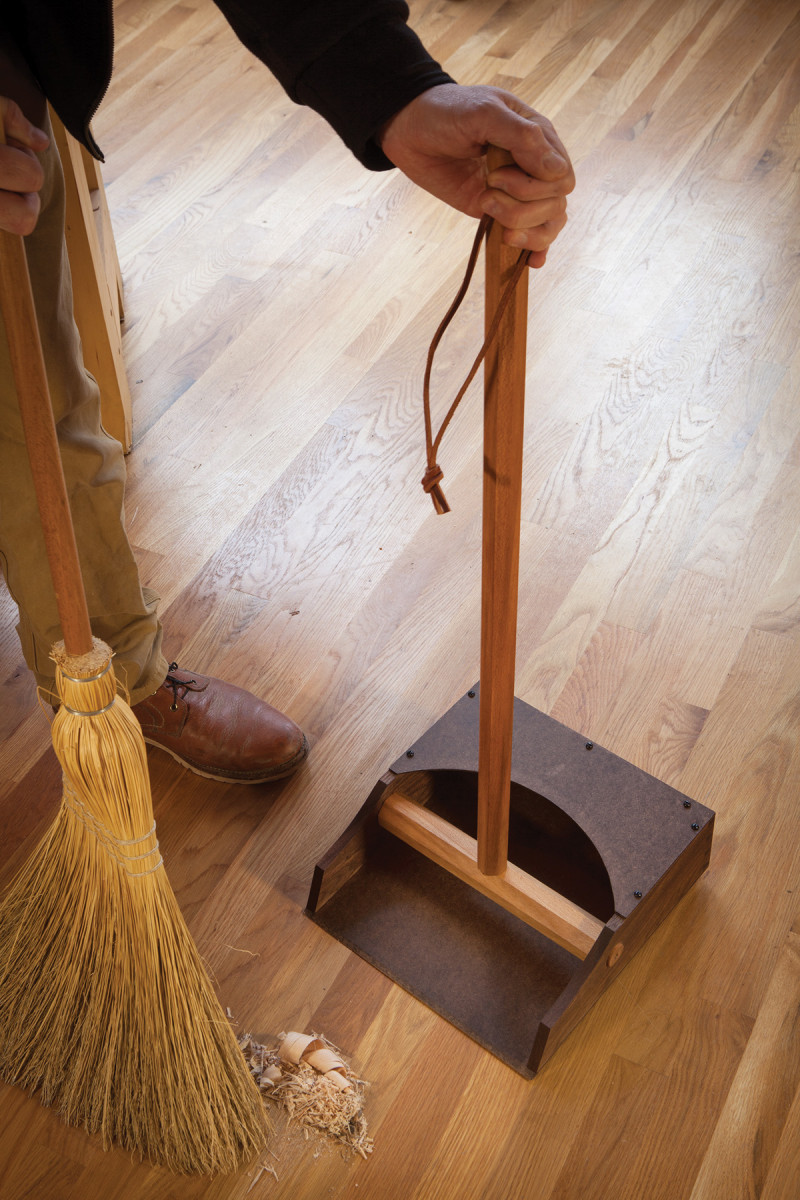
After studying commercial dustpans and making a prototype, I settled on this design. It’s lightweight, easy to build, stands upright on its own and the pan pivots snappily on an axle that runs between the two sides.
It’s also a great way for a beginning dovetailer to practice the joint. Whether your joints are perfect or perforated, they will end up in the dustbin.
How it’s Built
The two sides are joined to the back piece with through-dovetails. An axle passes between the two sides. The dustpan’s handle is tenoned and wedged into the axle.
The assembled sides and back are then clad with 1⁄8“-thick hardboard. The bottom of the pan is beveled on its front edge so you can pick up fine dust. A half-dowel on the underside of the pan ensures the front edge of the pan will contact the floor.
Dovetailed Dustpan Cut List
No.ItemDimensions (inches)MaterialComments
t w l
❏ 2 Sides 1⁄2 x 3 1⁄2 x 12Walnut
❏ 1 Back 1⁄2 x 3 1⁄2 x 12Walnut
❏ 1 Top 1⁄8 x 6 1⁄4 x 12Hardboard
❏ 1 Bottom 1⁄8 x 12 x 12 1⁄4Hardboard
❏ 1 Axle 1 1⁄2 x 1 1⁄2 x 12 1⁄4 Hardwood 5⁄8” tenon, both ends
❏ 1 Handle 1 1⁄4 x 1 1⁄4 x 33 1⁄2 Hardwood 15⁄8” tenon, one end
❏ 1 Dowel 5⁄8 dia.11
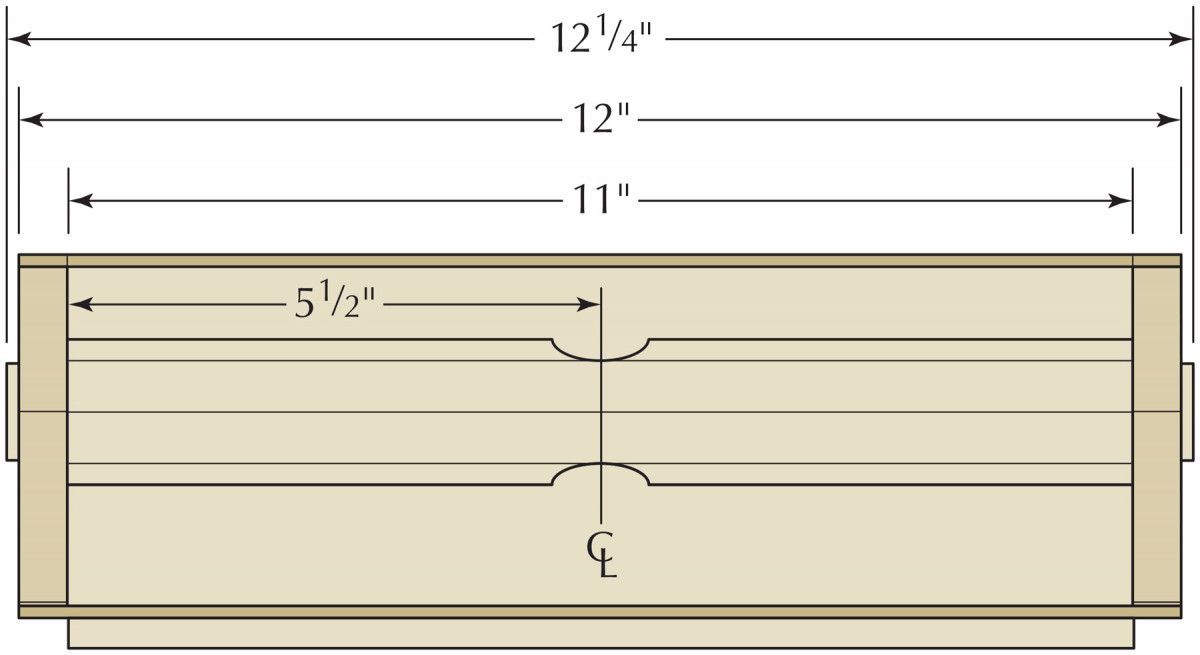
Elevation
Plan
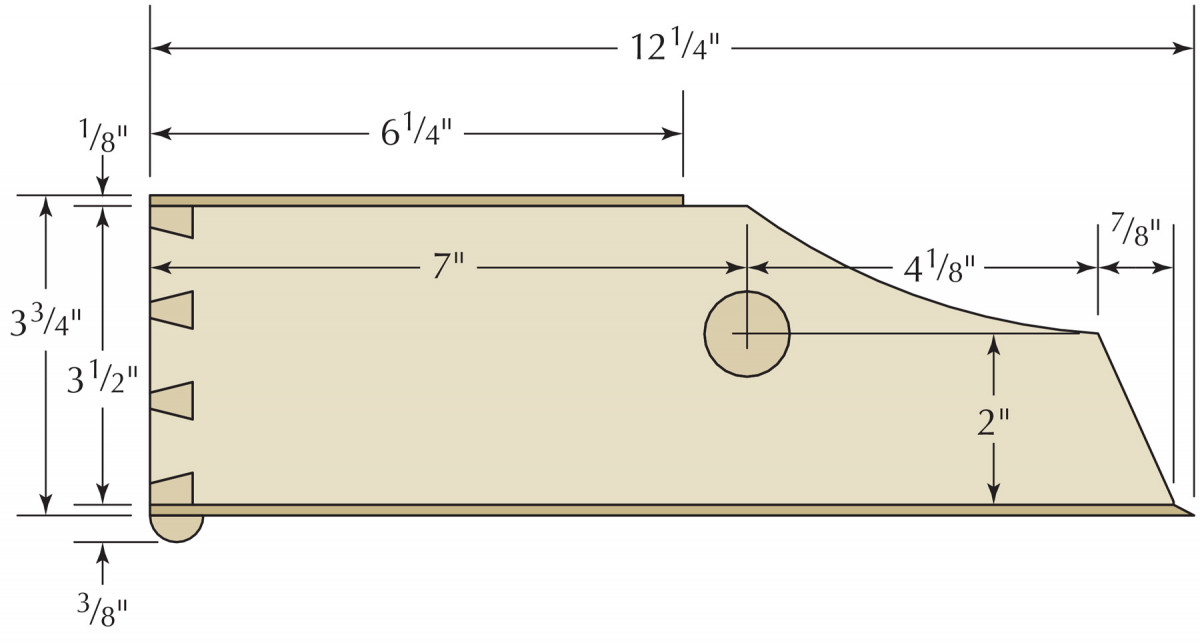
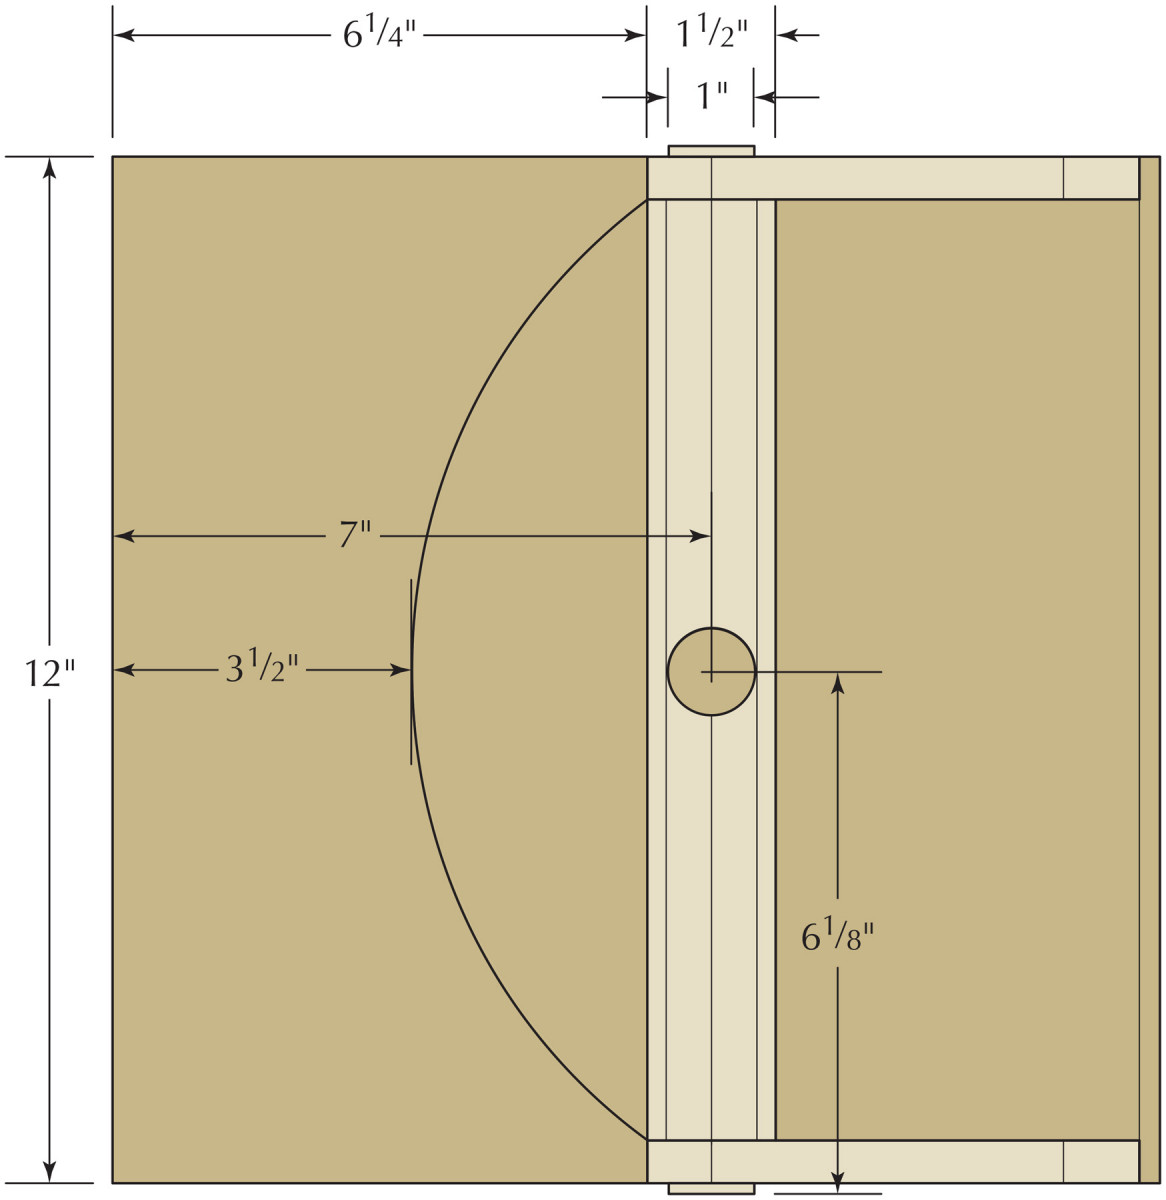
Profile
Sides & Axle
After you cut your stock to size, lay out and cut the cove and bevel shape on the sides of the pan, using the construction drawings as a guide. Drill the 1″-diameter hole through both sides that will accept the axle. It’s best to bore the 1″ hole through both pieces simultaneously to ensure they align.
The axle is a scrap that I cut to an octagon (I like facets). Then I turned 1″-diameter x 5⁄8“-long tenons on both ends. These tenons will rotate in the holes in the side pieces.
If you don’t have a lathe, a simple solution is to make your axle 11″ long and bore 1″-diameter holes into each end of the axle. Then glue 1″-diameter dowel pieces into those holes – instant tenons.
Now drill a 1″-diameter hole through the midpoint of the axle to accept the tenon on the handle.
Handle

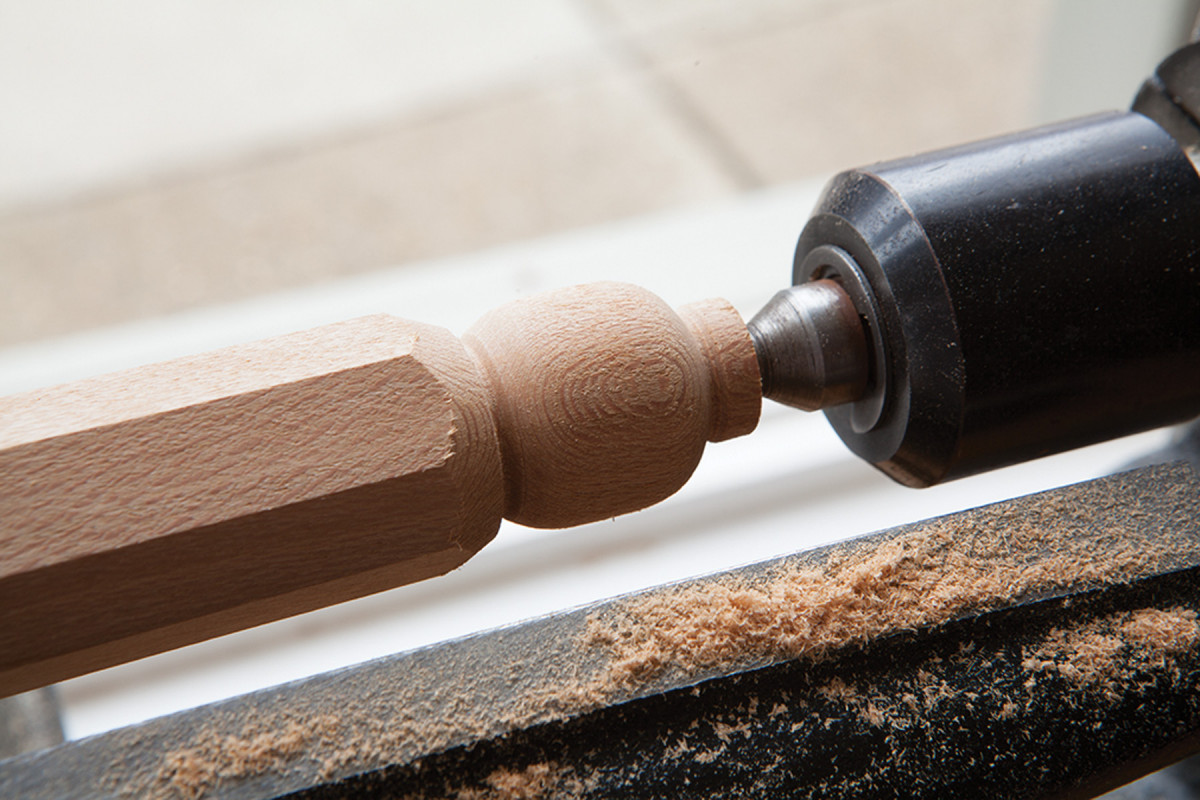
My turn. A lathe makes quick work of the tenon on the bottom of the handle.
My handle is a scrap of sycamore that I cut into an octagonal profile with a jack plane (followed by a smooth plane), then I turned a 1″-diameter x 15⁄8” tenon on one end, and a decorative sphere on the other. If you don’t have a lathe, you can buy a replacement broom handle. These usually have a tenon that is 15⁄16” in diameter or 11⁄8“. So you’ll need to make a different-sized hole through the midpoint of the axle if you go for the store-bought handle.
You also can turn some sort of decoration at the top if you please, or just bevel it off like any old broom handle.
Now assemble the axle and handle. I sawed a kerf through the length of the tenon. Then I glued and wedged the tenon into the axle. When the glue dried, I trimmed the wedge and cleaned up the joint.
Dust to Dovetails
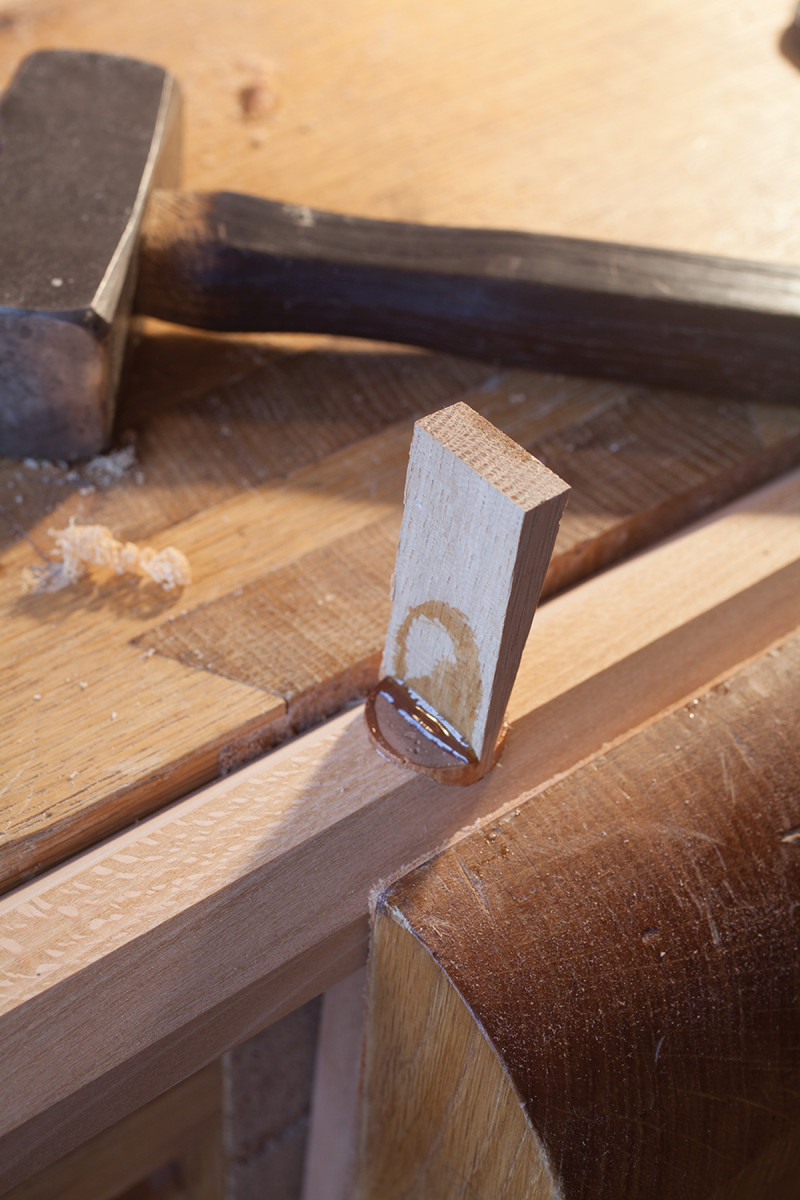
Permanent wedgie. Note that the wedge is oriented across the grain of the axle. If you orient the wedge 90° in the other direction, you’ll split the axle.
There are thousands of tutorials on cutting dovetails out there. So I’m not going to waste precious ink and paper explaining fundamentals you can find in almost any book. But I would like to point out what I consider to be the critical aspects of the joint – so read the captions in “The Finer Points of Dovetails” below.
After the joints are cut, bevel off the interior corners of the tailboard to make the joint easier to assemble. Paint hide glue on the mating surfaces of your joint. Put the axle in place between the side pieces and knock the dovetails together. Clamp the joint if necessary.
Don’t worry too much about squareness yet. If the pan looks square-ish, let the glue dry.
The Finer Points of Dovetails
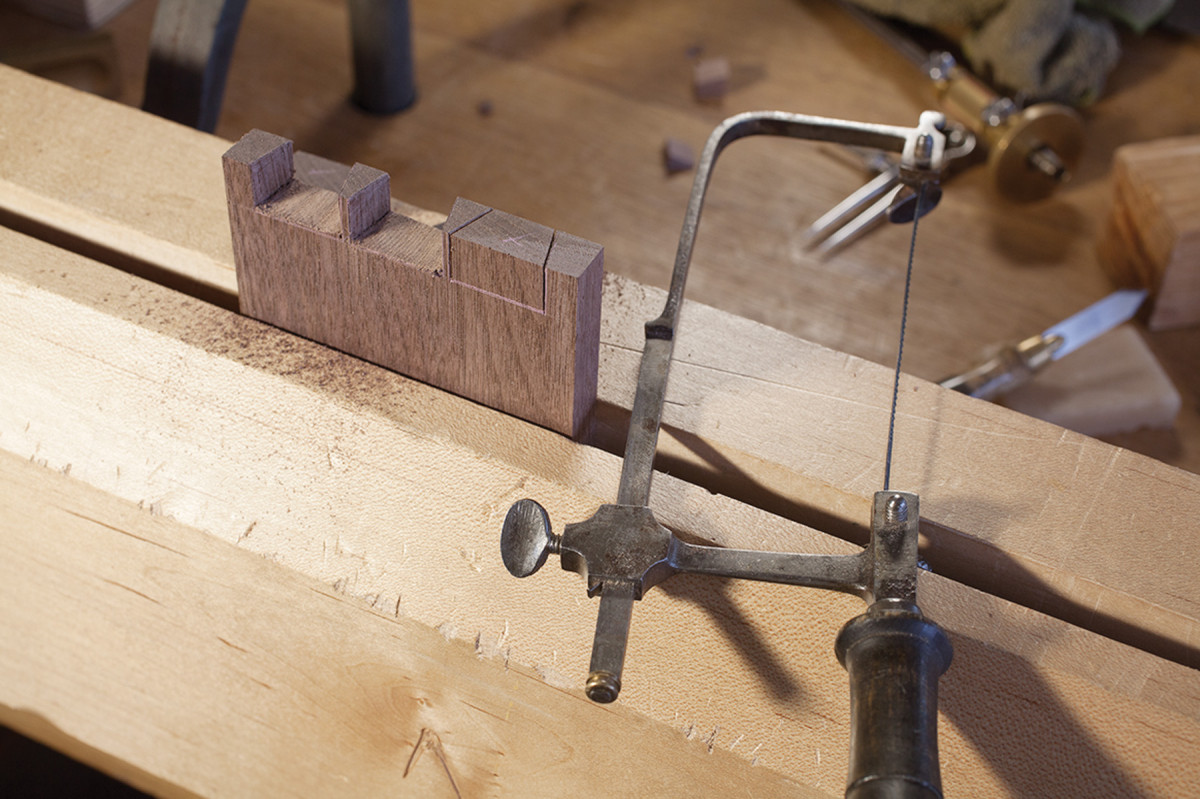
Gang of two. I gang-cut my tailboards whenever possible. This saves a lot of time and – for beginners – results in the tails’ walls being more square. I think three tails looks nice here.
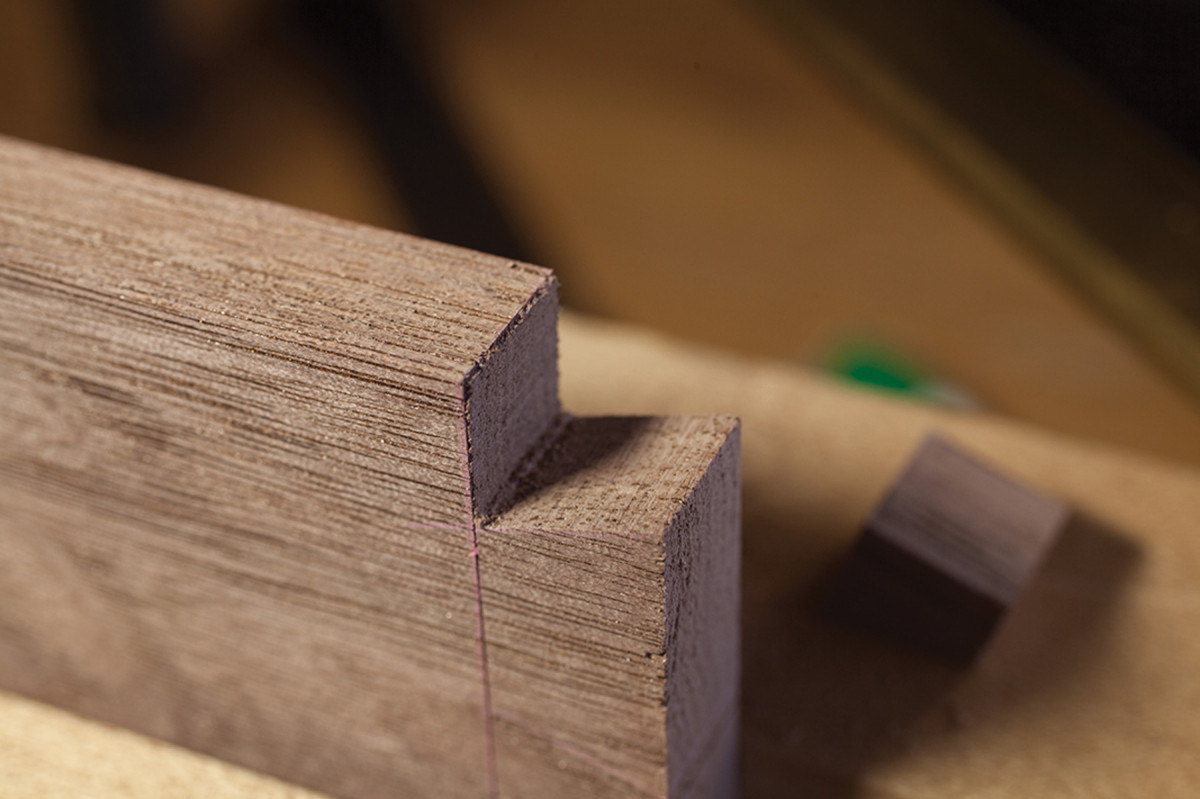
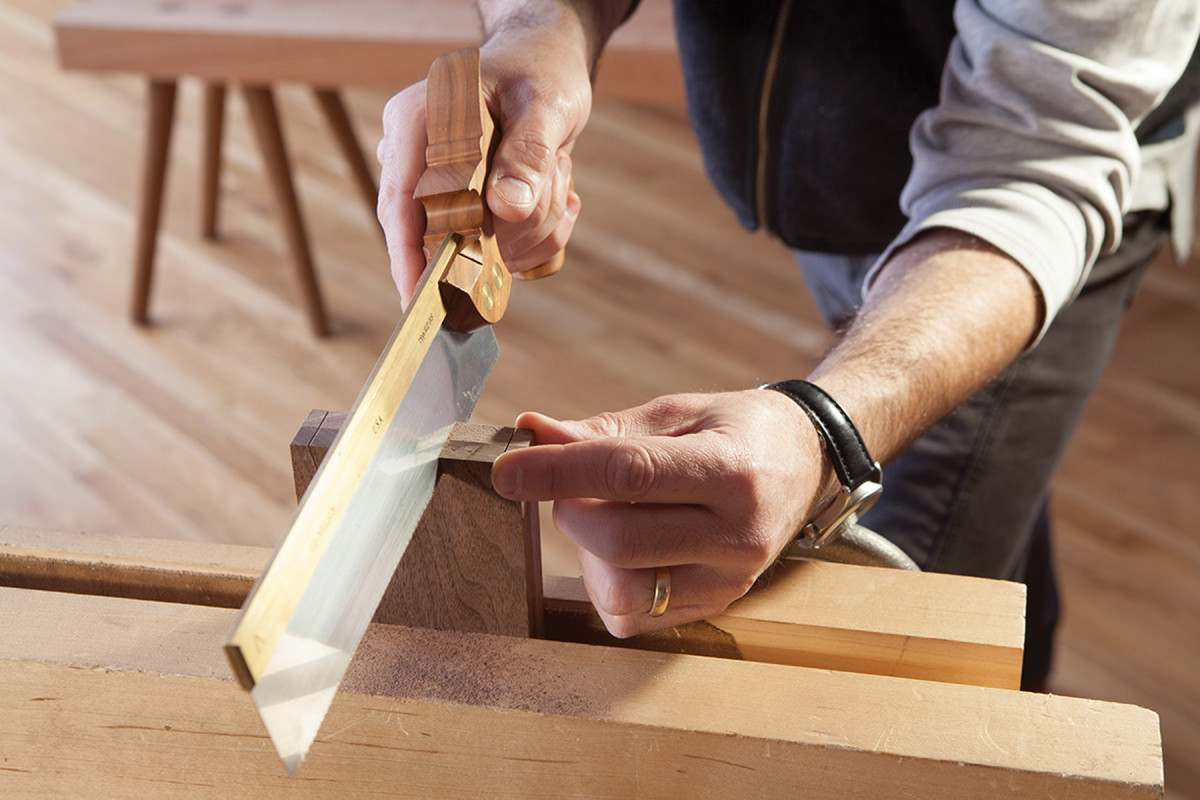
Go for broke. Don’t be timid when sawing the half-pin away. Split the baseline so you aren’t paring all afternoon.
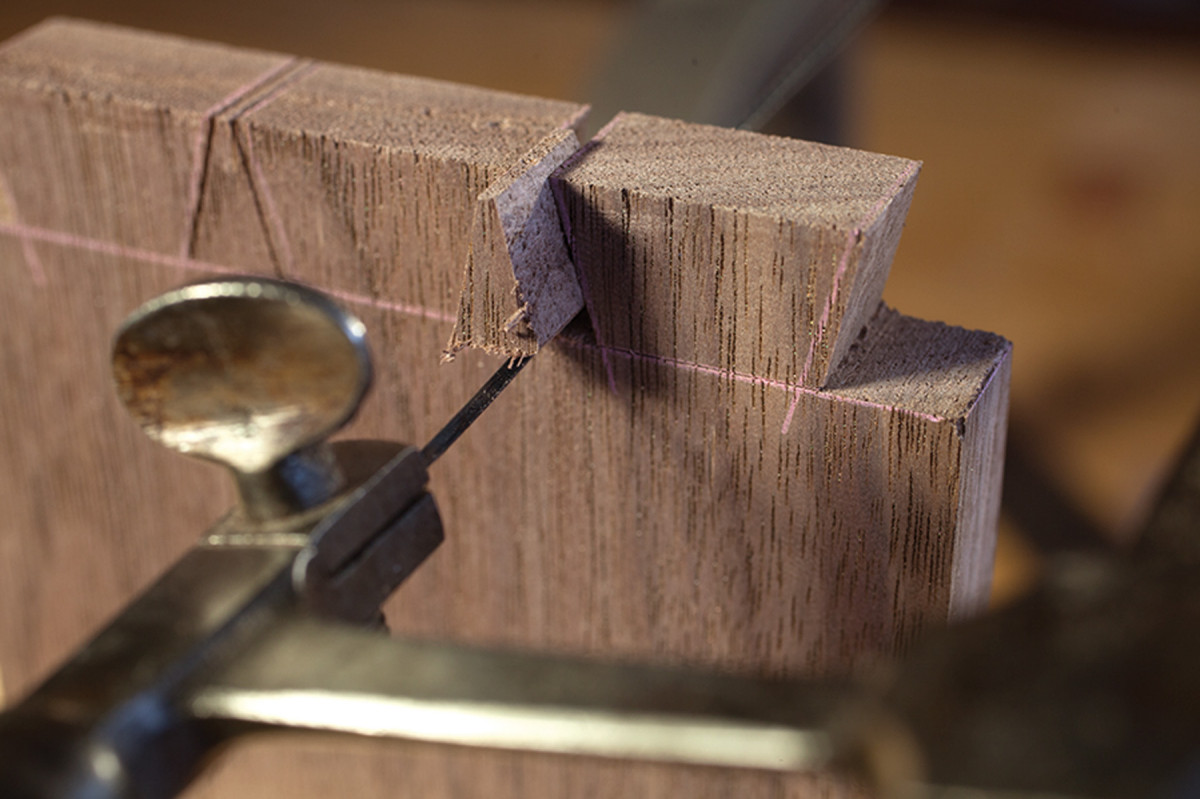
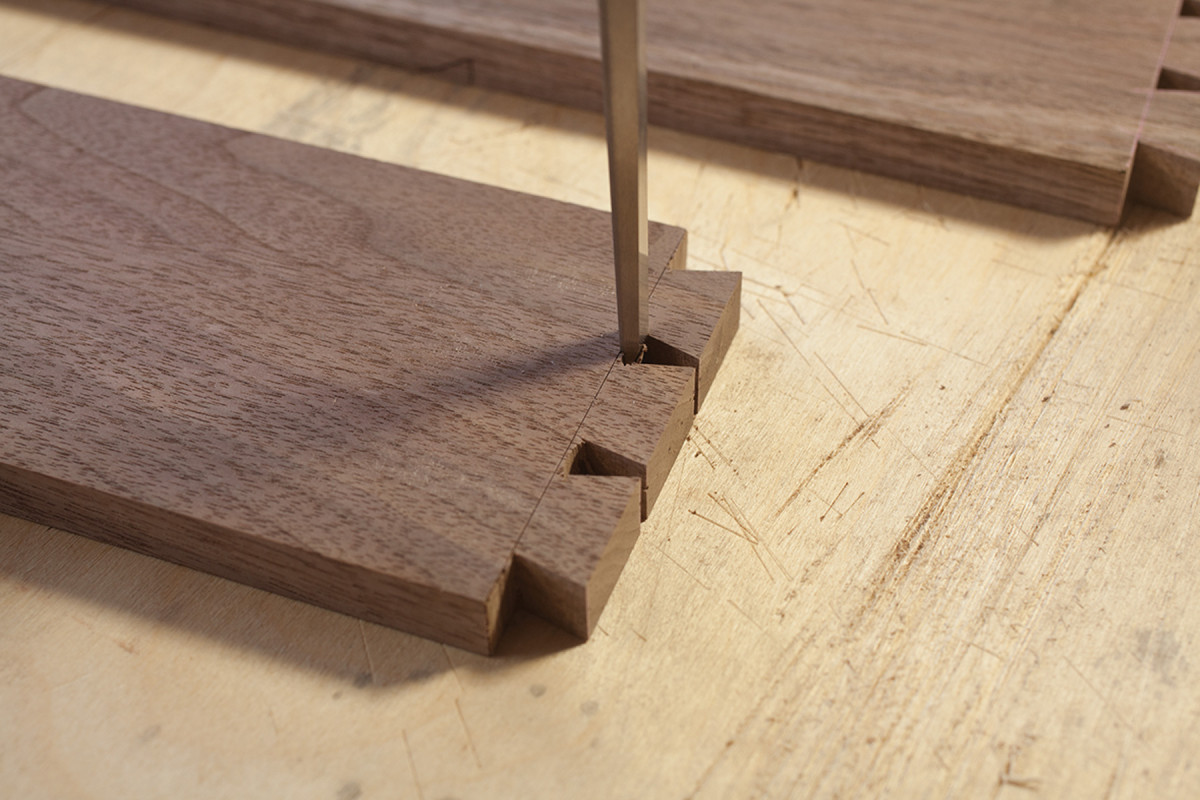
Start fretting. With thin stock, I use a fretsaw to remove the waste between the tails. Thick stock demands a coping saw or bowsaw. If you cut slowly, you’ll be able to saw close to your baseline – saving lots of chopping.
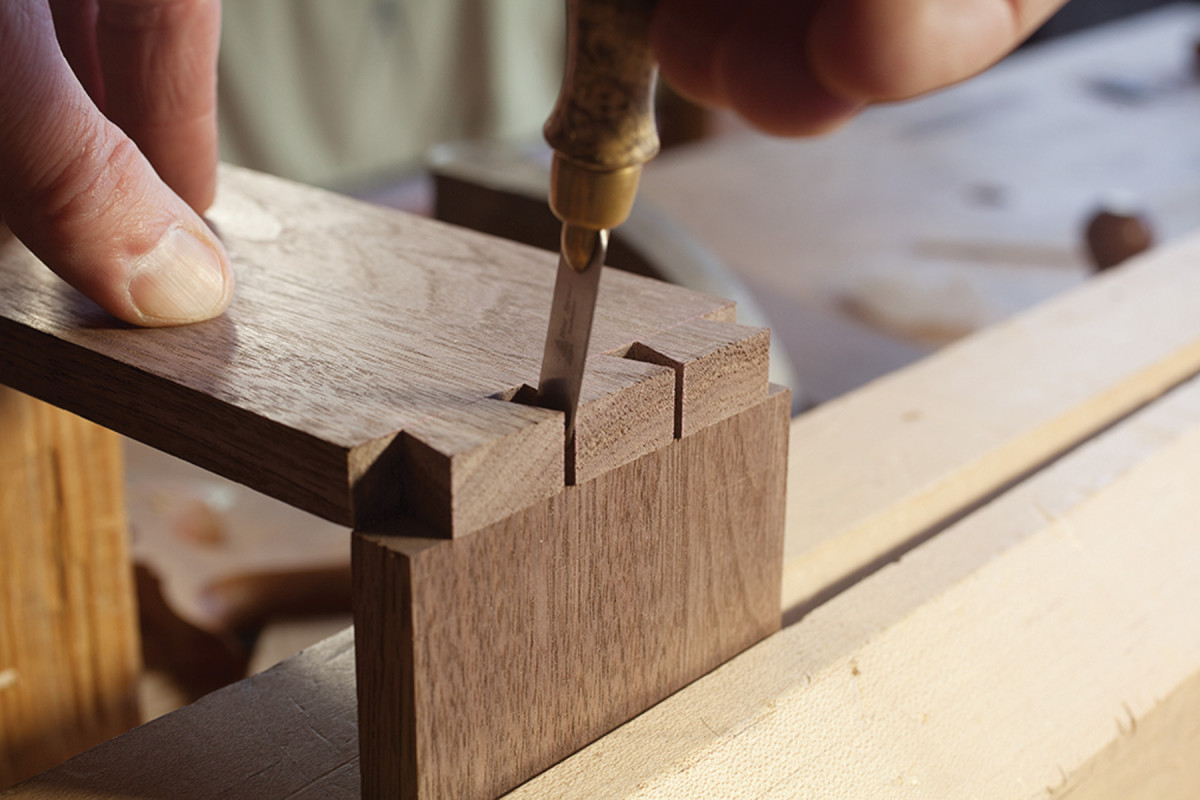
See the side. Chopping the last bit of waste is all about keeping your chisel 90° to the work. So sit to the side of the chisel so you can see when you are at 90°.
Don’t be a pinhead. Most dovetail mistakes happen when transferring the shape of one joint to the other. Take your time and take great care. Even after 25 years of cutting this joint, I focus 100 percent at this step.
Slow is much faster. Again, take your time when fretsawing away the pin waste. A little care will save lots of boring chopping.
Clad the Pan
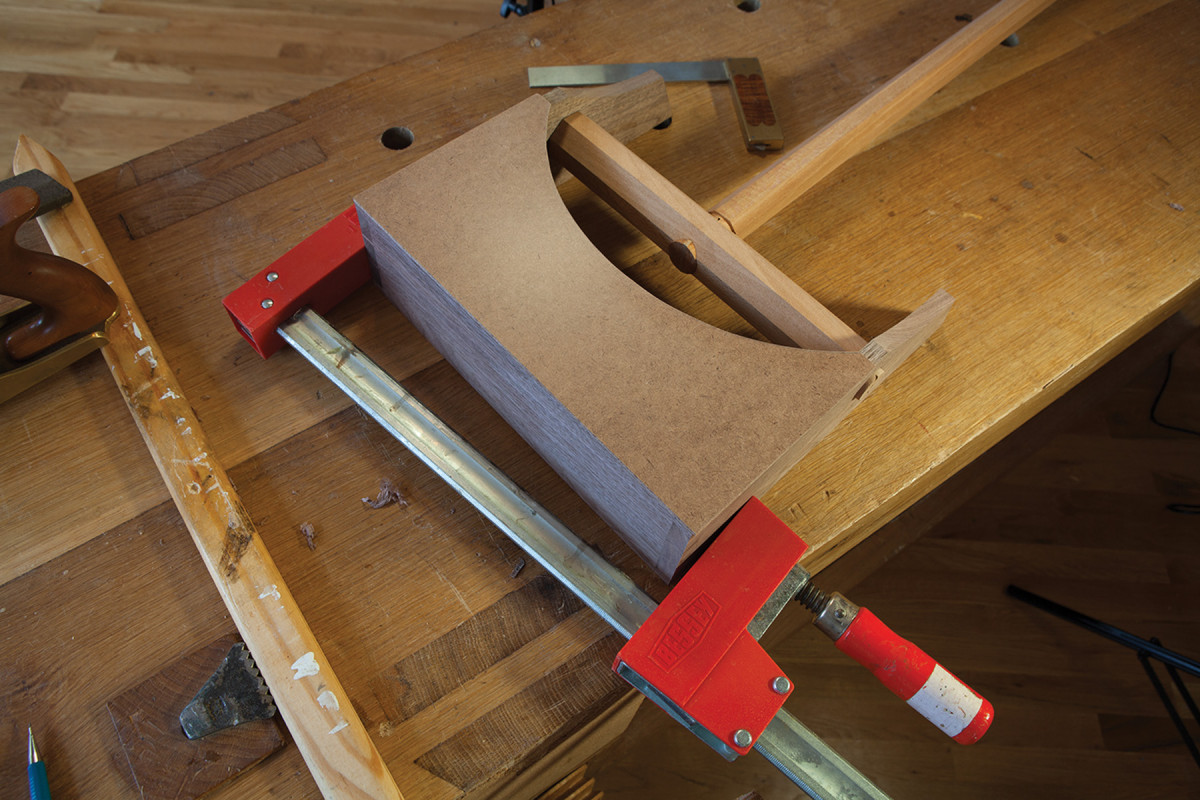
Offset clamping. Use a clamp to bring your pan into square. For the pan shown here, the joint at the bottom of the photo was more than 90°. The cocked clamp brought things into square.
After the glue is dry, plane up the sides and back to level the joints and remove any bruising. Then check the inside of the pan to see if the corners are square. If they aren’t, use a clamp to bring the pan into square before adding the top piece.
The top and bottom of the pan are tempered hardboard, a friendly engineered panel product made (usually) from exploded wood fibers and boiled linseed oil. You can saw, chisel and plane it like wood (because it is wood).
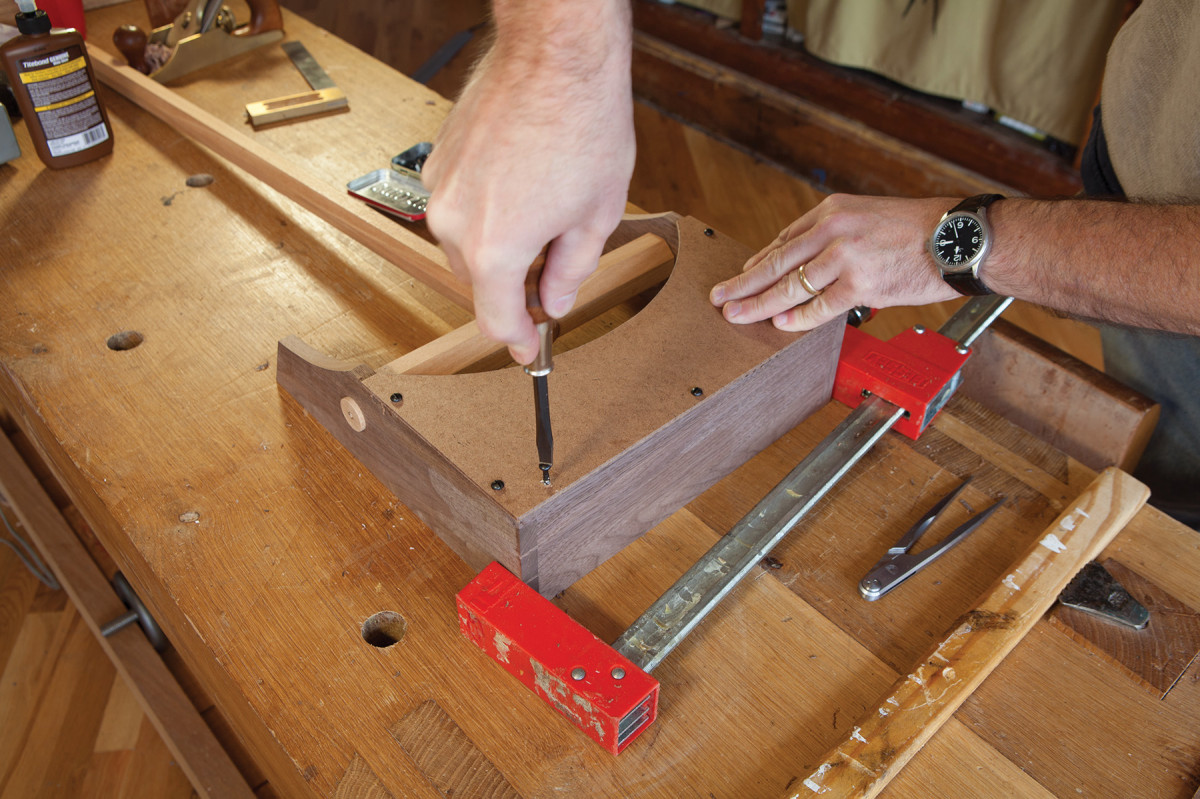
Screws hold it square. After you drive screws into the back and sides of the pan, you can release the clamp. The screws will hold the pan square.
The top piece of hardboard is curved to allow the handle to pivot a bit more, which makes the dustpan easier to use. Cut the curve with a coping saw and clean it up with a rasp and sandpaper.
Attach the top to the pan with hide glue and #6 x 5⁄8” panhead screws.
The bottom of the pan is also hardboard. The front edge is beveled off and sticks out in front of the sides 1⁄4“. The bevel allows you to capture fine dust. I planed the bevel on the front edge of the bottom. First I stuck a piece of painter’s tape 1⁄4” from the front edge. Then I used a block plane to create a sharp bevel.
Attach the bottom to the sides and back with hide glue and #6 x 5⁄8” wood screws.
The final construction step is to glue half of a dowel to the underside of the bottom. The dowel ensures the bevel on the front of the dustpan reaches the floor and isn’t sitting on debris. I made my half-dowel by planing down a 5⁄8“-diameter dowel with a jack plane. Then I glued the dowel to the underside of the bottom, right below the back piece.
Finish & Finishing Touches

Bevel edge. A strip of tape helped to guide me as I used a block plane to bevel the edge of the hardboard bottom.
If you want to hang your dustpan on a peg, drill a 1⁄4” hole through the handle and tie a string through the hole.
If you are going to use this dustpan in the shop, you probably don’t need to apply a finish to it. However, I thought the dustpan would look nice enough for the home if I applied an oil finish. Two coats of boiled linseed oil and wax did the trick.
Download the PDF of this article below.
June 2017 – Dovetail Dustpan
Here are some supplies and tools we find essential in our everyday work around the shop. We may receive a commission from sales referred by our links; however, we have carefully selected these products for their usefulness and quality.