


We may receive a commission when you use our affiliate links. However, this does not impact our recommendations.

Master Your Mortiser
Shop-tested techniques
guarantee great results.
By George Vondriska
| The first time I used my benchtop mortiser was almost my last. It was tedious to set up, difficult to operate and my results stunk. But now the mortiser is my first choice whenever I have mortises to cut. It turns out the problem wasn’t the machine—in fact, the newest benchtop mortisers do a great job. Instead, the problem was my inexperience. I discovered there’s a learning curve to successfully setting up and operating a mortiser.Read on to learn the techniques I use to get consistent, professional-quality results from my mortiser. If you follow these methods and mortising is still a struggle, your machine’s fence and hold-down may need tuning. |
Click any image to view a larger version.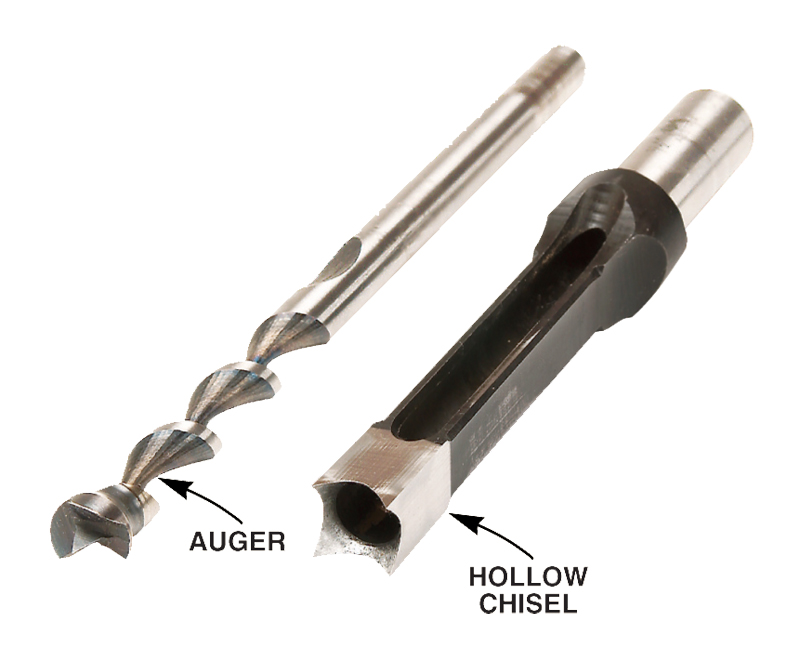
The hollow chisel and auger |
Start sharp, stay sharp
You’ll get better results with less effort
if you take a few minutes to sharpen
your bit and chisel before each use.
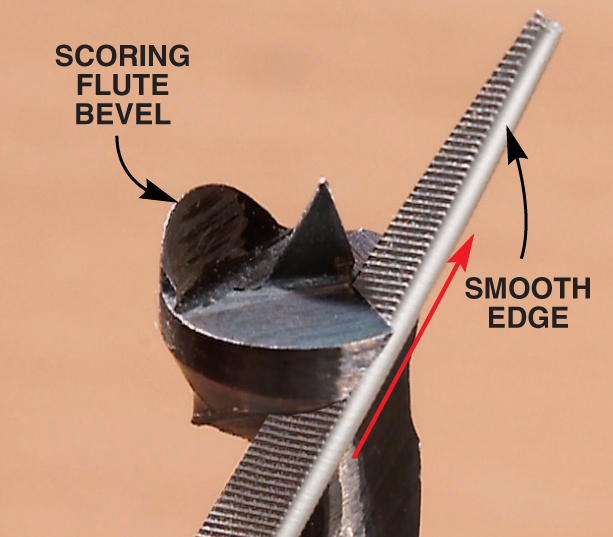
| Sharpen the auger’s flutes with a small auger file (this one’s from Nicholson’s miniature file set #42030, about $17 at Amazon.com). An auger file has smooth edges that won’t harm adjacent surfaces during close work. Hold the file flat on the bevel and move it forward only, toward the cutting edge. |
 |
| Sharpen the chisel’s inside bevels with a round slipstone (about $15 at woodworking specialty stores). |
 |
| Hone the outside faces on a flat stone, using even pressure and a circular motion. |
 |
________________________________________________________________________________________
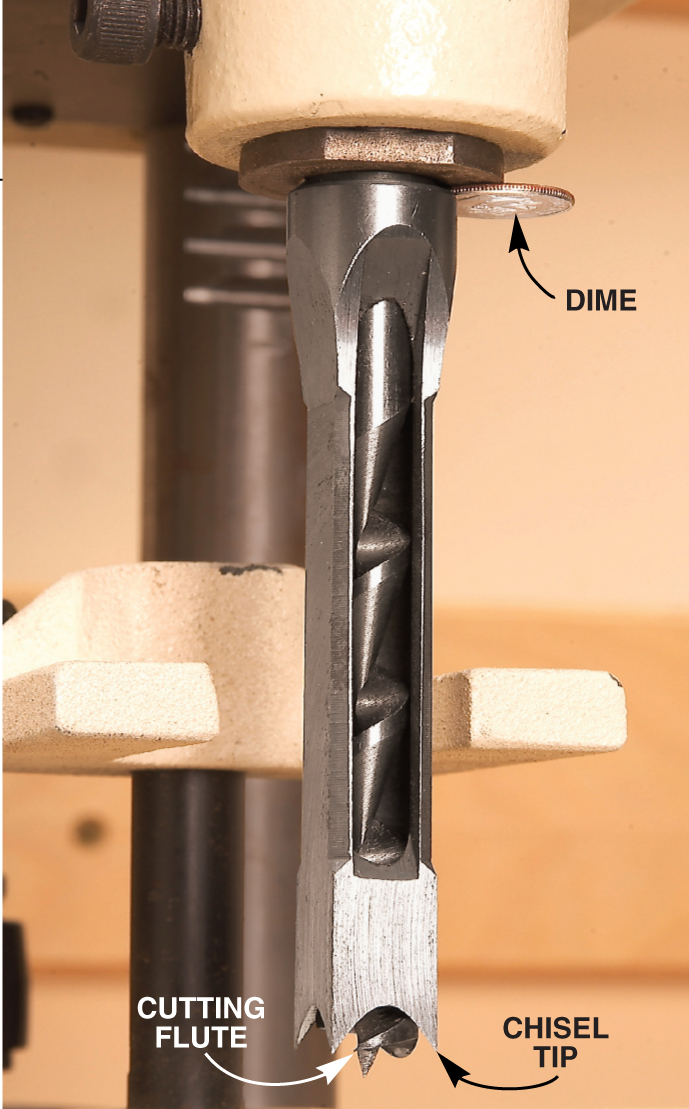
| Insert a dime to install the bits. To work properly, the auger must slightly project beyond the hollow chisel. Here’s an easy way to achieve the perfect projection. Temporarily install the chisel with a dime squeezed between its shoulder and the machine. Then lock the auger in position with the edge of its cutting flute even with the chisel’s tips. Remove the dime, slide the chisel’s collar tight to the machine and lock it. |
 |
| Instantly align the chisel. To create perfect mortises, the chisel must be parallel to the fence. It’s easiest to place a board against the fence, move the fence forward and pivot the chisel until its face is flush with the board. |
 |
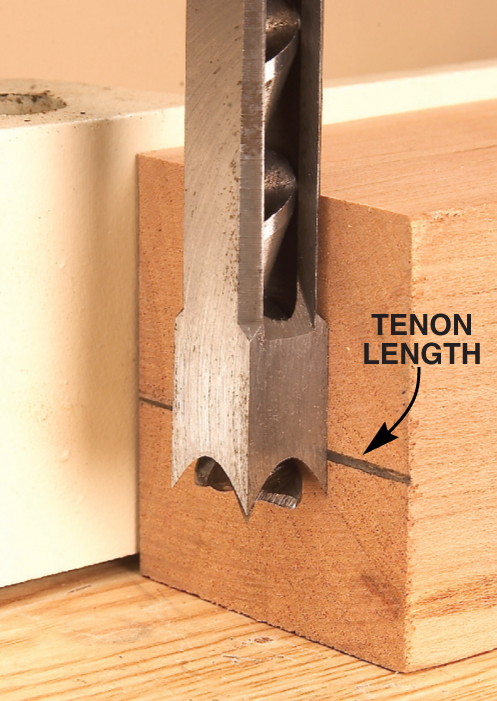
| Arches set the depth of cut. Mark the tenon’s length on the end of the workpiece. Then lower the chisel. Lock the depth-of-cut stop when the tops of the chisel’s arches are even with your line. This method assures that your tenons will seat properly, because it automatically creates a mortise that’s slightly deeper than the tenon’s length. |
 |
| Stay cool. Make life easier for the chisel and auger by spritzing them with cutting lubricant before each use. This prevents overheating, helps the auger to evacuate chips effectively and allows the chisel to smoothly enter and exit the workpiece. It’ll also help your ears; lubricating keeps the bits from squealing. Source Empire Manufacturing, empiremfg.com, 866-700-5823, OptiCut XL, |
 |
Let the chisel & auger do the work.
Synchronize your feed rate with the auger’s cutting action
by watching the flow of chips exiting the chisel.
Don’t try to overpower the machine; easy—but firmly—does it.
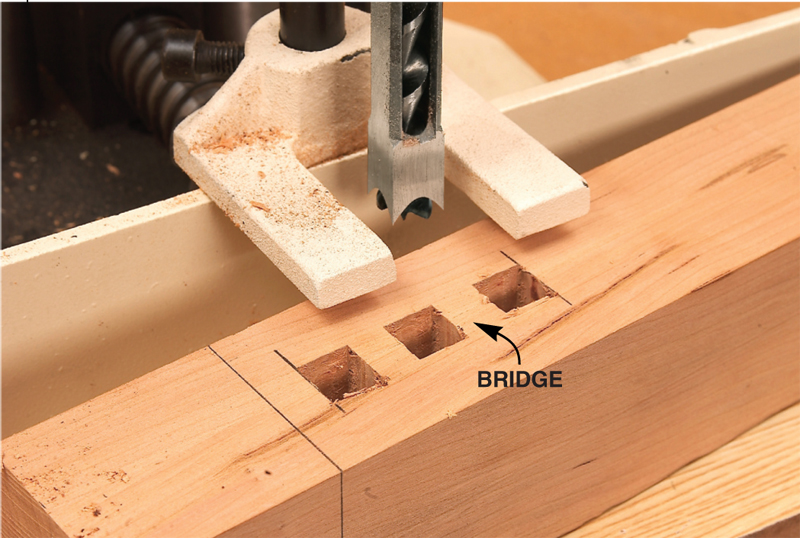
| Connect square holes to create a mortise. Establish the ends of the mortise first. Then clear out the middle: First cut individual holes spaced by slightly less than the width of the chisel. Then go back and remove the remaining bridges. Always engage the chisel on all four sides or on two opposite sides, but never on three sides. Engaging three sides can deflect—and even break—the chisel. |
 |
| Make a cleaning pass. The first set of holes you cut will leave considerable debris in the bottom of the mortise. The mortise sides may also be slightly rough. A second pass, made with numerous plunges very close together, cleans both the bottom of the mortise and the sides. |
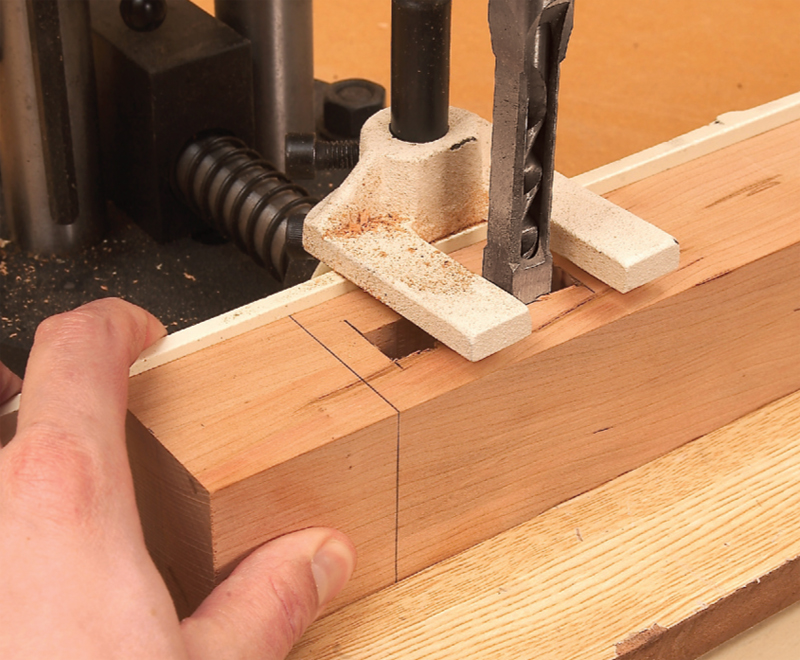 |
| Mortise before cutting to length. When a mortise starts near the end of a piece, as on the table leg shown here, leave the piece long until after the mortise is cut. Then you’ll always have material under both arms of the holddown. This greatly reduces the chances of jamming the chisel. |
 |
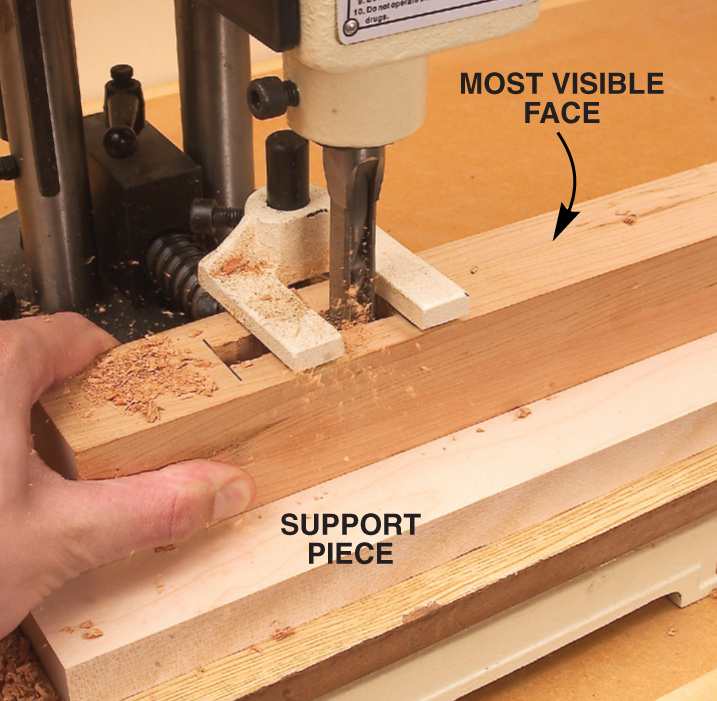
| Cut through mortises from the visible face. Only one side of a through mortise shows, so it only needs one perfect face. Cut these mortises with the most visible face up—this side will be cleanly cut. Support the exit side with a scrap piece to reduce splintering. To keep the bit from wandering or overheating, cut the mortise in stages, halfway first, then all the way through. |
 |
| Let the grooves be your guide. When you use mortises and tenons to join rails and stiles on frame and panel constructions, cut the grooves for the panel first. Then use the grooves to set up and guide the mortising chisel when you cut the mortises. |
 |
| This story originally appeared in American Woodworker May 2007, issue #128. |
Here are some supplies and tools we find essential in our everyday work around the shop. We may receive a commission from sales referred by our links; however, we have carefully selected these products for their usefulness and quality.


