


We may receive a commission when you use our affiliate links. However, this does not impact our recommendations.
It took me longer to process and prep stock than to cut the tapered legs then cut and glue up the loose-tenon joinery on this table base. (Pay no attention to the doors; they’re for a different project.)
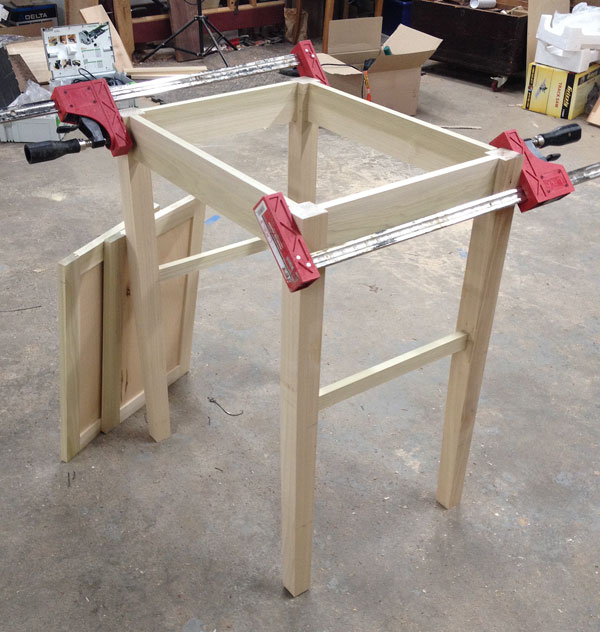
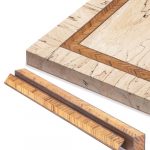
Last weekend, I finally got started on…and almost finished… the table build for the curved corner of my kitchen. The base is 34-1/2″ high and will get a top of butcher block that will be curved at the back to match the wall (which reminds me…I need to pick up a new band saw blade). The “ankles” – now “cankles” – are a little thicker than I’d originally intended…for reasons that will be explained below. But that’s OK – this piece has to hold a fair amount of weight.
I thought about using pocket screws to assemble the base, but decided tenons would be the better choice for longevity. Given that the 1-1/2″-thick x 25-1/2″-wide x 38″-long, top is pretty heavy, and the base has lower stretchers only on the sides, a sturdier approach, with two tenons on each apron (one on the stretchers) made me more comfortable.
And while I’m quite comfortable cutting mortise-and-tenon joinery by hand (or tenons at a table saw or band saw, and mortises with a hollow-chisel mortiser or router), I’m on a tight deadline. Plus, I wanted to try something new – loose-tenon joinery using the Festool Domino (which I’ve used only once before, in my 2009 “Gluebo Bench” build – an article you’ll find in the November 2009 issue, and/or in “The Workbench Design Book: The Art & Philosophy of Building Better Benches“).
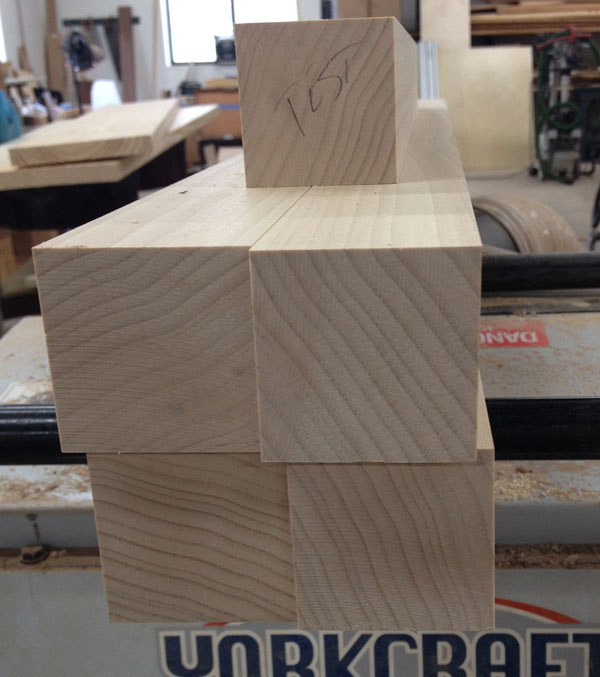
To square stock quickly, run two adjacent faces on the jointer to create a 90° corner. Alternately keeping each jointed face flat the planer table, run the piece through the planer to cut the two un-jointed faces to remove the remaining material until you reach your desired dimensions.
So, in the quest for expediency coupled with the fact that I enjoy hand work more for the process rather than the outcome – and I’m really sick of the process work in this kitchen – I plugged in soup to nuts for this base build.
Below is how I made the tapered legs at the jointer. In the next day or two, I’ll post about the loose-tenon joinery using a Festool Domino.
The first task is to square the leg stock in preparation for cutting tapers at the jointer. And my design changed on the fly when I couldn’t get 2-1/2″-square stock from my available wood; the legs are now 2″ rather than the 2-1/2″ indicated in my drawing (shown in the first link at the top of this post).
With the stock square, I then did my layout work to cut tapers on two sides of each leg using the jointer. The jointer tapering process looks a bit scary, but with careful attention and push blocks (and guards, of course), it really isn’t.
The first layout step is to mark on the leg where the taper will begin (in my case, that’s 16-1/2″ down from the top). Then find the center point between that line and the bottom of the workpiece (8-1/4″, for mine) and mark it.
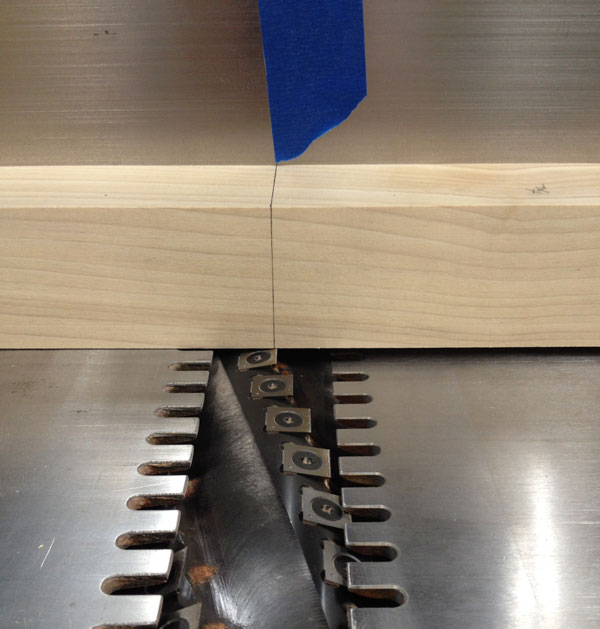 Show that centerline to the top-center part of the cutterhead or jointer knives, and use tape, or make a pencil mark, to indicate the point on the fence where your centerline intersects the cuttherhead/knives (make sure the tape/mark is above the path of your workpiece, but close enough to it that you can easily see when they meet).
Now lower the infeed table on the table to half the measurement of the amount you wish to remove. I’d planned to taper these legs from 2″ at the start of the slope to 1″ at the bottom. So, if I wanted to remove 1″ of stock overall at the bottom, that would mean lowering the fence 1/2″. Well, we have a helical cutterhead in our big jointer which precludes more than about a 1/4″ cut. So, my taper now goes from 2″ to 1-1/2″.
Aside: For this technique, my “proper” machine choice would be our 6″ jointer with traditional knives; that one can go to 1/2″ and easily make the cut (I know, I know…you’re thinking, “1/2″ is a lot to remove in one pass.” The machine can handle it). But that jointer was across the parking lot in our photo studio where were used it for a recent video shoot…and it was raining…and the thing is heavy…and…
Make the first pass foot first, and lift off when your layout line on the stock meets the line marked on the fence.
Now back to the build: Run the leg foot-first over the jointer, but lift it out of the cut (or simply turn off the jointer and allow it to power down before lifting off, if that’s a more comfortable approach for you) when the centerline on the stock meets the line marked on the jointer fence. (Know that because you’re removing a fair amount of stock, the cut will be slower than what you’re likely used to, and you need to keep a firm hold of the push stick and apply a decent amount force to move through the cut.)
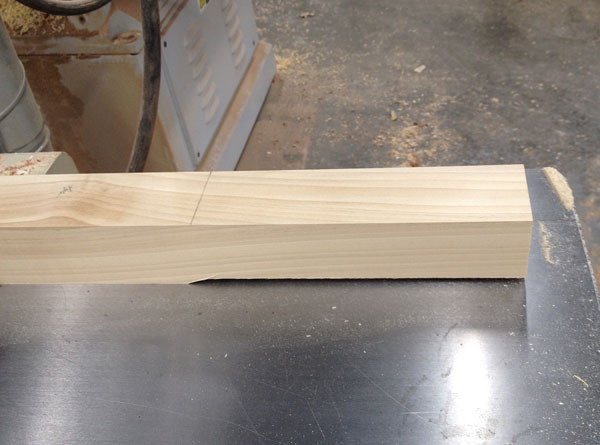
Now turn the leg 180°, and run it from end to end while “popping a wheelie” – that is, hold the already cut end firmly down to the infeed table with your push block and move it over the knives. If you lifted off exactly at the centerline on your first pass, the second-pass cut won’t begin until you’ve reached the top end of your taper.
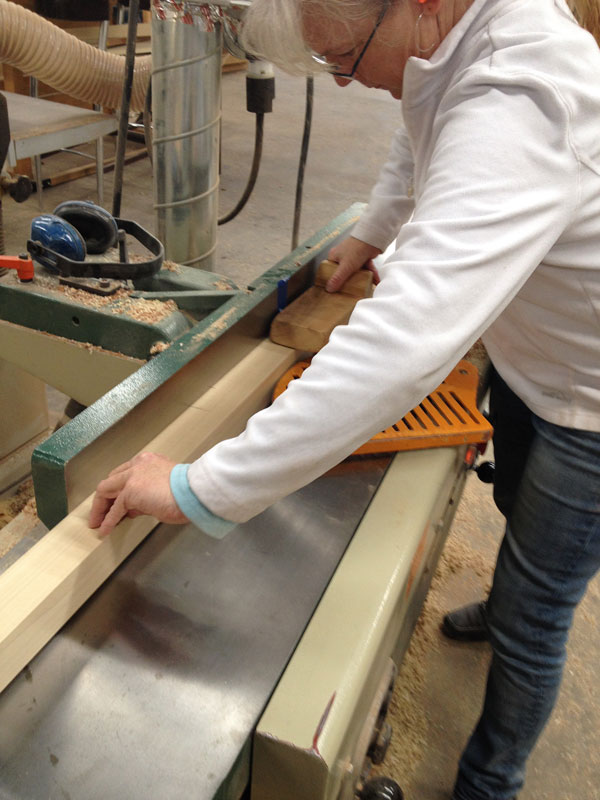
On the second pass, “pop a wheelie.”
Make sure to keep the push block firmly in place, and hold the workpiece tight to the fence with your other hand for a crisp, clean taper. Also know that once you meet the first cut, the work wants to jump forward a bit; don’t let that scare you.
Now repeat on the adjacent face (if, like me, you want a taper on two sides).
Troy Sexton showed this method to Glen Huey and Christopher Schwarz years ago, then one of them (I can’t recall who), showed me. While I usually cut tapers with a band saw and/or with a handplane, this technique is a great choice if you’re in a hurry – and again, in practice, it’s not as scary as it might appear. (We filmed a video of this process a few years back; you’ll find that by clicking here.)
I’ll finish up this base build in a day or two with a post on the loose-tenon joinery. I also still have to make the removable slatted shelf that will rest on the stretchers, then paint the base and shelf (antique white to match my kitchen cabinets) before I can attach the top and call it done.
— Megan Fitzpatrick
Here are some supplies and tools we find essential in our everyday work around the shop. We may receive a commission from sales referred by our links; however, we have carefully selected these products for their usefulness and quality.


It never ceases to amaze me how squaring the stock requires an electric jointer and electric planer. Its quick and easy. Granted, you need to invest several hundred dollars to get those needed results and thousands if you are production shop. Yet, there are authors galore that tout the glory of using hand planes. Unfortunately, I haven’t found any that successfully square stock well. Granted, I could use my jointer plane and an attached guide to simulate an electric jointer but you are only dealing with the width of the jointer plane blade and a lot of muscle. Thickness planing is a whole different story. Your writers have interesting articles but I have never seen an article that addresses squaring stock with a hand plane.
I clicked the link to the video, got the blog post, but the video is MIA.
Love using the jointer for leg tapers but I find the flipping method a little more cumbersome than just taking multiple passes in the same direction. If the goal is a 1/2″ taper set the jointer to 1/8″ or 1/4″, start the cut about 1/2″ below the transition and just take 4 or 2 passes to get the taper. Can also set a stop block on the infeed table to get the start position. Clean up the transition with a bench plane. Segmented cutter heads do make this a bit easier but as you said, light cuts on an older machine are doable.