


We may receive a commission when you use our affiliate links. However, this does not impact our recommendations.
Scribing, like coping, is one of those seemingly magical techniques that allow you to make one piece fit another. Scribing has a variety of applications. It’s not only good for fitting trim to irregular walls, or cabinets to floors that are out of level; you can scribe almost any material – round logs, sheets of drywall, floor tiles, pieces of exterior siding … you could even, in principle, use it on cake (though it would probably work better on fondant icing than on cake itself, due to cake’s crumbly texture.) In this example I used the technique to fit a drawer face that will be applied to a kitchen drawer that’s mounted on full-extension runners.
Scribing is simply a matter of accurately marking a workpiece with a line that corresponds precisely to the contour of the workpiece’s intended surroundings.
Step 1: Make a guide
There are specialty scribing tools available, such as the Lee Valley log scribe. You can also mark a workpiece with compasses or dividers. When I’m on a job site, I often resort to a simple shim, which works just as well as the above-mentioned tools with fine points when you’re dealing with a surface that’s basically flat (or even curved, as long as the curve isn’t very tight).
The problem. This drawer face is tight at the top of the right side but has a gap at the bottom. I need the gap to be even from top to bottom, so I’m going to scribe it.
To make a scribing guide from a shim, take a plain builder’s shim and stick the thin end into the widest part of the gap. Push it in gently until it fills the gap; don’t force it, or you’ll end up making your guide (and the resulting gap around the drawer face) larger than necessary.
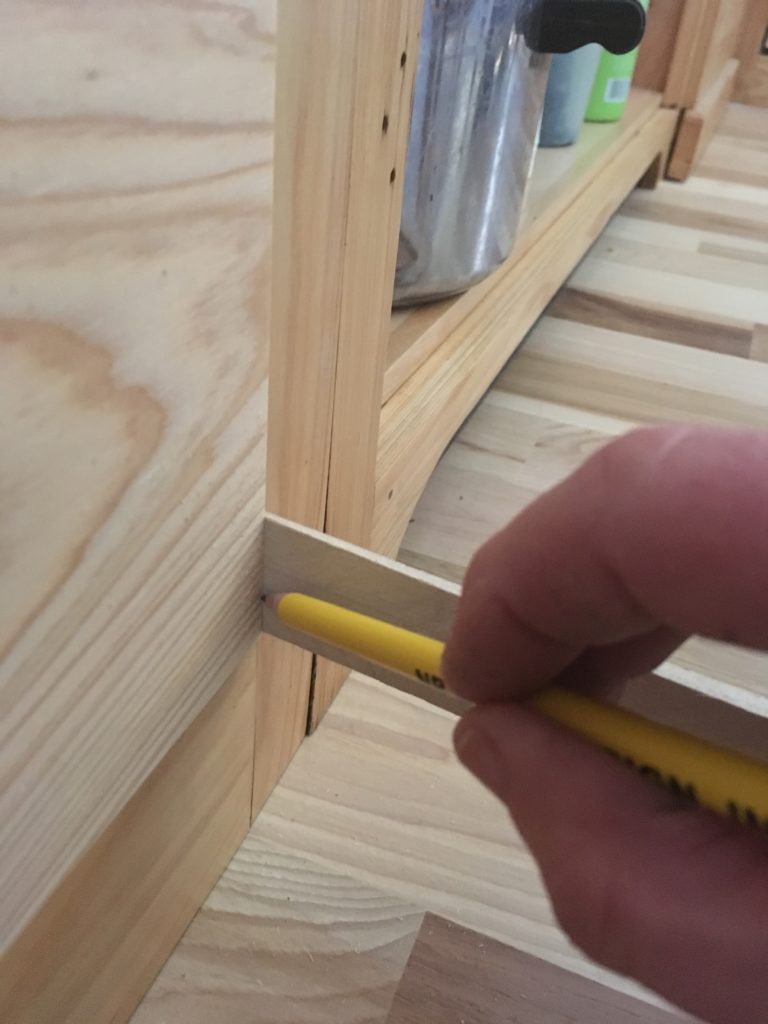
Insert the thin end of a builder’s shim into the widest point of the gap. Mark a line across the shim’s width at that point. (In real life I would hold the pencil with my left hand and the shim with my right, but I was holding the camera with my left.)
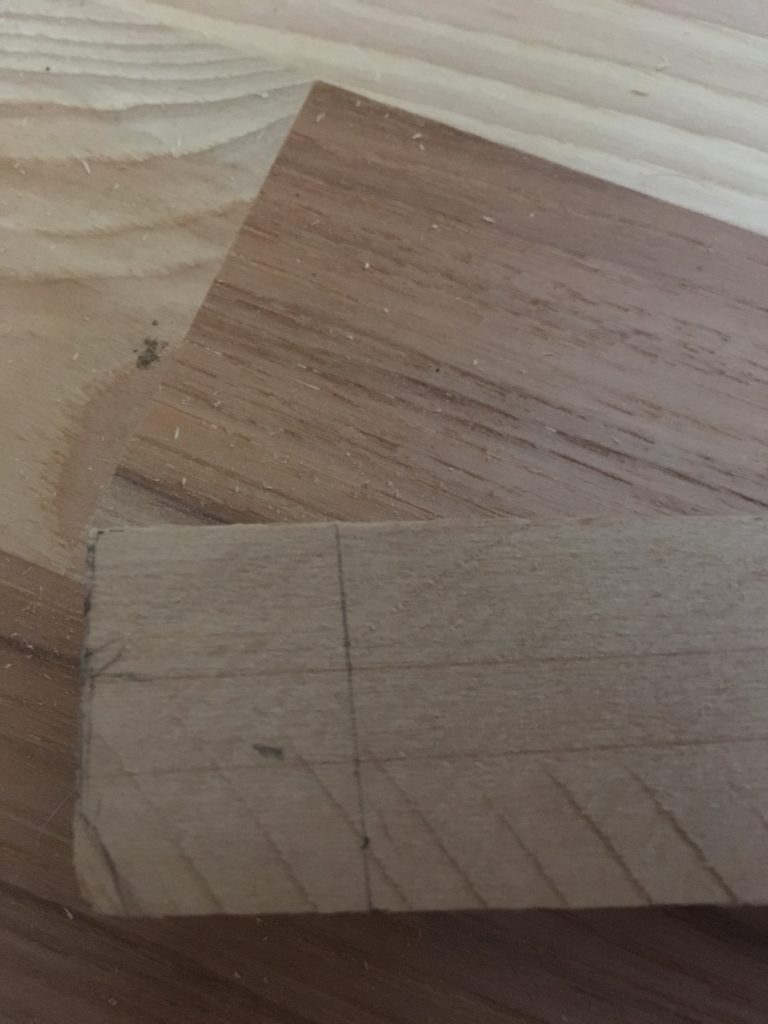
The resulting line on the shim
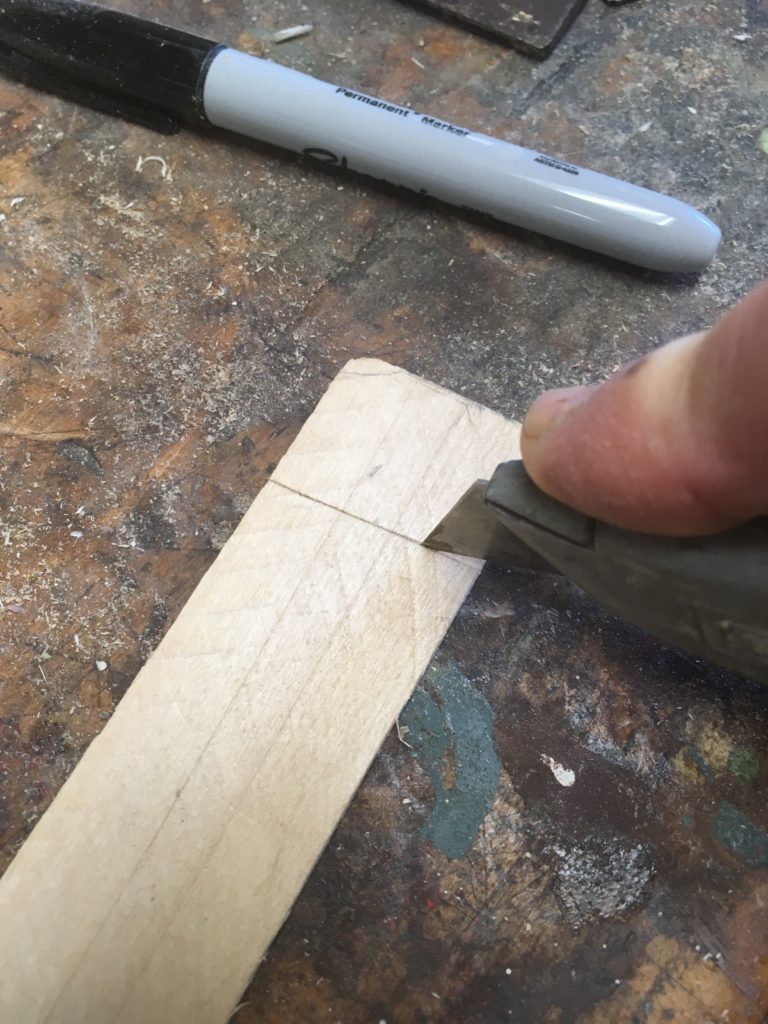
Cut the shim at this line, using a utility knife or fine-toothed saw.
Ignore the Sharpie, which just happened to be lying on the bench. I don’t use Sharpies for scribing unless the work is crude; the line they make is (obviously) too fat.
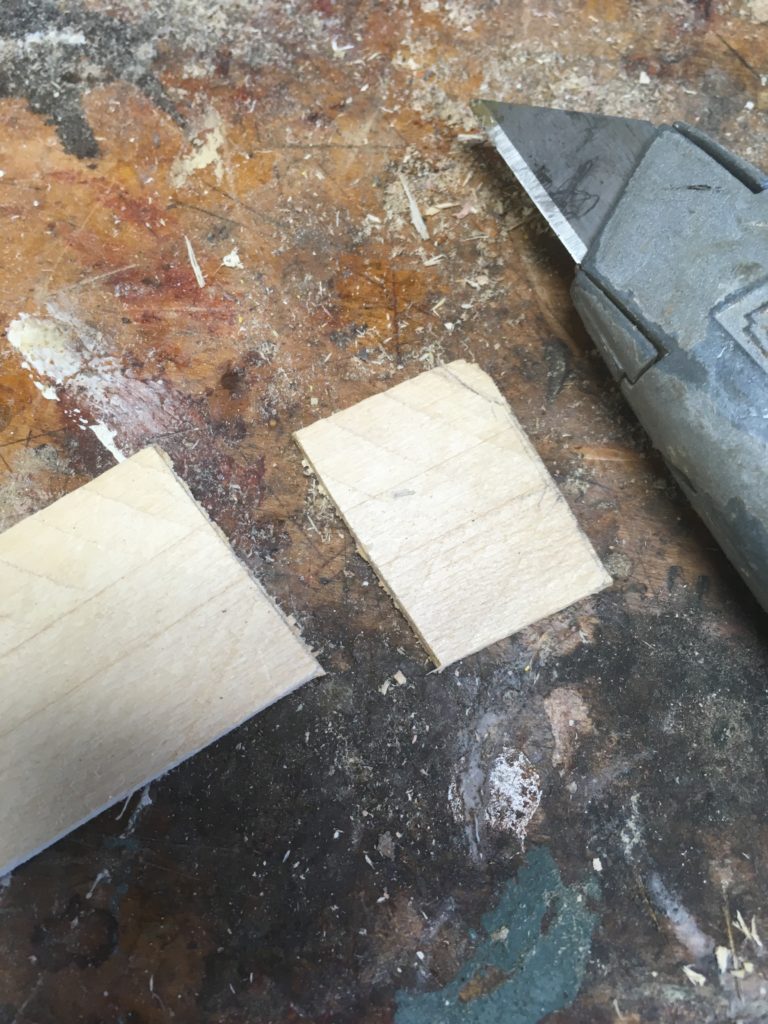
That’s my high-tech marking guide on the right. The cut end is the one I’m going to use. Please don’t bother posting comments about the not-sharp utility knife blade. Use a sharp blade. (I was using what I happened to have at hand … and it worked perfectly well.)
If you are going to use a compass, dividers or a specialty scribing tool, set the width from point to point to this same dimension, i.e. the widest part of the gap between your work piece (in this case, the drawer face) and the surface to which you’re fitting it (in this case, the stile of the cabinet’s face frame).
Step 2: Scribe (translation: this just means “write,” i.e. mark)
Now take your scribing guide and set it against the surface to which you are fitting your workpiece. In this case, that means resting one face of the shim cutoff against the inside edge of the face frame stile. (If you’re using dividers, this translates to: Rest one point of the dividers against the inside edge of the face frame stile.) Hold your pencil (again, if you are using the pencil-and-shim-cutoff technique; if you’re using dividers, this will refer to the second point of the tool) so that it will ride tightly against the other face of the shim cutoff while marking your workpiece.
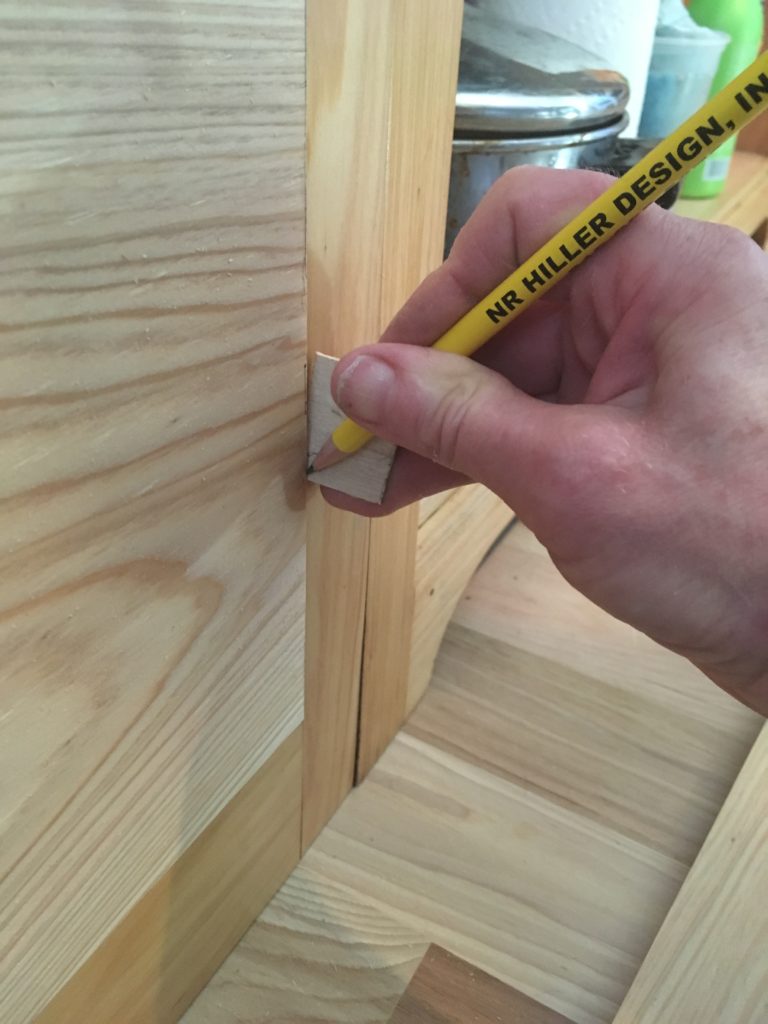
Again, I would ordinarily be holding the shim cutoff/scribing guide with one hand and the pencil with the other, keeping the point of the pencil hard up against the face of the scribing guide.
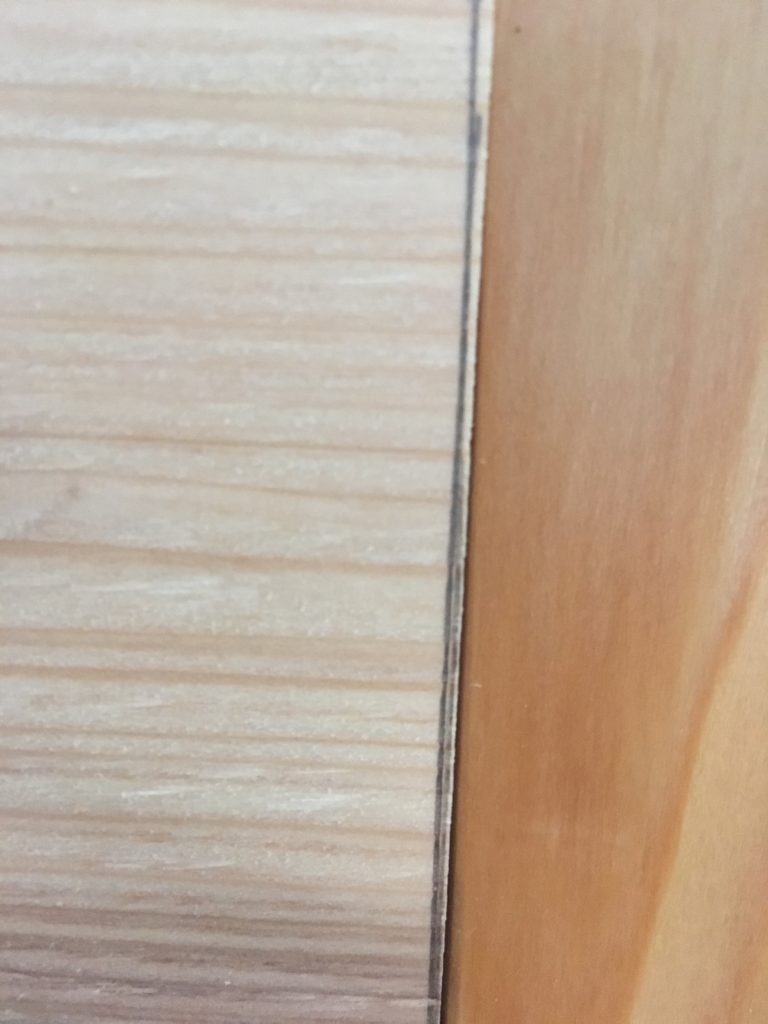
In real life, you should end up with a single line that’s far cleaner than this one. This one is the result of my having held the scribing guide and pencil in one hand.
Step 3: Cut
If you have a lot of material to remove, you may want to use a jigsaw to cut close to the line you just marked, then use a hand plane. Plane up to your line as you would in any fitting procedure, then check the fit.
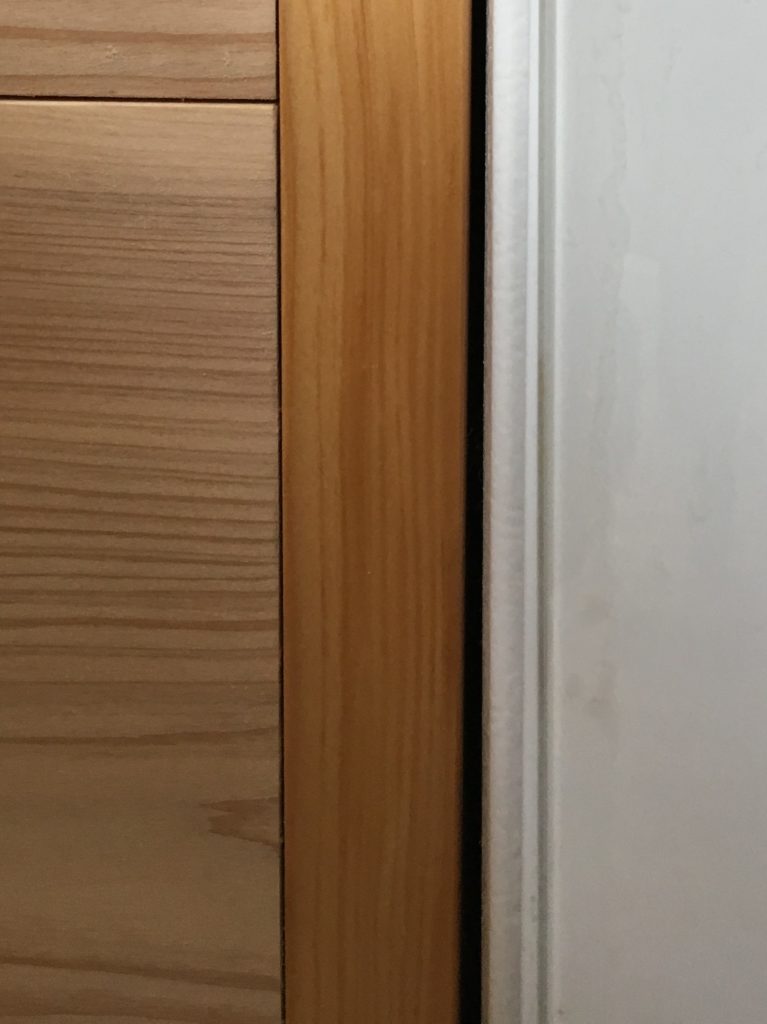
Evened up.
– Nancy Hiller
Here are some supplies and tools we find essential in our everyday work around the shop. We may receive a commission from sales referred by our links; however, we have carefully selected these products for their usefulness and quality.


Nice pencil.
I had a miscue on “you may want to use a jigsaw to cut close to the line you just marked” till I realized you didn’t mean what most call a scroll saw, but what I first learned to call a saber saw!
As always a very clear concise tip and how to.
Maybe a small tripod holder for your camera or phone? Then you won’t need that evolutionary third arm…