


We may receive a commission when you use our affiliate links. However, this does not impact our recommendations.

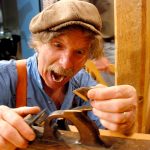
Shop cabinet with Rod Layout board setting atop it.
When working on cabinet or furniture project, most woodworkers, me included, rely on shop drawing and cutting list to guide our work. These are helpful tools but have their limitations. Drawings developed with a computer program like SketchUp can be very helpful and are well worth learning to produce. We have a great tutorial on it called SketchUp for Woodworkers. SketchUp is great in both the design stage and working out lots of details from joinery and profiles of moldings. With a plug-in, it can even kick out an accurate cutting list from your drawing.
But years ago, before computer assisted drawing programs, I learned a cabinet layout method that I don’t read much about but can be very useful. It’s called rod layout, although I’ve heard others refer to it as using a story stick. At the trade school I attended, a story stick was used for laying out stairway rise and run. Rod layout was used in cabinet layout.
Rod layout is done in full scale on a board that’s 3″ to 4″ wide and as long or slightly longer than the projects longest dimension, or the combination of the project’s two overall shorter dimensions. On the single board virtually every cabinet part dimension is represented, again, in full scale. At first glance, the Rod Layout looks overly simplified using few numbers. But once you use and understand the method you begin to appreciate the elegance of it’s simplicity. And once you’ve made your rod layout, you can make an accurate cutting list by taking the full scale measurements directly from the rod. Then, in the shop, you can use the rod to check the parts you’re cutting against the rod. This can be a big help in reducing math errors that can creep into a project, either in the planning or building stage of your project.
To get familiar with what a rod layout looks like, I’ve made one based on one of the back benches in our shop. The photo shows the bench with the rod layout board sitting on top. In order to see the layout lines on the rod, I’ve shot some video that pans along the rod so you can see how the layout lines work. The video won’t win any Academy Awards, but it allows you to see close up the dimensions lines, labeling, etc. The video is only a couple minutes long so you might want to refer to it a couple times as you read on.
In this instance, the length of the rod was determined by the width (or cabinet length). That layout is on one side of the rod. On the other side, the cabinet depth and height are drawn. The width (length) dimensions are based on an elevation or front view of the cabinet. The depth and height of the cabinet are both profile, or end views.
Since space on the rod is limited, there is a sort of “shorthand” for naming cabinet parts. You can develop your own, but in this layout, the bottom is “bott,” the partitions are “part”, etc. The part names are directly adjacent to the arrow indicator lines. The arrow point touches the line and represents the extremity of the part dimension in that view. There is, of course, another reference to the part by name and arrow point at the opposite end of the part extremity.
Before making a rod layout, you’ll need to know the joinery you plan to use for your project. That way, you’ll know were rabbets and dados are placed and how deep and wide those will be. The same would apply for tenons, etc.
Rod layout can apply to most any size project. Years ago, I made a completely detailed rod layout for a large kitchen project. In that case, it was particularly helpful because all the cabinets, both upper and lower, were fit between walls and required allowances for appliances, etc. If you’d like to try your hand at a rod layout, start with a simple, small project to get a feel for the technique. You likely won’t use rod layout for all your projects, but there will be times when using this method will be very helpful.
Here are some supplies and tools we find essential in our everyday work around the shop. We may receive a commission from sales referred by our links; however, we have carefully selected these products for their usefulness and quality.


Wow, thank you for showing me a strip of wood with some numbers on it.
With that sad, now please use the strip to hit your self over the head until you figure out that the video is JUNK…
I’m a bit behind on the blog and was somewhat dismayed at most of the comments. However, I do understand where they come from, based on the variety of learning techniques. In this blog entry, there are two types of information given: the “silent” video, which does as stated to “show” what a layout rod or story stick “looks like.” I, for one, had no need for anyone to describe what I was seeing, since I took the time to “read” the blog entry first. Some people have a problem reading something and then looking at pictures or a video. In this age, a lot of people have grown accustomed to having narration while watching the video. Could that have been done? Quite possibly, but I would then have eliminated the writing which would, in turn, have alienated far more people.
I also was really bummed out on this, I know about story sticks but one of the worse videos I have seen, someone describly verbally would maybe help. I learned absolutely nothing. Its just like your magazine I recieved yesterday, its getting worse for content, I dont know who edits it or who is writing it, but its basically garbage. Clean up your magazine make it more stand out, more projects large and small. If you have fire everyone and start over. Even I can do better then these idiots. Not sure I will renew my subscription. But you are not alone some other competion mags have gone same way. By the way the website isnt much better. Garver
Agree with Frank… What a shame to put this on Pop Woodworking site. Not a learning experience at all.
Hope Glen has some control over this in the future!
Shame on Me if I dont make a story stick on anything I build. I use the same mearsureing device all the way through. Mark it with a knife, darken with a pencil. I have prevented a lot of miscuts this way.
I agree with Frank to the extent that you could have conveyed the same information with a slide show. For the next time, I suggest a slightly different approach, based on what I would find most helpful. In explaining the story of the story stick based on an actual project, why not show how the story stick was created – e.g., butt the thing up against the actual bench and show how and why the individual marks were made and then how the pieces were cut?
We always called them story sticks, for both stairs and cabinet making, to keep from getting them confused with the grade rods used in surveying.
I think it’s more in what part of the country one resides in, as to what they are called, as when we referred to a rod, the first think we thought of, was the grade rod behind the seat in the truck, packed beside our transit.
it’s a pity that there is no speaking commentary to accompany the video – describing what is being shown on the video – the camera moves up & down a piece of timber a number of times – so what – Sorry, I consider it a waste of time!!