We may receive a commission when you use our affiliate links. However, this does not impact our recommendations.

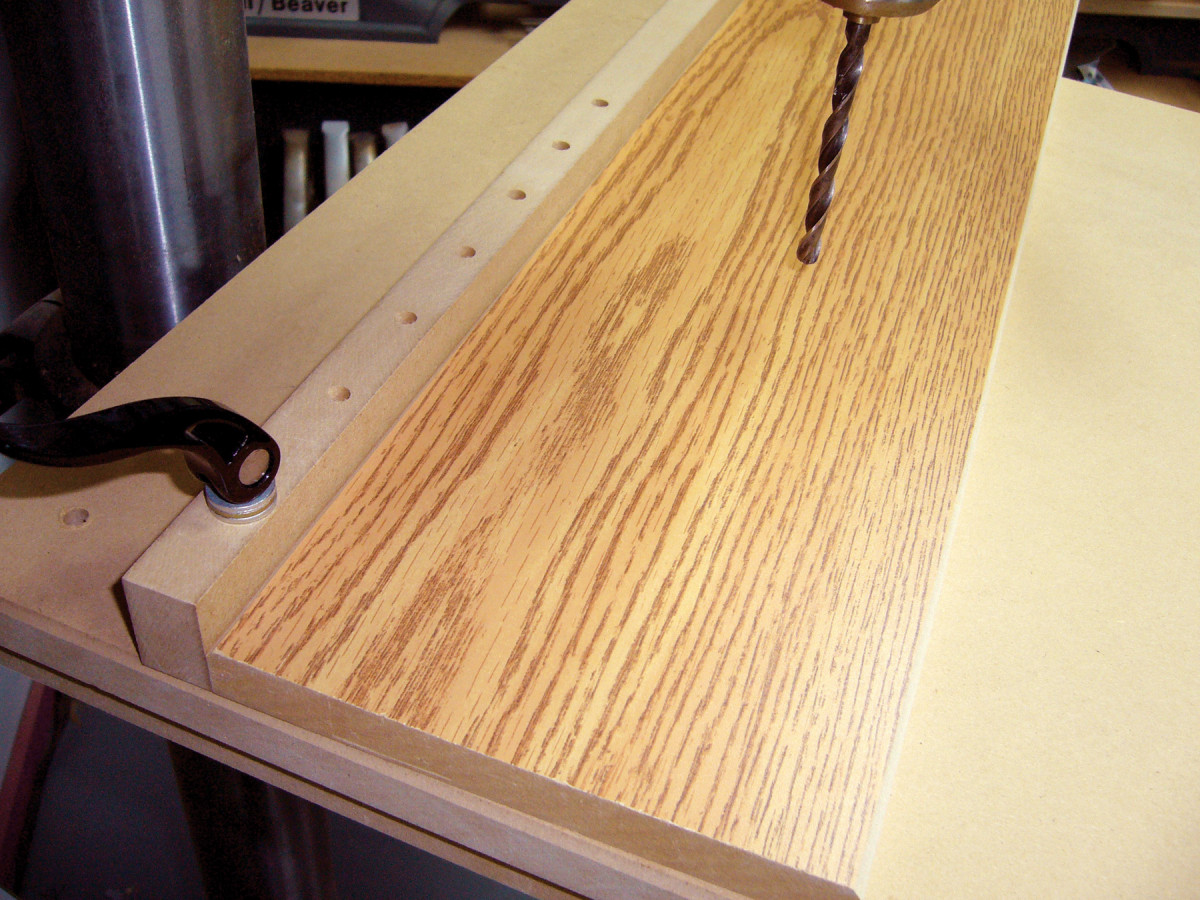
Instead of making disposable inserts for my drill press table, I found that it’s faster and cheaper to make disposable fence/table assemblies. I can use the entire surface of my disposable tables, so I get more life from them.
First, make a 3/4” x 16” x 20” base for your drill press table and bolt it in place. Epoxy a 3” 1/4-20 bolt through one corner of the base. Then cut a fence 3/4” x 2” x 18”. Drill 1/4” holes 2” apart along the 3/4” surface of the fence’s length. Screw the fence to an MDF or plywood off-cut. Slip the fence/table assembly onto the bolt through the fence’s first hole, and secure it with a cam clamp or jig knob. Pivot the other end to position the fence and clamp it in place.
When the first area of the disposable table is full of holes, loosen the clamp and move the fence to the next hole. When you’ve moved the fence through all of the holes, unscrew the fence and screw it to the opposite edge of the disposable table and start over. When the whole board is used up, salvage the fence for the next disposable table. –Serge Duclos
Here are some supplies and tools we find essential in our everyday work around the shop. We may receive a commission from sales referred by our links; however, we have carefully selected these products for their usefulness and quality.


