We may receive a commission when you use our affiliate links. However, this does not impact our recommendations.

Practical solutions to common plane problems.
When a plane is working right, it can produce a silky-smooth surface that absolutely glistens. When it doesn’t work, you get an ugly surface covered with blemishes. The problem can be your sharpening, your technique, or the plane itself. Quite often, it’s the plane.
These troubleshooting tips should go a long way to clearing up how a plane works and how to tune it up. Most Stanley, Record and similar types of planes certainly require a tune-up. You’ll probably encounter every problem addressed here. Premium planes, such as a Lie-Nielsen, Veritas or Clifton, usually don’t need much tuning at all.
Plane talk
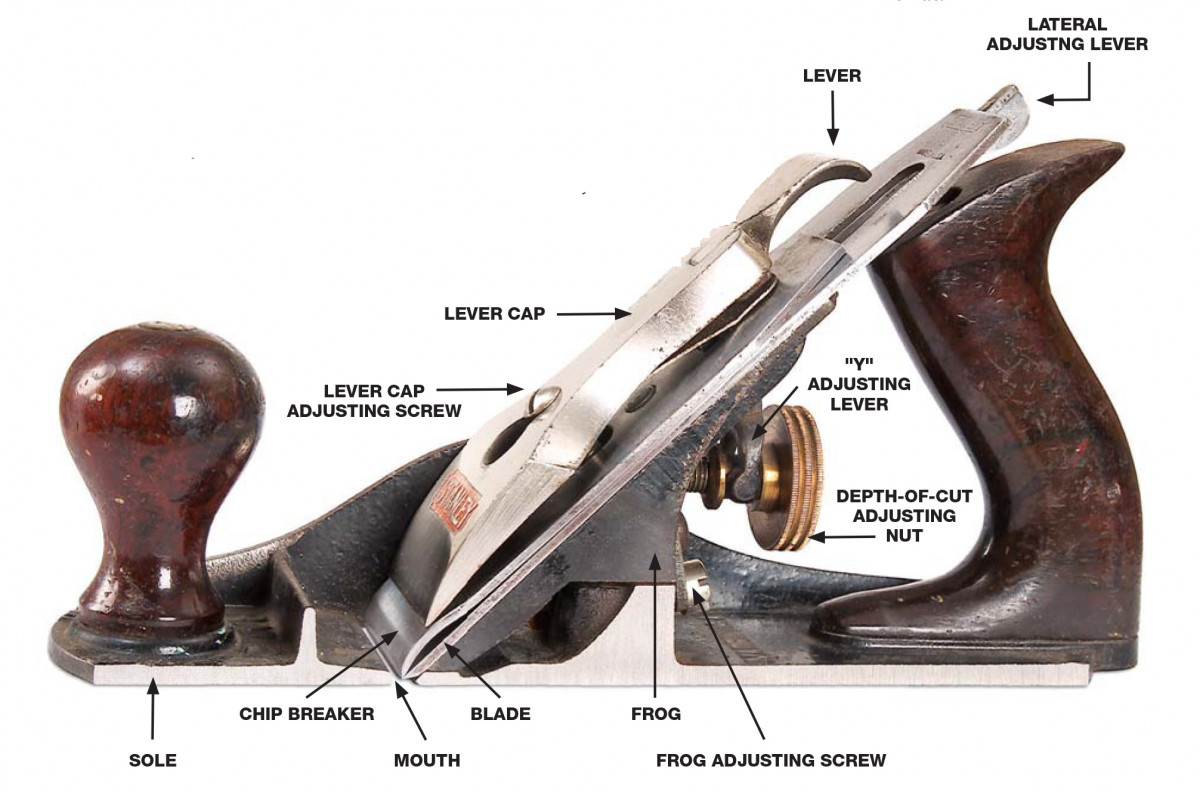
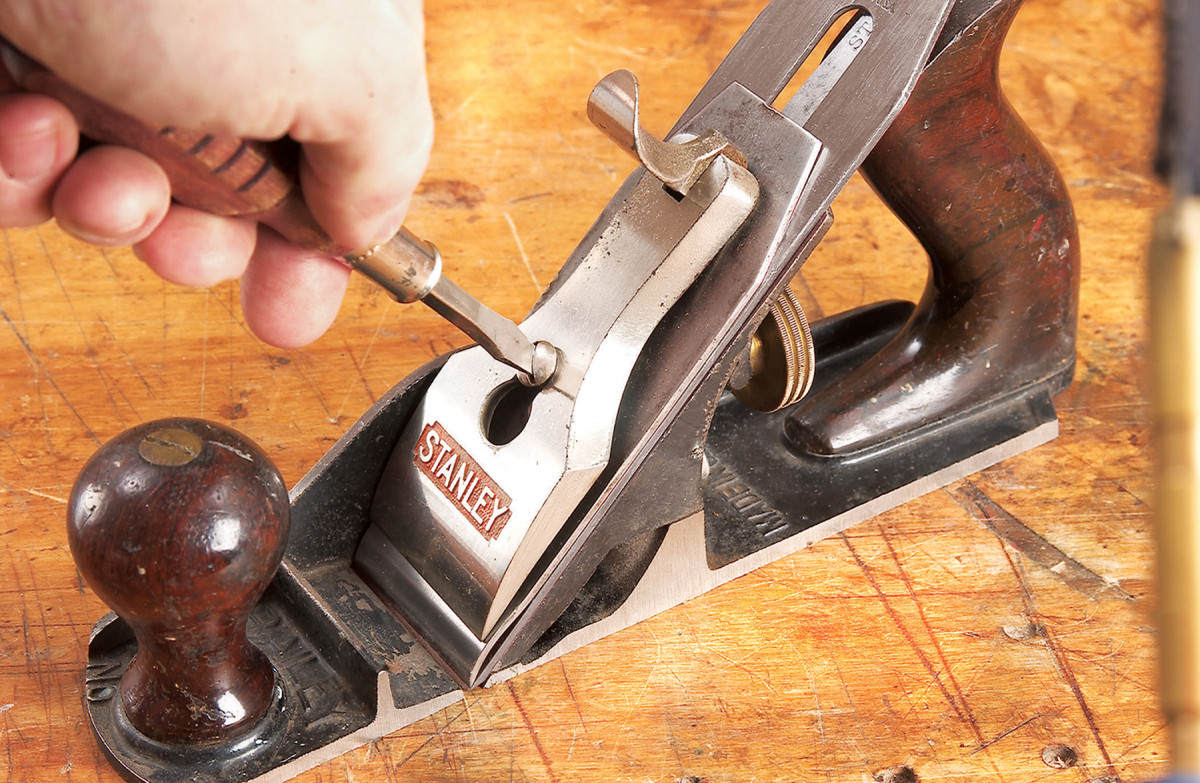
Before launching into troubleshooting, let’s identify a plane’s basic parts. I cut open one of my No. 3 Stanley planes (below) to give you a better look at how the parts fit together. We’ll start at the bottom and work our way up.
- The sole is the full length of the plane’s bottom.
- The frog holds the blade assembly at a 45° angle to the sole.
- The frog adjusting screw moves the frog forwards or backwards.
- Moving the frog effectively opens or closes the plane’s mouth, the gap in front of the blade.
- The uppermost part of the blade assembly is the lever cap.
- The middle part of the blade assembly is the chip breaker (screwed to the blade).
- Pushing down on the lever clamps the blade assembly to the frog.
- This clamping pressure is regulated by the lever cap adjusting screw.
- Turning the depth-of-cut adjusting nut rocks the “Y” adjusting lever, which slides the blade and chip breaker up or down the frog.
- Pushing the lateral adjusting lever side-to-side levels the blade with the sole.
 Problem
Your plane cuts at the beginning or end of a board, but not in the middle.
Cause
The plane’s sole may not be flat.
Solution
Rule out some similar causes first. Test the board’s flatness with a long straightedge. If it’s hollow in the middle, the problem is with the board, not your plane. Similarly, test the flatness of your bench. If it’s hollow, the board will bend as your plane. Time to flatten the bench. But if your board and bench are just fine, and this mysterious behavior persists, chances are the sole of your plane isn’t flat.
A plane’s sole must be flat for the blade to remove continuous, thin shavings the full length of the board, your ultimate goal. Test your sole by placing the plane on a very flat surface, such as a tablesaw’s cast iron wing. Try to slide a thin strip of paper underneath it at various places. If it slips under at any point, the sole isn’t flat enough. It needs lapping (a machinist’s term for flattening).
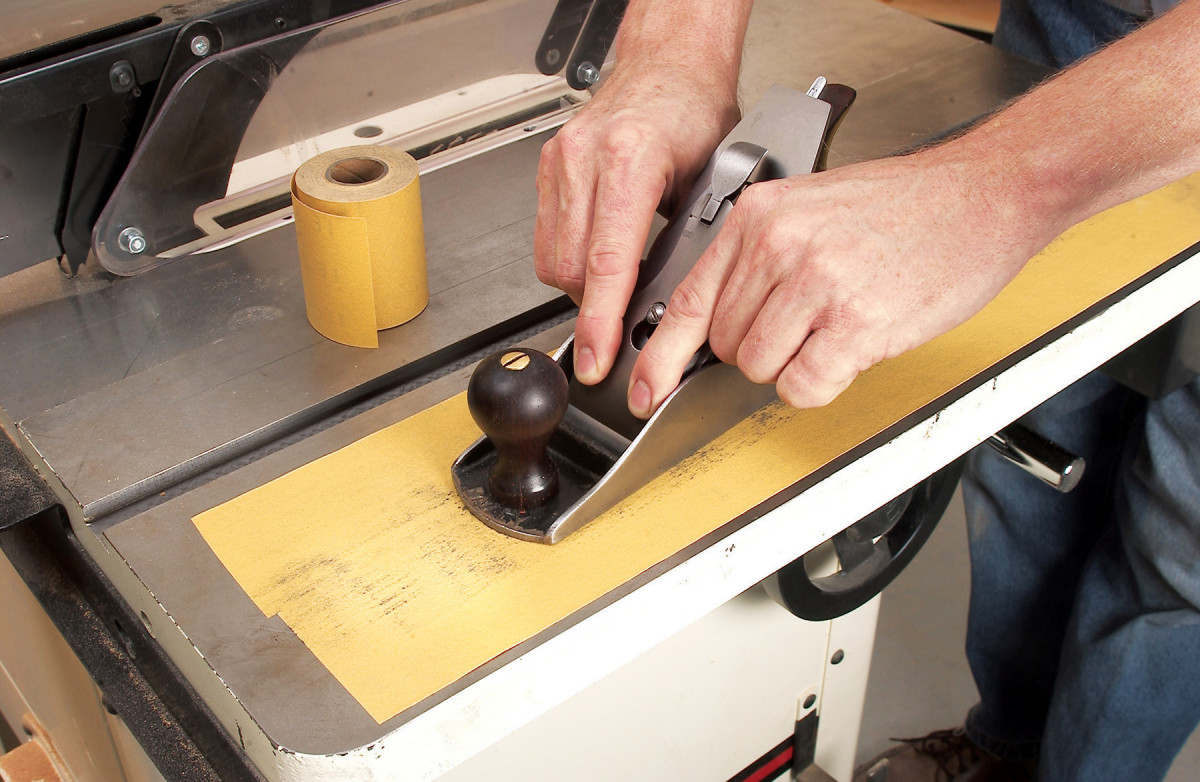
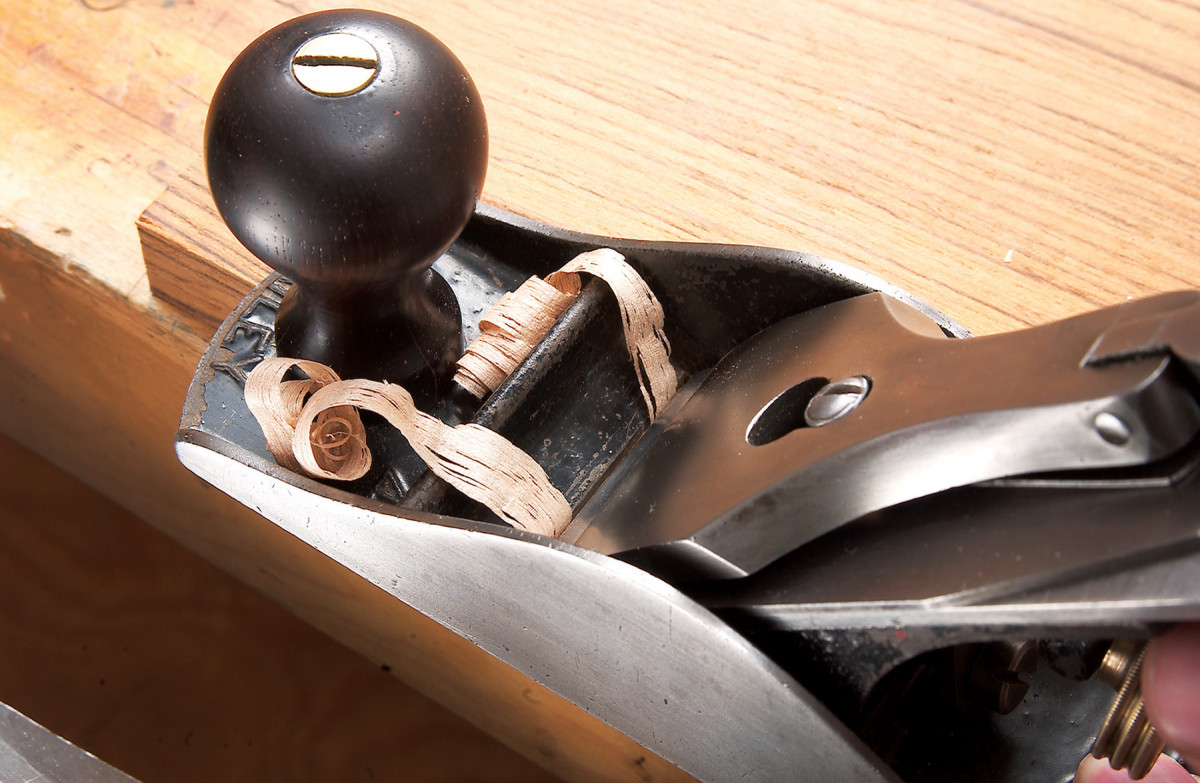
1. Flatten your plane’s sole using sandpaper. A flat sole enables a plane to make long, thin shavings.
The easiest way to lap is using self-adhesive sandpaper on a rigid, flat surface, such as a tablesaw’s cast iron wing, a jointer bed, or a long piece of 1/4“ plate glass. (You can also use regular sandpaper and a low-tack spray adhesive). You may have to remove a lot of metal, so it helps to have a variety of grits available, from 80 to 220. The surface and paper should be at least twice as long as the plane’s sole.
2. Mark your sole with a felt-tip pen to help reveal the low spots. Planes with corrugated (grooved) soles have less metal to remove than planes with smooth-bottomed soles, so they’re easier to flatten.
Retract the blade and start lapping with a 120 or 150-grid paper (Photo 1). If the sole is convex, grip the plane as show to avoid rocking it. Inspect the bottom after a few stocks (Photo 2). The newly sanded areas should be easy to see. If there are lots of low spots, switch to coarser paper.
Whichever grit you start with, keep sanding until the entire bottom is scratched with sanding marks. The area right in front of the mouth is very important; it must be flat to prevent tearout. Don’t worry about the sole’s extreme ends, though, or old scratches from previous use. Once the sole is flat, work up to 220 grit or more to polish it.
Problem
Your blade chatters. It feels like its bouncing up and down as it cuts.
Cause
Your blade may not be clamped down tight enough, or your frog may not be flat.
Solution
Try simple fixes first. Your blade may be dull, or set too deep, or chip breaker may have slipped over the blade’s edge, so it’s trying to do the cutting. If you rule out these causes, try the following:
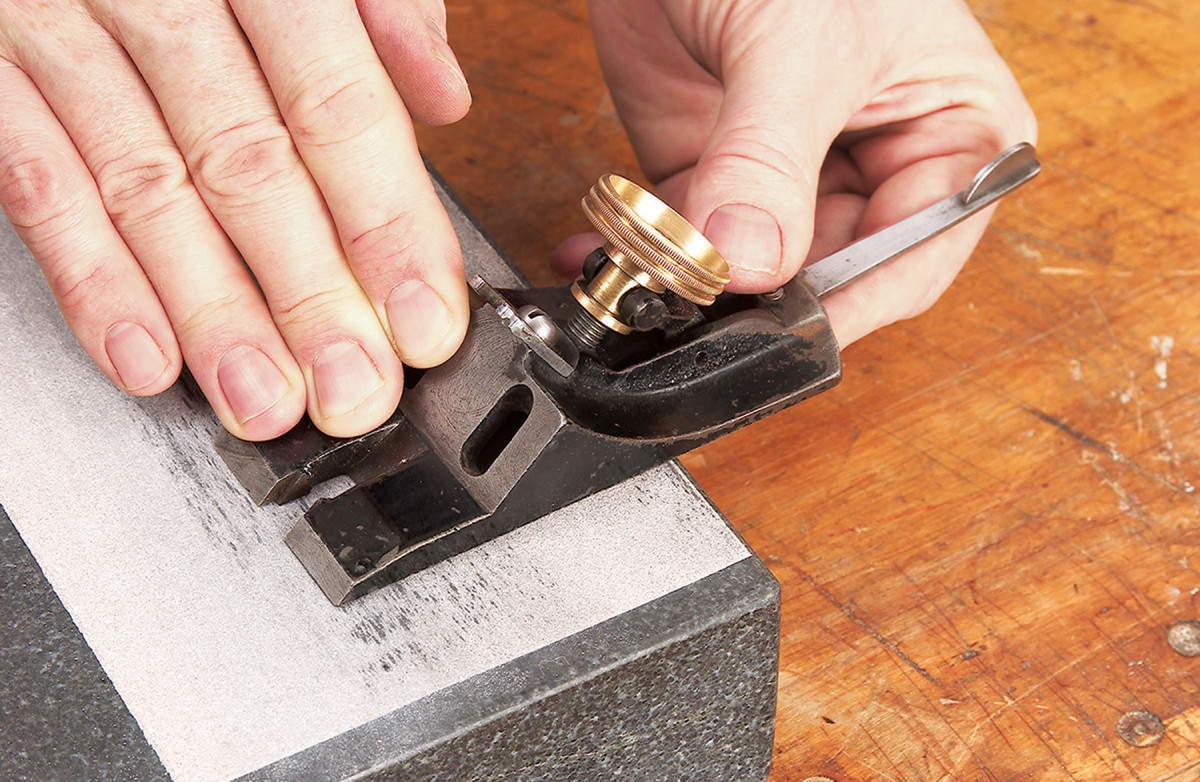
3. Your blade will chatter if the lever cap doesn’t provide enough pressure to clamp the blade tight to the frog. Adjust the lever cap screw to provide more pressure, if needed.
First, increase the clamping pressure on the blade. This is controlled by the lever cap adjusting screw (Photo 3). This screw isn’t something you fiddle with every time you plane, though. Adjusting it is a matter of finding the sweet spot that puts lots of pressure on the blade, but not too much. If you overtighten the screw, applying too much pressure, you won’t be able to turn the larger brass wheel that controls the depth-of-cut.
4. Your blade will also chatter if your frog’s top surface isn’t flat. Flatten the frog with sandpaper adhered to a flat surface.
To find the sweet spot, loosen the lever cap and tighten the screw 1/8 turn. Re-tighten the lever cap. Turn the brass adjusting nut to move the blade up and down the frog. If it moves very freely, loosen the lever cap again and tighten the lever cap screw another 1/8 turn. Re-fasten the lever cap. Repeat this procedure until the adjusting nut is somewhat hard to turn with two fingers, but not too hard. Once you’ve found the best setting for the screw, leave it there. You should rarely have to re-adjust it.
A second cause of the blade chatter may be a frog that’s not flat (Photo 4). To check your frog, unscrew it from the plane’s body and remove the lever cap screw. Lap the frog on sandpaper. You won’t be able to lap the entire surface because the Y lever sticks out the top, but that’s okay. Flattening the first two to three inches’ worth is good enough.
Problem
Your smoothing plane leaves tracks on a board’s surface.
Cause
The blade isn’t level, or its corners are too square.
Solution
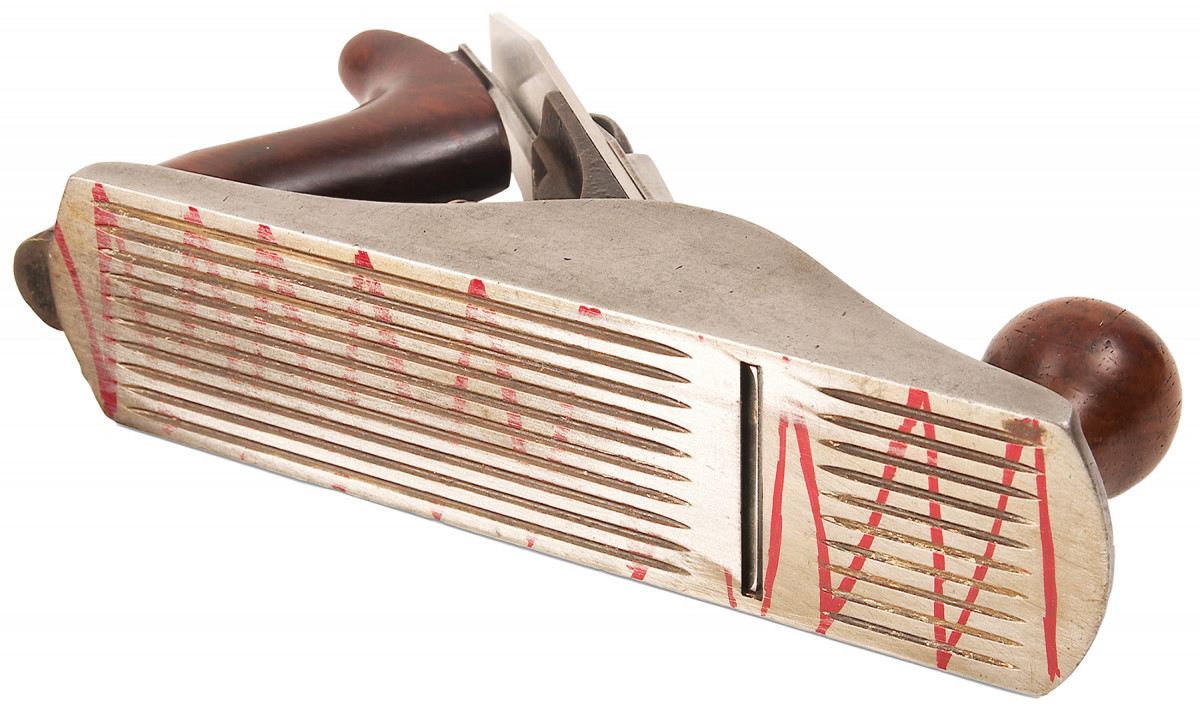
First, make sure the tracks you see aren’t ridges caused by a nick in the blade. If the tracks look like shallow steps (Photo 5), one side of the blade is cutting deeper than the other. Raking light or chalk using flat-side down clearly reveals these tracks.
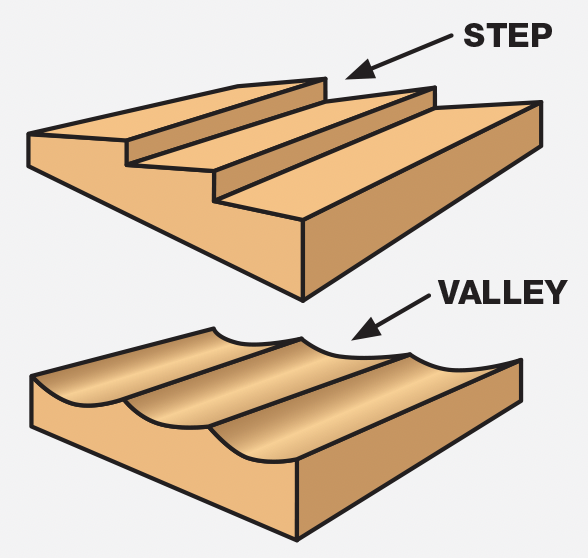
5. Shallow steps are caused by a plane blade that’s not set perfectly level. A commonly used method to minimize this problem is to round the blade’s corners, and maybe its entire profile. This produces a surface with extremely shallow valleys, which are leveled by scraping or sanding.
You’ll have more success avoiding track marks and leveling your blade if you round it (Photo 6). This prevents the corners from digging in. Rounding a smoothing blade’s profile one way or another is an old tradition. Here’s how I go about it. First, I round over the blade’s corners on the grinder. I do the rest of the rounding work when I hone, by rocking the honing jig to one side or the other on the pull stroke (Photo 7). This creates a cambered edge and a transition to the rounded corner.
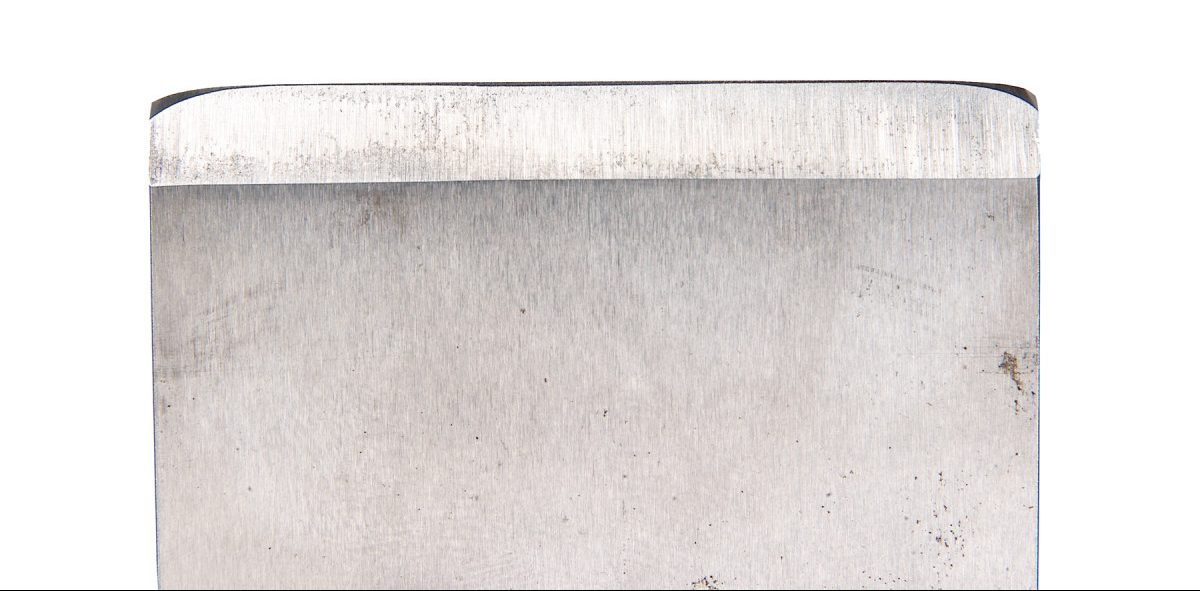
6. Round a smoothing plane blade to avoid making steps on a board’s surface. The corners of this blade are rounded off, and the area in between is cambered (that is very slightly curved), or left straight.
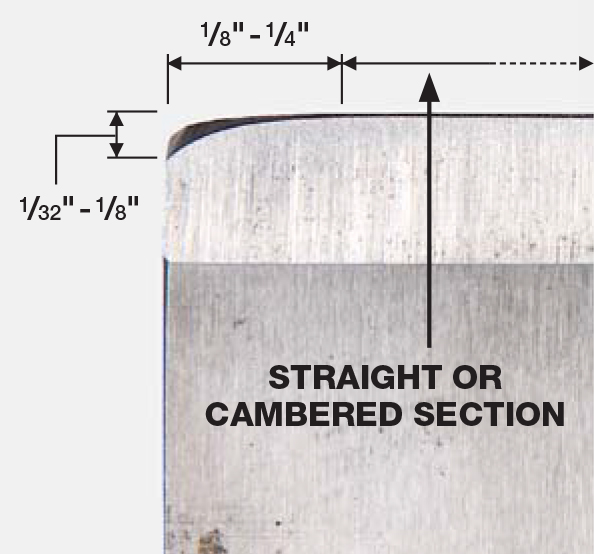
6. Detail
If you’re new to planes, I recommend you camber the blade’s full width. To check it, I hold the blade upright and lay the fat side of the small square on the blade’s edge. The blade’s center should be higher than the edges by about the thickness of one or two pieces of paper.
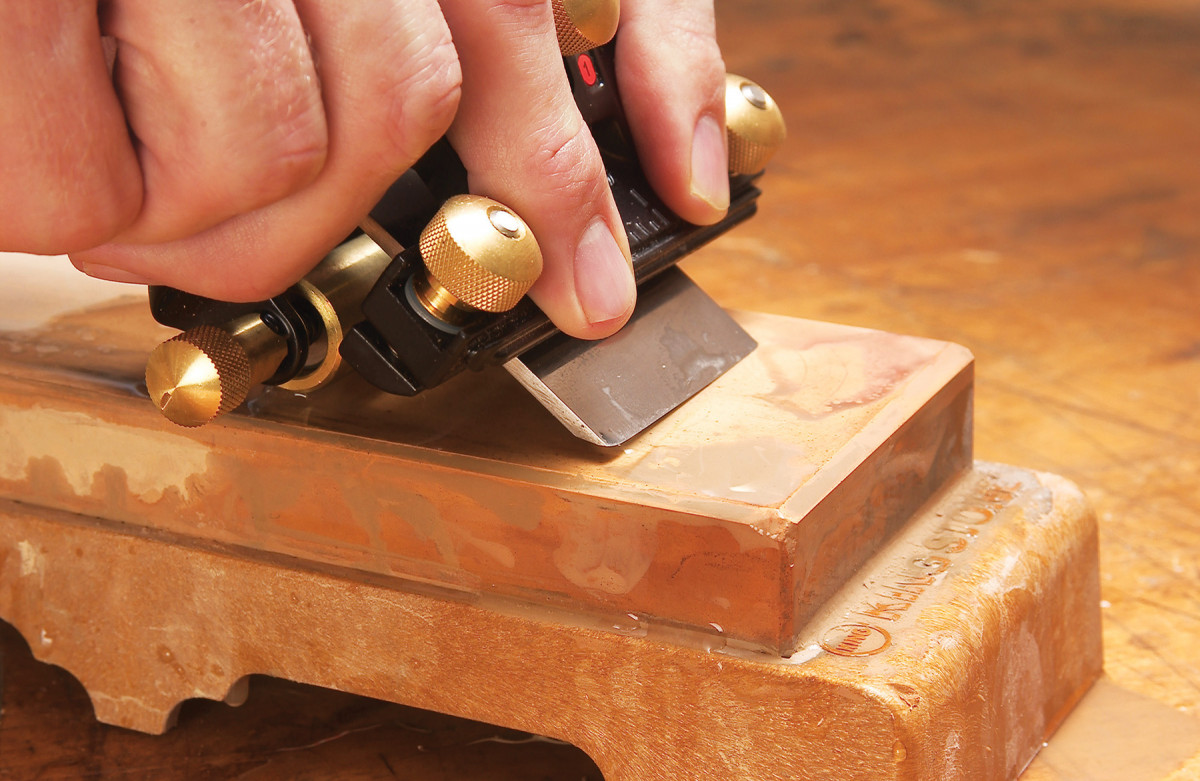
7. Round a blade’s profile by rolling the jig sideways as you hone. Favor the right side, then the left side on alternate pull strokes to produce a curved profile.
If you’re more experienced with a smoothing plane, it’s better to leave the majority of the edge straight across, and only camber the outer edges; that is, round 1/8“ to 1/4“ of each side. This will create a flatter surface than the previous method, but the blade will be more difficult to level.
8. Level your blade by comparing shaving made with each side. Hang the plane off the edge of the board and make a narrow shaving using only the blade’s left side. Turn the plane around and make another narrow shaving using the blade’s right side. Adjust the lateral lever until these shaving are equally thick.
To level your blade, make a narrow shaving using the outer 1/2“ of the blade’s left side. Make another shaving using the right side (Photo 8). Compare the thickness of the two shavings. Adjust the lateral lever until the shavings are equally thick. Back off the blade, re-adjust its depth of cut, and you’re good to go.
Here are some supplies and tools we find essential in our everyday work around the shop. We may receive a commission from sales referred by our links; however, we have carefully selected these products for their usefulness and quality.