We may receive a commission when you use our affiliate links. However, this does not impact our recommendations.
Tools solve problems in wood. Hand tools bought just to collect do not serve you well. But tools bought when you need them will serve many projects to come. Don’t hesitate to buy a good hand tool suitable to the task. The tools mentioned here actually stand a chance of being useful in the hands of some future woodworker a century from now.
Drawknife
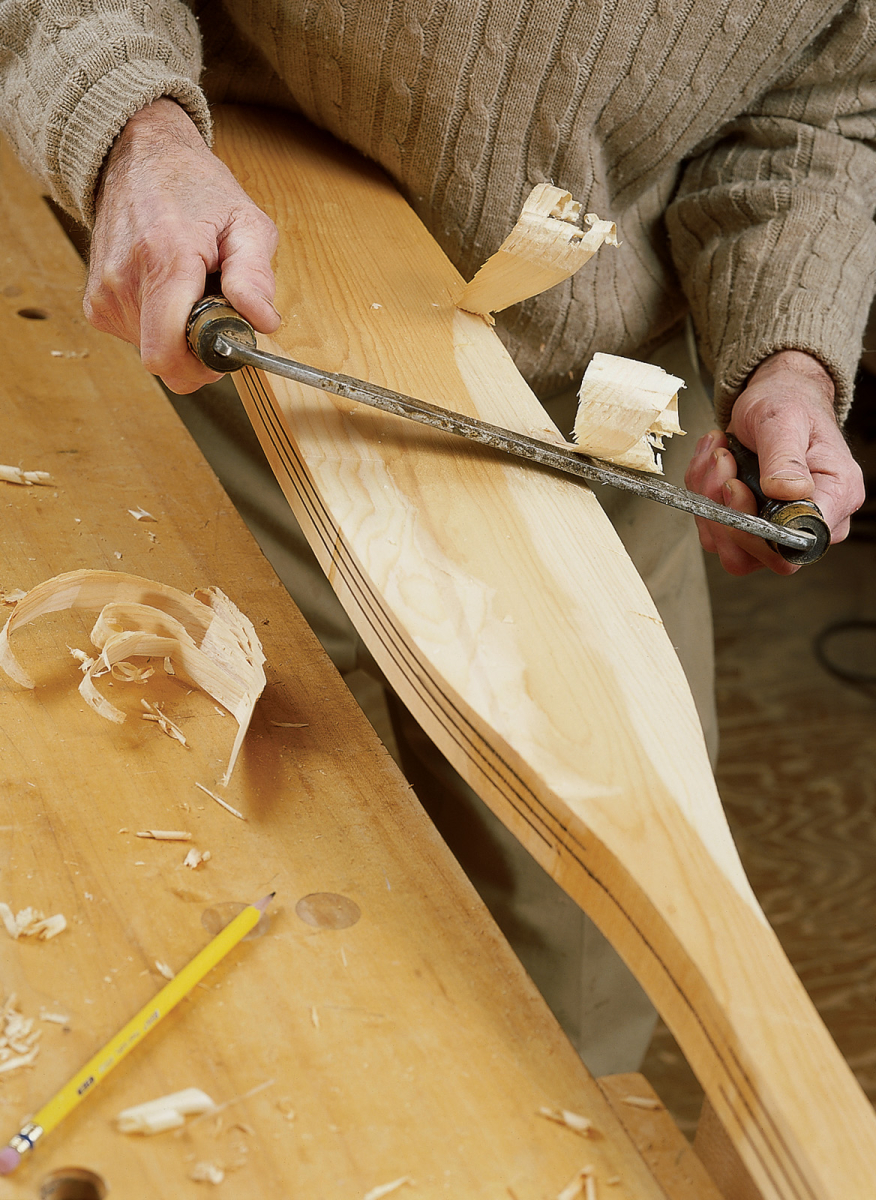
I owned a drawknife for years without ever putting it to use. There were only two instances when I observed it being used in the hands of a professional. One was in a boat shop where planks along the sheer (the top of the sides where it meets the deck) were being finished off in the gentle curve that makes the profile of the hull. The other was watching Geoff Burke make a paddle that fine summer day. I have since learned that there are several styles and blade treatments for this tool.

Drawknives are made in a variety of sizes for a variety of tasks. The largest drawknife is used for peeling bark from logs. Carvers’ drawknives are small. The one shown in this article is referred to as a carpenter’s drawknife, and is 12″ long with a 7″-wide blade.
As is so often true, the critical point of this tool is the sharpness and angle of the blade. Hogging off rough chunks of wood is not light work. Check the angle of sharpening before use. The tools often are made with an angle of 25° to 30°, which is steeper than necessary and will make heavy going of your work. A finer pitch of 15° to 20° will serve well in the straight-grained softwood of a paddle.
Drawknives are used bevel up for straight cuts. Turned over they will follow contours for shaping. Leonard Lee, in his book “The Complete Guide to Sharpening” (Taunton Press), points to an alternative:
“If you put a 15° basic bevel on a drawknife and dub [a slight bevel on the flat side] from 2° to 5° off the face of the knife, you will find that it is much more maneuverable.” (See the drawing of a modified drawknife at right.)
 Old drawknives of good quality can still be found at a considerable savings, and they can give you great satisfaction for having rescued a very useful tool.
Spokeshave
This is a short-soled plane used for smoothing hollows that typically appear when transitioning from one shape to another.
Modern versions of the spokeshave have a metal body holding the blade at an angle to the sole similar to a plane. They come with a flat sole like a conventional plane for flat work or outside curves, with a convex curved sole for shaving inside curves, or with a concave sole. Two high-quality versions of this concave-soled tool are available from Veritas (Lee Valley Tools) and Lie-Nielsen Toolworks.
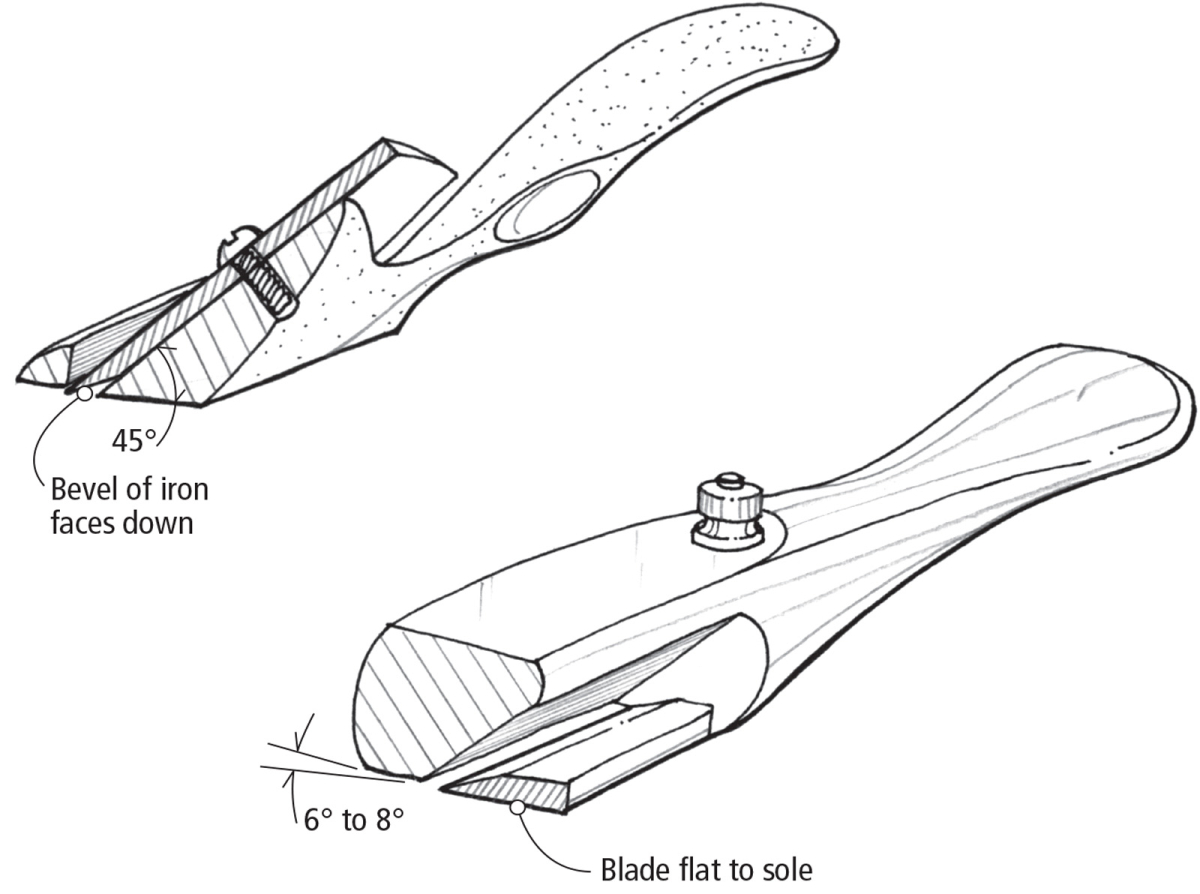
 The traditional spokeshave had a wood body and the blade lying flat to the sole. They are sometimes called razor-type shaves, identifying the shape of the blade, which looks like a traditional straight razor. The change in blade angle makes the modern version less effective for many cutting operations. The flat position of the razor-type blade makes it easy to work with.
The traditional wood-bodied shaves have a 6° to 8° bevel in the sole ahead of the cutting edge. This allows for making hollows, while the blade slices into the wood at no angle at all.
Block Plane
For years, a block plane was a familiar tool tucked into my nail apron as a trim carpenter. It was used for almost any planing job, not just the smoothing of end grain that tradition has made its appointed task. To this day, I will reach for a block plane more often than a bench plane to smooth wood.
Fortunately, a good version of this plane, the Stanley No. 60 1⁄2, is readily available. You will find this version in most tool catalogs and may even find it in the hardware section of a home-supply store.
Be aware that there are two versions of the block plane – a regular and a low-angle. The low-angle Stanley No. 60 1⁄2 is 1⁄4” narrower than the standard version. It is this low-angle, narrower block plane that fits my hand best.
In all these tools, their effectiveness depends on being sharp. That should be job one before beginning your paddle.
Finger Marking Gauge
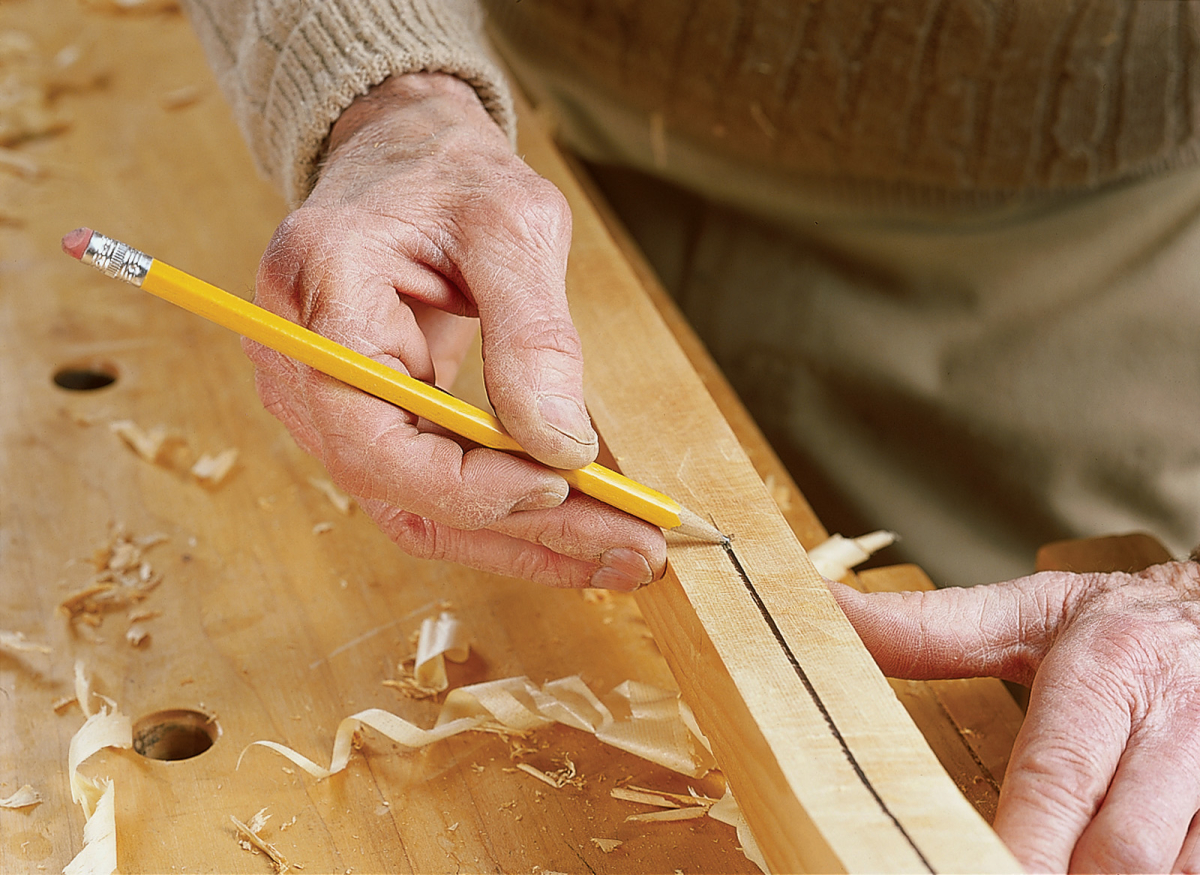
To the list of these tools – drawknife, spokeshave and block plane – I have added a fourth “tool:” the finger marking gauge. This is simply a pencil in your hand.
I learned this skill from my father so early in my woodworking career that I thought everyone knew how to do it. That is, until I started teaching woodworking. I would use this technique for gauging a line along a board and find that my students would do a double-take to see where the straight line came from.
The photo below shows this better than a description could. The middle or ring finger serves as a stop to determine the width of the space to be drawn. To find the center of a board, as in the paddle blank, simply gauge a line from both sides approximately half the board’s width. Seeing now how closely they meet in the center gives you an eye for the exact center to set the final holding position for your finger marking gauge. In applications where the space to the gauge line widens, you need to hold the pencil higher, using your ring finger instead of your middle finger as a stop.

Here are some supplies and tools we find essential in our everyday work around the shop. We may receive a commission from sales referred by our links; however, we have carefully selected these products for their usefulness and quality.


Is there any list of drawknives to figure out what kind you have? I got some at an estate auction of a guy who cut timber and had a large farm. One or two have handles you can adjusts the angle of the other does not. I learned of draw knives back in the 60’s when I found a hand made one in my Grand Fathers Corn House with a large grinding wheel and a bunch of other tools. It originally was a large wood rasp some Black Smith had cut or hammered about 1/2-inch square sections that they wrapped around two bolts for wood handles. It’s blade was still a good two foot long. What got me was the area above where they hammer a blade edge on still had file teeth in it. My introduction to draw knives in use was in the late 60’s or early 70’s. When my cousin took me to where a friend had set up a rail mill. It was powered by the rear axle of an old car they had put a flat pulley on and that drove a old saw mill blade. The guy shaving the bark off was using a draw knife and shaved several while we talked to them. His shoulders and back had to be hurting, as they had a pink tint after several hours but every rail was a few more bucks.
Looks like this article was chopped off before the end.
If anyone sees this comment, please fix.
The final photo was missing, thanks for catching!