We may receive a commission when you use our affiliate links. However, this does not impact our recommendations.
Armed with a little trickery, you can make the block plane perform a wide variety of tasks.
Hang around enough woodshops (or Internet discussion groups) with a block plane in your hand and you’ll eventually be derided for owning a “carpenter’s tool.”
It’s a criticism that I’ve never understood. Small trimming planes – no matter what you call them – have been a common tool in furniture shops for centuries. And while you certainly can build furniture without a block plane, I sure as heck wouldn’t want to.
When I travel overseas to work and I have room for only one plane, I bring a block plane because I can easily alter it to do the job of many other tools, including a smoothing plane, miter plane, pencil sharpener, and even a toothing plane.
Despite its versatility, a lot of woodworkers are confused about how to choose, set up, and use this tool for basic chores. And through misuse and misunderstanding, they create a plane that will not take a fine cut. So if you have a block plane that isn’t working well, or you don’t feel you get much out of it, read on.
The Different Kinds of Block Planes
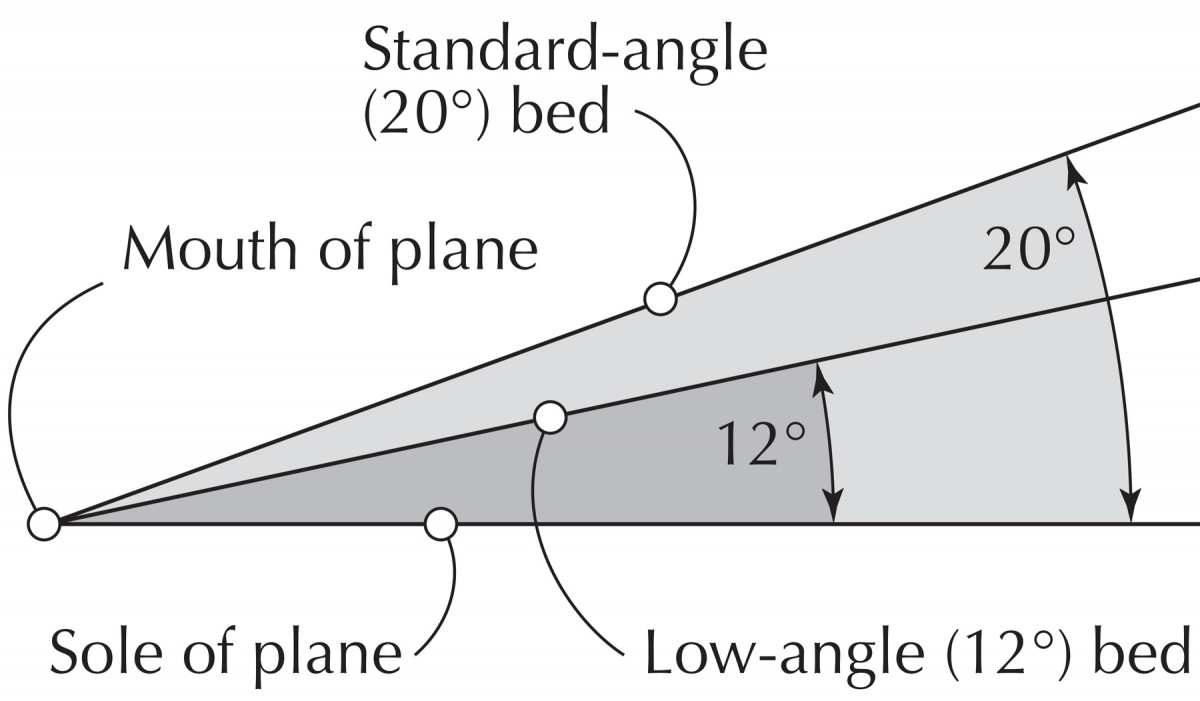
Eight degrees of separation. The standard bed angle is 20°; the low-angle bed is 12°. While the difference does affect the cutting action a little, it more significantly changes the grip of the tool.
During the early 20th century when the metallic plane nearly defeated the wooden plane, block planes were produced by the millions for everyone from the homeowner to the professional woodworker. As a result, there are so many varieties that it’s easy to get confused about which features are important for furniture folks.

Clean your mouth out. The mouth plate allows you to reduce tear-out, but it also requires maintenance. Keep the mechanism clean and lightly oiled for a predictable cut.
Here, regardless of the brand name of the tool or when it was made, are the important aspects of the tool.
■ Bed angle: Most block planes come with a bed that is angled either 12° off the sole of the plane or 20°. Does this 8° difference change the way the tool cuts? A little. Does it matter for most tasks at the bench? I would argue that no, it doesn’t.
Many woodworkers say they prefer the 12° angle (called a “low-angle” block plane) because it is easier to use when cutting end grain. While technically that’s a true statement, the sharpness of the blade is far more important than the plane’s bedding angle when cutting end grain.
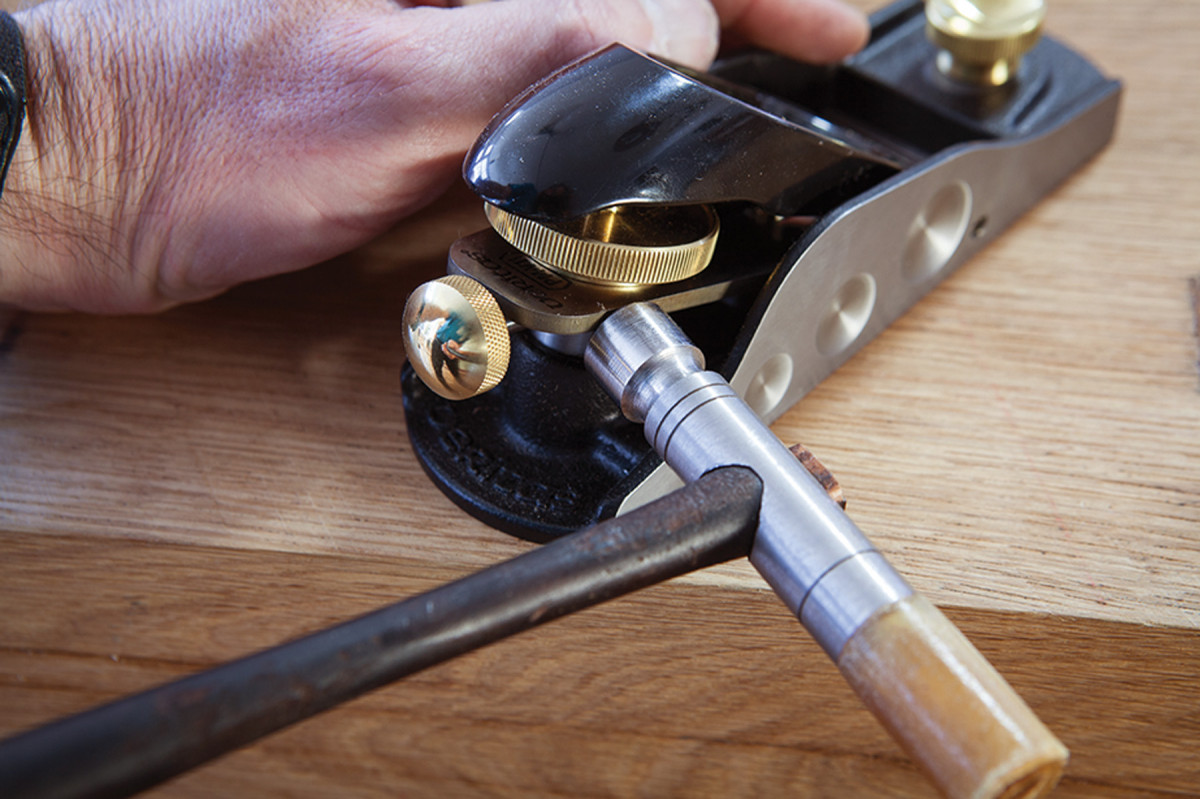
Tap that. Small taps on the side of the iron produce better results than a mechanical lateral adjuster.
There’s a little geometry behind the question of a 12° or 20° bed that I’ll explain a little later on modifying the tool. But for the purposes of buying a tool, I think the bed angle is important because it changes how the tool fits your hand. So pick a plane that is easy to grasp, push and pull without your hands aching.
■ Adjustable mouth: Good block planes allow you to close up the mouth opening via a movable plate in front of the mouth. For me, this feature is a must if you want to use the plane as a smoothing plane at times.
A tight mouth reduces tear-out. Get it as tight as possible when working figured woods. The nice thing about using a block plane for this operation – in contrast to a bench plane – is that it’s easy to close and open the mouth without dismantling the tool.
■ Blade adjuster: Many block planes have a wheel at the back that allows you to increase or decrease the depth of cut. Inexpensive tools do not. I prefer planes with this blade adjuster because I constantly change the depth of cut on this tool as I work. Doing this operation with a hammer is slow.
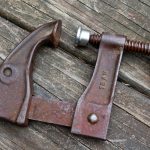
Bad bed. A bed that’s poorly machined will throw your iron off kilter.
A few block planes also have a “lateral” adjuster that helps you center the blade in the mouth. I find these lateral adjusters to be too coarse for furniture making. Tapping the blade side to side with a small hammer is more precise.
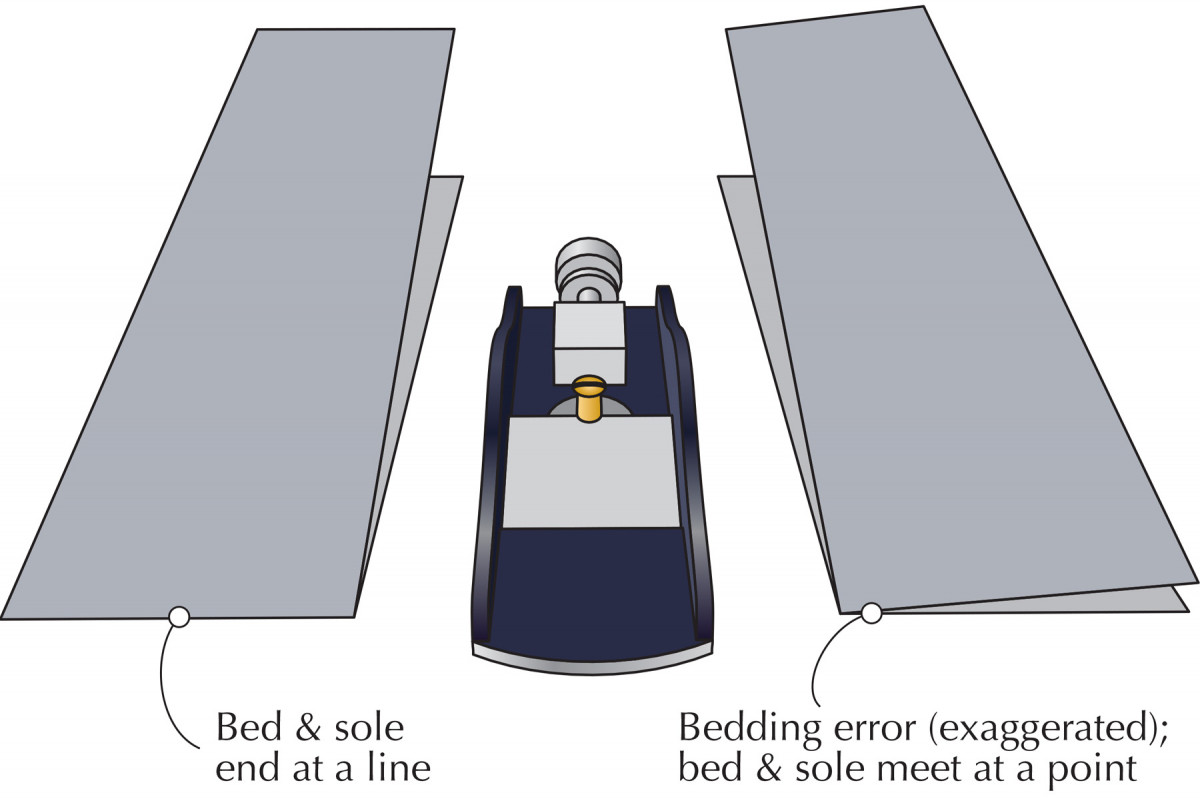
■ A solid bed: If you use a block plane for carpentry chores, such as trimming softwoods, then the bed doesn’t have to be precisely made and you can get away with a home-center block plane. But if you are going to do furniture work, I recommend a nice vintage block plane or one of the modern premium planes.
Here’s why: If the bed is poorly machined so it is out of kilter with the sole, you’ll never be able to get the iron centered in the mouth unless you intentionally grind the cutter at a skew. And that’s a lifetime of agony.
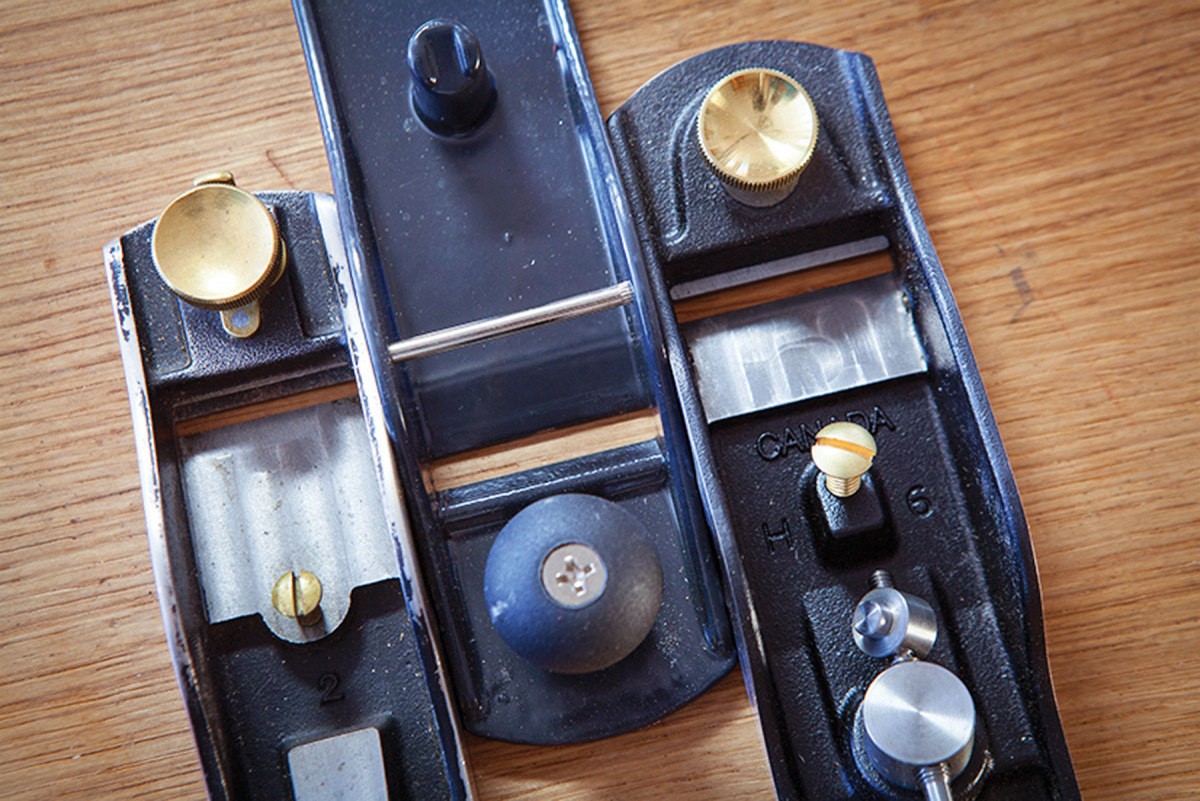
A well-made bed. A machined surface (left and right) ensures the cutter will not vibrate. A simple cast and painted bed (center) is usually a bad sign.
Good block planes have a large, fully machined bed. Poor block planes have small beds that are lumpy and painted.
■ Size: The final factor is the size of the tool. Block planes come in a range of sizes, from 3″ up to 7″. In general, I think smaller block planes are better because the short sole allows you to sneak into small hollows on a board that a big block plane cannot easily reach. That said, the plane has to fit your mitt.
The other features of block planes are generally marketing puffery. I don’t think it matters what kind of steel the cutter is made from, as long as you can sharpen it. And I don’t care how the lever cap operates, as long as it will secure the cutter with ease.
Sharpening & Blasphemy
Rounding the corners. I remove the sharp corners of the cutter on a coarse sharpening stone (I’m using a diamond plate in this instance). Begin with the cutter resting on its side.
Many sources on block planes say you should always sharpen the iron straight across, with no curve or camber. While there are times to use a straight blade, you can use the tool for a wider variety of chores if you reject that advice.

Pull the cutter toward you as you rotate it to vertical.
My approach is based on what I want the tool to do. If I want to use the block plane as a smoothing plane or to sneak into areas and trim a little bit of proud wood away, then I don’t want the corners of the cutter leaving plane tracks on my work. So I round over the corners of the cutter and I sharpen the blade so the edge is curved.
Ending with the cutting edge touching the stone.
How much curve? Well, it’s more than you probably think. To understand this important aspect of a block plane, we need to talk about geometry a little (but not too much).
The reason you need more curve on the cutter of a block plane than any other bench plane is because of the low angle of the bed. Go get a quarter for the next part of this explanation. It will help.
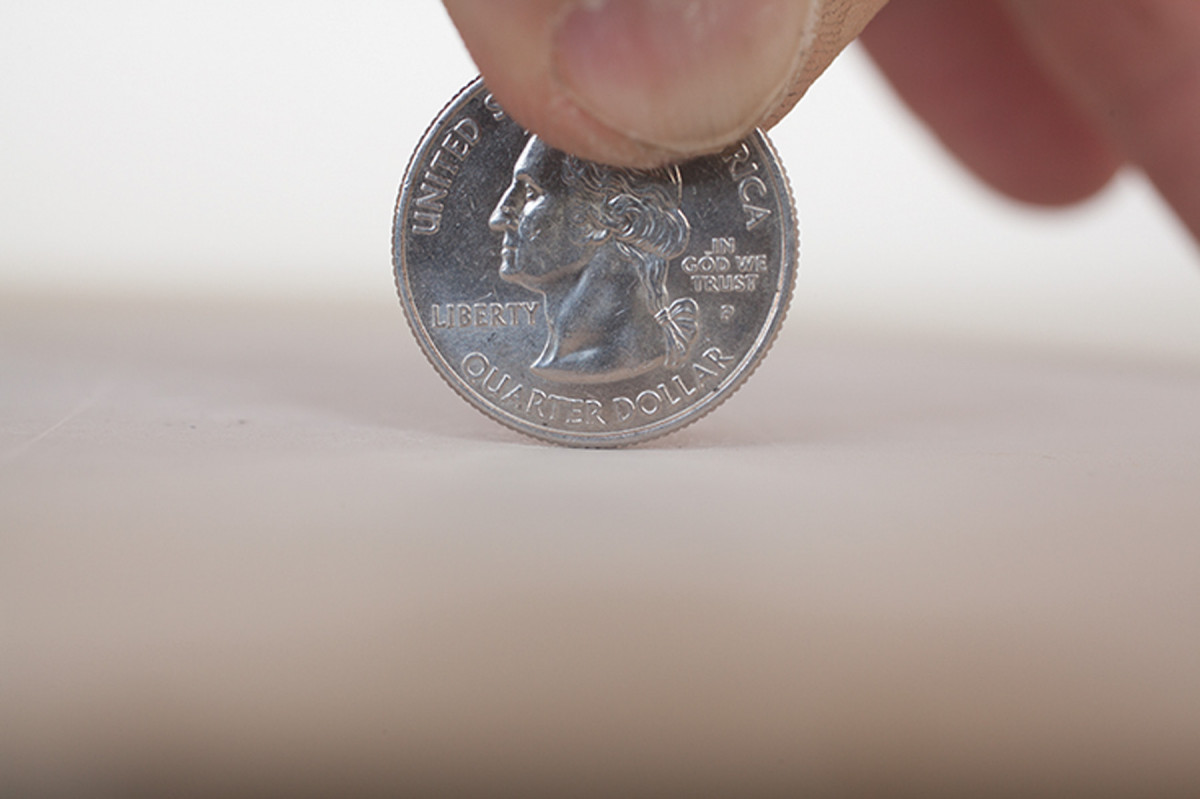
Upright. A quarter shown at 90° from the front and side.
 Let’s pretend that you sharpened a curve on your block plane blade that is the same curve as the diameter of your quarter (this is too much curve, but it will help demonstrate the problem). Stand the quarter on its edge on a table. This is what the wood would see if the cutter were bedded at 90°. It would see the full curve of the edge and the plane would make a curved trough in the wood.
Halfway. A quarter shown at 45° from the front and side.
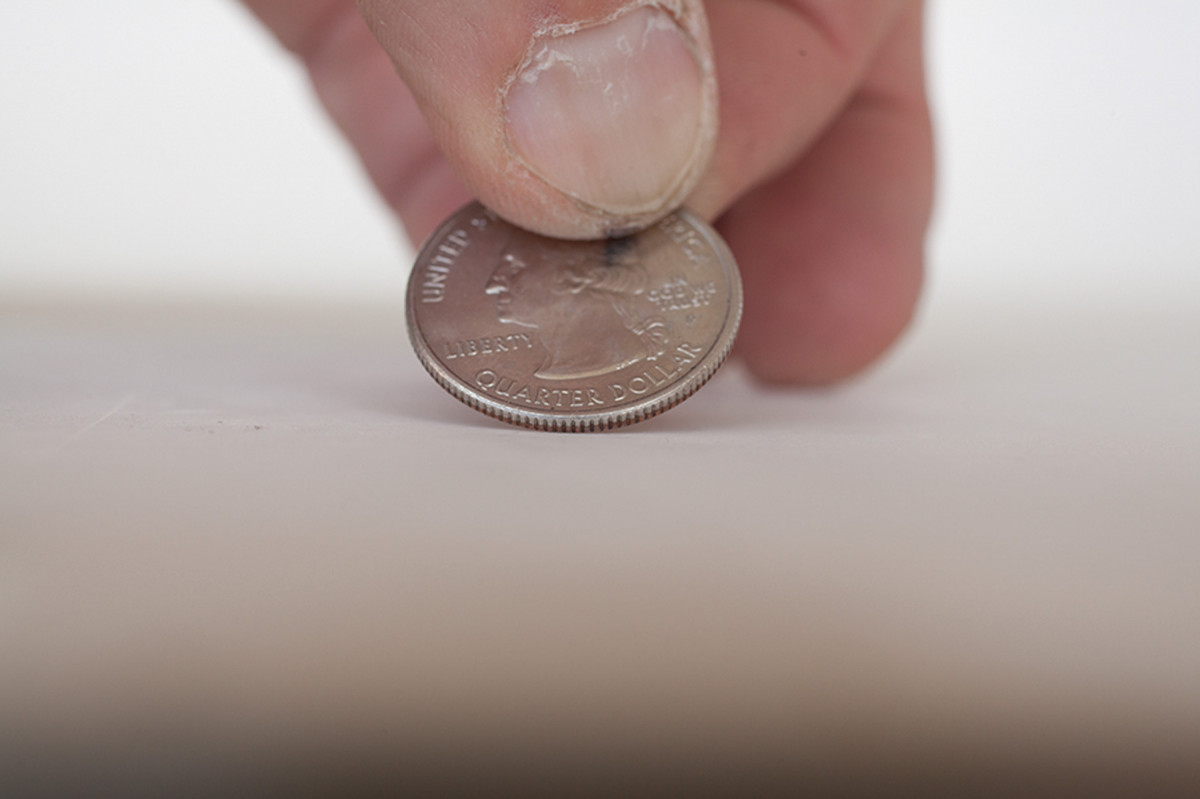
 Now lean the quarter back at 45° to the table and look at the coin straight on. This is the curve that the wood would see if the quarter were bedded in a 45° plane, such as a metal jack plane. As you can see, the curve looks shallower to the wood.
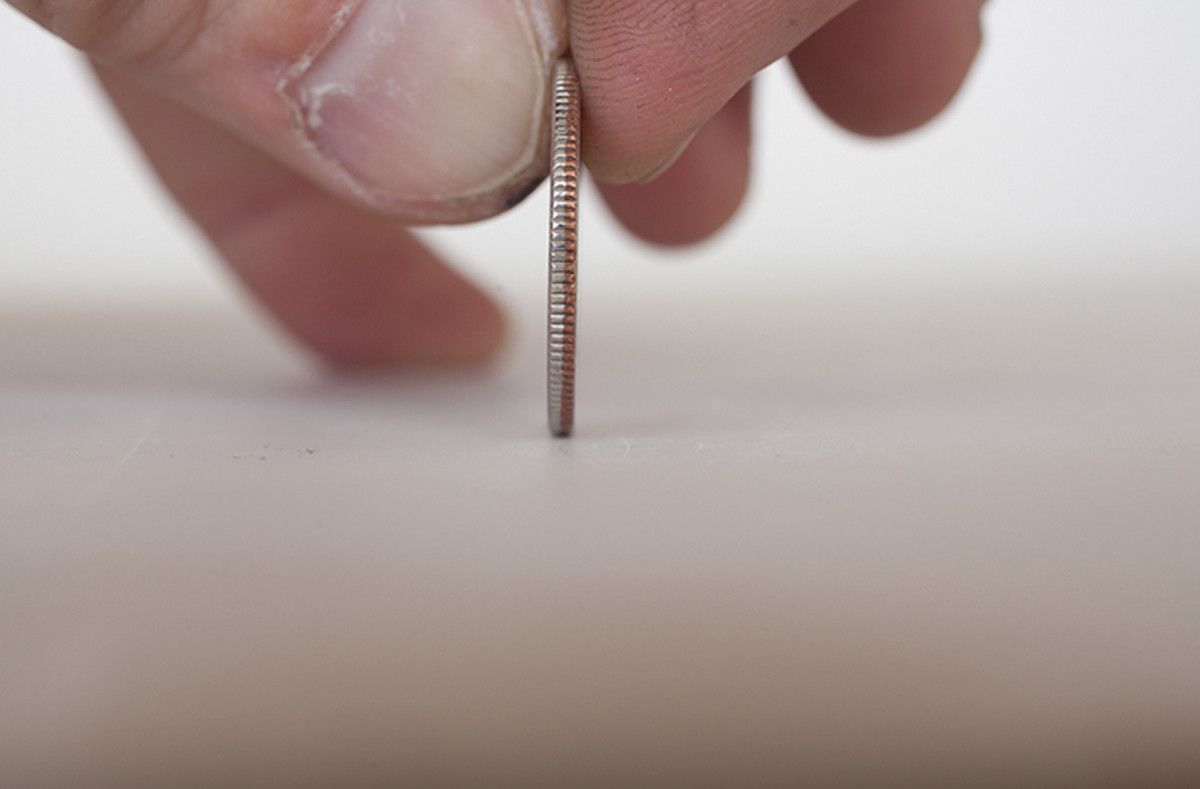
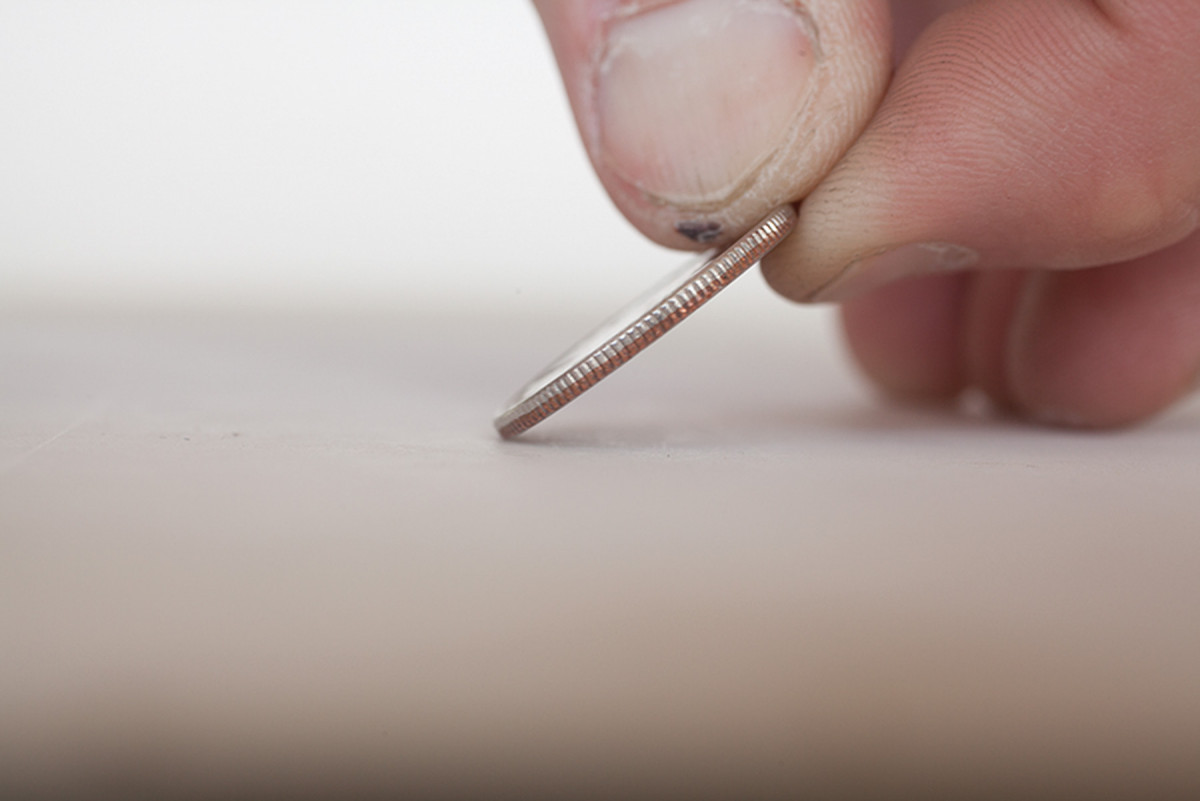
Lay the quarter down even more – like 25° off the surface of the table and look at it straight on. The curve is still shallower. Finally, lay the quarter flat on the table and you can see that the wood would see no curve whatsoever.
What this means is that if you want to tuck the corners of the cutter inside the body of the block plane you’ll need to sharpen it with a significant curve. I achieve this curve by both rounding the corners of the cutter and applying additional pressure on the corners of the blade during all phases of sharpening.

Low. A quarter shown at 25° from the front and side.
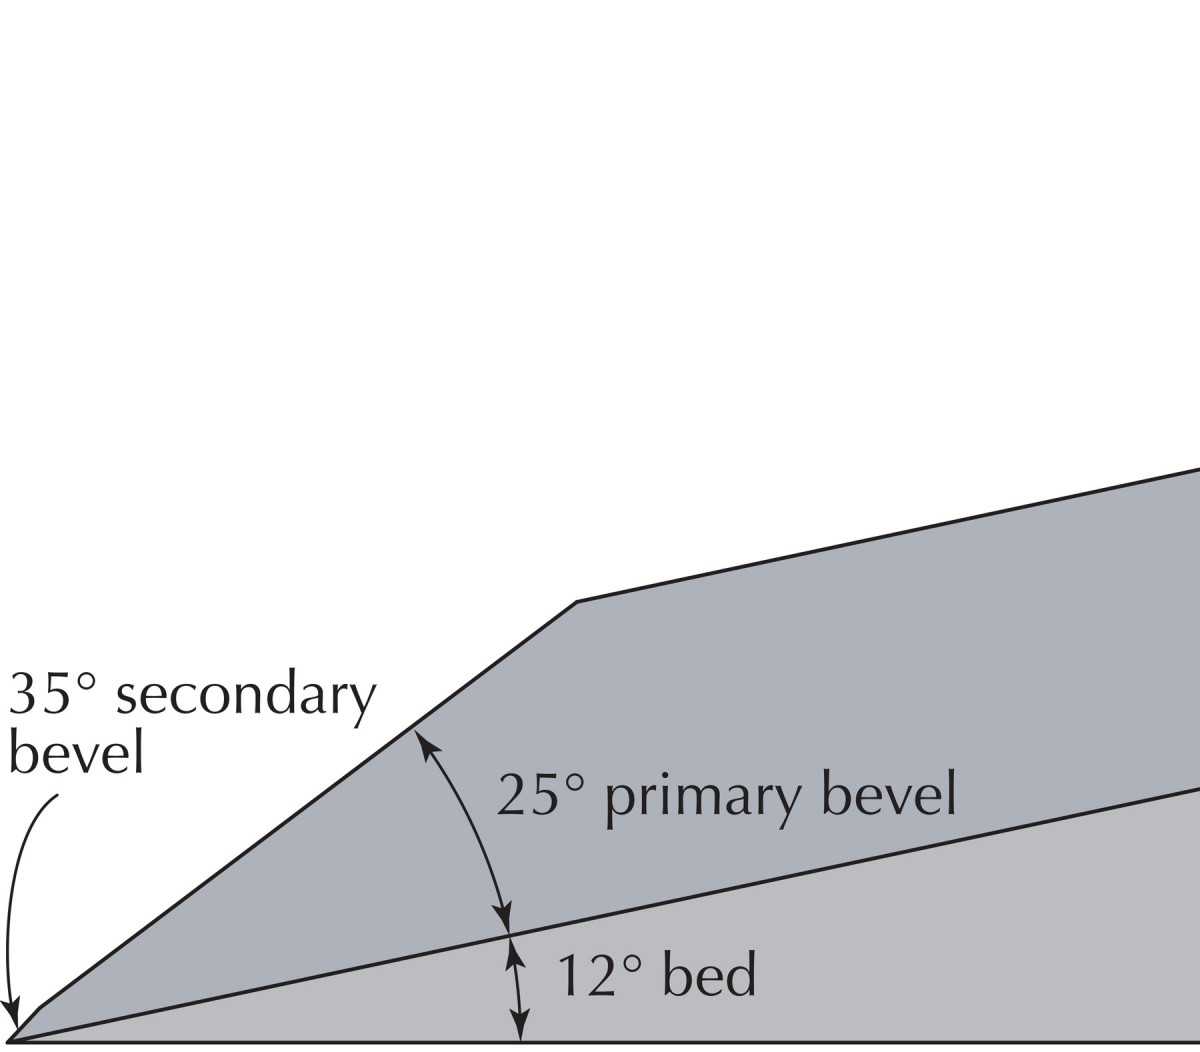
 So now that you know you can curve the blade, you might be wondering what angle you should sharpen the bevel of the cutter. Most cutters come with a 25° primary bevel ground at the factory. So you can hone your finished edge on the tip at 25° or something steeper – 30° is typical for most chores.
But if you want to stretch the tool to do other things, I recommend you explore even steeper angles. With all bevel-up tools, you can easily turn the tool into a high-angle plane or even a scraper by sharpening the tip of the iron at a steep angle. Steep angles make the tool harder to push, but the payoff is that they will also greatly reduce tear-out in figured woods.
Here’s an example. Let’s say you have a low-angle block plane with its 12° bed. If you sharpen the tip of the iron so it is 45°, then you have created a tool that will cut at 57° – a very steep angle useful for tropical hardwoods.

Flat. A quarter shown at 0°.
Then, when you are done with that tricky bit of work, resharpen the tip of the tool at 35° and you are back to the standard, off-the-rack cutting angle of 47°.
To take this example to an extreme, try sharpening a small 90° flat on the front of the iron, an idea I first heard from chairmaker Brian Boggs. You have now created a scraping plane. (Some people keep an extra cutter on hand for this operation.)
Easy to adjust. By honing a steeper angle on your cutter, you can change any bevel-up plane to a high-angle tool.
 Modifying the tool to work at different angles is the primary reason many people prefer the low-angle (12° bed) block plane to the standard-angle (20°) tool. Because the 12° plane starts 8° lower than its 20° cousin, it has a wider range of angles available. But I honestly think that’s a minor point overall.
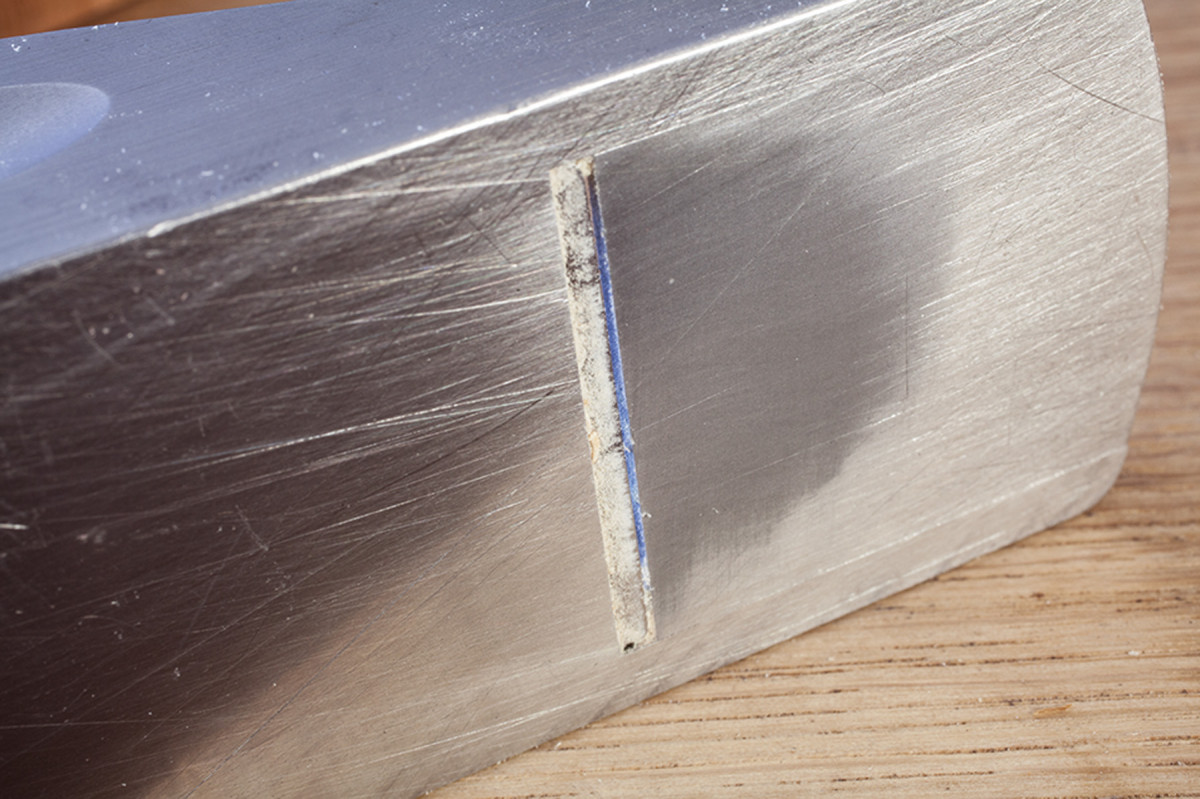
There is one other important thing to know about sharpening a block plane’s cutter and that is its “wear bevel.”
Whenever you use any plane, the part of the cutter that faces the workbench always endures more wear than the part of the cutter that faces the ceiling. This additional wear is called the wear bevel. On a block plane (and any bevel-up plane) the wear bevel occurs and grows on the flat back of the cutter.
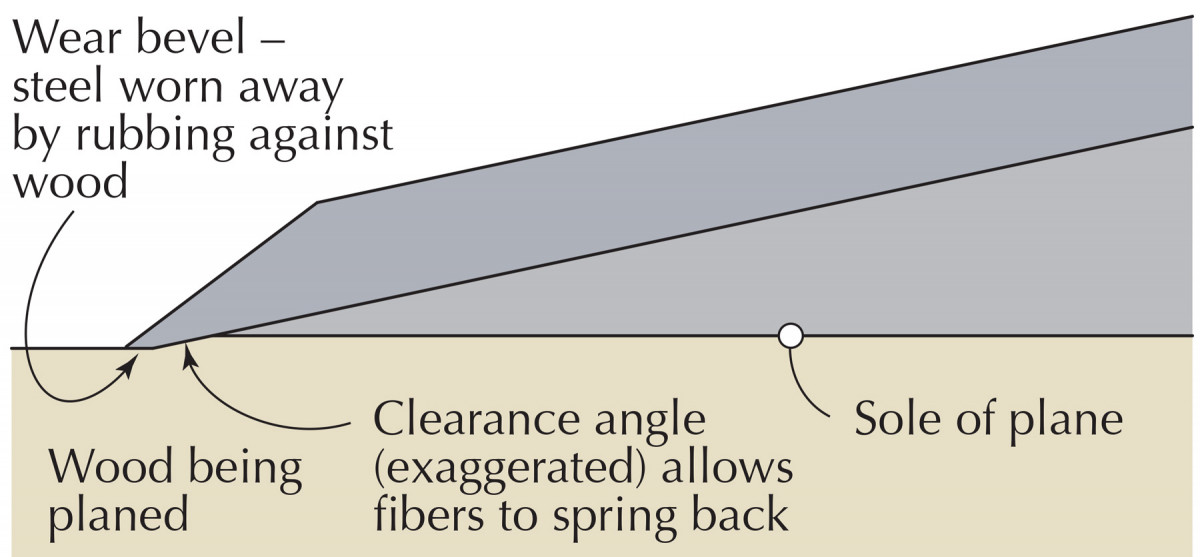
The wear bevel. The part of the steel that rubs against the work surface gets the most wear. If you don’t dress the back of your cutter, eventually you will create a knife-edge that will have difficulty making fine cuts.
Left unchecked, the wear bevel can grow to the point where the block plane won’t take a fine cut and cannot be properly sharpened.
There are several ways to deal with the wear bevel. You can grind the bevel until the wear bevel is gone; this is wasteful of steel. You can reflatten the back of the iron, starting on a coarse stone and work your way back to polished; this is wasteful of your time.

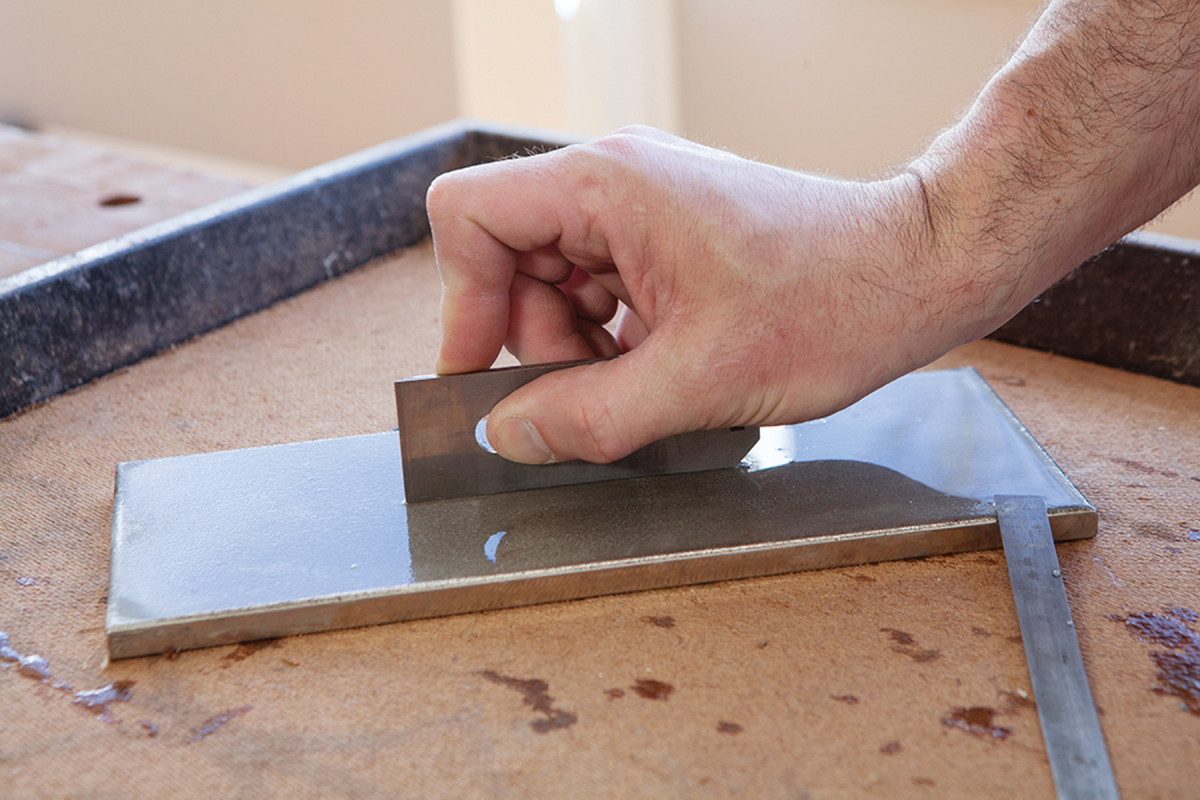
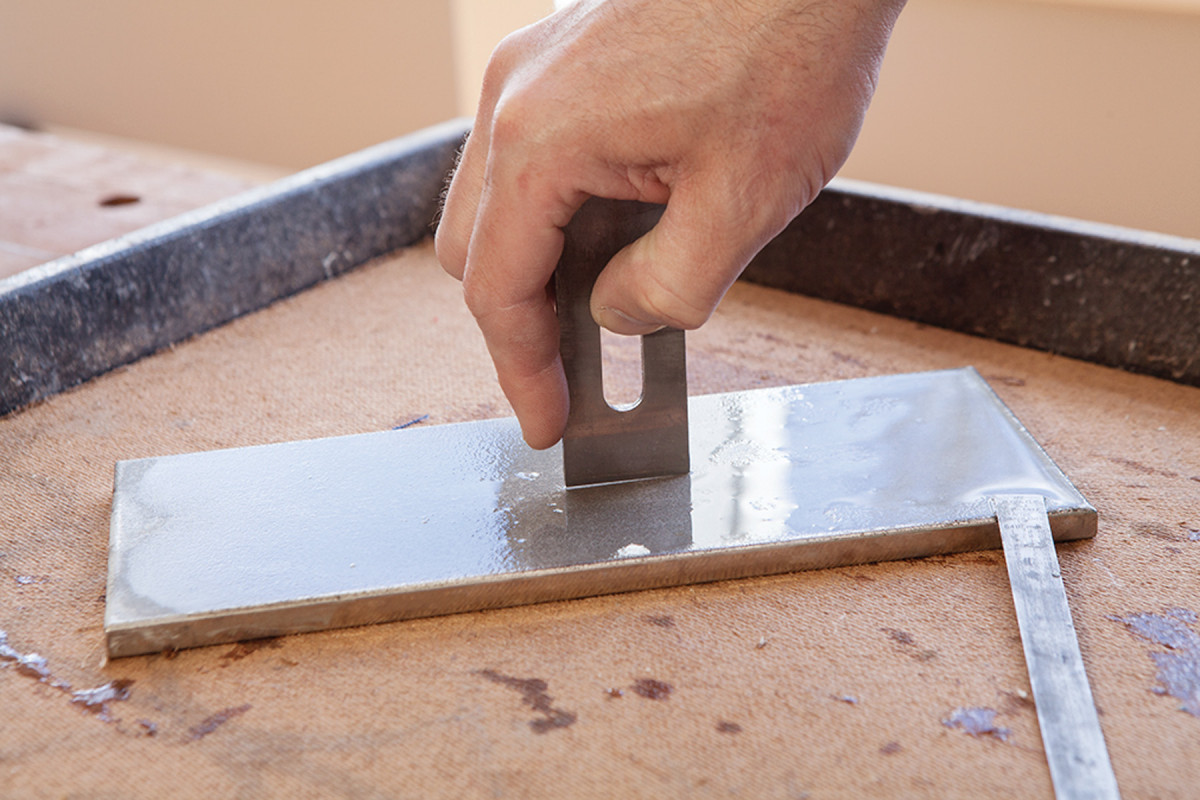
Thanks, David. By polishing the back of the cutter with the help of the ruler, you eliminate the problem of the wear bevel on a block plane (and other bevel-up planes).
The third, and my preferred, option is to use David Charlesworth’s “Ruler Trick” to dress the back of the iron. Place a thin ruler on your polishing stone and place the iron on the ruler. This allows you to polish the wear bevel and keep it in check.
Setting Up to Cut
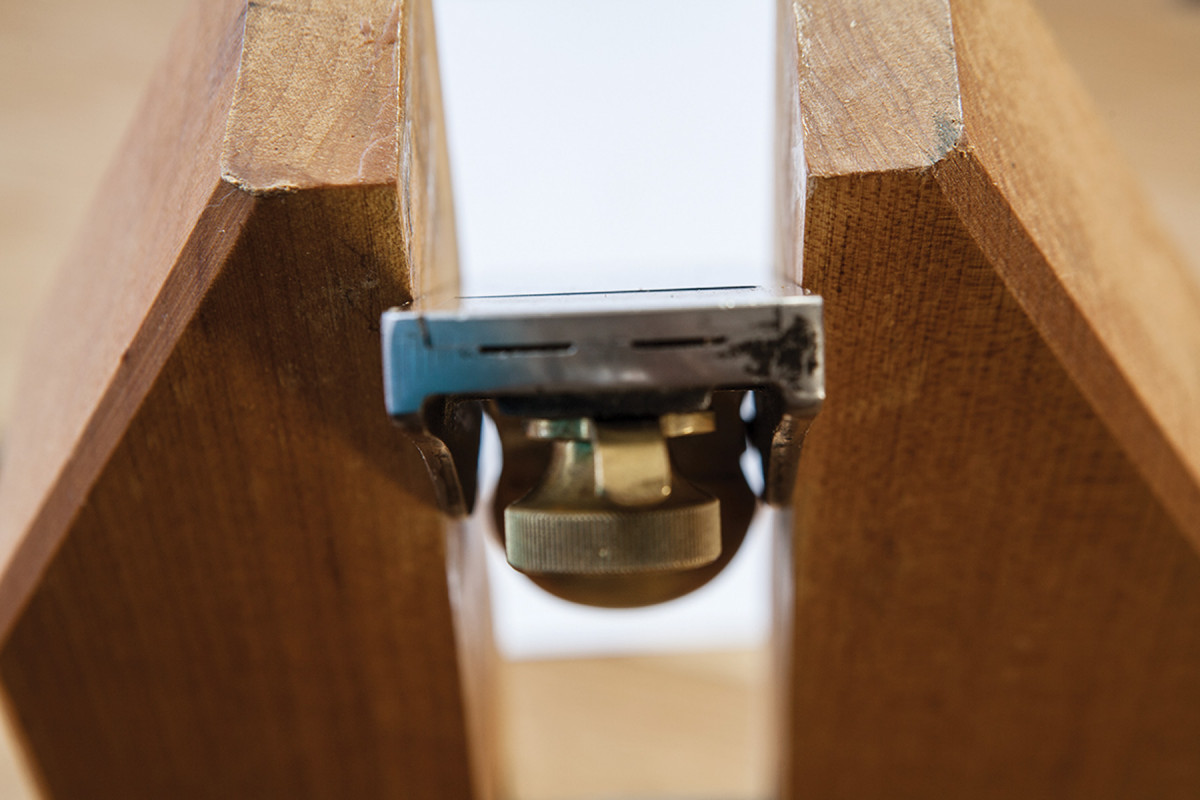
Look for the line. A black line all the way across the mouth is the first goal when setting the cutter.
Once you have your cutter sharpened, the next trick is to get the iron centered in the mouth. Here’s how I do it:
After securing the iron in the body of the plane (the iron should be held tight, but you should be able to move it with the adjuster), turn the tool over and sight down the sole with the bench or a sheet of paper as the backdrop. Increase the depth of cut until the cutter appears as a black line across the sole. Use your fingers to push the iron left and right until the black line appears the same thickness on the left and right side of the mouth.
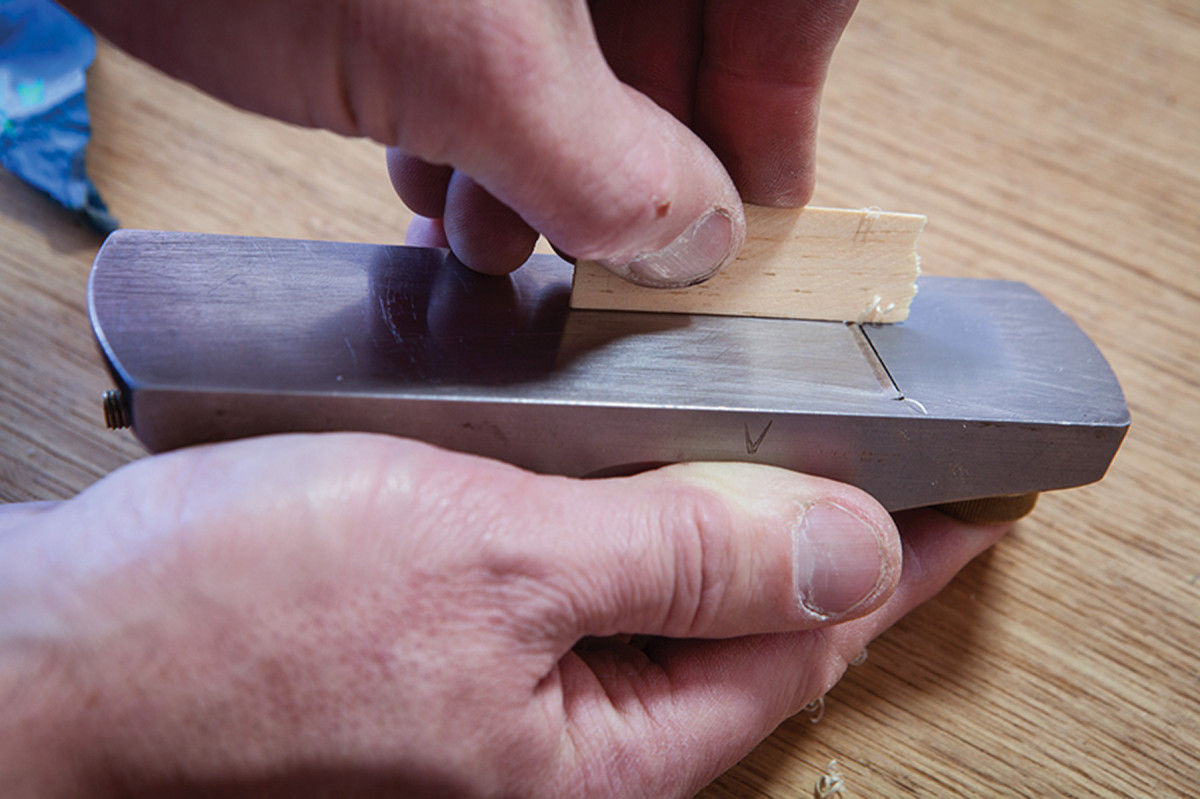
Feel the drag. A small chip of wood can tell you a lot about how the plane will cut – both how deep the cut is and if the cutter is centered in the mouth.
Retract the iron into the body then extend it just a bit. Take a small bit of thin wood and skim it along the sole and over the iron. You’ll be able to feel where the plane is cutting and whether the iron is cocked too far left or right.
Take a small hammer and tap the iron left or right until the cutter is centered in the mouth. Now you are ready to go to work.
Use – Basic & Beyond

Cut to the end. A sacrificial block is the most reliable way to prevent spelching and produce a flat surface. Note how the plane is skewed at the beginning of the cut.
Most people use a block plane for dressing end grain, so let’s start there. First moisten the end grain with alcohol or mineral spirits. This softens the wood and lubricates the cutting action.
To prevent spelching (splintering) on the far side of the cut, clamp a small sacrificial block where the plane will exit the cut. There are lots of other ways to prevent spelch (such as working only toward the center of the board), but this technique is the most reliable.
You are the bench. Clamp the work in a vise. Use your hands to press the work into the mouth of the tool and move the tool forward.
To start the cut, place the toe of the plane on the work and press firmly. Skew the plane about 20°. This reduces the tool’s effective cutting angle and makes it easier to start without chatter. Push forward.
What comes out of the mouth is a good test of your sharpening skills. If, after a couple passes, you can produce only dust, you probably need to sharpen up. If you are getting end-grain shavings, you are sharp enough.
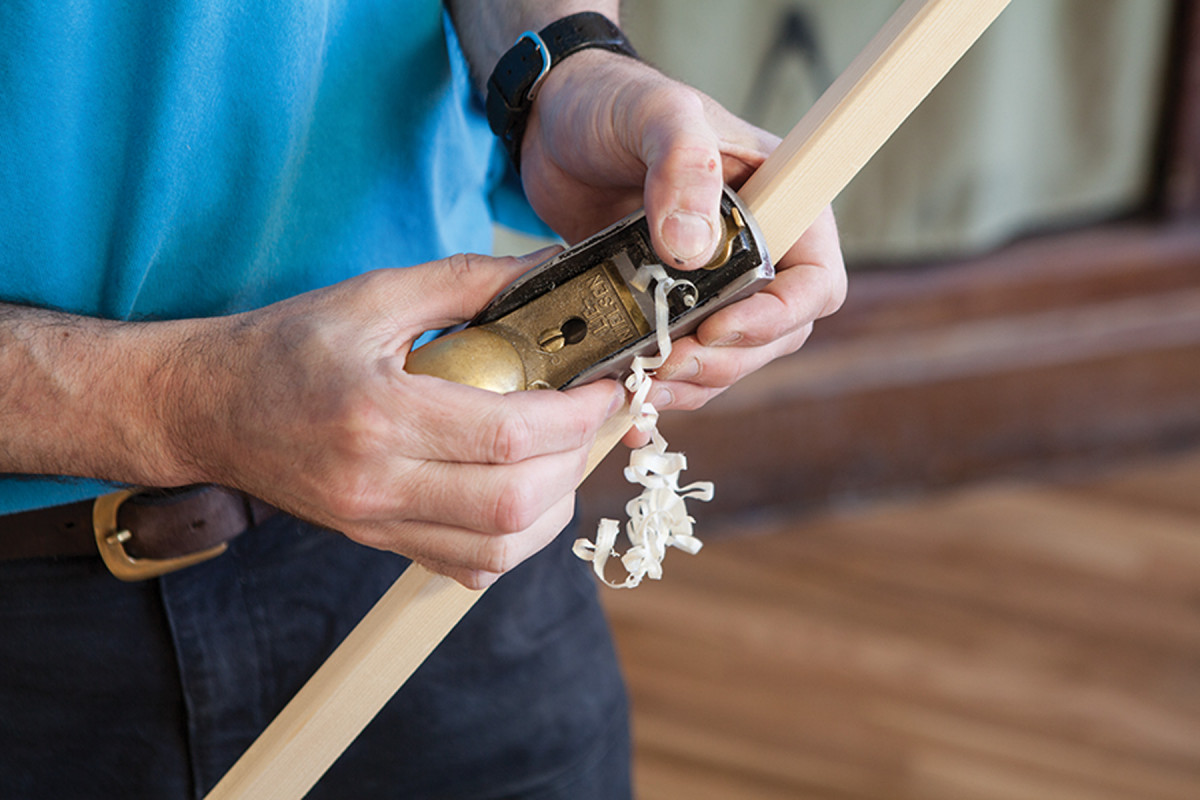
One common use for block planes is to clean up and round over chair spindles, removing facets left by other tools. I’ve seen some crazy jigs for doing this. The truth is you have the answer already in your hands – the answer is your hands.
A high heel. To end a touch-and-go landing on your work, lift the heel of the plane, not the toe.
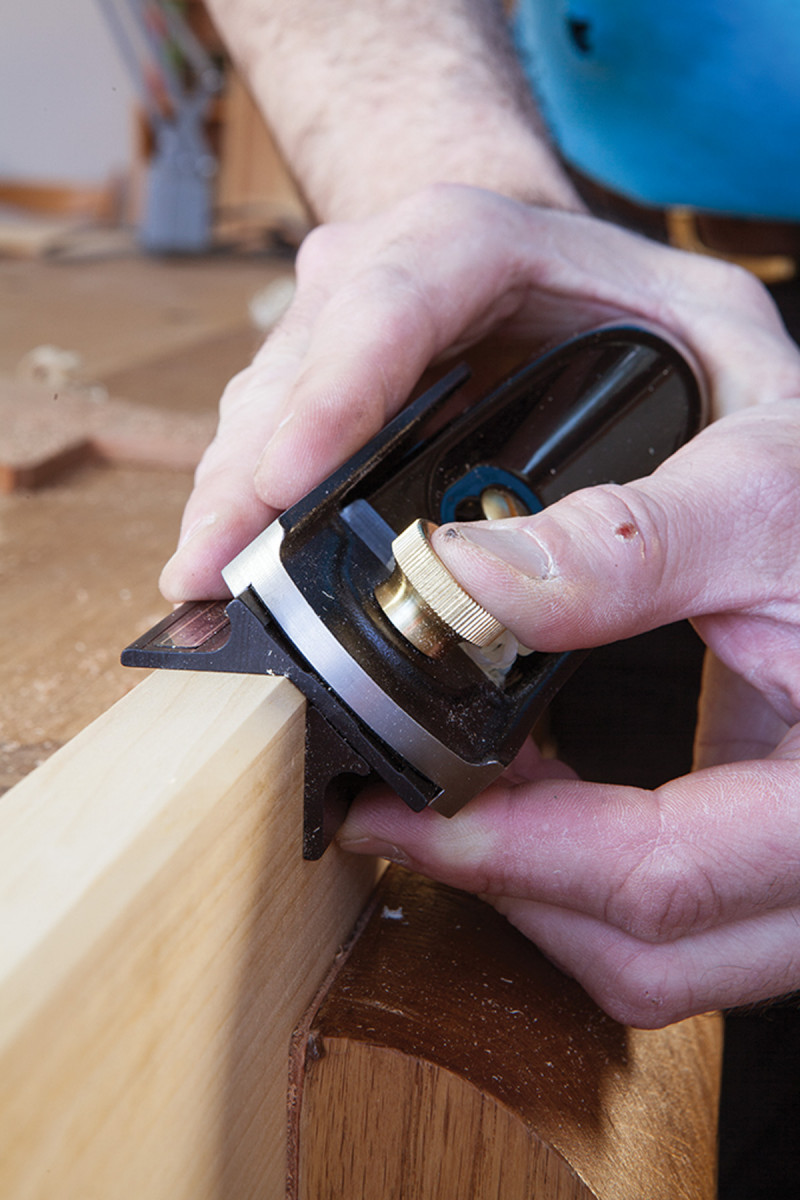
With one hand hold the block plane and with the other hand hold the spindle against the mouth of the tool. This provides support and control that will shock you at first. I also use this grip when cleaning up small mouldings.
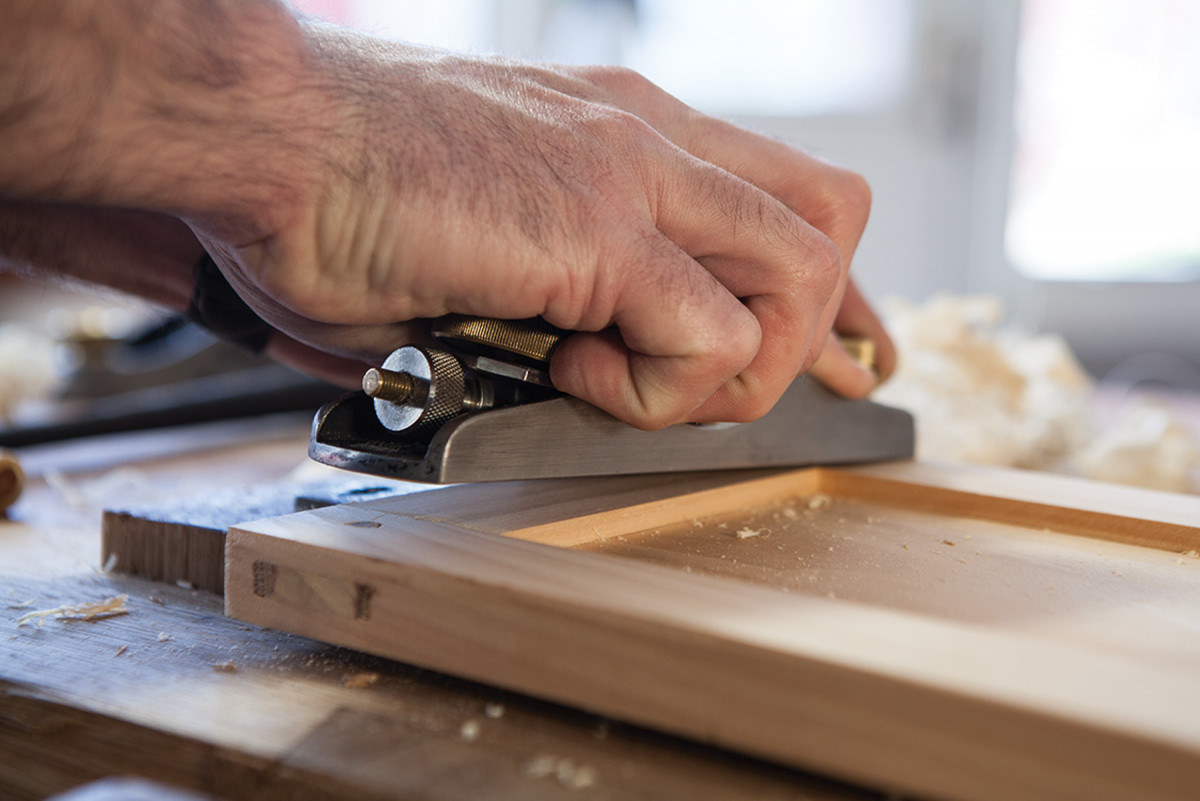
Another common use for the block plane is to level assembled joints that aren’t in the same plane – for example, a rail and stile of a door. There are lots of ways to do this, but here are a few tips:
Use a curved cutter so you don’t leave plane tracks. Skew the plane significantly. This reduces the effective length of the sole, fooling the wood into thinking you have a smaller plane. This allows you to get into areas long planes cannot go without a lot of work. And third, do touch-and-go landings on the wood to prevent ugly marks from the cutter.
To do this, put only the toe on the work with the rest of the plane about 5° off the wood. Push forward and land the plane on the wood. When you want to stop cutting raise the heel of the tool (not the toe) for a clean take-off.
A Note on Cleanliness
A foul mouth. The dust behind the cutter will build up and prevent the tool from taking a fine cut. This is especially a problem with resinous woods. Keep this area clean.
After using your block plane for a spell, you might notice that it sometimes behaves unpredictably – that it will stop taking a shaving when you think it should be cutting.
Some of that odd behavior could be a message that your iron is dull. But it also could mean that dust or debris has built up behind the cutting edge.
With block planes – especially the low-angle ones – a little dust behind the cutting edge can make the plane stop cutting predictably. Keep that area cleared out as you work, either with an old paint brush or a wipe of an oily rag.
Speaking of plane hygiene, your block plane will work better if you keep the bed clean and lightly oiled – I do this every time I sharpen the plane. Little bits of dust between the blade and bed can make the plane cut erratically.
A Toothing Blade

Flat & figured. A toothed iron is especially helpful for dealing with curly woods that cannot be easily planed.
Many manufactures offer a toothing blade as an aftermarket accessory for your block plane. Do you need one? Maybe. If you do a lot of traditional veneering with hot hide glue, the toothing blade helps you level the groundwork for the veneer without having to buy a dedicated toothing plane.
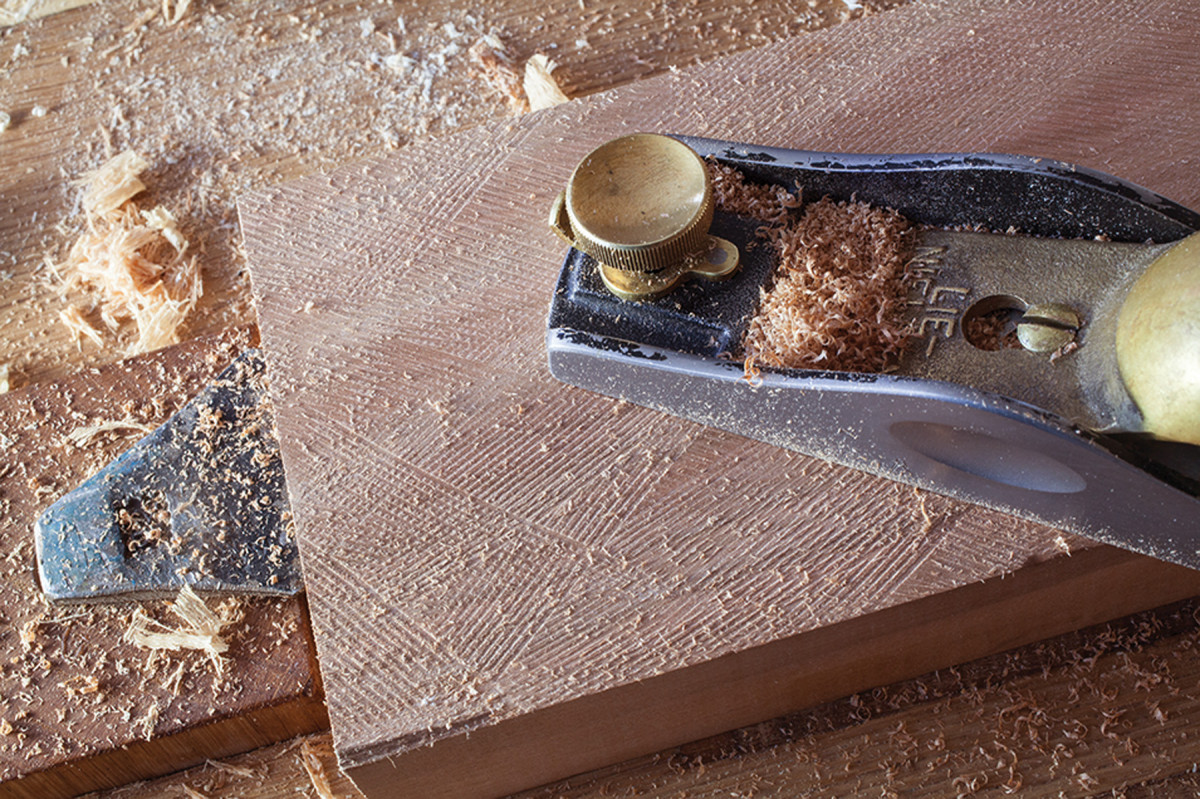
The toothed iron gets the board flat. Then come back with a fine-set plane to clean up the toothing marks.
The toothing iron is also ideal for surfacing crazy figured boards. If you tooth the entire surface lightly with a toothed blade, the tear-out will be minimal and you can easily get the board flat. Then you can come back with a freshly sharpened smoothing plane to clean up the toothing marks. This technique is a lifesaver with curly woods.
Chamfers With or Without a Guide
A wonderful cheat. This aluminum gizmo makes chamfers quickly and perfectly. I wish it were available for all block plane brands.
I make a lot of chamfers with my block plane. The simple way to do it is to count the strokes on each edge so your chamfers look consistent to the eye. If you need bang-on chamfers, a chamfer guide, such as the one sold by Veritas for Veritas planes only, is solid gold. The guide is adjustable so you can set the width of your chamfer. Then you simply plane the edge until the tool stops cutting. All your chamfers will be perfect.
Shooting Small Parts
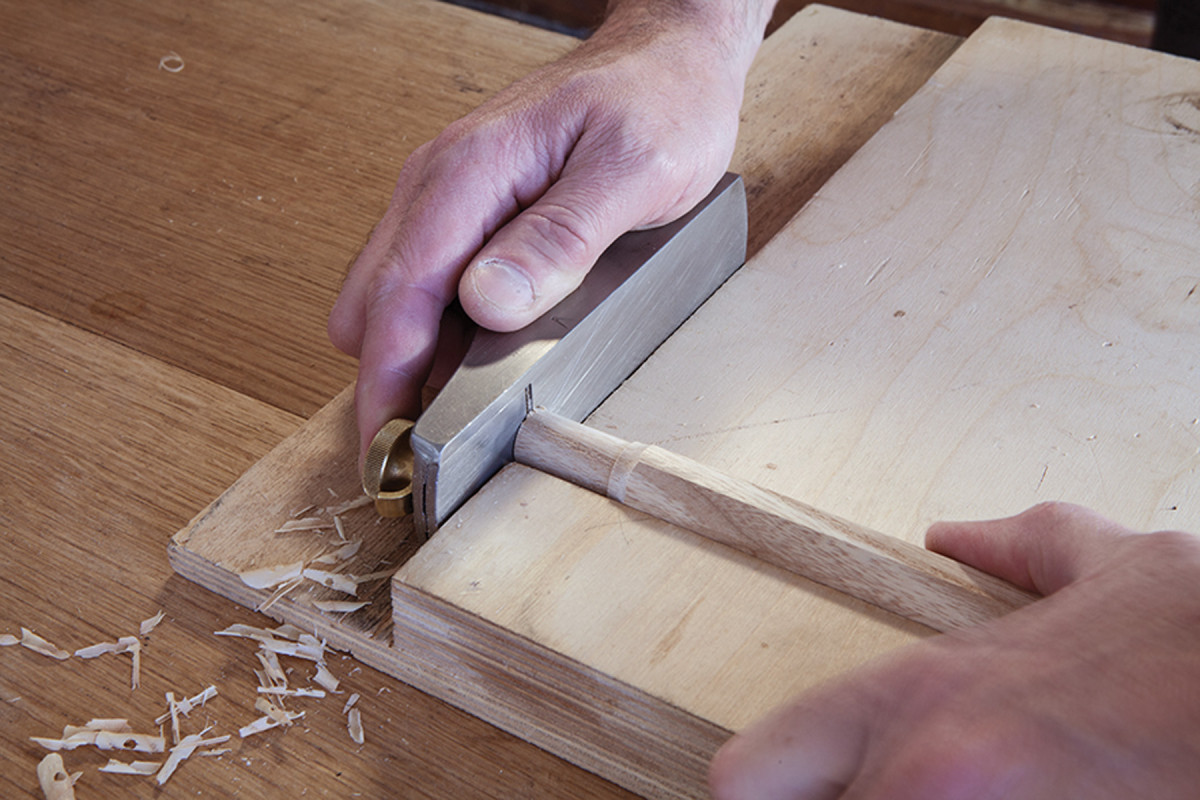
A good shot. When fitting small parts, a block plane and a shooting board will outwork any piece of power equipment.
Fitting small parts can be a pain because it can be difficult to hold them or downright dangerous to do on a machine. A block plane and a bench hook can help you shoot muntins and mullions, for example, to exact length. This process allows you to sneak up on an exact fit.
A block plane doesn’t have the mass to shoot the end grain of big parts, but it will introduce you to the idea of shooting with a plane. And shooting is a great skill to have for fussy fitting jobs.
You also can shoot small miters with a block plane, which is ideal when adding small mouldings around a carcase (or the baseboard in a room, for example). A miter shooting board takes only a few minutes to make from scrap.
Leveling Legs
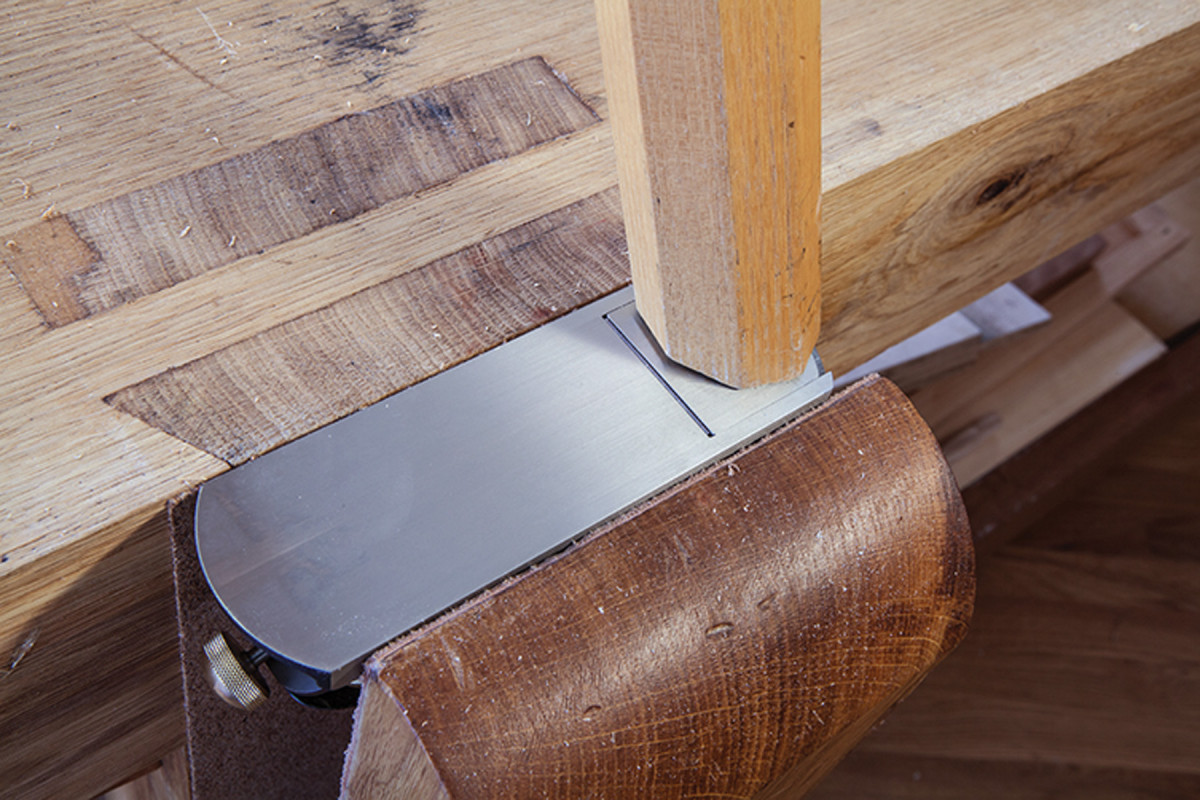
Flat-footed. Pull the offending chair leg across the mouth of the plane to trim it. Check to see if the chair wobbles and repeat if necessary.
If you have a chair that rocks because it has legs of unequal length, you can fix that quickly with a block plane. Clamp the plane upside down in your face vise so the sole is co-planar to the benchtop. Place the wobbly chair on the bench. Place one of the long legs in front of the mouth of the block plane and pull the leg toward you and over the iron.
This will slice the leg until the chair sits flat-footed on the floor – thanks to chairmaker Peter Galbert for this trick.
Tip: Before planing the feet, break the sharp rim of the feet with sandpaper to prevent spelching.
Sharpening Pencils
Last but not least, I keep my pencils sharp with my block plane. It’s as fast as a knife and leaves a nicer point. Simply rub the beveled section of the pencil across the mouth. Rotate the pencil a few degrees and repeat. (No the pencil lead doesn’t hurt the cutter.)
There are probably 100 more great tricks with a block plane I’ve forgotten to mention in this article, but you can discover them for yourself by sharpening up one of these tools and keeping it on your bench.
Here are some supplies and tools we find essential in our everyday work around the shop. We may receive a commission from sales referred by our links; however, we have carefully selected these products for their usefulness and quality.