We may receive a commission when you use our affiliate links. However, this does not impact our recommendations.
 Machine joints that look hand-made.
 Machine joints that look hand-made.
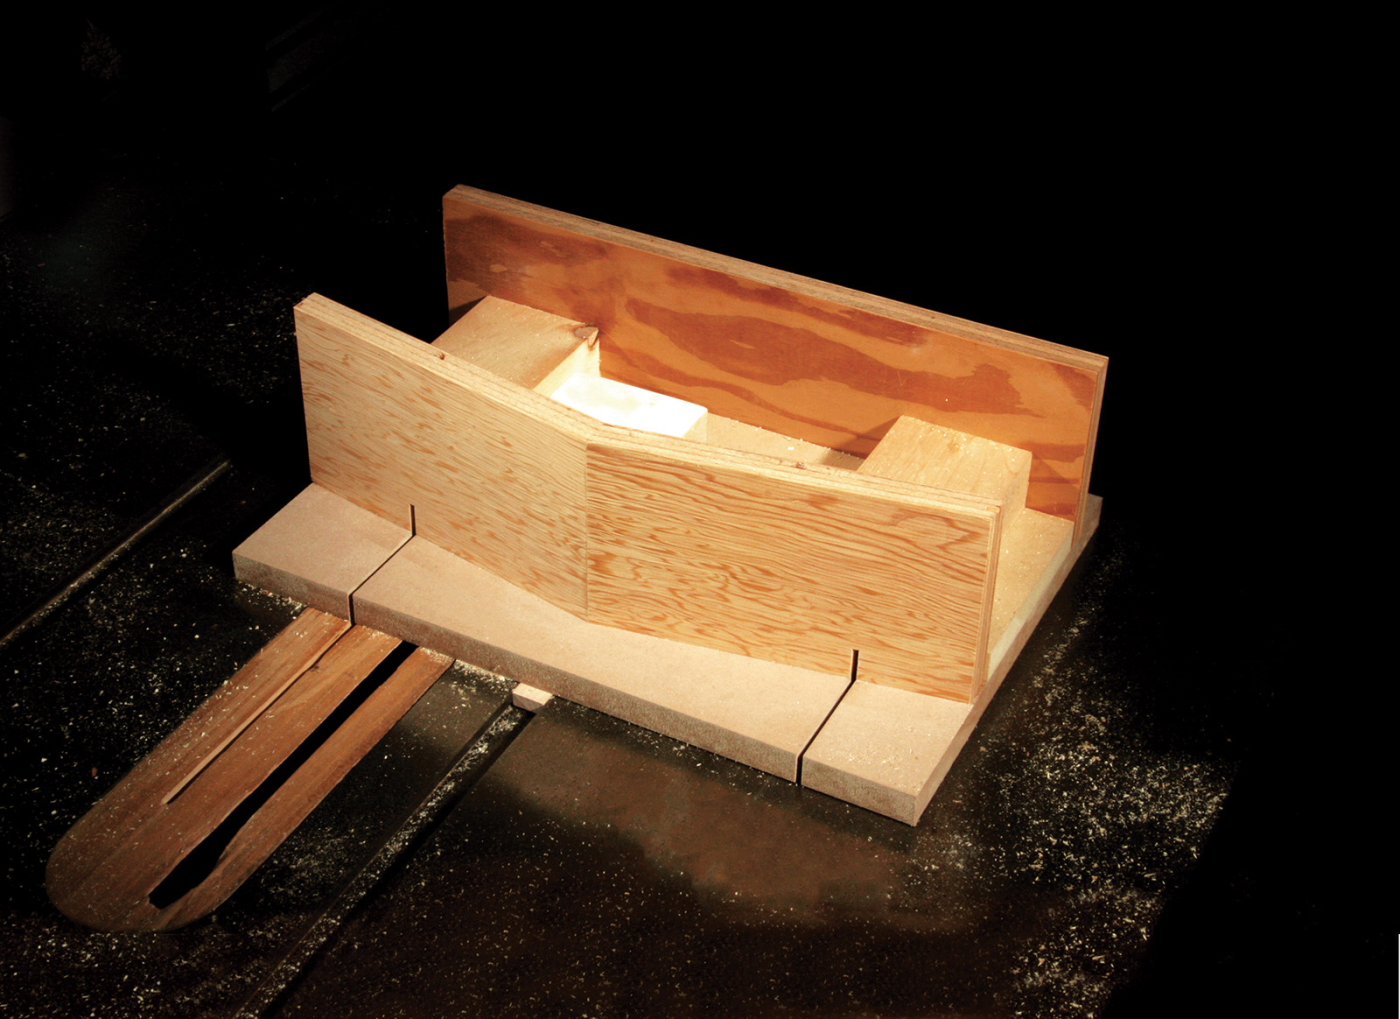
Imagine cutting through dovetails with pins and sockets spaced any way you like—as if they were cut by hand. Now imagine cutting them without using a dovetail saw or a router. The humble fixture showcased above allows you to do just that—using your tablesaw. It allows cutting both pins and tails that require only minimal cleanup, and it can be used to make unique pieces or production runs (simply clamp a stop on the fences to locate the identical parts).
 This fixture is easy to build and it can be adapted for use on virtually any saw. The first time I used this method to cut dovetails, they came out perfectly—and they have ever since. Am I that good? Nah, it’s because this fixture is that easy to use.
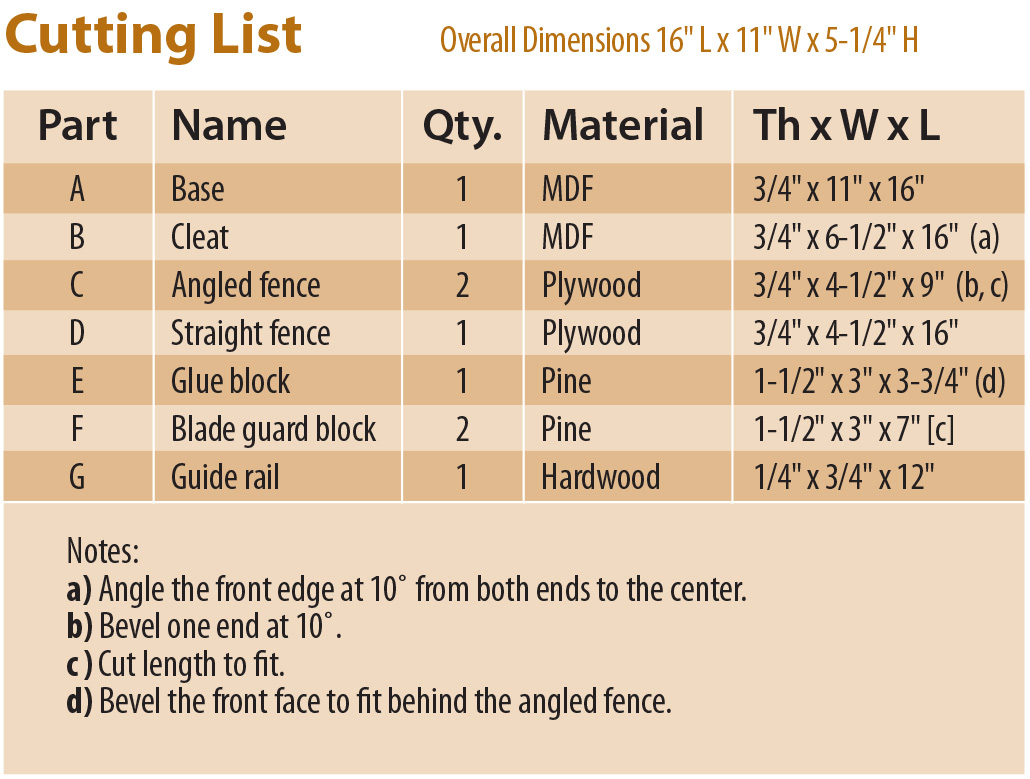
Table Saw Dovetail Cut List
 Build the fixture

 Build the fixture
The fixture’s length depends on 1) the distance between your saw’s two miter slots, and 2) the width of the pieces it’s designed to cut. This fixture is sized for use with slots spaced 10″–12″ and workpieces up to 5″ wide (Fig. A and Cutting List). Use a hardwood such as maple to make the guide rail; use pine, plywood or MDF for the other parts. Cut the base (A) to final width and length.
Make the cleat (B) from a rectangular blank. On the leading edge, precisely cut 10˚ angles that meet at the middle. This angle determines the slope of the pins and sockets. (To change the slope, use a different angle.) Glue the cleat to the base, making sure its straight back edge is parallel to the back edge of the base.
Miter one end of each angled fence (C) at 10˚. Then cut both fences to length—it’s OK if they’re longer than the base, but they shouldn’t be shorter. Glue the fences to the cleat’s angled edge, making sure they’re square to the base—install shims, if necessary. Similarly, cut and glue on the straight fence (D). Shape the glue block (E) to fit behind the angled fences. Clamp the block in your vise and have at it with a hand plane. Then glue it in place. Cut, fit and glue on the blade guards (F).
Install the guide rail
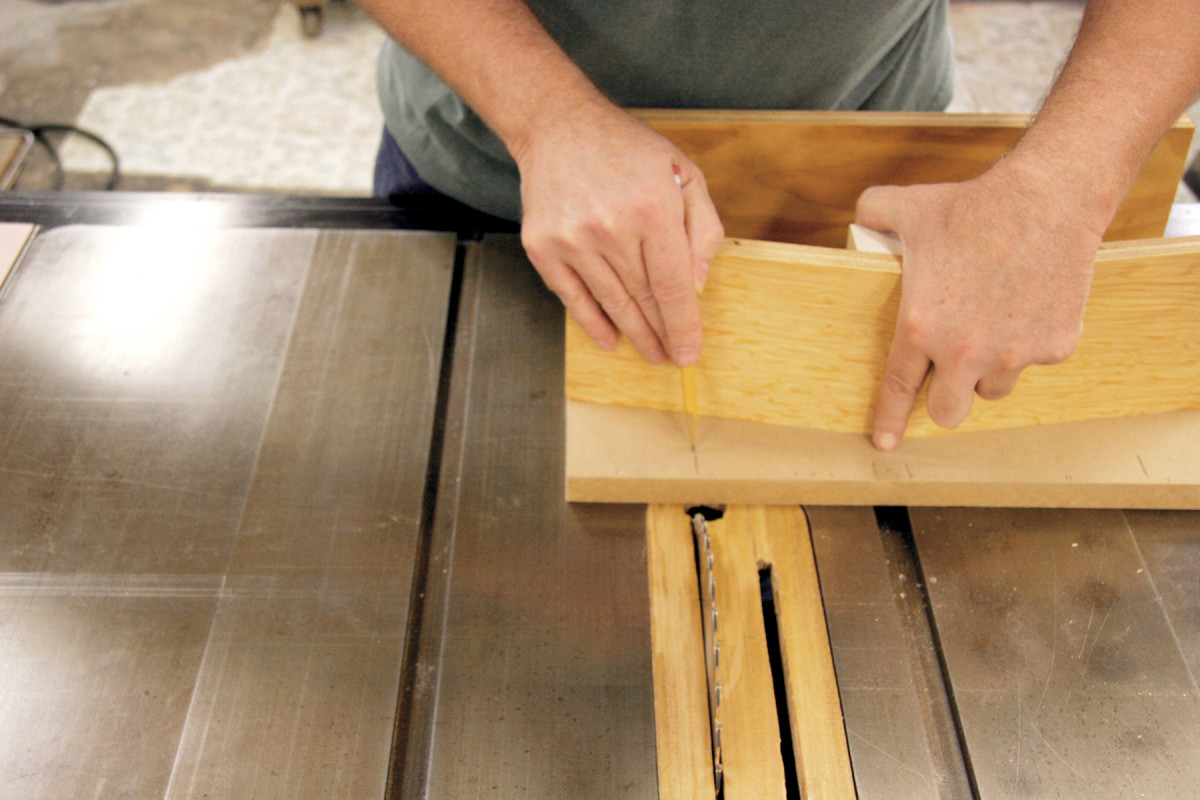
1. Locate the guide rail so the fixture allows positioning the blade on both sides of the angled fence. Find the sweet spot by marking a possible location for the rail and moving the fixture from one miter slot to the other.
Fit the guide rail (G) to your saw’s miter slots. The rail should fit snugly yet slide easily, without binding or wobbling. Locate the guide rail by roughly centering the fixture (with its angled fences facing the blade) on one of the tablesaw’s miter slots (Photo 1). Mark the slot’s location on the fixture. This mark represents a possible location for the guide rail. Move the fixture so the mark is centered on the saw’s other miter slot. At both locations, the goal is for the blade to be roughly centered on either the right or left angled fence. Miter slot locations and their relation to the blade vary from saw to saw, so you’ll probably have to try a few different guide rail locations to find the one that works the best. Mark this “sweet spot” on the front edge of the fixture’s base.
Flip over the fixture and clamp one end of the guide rail to the base at your mark. Drill a pilot hole and install a 3/4″ #6 screw. With the fixture’s straight fence facing the blade, slide the guide rail into one of the saw’s miter slots. Then use the straight fence and a framing square to square the fixture with the saw’s rip fence (which, of course, is parallel to the blade). Hold the fixture in position and precisely mark where the rail extends beyond the back edge. Remove the fixture, flip it over and use this new mark to locate the guide rail. Clamp the rail in position, and install another screw. Test the guide rail’s fit in both miter slots. If the fixture doesn’t slide smoothly, rub paraffin wax on the rail and in the grooves. If the fixture still resists, use a rabbet plane to remove a tiny amount of wood from one side of the rail. Try the fixture again and repeat until the fixture glides smoothly in both slots. Remember that any side-to-side movement in the slots is bad.
Cut pins
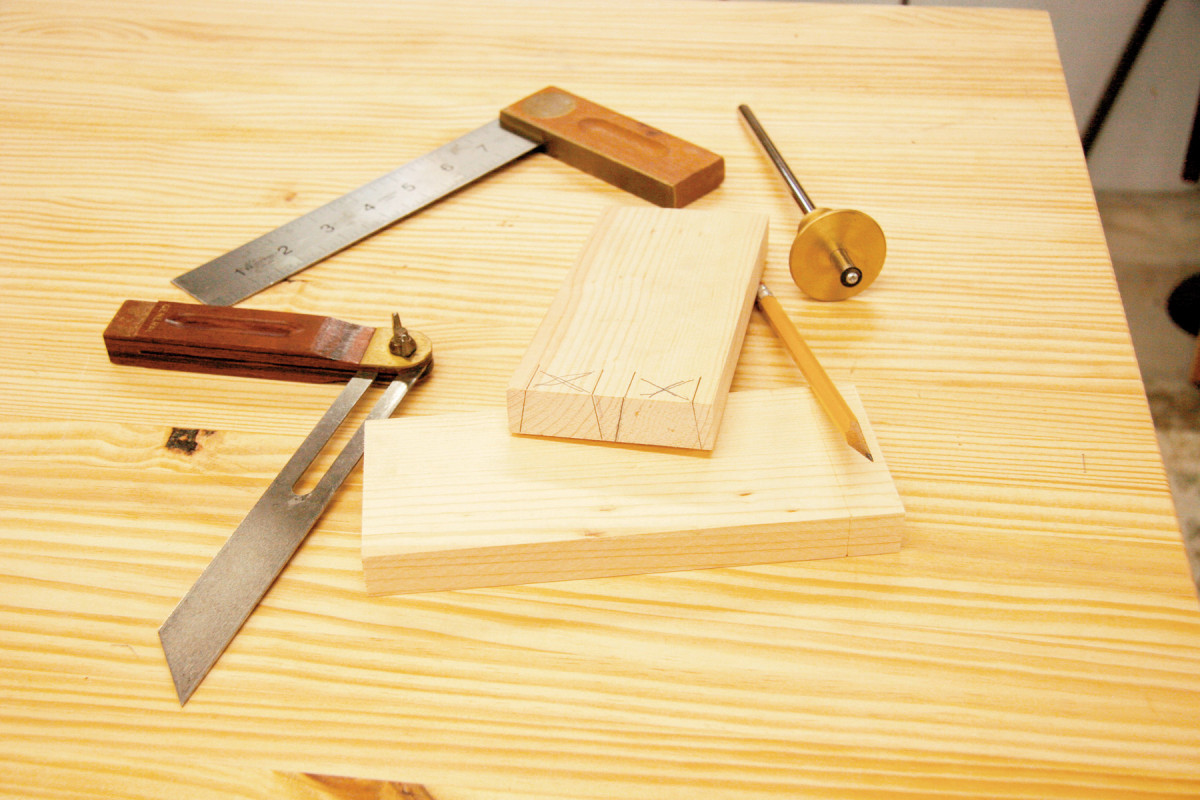
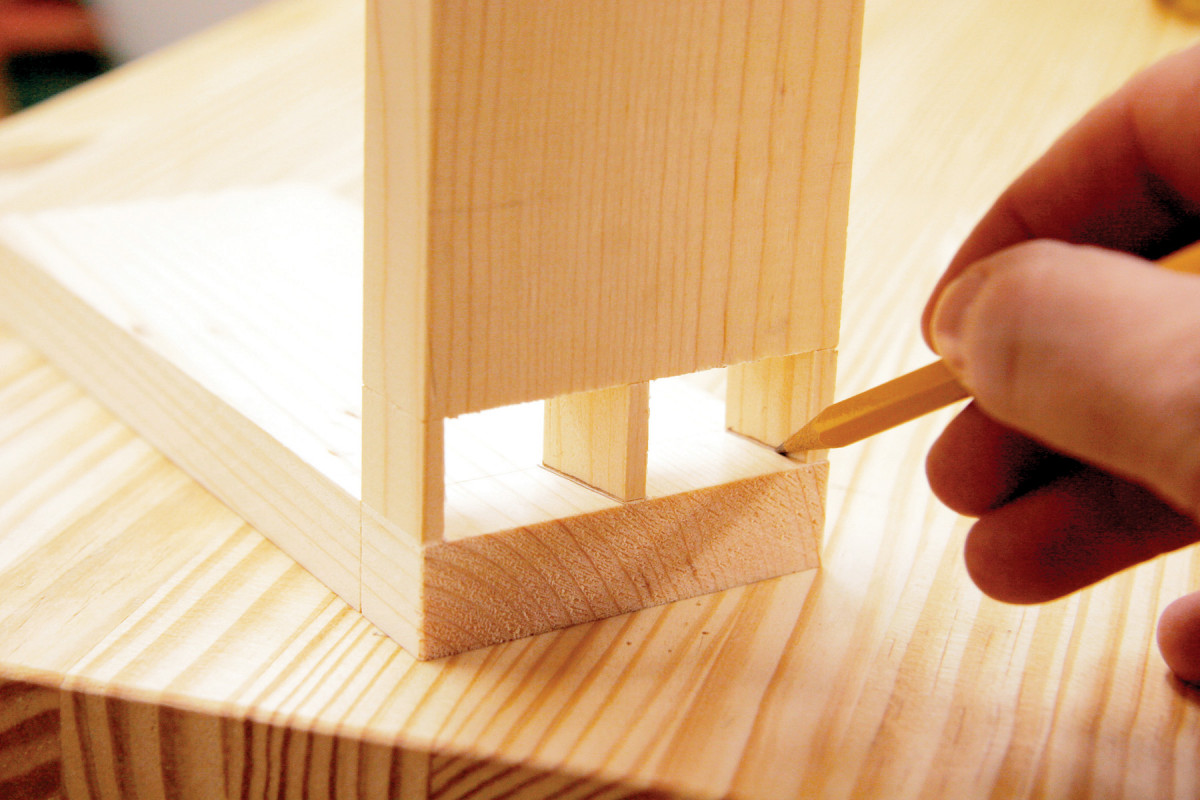
2. Lay out the pins as if cutting dovetails by hand. Their slope must match the angle of the fixture’s fences. Mark the waste on the outside face (where the pins are wide).
Start by laying out the pin board (Photo 2). Use a scoring tool to mark the length of the pins—their length is determined by the thickness of the tail board. The scored marks will prevent tearout when you remove the waste between the pins. Use a sliding bevel square to mark the angled pins. Set the bevel to match the angle of the fixture’s front fence (80˚ in this case). Mark the waste between the pins.
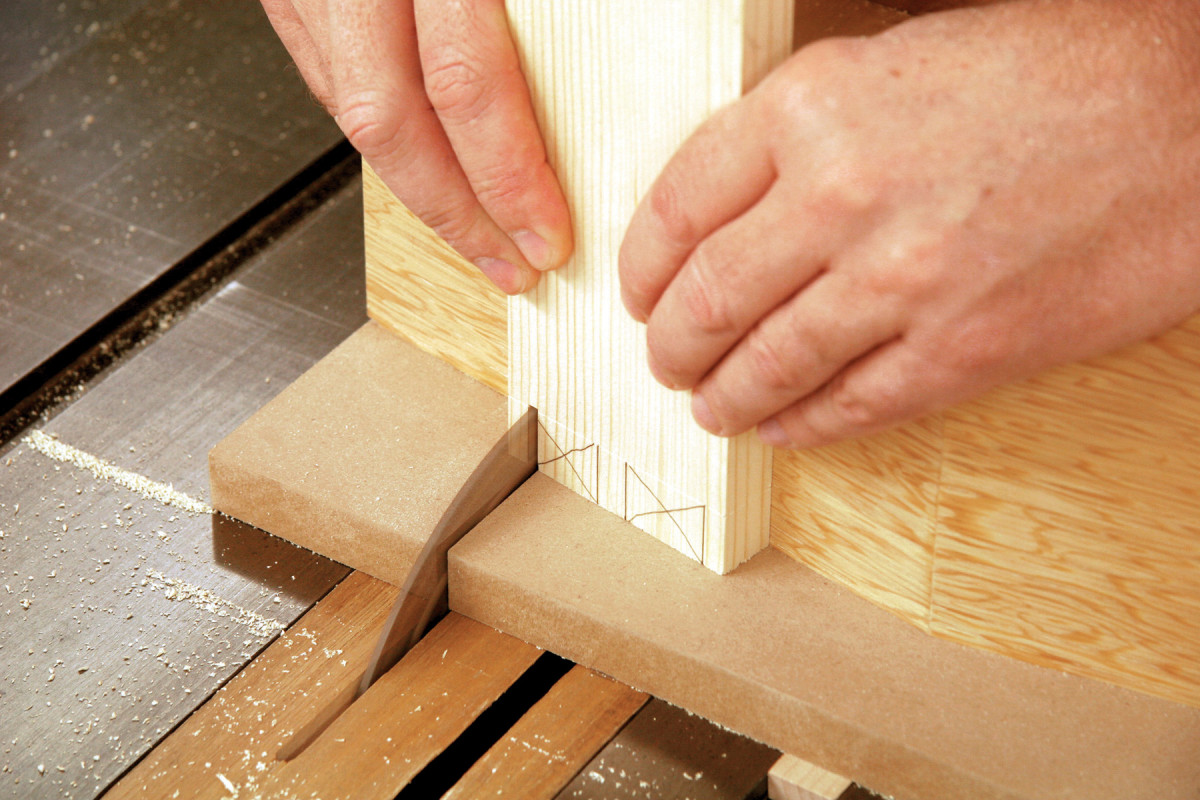
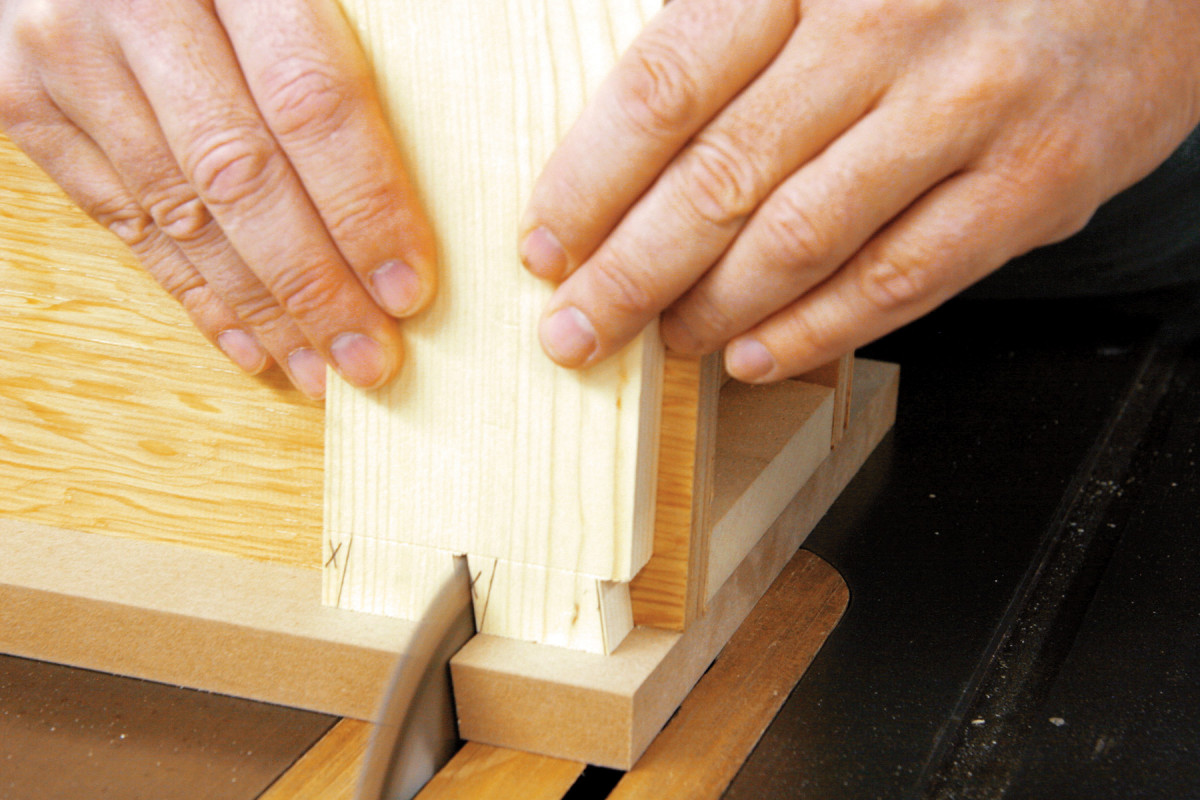
3. Cut the first half-pin. Use the scribed layout line to set the blade height. The fixture’s angled fence automatically sets the slope. Clear the waste by making successive adjacent cuts.
Place the workpiece on the fixture with its inside face against the angled fence—make sure it’s on the correct side of the fence. Use the scored mark to set the blade height. I install a rip blade to make these cuts because its flat-topped teeth cut flat shoulders, virtually eliminating clean-up.
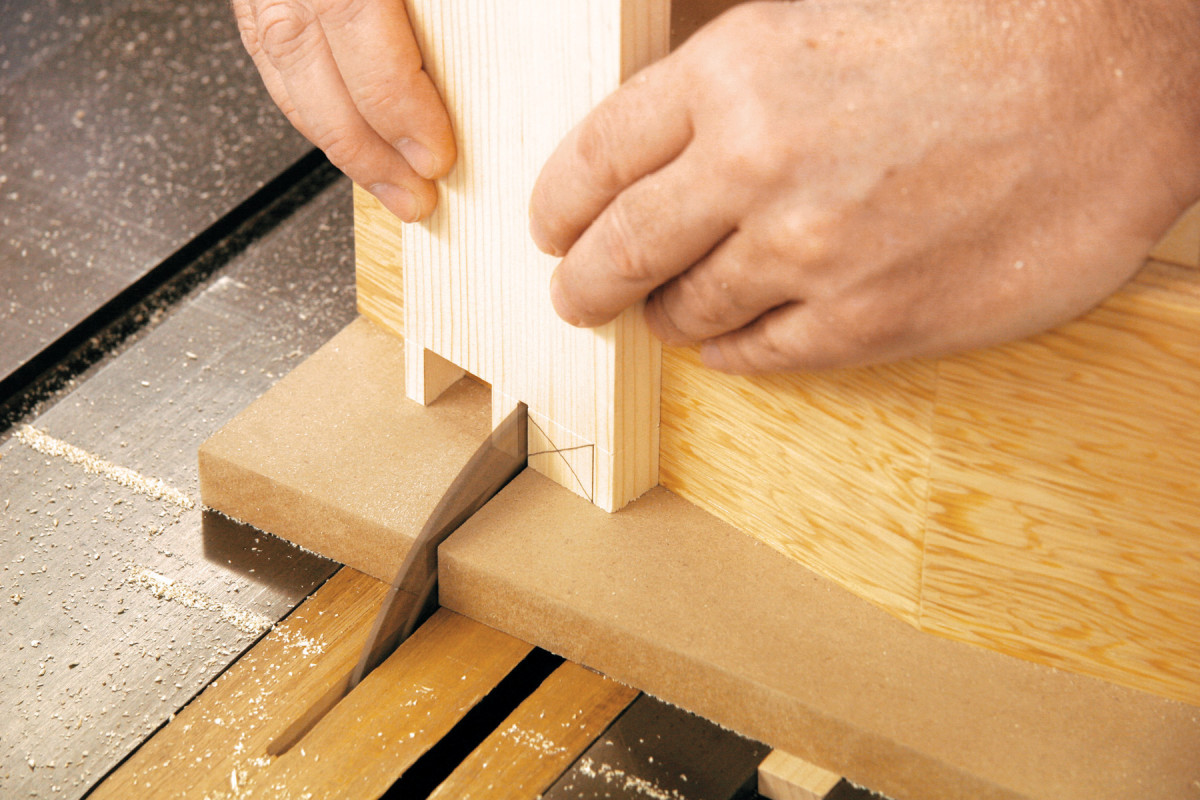
4. Jump to the same side of the next pin and repeat the process. Use a rip blade to make these cuts—its square-topped teeth leave flat shoulders.
Make a cut on the waste side of the half-pin (Photo 3). Reposition the workpiece and make additional passes to clear the waste, stopping just shy of the line indicating the next pin. Repeat this process to cut the remaining pins that slope in the same direction (Photo 4).
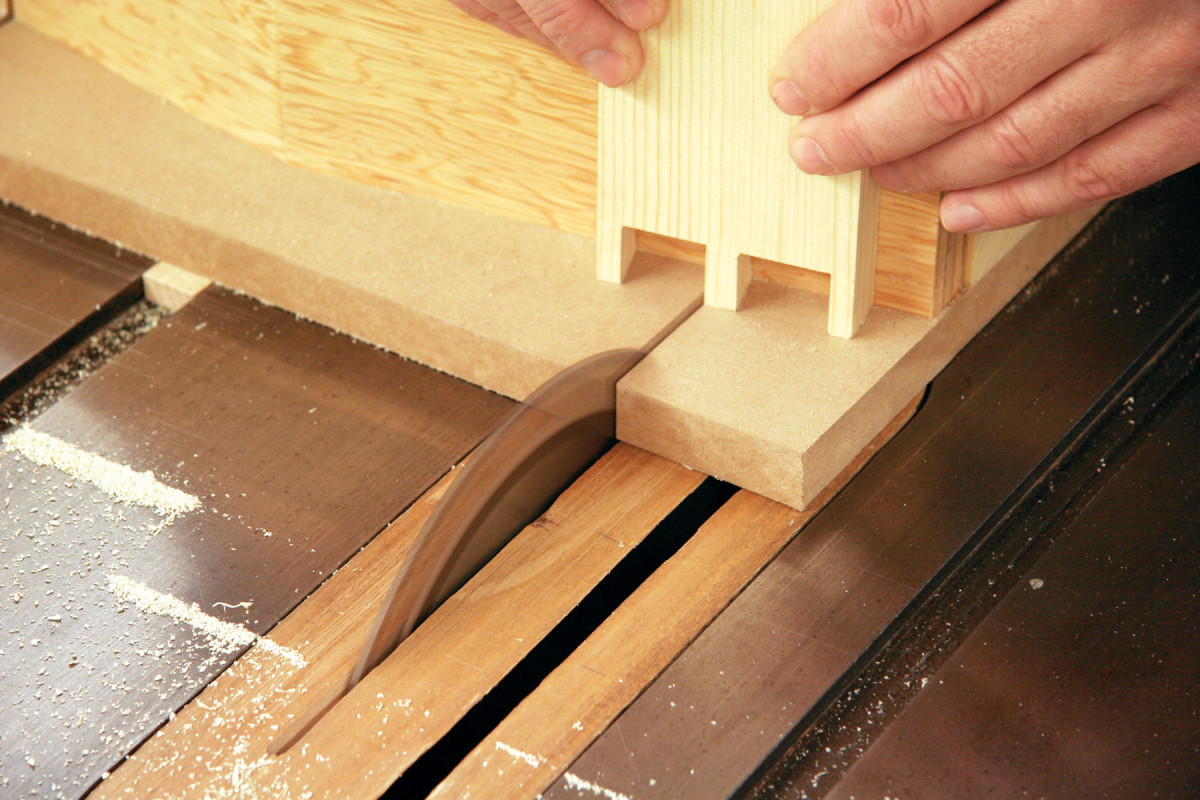
5. Finish cutting the pins by moving the workpiece to the other side of the angled fence. This side slopes the cut in the opposite direction.
Then move the fixture to the other miter slot to cut the pins that slope in the opposite direction (Photo 5). Nibble out the waste as needed.
Cut tails
6. Use the pins to locate the tails. Use a sharp pencil, so there’s no gap between the pencil mark and the pin.
Use the pin board to mark the tails on the tail board (Photo 6). Tilt the saw’s blade to match the tails’ slope (10˚). Whether the blade tilts to the left or right doesn’t matter. I switch from the rip blade to a general purpose blade to make these cuts. Both blades leave ridges at the top of the cut that have to be removed later, but the ridges left by the general purpose blade are smaller.
7. Tilt the blade, turn the fixture around and use its straight fence to cut the tails. Make all the cuts that angle one direction, then flip the workpiece to its opposite face to complete the job.
Install the fixture with its straight fence facing the blade. Place the workpiece on the fixture and raise the blade to meet the scored line. Next, carefully position the workpiece so the blade will cut away all but a sliver of the sloped line. The placement is critical because these angled cuts determine the joint’s fit: Remove too little and the joint won’t go together; remove too much and the joint will be too loose.
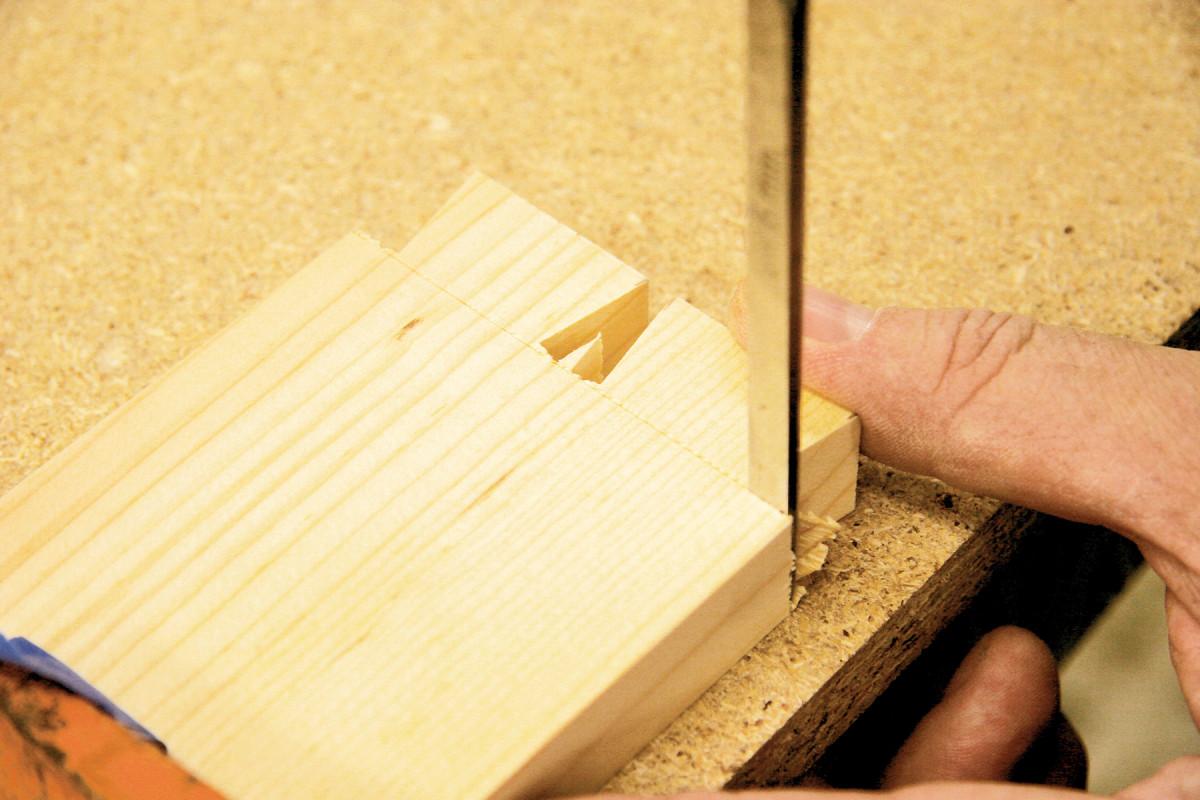
8. Square the shoulders at the scribe line, using a chisel.
Make angled cuts on one side of each tail (Photo 7). Then flip over the stock to cut the other sides. Use a chisel to remove the waste that remains between the tails (Photo 8). Keep the chisel handy for fine-tuning when you test fit the joint.
Here are some supplies and tools we find essential in our everyday work around the shop. We may receive a commission from sales referred by our links; however, we have carefully selected these products for their usefulness and quality.