


We may receive a commission when you use our affiliate links. However, this does not impact our recommendations.
Designing and building kitchen cabinets is a big project, and there are lots of things to consider. Before you can make a cut list, you’ve got to know how to incorporate hardware like drawer slides, hinges, Lazy Susans and pantry pullouts. You’ve got to think about material yield, installation, tools you’ll need and much more.
You can’t anticipate everything, but here are a few tips that will make your project easier.
1. Build Frameless Cabinets
If you like the look of frameless European cabinets, you’re in luck, because most of the hardware available today is made for that style. Even if you prefer a more traditional look, you can get it with frameless construction.
2. Make Your Base Cabinets 23-3/4” Deep
Most sheet goods are 48-1/2” wide. After you trim the factory edges and lose 1/8” for the saw kerf, you’re left with about 47-7/8.” Making your cabinets slightly less than 24” deep allows you to get two rips out of a sheet of plywood.
3. Make Upper Cabinets 11-7/8” Deep
Again, this is to allow the best material yield. You’ll be able to get four rips per 48-1/2” sheet when you make your upper cabinets just shy of 12” deep.
4. Space adjustable shelf holes 32mm apart, and make the first row of holes 37mm from the cabinet’s front edge
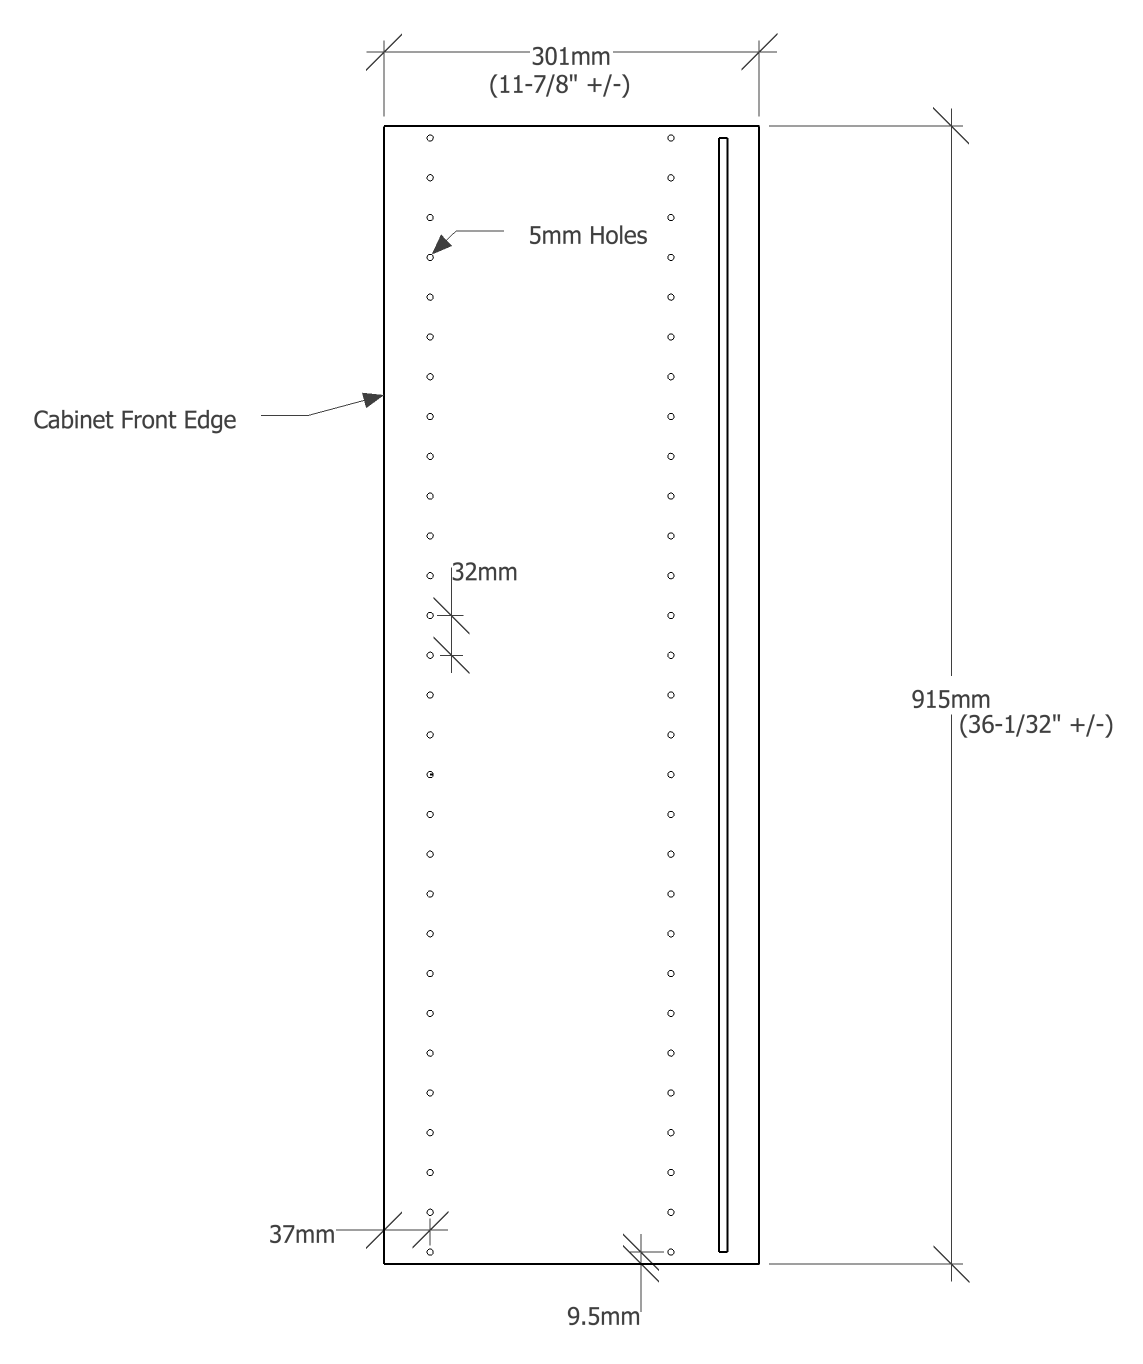
An upper end panel made to 32mm System specs.
Almost all hinge plates and drawer slides from major manufacturers are designed to work with the 32-Millimeter System. You can use this system to accommodate a lot of different hardware. See the drawing above.
5. Know How to Convert from Inches to Millimeters
Some of the hardware you buy will probably come with instructions and templates in millimeters, so it may be helpful to know how to make the conversion from millimeters to inches. There are 25.4 millimeters in an inch. That means that to convert inches to millimeters, you need to multiply by 25.4, so 36 inches is 914.4mm (36×25.4= 914.4).
6. Use a little Modular Arithmetic
This might seem scary, but it’s easy. If you divide the height of your cabinets by 32mm, you should have a remainder of 19. This allows a hole spacing of 32mm, and the first hole will be located at 9.5mm from the bottom edge. Use your calculator’s mod key to divide a number and find the remainder. Example: 851 mod 32 = 19.
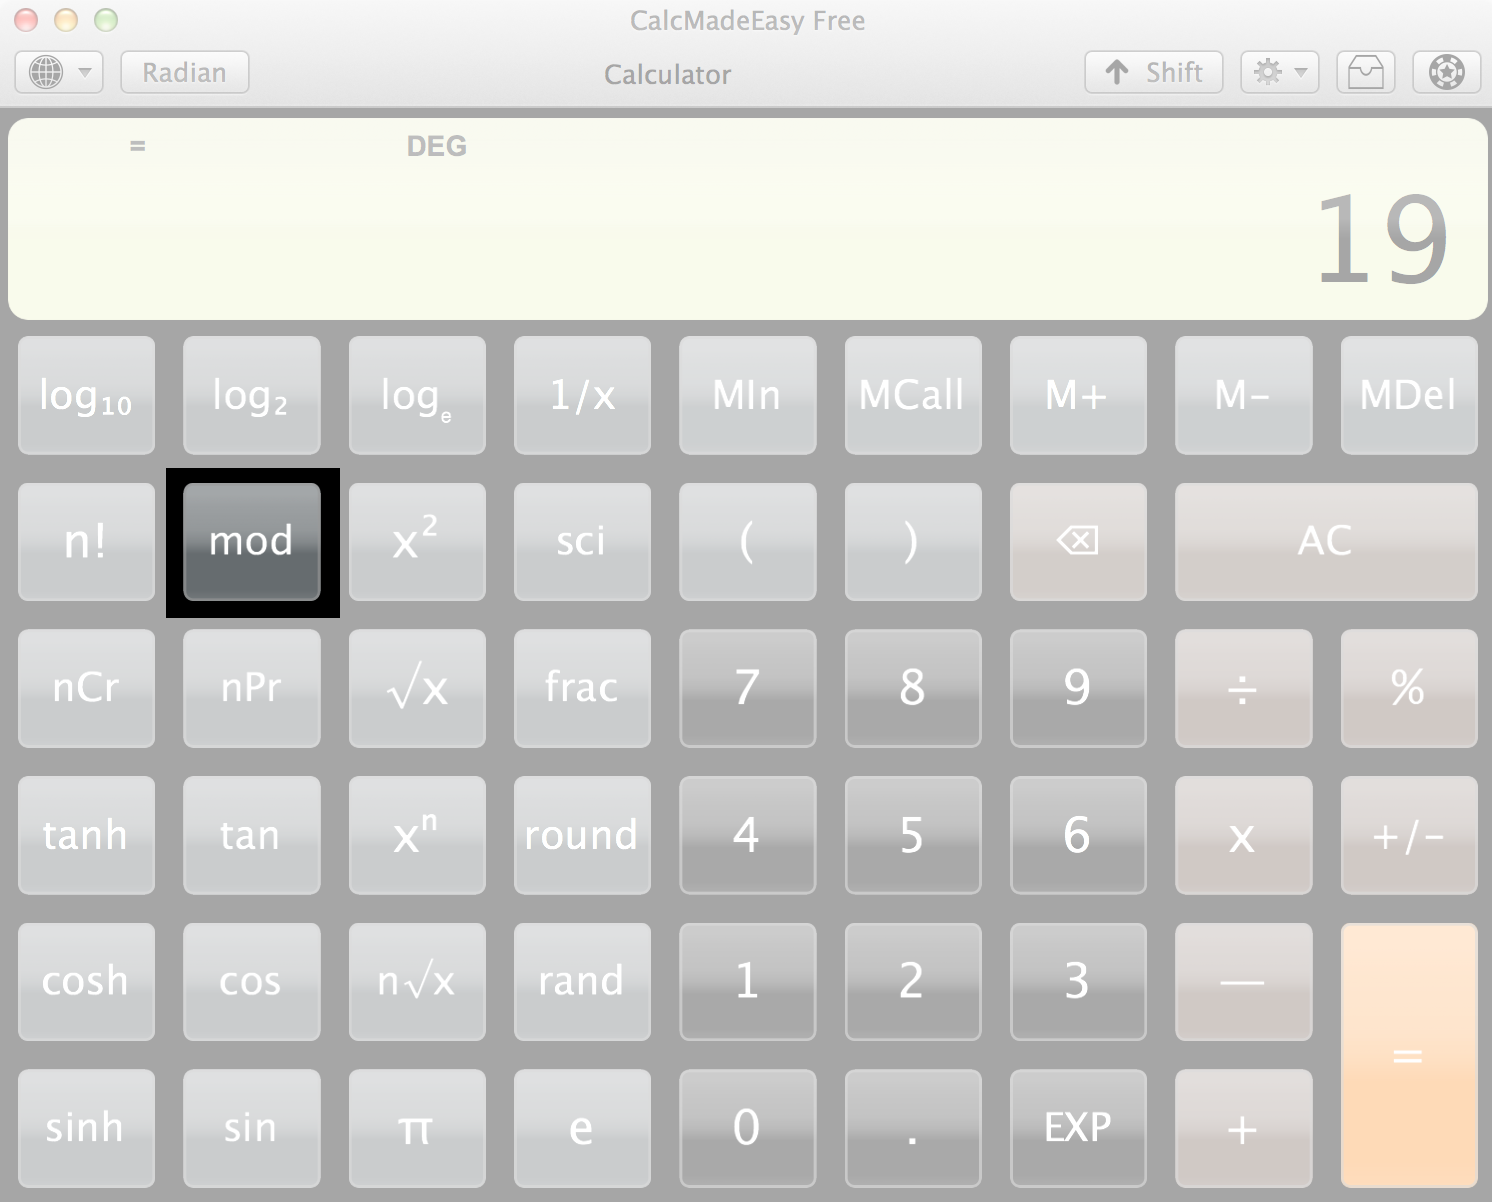
Use the mod button on your calculator to find a remainder.
These six tips will get you started, but you should research the 32mm System to find out how the professionals use it to simplify the cabinetmaking process. There are guides available online in PDF format, as well as drilling jigs and templates you can purchase.
To learn more about designing your own kitchen cabinets, check out our webinar on January 28, Designing Kitchen Cabinets: Planning Tools and Resources. We’ll introduce you to dozens of online resources and free planning tools.

Here are some supplies and tools we find essential in our everyday work around the shop. We may receive a commission from sales referred by our links; however, we have carefully selected these products for their usefulness and quality.


Welcome Nick ! It’s nice to have someone on board that’s been an actual cabinet and furniture builder and designer. I’ve been a part time cabinet and furniture builder for about twenty five years and am still learning. I’m probably going to sign up for your upcoming online seminar on cabinet making just to keep updated, since I’ve only built only a half dozen kitchens over all those years. Your comments about sheet goods cut dimensions are spot on. This last kitchen I built I was trying to conserve a little room in a small condo kitchen so I went a little shorter( about 22″ not including the face frame) on the lower cabinet depth. Everything turned out well in the end , but the problem this created was it didn’t leave enough room for the dishwasher to fit completely flush with the front of the cabinets. To resolve that problem I had to add about and inch thick trim piece around the front of the dishwasher cavity. it turned out looking pretty custom, but it’s a good thing I was going traditional face frame on this one as that would have been more difficult to do with a frameless design.